Robotic Screw And Bolt Sorter Seeks A New Challenge

As someone who disassembles and repairs hardware, [Aad] eventually ended up with a huge collection of mixed bolts and screws. This led to creating the automatic bolt and screw sorting system you see here, although in a way it is just a proof of concept. Bolts and screws happen to be a useful application for now, but the system is capable of sorting just about any small objects.
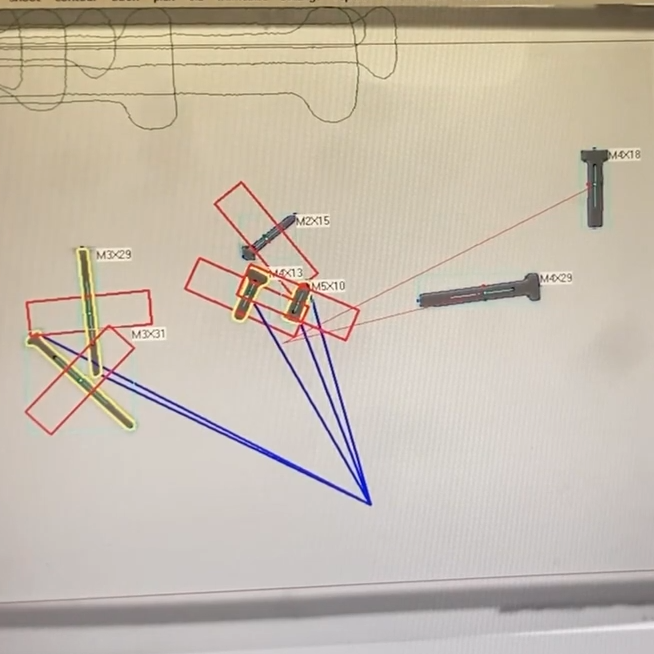
A bit of machine vision detects the size and shape of each object. Weight can also be measured.

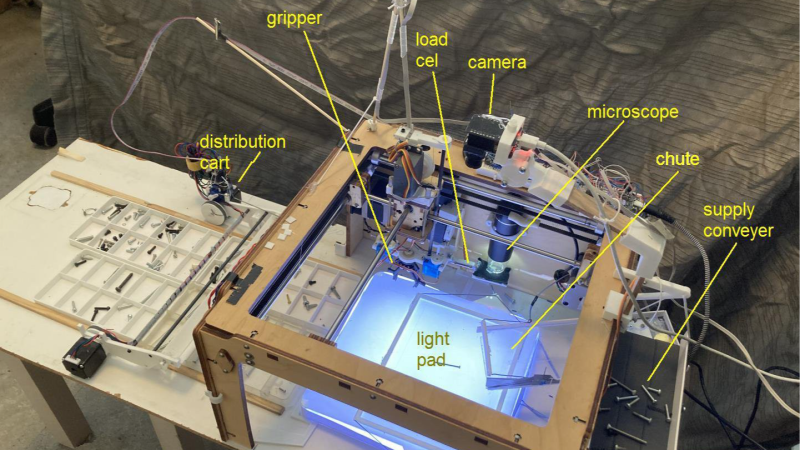
Mixed pieces go onto a large conveyor belt, shown on the right. This feeds a few screws at a time down a chute, where they roll onto an illuminated platform.

Above the lit platform is a camera, and machine vision is used to detect the size and shape and orientation of each screw. A robotic gripper on a gantry picks the screws up one by one — separating them first if they happened to clump together — and places each in a drop-off cart. The cart drops the object into a receptacle with its brethren, making sure similar ones are grouped together. Watch it in action in the video, embedded below the page break.

It’s a great build that shows fancy components aren’t necessary for good results. Servos and steppers are controlled with an ESP32-WROOM board, and a piezo sensor detects screws falling off the conveyor. Some of you may have noticed a repurposed Ultimaker 3D printer serving as the bulk of the system, its hot end having been replaced with a gripper that can raise and lower. The overhead camera is an ESP32-CAM adapted to accept M12 lenses so it can focus on the platform.

There’s one more feature worth mentioning — the system also has the ability to measure the weight of a picked object by placing it onto a moveable inspection platform, which can optionally put it under a USB microscope for a closer look. Everything is controlled by a nearby PC, so there’s a lot of flexibility built into the system.

We suppose that once all the screws and bolts in a shop are sorted, it only makes sense to sort all the nuts. Are there other objects besides screws and bolts that would be useful to sort with a system like this? If you have any ideas, don’t keep them to yourself! [Aad] would love to hear your comments and ideas, so share them below.

Continue reading “Robotic Screw And Bolt Sorter Seeks A New Challenge”

Junkbin, A Way To Efficiently Reuse Your Old Electronics

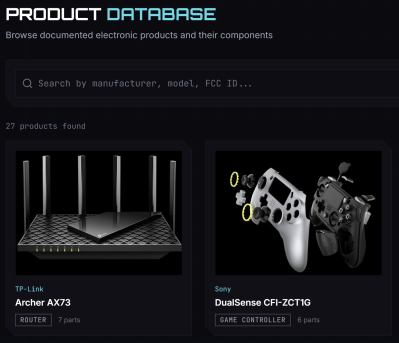
We all have that bin in the corner of our shops — the one with all the circuit boards or broken electronics that we are totally gonna do something with. We might rationalize that they’re worth keeping for the parts alone, but the reality is, unless you desolder and sort all the components ahead of time, most of us will never really use these spare parts to their full potential. Except it really doesn’t have to be that way. Junkbin.io is an attempt to improve on the state of that corner bin.

Though in its early years, Junkbin has a variety of the previously mentioned resources as well as many others. Currently, it is ripe to contribute, and we here at Hackaday know how important the community is to get these projects truly off the ground and to their full potential.

Created by [Steve Cap], Junkbin is a community dictionary of sorts to document and reuse electronic components found on many of the devices found around you. Do you need a single small form factor resistor of a specific resistance? That’s where Junkbin comes in to show you where you might find that specific component.

If you want a more macro-scale example of electronics recycling, make sure to check out our other featured projects such as these reused laptops! Or maybe take a look at this graveyard of defunct electronics to add to Junkbin…

A 3D Printed Cycloidal Gearbox

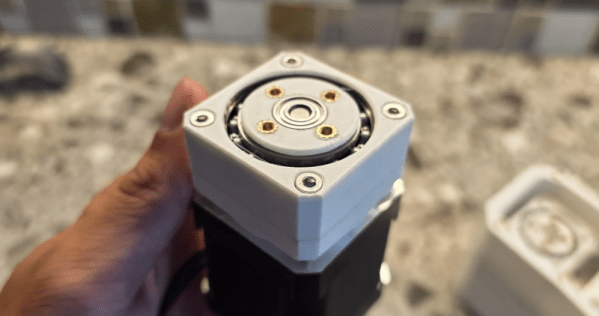
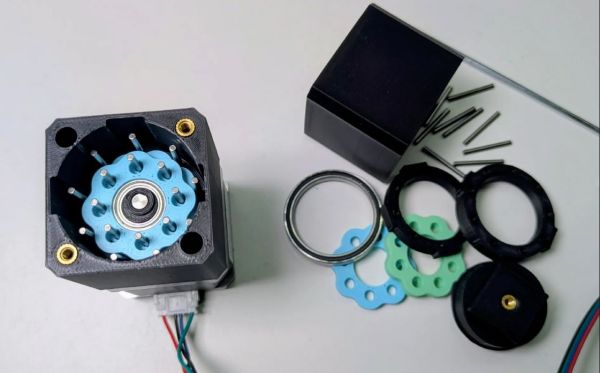
Stepper motors are undeniably useful, but sometimes they need a bit of gearing to help perform their task. [Gjhudson2008] has a compact gearbox for NEMA 17 or 23 steppers that is mostly 3D printed. How compact? The gearbox, named VANTIX, is exactly the height of a standard NEMA 17 axle.

However, for it to be that thin, your stepper has to have the D-bore on the shaft go all the way down. Some steppers leave a shank uncut at the base, and that won’t work for VANTIX.

The recommendation is to print in ABS with a 0.2 mm nozzle for certain parts to help improve tolerance. Most of the assembly is either press fit or installed during the printing process. Some parts of the gearbox are better to print with a larger nozzle, too.

There are some heat-set inserts and, of course, you’ll need lube to keep everything moving smoothly. There are a few top plates you can print to fit various mounting scenarios.

We have seen a number of similar designs. We’ve also looked at some e-bike-inspired drives.

Could Camera Hardware Be The Physical Equivalent To USB-C?

[Mansour] presents an interesting idea in his essay A Common Thread — just as USB-C has become the “One Connector To Rule Them All” in the world of electronics, so too should his projects have a unified physical connection layer. A common thread, if you will.

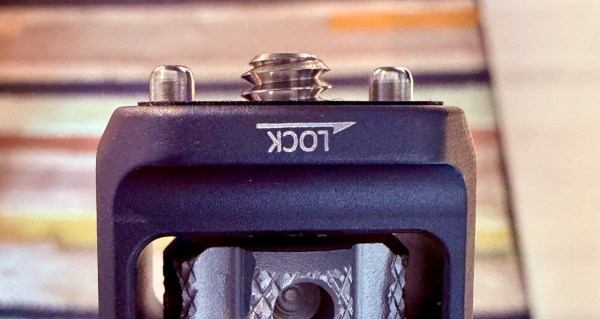
Specifically, the 1/4″-20 UNC connector that was already on all his camera equipment. Unifying his stuff around that connector wasn’t a bolt from the blue brainwave. By the sounds of it, the idea evolved over time and only became intentional after he’d already started using it.

There’s something to be said for it, though. One thing is the convenience of knowing your various bits and bobs are going to fit together like they were made with LEGO. Another is taking away a whole set of decisions in the design process: it’s going to have a 1/4″-20 UNC fitting, so [Mansour] needs only decide if its going to be tapped into the material or if he’s using an inset or captive bolt.

It isn’t like a 1/4″ bolt is going to introduce a weak point in most things we build — with good hardware it can take a ton or more. On the other hand it’s not exactly resilient to torque, but [Mansour]’s camera bag had the answer to that, too: spring loaded locator pins that drop into holes on the female side to take up the torque. In the photography world, these are ARRI pins. To us they just seem like a good idea.

Maybe you don’t see the point of avoiding redesigning the wheel every time for custom mounts and brackets. After all, that lets you come up the the ideal solution every time. On the other hand, [Mansour] has both simplified his design process and made decades worth of camera-holding objects — everything from tripods to stabilizing gimbals — accessible to all his stuff. It’s an interesting idea, and his full blog post is worth a read, even if it’s not likely the EU is going to force its adoption like it did USB-C. 

The Seven Sensors And Breakout Boards To Avoid In A Product

We’ve all seen these sensors and modules kicking around, as part of beginner kits, strapped into prototypes and potentially even in products deployed in the field. Yet as [John Teel] rightfully points out in a recent video, most of these have no business ever being used in a real product, and might not even be suitable for prototyping.

First up is a combination of the related DHT11 and DHT22 temperature-humidity sensors. As common as these are, they’re also pretty sketchy with their proprietary one-wire protocol and at most questionable accuracy, worsened by not having a good supply chain. The replacements are plentiful: the SHT40 and SHT41, the Bosch Sensortec BME280 or BMP180, as well as TI’s HDC3020. These get you standard I2C communication and a supply chain plus a datasheet you can trust.

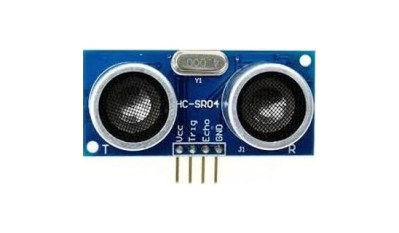
Second is the HC-SR04 ultrasonic distance sensor. Although fine for prototyping, it’s a 5 V module, lacks temperature compensation and other features that’d be needed outside a temperature-controlled room. Here ST’s VL53 Time-of-Flight sensors are a good alternative, containing a range of sensors of which we covered the fancier VL53L5CX previously for 3D scanning a room. Of course, you can also use reflective IR as a good cheap alternative.

Third is the HC-SR501 passive infrared (PIR) motion module. This one is also fine for PIR and motion sensing prototyping, but is too inconsistent and power-hungry for production. Instead you can get much better and much smaller PIR modules, like the Panasonic EKMC and EKMB, or the ST STHS34 IR motion and presence sensor.

Continue reading “The Seven Sensors And Breakout Boards To Avoid In A Product”

Testing A 3D Printed Cycloidal Gearbox Design

Cycloidal gearboxes are a recurring theme in the hobbyist space due to the performance they promise in a compact package. They are capable of taking in a high-speed input and reducing it down to a set ratio with very low backlash, which theoretically makes them perfect for a wide range of projects where size and weight matter. Correspondingly, [Advanced Hobby Lab] has been tinkering with a 3D printed design to fit on NEMA 17 stepper motors.

For [Advanced Hobby Lab] the primary goal was to check that his cycloidal gearbox design was a real improvement over the planetary gearbox alternative. Although the 3D printed cycloidal drive worked well enough, some testing put real numbers to it, including a 92% efficiency. The gearbox also adds some noise over the stepper motor, but less so than the 3D printed planetary gearbox.

Of course, all of this is within the limits of FDM 3D printing and with a few metal parts, so there’s always room for improvement, but in the world of hobbyist 3D printed gearboxes it’s not a bad showing. The print and project files are available for anyone who is also feeling the itch. Of course, you can also opt for the dual-nested cycloidal design that we recently featured, as it promises to be even more compact, have even fewer parts and smoother action.

Continue reading “Testing A 3D Printed Cycloidal Gearbox Design”

20 FPS On E-Paper Display Without Help

If electronic paper displays have one downside, it’s generally refresh rate. Earlier versions of the tech might only have been able to do single-digit frames per second, while modern, mid-range devices can sometimes manage 10-20 FPS — and that’s not including the frames needed to blank the display. Getting up past that double-digit barrier typically requires higher-end displays, more powerful processors or FPGAs, and more money. On the other hand, [Tony] was recently able to get 20 FPS out of an ESP32-based device without using any extra processing power.

The key to improving e-paper performance is understanding how the display actually works. The “ink” consists of microscopic charged pigment particles that physically move in response to electric fields, making the display much slower than LCD or OLED panels. Rather than fully erasing and redrawing every frame, the software takes advantage of the particles’ existing state by generating optimized driving waveforms that only move the particles needed to produce the next image. On the software side, an MPEG-like encoding is used so only changes between frames are transmitted and converted into these waveforms, reducing unnecessary data transfers and allowing much higher frame rates.

[Tony]’s method is able to drive 960×540 panels, like those found in the Lilygo or M5PaperS3, to 20 FPS, and these platforms are based on nothing more than the capable but limited ESP32 chip. It’s an impressive push, and worth checking out the video in the linked project page. We assume you’d need a little more to drive something like the massive e-paper display found in this home automation setup, though.

Continue reading “20 FPS On E-Paper Display Without Help”