


Hey Friends!
I hope you have all had a lovely week so far? The sun has shined, the rain has rained, the weather is more up down than my mood swings, but it’s finally been a good week in the kitchen for me – which if I’m being honest, has felt like a long time coming. Things have been slightly intense and full on my side of late, which has seen me rarely venture into the kitchen to do any baking, so it has felt so nice to be back in the swing of things, cooking up a carb laden storm.



I’ve got a super busy Summer coming up, followed by a manic start to Autumn (hi new book publication!) so I’m keen to make the most of the next 6 weeks, baking and filming as much as I can. Because before I know it, September will have been and gone and then my brain will be homing in on one thing and one thing only people. Yes, I am talking about the yearly gingerbread house fiasco. Yup. I said it.
But before all that, I’ve got a fun announcement coming up next week but not before my first year wedding anniversary on Monday, which feels BONKERS in itself cause what do you mean it’s already been 365 days since I planned a whole wedding in four weeks, only for the final outcome to be getting e.coli a few days later???? The announcement should hopefully shed a little light on what I have been cooking up recently – it’s fun and mildly petrifying in every way.
We’ve got a long old newsy in store this week, so I’m gonna keep my rambles short and sweet so we can get to the good stuff in rapid time. Yes, that does mean I won’t be shovelling book promo down your throats this time round. You’ve escaped that…for now.

We are starting off the menu strong this week and ending on what is without doubt, the best thing I have made this year so far.
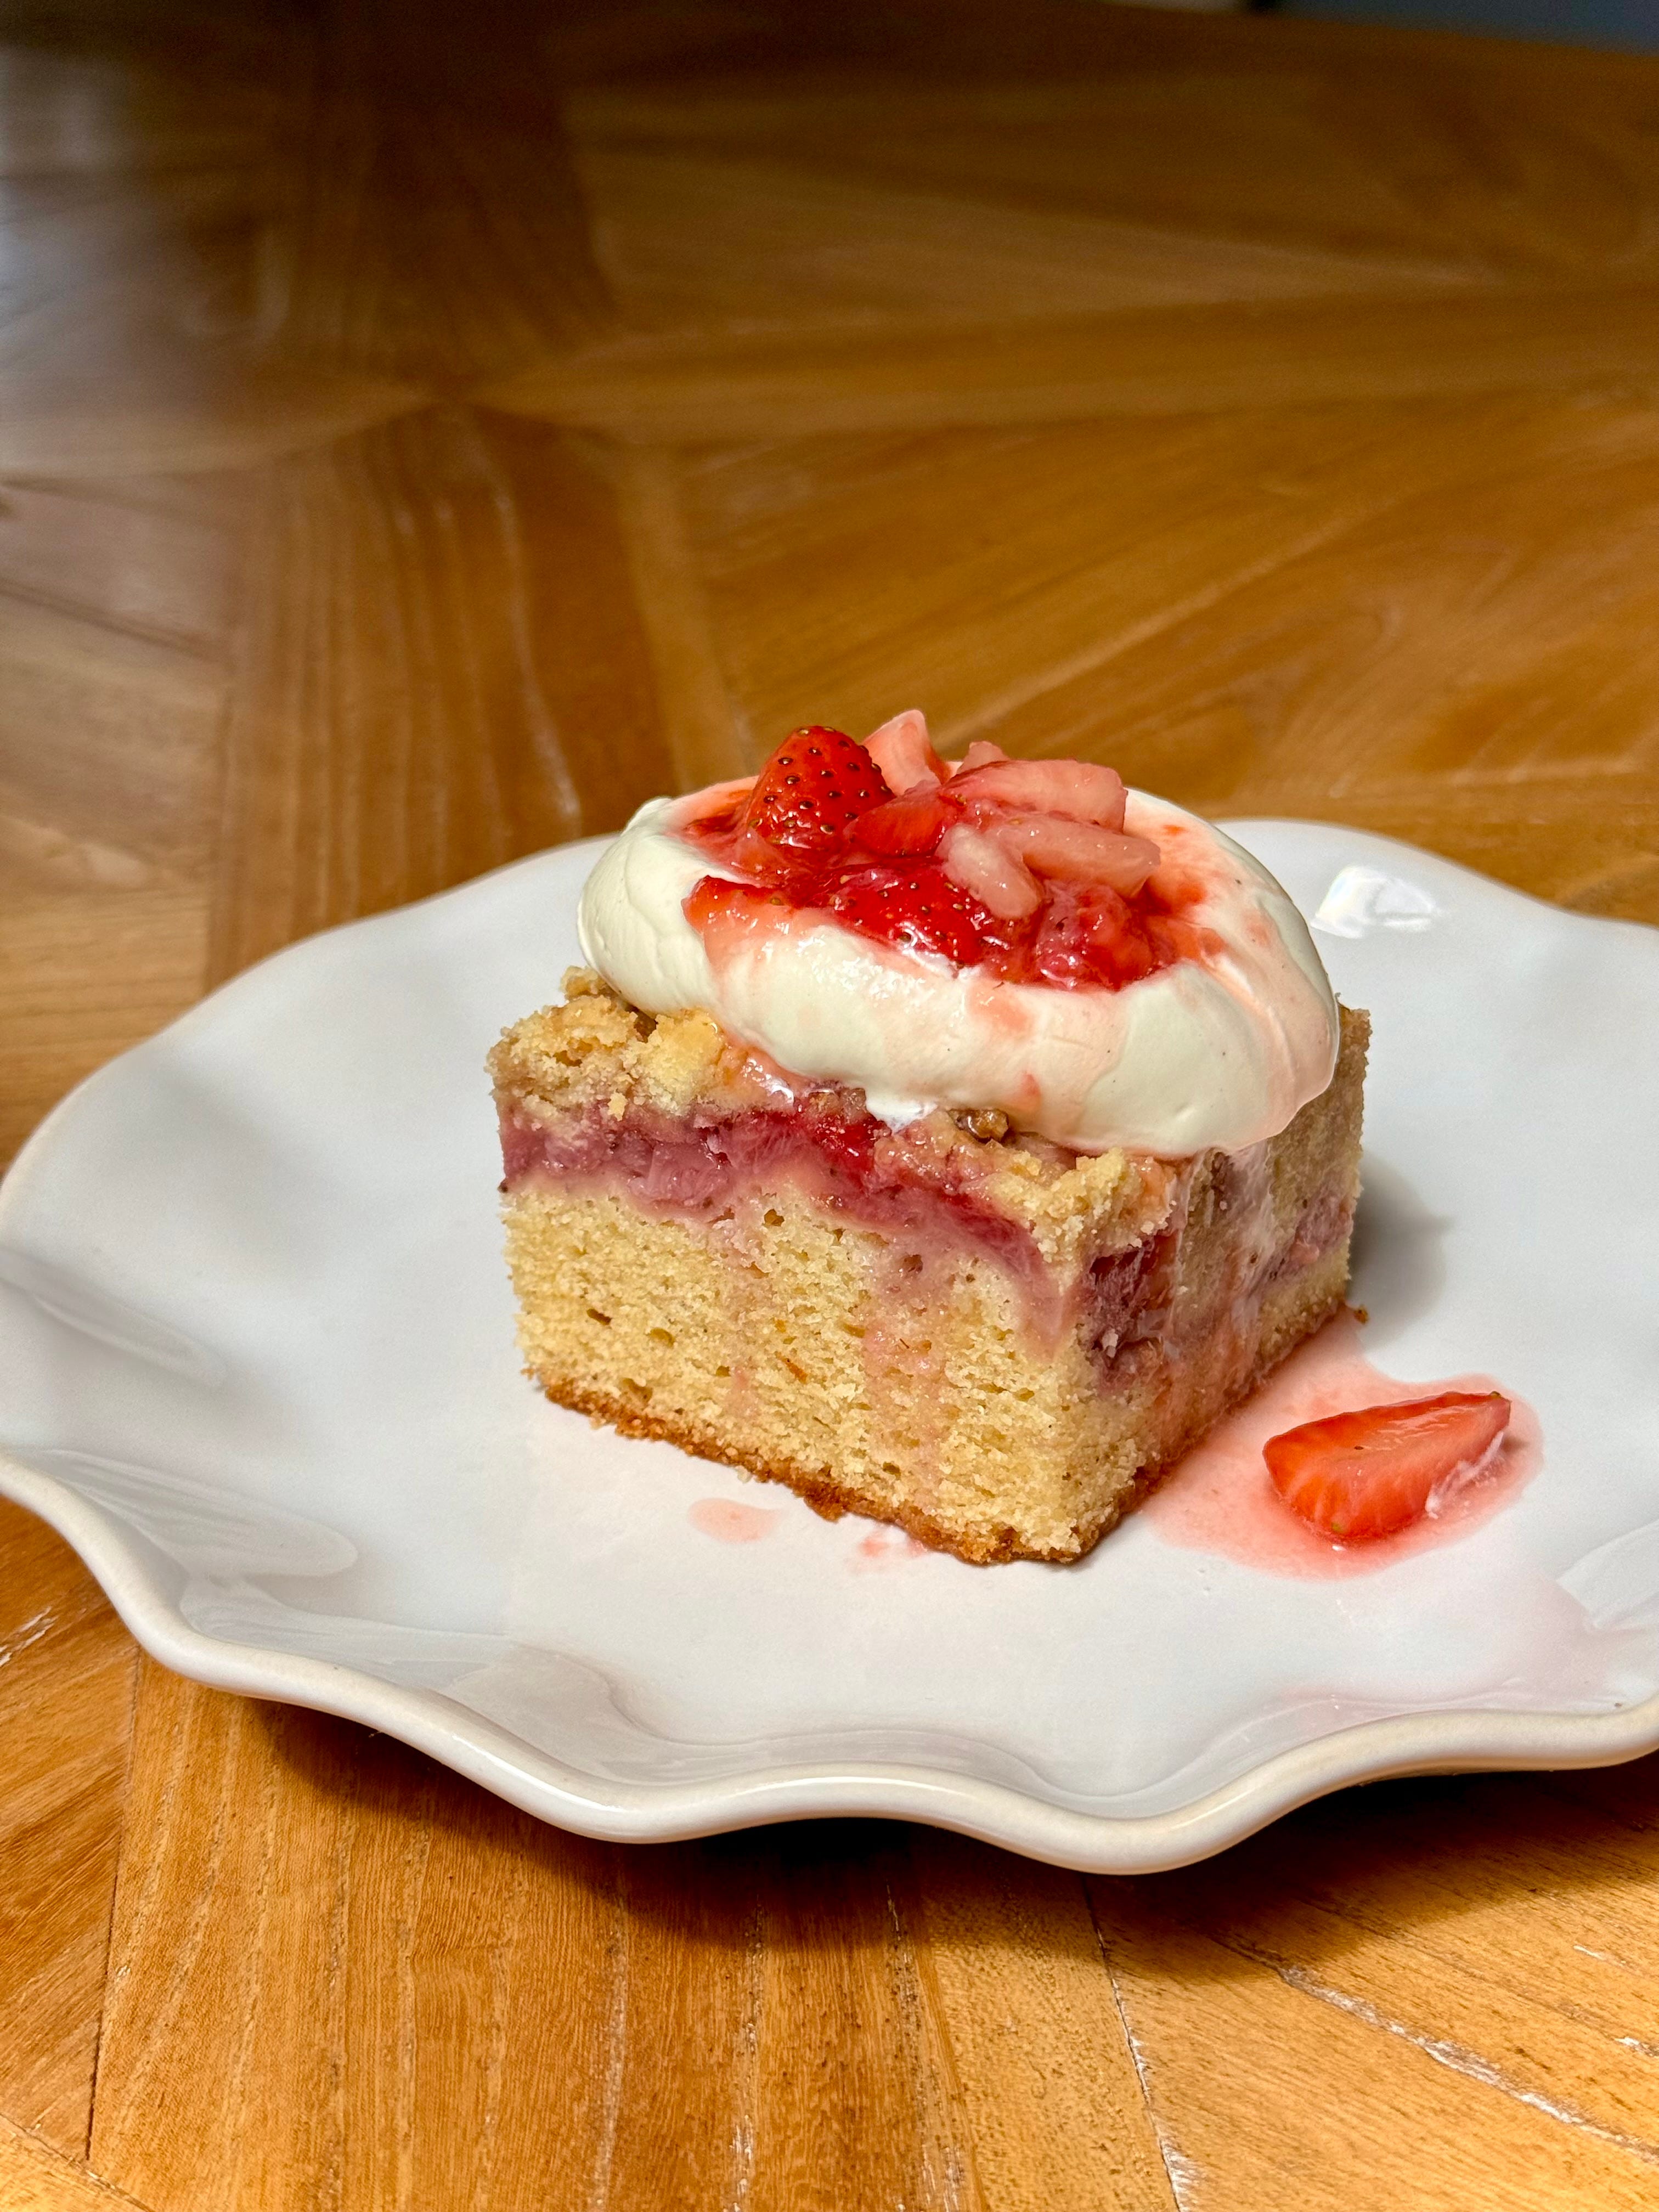
Getting things started, we’ve got my Strawberry Crumble Cake. A real easy, delicious tray bake which can be served up both hot or cold and is delicious served up solo or drowning in a tonne of custard or topped with ice cream. A real summer sweet treat, guaranteed to tickle everyone’s pickle.
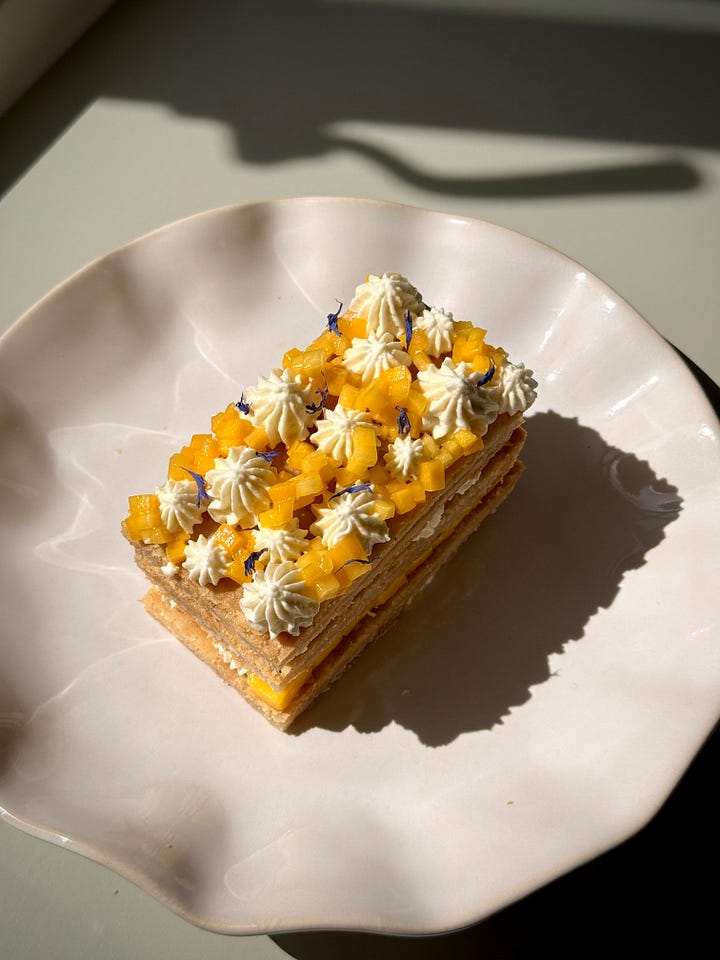
We haven’t done anything with puff pastry over here in a while, so we are righting some wrongs with my Mango and Coconut Millefeuille. A painfully easy dessert to whip up, using rough puff pastry for all the same yum but for minimal effort. Fruity, creamy, crisp and crunchy.
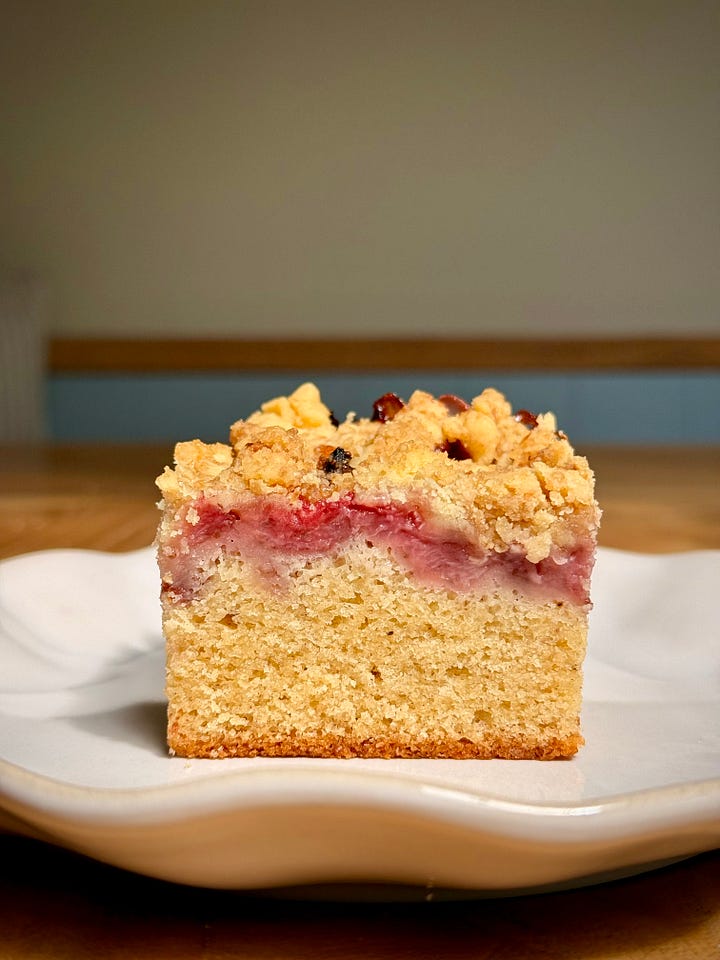
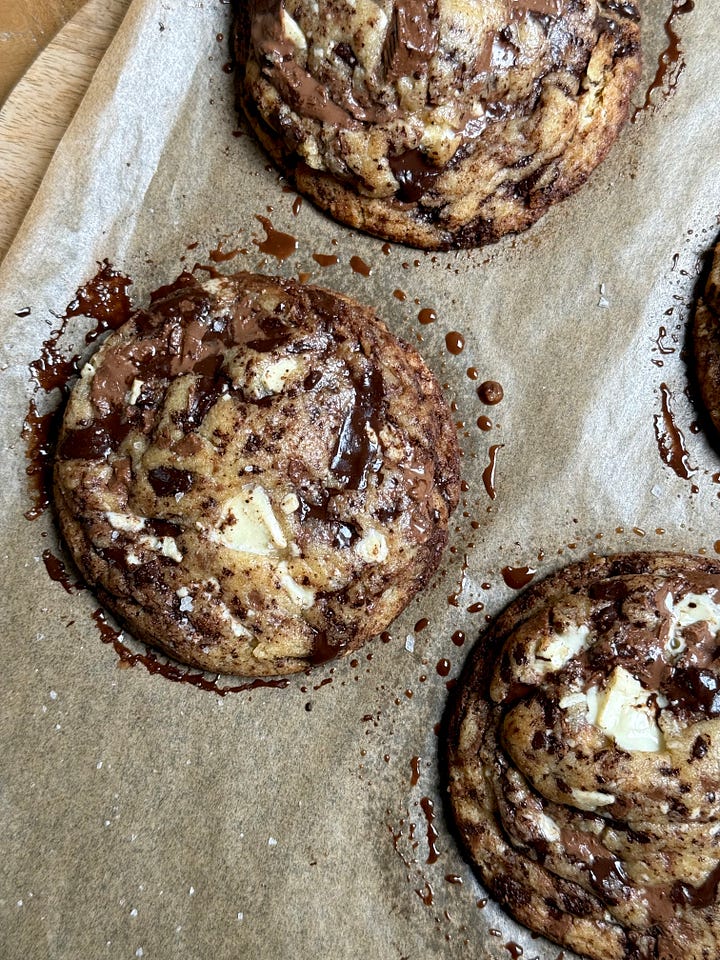
I’ve shared these over here before, but I made a fresh batch of these the other day so had to bring this recipe back onto your radar. My Triple Chocolate Brown Butter Cookies are THAT gal. Sensational. Delightful. Unbelievably moreish, utterly filthy, stupidly sumptuous. They are everything I want in a cookie and more. I will warn you though, one is NEVER enough.
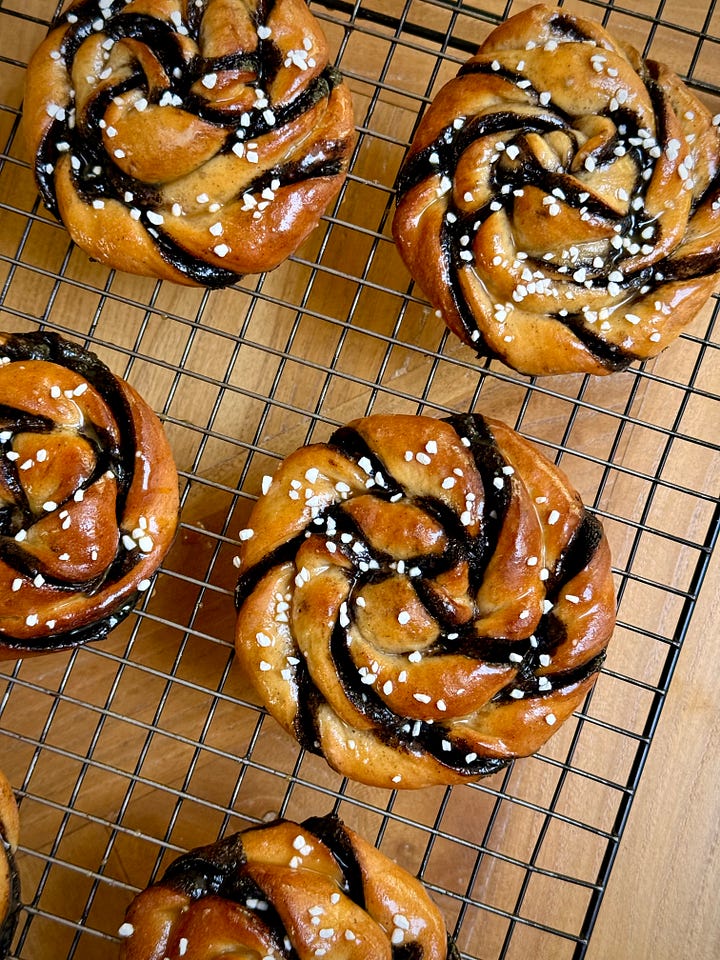
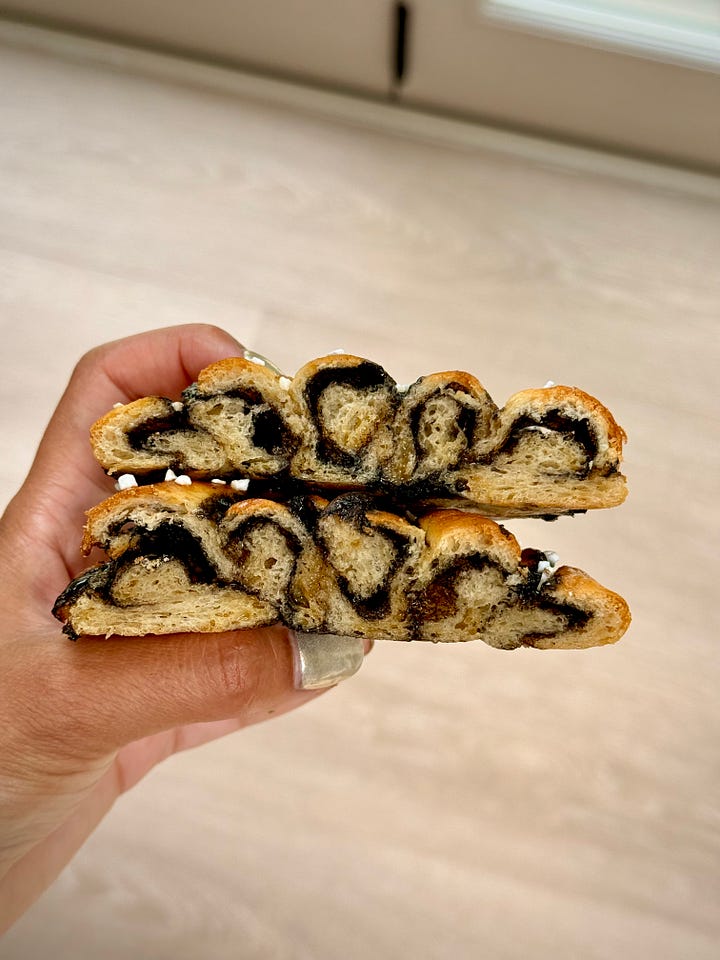
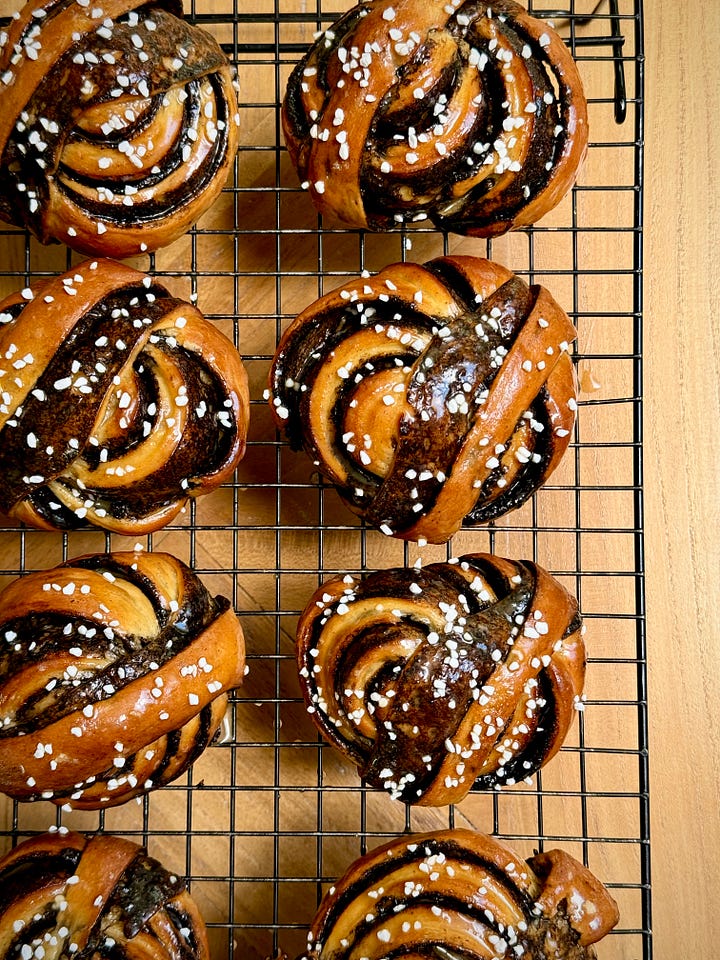
Finishing up the newsy this week with our main bake of the day, my Chocolate Cardamom Buns. A little filthy twsit on a Swedish classic. Buttery, spiced dough, smothered in a chocolate butter, swirled and twirled around into a pretty little shape, glazed and topped with nibbed sugar. These are SO dangerous to eat and perfect for any time of the day. Pillowy soft, plump, buttery, warming carbs, drenched in chocolate. Is this heaven????

Getting the delicious things started on the newsy this week is my Strawberry Crumble Cake. By now, you may have come to the obvious realisation that a) I adore strawberries and so the minute they come into season, that’s all I ever want to bake with and b) I bloody love cake and c) I bloody love crumble even more.
Summer felt like it was just knocking on the door the other week and one thing that it immediately makes me crave is strawberries and cream.
But as a die hard cake girly, you know I’m going to try and combine that all in one, add in a few extras, sprinkle a little something extra on top and serve up a fat wedge of tender, buttery soft, almond spiked sponge, topped with a bucketful of fresh, in season strawberries, and finish it all off with a generous sprinkling of a coconut crumble.
Served with some whipped cream and a little strawberry syrup to finish and this my friends, may be my go to cake of the summer. Easy to put together and easily adaptable - switch out the strawbs for the fruit of your choice for the gift that’ll just keep on giving all year long.

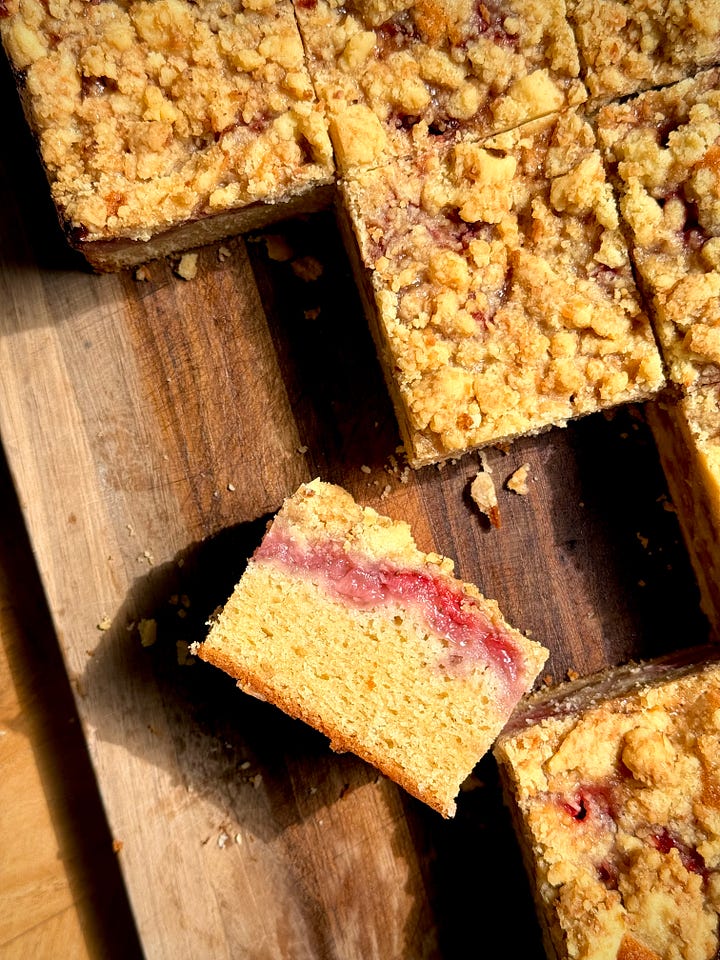
Soft, tender, buttery, sweet, mildly tart and crunchy. This gals got it all.
Recipe Makes: 20 by 30 cm / 8 by 12 inch deep cake tin
Recipe Serves: 12 to 15
Y O U – W I L L – N E E D -
Crumble
200 g Plain Flour, sifted
135 g Unsalted Butter, fridge temp & diced
100 g Demerara Sugar
20 g Desiccated Coconut
Strawberry Filling
700 g Strawberries, quartered
50 g Caster Sugar
2 tbsp Plain Flour
Cake
200 g Unsalted Butter, room temp
50 g Neutral Oil
225 g Caster Sugar
75 g Light Brown Sugar
4 Large Eggs
100 g Soured Cream, room temp
360 g Plain Flour, sifted
3.5 tsp Baking Powder, sifted
Pinch of Salt
1 tsp Vanilla Bean Paste
2 tsp Almond Extract
M E T H O D –
Begin by making the crumble by adding the plain flour and butter to a food processor. Pulse until the mix begins to get clumpy.
Transfer the crumble to a bowl, alongside the sugar and coconut. Use your fingertips to mix in well, coating the clumps in sugar. We want this chunky for good bite so pop the bowl into the fridge until needed so the butter can begin harden again and it can lightly set.
To a bowl, add the quartered (mine were big so I chopped them into eighths) strawberries to a bowl, along with the caster sugar. Mix well and leave to one side.
Preheat the oven to 160C Fan/180C/360F and grease and line a 20 by 30 cm / 8 by 12 inch deep cake tin. Pop to one side.
Into your stand mixer bowl, add the unsalted butter, neutral oil (i.e., one that doesn’t impart flavour) and sugars. Mix on a medium to high speed for at least 5 minutes until aerated in texture and lighter in colour, using the paddle attachment.
Begin to add the eggs to the bowl, adding one at a time, mixing well between each addition.
Add the soured cream and mix well on a high speed for 2 to 3 minutes.
In a separate bowl, mix the plain flour, baking powder and salt using a balloon whisk.
Add the flour to the mixer bowl, along with the vanilla and almond extract and either mix on the lowest stand mixer speed setting or use a rubber spatula to gently fold the flour through until well combine, smooth and you are left with little to no flour streaks.
Transfer the batter to your lined tin and use the back of a spoon to level out.
Before you add the strawberries to the batter, add 2 tbsp of flour to a sieve and sift the flour over all the batter. This layer will help prevent your strawberries from sinking to the base of the tin.
Once the entire top is well coated in flour, add ¾ of the strawberries, reserving the rest to use for when serving.
Generously sprinkle over the set crumble to completely cover the fruit and pop into the oven to bake for 65 to 75 minutes until the top is golden brown and a skewer comes out clean with a few crumbs when poked into the middle.
Once baked, leave to one side to cool to room temperature before slicing, serving and topping with your reserved strawberries.
Please note as this is a butter based cake – if you pop this into the fridge, the sponge will harden so make sure you bring out to sit at room temperature for a few hours before serving.
Moving onto another fruity affair, and something we haven’t tackled before over here on the newsy, it’s my Mango & Coconut Millefeuille. I whipped this super easy dessert together when the weather was scorching and my kitchen was essentially a sauna. Did I want to bake? Absolutely not. But did I want a sweet treat? Always. Always and forever my friends and I make absolutely zero apologies for it.
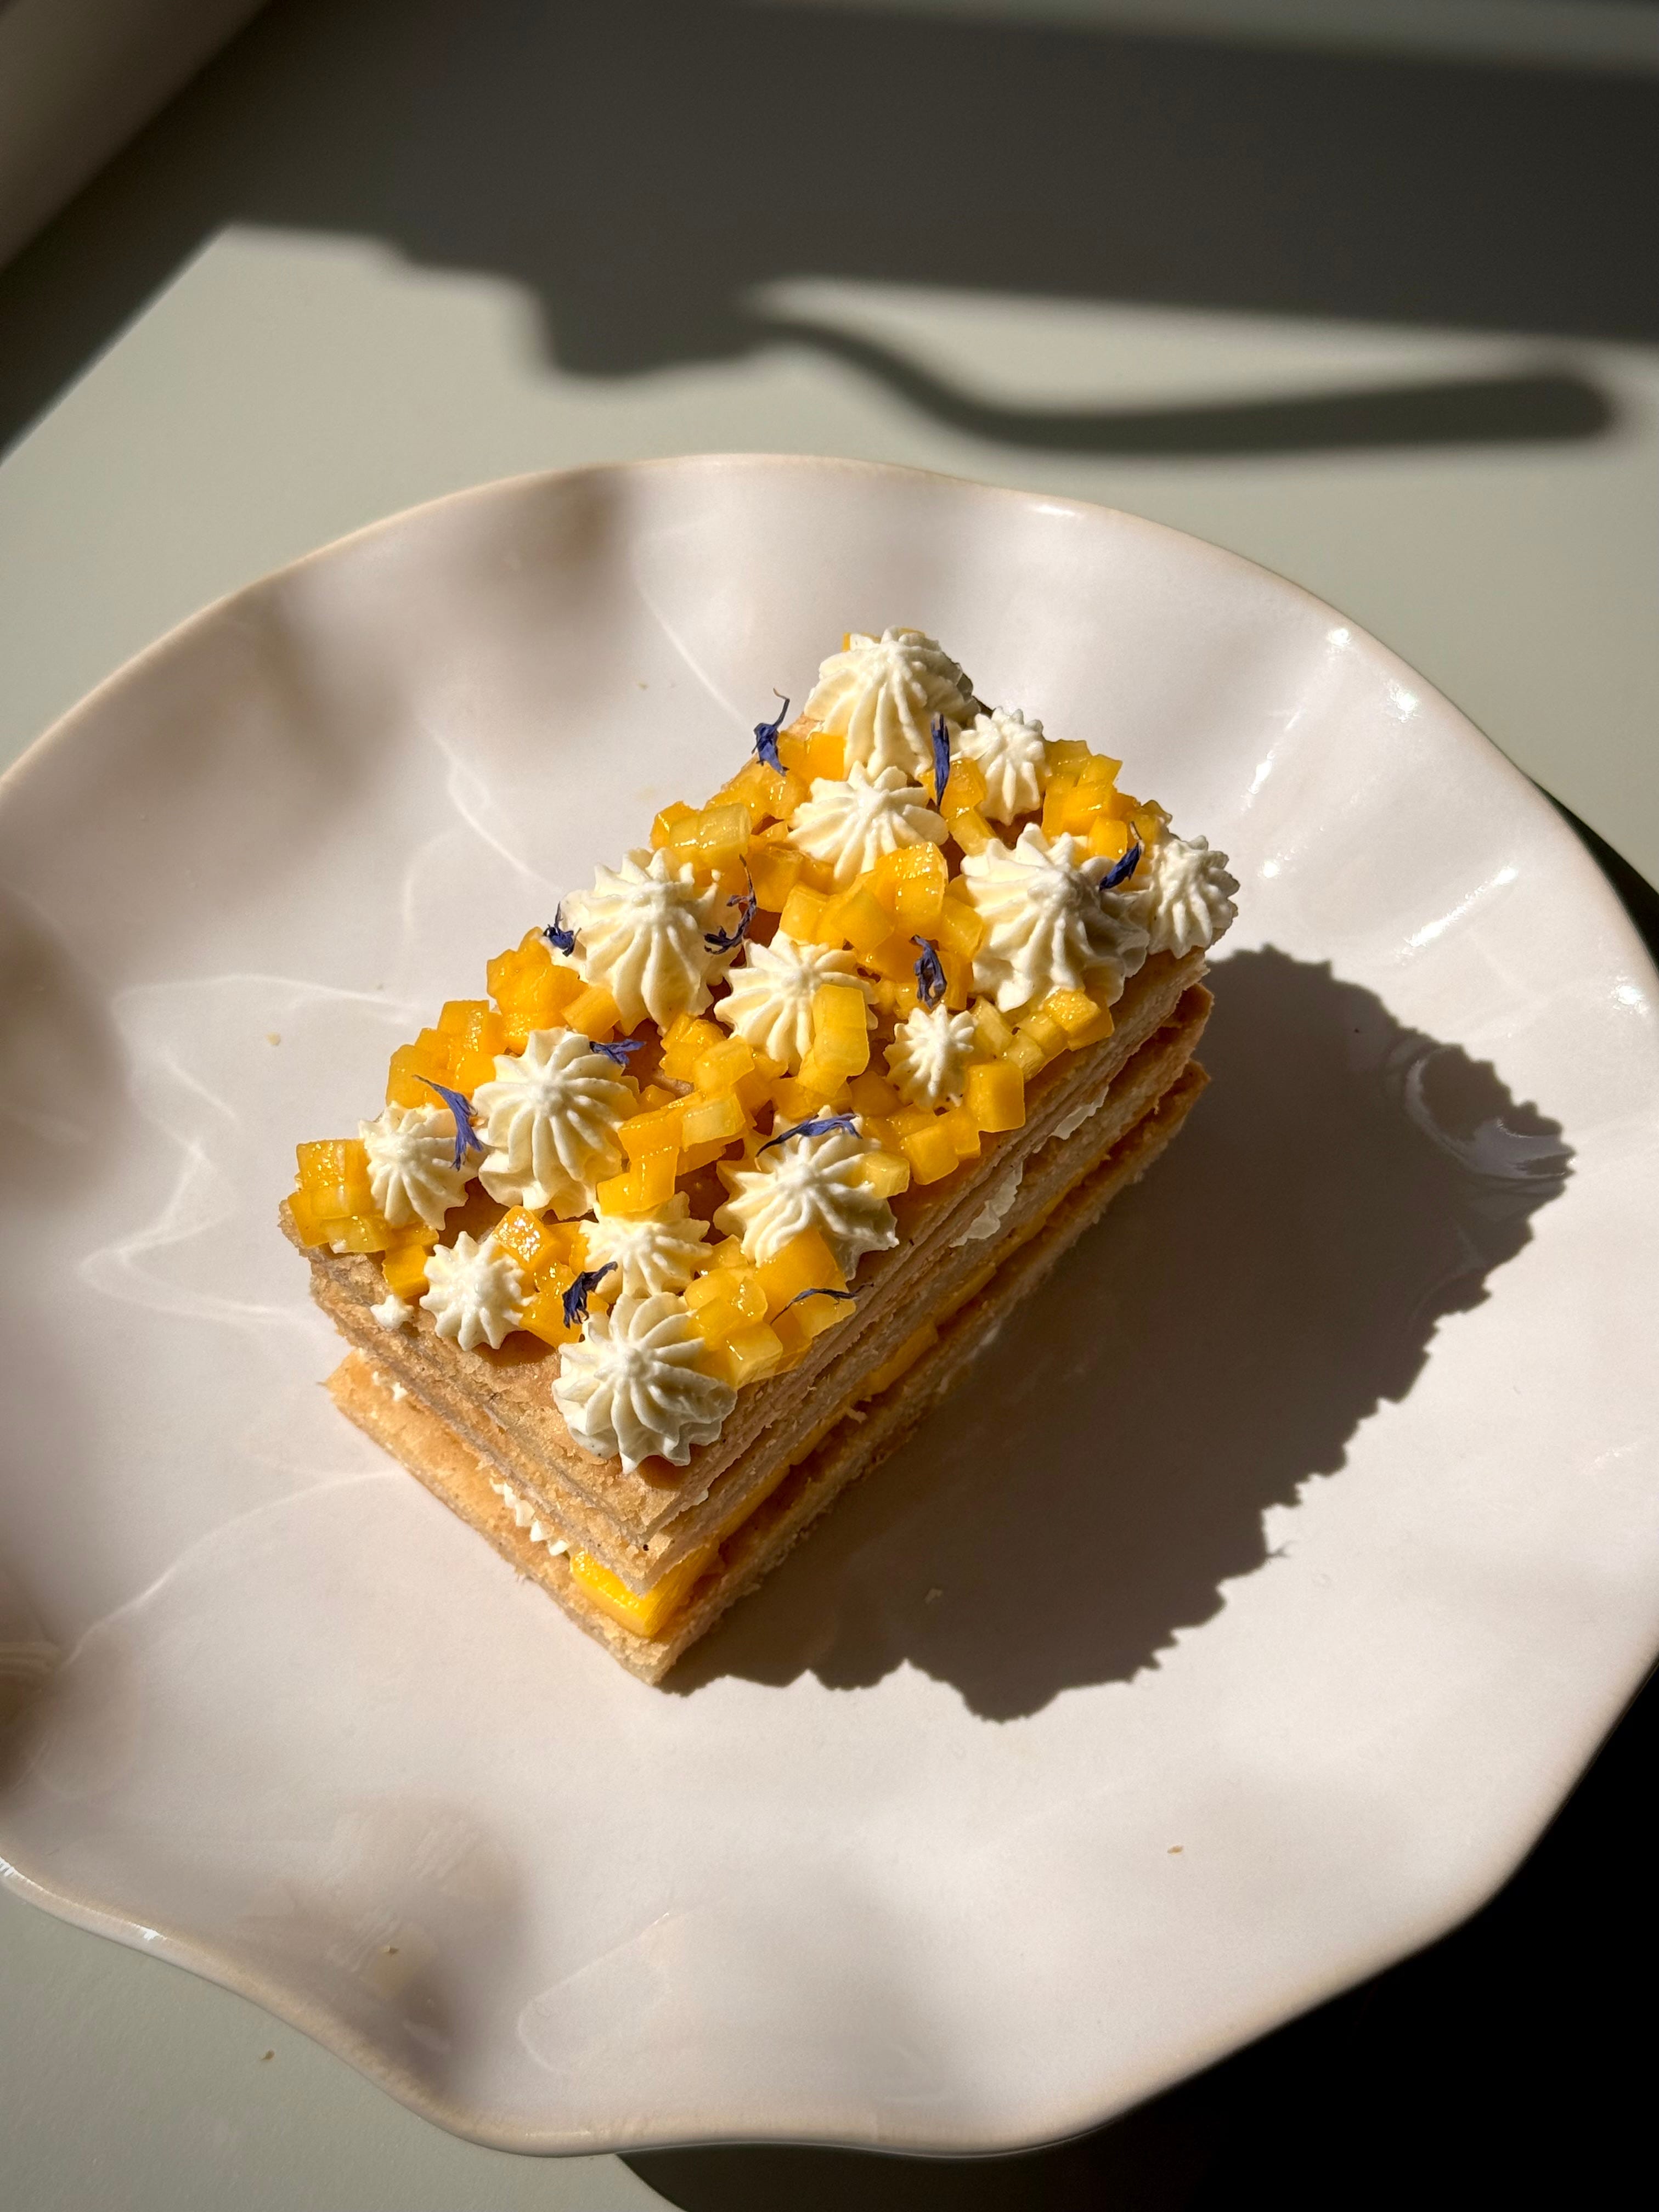
Millefeuille is not only an incredibly delicious and light pudding but it also holds incredibly fond memories for me as baking one of these, with the same sort of pastry we are using here, reminds me of one of the Bake Off interview rounds where we did a mock technical challenge. It was filmed, you were interviewed just as you are on the show and working to a radically reduced time scale but I just remember the panic and chaos that ensued in the hour we had to put it all together.
Yup, from start to finish. One hour. After that, they whittled down the numbers one more time for another round of interviews before deciding on their final 12 but I remember being told the challenge, never having made rough puff pastry before, looking slightly like a deer in headlights but managed to muddle through.
Moral of that long winded story is that if I, a total baking newb, could make a (variation of a) Millefeuille, under those circumstances, that additional pressure, without ever having made one before, you guys have got this in the bag. Easy peasy mango squeezy.
This is perfect for anyone looking for something that looks the part, but just without all the fuss. It’s sweet, it’s slightly salted, crunchy, smushy, buttery, and lick the plate worthy.
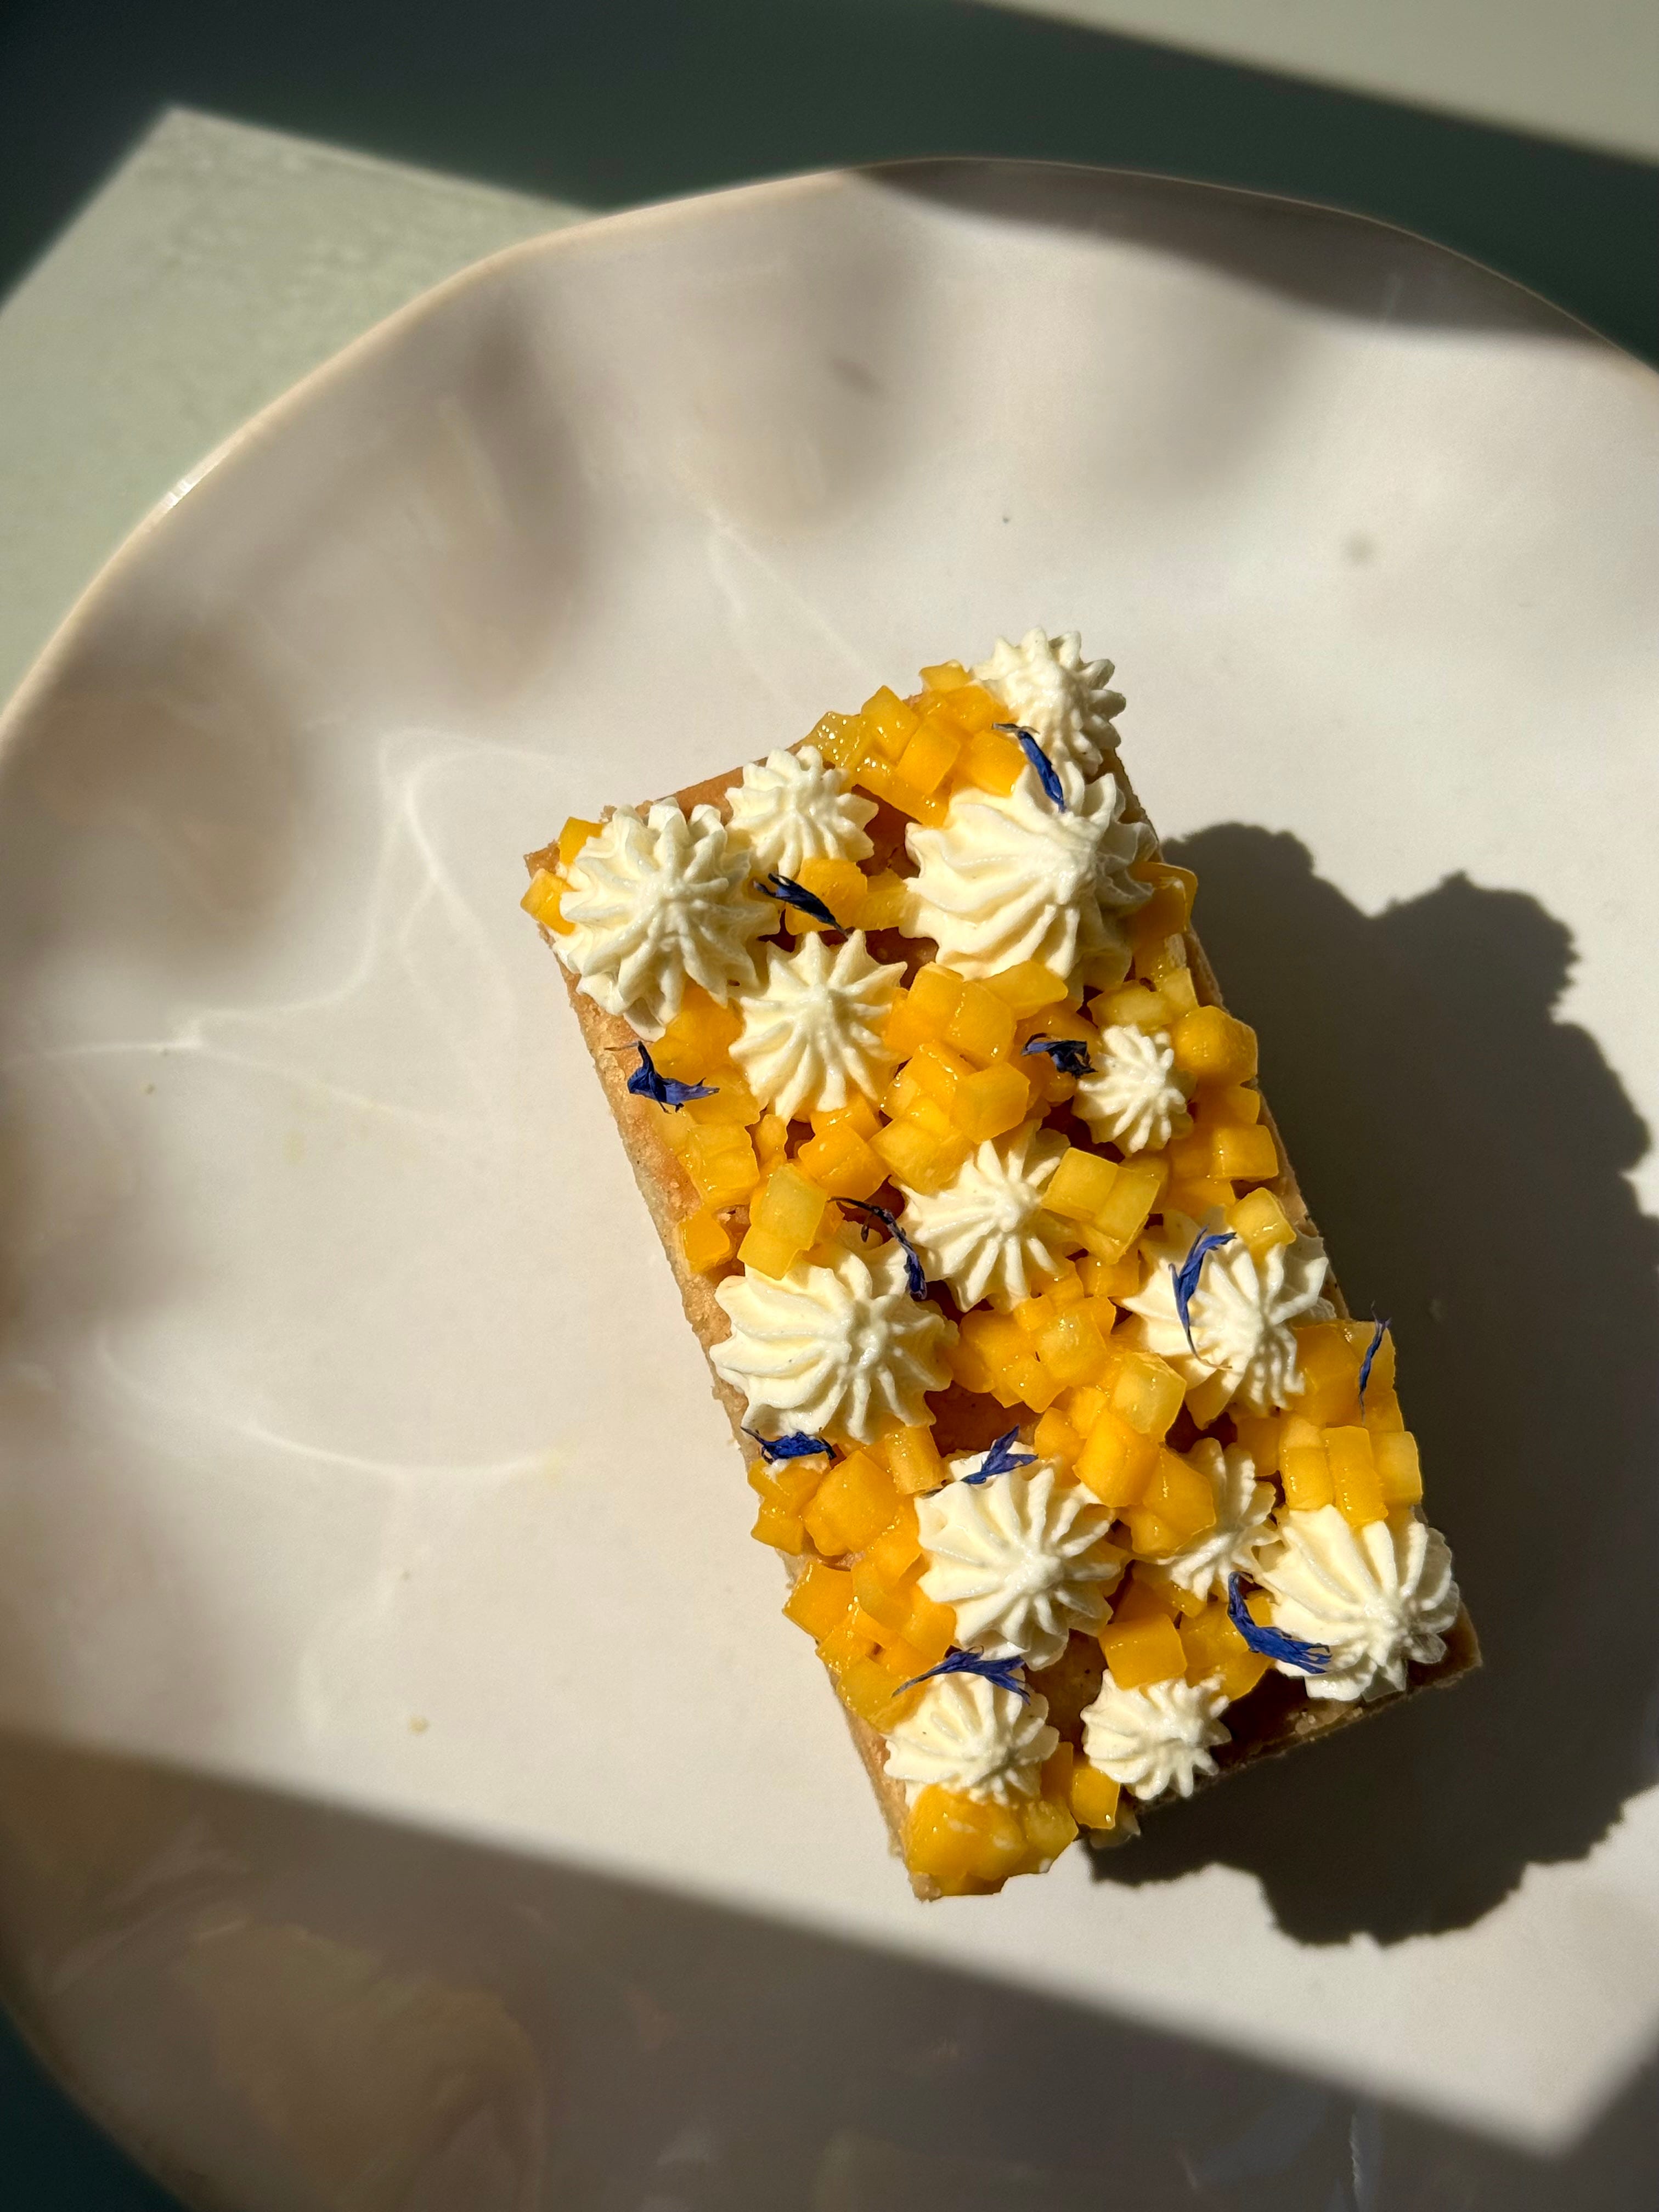
A key part of the recipe is making sure you use good quality butter for those crisp, flaky, melt in the mouth layers and ensuring that you allow adequate chilling time in the fridge to keep your butter solidified, helping you build those crunchy, laminated layers. Would I recommend making this on a super hot day like I did? Only if you’re mad like me, which I am presumptuously going to say that you are, because why we all here?!
Go wild with the fillings, switch up flavours in the dough, introduce some citrus zest, maybe some spices (you know I am talking about cardamom and cardamom only here), and go as extravagant or simple with the decoration. It’s currently Mango season so wanted to make the most of that and whilst I have no holidays on the horizon, teaming it with coconut is the next best thing.
Simple, easy, and delicious. Big wins all around.
Recipe Makes: 1 x Batch Dough
Recipe Serves: Dependent upon size you choose
Y O U – W I L L – N E E D –
Rough Puff Pastry
250 g Strong Bread Flour, sifted
Pinch of Salt
1.5 tsp Vanilla Bean Paste/1 tsp Vanilla Powder
225 g Salted Butter, frozen
110 ml Water, ice cold
1 tsp White Wine Vinegar
Filling
100 ml Coconut Cream
150 g Mascarpone
1 tsp Vanilla Bean Powder
35 g Icing Sugar, sifted
400 ml Double/Whipping Cream
1 Mango, diced
M E T H O D –
Starting with the pastry. We aren’t going for a full puff so it’s super important before you begin that the butter is frozen through completely and the water is ice cold.
Place the flour into a large mixing bowl, alongside the vanilla and frozen grated butter.
Lightly mix until all the grated butter is coated with flour, before going in with the water and mixing with your hand until a rough dough forms. We really want to keep the butter as intact as possible – you want to be able to see streaks of unmixed butter throughout the dough.
Form the dough into a rough rectangle shape and lightly flatten before wrapping in clingfilm and popping in the fridge for 30 minutes to allow the butter to harden.
Lightly dust the worktop with flour and roll out the dough to a rectangle approx. 40 cm by 20 cm.
Fold the dough into three by folding the bottom third up and the top third on top. This is one fold.
Rotate the dough a quarter turn and roll the pastry out again to 40 by 20cm. Fold it into 3 again making it 2 turns. Wrap the dough tightly in clingfilm before placing it back in the fridge for 30 (60 if it’s a hot day) minutes.
Remove the pastry and repeat the above twice over, meaning you have folded the dough 4 times in total. Wrap again and chill until needed.
Preheat the oven to 180C Fan/200C/390F.
Roll out the dough on a lightly floured surface into a large rectangle, approx.. 3 mm thick. Transfer to a baking sheet lined with greaseproof paper.
Lightly prick the top of the dough with a fork before placing another sheet of greaseproof paper on top. Docking the dough will allow steam to escape and prevent your pastry from puffing up into a giant pillow.
Place another baking sheet on top to help weigh the pastry down - this will help prevent the pastry from puffing up too much, giving us a crisp, thin layer once baked.
Pop into the oven for 45 minutes on the middle shelf. I like to rotate the sheet halfway through to ensure even browning and cooking of the pastry if your oven has any hot spots.
Remove the top baking sheet and greaseproof paper before popping back into the oven for a further 10 minutes to continue baking until completely golden on the top.
Leave the cooked pastry sitting in the tray for 20 minutes before transferring to a cooling rack.
When cooled, use a serrated knife and ruler to divide the pastry into even rectangles - go for whatever size you wish for here.
To make the coconut filling, add the coconut cream, mascarpone, vanilla and icing sugar to a mixing bowl. Use the whisk attachment to mix until smooth.
Add the double cream and whisk until you just reach medium peak.
Transfer the cream to a piping bag with the nozzle of your choice fitted.
Place a pastry rectangle onto your serving plate. Pipe the coconut cream on top, adding the diced mango in between.
Once the base is covered in an even layer, add the second layer of pastry and repeat.
Top with a final layer of pastry and decorate as you wish.
Finish with a sprinkling of icing sugar and serve.
Next up are my dearly beloved Triple Chocolate Brown Butter Cookies.
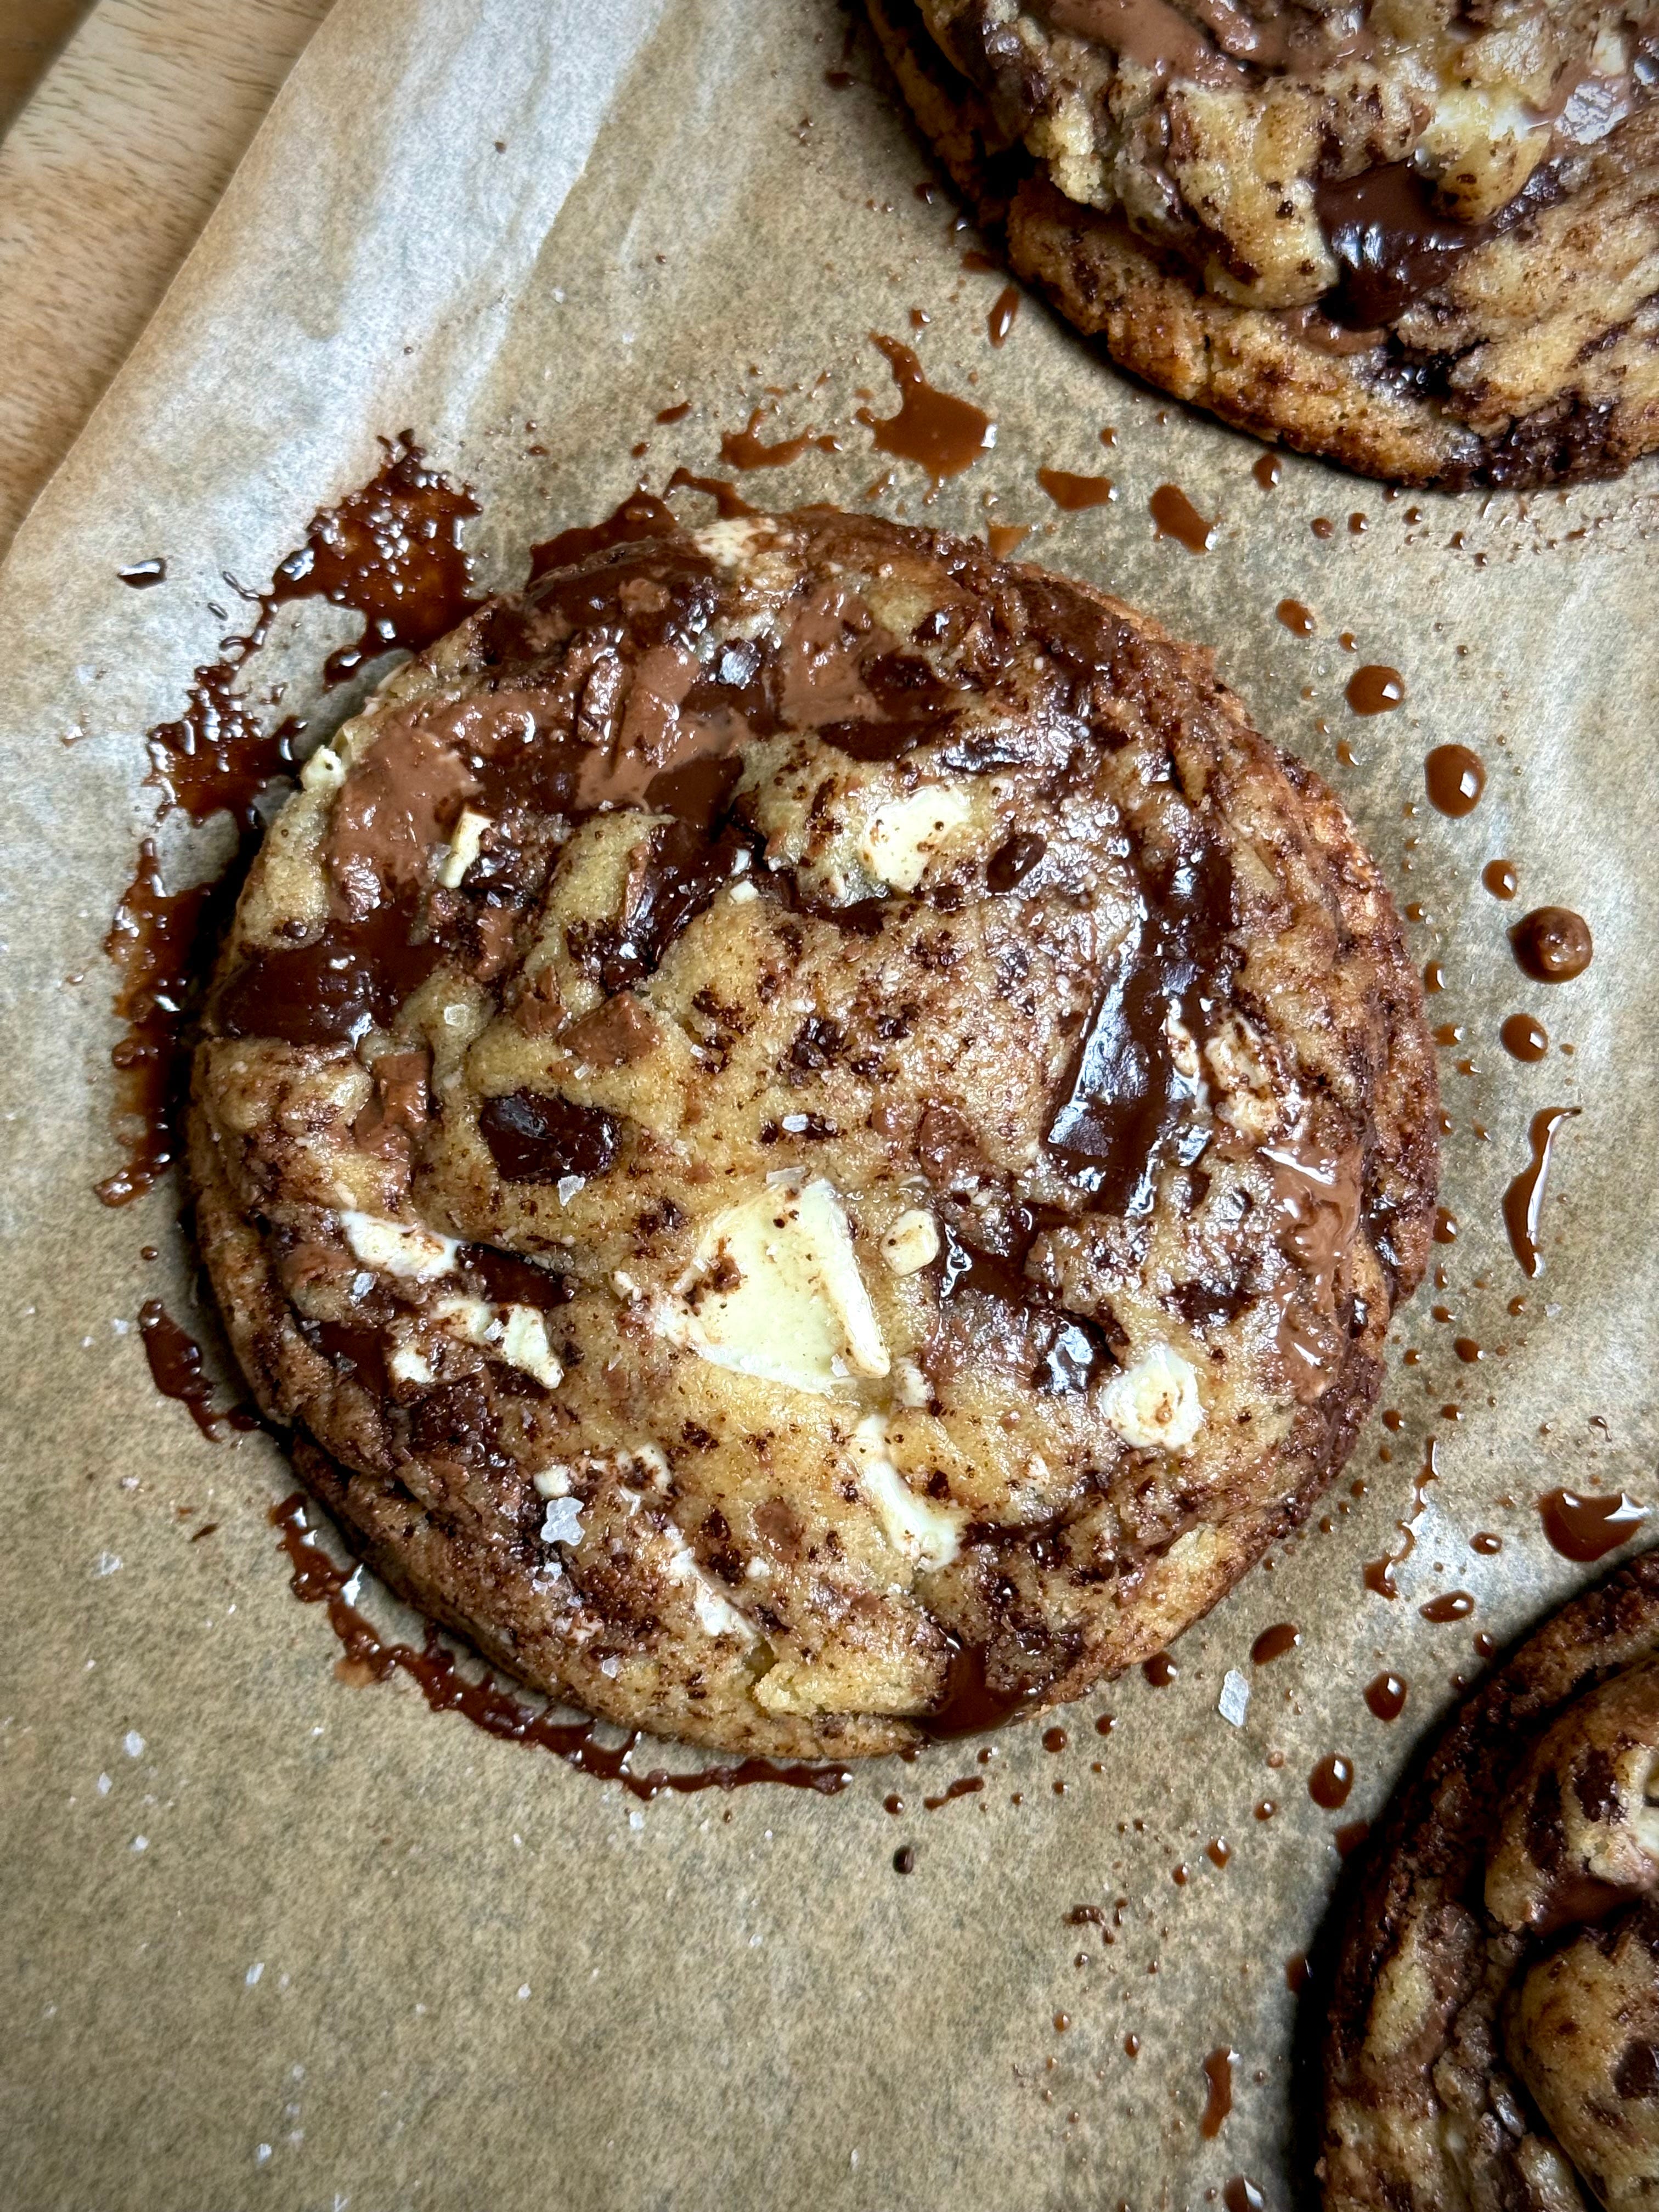
Now here’s the thing. Every man and their Gran claim to have the best cookie recipe. Theirs is the best. You can’t beat it. World class cookies. Nothing can ever compare. Nope, nope, nopeity nope. I hate to break it to you folks but they are lying to you. LYINGGGG. They know their cookies aren’t the best. The know their cookies are okay, good at best. But mine? Mine are LEGIT the best. I say that boldly and I say that with every part of my being because the recipe I am sharing with you below is a mildly, slightly tweaked version of the recipe I came this ←→ close to selling a few years back (I’d even bought all the packaging for it, which is currently gathering dust in my parents garage) and am currently toying with reviving said idea because they are THAT DAMN GOOD.
They are rich, indulgent, moreish and are great eaten hot or cold – washed down with a pint of water (we operate a strict no-go milk zone over here) and you’re somehow refreshed to chomp down another 2 or 3. I don’t understand the science behind it but if you know what I am talking about, then you know they are the real deal. They have a deliciously ooey gooey middle, crisp and crunchy outsides and have a triple C thiccc middle and finished with a hefty sprinkling of sea salt – just the way every good cookie should be. I am not a fan of the sad, slim, paper-thin cookies. Gimme chunky and gimme em all.


These are dangerously easy to make but will give some prior warning that they do require an overnight chill in the freezer to ensure you have that perfectly baked gooey middle. All this means is that you can bake as many or as little as you want whenever you want. I firmly believe that an emergency cookie stash should be mandatory for when that 7pm Sunday sofa slob sesh starts – in 15 minutes, you got yaself a freshly baked ooey gooey pile of goodness.
At the very base of the dough is where the magic begins – the almighty brown butter, which you’ve probs seen being used in every sort of baked good online over the last few years BUT for good reason. We all know that butter is delicious. But brown butter? That my friends is the elite level of butter. Here you melt the butter down until the milk solids begin to brown, producing this wonderfully nutty smell and taste. It’s a real simple trick to help you elevate your bakes with very little work - whether that’s for buttercreams, cake batters, cookies, biscuits or breads.
Make em, bake em, eat em and repeat. These are cookies done the only way they should be – FILTHY.
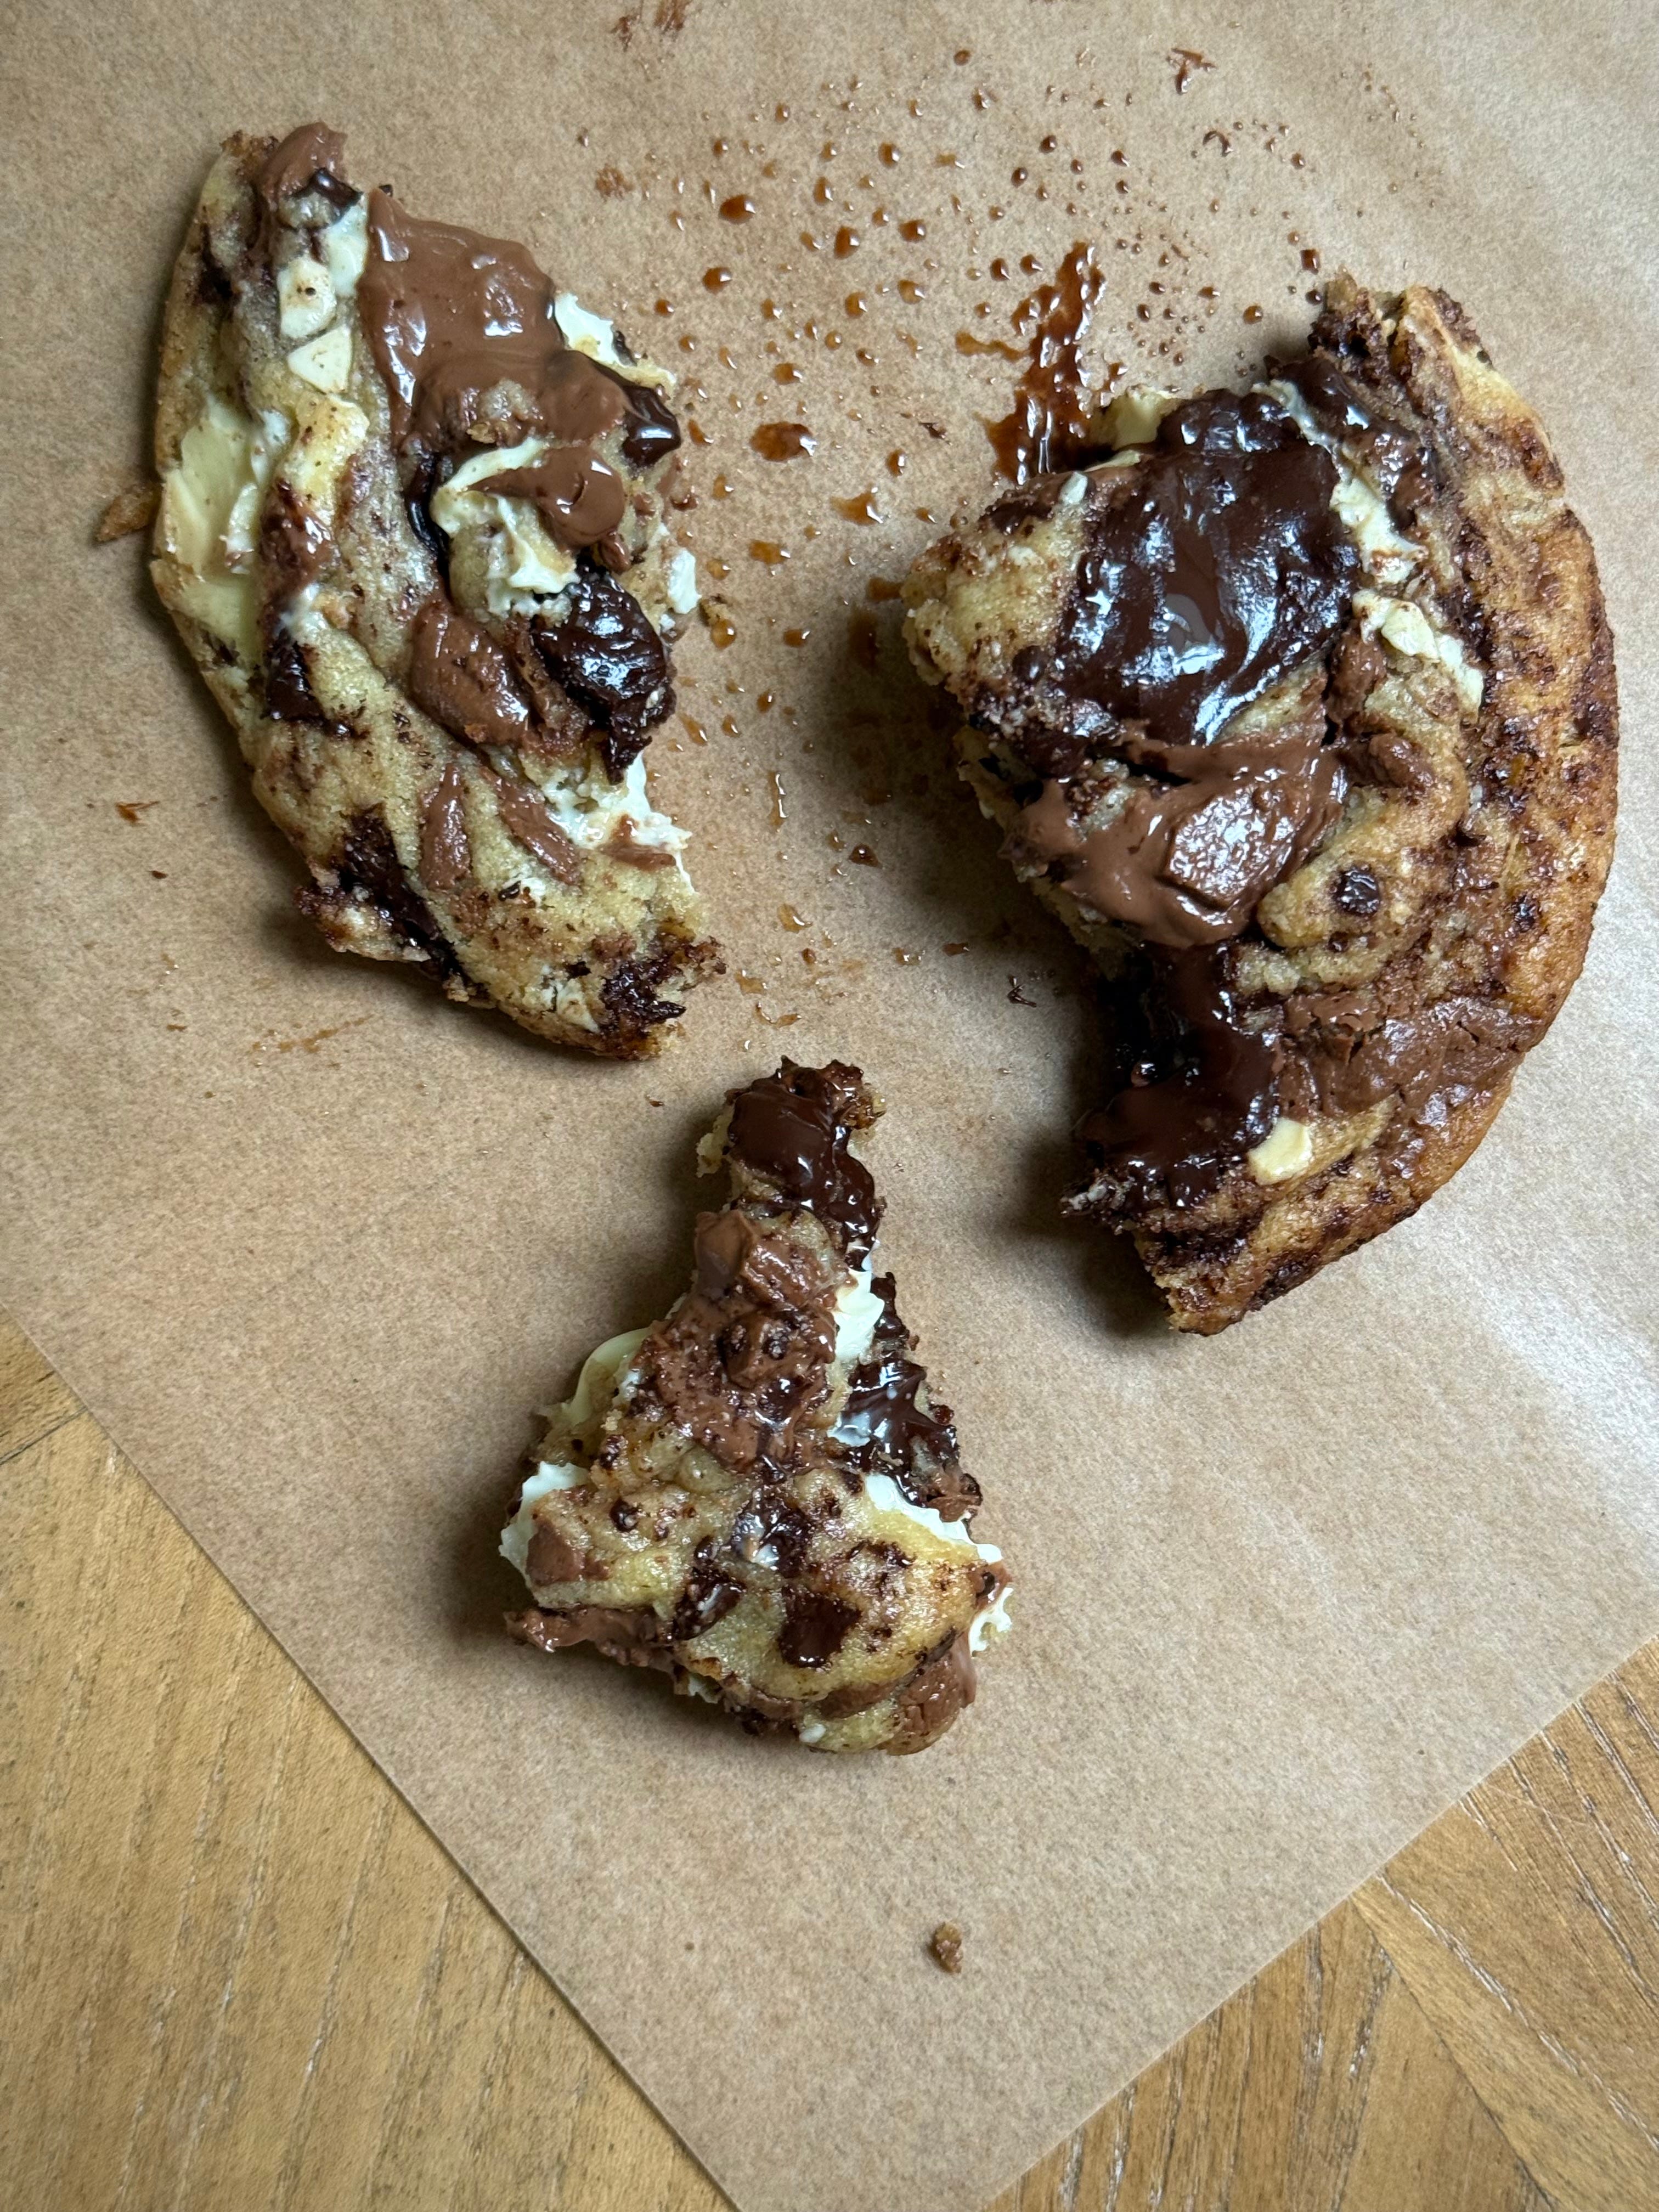
Recipe Makes: 10 Chunky NYC Style Cookies
Recipe Serves: This feels like a trick question cause I can never eat just 1 cookie, it’s gotta be two so with that maths – 5?
Y O U – W I L L – N E E D –
Dough
260 g Unsalted Butter, diced
115 g Light Brown Sugar
110 g Caster Sugar
1 Large Egg
115 g Condensed Milk
1.5 tsp Vanilla Bean Paste
310 g Plain Flour, sifted
50 g Cornflour, sifted
1 tsp Baking Powder, sifted
½ tsp Bicarbonate of Soda, sifted
½ tsp Sea Salt
100 g Milk Chocolate, roughly chopped
100 g Dark Chocolate, roughly chopped
80 g White Chocolate, roughly chopped
M E T H O D –
Into a pan, add the unsalted butter and place over a low to medium heat. Gently melt the butter. Once melted, continue cooking until the milk solids begin to turn a dark golden brown colour. They’ll pool at the base of the pan looking like crumbs and the butter should smell buttery. Remove the pan from the heat, re-weigh the butter and transfer 225 g to a heatproof container before placing into the fridge to cool.
Once cool but not set firm, add the 225 g brown butter into a mixer bowl alongside the two sugars. NOTE: you need to melt more butter than needed in the recipe as the water content will evaporate when being cooked so make sure you weigh it before adding to the bowl.
Cream together for a minute or two on a medium speed using a paddle attachment on your stand mixer. We don’t want this to be light or fluffy, we just want this combined. NOTE: If you do not have a stand mixer, you can use an electric hand whisk or a wooden spoon.
Next, add the egg, condensed milk and vanilla. Again, mix until just combined – if you continue to mix and the base of the dough becomes aerated, you will be left with a cakier consistency, as opposed to cookie.
In a separate bowl, add the plain flour, cornflour, baking powder, bicarbonate of soda and salt. Mix using a balloon whisk. NOTE: If you do not have cornflour, you can sub for same quant flour. I have had a few people ask me if the cornflour is a necessity for this recipe, which it isn’t but I would highly recommend using it. It helps to not only promote a more tender, chewier middle but it also helps to inhibit the gluten development and prevent the cookies from spreading too much when baking.
Mix the 3 chocolates together before adding 3/4 of it and the mixed flour to the mixer bowl.
Mix on a low to medium speed until everything has just combined and there are no visible streaks of flour.
Use an ice cream scoop to scoop out dough balls (I opt for approx 115 - 120 g dough ball to make 10 cookies). Roll the dough balls into a tall cylindrical shape if you want chunkier cookies, or opt for a round ball if you prefer them slightly flatter. Press the tops and roll the sides of each dough ball into the remaining chopped chocolate chunks and place onto your lined baking tray.
Place the baking tray into the freezer and leave until frozen through. NOTE: I opt to leave them overnight just to allow the cookie to completely freeze through and allow time for the gluten to relax and flour to hydrate. Do not thaw before baking, bake straight from frozen.
Once frozen, preheat the oven to 160CFan/180C/350F/Gas Mark 4.
Place a few of the dough balls onto a lined baking tray leaving plenty of space around each one and bake for 15 minutes – anything more than this will produce a more cooked through cookie where the internal texture isn’t gooey. If you find your cookies are still standing tall in a cylindrical shape, you can gently flatten with the back of a palette knife or fish slice and place back into the oven for a few minutes to cook.
Remove the tray from the oven, use a glass or cookie cutter to scoot around the edges to tidy up and let the cookies sit on the tray for at least 45 minutes before moving them onto a cooling rack and enjoying. NOTE: moving the cookies before they have set may result in a delicious mess. If you are unable to pick them up, continue letting them cool on the tray until you are.
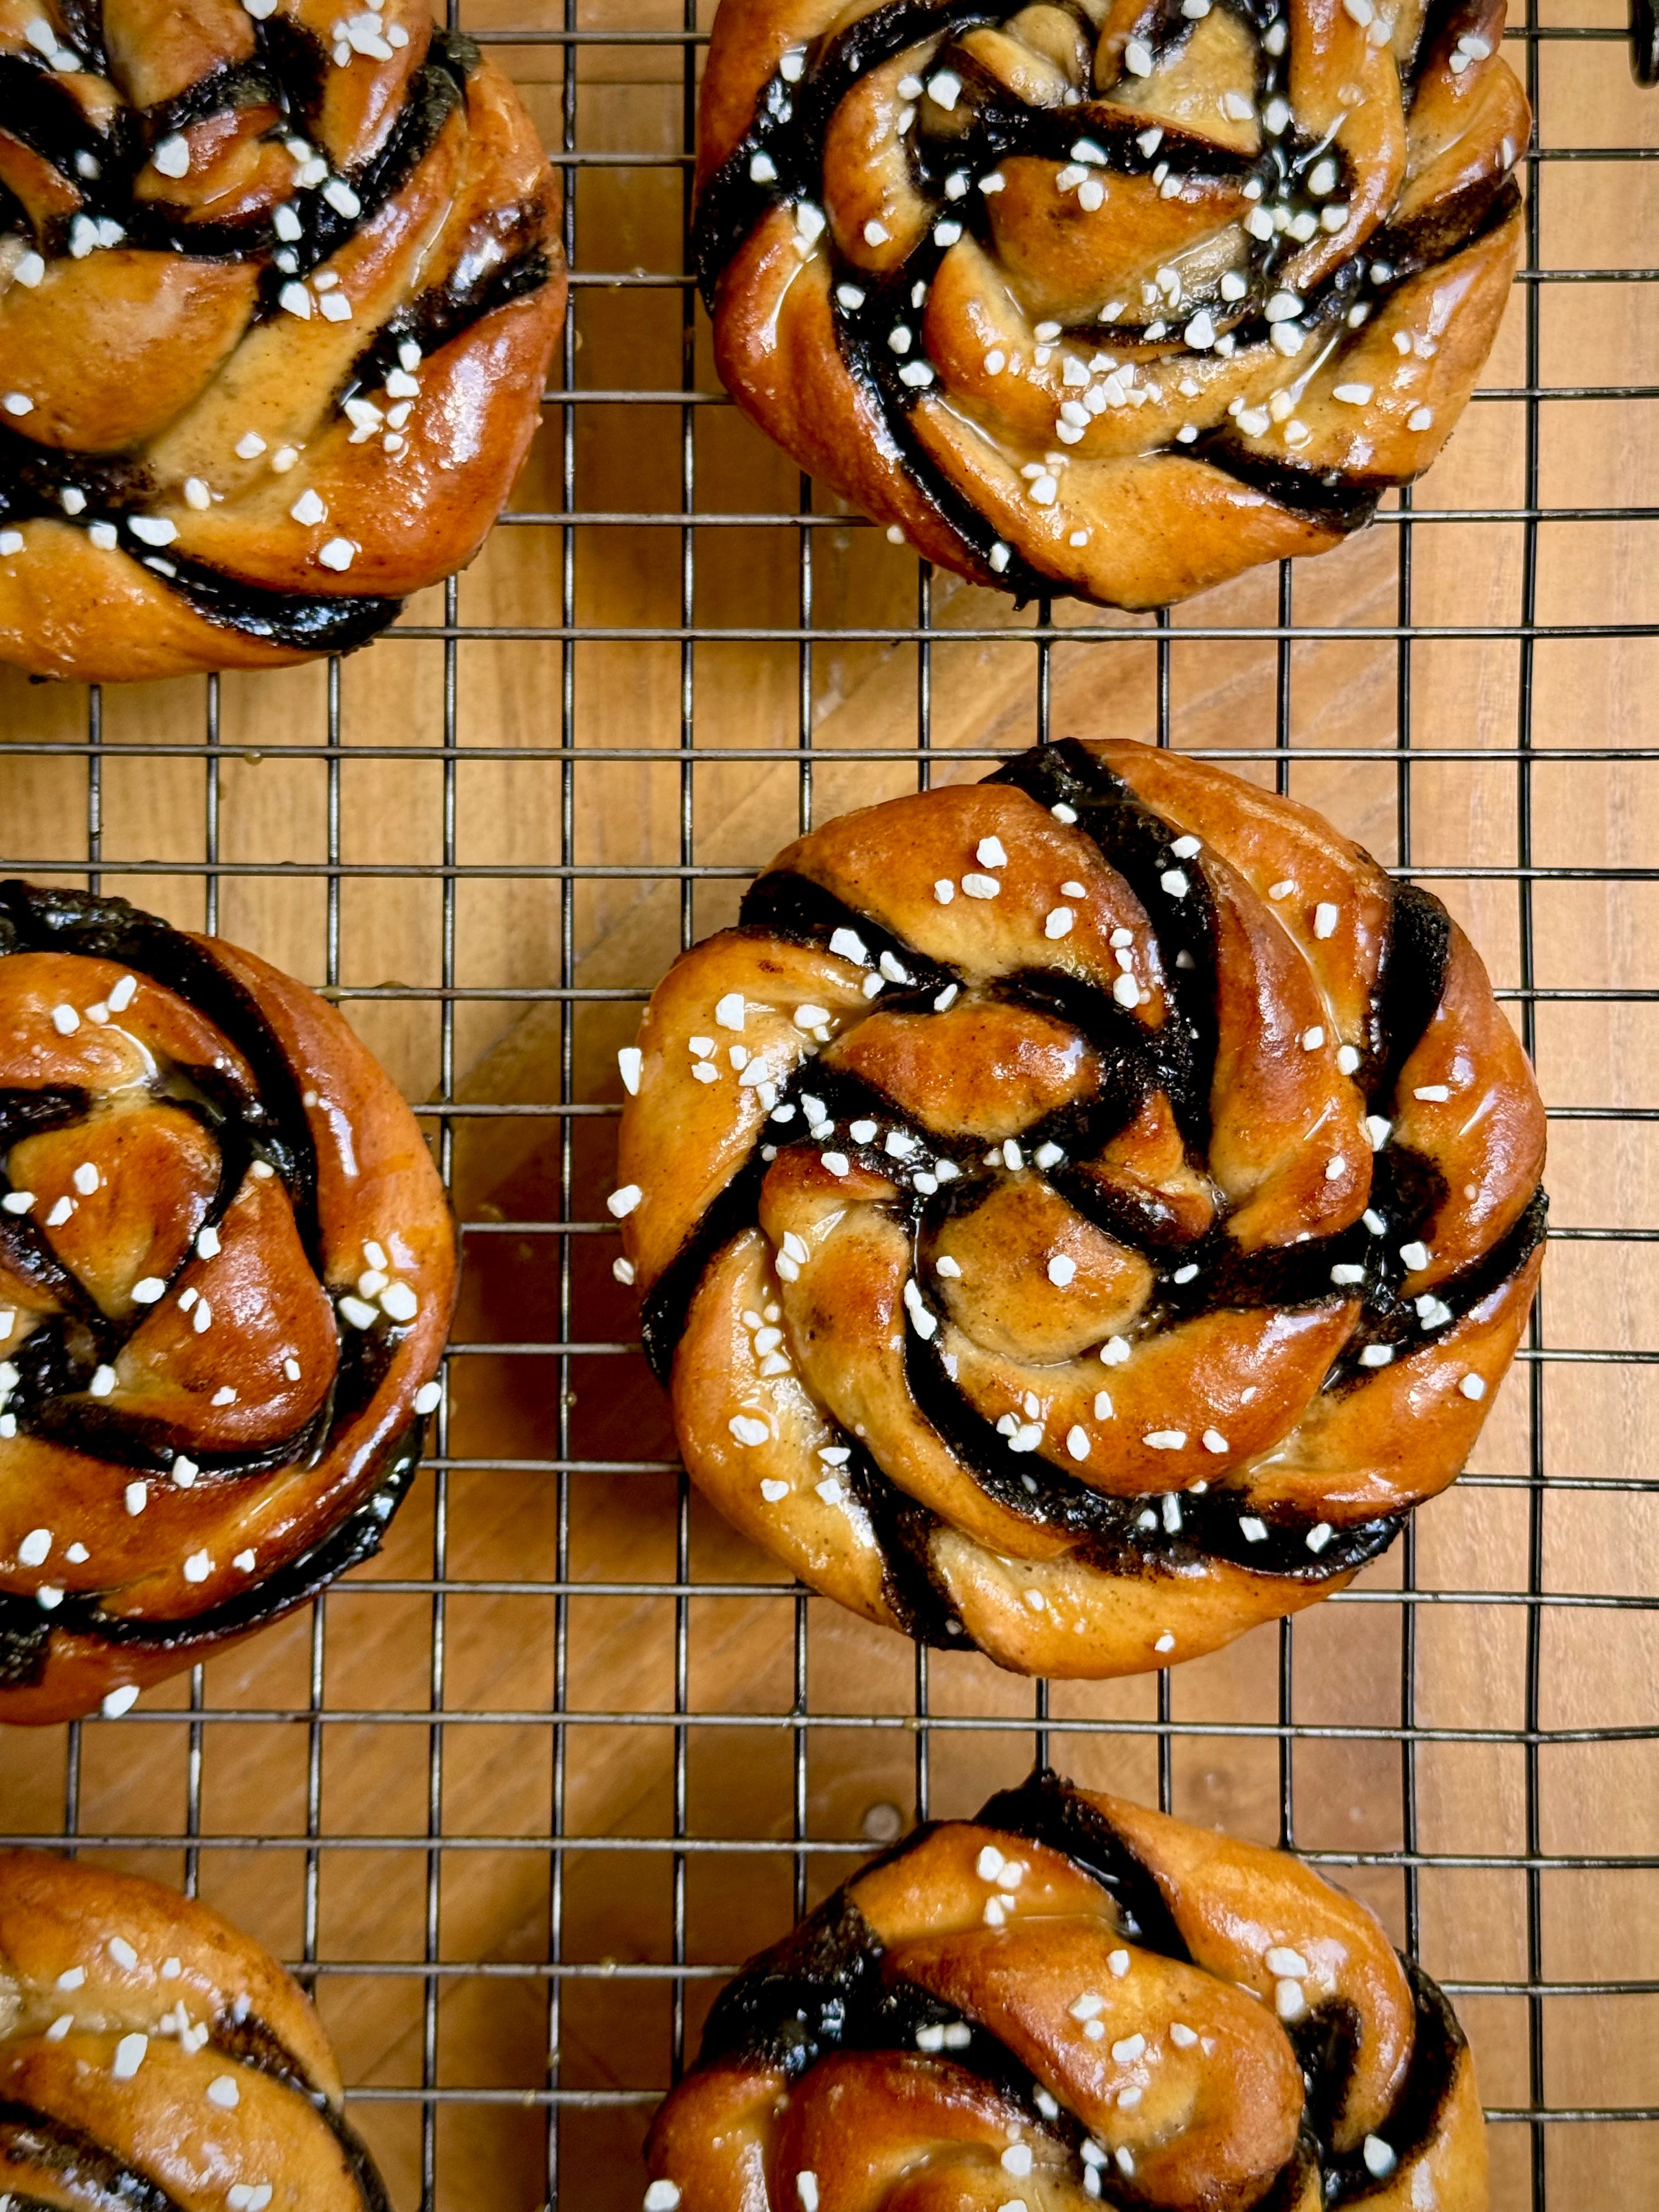
And now finally moving onto the main bake of the day, my Chocolate Cardamom Buns. I have spoken about the magic of bread and the power it holds over me on here many a time. I owe bread baking for saving my sanity during a long old stint of unemployment before I did Bake Off, and whilst you’d be forgiven for thinking making cakes is my number one love, bread will always top the charts every single time.
Who can resist a warm, freshly baked slice of bread slathered in a bit of salted butter?? The breadbasket that comes for the table at some restaurants, that is supposedly ‘for the table’?! No chance. Its for me, and me only. I’m not normally a Joey when it comes to food (too niche of a Friends reference?) but have been known to unashamedly hog free bread when its going.
Savoury breads are divine. Fantastic. Delicious. Excellent vehicles to mop up sauces, dunk into dips, slather with spread or provide the foundations for my staple daily meal – a sandwich. But for me?? Sweet breads are where its at. That’s where I started when I began my baking journey at the backend of 2016. Did I start off soft? Ease my way into it? Dip my toes into the water? Nope. I went headfirst into a plaited cherry and white chocolate loaf. Thankfully photo evidence of said loaf doesn’t exist because it was an overproved horror show. The bread was GINORMOUS but I still ate every last bit of it with Augustus Gloop-like gusto and savoured every last bit.
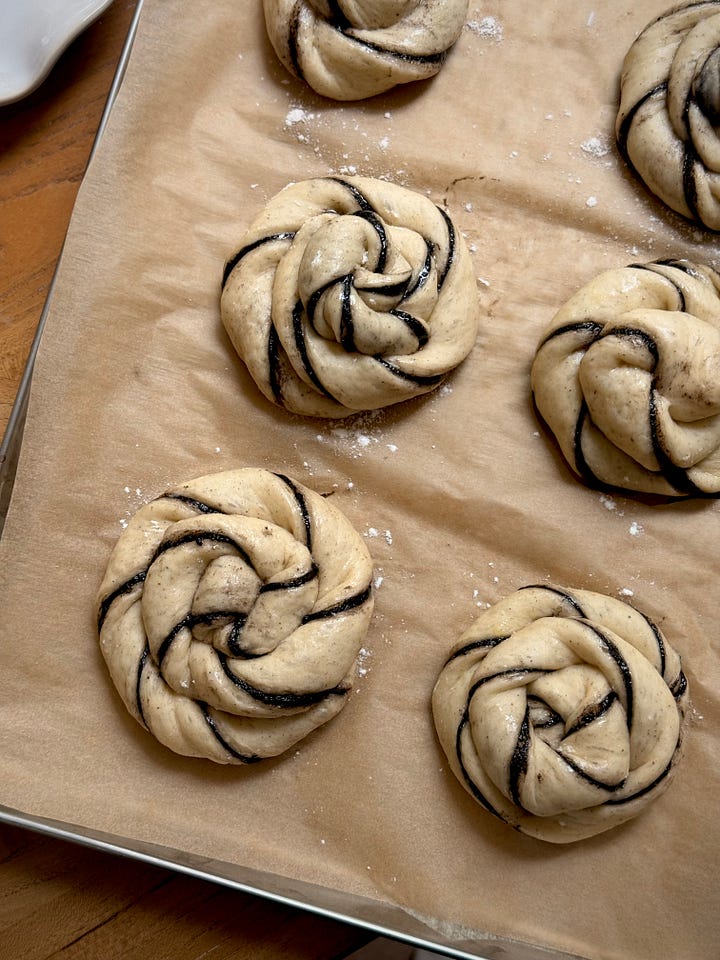
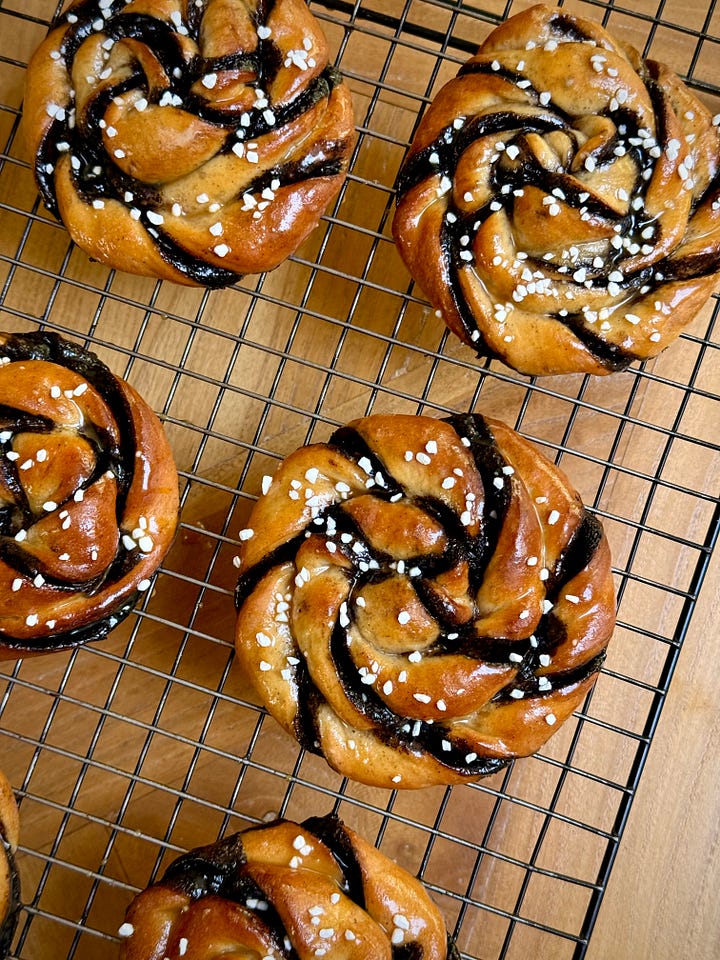

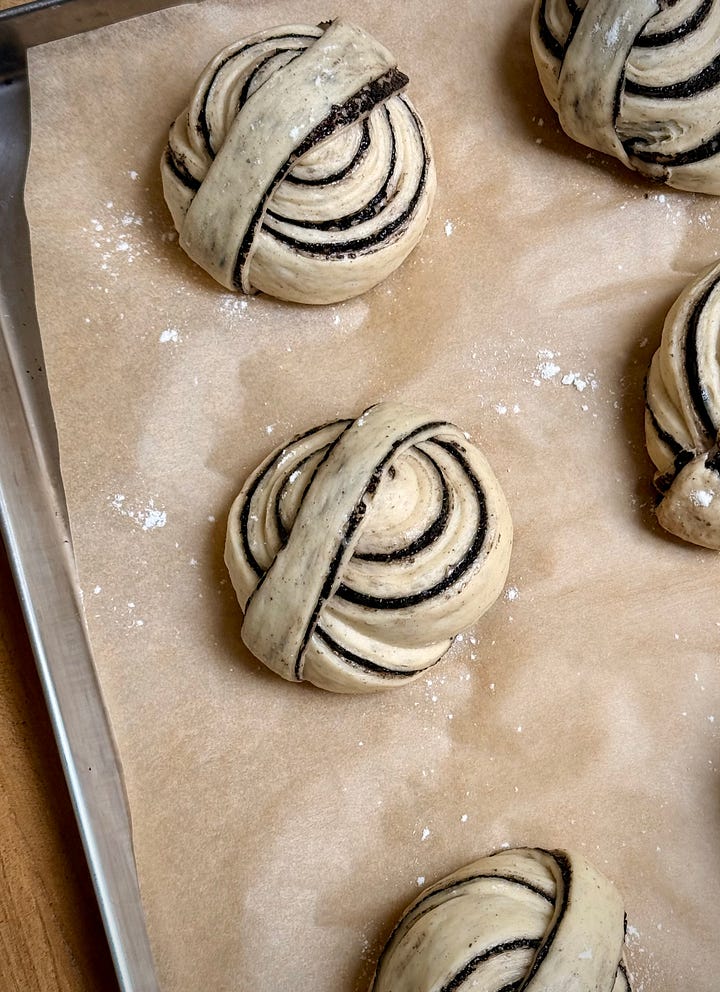
This week I wanted something moreish. I wanted something that would make my kitchen smell heavenly, make the drab grey weather more tolerable and something that would push my waistband to its very limit. Originally I was going to share a recipe for my ultimate Cinnamon Rolls (which fyi, are nothing short of sensational) but decided to push it one further with my Chocolate Cardamom Buns. A little twist on the Swedish classic Kardemummabullar aka Cardamom Buns. You know those fancy twisty bread rolls you’ve seen in some bakeries, topped with nibbed sugar? Yup. Those.
Except mine takes it one step further with a chocolate and cardamom sugar butter and a salted caramel glaze. Once you’ve stopped drooling, you may want to read that again. Yup. I said a chocolate and cardamom sugar butter and a salted caramel glaze. Buttery, pillowy soft, cardamom scented dough, all smothered in a sugar butter before being drenched in a glaze and topped with nibbed sugar. THESE ARE THE BEES KNEES. Love. Ate 5 of them in one day (not in one go, I am not *that* much of an animal) so hopefully that stresses just how devilishly delicious they are.

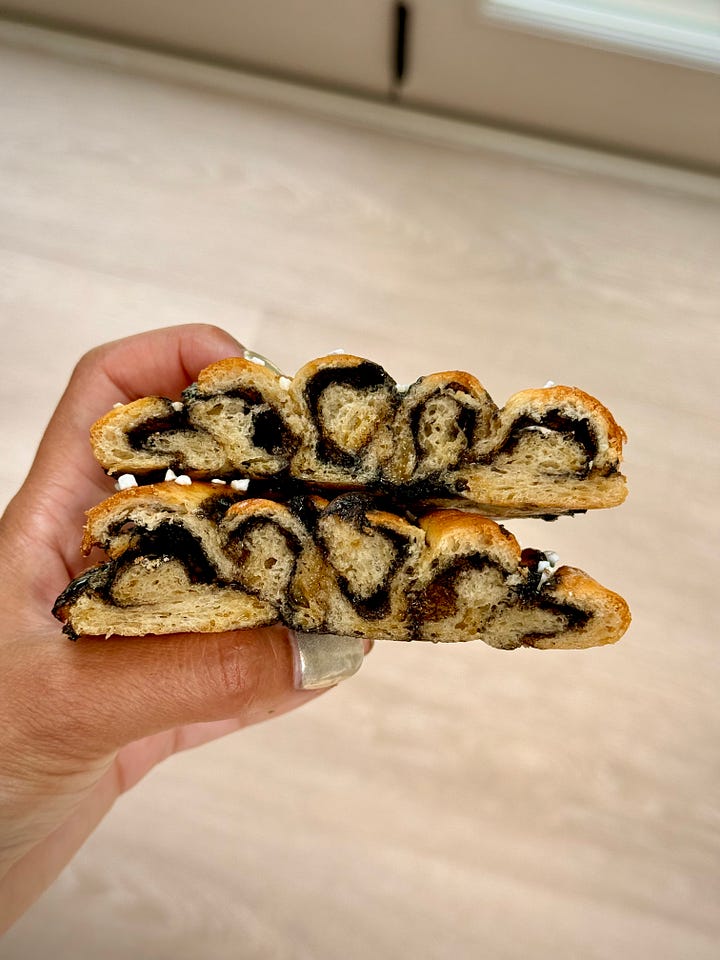
The key to these being incredible is the tangzhong – an additional step I throw into lots of my bread recipes. This Japanese method of bread baking sees you cooking out a percentage of the flour alongside the milk to form a gelatinous paste. You add this to the dough ingredients at the start and the results are always worth the extra effort as the bread stays softer and tender for longer. But the good news is folks, you can prep this a day or two in advance and store it in your fridge till you need it.
Gimme. Gimme them all.
Recipe Makes: At least 16 Pastries
Recipe Serves: 16
Y O U – W I L L – N E E D –
Comments
Nothing yet. Say the first thing.
Sign in to join the conversation.