
Today’s recipe is free for all subscribers! Leave a comment on this post if you try the recipe. I hope you’ll upgrade your subscription to enjoy all of my weekly newsletters, recipes, and baking lessons here on Everyday Baking!
0:00
-0:19
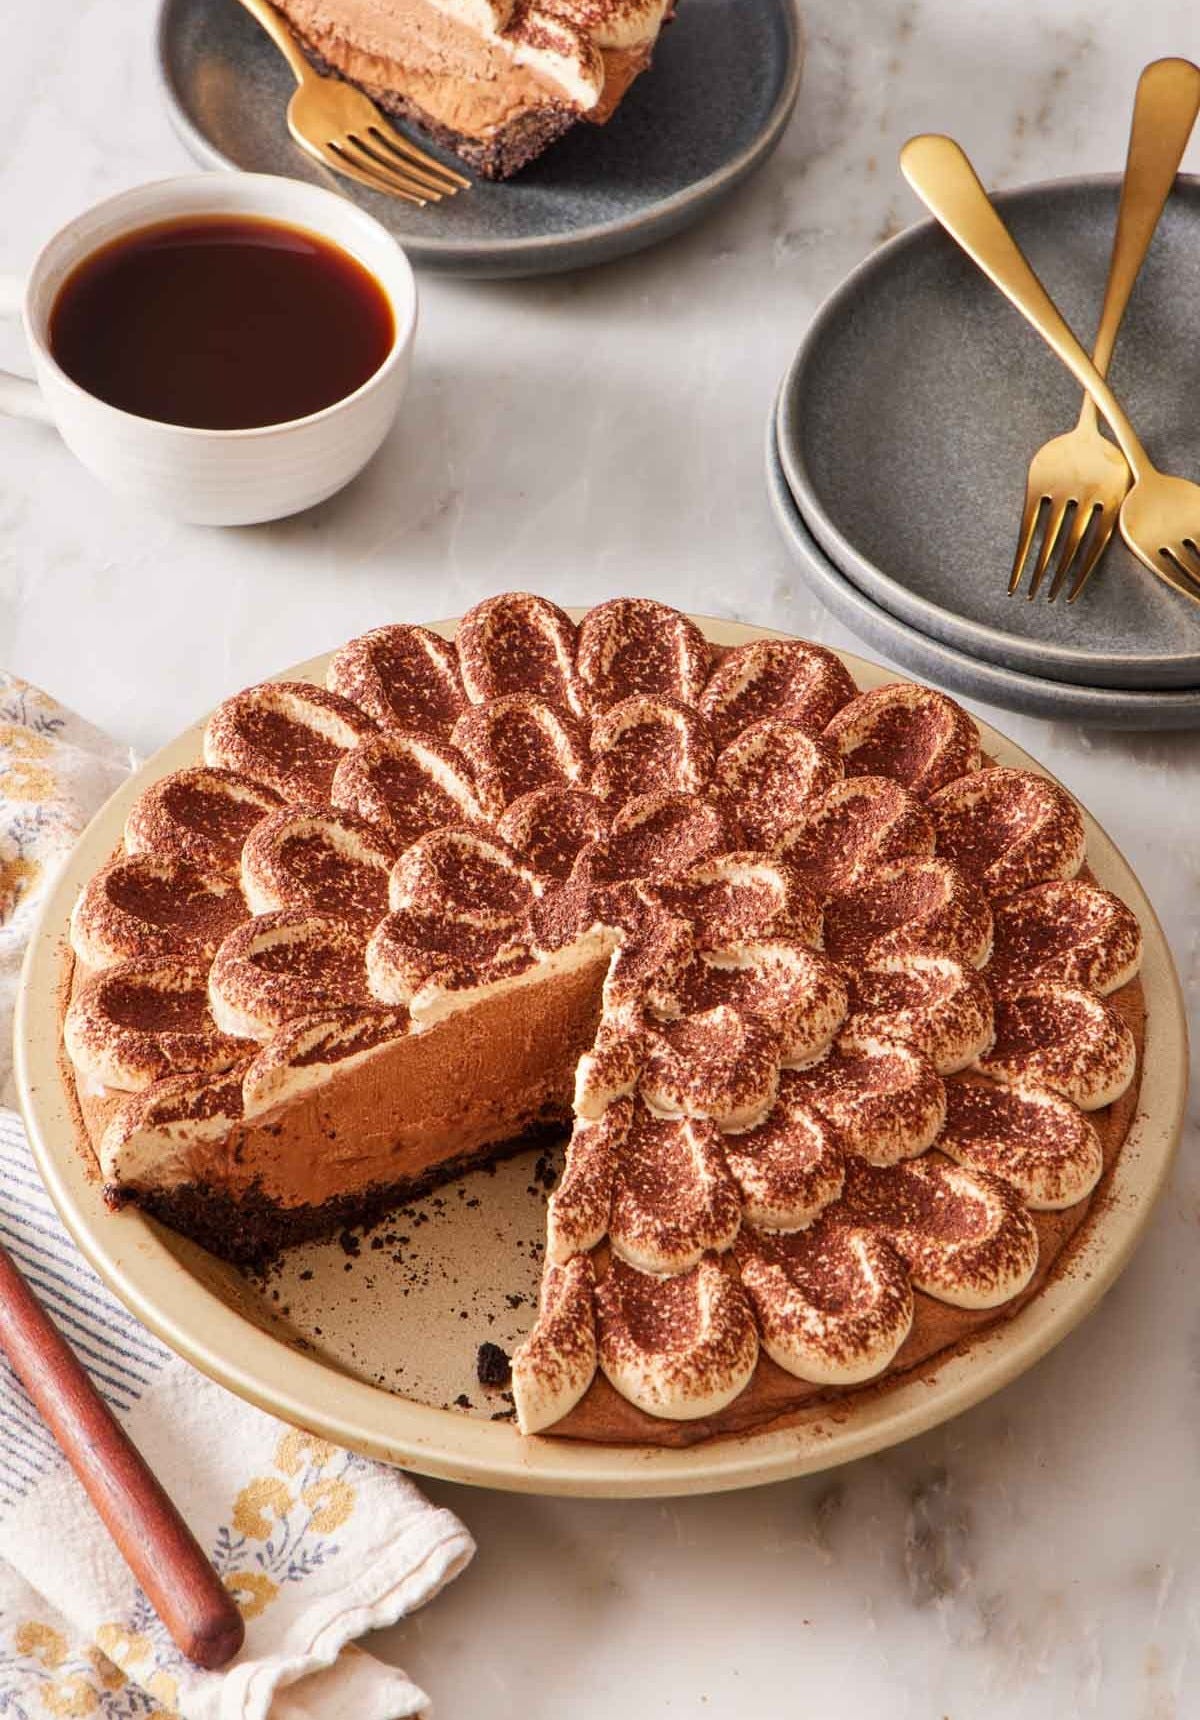
One of the original recipes on Preppy Kitchen is my French Silk Pie. This was my husband Brian’s favorite dessert growing up, and he had a very specific memory of its texture and flavor. I made endless pies, perfecting that recipe for him, and I’m still so proud of it. This Sunday’s newsletter is a riff on that magical chocolate pie recipe.
I swapped the flaky, blind-baked crust for an easy Oreo crust and amplified the flavor with a generous amount of espresso in the filling and an espresso whipped cream on top. The decadence factor also increased with a ribbon of hot fudge running through the center of each slice. The filling has the same, magically airy-dense, melt-in-your-mouth mousse filling made from whipping melted chocolate, butter, eggs, sugar, and cream.
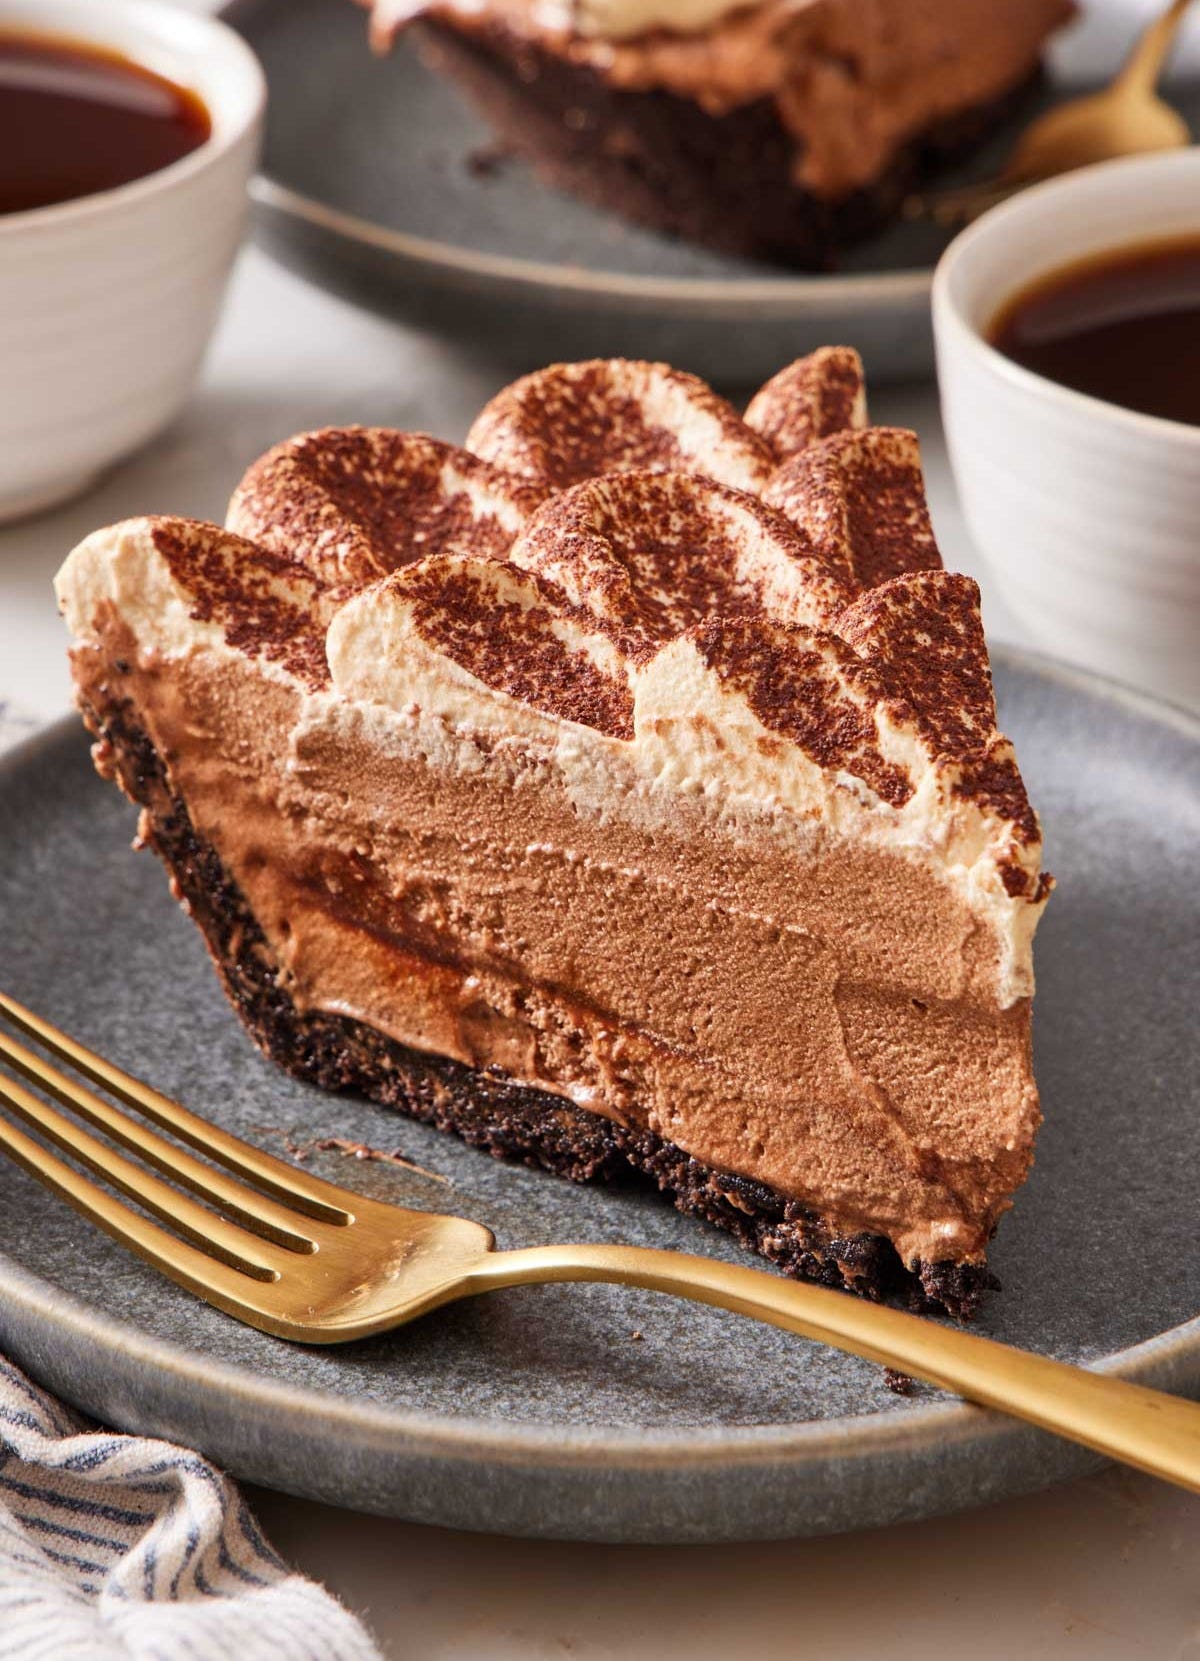
Once the pie is chilled, it slices beautifully and sets into a texture that is somehow dense and airy. It’s rich but also cold, making a lovely summer dessert for a backyard barbecue.
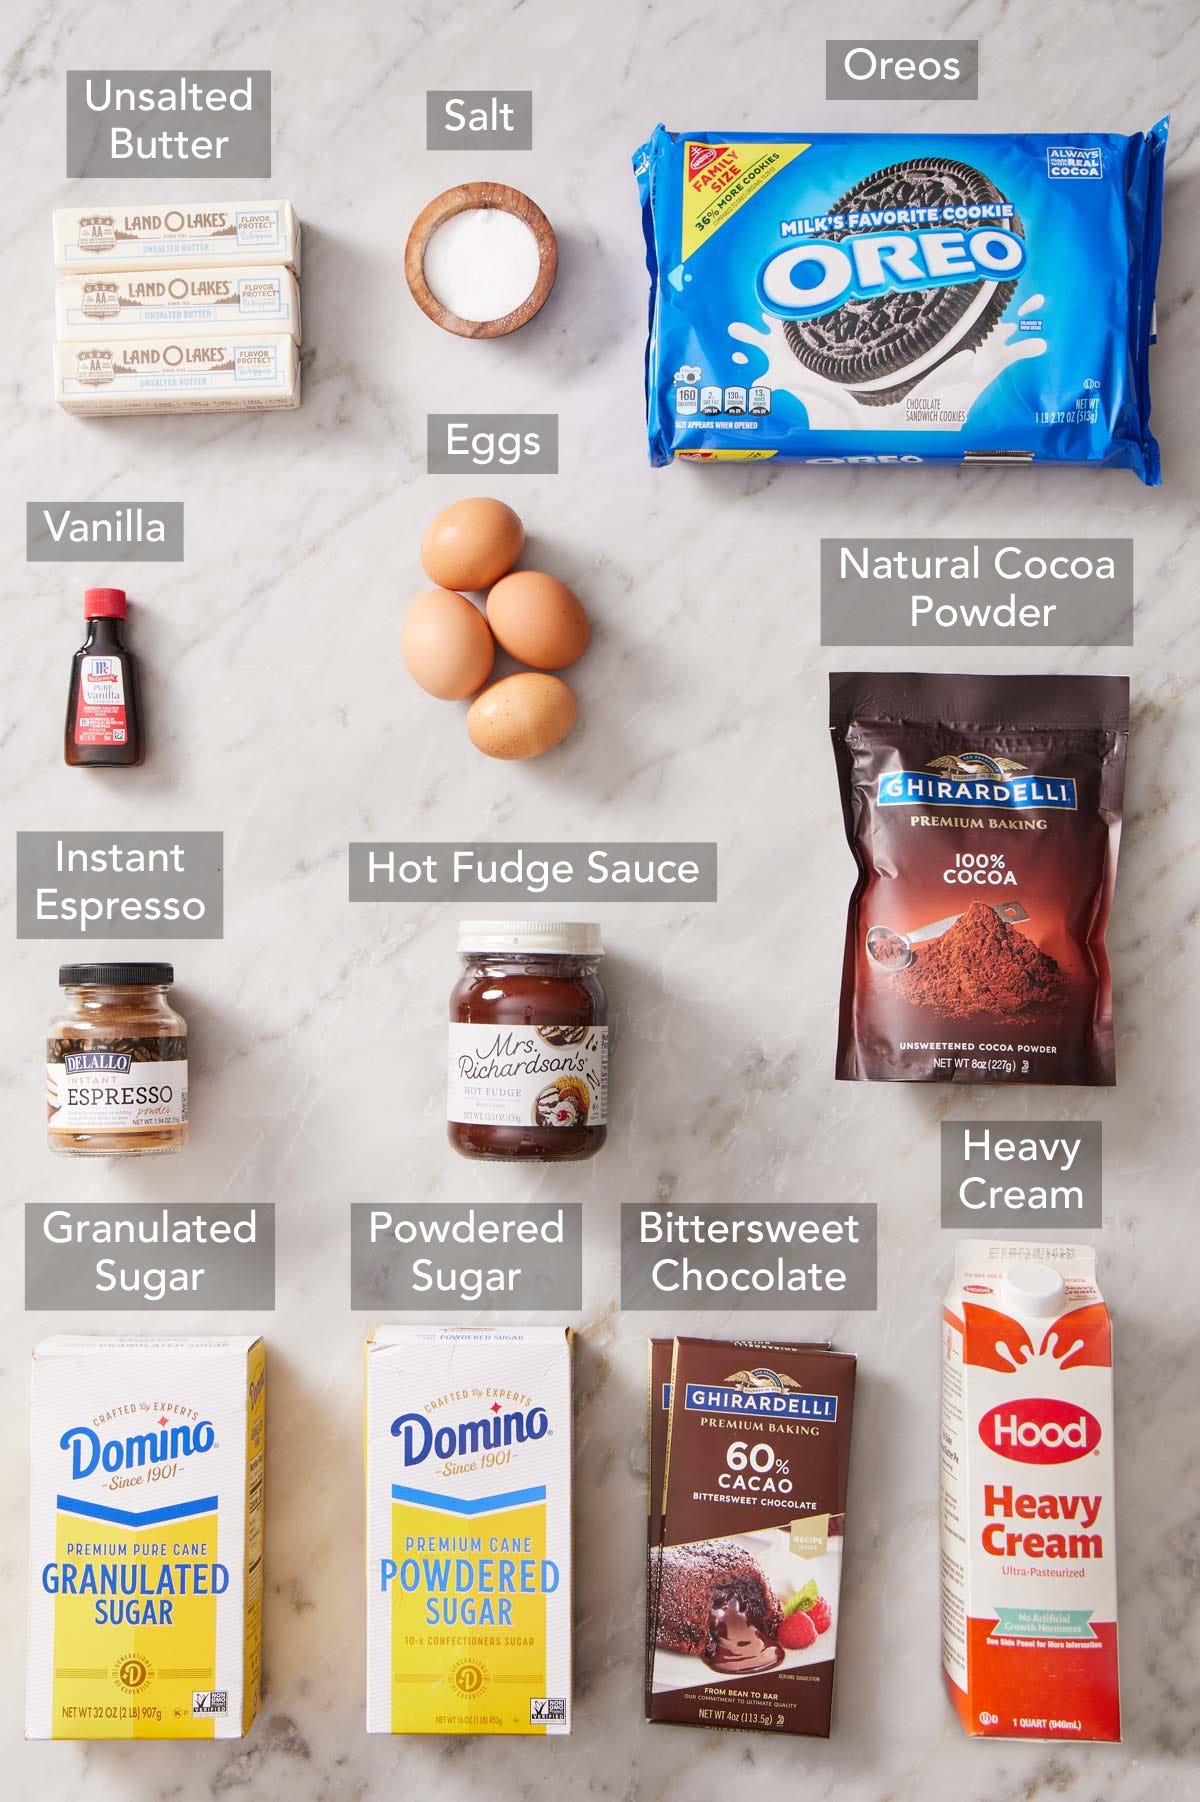
A note on Oreos: Use regular-filling Oreos for the crust (not Double Stuf). You can use flavored ones, though! Chocolate, peanut butter, or the Tiramisu flavor are delicious with the filling. (And no, you don’t need to remove the cream—it helps the crumbs hold together.)
A note on chocolate: Use a good-quality bittersweet chocolate for the filling! This is where most of the chocolate flavor comes from, and the better the chocolate, the better the pie will be.
A note on instant espresso: Instant espresso powder is important in this recipe. Regular espresso grounds will make the filling gritty—you need the instant espresso to dissolve into the filling to flavor it while still being smooth and creamy. If you just don’t want coffee in your pie, you can leave it out without affecting the texture.
A note on hot fudge sauce: You can use your favorite brand, or swap it for chocolate ganache if you’d prefer. Melt 1/4 cup of chocolate chips with 1/4 cup of cream and let it cool until it’s spoonable but not hot. Don’t use chocolate syrup—it’s too runny and can make the filling too soft to slice easily, or it will ooze out.
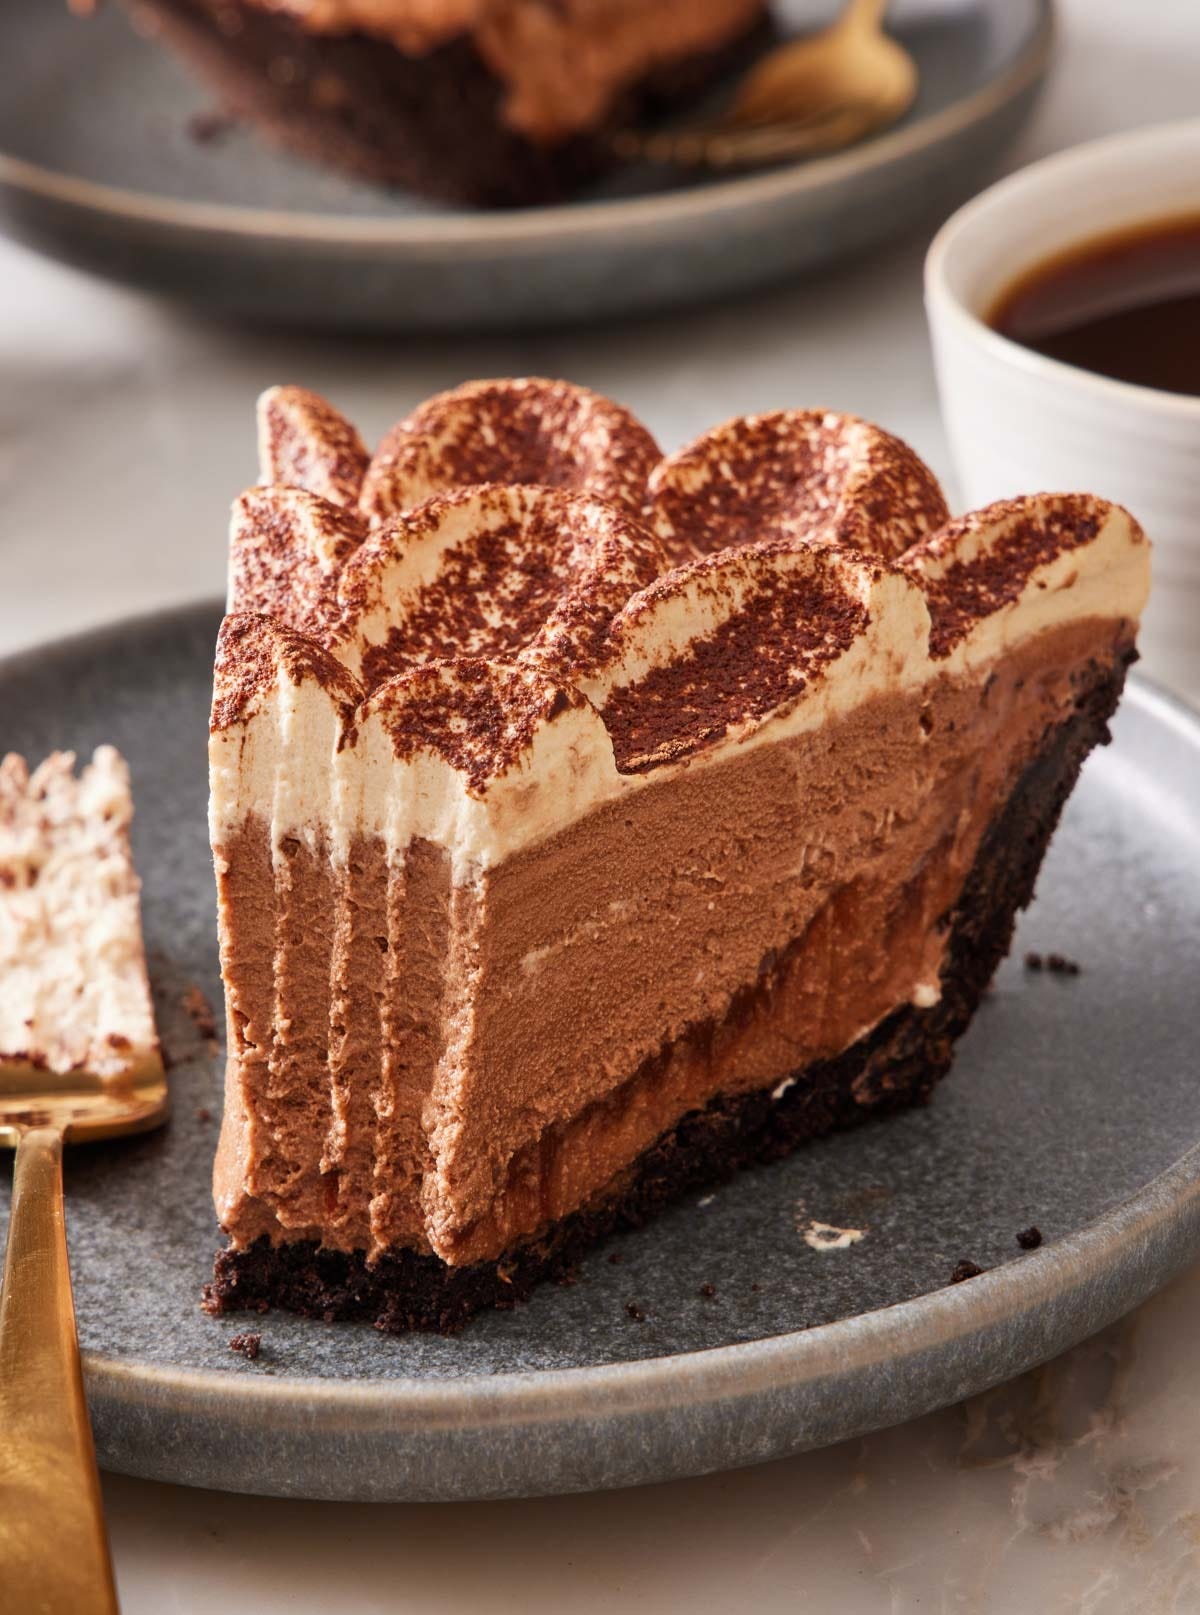
My recipe testing for the French Silk Pie taught me a lot about which parts of the recipe are key to ensuring the filling has just the right texture. Here are the most important parts of the process and why they matter.
Cook the eggs and sugar to 160F. The egg yolks and sugar are cooked before the chocolate is added, forming the base of the filling. Achieving the right temperature here is key. Heating it to 160°F changes the egg proteins so they begin coagulating. When you whip the filling, this helps form a stronger structure to hold the air and prevent the filling from deflating or being too runny.
Cool the chocolate mixture thoroughly. The chocolate is added to the cooked egg and sugar to melt it. This mixture is whipped into softened butter, but to avoid melting the butter, you need to cool the chocolate mixture sufficiently. Make sure it is at least 80°F or below before you add it to the butter. You can speed this up by placing the bowl in an ice bath and gently stirring it for a few minutes.
Whip the mixture well. Once the butter, chocolate, and egg mixture is combined, you want to whip it until the mixture looks fluffy, light in color, and holds
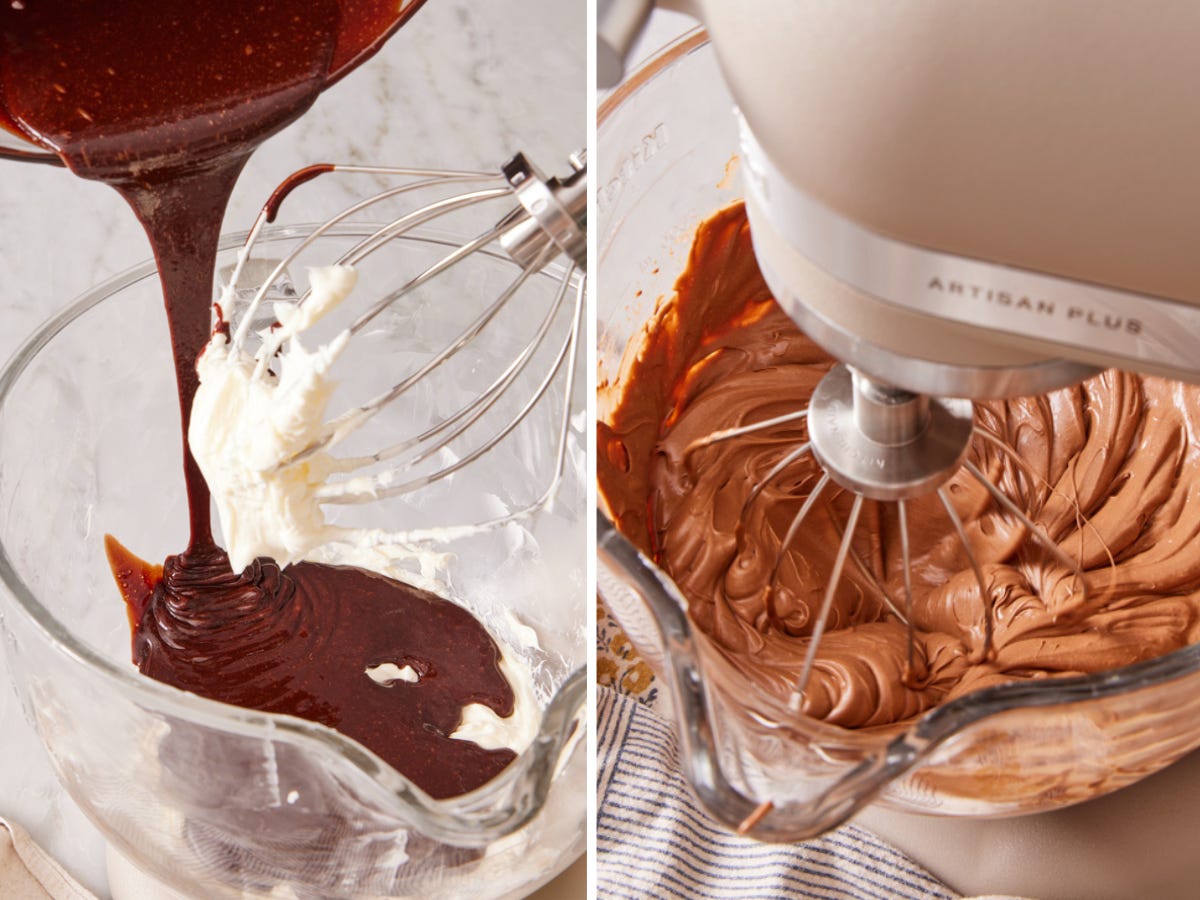
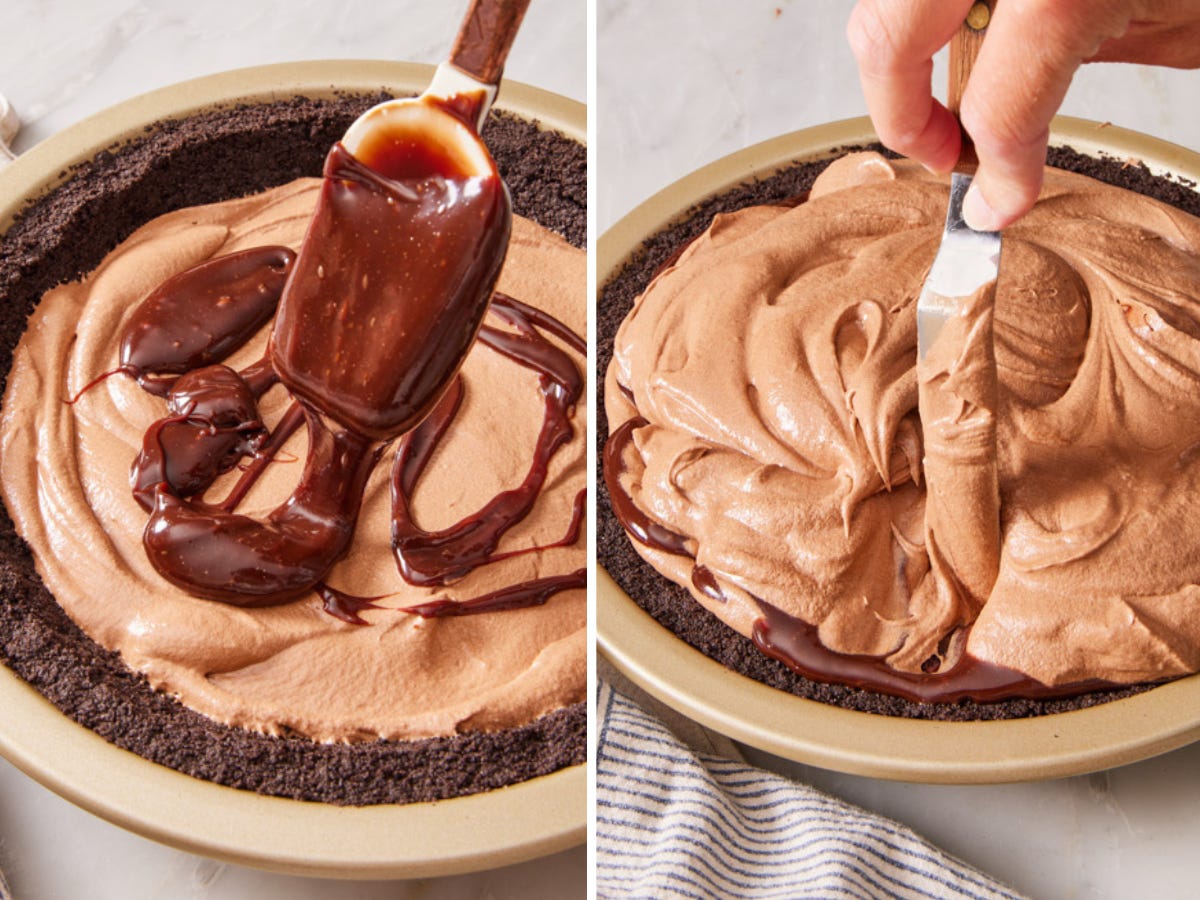
To make the fudge ripple in the center, spread half of the pie filling into the crust and spoon the fudge on top. You will likely need to warm the fudge a bit so it is loose enough to spoon. Just be sure it isn’t very hot, or it will melt the filling. Use an offset or butter knife to gently swirl the fudge into the filling.
Once the pie is chilled, it’s topped with an espresso whipped cream. You can simply dollop it on top and swoop it for a very easy finish. But if you want to add a bit of flair, try this technique! You simply pipe dollops in a ring, then pull them towards the center with an offset spatula or a butter knife.
Start by pressing the blade into the center of the dollop, then drag it towards the center of the pie, just an inch or so. Continuing in concentric circles gives the top a flower pattern—it’s impressive but doesn’t require any technical piping skills or special tips.
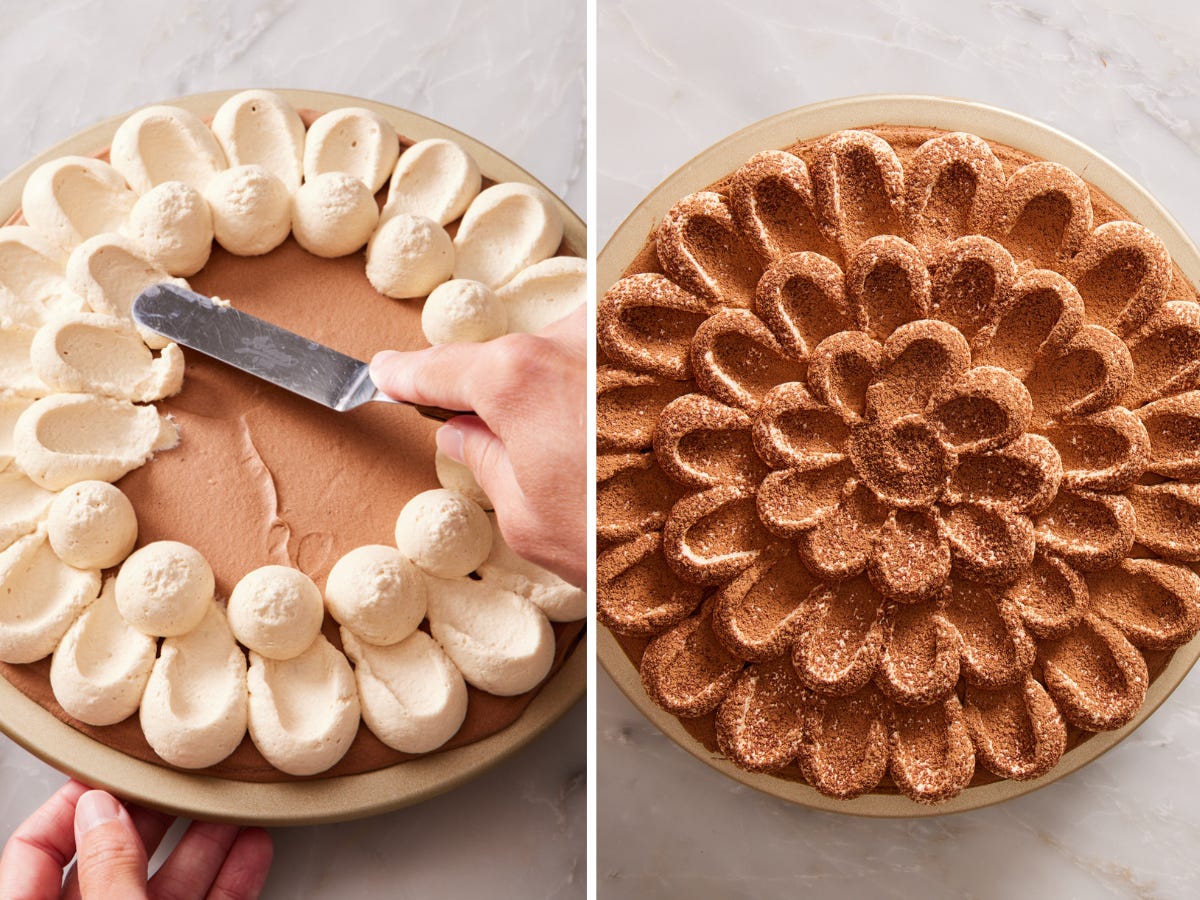
Finished with a dusting of powdered sugar, and your pie is a gorgeous centerpiece!
Make the crust ahead: Press it into the pan and freeze it for a month before baking. Wrap it tightly in plastic wrap and foil before storing it.
This pie is great if made a day in advance! It needs plenty of time to chill, so it’s a good one to prep ahead. The whipped cream on top also holds well if you want to fully assemble it, or you can chill it without the topping and add it closer to serving. The cocoa powder dusting on top will absorb moisture and darken over time—add it before serving if you want it to look fresh.
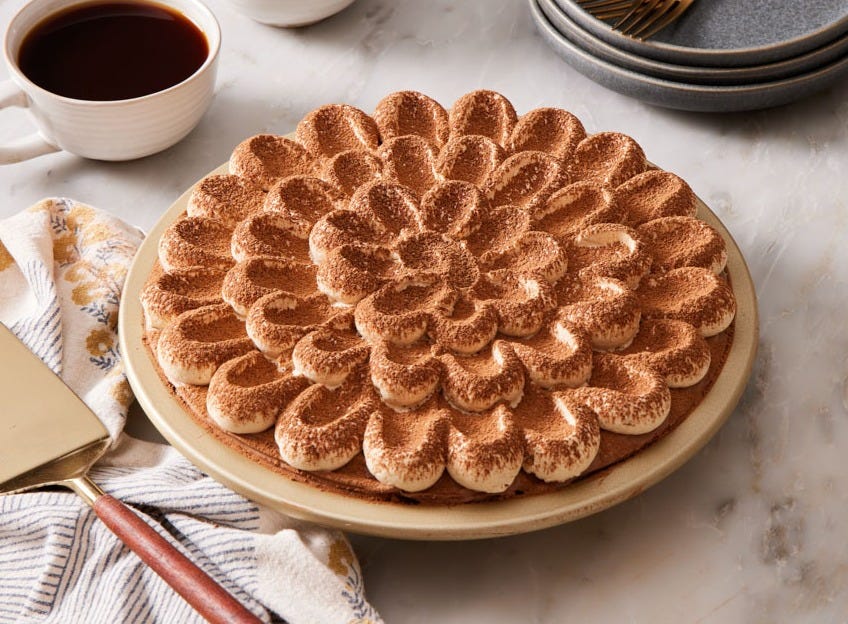
Makes 1 (9-inch) pie / 10-12 servings
For the Crust:
25 (300g) Oreo cookies (don’t remove the filling)
¼ cup (56g) unsalted butter, melted
For the Filling:
4 large eggs, room temperature
1 cup (200g) granulated sugar
1½ (4 ounce/113g) bittersweet chocolate bars, finely chopped (or 1 cup chocolate chips)
2 teaspoons vanilla extract
½ teaspoon fine sea salt
1 tablespoon instant espresso powder
⅔ cups (160ml) cold heavy whipping cream
1 cup (2 sticks/227g) unsalted butter, very soft
½ cup (150g) hot fudge
For the Topping:
1½ cups (360ml) cold heavy whipping cream
¼ cup (50g) powdered sugar
1 tablespoon instant espresso powder
1 teaspoon vanilla extract
Garnish: dusting of cocoa powder (optional)
Make the Crust:
Preheat the oven to 350ºF. To the work bowl of a food processor, add the Oreo cookies and pulse for 30 seconds to 1 minute or until finely ground. Drizzle in the melted butter and pulse for an additional 15 seconds or until the mixture resembles wet sand and holds together when squeezed.
Transfer the mixture to a 9-inch pie dish. Spread the crumbs into an even layer and firmly press into the bottom and 1 inch up the sides using a flat-bottom glass or measuring cup. Bake for 10-12 minutes or until the crust appears dry. Allow to cool completely.
Make the Filling:
Fill a medium pot with 2 inches of water and bring it to a simmer over medium heat. In a heatproof bowl large enough to sit on the pot without the bottom touching the water, add the eggs and the sugar. Whisk to combine.
Place the bowl on top of the simmering water and gently stir with the whisk constantly until the mixture reaches 160ºF on an instant-read thermometer, about 5 minutes. (If you don’t have a thermometer, the mixture should feel smooth when rubbed between your fingers.)
Remove the bowl from the pot, and add in the chopped chocolate, vanilla, and salt. Gently whisk until the chocolate is fully melted and smooth. Add the espresso powder and whisk until combined. Allow the mixture to cool until no longer warm to the touch, about 30 minutes. (It should be no warmer than 80F or it will melt the butter.)
Finish the Filling and Assemble:
To the bowl of a stand mixer fitted with a whisk attachment or a large bowl with an electric hand mixer, beat the heavy cream on medium speed until soft peaks form, about 2-3 minutes. Transfer to a different bowl and chill until ready to use.
Using the same mixing bowl and beaters, beat the butter on medium speed until light and fluffy, about 2 minutes. Scrape down the bowl and add in the cooled chocolate. Beat on medium-high speed until lightened and fluffy, about 3 minutes, scraping down the bowl as needed.
Using a spatula, fold in about one-third of the whipped cream into the chocolate mixture until no streaks remain. Repeat in two more additions. Set aside.
To a small bowl, add the hot fudge. Microwave in 10-second bursts until the fudge is loosened and easily spoonable but not hot (about 20 seconds).
Transfer half of the whipped chocolate filling into the cooled pie crust, then drizzle the hot fudge all over the top. Top with the remaining whipped filling, using an offset spatula or knife, swirl the fudge into the filling, then smooth the top off. Cover and refrigerate for 4 hours or up to 24 hours.
For the Topping:
When you are ready to serve, combine the heavy cream, powdered sugar, espresso powder, and vanilla extract in a large mixing bowl. Beat on medium speed with a hand or stand mixer until stiff peaks form, 3-5 minutes.
Transfer the whipped cream to a large piping bag fitted with a large round tip. Pipe dollops all over the top of the pie. Dust lightly with cocoa powder or shave the remaining half of your chocolate bar over the whipped cream, if you’d like. Keep the pie chilled until you are ready to slice it.
Recipe Notes:
This pie is virtually no-bake, but you can skip the oven if you want. The crust is baked for 10 minutes to help the sugar melt and set the structure, but you can freeze it if you don’t want to turn the oven on! It’ll be slightly more crumbly but still delicious.
Storage: Loosely cover and keep refrigerated for up to 5 days. You can freeze it, but I recommend serving it partially frozen rather than fully thawed. The whipped cream loses its structure if it’s fully thawed. Place the pie in the fridge for 4 hours before serving.
Don’t want coffee or caffeine in the pie? Leave out the espresso! You could replace it with orange zest for an orange-chocolate flavor combo, or replace it with Dutch-processed cocoa powder for an extra kick of chocolate.
Have a question about the recipe? Leave a comment for me below!
No posts
Comments
Nothing yet. Say the first thing.
Sign in to join the conversation.