
One thing I’ve always loved about vintage waist level cameras is the amount of modularity they thought of when it came to designing accessories. I’ve spent years obsessing over different prism finders and grips to pair with my Mamiya cameras. My main goal when picking accessories was always to find the most ergonomic option that limited the number of times I had to change hand positions while taking photos.
I’ve carried this ethos forward into my design philosophy for the WLV-01. When I first introduced the camera, I kept a single shutter button and on screen controls placed next to your thumbs so you never had to take your hand off the camera when shooting. This later brought some friction when shooting in bright lighting conditions with a viewfinder, so I introduced the slider UI as a solution.
Several people have mentioned the desire to add a rotary dial and more buttons to the camera. I’ve definitely considered it, but I’ve always felt like it would take away from the raw simplicity of the WLV-01. My goal for this camera wasn’t to create another vintage replica or a pro level body with multiple customizable buttons. It’s always been about picking up a camera that was as simple as a point and shoot but gave you all the controls you need to quickly manipulate the exposure triangle.
New Grip Design
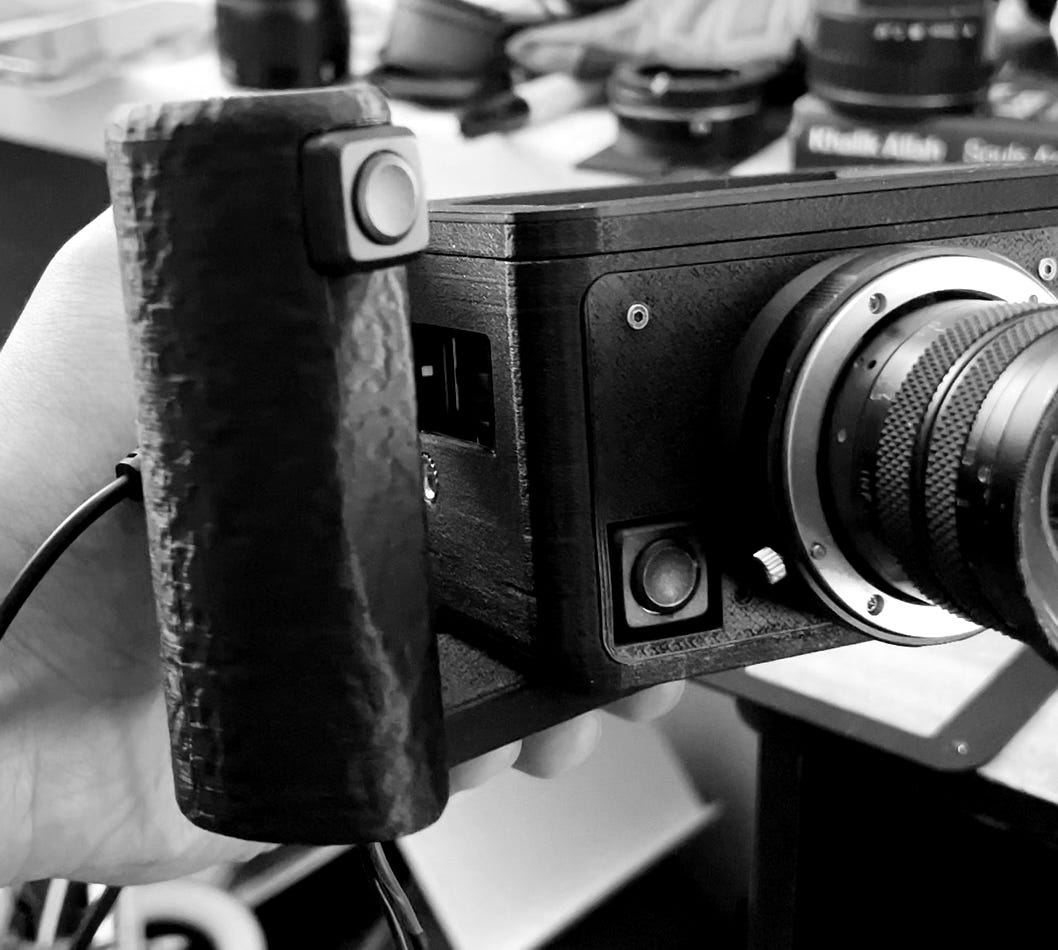
To help address the issue of not being able to quickly change settings while using a viewfinder, I’ve created a shutter release grip that works in relation to the on body shutter button.
Button Functionality
When the shutter button on the grip is first pressed, it enables “grip mode.” When in grip mode, the shutter button on the grip takes images while the shutter button on the body acts as a modifier button. When you press the body button, it will cycle between highlighting the shutter speed, ISO and EV as options to change. When you hold down the body button and click the grip button, it will cycle through different values depending on the setting you selected. It works in both directions: holding the body button and clicking the grip will move up in values, and doing the opposite combination will move down in values. You can also hold both, and it will quickly cycle through values until you release.
Button Design
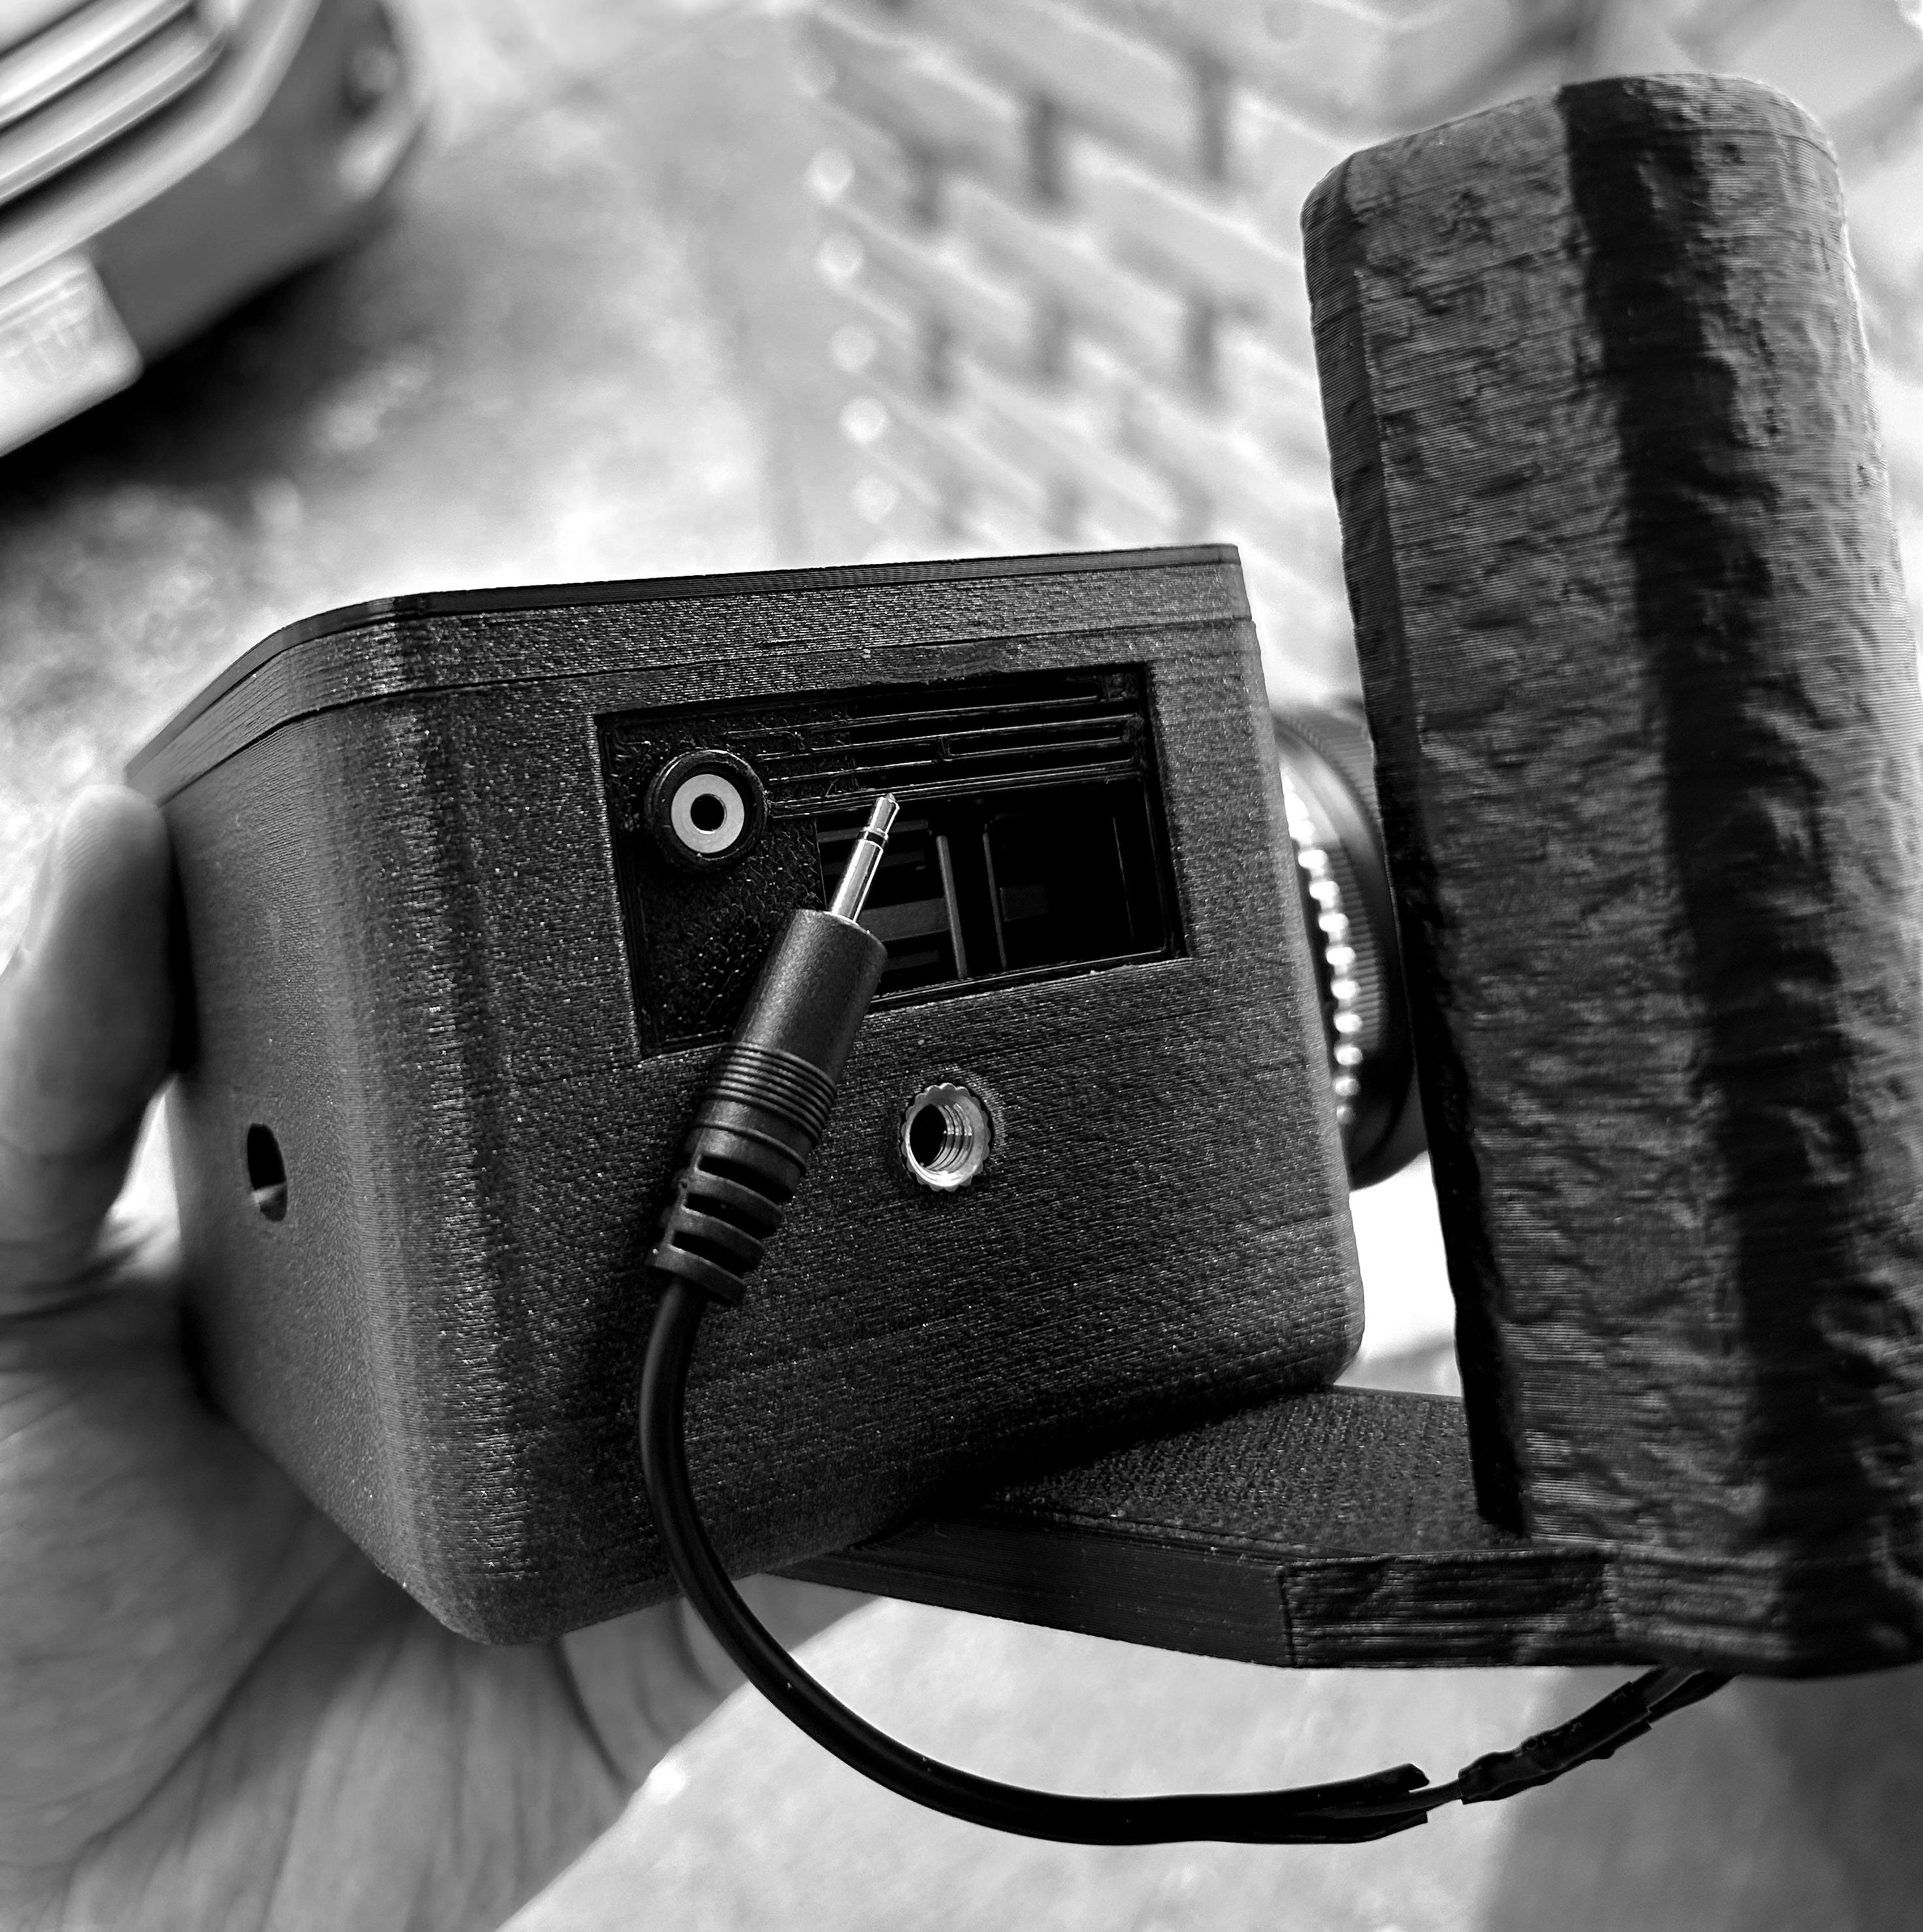
I wanted to come up with something reliable and simple to trigger the shutter. I first considered a Bluetooth button, but that required a separate battery to worry about and more setup to get pairing to work. I then thought about using a USB triggered key, but there was nothing readily available that would fit nicely as a shutter button. I also went down the rabbit hole of trying to use a vintage shutter release cable on top of the existing body shutter button; it worked but wasn’t that reliable.
I then thought back to my musician days and remembered that mono audio cables carried a basic +/- signal that I could route to GPIO pins. To get it working, all I did was splice a momentary switch into a 2.5” mono audio cable. I then put a female mono mount on the camera body and attached it to GPIO 21. This creates a simple and reliable connection for the shutter grip and opens the camera up to future accessories that need to access the GPIO.
Mounting
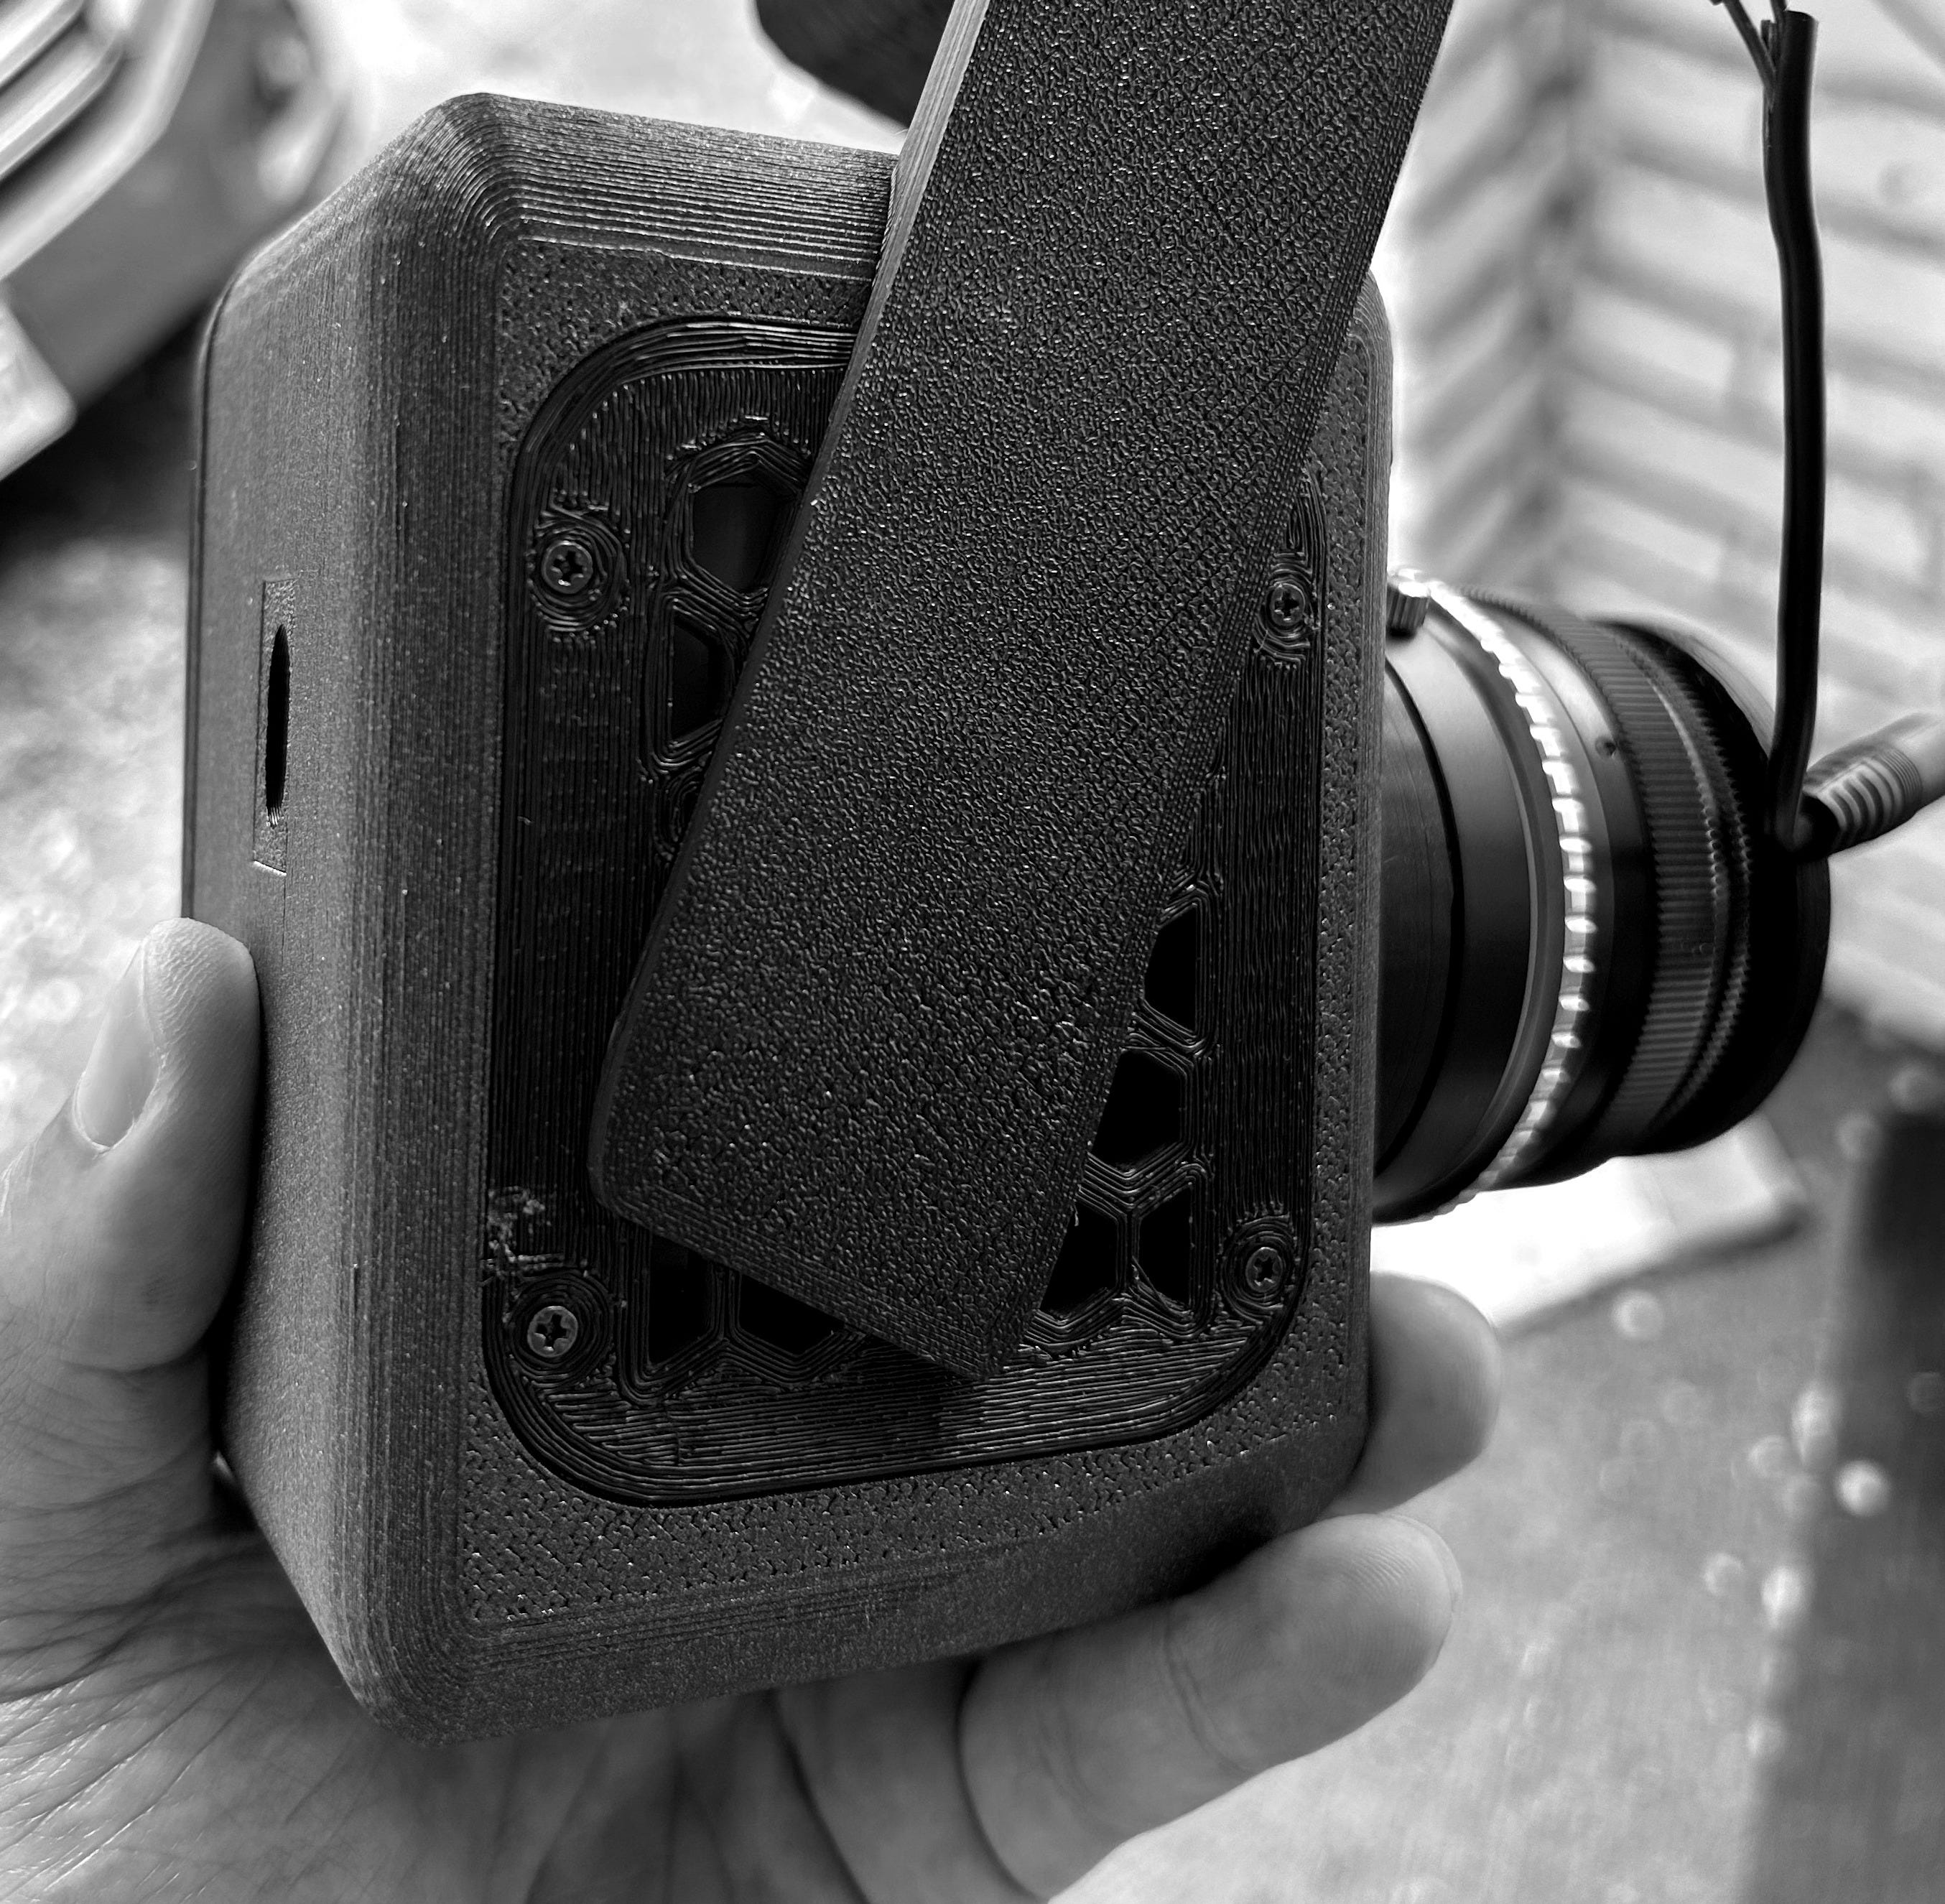
Instead of using the 3/8” mounts to design the grip, I leveraged the battery plate to secure the grip at the bottom of the camera.
Build it Yourself
That's the full build so far. If you want to make one, the print ready STLs and the updated app code with the shutter button integrated are right below. Paid subscribers get the files, and every subscription goes straight back into developing the WLV-01.
Comments
Nothing yet. Say the first thing.
Sign in to join the conversation.