Scanning For Lifesigns With ESP32 And Raspberry Pi

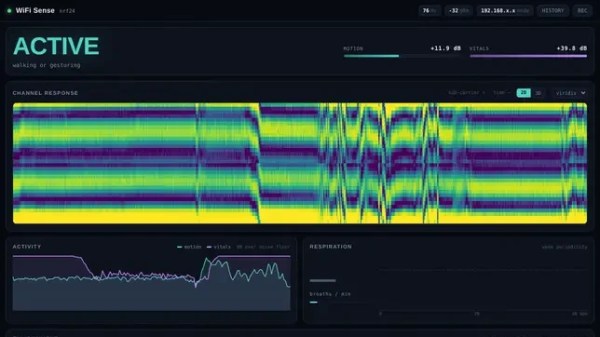
It’s a sci-fi trope that you can ‘scan for life signs’ and detect if there are humans — or suspiciously human-shaped aliens — present, but in real life it’s harder than that. [The Masked Bear]’s wifisense-pi project isn’t really scanning for signs of life, either, unless you happen to consider breathing a sign of life. Even then, it’s not detecting breathing per se, but the subtle motion that goes with it: it’s a very sensitive motion detector that relies on the fact that we fleshy bags of goo disturb WiFi signals with our presence, and motion alters those disturbances.

The device uses an ESP32-S3 to measure the radio channel 100 times per second, while a Raspberry Pi 4 provides the signal processing muscle. It can detect the slightest motions, and even determine the presence of a perfectly still human by their breathing, though you can hide your presence for as long as you can hold your breath.

A single sensor, no matter how sensitive, cannot give position information, and while multiple humans will distort WiFi more than a single one, [The Masked Bear] reports you cannot reliably extract that signal. So this project answers the question: “are there humans in this room?” Or, even more likely, “are there any large breathing animals in this room?” We can’t imagine a 50 kg Mastiff looking any different to this sensor than an equivalent mass of quivering human flesh.

Before you dismiss this as just another motion sensor, keep in mind that it is sniffing the signals already present on the 2.4 GHz band, and, like the WiFi signals themselves, it can work through walls. So we think it’s pretty nifty.

Of course, there are many other ways to detect humans, from machine-learning cameras to millimeter-wave sensors to a simple PIR. This isn’t the first project we’ve seen that uses WiFi like this. It isn’t even the first with an ESP32, but it’s an interesting implementation worth checking out.
A Standalone YouTube Streaming Rig

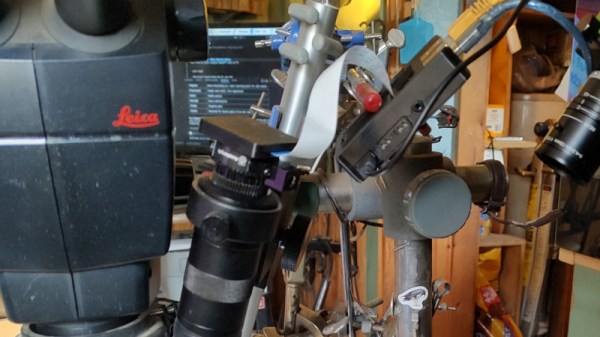
YouTube streaming typically involves a camera with an HDMI output, a USB3 HDMI digitiser, and a suitably beefy PC to run it all. It’s quite a process, and for [Coreymillia], more complex than it needs to be. He’s come up with something simpler, a dedicated self-contained streaming rig using a Raspberry Pi 4.

As you might expect it uses the Raspberry Pi HQ camera at the optical end, but it’s the software surrounding it that transforms it from a mere camera into a streaming rig. There’s a web based user interface, but perhaps more interesting are the companion dashboard peripherals. A Raspberry Pi or an ESP32 Cheap Yellow Display can both serve as a small in-view dashboard and controller.

We know from experience that a stream can be a difficult thing to get right even with high-end hardware, and we’re interested to see this standalone device allowing , we hope, an easier way to do it. If you’re a streamer we’re guessing you’ll be taking a closer look. Even so, this is surprisingly, not the simplest Raspberry Pi based streaming device we’ve seen.

The Raspberry Pi 4 With 3 GB RAM Is No Joke

Raspberry Pi 5 price increases. (Credit: Jeff Geerling)

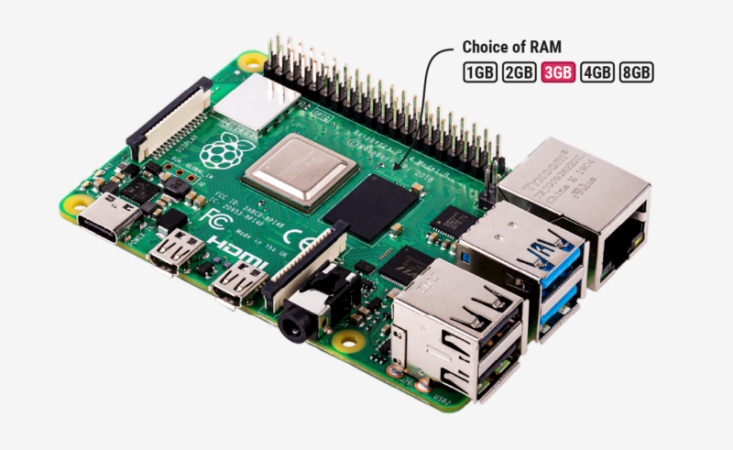
Although easily dismissed by some as another cruel April Fools joke, Raspberry Pi’s announcement of a new 3 GB model of the Raspberry Pi 4 along with (more) price increases for other models was no joke. Courtesy of the ongoing RAMpocalypse, supplies of LPDDR4 and LPDDR5 are massively affected, leading to this new RPi 4 model with two 1.5 GB LPDDR4 chips, as these are apparently cheaper to source.

Affected in this latest price increase across RP’s product range are RPi 4 and 5 models with 4 or more GB of RAM, with price bumps ranging from $25 on the low end to $150 for the Raspberry Pi 500+. If you wanted a Raspberry Pi 5 with 16 GB of RAM, you’re now paying $300 for the privilege.

Obviously, this news has got people like [Jeff Geerling] rather down in the dumps, essentially stating that using SBCs like the RPi is now beyond the means of many hobbyists. While you can still use SBCs that use e.g. LPDDR2 RAM, such as the older RPi Zero, 2 and 3 models, [Jeff] himself is now moving more towards wrangling with snakes on MCUs, as these boards are so far not significantly affected in terms of price.

With current projections in the RAM market being that this year will still see more price increases, it remains hard to tell exactly how ‘temporary’ this situation will be. That said, using readily available, powerful and cheap MCUs like the ESP32 variants for projects isn’t a bad idea if you really don’t need to be running more than perhaps FreeRTOS.

Continue reading “The Raspberry Pi 4 With 3 GB RAM Is No Joke”

The Decisioninator Decides Dinner, Saves Marriage

For something non-explosive, this might be the most American project we’ve featured in a while. [Makerinator]’s domestic bliss was apparently threatened by the question “what shall we have for dinner”– that’s probably pretty universal. Deciding that the solution was automation is probably universal to software devs and associated personalities the world over. That the project, aptly called “The Decisioninator” apes a popular game-show mechanic to randomly select a fast-food restaurant? Only people with 100-octanes of freedom running through their veins can truly appreciate its genius.

In form factor, it’s a tiny slot machine which [Makerinator] fabbed up on his laser cutter. The lovely “paintjob” was actually a print out with dye-sublimation ink that was transferred to plywood before laser cutting.  Mounted to this are illuminated arcade buttons and a small ISP display. The interface is simplicity itself: the big button spins a virtual “wheel” on the display (with sound effects inspired by The Price is Right) to tell the family what deliciously unhealthy slop they’ll be consuming, while the other button changes decision modes. Of course you can pick more than just dinner with The Decisioninator. You need only decide what spinners to program. Which, uh, that might be a problem.

Luckily [Makerinator] was able to come up with a few modes without recursively creating a The Decisioninator-inator. He’s got the whole thing running on a Pi4, which, with its 1980s supercomputer performance, is hilariously overpowered for the role it plays (in true American fashion). He’s coded the whole thing in the Flame Engine, which is a game engine built on the Flutter UI toolkit by American technology giant Google.

What’s more American than tech giants and fast food? A propane powered plasma cannon, for one thing; or maybe mental gymnastics to translate into freedom units, for another.

Thanks to [Makerinator] for the tip.

Rebooting An 1973 Art Installation Running On A Nova

Electronics-based art installations are often fleeting and specific things that only a select few people who are in the right place or time get to experience before they are lost to the ravages of ‘progress.’ So it’s wonderful to find a dedicated son who has recreated his father’s 1973 art installation, showing it to the world in a miniature form. The network-iv-rebooted project is a recreation of an installation once housed within a departure lounge in terminal C of Seattle-Tacoma airport.

You can do a lot with a ‘pi and a fistful of Teensies!

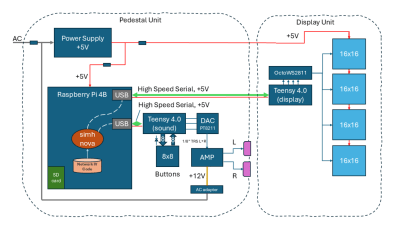
The original unit comprises an array of 1024 GE R6A neon lamps, controlled from a Data General Nova 1210 minicomputer. A bank of three analog synthesizers also drove into no fewer than 32 resonators. An 8×8 array of input switches was the only user-facing input. The switches were mounted to a floor-standing pedestal facing the display.

For the re-creation, the neon lamps were replaced with 16×16 WS2811 LED modules, driven via a Teensy 4.0 using the OctoWS2811 library. The display Teensy is controlled from a Raspberry Pi 4, hooked up as a virtual serial device over USB. A second Teensy (you can’t have too many Teensies!) is responsible for scanning a miniature 8×8 push button array as well as running a simulation of the original sound synthesis setup. Audio is pushed out of the Teensy using a PT8211 I2S audio DAC, before driving a final audio power amp.

Continue reading “Rebooting An 1973 Art Installation Running On A Nova”

Robots Collaborate To Localize Themselves Precisely

Here’s the thing about robots. It’s hard for them to figure out where to go or what they should be doing if they don’t know where they are. Giving them some method of localization is key to their usefulness in almost any task you can imagine. To that end, [Guy Elmakis], [Matan Coronel] and [David Zarrouk] have been working on methods for pairs of robots to help each other in this regard.

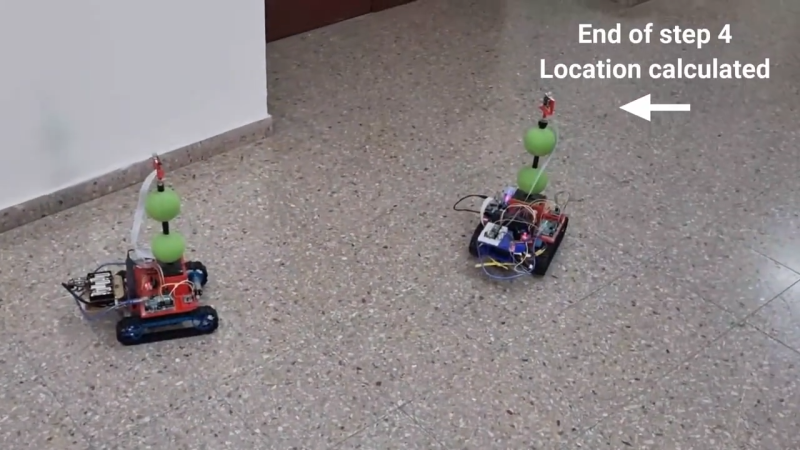
As per the research paper, the idea is to perform real-time 3D localization between two robots in a given location. The basic idea is that the robots take turns moving. While one robot moves, the other effectively acts as a landmark. The robots are equipped with inertial measurement units and cameras in a turret, which they use to track each other and their own movements. Each robot is equipped with a Raspberry Pi 4 for processing image data and computing positions, and the two robots communicate via Bluetooth to coordinate their efforts.

It’s an interesting technique that could have some real applications in swarm robotics, and in operations in areas where satellite navigation and other typical localization techniques are not practical. If you’re looking for more information, you can find the paper here. We’ve seen some other neat localization techniques for small robots before, too. Video after the break.

Continue reading “Robots Collaborate To Localize Themselves Precisely”

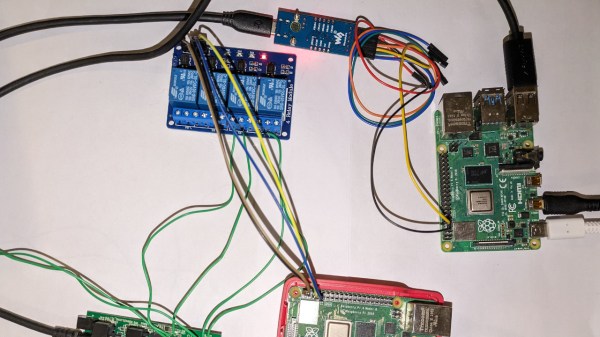
anfractuosity's test setup showing the Pi under test and a few pieces of equipment used to perform the attack

Cold Boot Attack You Can Do With A Pi

A cold boot attack is a way to extract RAM contents from a running system by power cycling it and reading out RAM immediately after loading your own OS. How easy is it for you to perform such an attack? As [anfractuosity] shows, you can perform a cold boot attack with a Raspberry Pi, with a reasonably simple hardware setup and a hefty chunk of bare-metal code.

[anfractuosity]’s setup is simple enough. The Pi 4 under attack is set up to boot from USB drive, and a relay board has it switch between two possible USB drives to boot from: one with a program that fills RAM with , and another with a program that extracts RAM out through UART. The process is controlled by another Pi controlling the relays through GPIOs, that also monitors the target Pi’s UART and uses it as a channel to extract memory.

The outcomes are pretty impressive. After 0.75s of power-down, most of the image could be extracted. That’s without any cooling, so abusing a can of electronics duster is likely to improve these results dramatically. Want to play with cold boot attacks? [anfractuosity]’s code is great for getting your feet wet. Furthermore, the code examples provided serve as a wonderful playground for general memory attack research.

Raspberry Pi not fun enough for you anymore? Well then, you can always start playing with Android phones!