
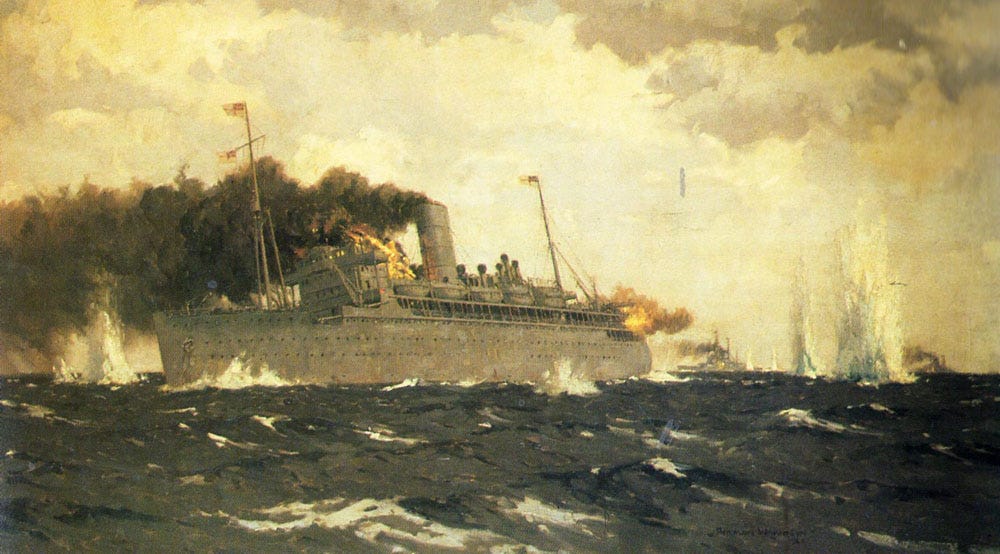
In November 1939, a lone British passenger liner has a bad encounter in the North Atlantic. Strangely enough, she is in those waters for the very purpose of intercepting enemy shipping. She has just been armed for war and given the status of an “auxiliary cruiser,” to bolster the Royal Navy’s strength alongside other liners of the same kind. Yet when faced with two heavy German warships, HMS Rawalpindi could have tried to save herself by running. Instead, she chose to fight—under no illusion about her chances of surviving.
Arming merchant ships for war is not a new idea. As far back as Antiquity, Greek city-states did not hesitate to employ merchant galleys in combat; the same was true in the Middle Ages, when cogs and carracks could carry cargo, or serve as privateers—or pirates—depending on the opportunities that arose. Without going that far back, Britain’s experience with the concept dates at least to the East Indiamen of the eighteenth century. Chartered by the English East India Company to carry goods and passengers between India and the metropole, these large sailing ships were armed well enough to deter trouble, whether sailing in convoy or alone. During the Napoleonic Wars, these Indiamen—painted to resemble warships—fought the French alongside the Royal Navy, which even purchased some of them and converted them into ships of the line.
In 1856, the Treaty of Paris abolished privateering but recognised the right of signatory states to arm merchant ships—generally cargo vessels—provided they flew the national flag and their crews were officially part of the country’s navy. Such ships were then known as auxiliary cruisers. In the late nineteenth century, as European naval powers engaged in an expensive arms race, they required major shipping companies to design liners strong enough to be fitted with artillery, so they could be converted in wartime into fast auxiliary cruisers. Thus, in 1895, at the Kaiserliche Marine’s request, one of the first four liners of the German HAPAG company, the Normannia, underwent fifteen days of trials during which she was armed with eight 152.4 mm (6-inch) guns, two 89 mm (≈ 3.5-inch) guns, and six 37 mm (≈ 1.5-inch) guns. It is therefore unsurprising that during the First World War both the British and German navies mobilised a number of liners as troop transports, hospital ships, or auxiliary cruisers. As early as 1914, the Royal Navy requisitioned seven ships from the Peninsular and Oriental Steam Navigation Company (P&O)1 and converted them into “Armed Merchant Cruisers” (AMCs). These ships had certain attractive qualities: they were far faster than most warships of the day and large enough to remain seaworthy despite the addition of artillery. On the other hand, their hulls had little or no armour; their optical equipment was basic; and, above all, their coal consumption was such that they could have burned through the Admiralty’s entire reserves in three months if they had operated at maximum speed!
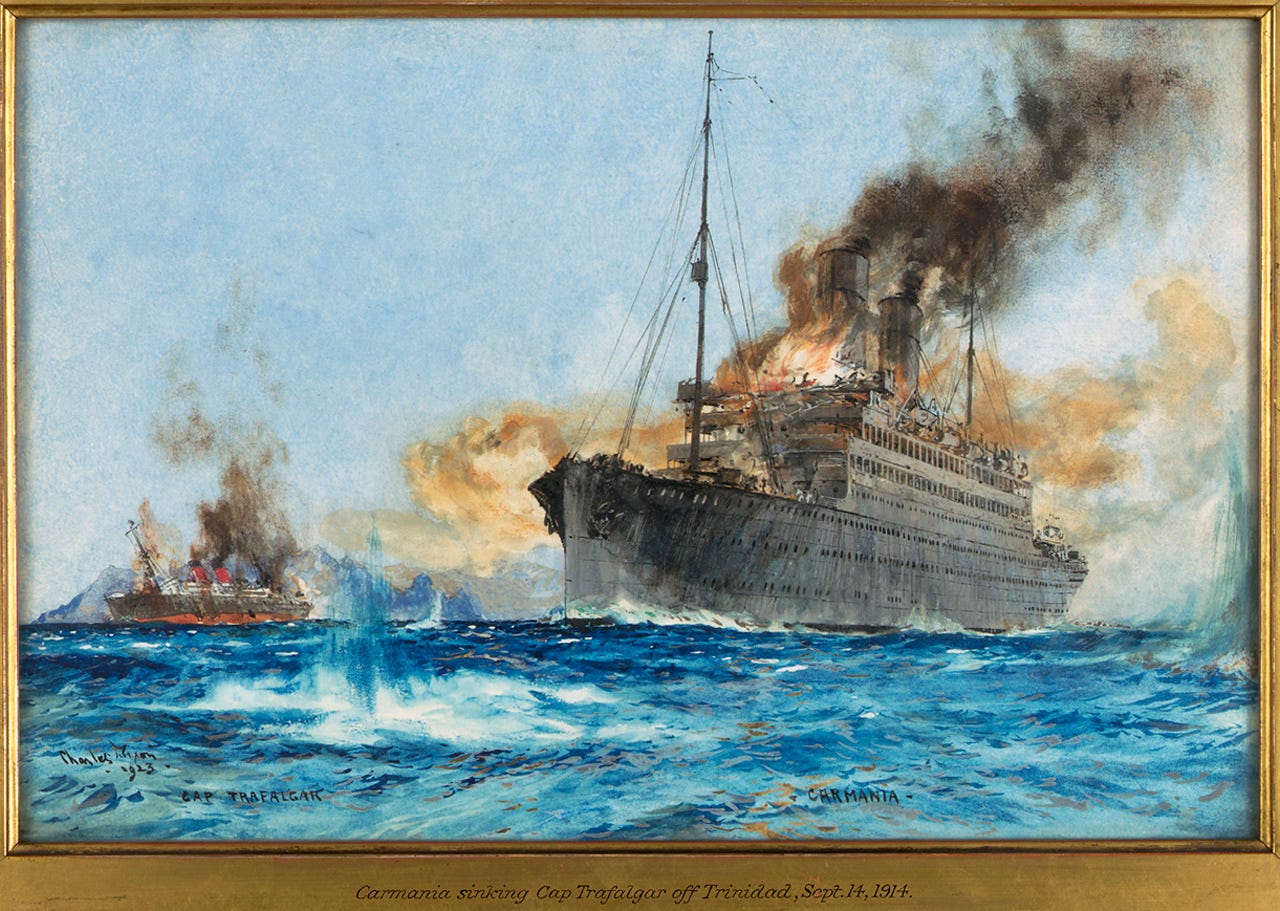
These AMCs largely replaced British cruisers in thankless, long-duration missions on secondary fronts. The most important was enforcing the blockade meant to prevent units of the Kaiserliche Marine from reaching the Atlantic and to ensure that merchant ships entering the North Sea were not trading with Germany. The United Kingdom had prepared for this blockade for years and, in 1914, opted for a “distant” blockade—beyond the range German destroyers could reach after steaming all night—so Royal Navy units could patrol at a safe distance while remaining close to their bases. In practice, Britain’s geographic position was an insurmountable obstacle to any attempt by the German fleet to break into the Atlantic: to reach the ocean, Germany had to choose either the English Channel—an extremely risky route given how heavily mined and watched it was—or the GIUK line2 north of Scotland, a longer route but one far less densely patrolled by British units.
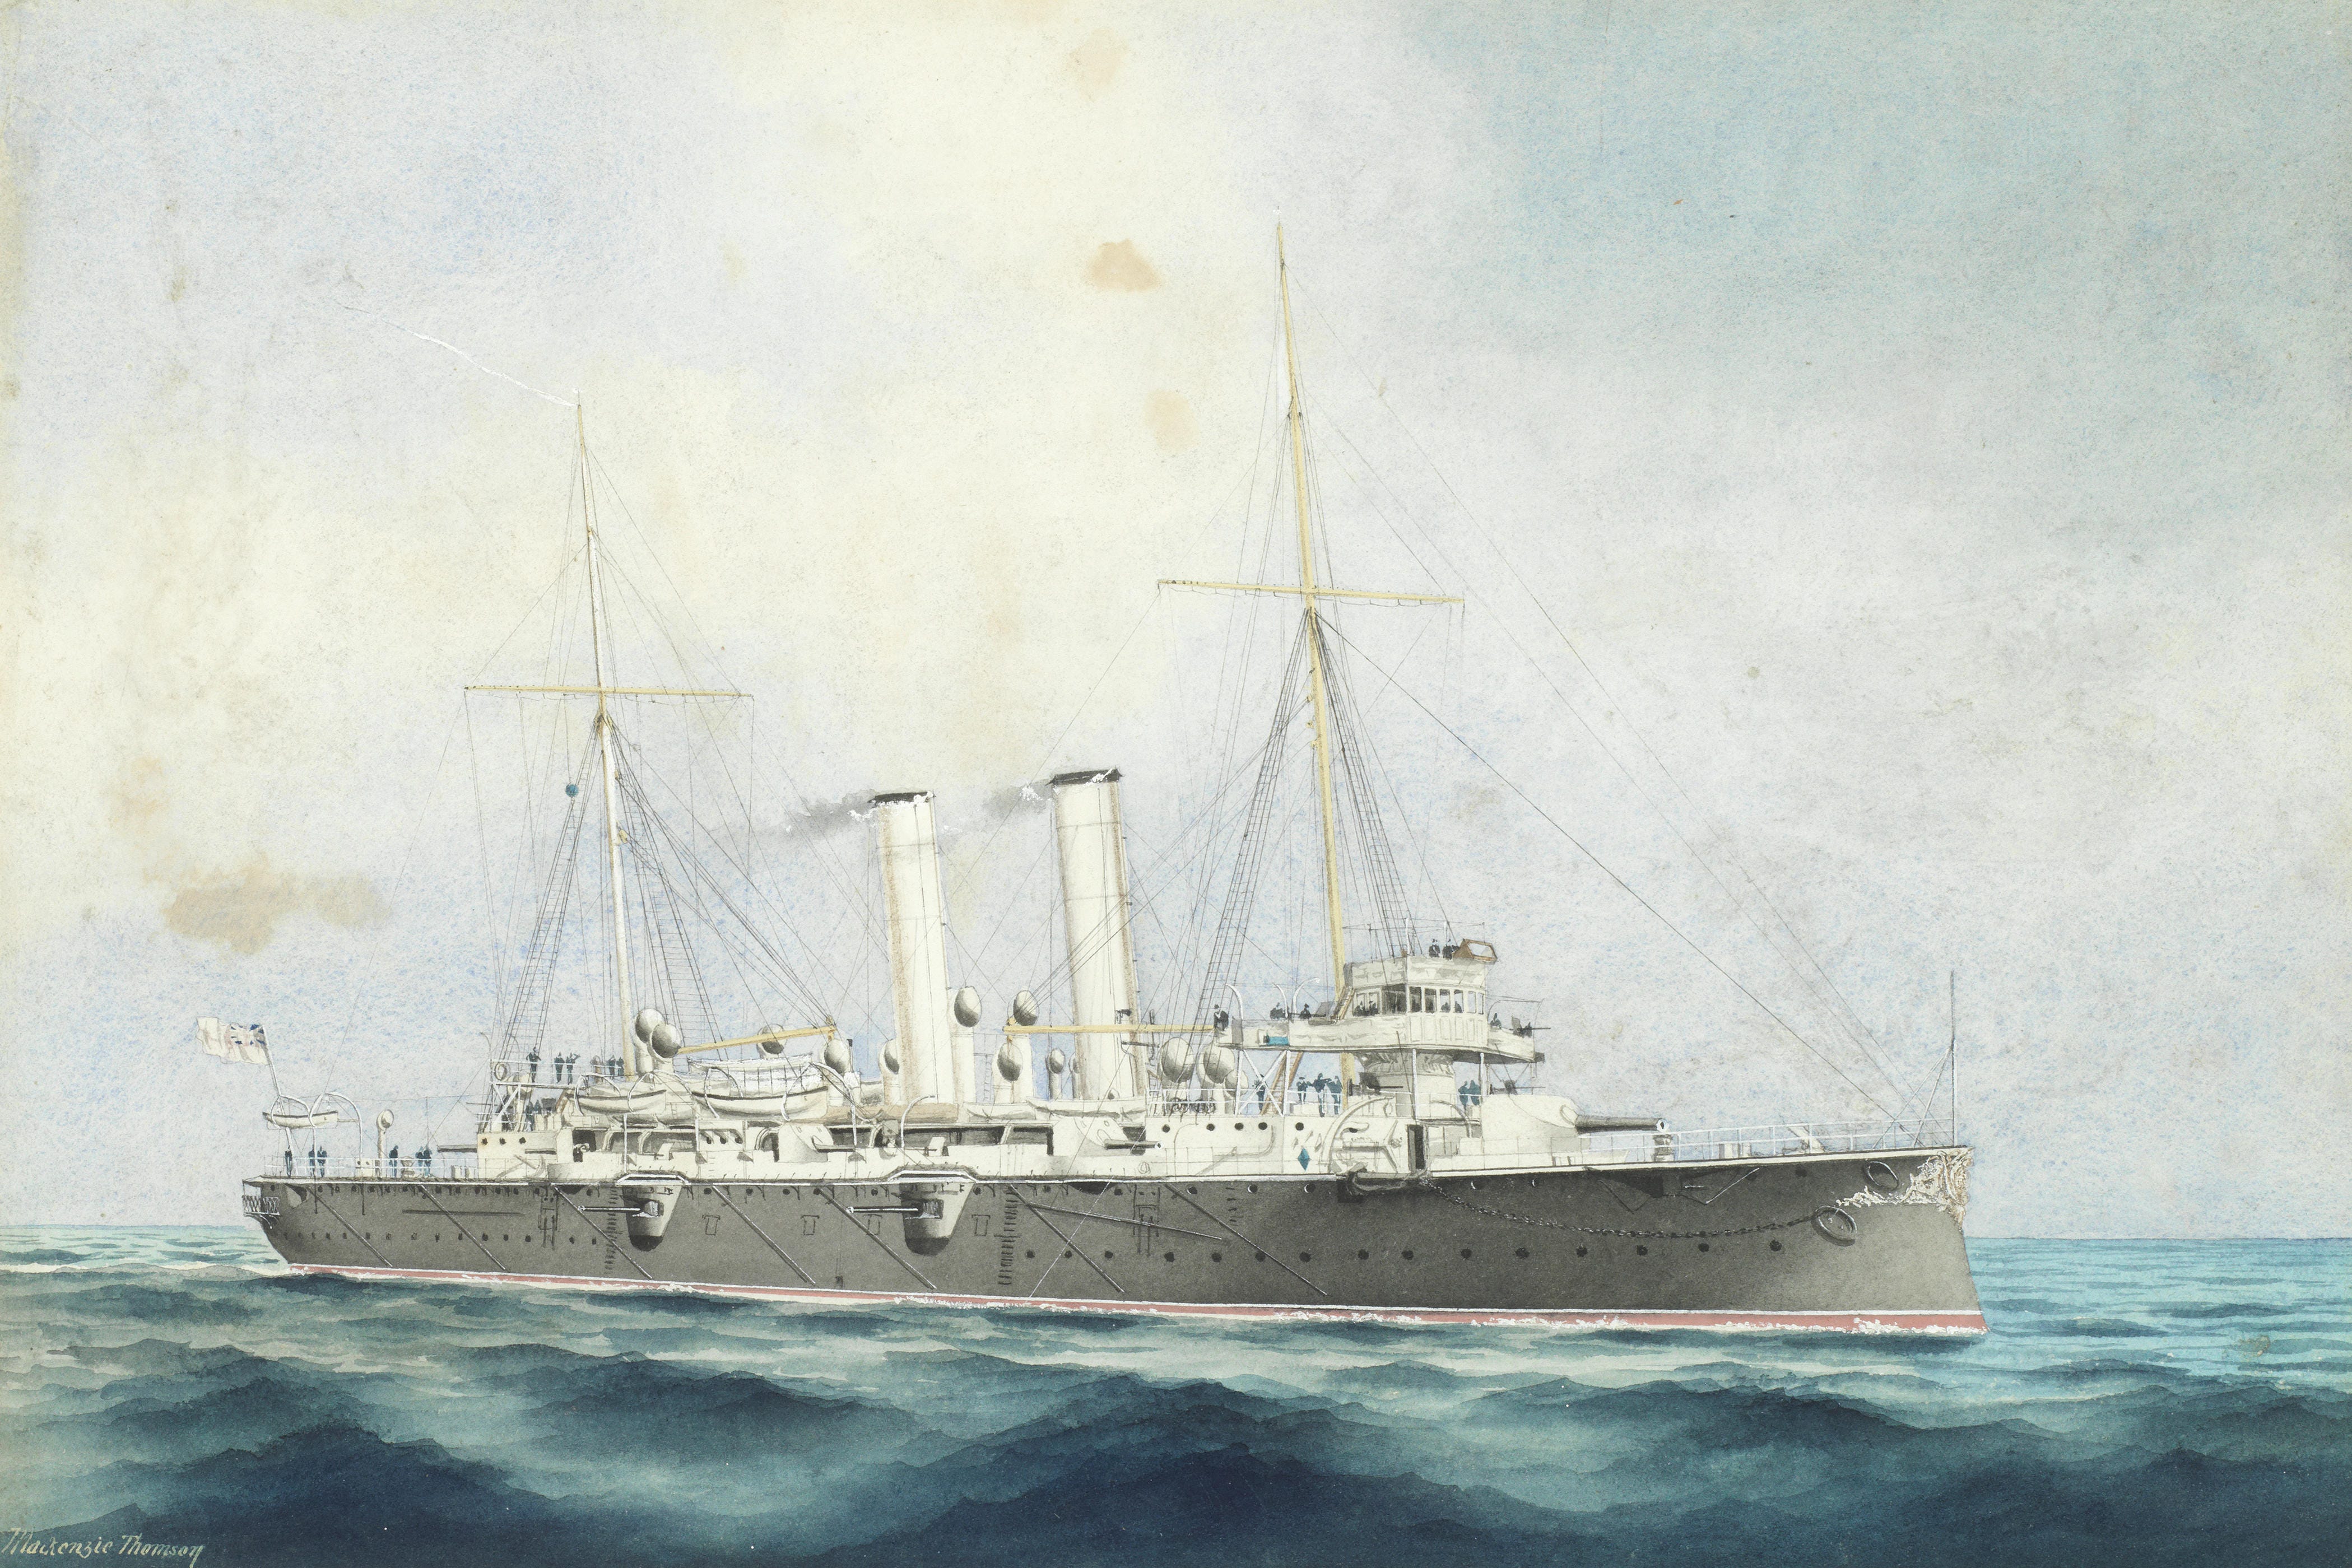
Guarding this GIUK line largely fell to the Northern Patrol, a cruiser squadron tasked with controlling traffic passing between northern Scotland and Norway from its base at Scapa Flow in the Orkneys. At the outbreak of war, the Northern Patrol consisted only of the 10th Cruiser Squadron, with eight elderly Edgar-class protected cruisers, soon reinforced by the first requisitioned AMCs. More reliable, faster, more comfortable, and possessing better seakeeping—no small advantage in the turbulent Norwegian Sea—the AMCs gradually relieved the Edgars until the United States, the principal source of contraband destined for Germany, entered the war in 1917. The blockade then became far less useful, and the remaining AMCs saw their missions evolve: they now mainly escorted slow transatlantic convoys against U-boat attacks.
In short, in an emergency the AMCs provided a practical answer to a shortage of major warships, thanks to their performance and relative versatility. They could carry out repetitive but essential ocean patrol and escort duties, freeing destroyers and cruisers for tasks where they were more valuable. Thus, from August 1914 until the 10th Cruiser Squadron was dissolved at the end of November 1917, the Northern Patrol inspected nearly 13,000 merchant ships—something that would not have been possible without the 33 AMCs assigned to it. These missions were usually not especially dangerous, but in any confrontation with the enemy the risks could quickly become fatal: of the roughly 70 Armed Merchant Cruisers mobilised during the war, about twenty were sunk at sea, in the vast majority of cases by U-boats. After peace returned, these militarised liners—often in poor condition after years of intense service—went back to their owners, and many were scrapped soon afterwards.
In the 1920s and 1930s, however, the Royal Navy did not forget the assistance these ships had provided, and the Admiralty developed a mobilisation plan for any future conflict. From August 1939 onward, more than fifty British merchant ships were requisitioned to be converted into auxiliary cruisers. The Admiralty prioritised large, modern transatlantic liners with high top speed, excellent endurance, and superstructures suitable for mounting guns. When the Second World War began, the British government imposed a specific labour agreement on the civilian mariners aboard these AMCs—now under Royal Navy command—applying to each individual on a specific ship. Under the T124 Agreement, these Merchant Navy men became, officially, “naval auxiliary members of the armed forces” and were therefore struck off the conscription lists. They retained their rank and pay, but had to submit to military discipline—though far looser than aboard regular warships. In 1940, the need for manpower and relief crews became so great that the agreement was revised (the T124X Agreement) so sailors could be transferred from one ship to another “for the duration of the present emergency.”
Reconstituted in early September, the Northern Patrol was tasked with patrolling a far broader area than in the First World War: its operating zone stretched from northern Scotland and Ireland to the Norwegian Sea, via the Shetlands and the Faroe Islands, and as far as Greenland and Iceland—including the Denmark Strait. Its 7th and 12th Cruiser Squadrons (the latter renumbered 11th in October) assembled twelve old cruisers and light cruisers dating from the Great War (Caledon, Danae, Ceres, Carlisle, Hawkins, and Emerald classes), designed for the calmer waters of the North Sea rather than the far rougher Norwegian Sea and North Atlantic. Not only were they slow and poorly armed, their range was also too limited for their theatre. Their constant back-and-forth to refuel meant they were too few to form a watertight cordon: only two ships covered the 200 nautical miles between the Shetlands and the Faroes, and three others patrolled the 250 nautical miles between the Faroes and Iceland. The Royal Navy therefore decided to replace these old cruisers as quickly as possible with AMCs—more numerous, faster, longer-legged, and ultimately only slightly less well armed.
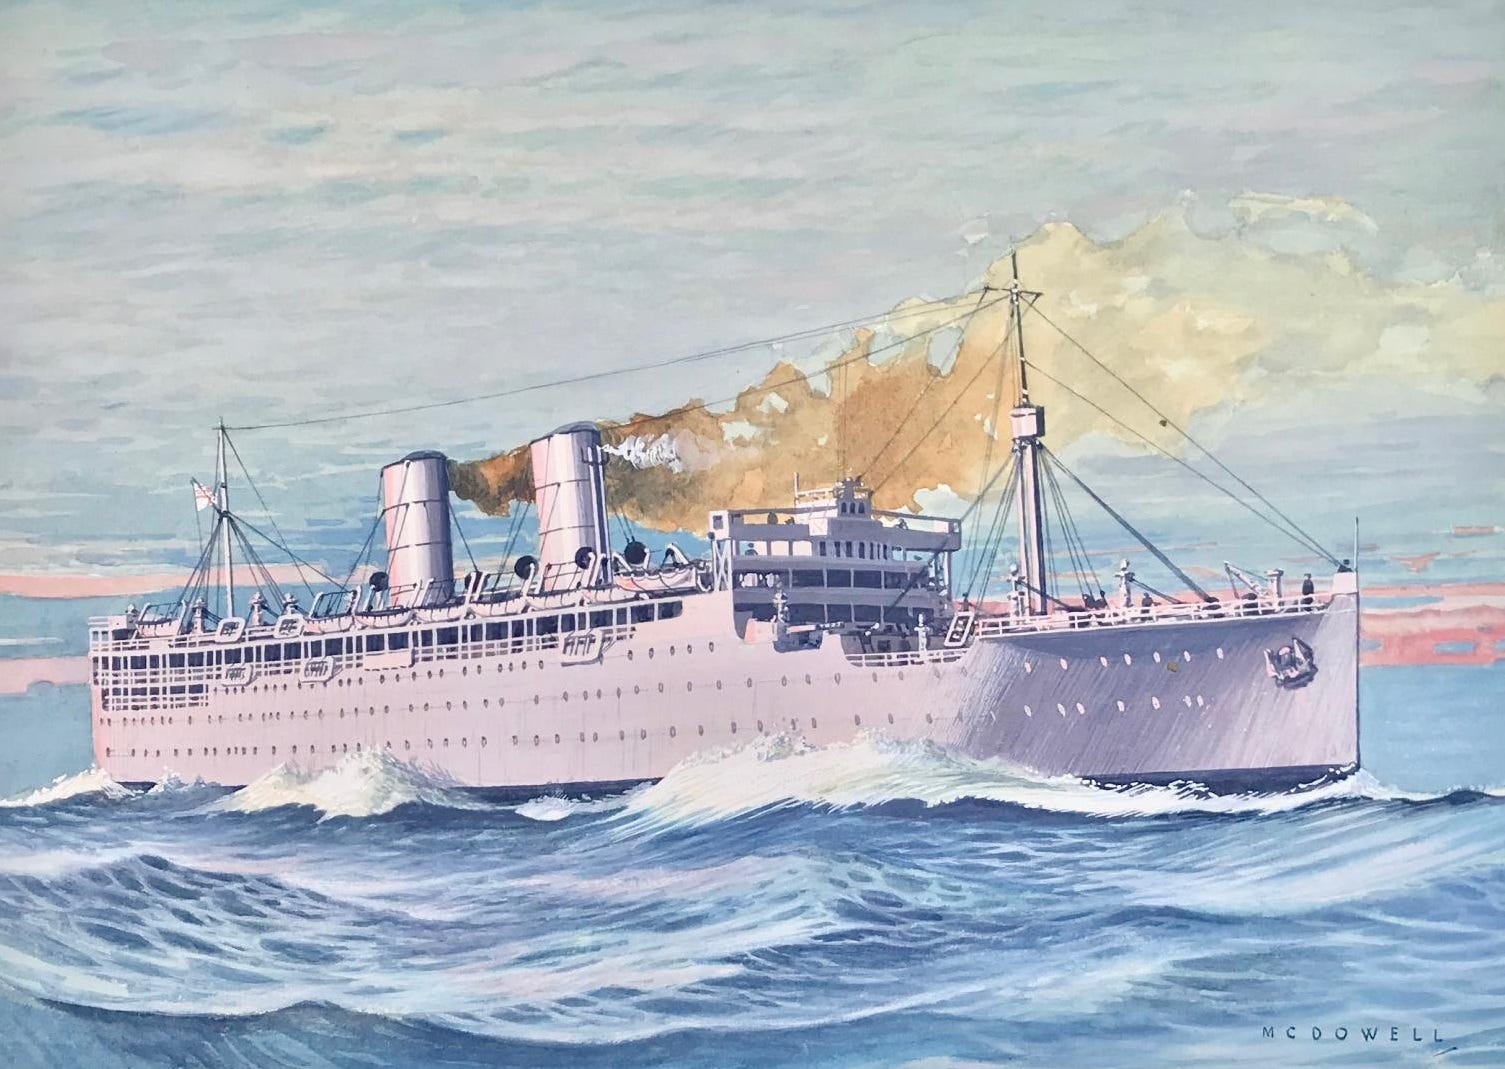
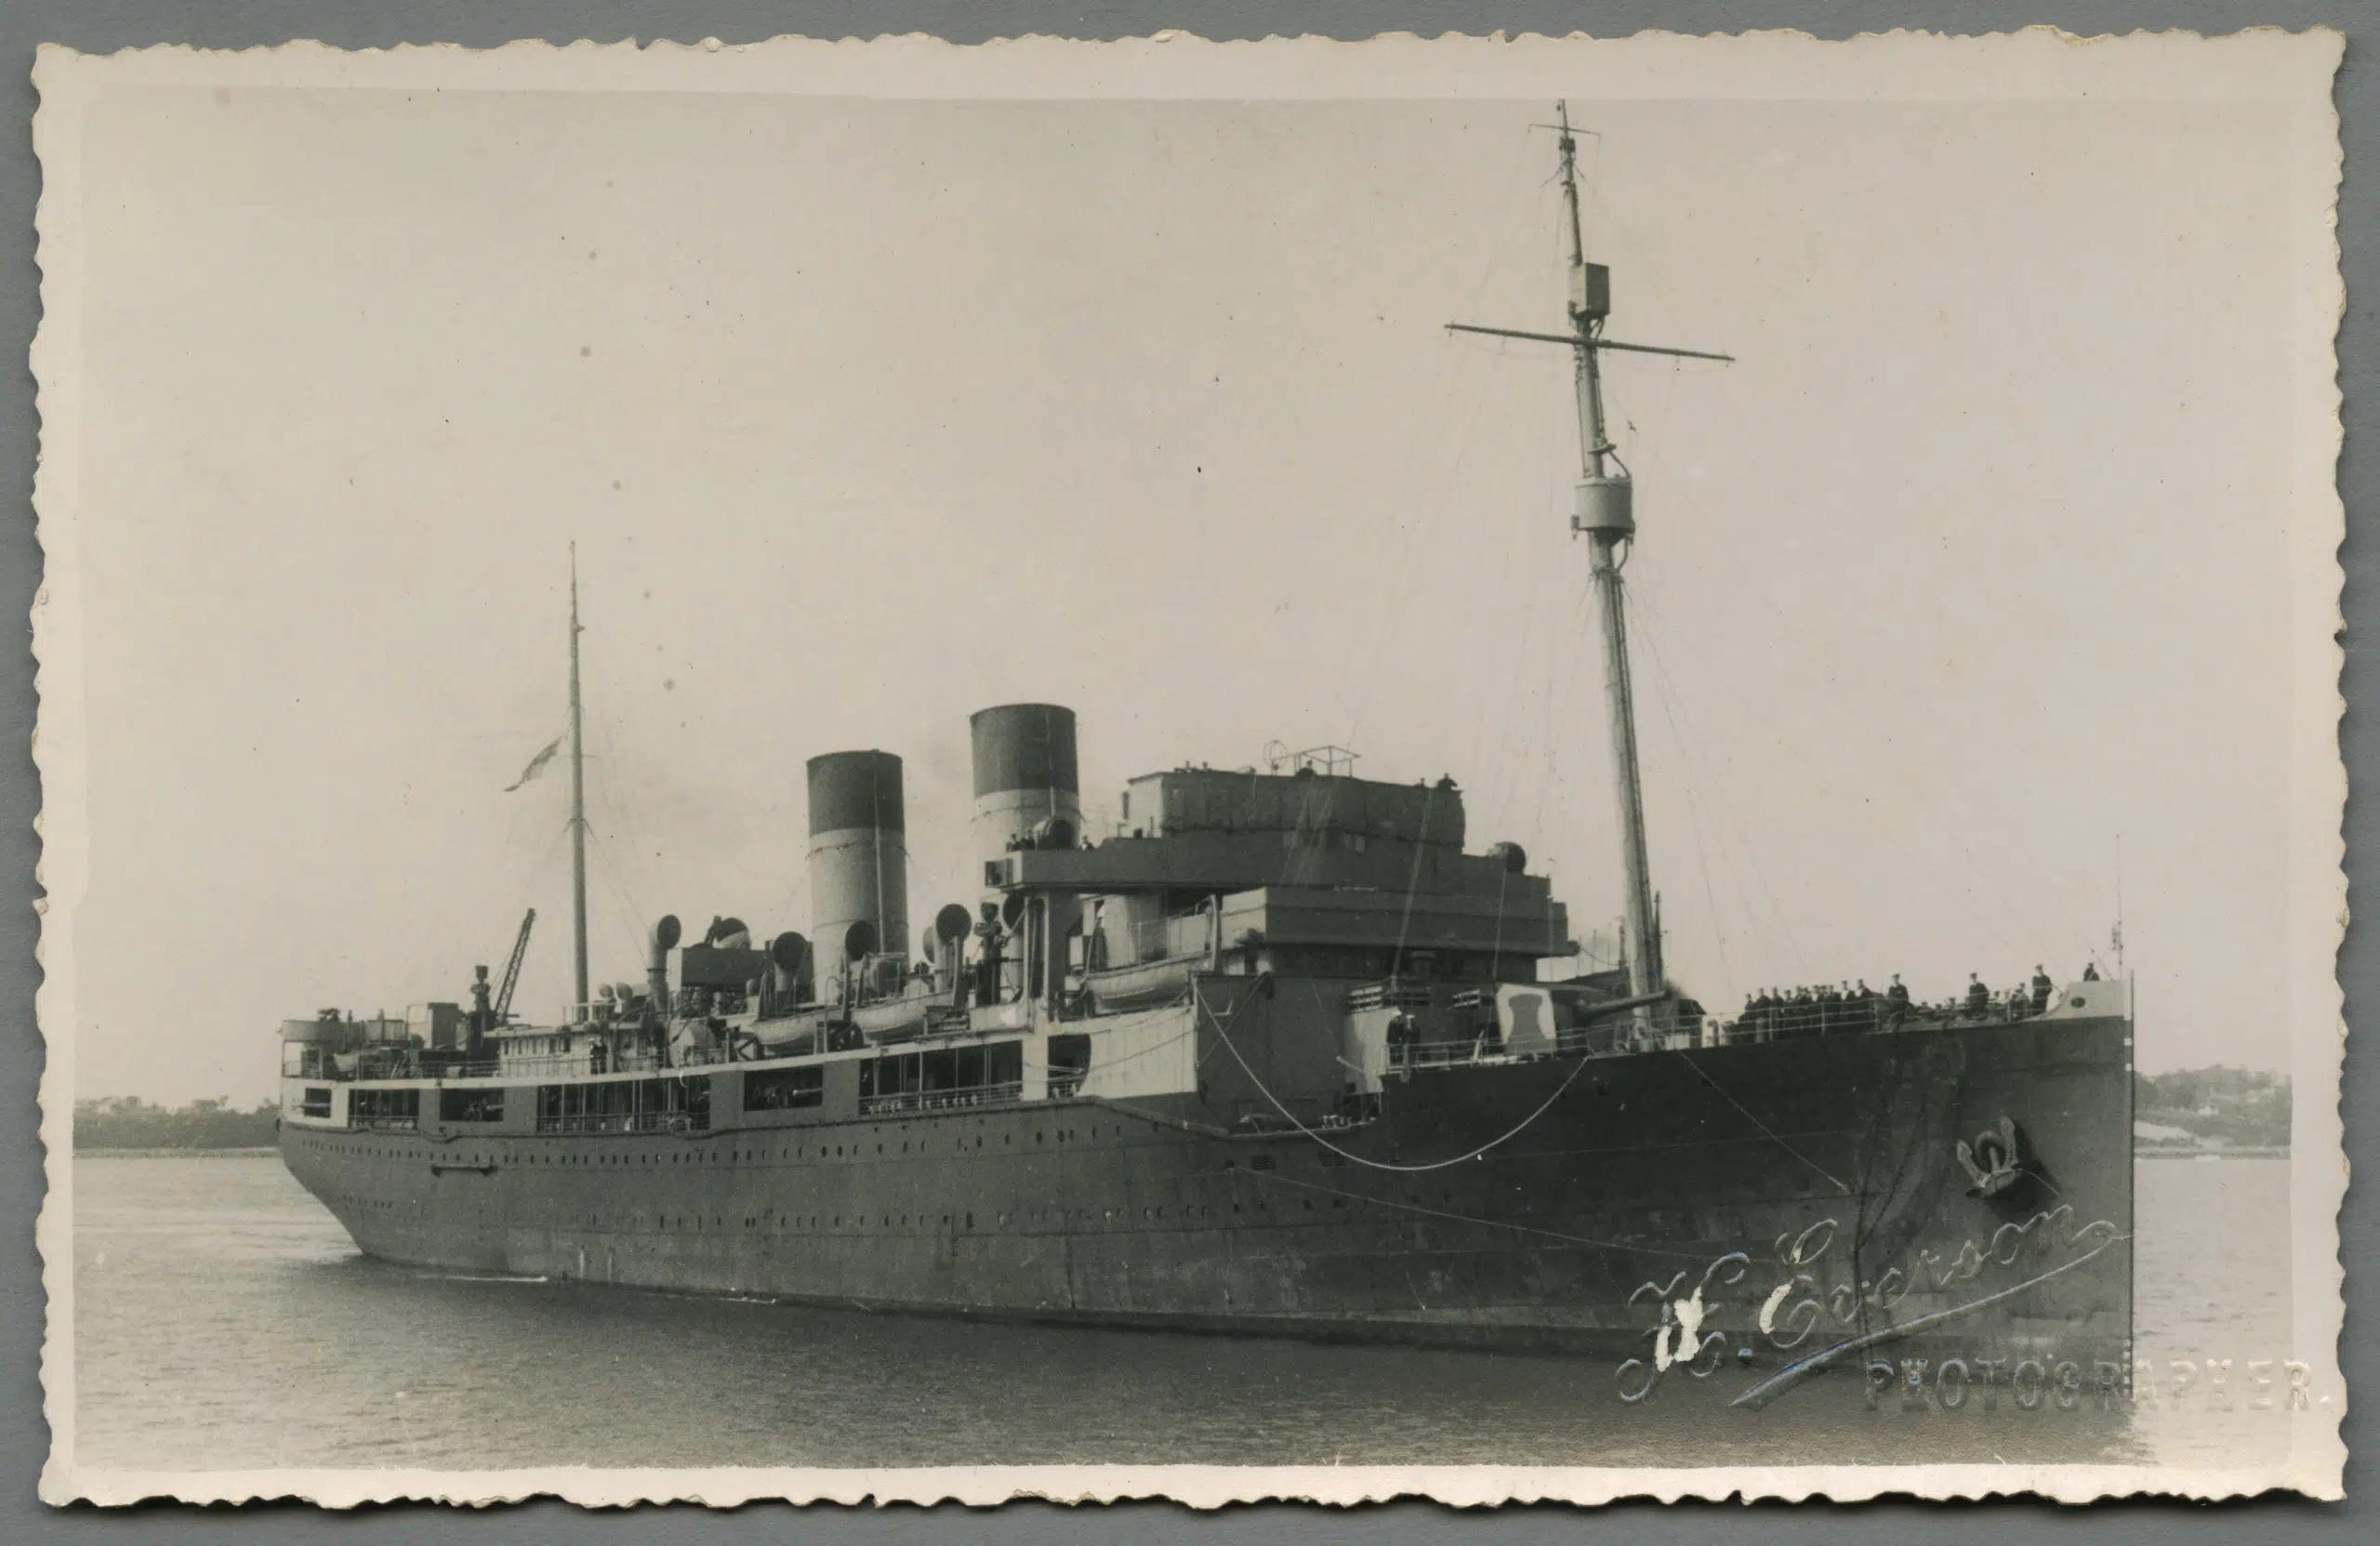
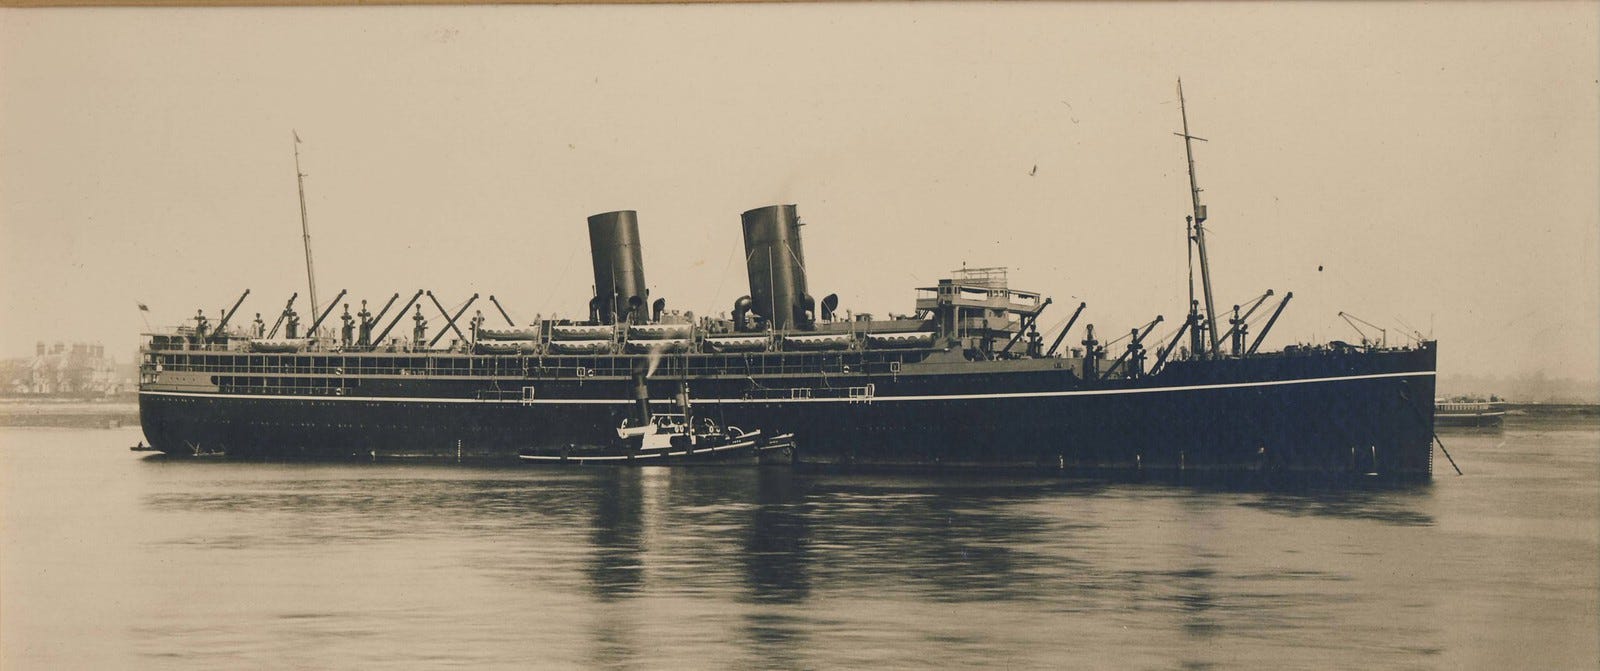
One such AMC was the passenger liner SS Rawalpindi. Built in 1925, she belonged to a class of four ocean liners (with Ranpura, Ranchi, and Rajputana), the first P&O liners equipped with refrigerated chambers—more than necessary, since like her sisters the Rawalpindi was designed for the “Indian Run,” the route linking London to Bombay. Despite a displacement of 16,697 GRT, a length of over 166 metres (≈ 545 ft) and a beam of more than 21 metres (≈ 69 ft), she could make 19.6 knots while carrying 307 first-class passengers and 288 in second class. For almost fourteen years she carried passengers and mail to India and Southeast Asia without notable incident. Everything changed on 26 August 1939, when the Royal Navy requisitioned all four ships of her class in anticipation of a war about to begin.
The Rawalpindi underwent a rapid refit in London until 19 September to convert her into an AMC. The ship kept her name (now preceded by HMS to denote her Royal Navy service) but lost her after funnel—perhaps to reduce weight and save fuel, since she would not be operating at maximum speed on future convoy-escort duties and thus would not need all her boilers. She did, however, receive an “Emergency Equipment” package—issued to half of the 51 requisitioned AMCs—consisting of eight old 152.4 mm mounts (BL 6-inch Mark VII, range 12,800 m) and two 76.2 mm anti-aircraft guns (QF 3-inch 20 cwt). Distributed across the ship’s decks, these guns—at best dating back to the Great War—had no armoured shields. Furniture, woodwork, and light partitions were removed to make room for wooden ammunition magazines and an optical fire-control system. The only protection added consisted of sandbags and splinter plates around the bridge, the steering gear, and the machinery spaces.
Around the same time, her sister ships received similar equipment. The four liners were then dispersed as needs dictated: HMS Ranpura went to the Mediterranean, HMS Ranchi to the Indian Ocean, and HMS Rajputana to convoy escort in the Atlantic. The Rawalpindi joined the Northern Patrol in October. She retained much of her crew, since many were already members of the Royal Naval Reserve, but her commander was replaced by Captain Edward Kennedy, a Great War veteran recalled from retirement for the occasion.
In October the ship was ready. She sailed to her patrol zone southeast of Iceland. On the 15th, she was one of thirteen Northern Patrol AMCs scattered between Greenland and Scotland. On the 19th, she cruised the Denmark Strait with the Scotstoun and Transylvania when she intercepted the Gonzenheim, a 4,574 GRT German tanker that had left Buenos Aires days earlier in an attempt to reach Germany. Her crew preferred to scuttle the ship before a Rawalpindi’s boarding party could take possession. The AMC then resumed her laborious patrol, which was to carry her north of the Faroe Islands. On the morning of the 23rd, she intercepted and inspected a Swedish cargo ship—neutral, but found in violation of the blockade—and placed a prize crew aboard to take her to Britain. The Rawalpindi was then part of a cordon of five Royal Navy ships deployed between Iceland and the Faroes; she was also the easternmost—an alignment that would seal her fate.
On the other side of the North Sea, in Germany, the Kriegsmarine had received a clear mission as early as September 1939 for its major surface units: they were to operate in the Atlantic and wage war on British commerce. The Deutschland and Graf Spee had sailed even before the outbreak of hostilities, so they would be ideally positioned when the time came. The German naval staff expected their actions to have “an immediate effect through the capture and destruction of numerous merchant ships and the annihilation of enemy convoys”3. If the Deutschland’s cruise was cut short by mechanical issues, the other “pocket battleship” enjoyed a promising start in the South Atlantic. Hunted by British and French naval forces, she slipped discreetly into the Indian Ocean in early November.
The Kriegsmarine then judged it opportune to create a diversion to draw off some of the units sent in pursuit by sailing Germany’s two capital ships Scharnhorst and Gneisenau to simulate a breakout into the North Atlantic. Rear Admiral Wilhelm Marschall, flying his flag in the Gneisenau, received orders to strike—with the Scharnhorst—those enemy defences that had been thinned out, first and foremost the Northern Patrol. The objective seemed well within reach, given how little aggression the Royal Navy had shown so far. However, the ships were ordered not to push deeper, because until the Bismarck and Tirpitz became operational they represented the bulk of Germany’s naval strength capable of opposing an enemy incursion into the North Sea or the Baltic. As a secondary task, they were also to assist the Deutschland if necessary on her return route, and to help any merchant ship attempting to reach a German port.
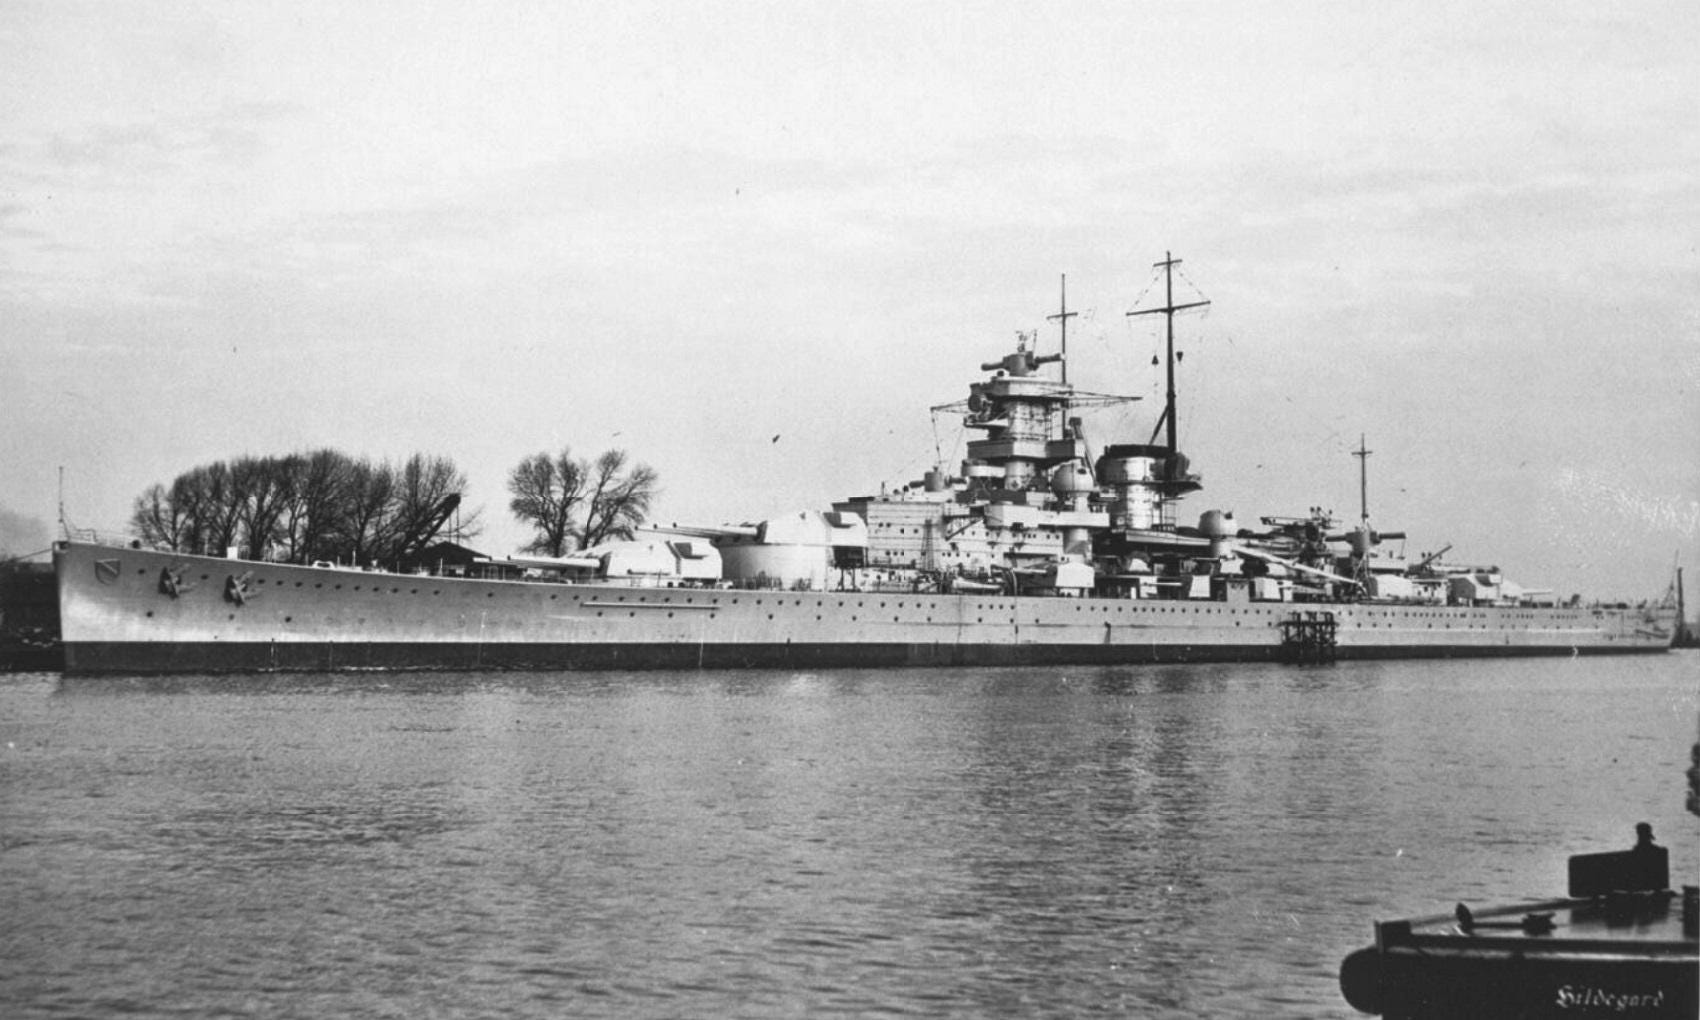
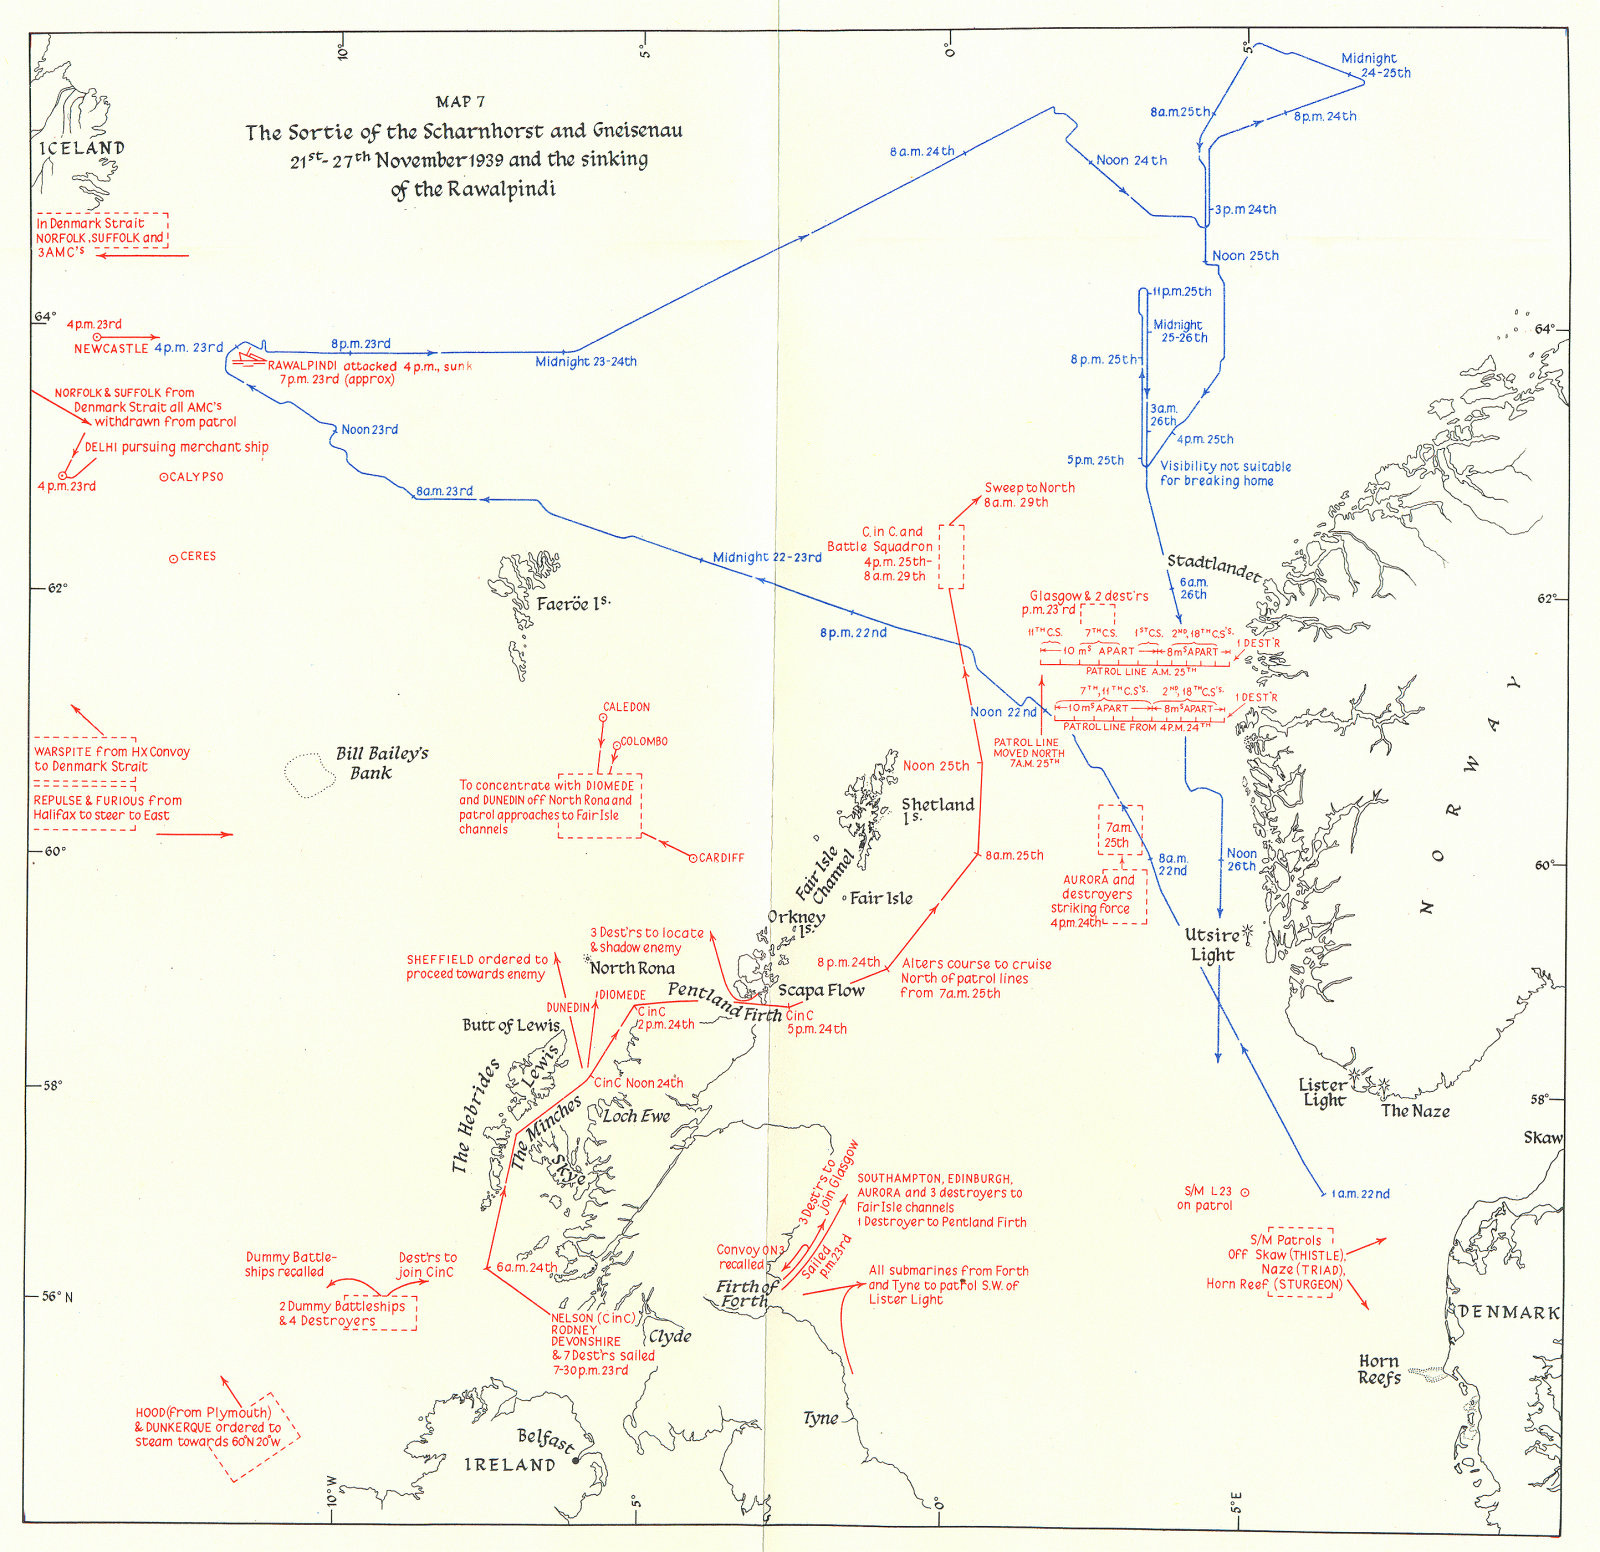
21 November, 14:00: the Scharnhorst and Gneisenau leave Wilhelmshaven and the Jade Bay with a destroyer escort, heading north-northwest. The weather deteriorates the next day, allowing the two ships to avoid detection. Their speed must be reduced to 20 knots, while their escorts—too light for such seas—turn back. The Luftwaffe also has to cancel reconnaissance flights intended to locate any opposing naval forces.
22 November, 00:00: the “terrible twins” struggle through the Shetland Strait in a raging sea that limits their speed to 12 knots. From midday, their course bends farther west, until they round the Faroes to the north in the early hours of the 23rd. The weather has improved considerably and they regain a speed of 17 knots.
Thanks for reading! This post is public so feel free to share it.
23 November, 08:00: the course is set for Iceland and, as they enter the Northern Patrol’s operating zone, Marschall orders the two ships to separate by 20,000 metres in order to sweep a broader sector. At the same moment, a few nautical miles farther north, the Rawalpindi resumes her route. She has been informed that the Deutschland is cruising somewhere in the North Atlantic; if encountered, she is to refuse battle and radio the ship’s position to the Home Fleet so a battle squadron can be dispatched to intercept.
15:07: the northernmost of the two German ships, Scharnhorst, sights smoke on the horizon and steams straight toward it.
15:30: with the sun low, the Rawalpindi is heading east when the lookout in the crow’s nest reports a ship far off the starboard bow. Assuming it is likely the Deutschland, Captain Kennedy sounds action stations. He also orders a hard turn to port at full speed to open the range and disappear into a fog bank.
15:51: the British auxiliary cruiser radios a contact report to the Home Fleet, stating that an enemy battlecruiser has been sighted. The Rawalpindi also tries to lay a smoke screen to speed her disappearance—but in vain: the canisters fail to produce any smoke. The ship then turns to starboard to hide among the drifting icebergs in the area. In reality, it is too late: the Scharnhorst is already moving to cut off her escape to the west. By flashing lamp, the AMC receives an order to stop, reinforced by a warning shot across her bow. Kennedy’s only answer is to continue his desperate manoeuvres and send a second radio message claiming—incorrectly—that the ship sighted is the Deutschland. The Scharnhorst repeats the order, again without effect, perhaps because the Rawalpindi’s captain has just spotted a second ship on the starboard bow and mistakes it for a friendly cruiser coming to his aid. His signals officer quickly kills that last hope: the second ship is the Gneisenau, which means the British AMC is now trapped between the two most powerful German warships in the region. For Kennedy, surrender is not an option. According to a witness on the bridge, he said aloud: “We shall fight both of them, they’ll sink us, and that will be that. Goodbye.”
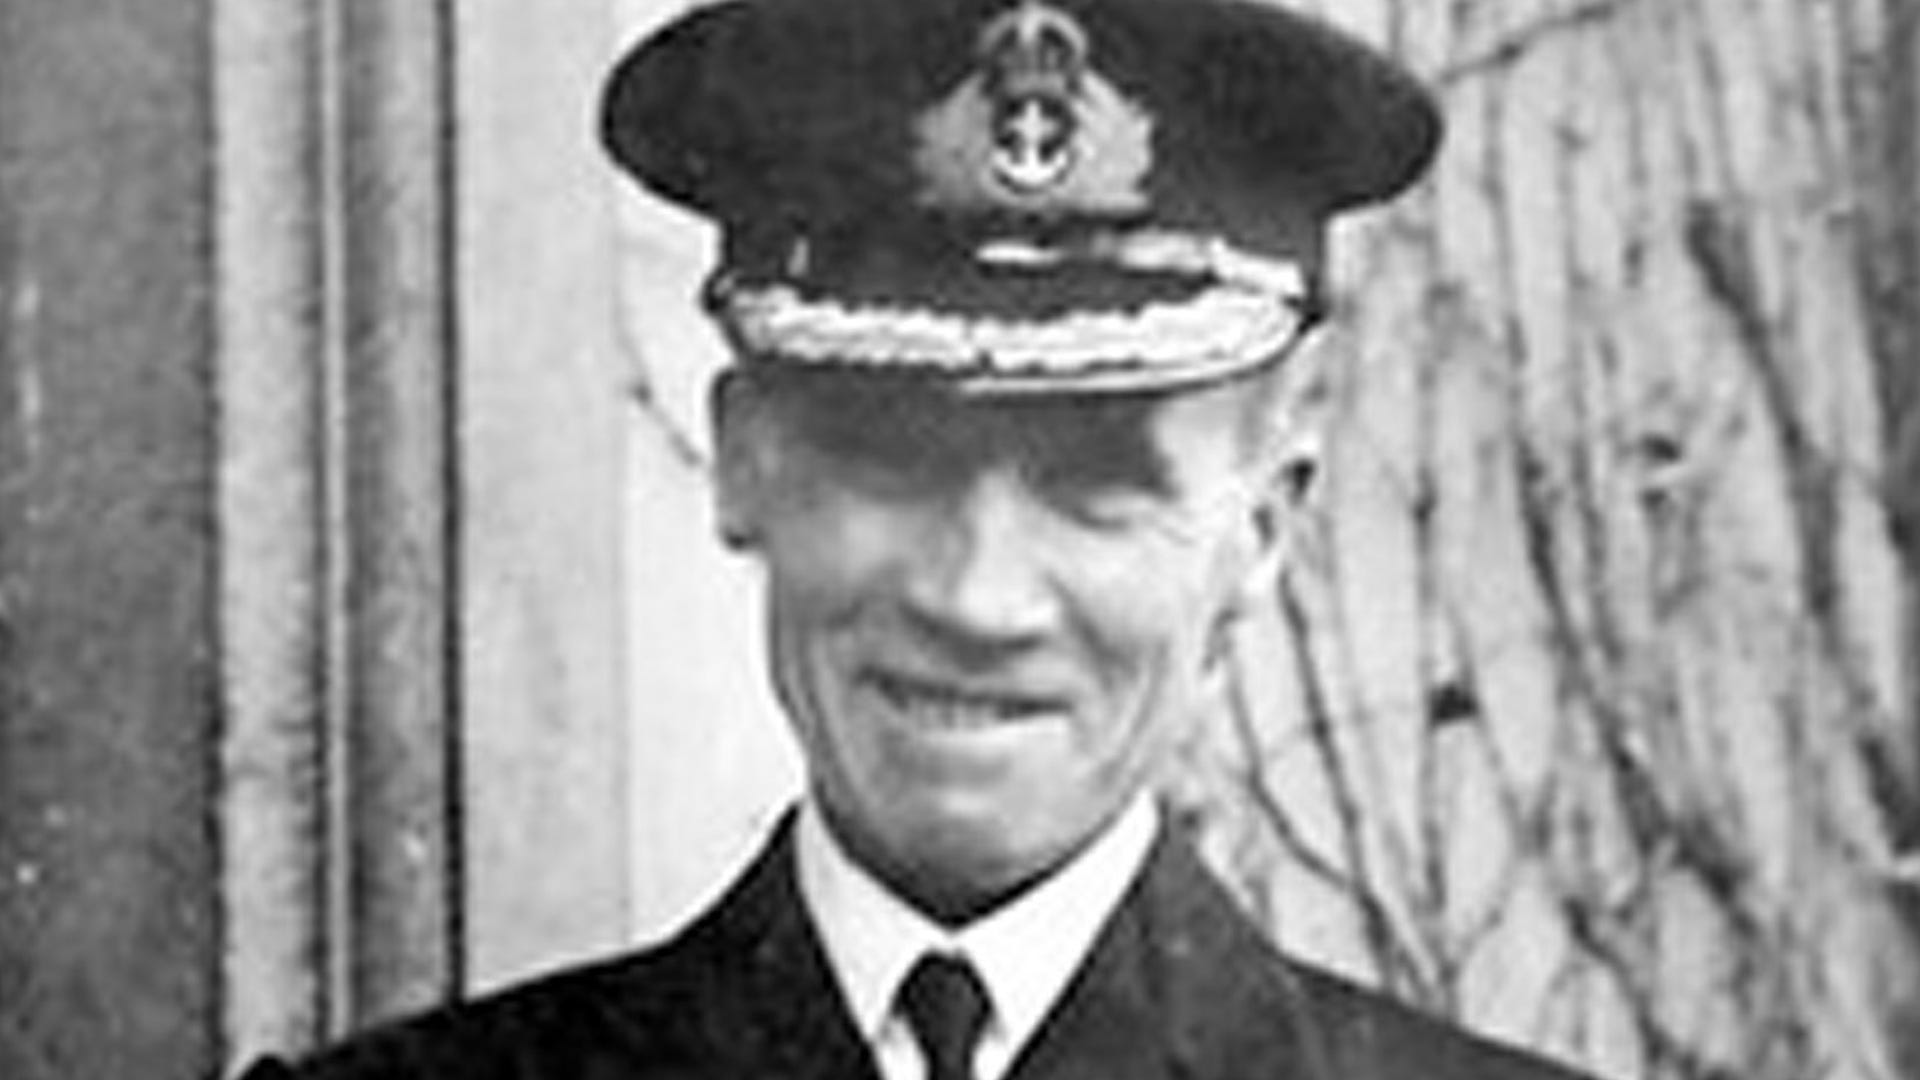
16:03: aboard the Scharnhorst, now only four nautical miles from her prey, Kapitän zur See Kurt Caesar Hoffmann sends the Rawalpindi a radio message ordering her to abandon ship. It is ignored. A second identical message meets the same silence. “The captain of that auxiliary cruiser must be mad,” Hoffmann thinks, “to believe his eight old 6-inch guns can compete with the eighteen modern 280 mm pieces of his two opponents…” As he prepares to open fire for lack of any other solution, his thoughts are interrupted by a detonation: the Rawalpindi’s four port-side guns have just fired at the Gneisenau—without scoring a hit. A second salvo is quickly directed at the Scharnhorst, again without result. At the same moment, the Scharnhorst opens fire and hits with her first salvo, smashing the boat deck, killing almost everyone on the bridge, and destroying the radio room. Kennedy survives miraculously, but his ship can no longer transmit by radio.
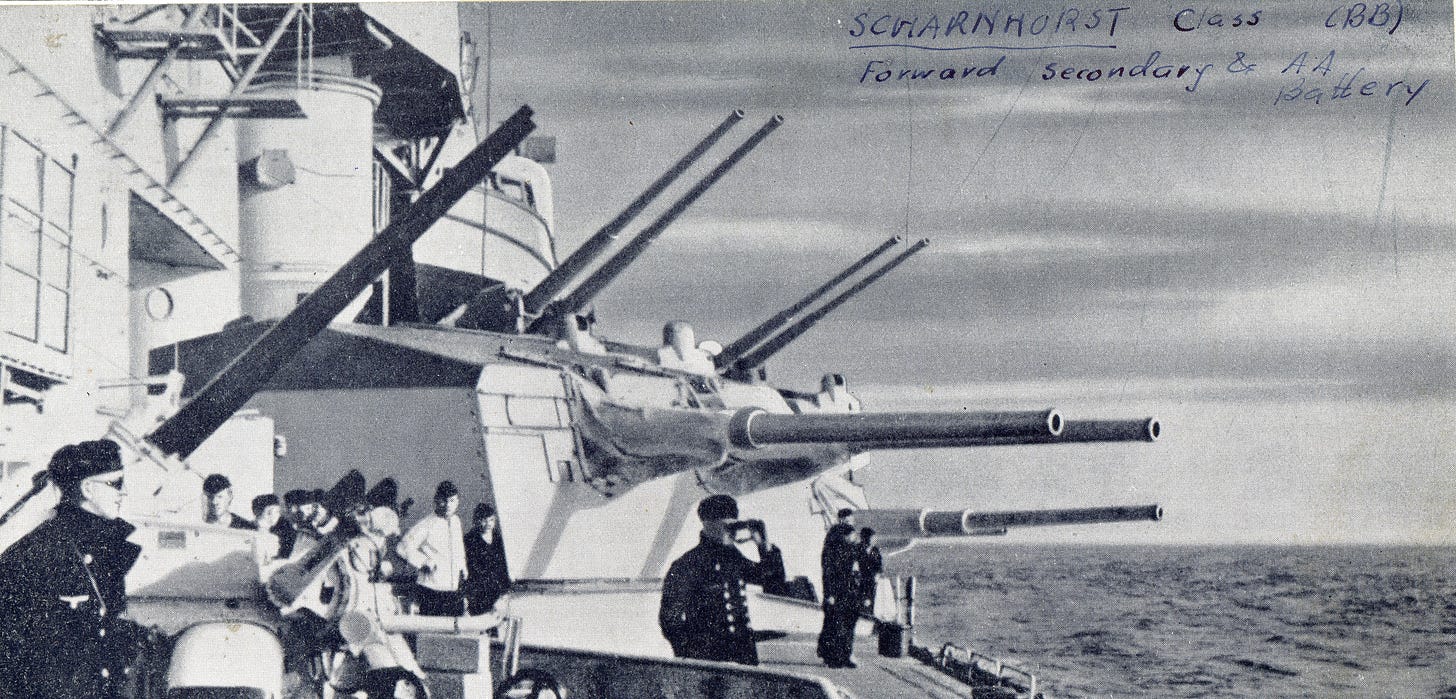
16:07: a second salvo from the Scharnhorst destroys the main-battery fire-control position and one of the starboard guns. The third hits the engine room, cutting power throughout the ship. As a result, ammunition hoists can no longer lift shells to the guns, and the guns themselves receive no firing data. Kennedy orders the seven remaining guns to fire independently, with every available man helping to hand-carry shells from magazine to mounting. Each shell weighs 45 kg, so the rate of fire inevitably drops, but during the brief exchange one of the auxiliary cruiser’s guns manages to land a hit on the Scharnhorst’s quarterdeck, causing minor damage.
16:11: the Gneisenau opens fire in her turn. As the Rawalpindi’s guns are knocked out one by one, fires rage from bow to stern; firefighting systems are put out of action and the steering gear jams. The ship is clearly doomed, yet she still does not sink—her underwater hull has not been hit. With two men, Kennedy leaves his post to try to lay a smoke screen from aft; he is killed in the attempt.
16:16: Chief Petty Officer Humphries gives the order to abandon ship. A boat carrying some forty wounded capsizes as it reaches the water, throwing its occupants into the freezing sea. Then, as only three other lifeboats have just been lowered, the Scharnhorst fires a final salvo: one shell explodes in the forward magazine, causing a massive blast that breaks the ship’s keel. The burning wreck begins to sink as her executioner turns sharply aside to avoid her. The turbulence of the Scharnhorst’s wake swamps the boats. The two German ships finally spot them and turn back to pick up survivors.
17:18: the Germans have recovered only 27 survivors from two boats when the search is abruptly halted. In the darkness, German lookouts have seen the silhouette of a warship; the area must be left as quickly as possible. The third boat, with its eleven occupants, is later rescued by the Chitral, another Northern Patrol AMC.
The Royal Navy did receive the Rawalpindi’s radio messages and quickly diverted several units—not to save the AMC, whose fate already seemed sealed, but to intercept the detected battlecruiser. For more than an hour, the cruisers HMS Newcastle, Delhi, Norfolk, and Suffolk have been racing at full speed toward the transmitted coordinates. HMS Newcastle (herself a Northern Patrol unit) arrives first and sights the Gneisenau at a distance. Keeping prudently clear, the light cruiser follows her as she and the Scharnhorst withdraw northward into a fog bank. Still believing it is the Deutschland returning to Germany, the Newcastle sends a report so better-armed ships can intercept. The Admiralty reacts promptly, converging a veritable armada on the sector.
19:30: the battleships HMS Nelson and Rodney, the heavy cruiser HMS Devonshire, and six destroyers leave the Clyde with orders to cut off the enemy’s presumed route off Norway. Meanwhile, the light cruisers HMS Southampton and Edinburgh sail from Rosyth with five destroyers to patrol between the Orkneys and the Shetlands, while HMS Sheffield weighs anchor at Loch Ewe to head for the enemy’s last known position. Northern Patrol ships are also placed on alert and are to receive reinforcements from Belfast and Scapa Flow.
20:00: HMS Rawalpindi sinks, taking 238 crewmen down into the depths. On the Gneisenau’s bridge, Admiral Marschall expects the entire Home Fleet to pursue him. He therefore abandons the mission and decides to slip back to Germany as discreetly as possible. Several favourable factors—none of them of his making—aid him. First, most British heavy units are too far away to catch the “terrible twins.” Second, at that date the closest British cruisers are not yet fitted with radar, which would have helped them maintain contact during the dreadful storm that rises on the night of 23–24 November. HMS Newcastle and Delhi lose track of the Germans after they steer east and then northeast. On the 25th, the German ships finally head south, hug the Norwegian coast, and reach Wilhelmshaven on the 27th without being intercepted.
On 18 December, in a radio address, Churchill compares the scuttling of the German pocket battleship Admiral Graf Spee—which had sunk the day before in the River Plate estuary—to the tragic but heroic end of the Rawalpindi: “Once in port [the Graf Spee] had the choice of submitting in the ordinary way to internment, which would have been unfortunate for him, or of coming out and fighting and going down in action, like the Rawalpindi, which would have been honourable for him.” For the Armed Merchant Cruisers, the Rawalpindi’s sacrifice—heroic though it was—marked, if not the beginning of the end, then at least a clear realisation of their extreme vulnerability, confirmed a year later by the destruction of HMS Jervis Bay by the Scheer. Their importance within the Royal Navy’s defensive system declined from 1941 onward when, at American request, many AMCs were reconverted into large fast troop transports shuttling to North Africa and Europe. By late 1942, the British retained only thirteen AMCs, patrolling secondary theatres in the South Atlantic and the Indian Ocean.
One of the largest cruise and shipping companies since its founding in the nineteenth century, operating especially in the Mediterranean and on routes to India, the Far East, and Australia.
An imaginary North Atlantic line forming a strategic passage stretching from Greenland to the United Kingdom via Iceland.
War Diary (KTB) of 28–29 September 1939 (T1)
Comments
Nothing yet. Say the first thing.
Sign in to join the conversation.