
In Part 1, we created our characters and built the world. In Part 2, we built the scenes and established the mood. Now, it’s time to make it all live and breathe…

Let’s dig in.
I feel like there’s been a dramatic build-up to this moment – the moment we finally start creating video. But here’s the secret: if you’ve taken great care with the first steps I’ve described, this should actually be the easy part.
By now, you have an exacting vision and all the tools you need (your characters, locations, and storyboard frames) to put the pieces together. At this stage, the work shifts from creation to discovery. Your job now is:
Unearthing problems you didn’t see coming (and turning them into strengths).
Rejecting shots that turn out A+++ but don’t serve your vision.
Discovering new ideas because the AI gave you something you weren’t expecting, but love because it perfectly serves your vision.
Finding new connections that hadn’t occurred to you until you started stitching the footage together.
To create a philosophical framework for these steps – and these issues – I’d like to offer an anecdote.
The legendary film editor Walter Murch (Apocalypse Now, The English Patient) talks about having his assistants print out single frames from every scene in a movie. He looks for those painterly, emotional images that really define a character or a moment. He wallpapers his editing room with them so he can see the “DNA” of the film in a single glance. Walking around during breaks from his keyboard his eyes will flit from frame to frame. He trains his eyes to avoid the linear progression – left to right, top to bottom. Instead his eyes roam the walls at random, always searching to make surprising new connections between disparate characters and unrelated storylines.
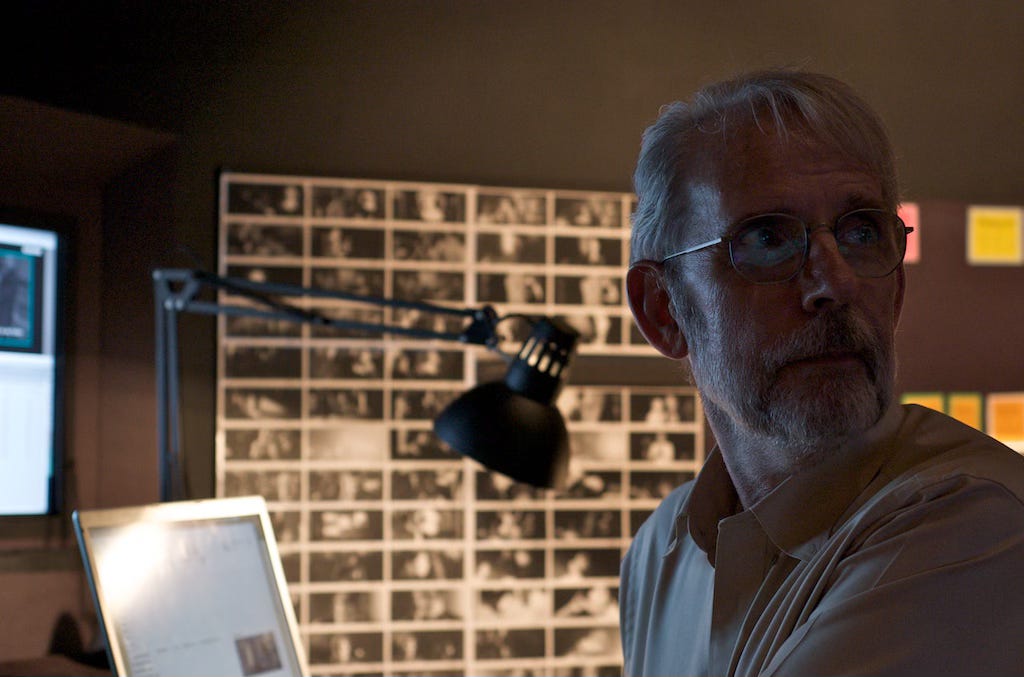
What he’s after is some of the creative chaos he remembers from the days before modern digital editing. In the seminal book-length interview between Michael Ondaatje and Murch, “The Conversations,” Murch laments that digital editing prevents the “happy accidents” of the old analog days: the random images he’d stumble across while winding through a reel of film. And the surprising connections he’d make as a result.
As Murch says:
“The computerized system gives you exactly what you ask for. And that’s the danger. You don’t see the things you’re not looking for.”
Well, doesn’t that just perfectly reframe the “hallucinations” of AI? We often see AI’s randomness as a bug, but perhaps Murch would see it as a feature. The accidents break our rigid efficiency. They create connections we never would have seen. They brings the “happy accidents” back into the workflow.
I try to remember that optimistic reframe when I’m screaming at my monitor because the AI doesn’t understand simple English. Speaking of which:
First off, a word about the tools.
Throughout this guide, I have kept my tech stack as simple as possible. Specifically, I have been using Google’s Flow interface to generate both stills and video through their Nano Banana and Veo tools, respectively.
Is that because Flow is the “best” UI, and Google has the best models? Not necessarily. To me, the appeal lies is the simplicity – especially for a “basic” course. The interface is easy, and I like easy. If Flow isn’t your thing, you may prefer to work in Adobe’s Firefly, Higgsfield, Runway, or Artlist. All have more robust workflows. But the principles in this course will apply to whatever tool floats your particular boat.
Whatever model you prefer, when it’s time to generate video, there will be three main approaches on offer:
Ingredients to Video: The “ingredients” are the reference images you upload. A frame from your Storyboard Grid, a Character Sheet to lock in your character’s consistency, and a Location Sheet (if needed). As a part of your text prompt (more on this below), you’ll explain “Image 1 is the primary composition. Image 2 is a character reference. Image 3 is a location reference.”
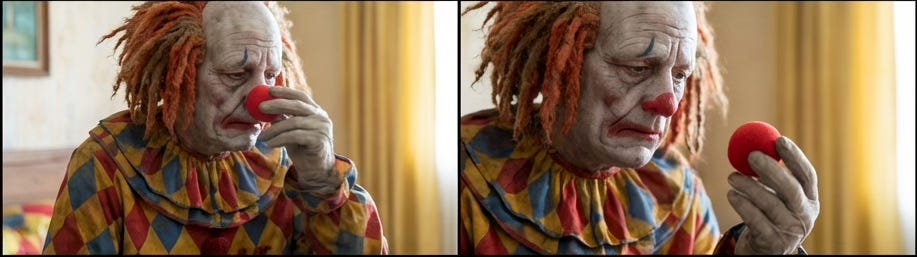
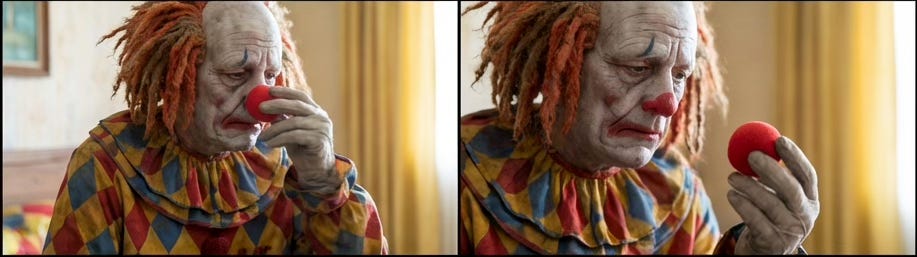
Frames to Video: This mode allows you to specify your exact first and last frame (or just one frame), making “Frames to Video” the ideal mode for super specific actions. These are the “small things” we talked about in Part Two of this course – like our clown removing his nose.
Text to Video: This mode creates video from whole cloth. This is the “slot machine” method. It has its place, but it’s not what we are doing here.
Now Let’s Get Prompting. Here are the 6 basic ingredients for a solid video prompt:
The Subject & Action (What is happening now?)
Camera Work (Dolly left, smash zoom, static)
Visual Style (Cinematic, Noir, Claymation)
Lighting (Hard, soft, motivated)
Environment (Windy, dusty, rainy)
Technical (FPS, lens choice, lens flare)
I know that sounds like a lot, but because of our extensive pre-viz work, most of this information is already baked in. You don’t need to describe the clown’s jacket anymore; the character sheet does that for you. You don’t need to light the scene; your location reference does that for you. You don’t need to place the camera; your storyboard does that for you.
It does help to restate the style of your film in the prompt – especially if it’s something unusual like “tactile claymation miniature animation.” But that will be a text block that you write once and cut-and-paste into every prompt. The part that changes on a shot-by-shot level is (usually) just going to be the Subject, the Action and the Camera Work.
For this example, I’m using the “Frames to Video” approach, and I’ve uploaded the first and last frames seen above. My text prompt is simply: “The clown takes off his nose, slowly shaking his head. Shaky handheld camera pushes in on his face.”
Easy enough. Here’s the very first generation I got back:
Perfect? No. Problems? Sure! But I bet generating it another 10 times would have gotten me something that I like even better.
One of the weirdest ways to interact with AI is also one of the most effective: Annotating your images with ugly colored boxes and writing the direction on the image itself. Oddly enough, this is the best way to get complex, specific action happening on different planes simultaneously. I’ll explain…
The Problem: If I have a lineup of three clowns and I prompt: “Left clown takes off nose, middle clown sits, right clown cries,” the model will likely panic and make them all cry. Or all sit. Or all cry. Or all those things at once.
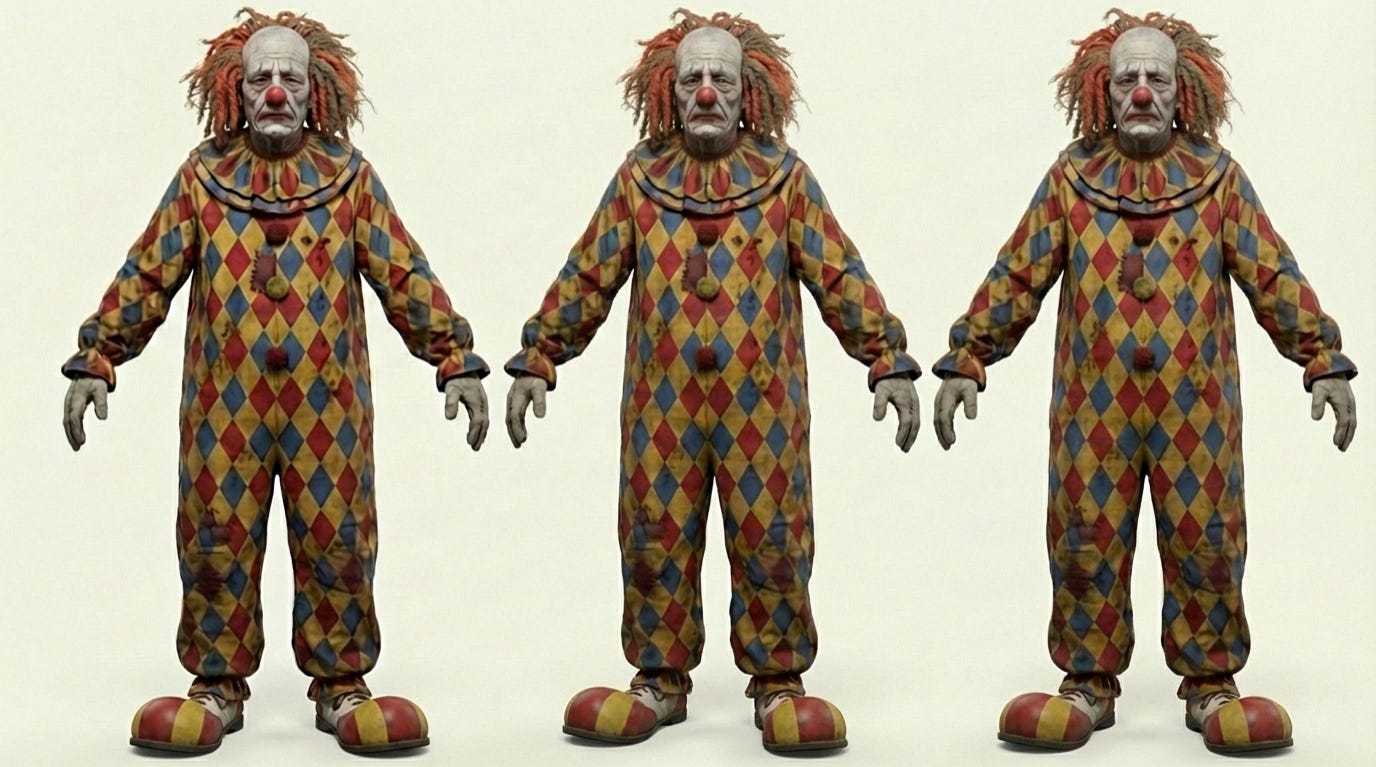
The Solution:
Take your image into a photo editor.
Draw a box around each clown. Use high-contrast colors.
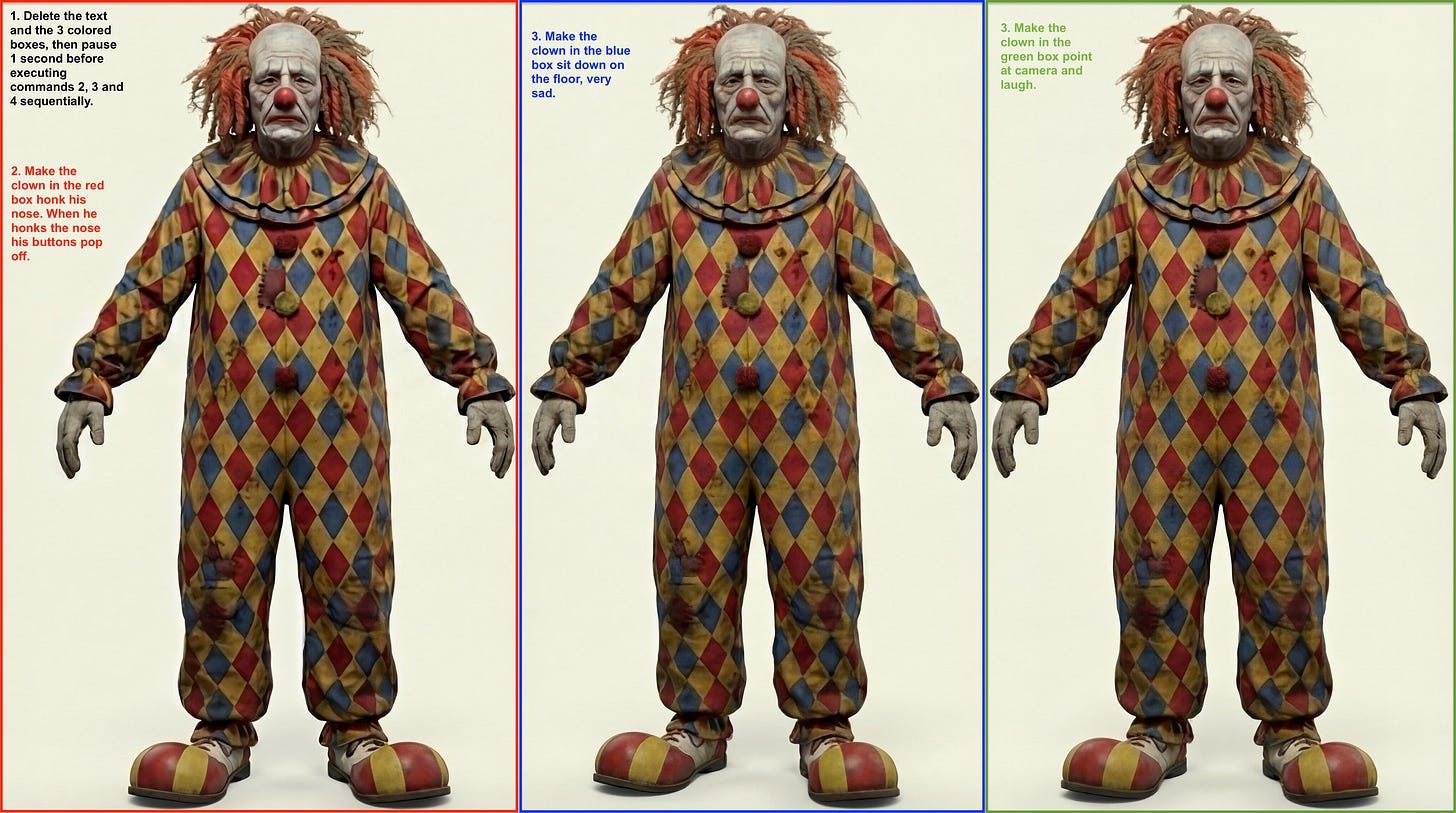
Write the instruction for each specific clown inside the clown’s box, in a text color that matches that box. Number each instruction so the AI knows which order to tackle them in.
Crucially, you must add a Master Instruction to your frame: “1. Delete the text and the three colored boxes, then pause 1 second before executing commands 2, 3 and 4 sequentially.” It doesn’t always work (of course!) but the idea is to make the AI delete your visual commands with a beat of separation before the action begins.
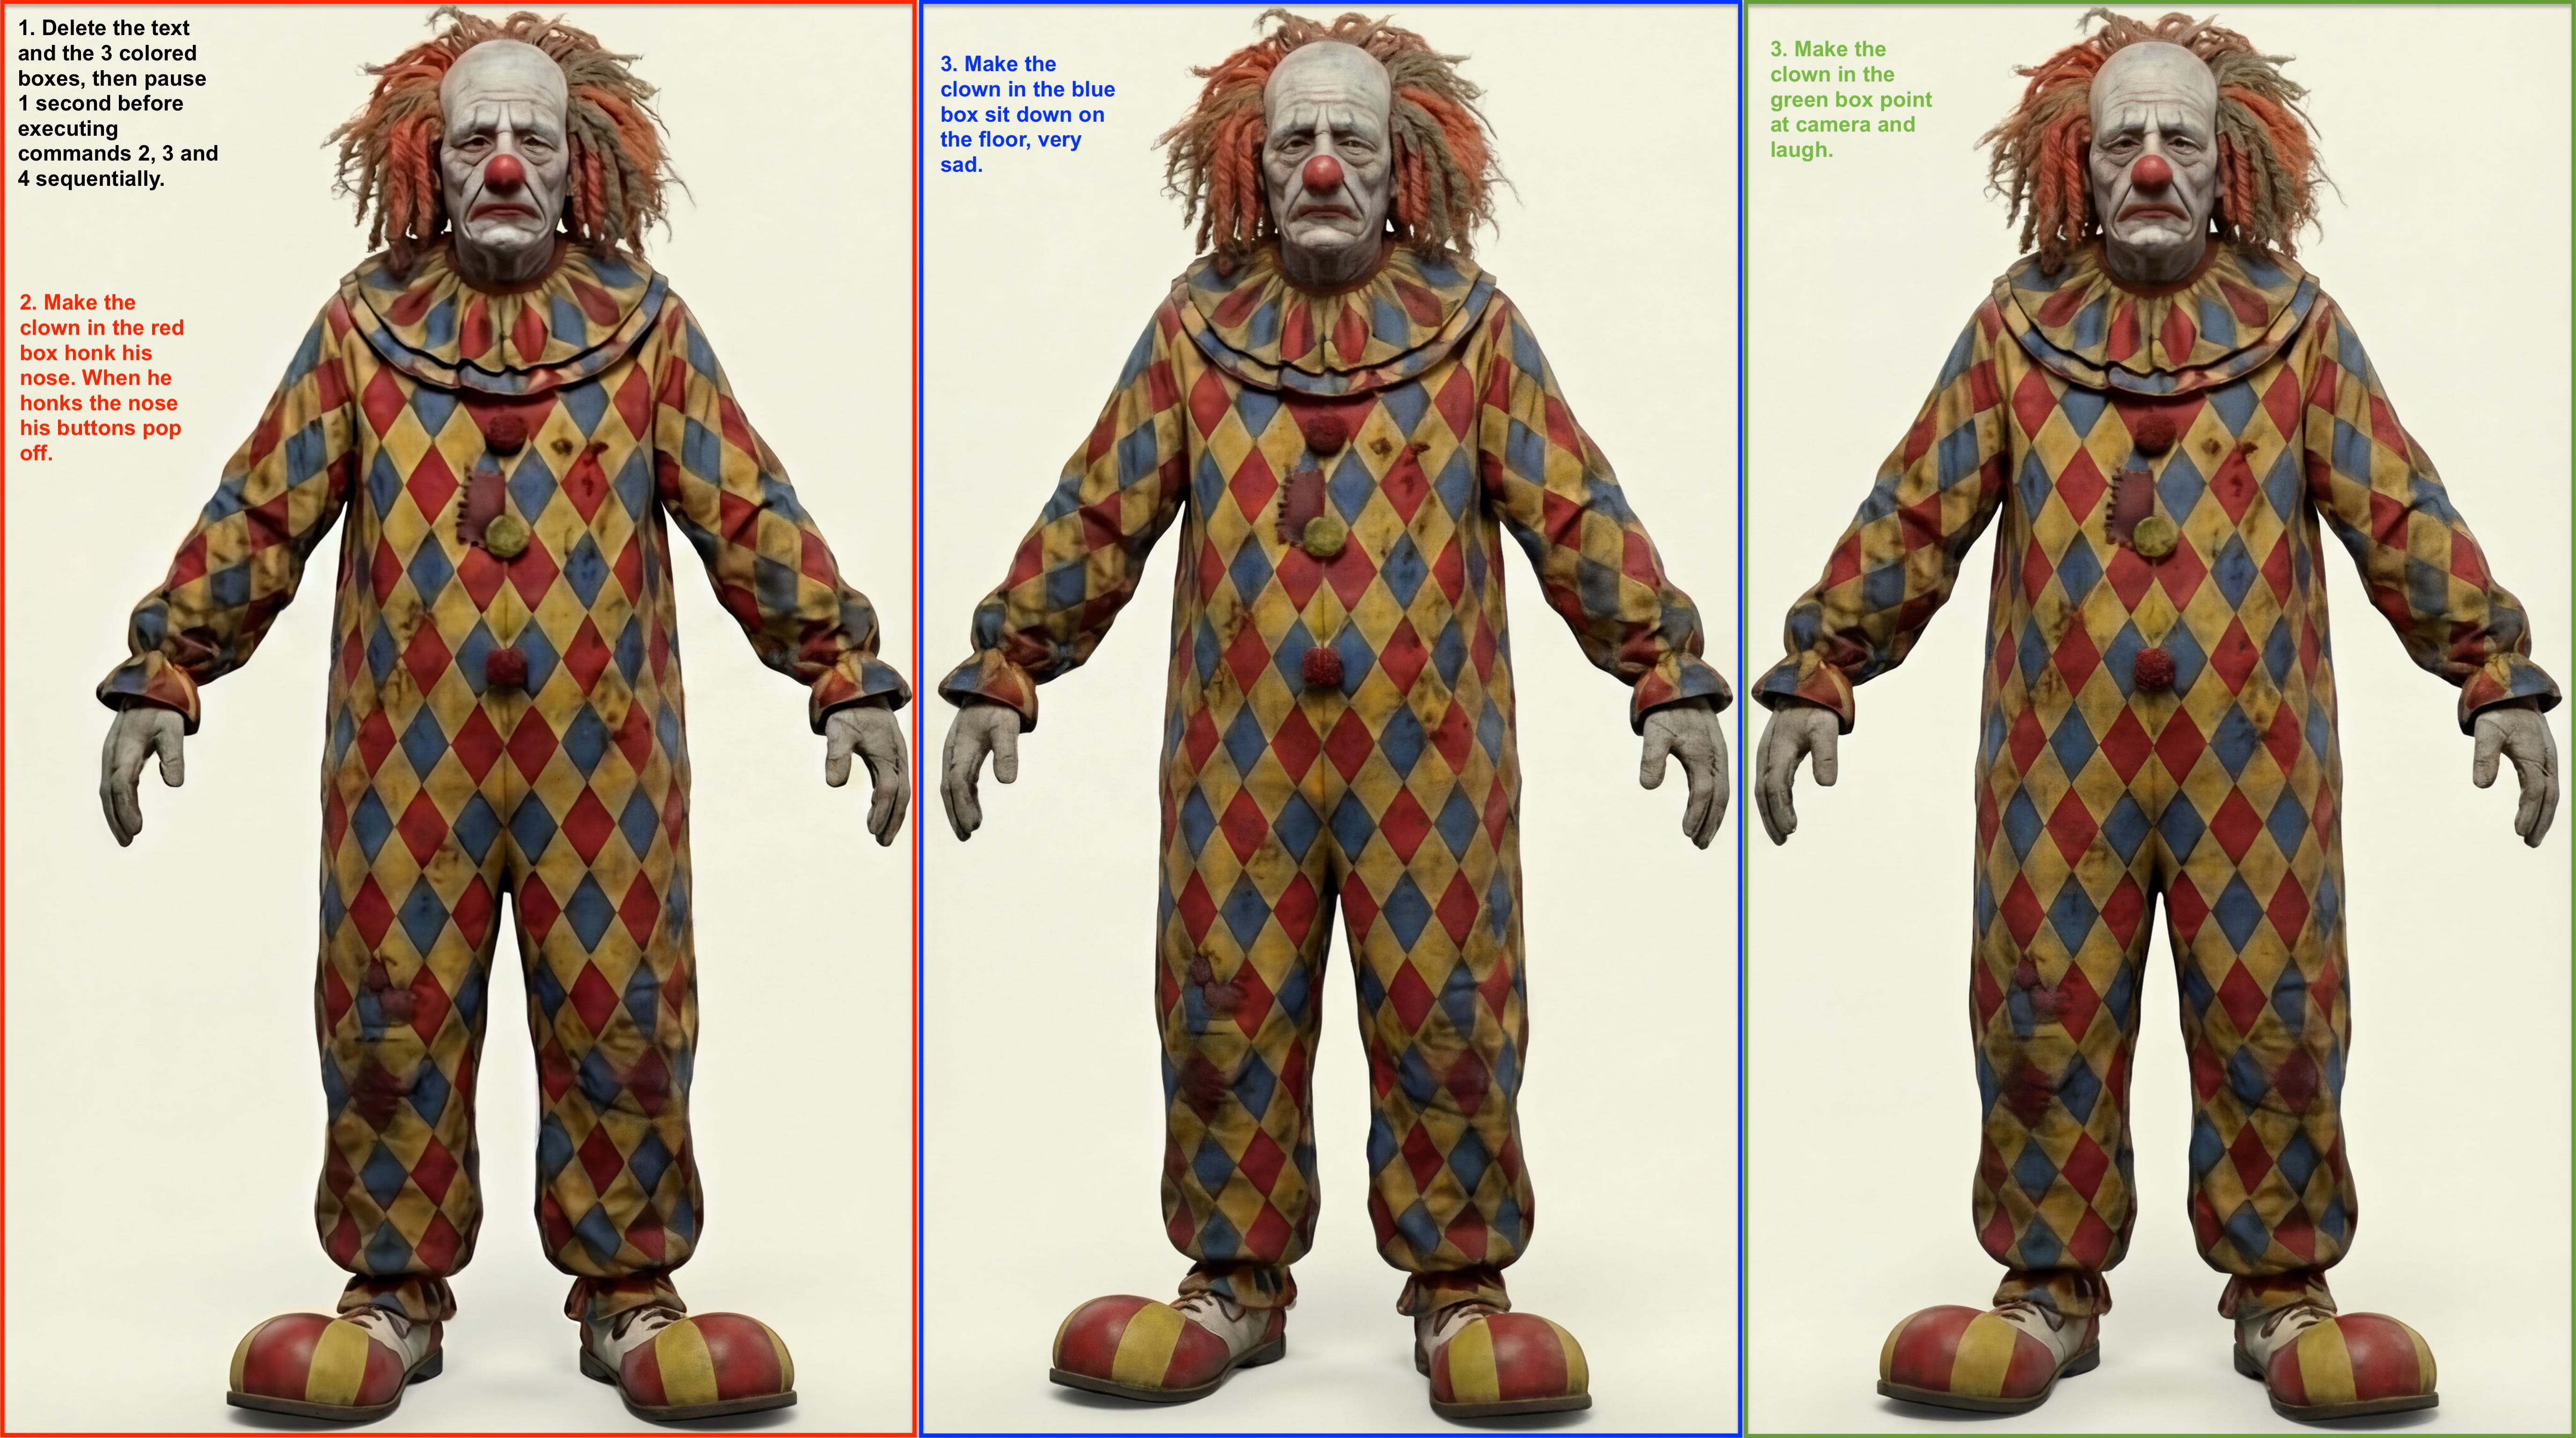
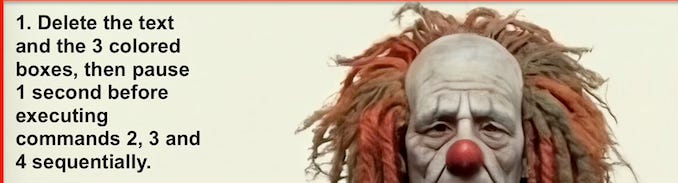
Finally, your text prompt to accompany the image is something along the lines of: “Using the exact reference image, follow the instructions written in the frame.” (You may also want to specify “no music, no dialogue.”)
All of this sounds insane, and there’s no question that this is a ridiculous way to make a motion picture. But check it out:
That was a whole lot of very specific choreography, and the AI performed pretty well. Not bad!
Here’s another test example. This is a frame from my Welcome To Wonderland trailer (If you haven’t seen it, hey, go on and give this link a click, won’t you?).
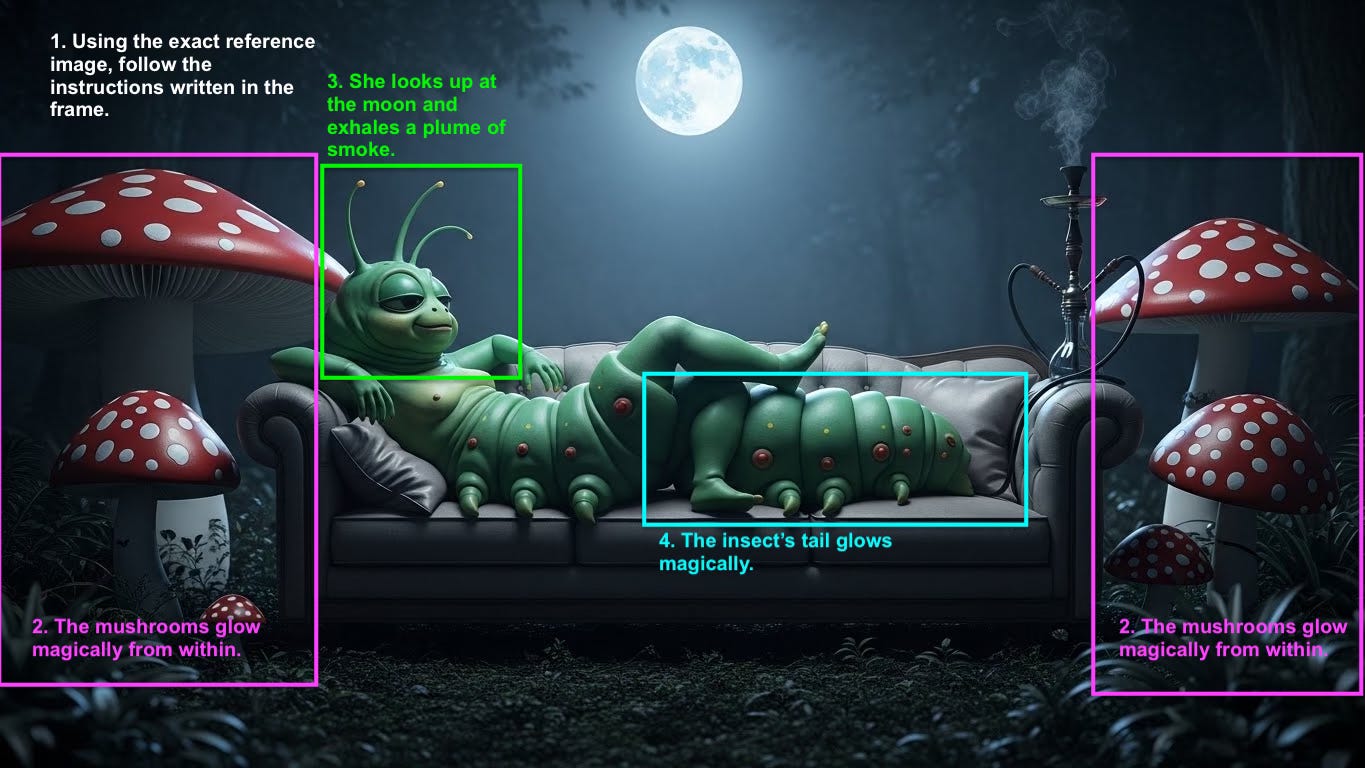
In it, I want the mushrooms to glow, the caterpillar to exhale a puff of hookah smoke, and her tail to light up like a lightning bug. Check it out:
Again – not bad! Exerting this type of granular control over the bot is exactly what we need so we can stop generating and start filmmaking.
As promised, this course has covered the (Very) Basics of AI Filmmaking. This should be enough to get you started executing high-value, cinematic AI filmmaking right away, using relatively straightforward tools and processes.
When the tools disappoint or frustrate you – and they will! – remember that this is the best the technology has ever been… but it’s also the worst it will ever be. The next generations of the tools are going to blow your mind, and change how movies are made.
And who gets to make them.
It’s a foregone conclusion that the tools & techniques I’ve described here will be totally obsolete in no time. Maybe even by the time you’re reading this. But what’s timeless here is the theory. The philosophy of WHY, the awareness of INTENTION, and the adaptability of HOW.
The tools are just tools. The understanding of how to tell a story with them is everything.
I hope this course has been helpful. Now, go make some great stuff.
Thanks for reading The AI Showrunner. If you enjoyed this course, share your own creations in the comments below.
No posts
Comments
Nothing yet. Say the first thing.
Sign in to join the conversation.