
Following our non-toxic home build, we ended up with extra building materials, which is quite exciting for persons who constantly dream up new things that can be made at home such as me! However, in the case of our insulation, we intentionally ordered extra as we have been planning to build our own mattress for around a year. It is incredibly hard to find a non-toxic mattress. Add in the necessity for avoiding any and all latex in a mattress, and it was nearly impossible!
(We do have a list of latex-free mattresses currently on the market. Even if you don’t have a latex allergy, sleeping on a latex mattress wrecked our lives and the evidence is clear: there is little natural about “natural” rubber latex.)
This post contains affiliate links. I may receive a small commission for purchases made after clicking affiliate links. I personally used all of these products for this project. As always, this is not medical information or advice and as an Amazon affiliate, I earn from qualifying purchases.
Prior to building our mattress, we slept in hammocks we purchased on Amazon.
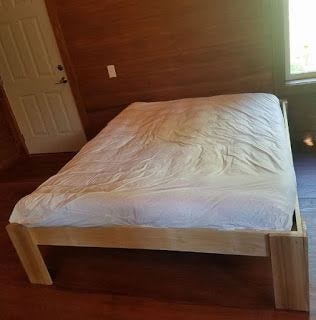
As I didn’t want to do any more sewing than absolutely necessary and purchasing ticking was more expensive than I was comfortable with, I opted to use a latex free allergen cover as ticking.. I purchased two allergen covers, one of which we used for the intended purpose. Following washing them a few times, I noticed no scent at all from the allergen covers. Any allergen cover you have found safe for your needs should work, though I really am a fan of the Allergycare 100% cotton mattress covers. They aren’t marketed as organic, but they don’t add any chemicals. I used them for a number of years before trying them out for this purpose. These covers are pricey but keep an eye out for sales and discount codes.
We ordered our Havelock wool insulation through Green’s Design & Supply. I highly recommend them!
Note that this is a two person project, and it is extremely labor intensive! We estimate that this took us around 21 hours, and it was hard work.
Important Note: I am planning a Q&A post soon for this. If you have a question about this process or materials, submit it ASAP to me via this link/ email so I can address it. The last mattress I made, I did record the process, but a video of said process would be a vast undertaking to edit/ produce. This was first posted online on June 5, 2019 and other than this note remains unchanged. I strongly advise against attempting to make a mattress using organic cotton. I tried!
Supplies:
1 allergen cover or ticking (I strongly recommend the purchase of an additional allergen cover to remove and wash as needed.)
1 spool of upholstery thread
2 Bags of sheep’s wool batts from Havelock Wool (Do not attempt to use loose fill. I tried.)
1 measuring tape/ tape measure/ ruler
1 marker
2 chairs (We used our Ozark Trail camp chairs.)
1 thimble
2 (optional) light duty masks
1 (optional) wood spoon or other item to press the needle through
1 (Optional) pair of heavy duty work gloves
1 package of sewing pins
Getting Started with Making the Mattress
(This portion may be completed by just one person.)
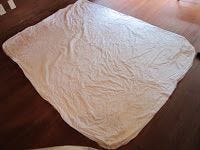
Ensure that you have as much space available as you can get. Our home is just 600 square feet, so we understand lack of space! However, you really need enough space to allow for two mattresses of your desired size, side by side, plus enough room to work around the edges.
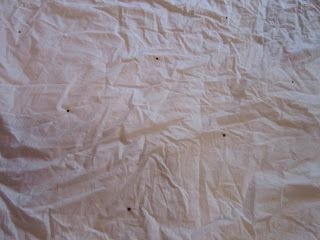
Use your choice of marker to mark dots on one side of the mattress cover, approximately 6 inches apart. This will be your guide later for the mattress ties.
Unzip the mattress cover and use a seam ripper along the sides to allow for the mattress cover to be opened like a book. In retrospect I got a little happy with the seam ripper, causing myself extra work later when we sewed it up. Sigh.
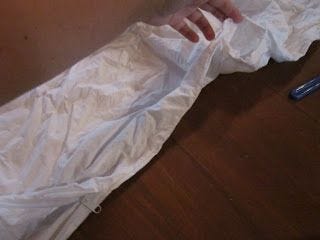
I don’t recommend removing the seam this close to the zipper.
Placing the Wool
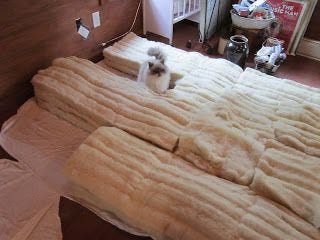
Open the bags of Havelock Wool. They may ship compressed, so be prepared for it to spring out when you release the tension. The wool is dusty and leaves dirt behind, so I highly recommend wearing a light duty mask to avoid breathing the dust. If you are able to allow time for the wool to off gas some, I highly recommend doing so in a safe place such as a garage or spare room. I wouldn’t advise off gassing it outside as it would offer a lovely nesting space for woodland creatures when the weather is cool!
Working from one corner, layer the 4 foot lengths of wool in piles 4 batts thick. You want as few seams between batts as possible, so pay attention when you are layering and alternate seams going from top to bottom. You can’t do much about the seams going from left to right, but lay the batts in as tightly as you can.
Cut off the ends of the insulation and store in a trash bag. It might come in handy for other projects. Spray the air with diluted vinegar, take off your masks, and vacuum if you feel the need.
Tying It Together
Fold the mattress cover back over on to the batts.
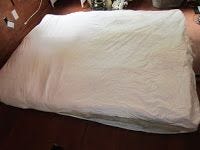
Zip the cover closed. Expect this to be a challenge.
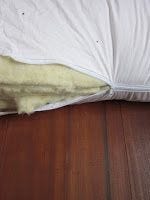
Cut lengths of yarn approximately 46 inches long. You’ll need over 100 for a queen sized mattress, so just cut them until you are tired of doing so. Alternately, you can cut one at a time as you go.
Thread your upholstery needle with a length of yarn, and have a seat near an edge of the mattress. Holding your needle straight up and down, press it through the top of the mattress, wool, and through the bottom of the cover. Do so very slowly the first few times. I held up the mattress once I got through the wool so I didn’t damage our floor. If you meet a lot of resistance, it is better to move it up and down like a plunger than to press it hard and hurt your hand.
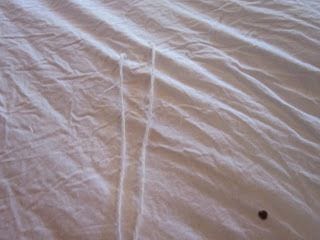
Pull your yarn through gently, allowing for enough yarn to turn around and go back through.
Identify where you are going back through. You want the spot to be about an inch away from where you came through initially. Having the holes too close will cause tears in the mattress cover.
Again attempting to keep your needle as vertical as possible, poke your needle back through the mattress.
Tie your yarn into a bow. You don’t need to pull it very tight at this point.
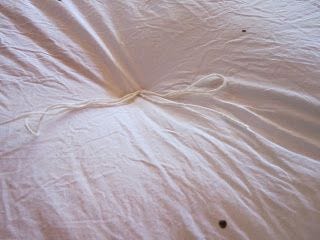
Repeat this process on all of your dots, starting from the outside and working your way inside. I recommend starting with ties on the corners to help hold the batts in place most effectively. I found that I could easily tie 2 or 3 rows from the edges, but any farther in required that I wait for help.
So Many Stinking Ties
By now you will be sick and tired of ties, but now is when you get to share your newfound joy with your assistant of choice! For this portion, we used the Ozark Trail camp chairs that we use as our living room chairs. Dining room chairs or a pair of side tables would also likely work. This may require some trial and error to figure out the best set up for your circumstances. Critical thinking is a plus here!
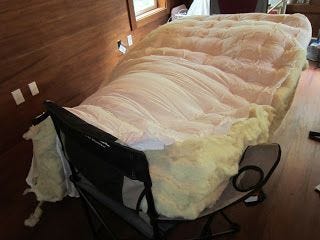
Set your two chairs up as pictured, and pull your surprisingly heavy mattress up so that the middle of your mattress is exposed to the air underneath. In our case, I worked from above and my husband from below, as he laid on his back underneath the mattress. Communication is key for this step- you need to be sure that no one gets hurt! As the mattress will require additional support during part of this time, the person underneath may opt for heavy duty work gloves, and a hard object such a wooden spoon may come in handy to push the needle back through.
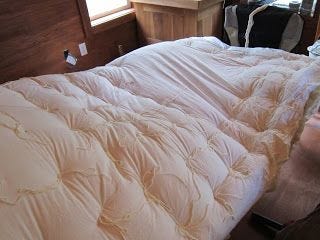
SLOWLY push the upholstery needle though the mattress (discuss this with your assistant first!). In our case the location of the first tie was quite surprising to my husband, as my marker had bled through. Once the first tie was in place, the other locations were more predictable for him though. I would stop once I felt the resistance of the mattress cover and wait for him to acknowledge my location. He then would come back through the mattress approximately 1 inch from where it came through, trying to keep the needle vertical, and I would tie it on top. Knowing the directions (North, South, East, West) helped during this step, as he sometimes would start to emerge too far or too close to the original hole. You still want the two holes on top to be around an inch apart.
Continue to finish putting in ties at all of your dots, approximately 6 inches apart.
The Ties Are Almost Finished, I Promise
Move the mattress back to the floor, and put your chairs away.
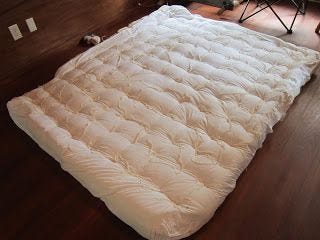
Working from one end, retie all of your ties. This time you want to tie them as tight as you can without risking tearing the fabric. So if the fabric looks strained around the holes, you likely can stand to loosen the ties slightly.
Sew Much Sewing
Starting at one end of the zipper, pull the mattress cover edges together tightly and pin. As I have problems with my hands (likely due to Cipro damage), my husband offered his muscle for this task. It is quite the challenge for one person to hold the cover together and pin it!
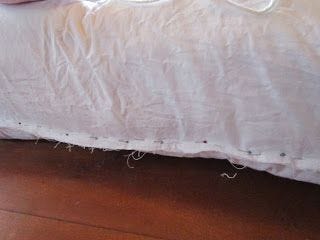
Hand sew around the sides using strong upholstery thread. Some areas I doubled up the thread, but most of it I simply sewed very small stitches. For an idea as to how long this step takes, it took me around 6 hours to sew.
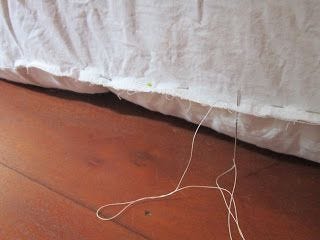
Remove pins.
Fall asleep on your new mattress in exhaustion.
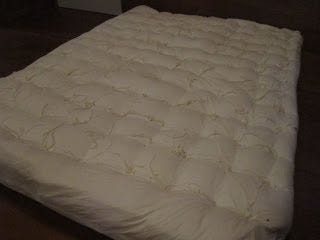
Revel in your handiwork!
Some Final Thoughts
Wool is known to moderate humidity up to 60% RH, so while I recommend keeping your mattress as dry as possible, it is inherently mold resistant. However, all mattresses need to be able to “breathe.” So, I wouldn’t recommend permanently placing the mattress on the floor or on a solid platform bed frame. We built our own slatted bedframe out of leftover poplar. Additionally, you never want to place any sort of vapor barrier on top of a mattress as this also traps water vapor.
This mattress will compress, and after only a month has already started to do so slightly. Flipping the mattress over and around will help, as will sleeping in various positions and areas. This can be more challenging for a queen or king mattress. From what I have read, the compression should stop at about 6 months.
This mattress is not soft or springy by any stretch. While it is soft compared to the floor as some are forced to sleep on, we are planning to build an additional mattress to place on top within the next few months. I expect it to eventually be more like a futon mattress.
Making your own box spring or using a tolerable box spring might also be an option to make the mattress even more comfortable.
Not your cup of tea? It’s a lot of work, indeed!
Are Metal Coils in Mattresses Toxic?
Comments
Nothing yet. Say the first thing.
Sign in to join the conversation.