
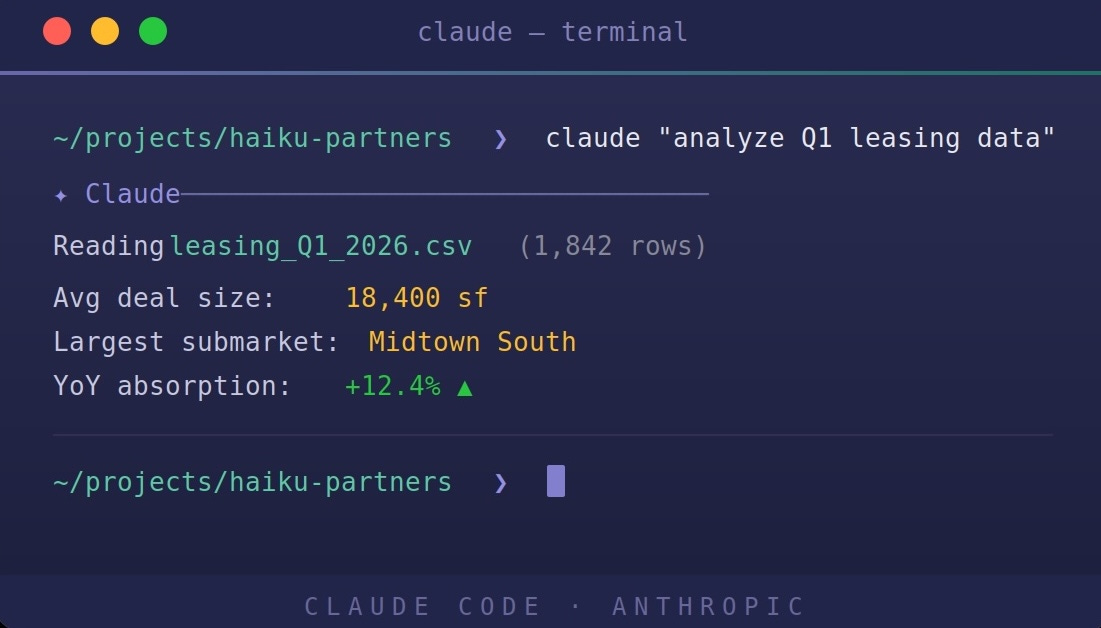
If you read Part 1, you can skip this section since it repeats.
A lot of what I’m going to say in these three posts has to do with something about which I feel strongly: if you want to use Claude, then you should find a way to use Claude Code. Everything else, in my opinionated opinion, is a distraction to get the most people into the Claude tent as possible. Claude CoWork, for example, is a distraction. Claude projects and skills created through Claude Desktop are distractions. If you disagree with this based on experience or other bias, skip this article.
If you arrived here, I assume that you have written code before, and if you have there is a good chance that you have used an integrated development environment, since they have been around for decades. If you have, then this will serve as a refresher. If not then it is a minimal introduction to something useful and cool.
When you make it to the end of this post, you can head to the third part of this trilogy.
Here’s the intermediate-level guide. As mentioned in the intro, this assumes that you have written some code at some point, and ideally have used an integrated development environment (IDE). These environments are highly recommended versus just using the terminal since they bundle together all the tools you need in one interface. This includes a text editor, a built in terminal, and lots of plugins to do things like create and maintain a GIT repository.
Note that this section also includes setting up Python. But don’t worry: no pythons will be harmed in using this section! In fact you don’t need to know any Python programming in order to create sophisticated Python programs. It is a language that many novices and hackers find easiest to learn and use, but it’s not necessary to understand it at all: Claude does. If anything goes wonky, just copy and paste the error or screenshot the screen, feed it back into Claude and say “WTF”. Actually it’s more polite to say “I received the following error; can you help?”
If you aren’t sure about how you feel about this idea, take my word for it that you are going to be using one of these IDE things sooner or later..unless you throw up your hands and slink back to Claude CoWork (no shame).
Both are excellent and nearly identical to set up. The honest difference:
VS Code is the industry standard, free, from Microsoft, with the largest extension ecosystem. Claude Code has an official extension for it with full support.
Cursor is a VS Code fork built specifically around AI coding — it has its own AI features baked in (tab completions, inline edits) on top of Claude Code. It costs $20/month for the Pro tier but many developers find the combined experience worth it. Cursor is built on VS Code but thinks like an AI product first and an editor second.
Recommendation: Start with VS Code since it’s free and officially supported. You can always migrate to Cursor later and your settings transfer automatically.
Everything else flows from this. Open your terminal (or iTerm2) and run:
/bin/bash -c “$(curl -fsSL https://raw.githubusercontent.com/Homebrew/install/HEAD/install.sh)”Homebrew is a package manager for macOS--think of it as an unofficial App Store for developer tools and command-line software that Apple doesn’t ship with the operating system. When you need to install something like Python, Node.js, Git, or hundreds of other tools, Homebrew handles the downloading, installing, and updating for you with a single terminal command (brew install python, for example). Without it, you’d have to hunt down installers manually, manage them yourself, and handle updates one by one. Homebrew also manages dependencies. If the tool you’re installing requires other software to run, Homebrew installs those automatically too. It’s become the de facto standard for Mac developer setups, to the point that most installation guides simply assume you have it.
Option A — Direct download (simplest): Go to code.visualstudio.com → Download for Mac → drag to Applications.
Option B — Via Homebrew:
brew install --cask visual-studio-codeAfter installing, do one critical step: open VS Code, press Cmd+Shift+P, type Shell Command: Install 'code' command in PATH, and run it. This lets you type code . in any terminal to open that folder in VS Code — essential for the workflow below.
Before anything else, orient yourself:
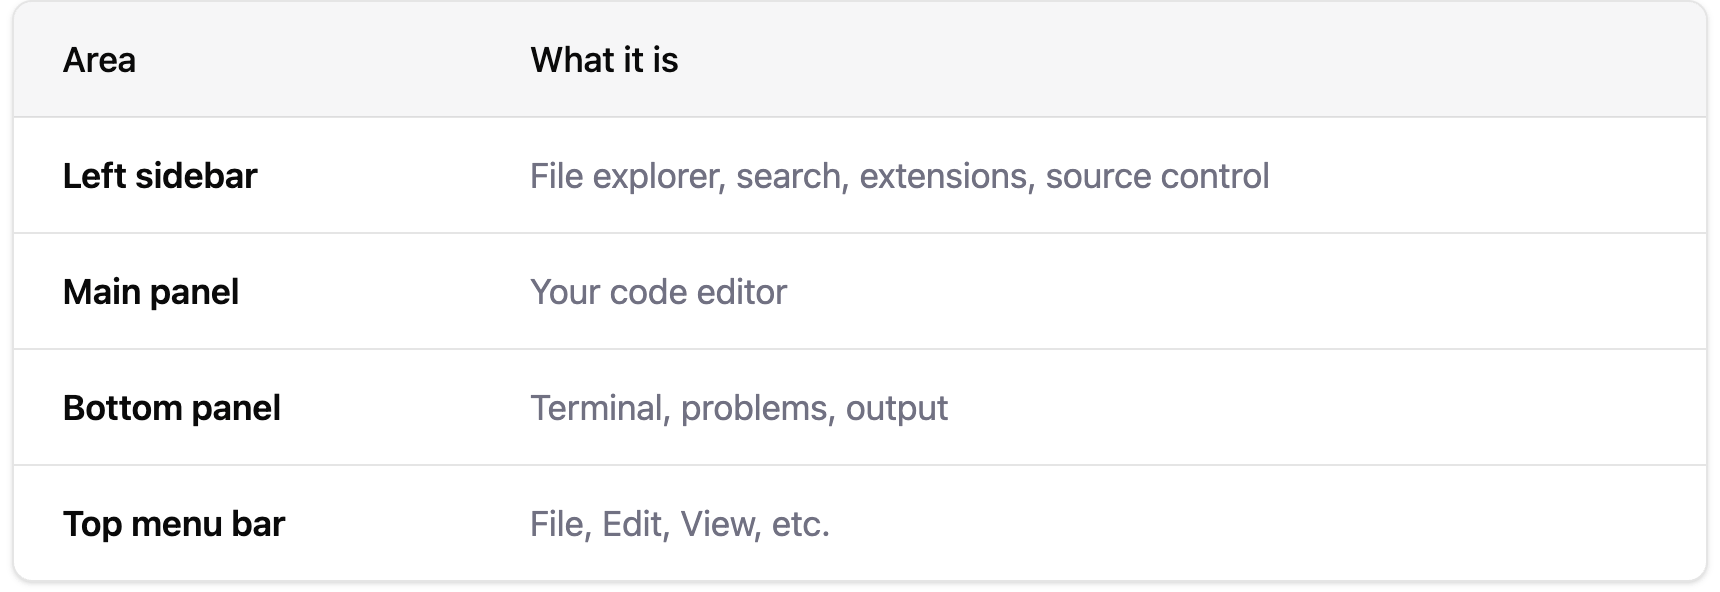
The most important keyboard shortcut to memorize immediately: Cmd+Shift+P opens the Command Palette — it’s VS Code’s universal search for every feature and command. When in doubt, open it and type what you want.
Opening the integrated terminal is how you’ll run Claude Code without leaving the editor:
Cmd+` (backtick) toggles it open and closed
Or: View menu → Terminal
You’ll see a real terminal panel appear at the bottom of VS Code
Same as the beginner guide — this is done in the terminal (either iTerm2 or VS Code’s built-in terminal, both work):
curl -fsSL https://claude.ai/install.sh | bashVerify:
claude --versionThis gives you a graphical panel inside VS Code so you’re not just using the terminal:
Press Cmd+Shift+X to open the Extensions panel
Search for “Claude Code”
Install the one from Anthropic (verified publisher)
Once installed, click the Spark icon in the left sidebar to open the Claude Code sessions list, or click the Spark icon in the editor toolbar (top-right corner of the editor) for quick access.
The extension includes the CLI, which you can also access from VS Code’s integrated terminal for advanced features. The extension and CLI share the same conversation history.
Note on Cursor: The extension also works with Cursor. However, automatic detection can be unreliable — if the extension doesn’t auto-connect in Cursor, you may need to install it manually via the VSIX file. VS Code is smoother for exactly this reason.
(Author’s Note: Claude strongly suggested that I include this here as well as above).
Same answer as the Terminal guide — Claude Pro ($20/month) is the right starting point. You authenticate via browser OAuth, no API key management needed.
macOS comes with a very old Python. You want a current version. Via Homebrew:
brew install pythonVerify:
python3 --versionYou should see Python 3.12 or 3.13 or later.
This is where things get exciting. Here’s the complete workflow:
mkdir ~/Projects/my-first-project
cd ~/Projects/my-first-project
Step 2: Open it in VS Code
code .VS Code opens with that folder as your workspace.
claudeAuthenticate via browser if prompted.
Here’s a good first prompt — be specific about what you want:
Set up a Python project for me from scratch. I want:
- A virtual environment using venv
- A clean folder structure with src/ and tests/ directories
- A requirements.txt file
- A simple “hello world” script to verify everything works
- A .gitignore appropriate for Python
Walk me through what you’re creating and why.Claude will create all of this, explain each piece, and you can watch it happen in real time in your file explorer sidebar. If you don’t know anything about .gitignore or venv, ask Claude.
Claude will tell you to run something like:
source venv/bin/activateYou’ll see (venv) appear in your terminal prompt, indicating you’re now inside the isolated Python environment.
Python extension: Install the Python extension from Microsoft (same Extensions panel, search “Python”). This gives you syntax highlighting, auto-complete, and the ability to run Python files with a play button.
Inline diffs: When Claude edits files, you see real-time diffs (difference files) as highlighted changes showing what Claude wants to add. You maintain full control; accept or reject each change, although at the beginning you will mostly be just accepting everything and riding along with Claude.
Plan Mode: This is extremely important and bears being said again: before asking Claude to do anything complex, type /plan in the Claude dialog first. In Plan Mode, Claude can only read and think; it cannot write, modify, or execute anything. It’s forced to think first. This is invaluable because you see exactly what Claude intends to do before it does it.
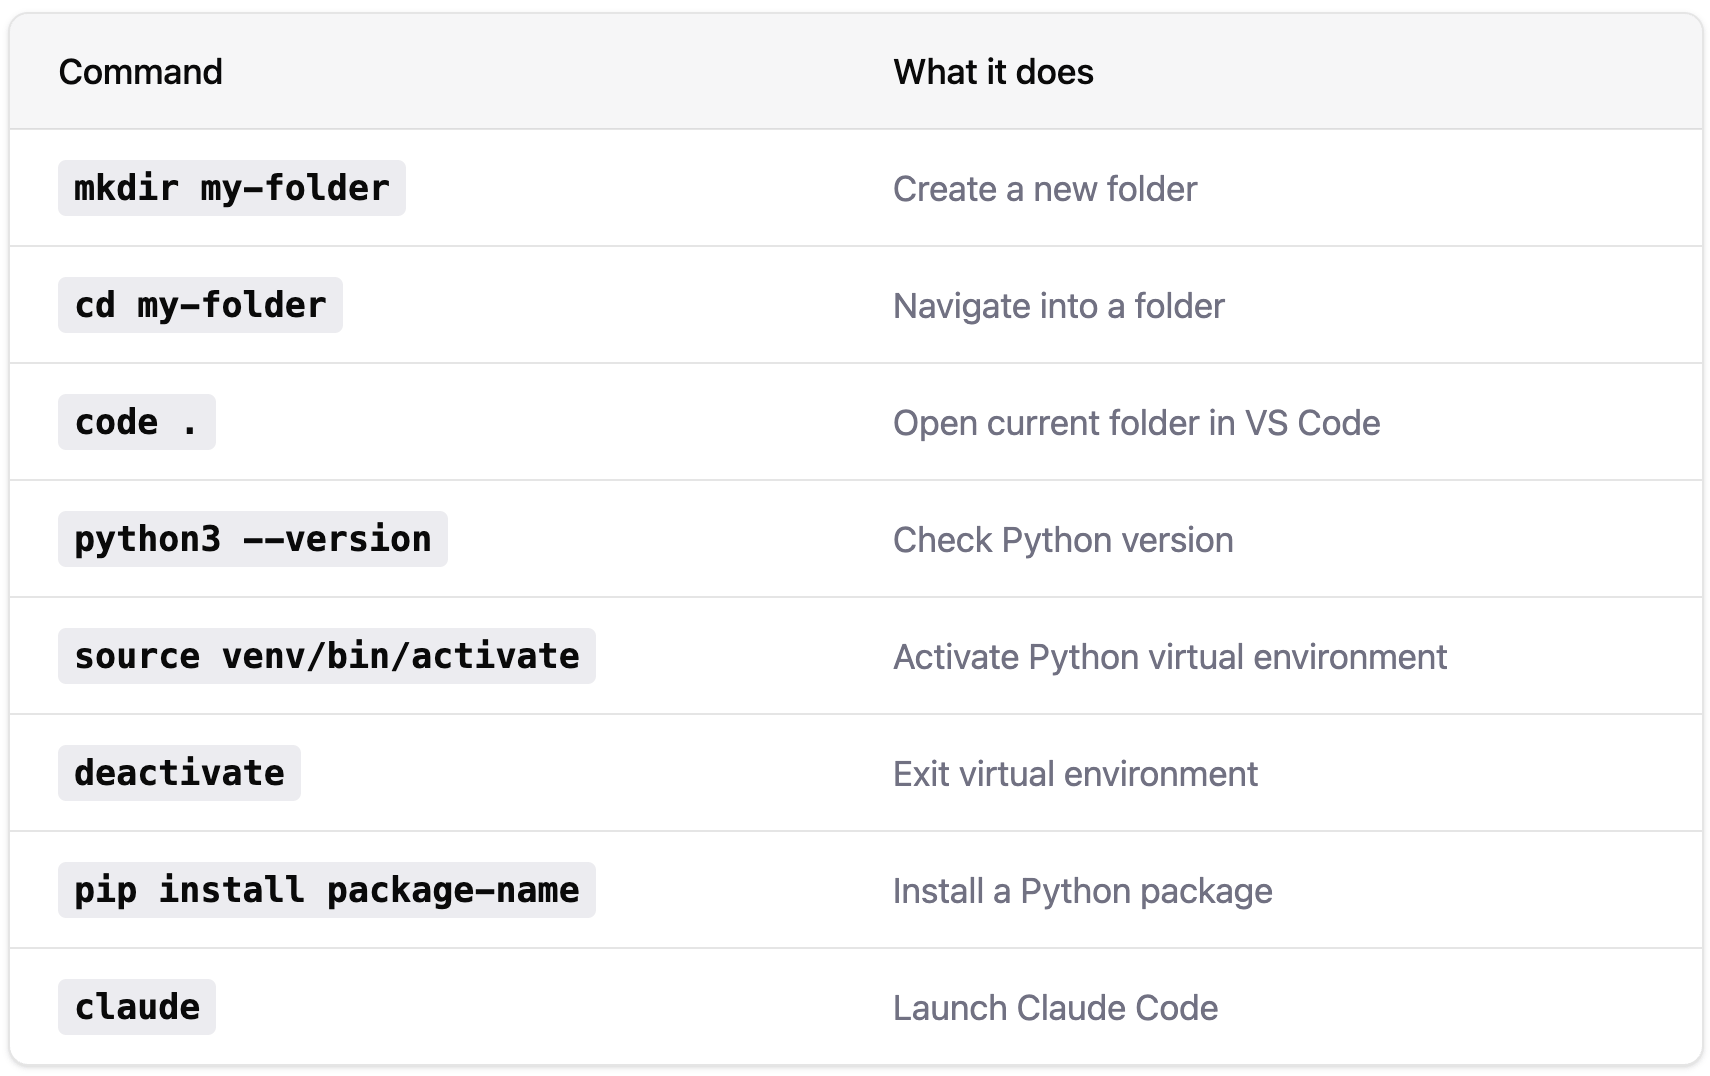
Once you’re set up, your daily loop looks like this:
Open VS Code → your project folder
**Cmd+
** to open terminal →source venv/bin/activate`Click the Spark icon or **Cmd+
** →claude` to open Claude CodeType what you want in plain English — Claude reads your files, makes changes, and shows you diffs to accept or reject
Run your code in the terminal to test it
You’re essentially pair-programming: Claude is doing the typing while you’re doing the thinking and reviewing. Ask it to explain anything it does that you don’t understand; that’s more than half of the learning value right there.
If you are on a long plane ride and need something to help you sleep, here are some resources to consult:
Official VS Code docs: code.visualstudio.com/docs — the “Get Started” section is genuinely excellent
Claude Code in VS Code official docs: code.claude.com/docs/en/vs-code
Python virtual environments: the official Python docs on
venvare clear and shortWhen stuck: ask Claude Code itself — “explain what a virtual environment is and why I need one” is a completely valid thing to ask mid-session
I hope that this has whetted your appetite to do some downloading and experimenting. Remember that about a year ago few people knew anything about what today would look like, and so your not behind! The key is trial an error and more trial and more errors; except now you have a partner to get you back on track and compliment you obsequiously, while never getting tired or irritable or bored.
If you want some ideas about using this for real estate, check out Part 3 “Claude Code aned Real Estate--Some Ideas.” It’s short and--I hope--motivating!
No posts
Comments
Nothing yet. Say the first thing.
Sign in to join the conversation.