
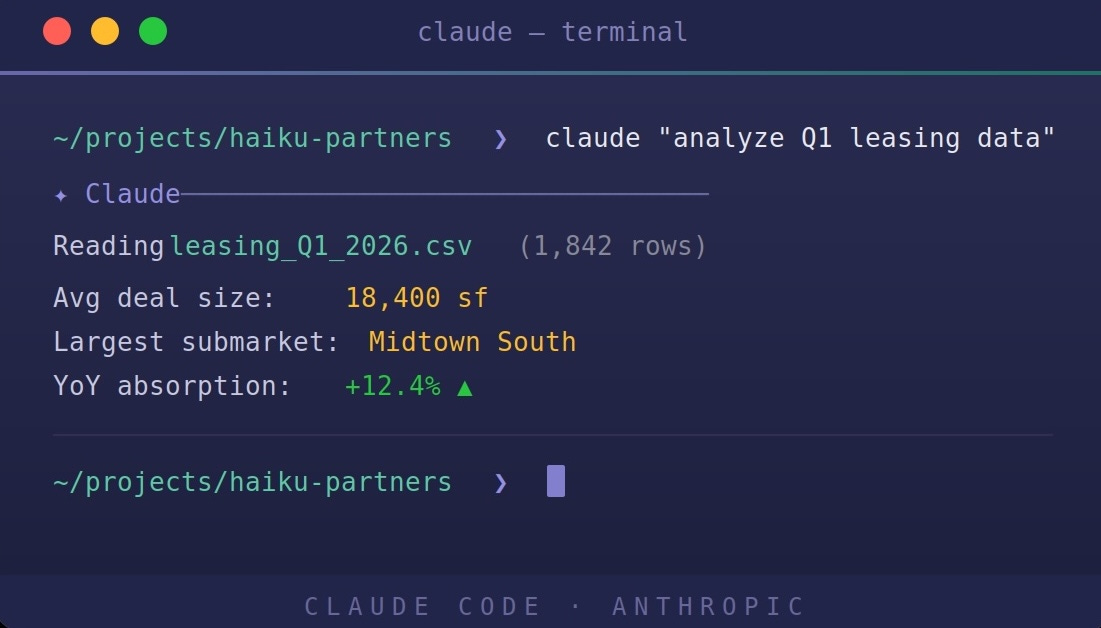
“When you come to a fork in the road, take it.” --Yogi Berra
A lot of what I’m going to say in these three posts (Parts 1-3) has to do with something about which I feel strongly. If you want to use Claude, then you should find a way to use Claude Code. Everything else, in my opinionated opinion, is a distraction created to get the most people into the Claude tent as possible. Claude CoWork, for example, is a distraction. Claude projects and skills that are created through Claude Desktop are distractions. If you disagree with this based on experience or other bias, skip these posts.
So how can one make the leap into Claude Code? There seem to me to be two ways.
The first question you need to ask yourself is, am I now or have I ever been a programmer? If the answer is yes, then the next question is: have I ever used an integrated development environment? If the answer to either of these is yes, then skip to Part 2; If the answer is no, then this post would be the place to start.
If you choose either path (or even if you choose neither) you can take a look at Part 3 for thoughts about real estate and the what can be done with Claude Code.
It is possible (and maybe even optimal) to use Claude Code directly from a terminal, and this section will provide as simple of an explanation as Claude and I could come up with for people who haven’t used a terminal interface before to learn how to use one with Claude. Since I am a Mac user, that will be what we explain; however I’m sure that there are direct analogs to everything in the Windows world. And if you are on Linux, you are almost certaiinly facile with the terminal already.
So how can you get started on using a terminal? First of all you need to conquer your fear. If you have used graphical user interfaces your entire time on a computer, the idea of jumping into Unix-land and its character-only terminal might seem like a giant leap backwards, or at least sideways. But since you have undoubtedly using ChatGPT or Claude or another chat interface (or you wouldn’t have read this far) then you are already halfway there. Terminal is just a chatbot that never graduated from middle school.
So in order to figure out how to use Claude Code and the Terminal, I asked Claude for a plan: here is what we came up with:
Claude Code is a CLI tool (Command Line Interface), meaning you interact with it by typing in a terminal window, not clicking in a GUI. Once launched, it opens a conversational dialog where you can ask it to write, edit, explain, or run code in plain English. That dialog is where you’re headed.
macOS has a built-in terminal (which someone in marketing decided should be named “Terminal”) but iTerm2 is vastly better: more readable, more configurable, and what most Mac power users run.
Go to iterm2.com → Download → drag to Applications
That’s it. Open it like any app.
Homebrew is the standard way to install developer tools on Mac. Think of it as an App Store for command-line software. You’ll use it once here, and it pays dividends forever.
Open Terminal (or iTerm2) and paste this single line:
/bin/bash -c “$(curl -fsSL https://raw.githubusercontent.com/Homebrew/install/HEAD/install.sh)”The installer will walk you through the rest. Takes 2–5 minutes.
(Author’s note: Claude insisted that I include this section).
You can’t use Claude Code for free — access is tied to Anthropic’s paid plans or the API. You have several paths:
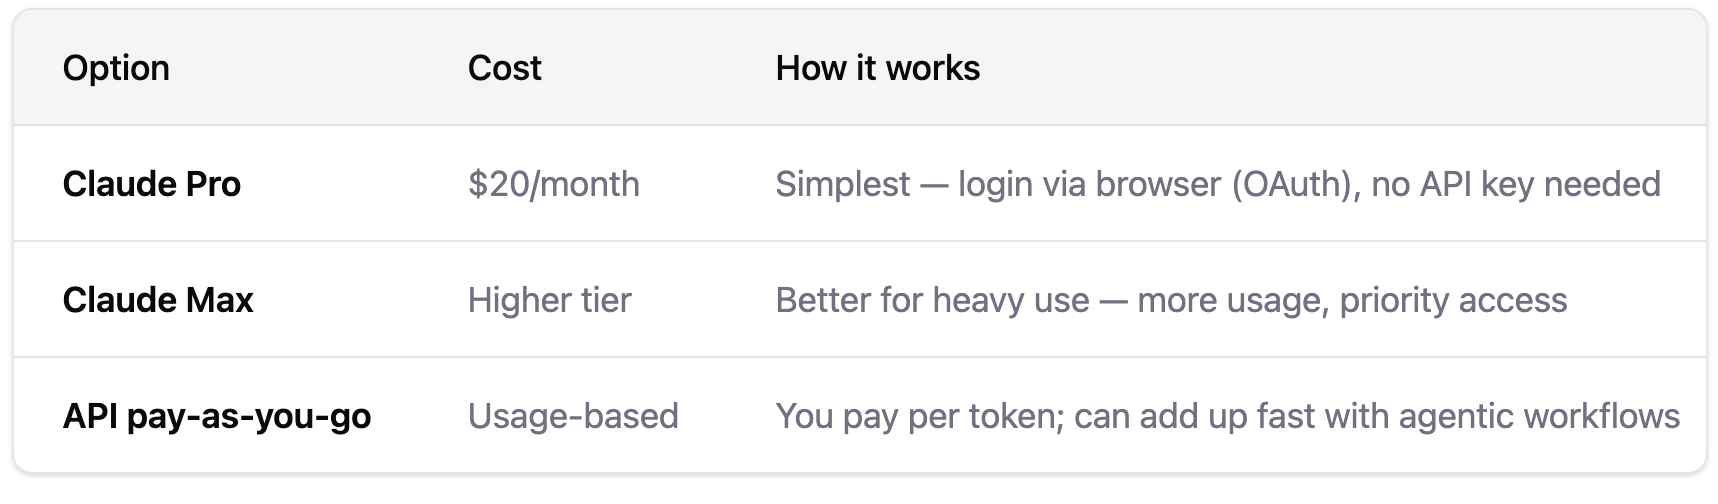
Recommendation for a new player: Start with Claude Pro ($20/month). For regular Claude Code users, a Claude Max subscription is likely the more economical option long-term, but starting with ~$20 in API credits or a Pro plan to test your typical workflows first is sensible. You almost certainly have a Claude.ai account if you got this far. Pro is the upgrade from there.
There is now a native installer — this is the easiest path for a newcomer. To install the native binary, run:
curl -fsSL https://claude.ai/install.sh | bashPaste that into iTerm2 and press Enter. Done.
Verify it worked:
claude --versionYou should see a version number.
Navigate to any folder. Here is where there is both similarity to your Mac finder, and some differences. With any Terminal you need to “cd” or “change directory” to do what you would do with clicks in Finder. Let’s assume that you want to go to your Desktop; you would use cd to get there, and then fire up claude by typing--you guessed it--claude:
cd ~/Desktop
claude
The first time you run it, a browser window opens and you log in with your Anthropic account. If you have a Claude Pro/Max subscription, select that option. No API key is needed and your subscription covers usage.
After that, you’re in the Claude Code dialog. You’re there.
You only need about five commands to get started:
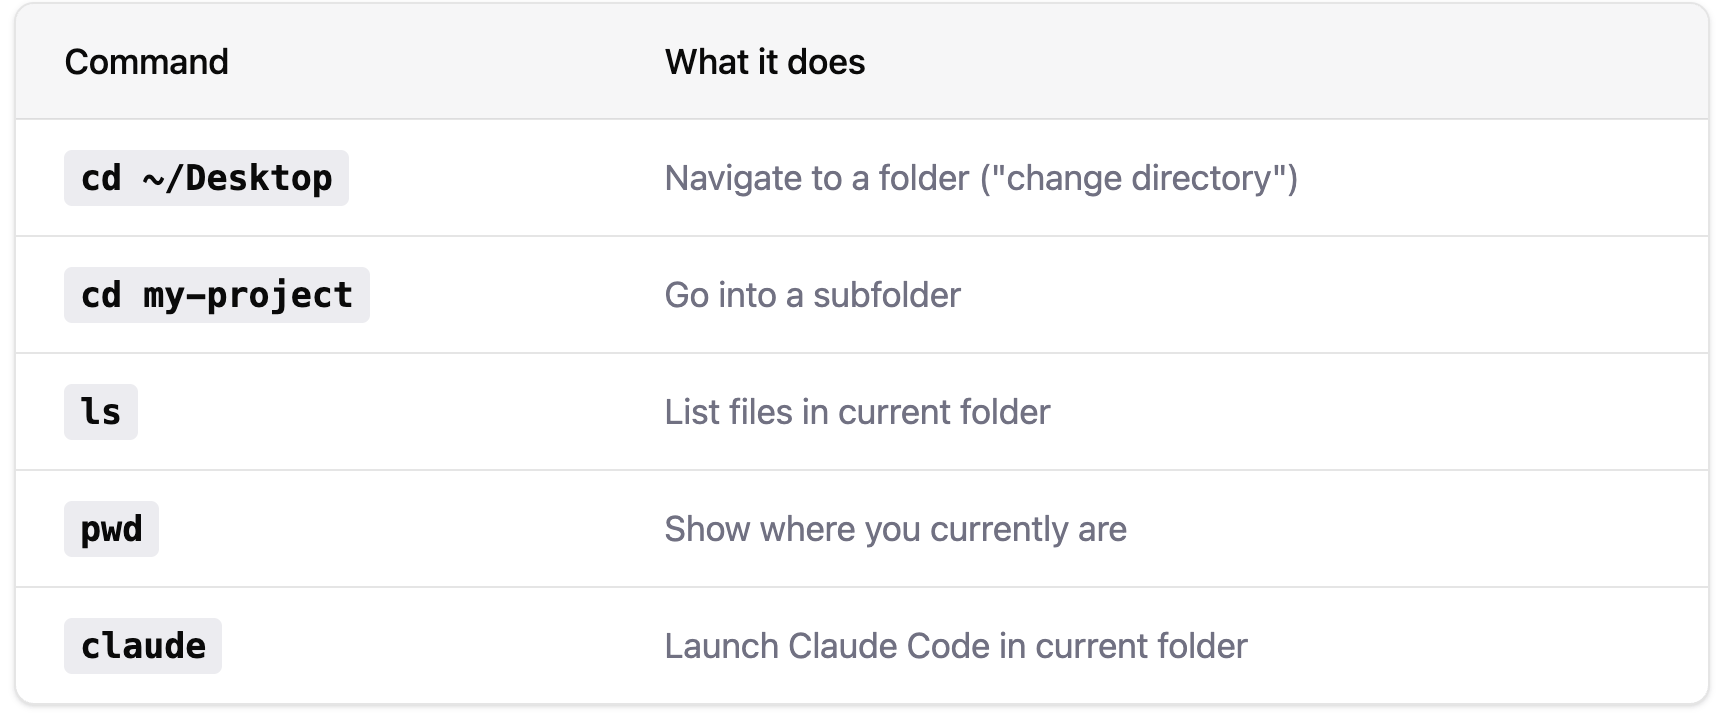
That’s genuinely the minimum. Once you’re in the Claude dialog, you’re talking to Claude in plain English and can ask it to explain anything you don’t understand or need to do.
Claude has something called “plan mode.” You invoke it by asking Claude politiely to enter plan mode. Then you tell it what you want to plan out, and it will coach you through all the steps interactively, asking good questions all along the way. This is an expert tip that is equally valuable for non-experts.
Here are some additional resources if you like to read.
Official docs:
docs.anthropic.com/en/docs/claude-code/overviewTerminal basics: Apple’s own “Terminal User Guide” (search in Safari) is surprisingly good for absolute beginners
Practical shortcut: Once you’re in the Claude Code dialog, just ask Claude itself — “what terminal command do I use to navigate to my Documents folder?” It will tell you.
Install iTerm2 via iterm2.com
Install Homebrew (one-line paste in terminal)
Upgrade to Claude Pro at claude.ai if you haven’t
Run
curl -fsSL https://claude.ai/install.sh | bashto install Claude CodeRun
claude --versionto confirmRun
cd ~/Desktopthenclaudeto launchAuthenticate via the browser window that opens
Start talking to it; be nice
The whole thing from zero to first dialog is probably 30–45 minutes, most of which is waiting for installs.
If you liked this post and are feeling ambitious, you can take a look at Part 2 coming soon. It’s more technical and not for everyone, so If you want to see how this might apply to you as a real estate professional, take a look at Part 3: “Claude Code and Real Estate--Some ideas.”
No posts
Comments
Nothing yet. Say the first thing.
Sign in to join the conversation.