
It was only right that with the never ending heatwave outside, I dropped two ice cream recipes (for the price of one) into your inboxes! I had the chance to play with an ice cream machine this week and it meant I got to experiment again with my classic ice cream base recipe and I’ve managed to develop a cheats soft serve and a super rich custard ice cream.
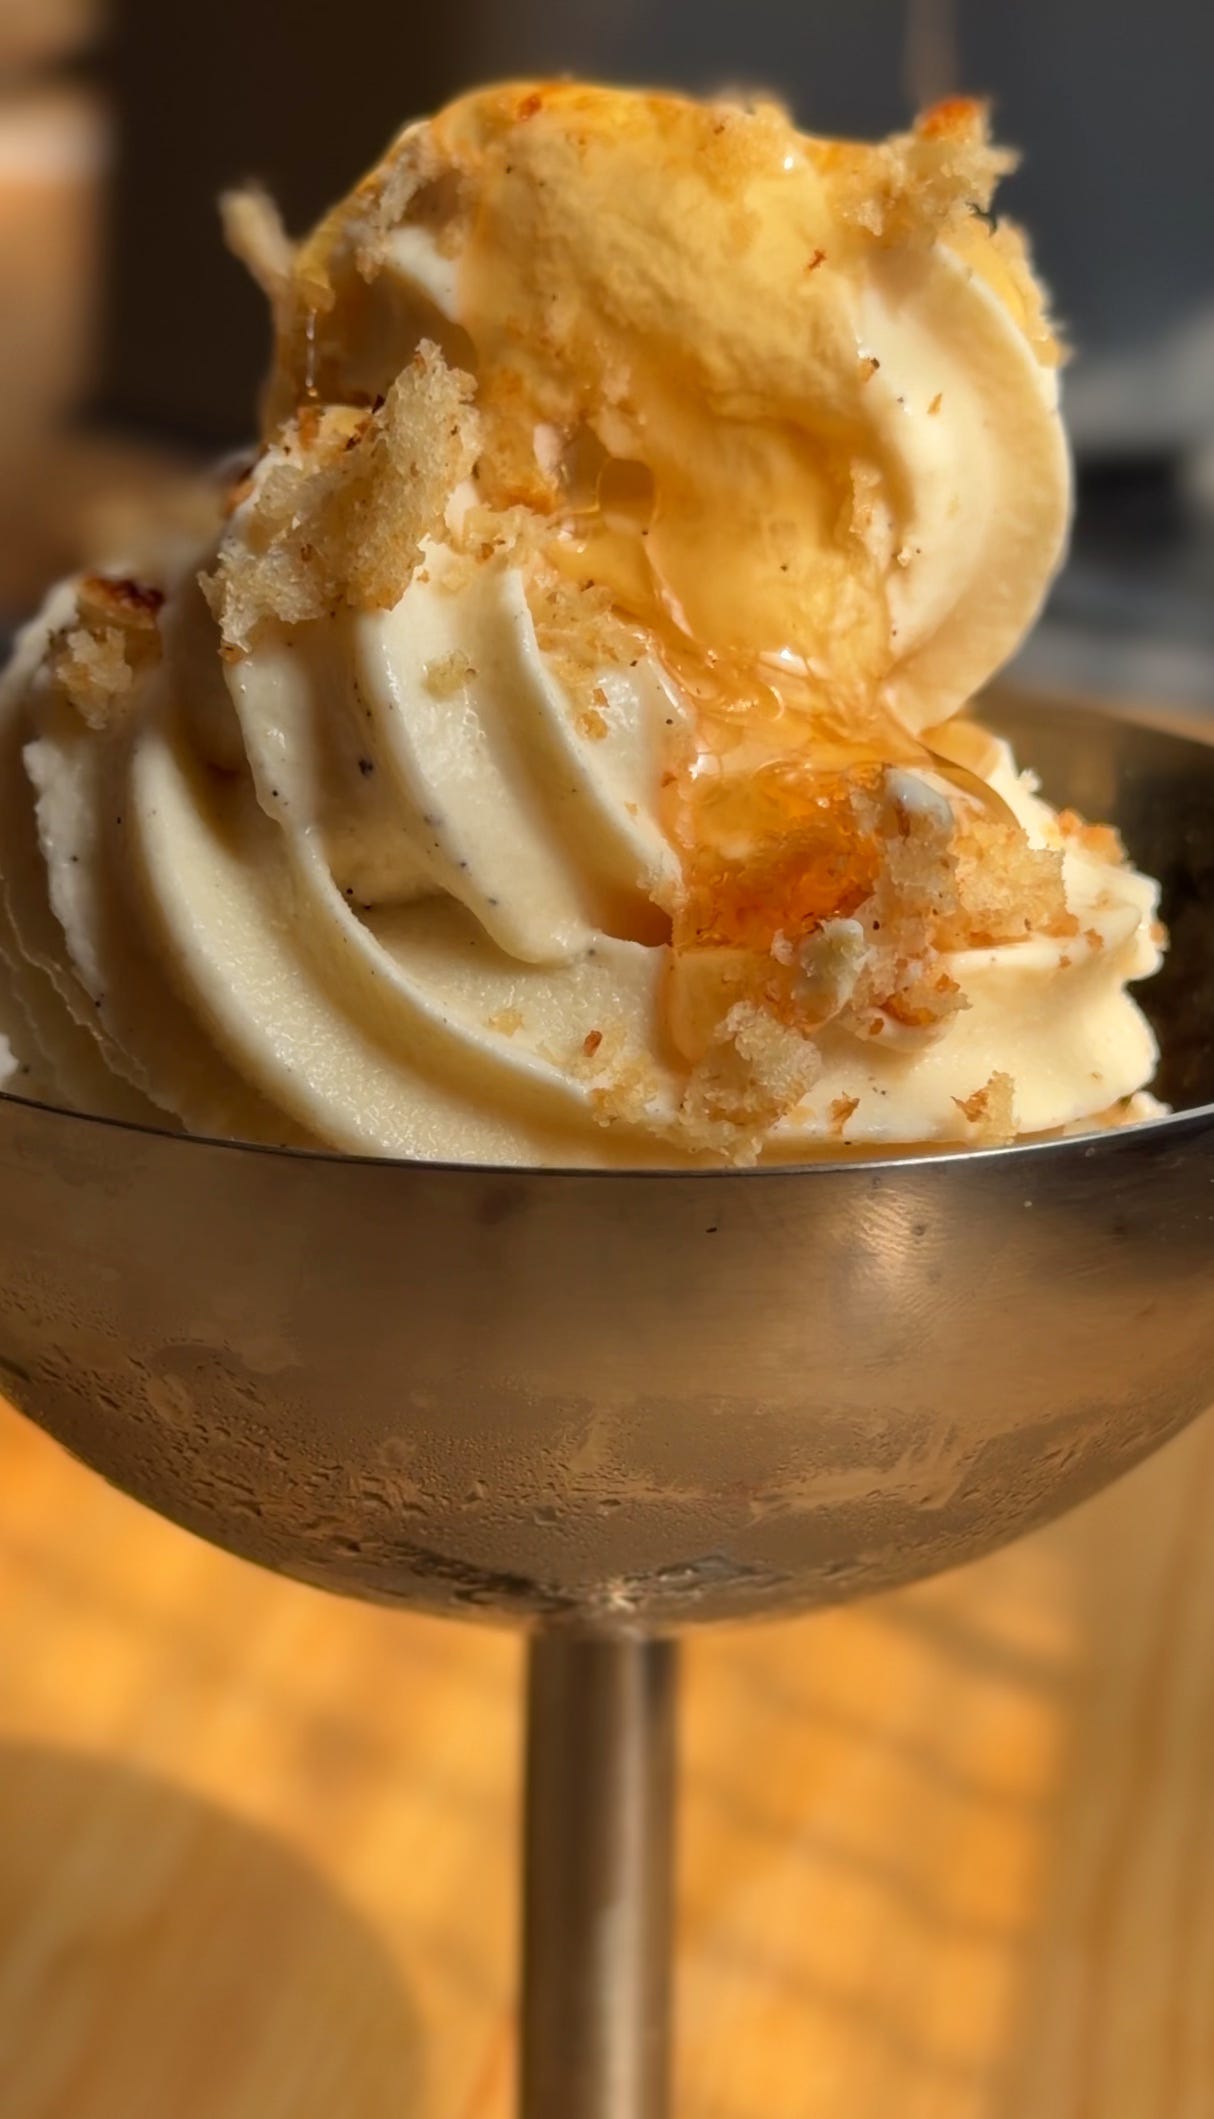
Recipe one: a soft serve that blends beautifully into a milky creamy dream, with an extra-luxurious mouth feel due to the brown butter inside and the use of Jersey milk & cream in the base. I made mine all in one container, froze, then churned the next day in the machine using the soft serve setting.
Recipe two: a custard ice cream base that’s the definition of indulgent, with an umami balance of miso and the malty flavours of sourdough bread that pair together for a truly memorable flavour combo. All married together with a lightly salted toasted marshmallow fluff that is toasted as it mixes for added flavour.
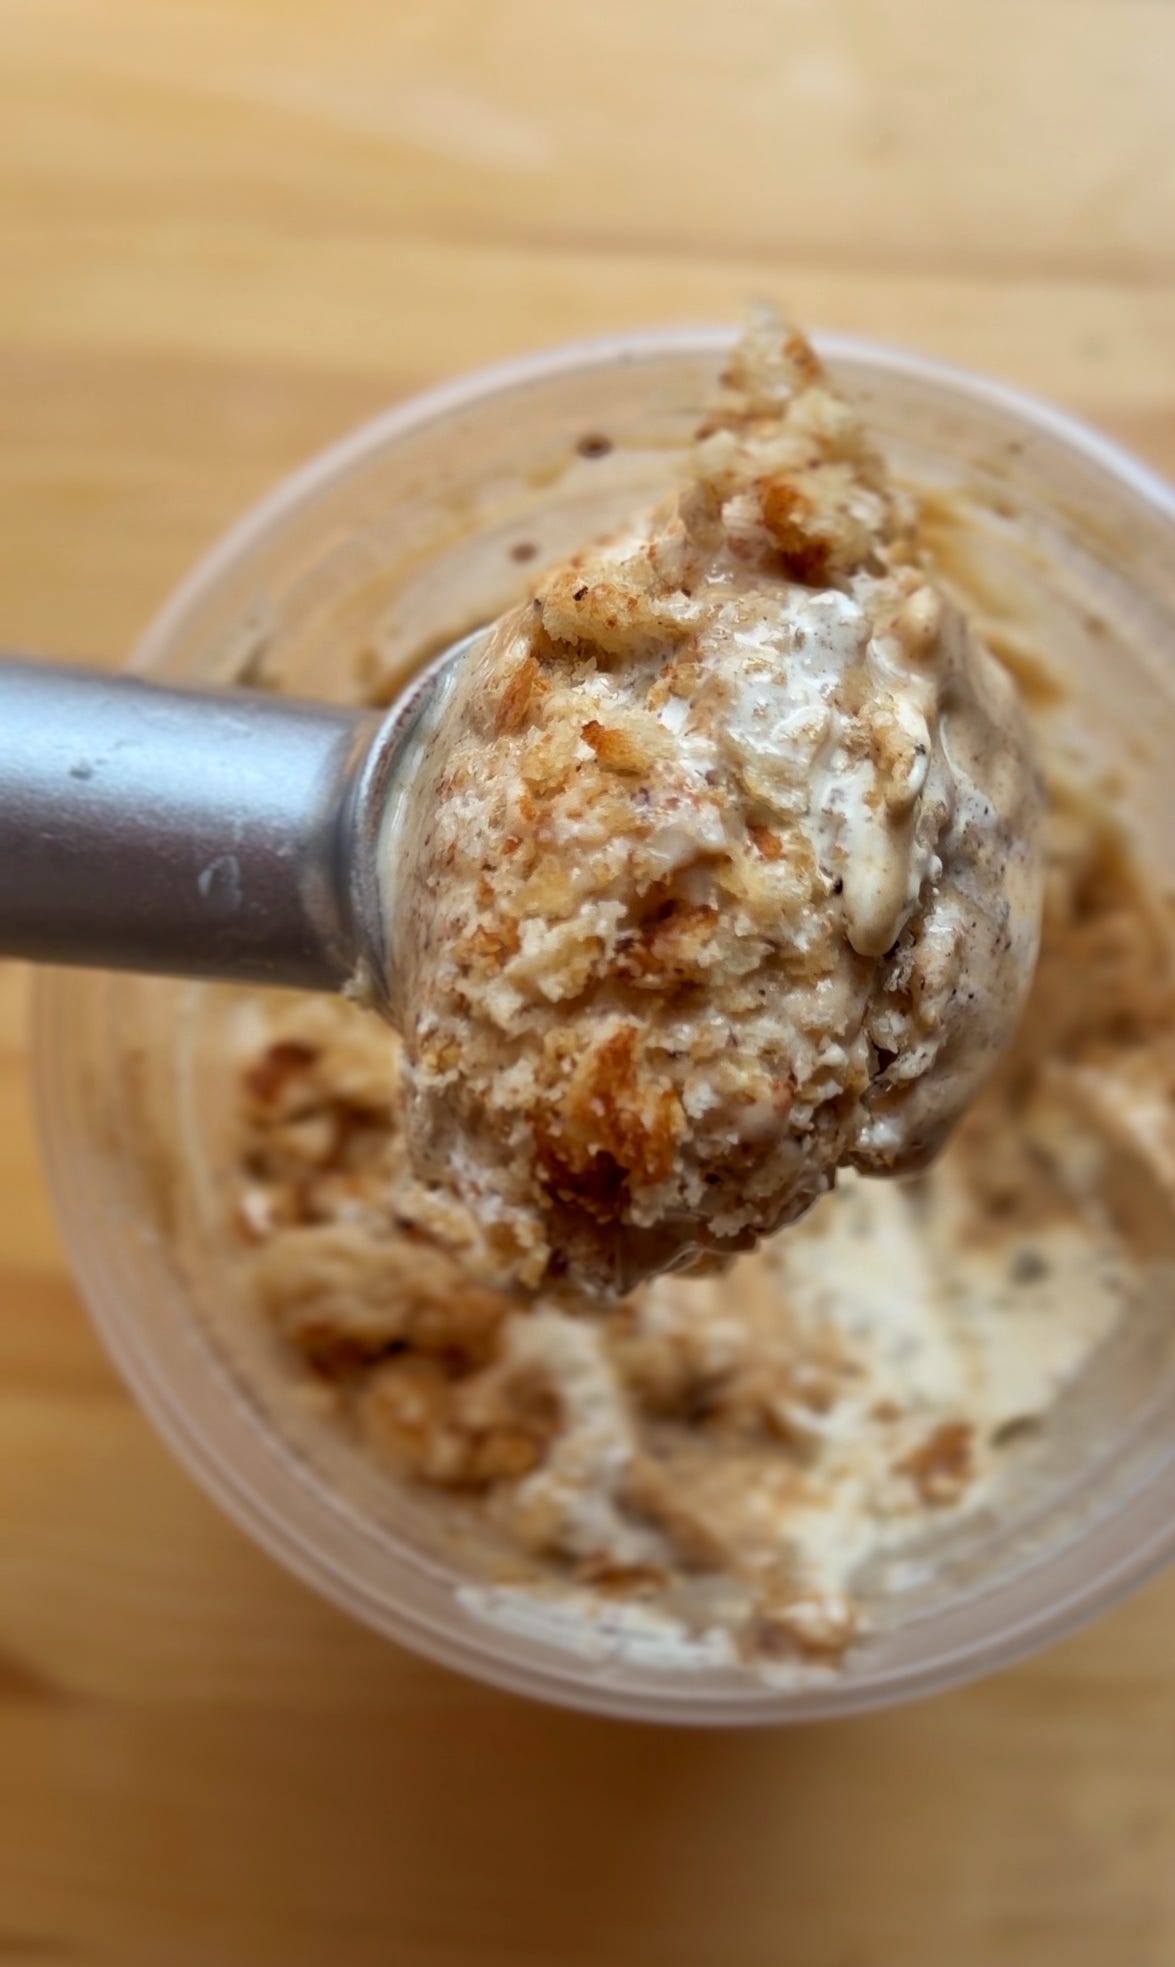
Both of the recipes below were made using my Ninja CREAMi Scoop & Swirl in a paid partnership.
Ingredients
250g whole milk
150g double cream
165g condensed milk
40g unsalted butter, browned
1 tsp vanilla
1/2 tsp white miso paste
Blender or immersion blender
Scales
Measuring spoons
Bowls
Spatula
In a small light coloured saucepan, add in your unsalted butter. Cook on a low to medium heat until foamy, golden and nutty. You should be able to smell the change in the butter. Be sure to stir as it cooks so it doesn’t burn. You will stop once the brown flecks appear at the bottom of the pot.
Immediately remove from the heat and set aside (you do not need to wait for it to cool to use in the next step).
In a blender add all your soft serve ingredients in, including the brown butter you just made. Blend until combined, around 1 minute.
Add to your ice cream machines designated container and freeze for 24 hours as per instructions.
The next day, churn the ice cream into soft serve using the machines soft serve setting.
I finished mine with honey and some smoked Maldon flakey sea salt.
This ice cream can be made in any home ice cream machine. It is a churn ice cream so you will need a machine that churns ice cream.
Toasted sourdough crumbs
3 slices of sourdough toasted & buttered with miso butter.
40-50g butter
Miso vanilla bean ice cream base
300g whole milk
120g double cream
1 1/2 tsp vanilla bean paste or extract
40g milk powder (optional but helps with mouth-feel)
50g caster sugar
30g light brown soft sugar
10g honey
3 egg yolks
1/4 tsp salt
1/4 tsp white miso paste
15g plain flour or 10g cornflour
Homemade sea salt marshmallow fluff
125g egg whites
¼ tsp cream of tartar
245 g granulated sugar
190g g golden syrup
90 g water
Pinch of sea salt (1/8th tsp)
Tools
Stand mixer or electric whisk
Scales
Saucepan
Toaster
Scales
Measuring spoons
Spatula
Whisk
Brown Butter Toast Flakes
In a toaster add your slices of bread and toast for 2-3 minutes until lightly golden.
Butter with salted butter and tear into a food processor or blender. Blend/pulse in the food processor until you have fine flakes.
Cover and set aside until later.
Custard Base
In a medium saucepan add your whole milk, double cream & vanilla and turn the heat to medium. You want your milk/cream mixture steaming, but not boiling.
Whilst the milk is heating, in a separate bowl, add your egg yolks, caster sugar, light brown soft sugar, honey, salt and miso paste. Whisk for 1 minute until light and fluffy & doubled in volume.
Now add your milk powder and whisk again just until combined. Lastly, add your plain flour and whisk one last time to combine.
In the meantime your milk should be steaming hot by now so remove from the heat and pour slowly over the egg mixture in 3 additions, whisking constantly. Make sure to whisk really well so the eggs don’t scramble.
Once fully whisked and all the milk is added, pour the mixture back into the pot and turn to a medium heat.
Cook your custard base, stirring consistently until thick. You’ll know it’s ready when large bubbles start popping on the surface.
Transfer the custard back into the original bowl and put cling film touching the surface (so a skin doesn’t form).
Leave to cool down for 1 hour at room temp, then transfer to a fridge for at least 4-6hours (this helps age the ice cream base which develops flavour & texture).
If using a Ninja Creami, after 4 hours transfer to your machines ice cream container and place in the freezer for 24 hours.
After 24 hours, churn on the cream setting, then transfer to a container and layer with the fluff & toast crumbs. Freeze for 6 hours minimum, then it’s ready to eat.
If using any other ice cream machine, follow the instructions for that machine on how to churn the base and then follow the layering steps below to finish.
In a medium saucepan, add your golden syrup, water and sugar (in that order).
Turn the heat to high and using a thermometer cook your sugar syrup until it reaches 124c.
Whilst your syrup is heating up, add your egg whites to a bowl of a stand mixer (or use a regular bowl with your electric whisk). Also add your cream of tar tar.
Whip the egg whites for at least 2 minutes until fluffy, foamy and doubled in volume.
By now your sugar syrup will almost be ready, once it is, slowly pour your sugar syrup directly into your egg whites, and turn your mixer or electric whisk on high and whip for minimum 5 minutes. The mixture will be glossy and white when you’re done and it will hold a firm shape.
After 5 minutes stop mixing and add the salt & vanilla and using your blow torch, torch the top to form a burnt skin on the top of the fluff. Now whip again. Pause the mixer and torch the surface again, then whip once more. Repeat this process 4 times until you have lots of little flecks of toasted marshmallow fluff in your bowl. This really amps up the flavour.
Once done, cover with cling film. Store in the fridge until you need to layer your ice cream as per the instructions below.
Layer your ice cream
After you’ve churned your ice cream, layer it into a tub ready for the freezer.
The layers go: Ice cream, then big spoonfuls of fluff, then your toast crumbs and keep layering until your tub is full.
Freeze for minimum 6 hours and then it’s ready to eat!
Bakers Notes
Do not skip ageing the ice cream base, it is so important for mouth feel and overall texture.
The marshmallow syrup will heat up quickly so please keep an eye on it and ensure it doesn’t go above 124c.
No posts
Comments
Nothing yet. Say the first thing.
Sign in to join the conversation.