
Dear Lennard,
Thanks for your response to my question about the creep with my SRAM Force D2 calipers. I feel like an idiot! I clean my mountain bike brake pistons a couple of times a year because they’ll physically get stuck. I didn’t put two and two together thinking road riding wouldn’t create a similar problem with dirt on the pistons. I do blow the dust off those pads and calipers every 2-3 rides with my air compressor, which is most likely just blowing the dust further into that seal around the piston. I’ll clean my act up!
Stan
Dear Stan,
You’re welcome! I hope it fixes the problem.
― Lennard
Dear Lennard,
Great experiment, though only in a warm/hot dry environment. I wonder whether the dried-out dish soap actually helped cement the tire bead. It’s reassuring to know that even LZ is sometimes lax about topping up the sealant.
RF
Dear RF,
I wonder the same thing. And you inspired me to top up the sealant in some other tires that needed it.
― Lennard
Dear Lennard,
Your recent puncture situation where you discovered that all the sealant in that tubeless tire had hardened got me to wondering if summer heat, especially if the bike is stored in a hot garage, can cause that sealant to go bad. For that matter, for all of us who store our bikes, bike tools, etc. in a garage that is subject to temperature extremes, are we shortening the lives of tubes, liquids and other bike components? Here in the Central Valley of California, 100-degree days are commonplace in summer. Ditto for the interior of the garage. Thank you for all you do!
Fred
Dear Fred,
This has been an exceptionally hot summer in Boulder. And my garage is very well insulated, which means that if I close it after having had it open in the heat of the day it maintains that temperature—even increases it from retaining additional heat from sunlight coming in through the triple windows. So my tires are certainly sitting at elevated temperatures a lot. It does seem likely that high temperatures could accelerate the solidifying of sealant in tubeless tires. As for other liquids stored in the garage, I no longer store rubber cement and wood glue in the garage; they seem to last longer after being opened when stored in the house. That would likely also be the case with tire sealant after the bottle has been opened, but it’s a bit messy to store in the house, and I also go through it pretty fast.
― Lennard
Dear Lennard,
I have been having an issue with my chain dropping when moving from the front big chainring to the small chainring. It only happens occasionally. Usually when I make a switch to the small chainring at high cadence. It happens enough that I am very wary of my gear changes.
According to Park Tools video and your Road Bike Maintenance manual, with the chain on the big cassette and big chainring, you should have two extra chain lengths. On my chain I have 5 extra chain lengths. I’m wondering if this is the cause of my chain dropping. I thought maybe the new Ultegra 12 speed derailleur requires a longer chain. Is this true?
My last ride the chain dropped and wrapped around the bottom bracket somehow and I was unable to get the chain back on. I had to get a ride home and remove the master link to get the chain off the bottom bracket. I have no idea how that could have happened.
I’ve enclosed pictures of the chain length on the big chainring and big cassette and a picture of the chain drop mishap.
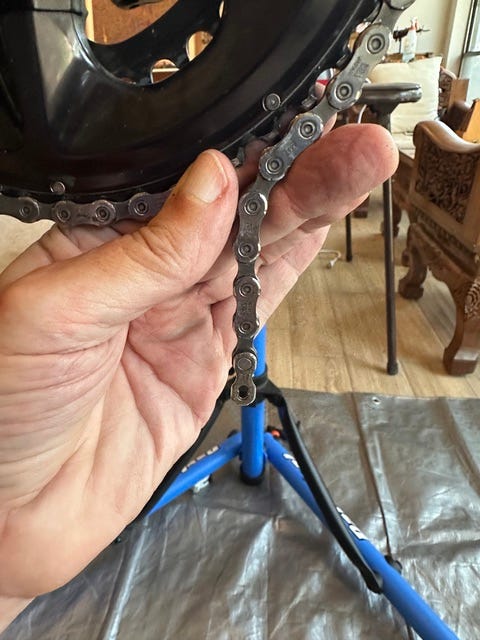
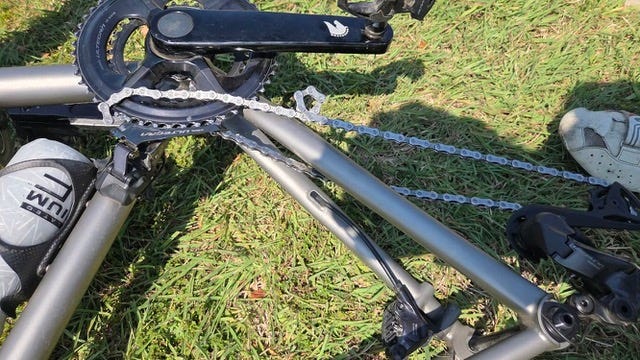
I need to know if I need to shorten my chain and by how much. Thanks.
Mike
Dear Mike,
The main point on going big-big and adding links to determine chain length is to ensure that there is enough chain—that there is no way to tear the rear derailleur (RD) apart by shifting to big-big. After that, there is room for some extra links, and rear cog engagement is improved with more, since there is more chain wrap.
As you probably saw in my book, there are lots of ways to determine chain length.
The older methods can only be used in today’s world of much bigger cassettes if enough chain length is ensured by checking that there is at least one extra link pair (two “chain lengths” as you described them) when wrapped big-to-big. Once that is ensured, methods like having the jockey wheels vertical in big-small—which takes more links the longer the RD cage is—creates less drivetrain friction than just making it so that the RD cage is pulled almost straight out in big-big, which the one extra link pair when wrapped big-big without passing through the derailleur provides.
In the 1970s and early 1980s, we used to race with so much chain that the bottom length of chain was sagging. That was to eliminate as much chain friction as possible by preventing the jockey wheels from pushing against the chain. Shifting was crappy, but it was crappy anyway then with frictional down-tube shifters (no indexing, if you youngsters can imagine it), and I’m not sure it was any worse than when the chain length was correct.
If you shift big-big and have some downward rotation of the RD cage, shifting should be good—and likely better in the rear due to more chain wrap and the upper jockey wheel coming up closer to the cassette across the entire range, thus putting a sharper lateral bend in the chain with a shift command and hence snappier shifts. At the same time, it would be reducing chain tension on the bottom length of chain, thereby reducing chain friction.
You can certainly remove one link pair from your chain. You still won’t break your derailleur in big-big, which is the main thing. I doubt it will improve your shifting if you do. It will create noticeably more drag when you shift to big-big, because that RD lower knuckle return spring tension will be maxed out.
I think the source of your chain drop is more likely improper front derailleur (FD) adjustment. Here’s the adjustment method for a 12-speed Di2 front derailleur:
You can adjust the derailleur two different ways, the first one being with the E-Tube app.
Once you have opened the app, hold down the button on the rear derailleur until the LED flashes blue, indicating Bluetooth mode. Under the Maintenance tab, follow the instructions on your phone screen to adjust the derailleur.
Without using the app, here’s how to do it using the buttons on the derailleurs and levers:
1. Shift to the large chainring and smallest rear cog.
2. Hold down the button on the rear derailleur until the LED glows yellow. You’re now in adjustment mode.
3. Micro-adjust the front derailleur position using the shift buttons on the left lever. Click the appropriate button until the outer cage plate is 0.5–1mm from the chain.
4. Press the button on the rear derailleur to leave adjustment mode.
5. Shift to the largest rear cog. The chain is still on the big chainring.
6. Hold down the button on the rear derailleur until the LED lights up yellow. You’re again in adjustment mode.
7. Micro-adjust the front derailleur position using the shift buttons on the left lever. Click the appropriate button until the outer cage plate is 0-0.5mm from the chain.
8. Press the button on the rear derailleur to leave adjustment mode.
9. Shift to the inner chainring and largest rear cog.
10. Hold down the button on the rear derailleur until the LED glows yellow. You’re again in adjustment mode.
11. Micro-adjust the front derailleur position using the shift buttons on the left lever. Click the appropriate button until the inner cage plate is 0-0.5mm from the chain.
12. Press the button on the rear derailleur to leave adjustment mode. Done!
I hope this resolves the issue and your chain never drops when shifting again.
― Lennard
Subscribers can send brief technical questions to Lennard at: veloqna@comcast.net.
Lennard Zinn has been designing and building custom bicycles for over 45 years; he founded Zinn Cycles in 1982 and co-founded Clydesdale Bicycles in 2017 and Tui Bikes in 2022. His Tech Q&A column on Substack follows his 33-year stint as a technical writer for VeloNews (from 1989 through 2022). He is a former U.S. National Cycling Team member and author of many bicycle books including Zinn and the Art of Mountain Bike Maintenance, Zinn and the Art of Road Bike Maintenance, and The Haywire Heart. He holds a bachelor’s degree in physics from Colorado College.
Follow Lennard Zinn on Substack, Strava, X, Instagram, LinkedIn, or Facebook.
No posts
Comments
Nothing yet. Say the first thing.
Sign in to join the conversation.