
Scroll down if you’re looking for the day 2 update!
I’ve been dreaming up something special to celebrate—and this is it.
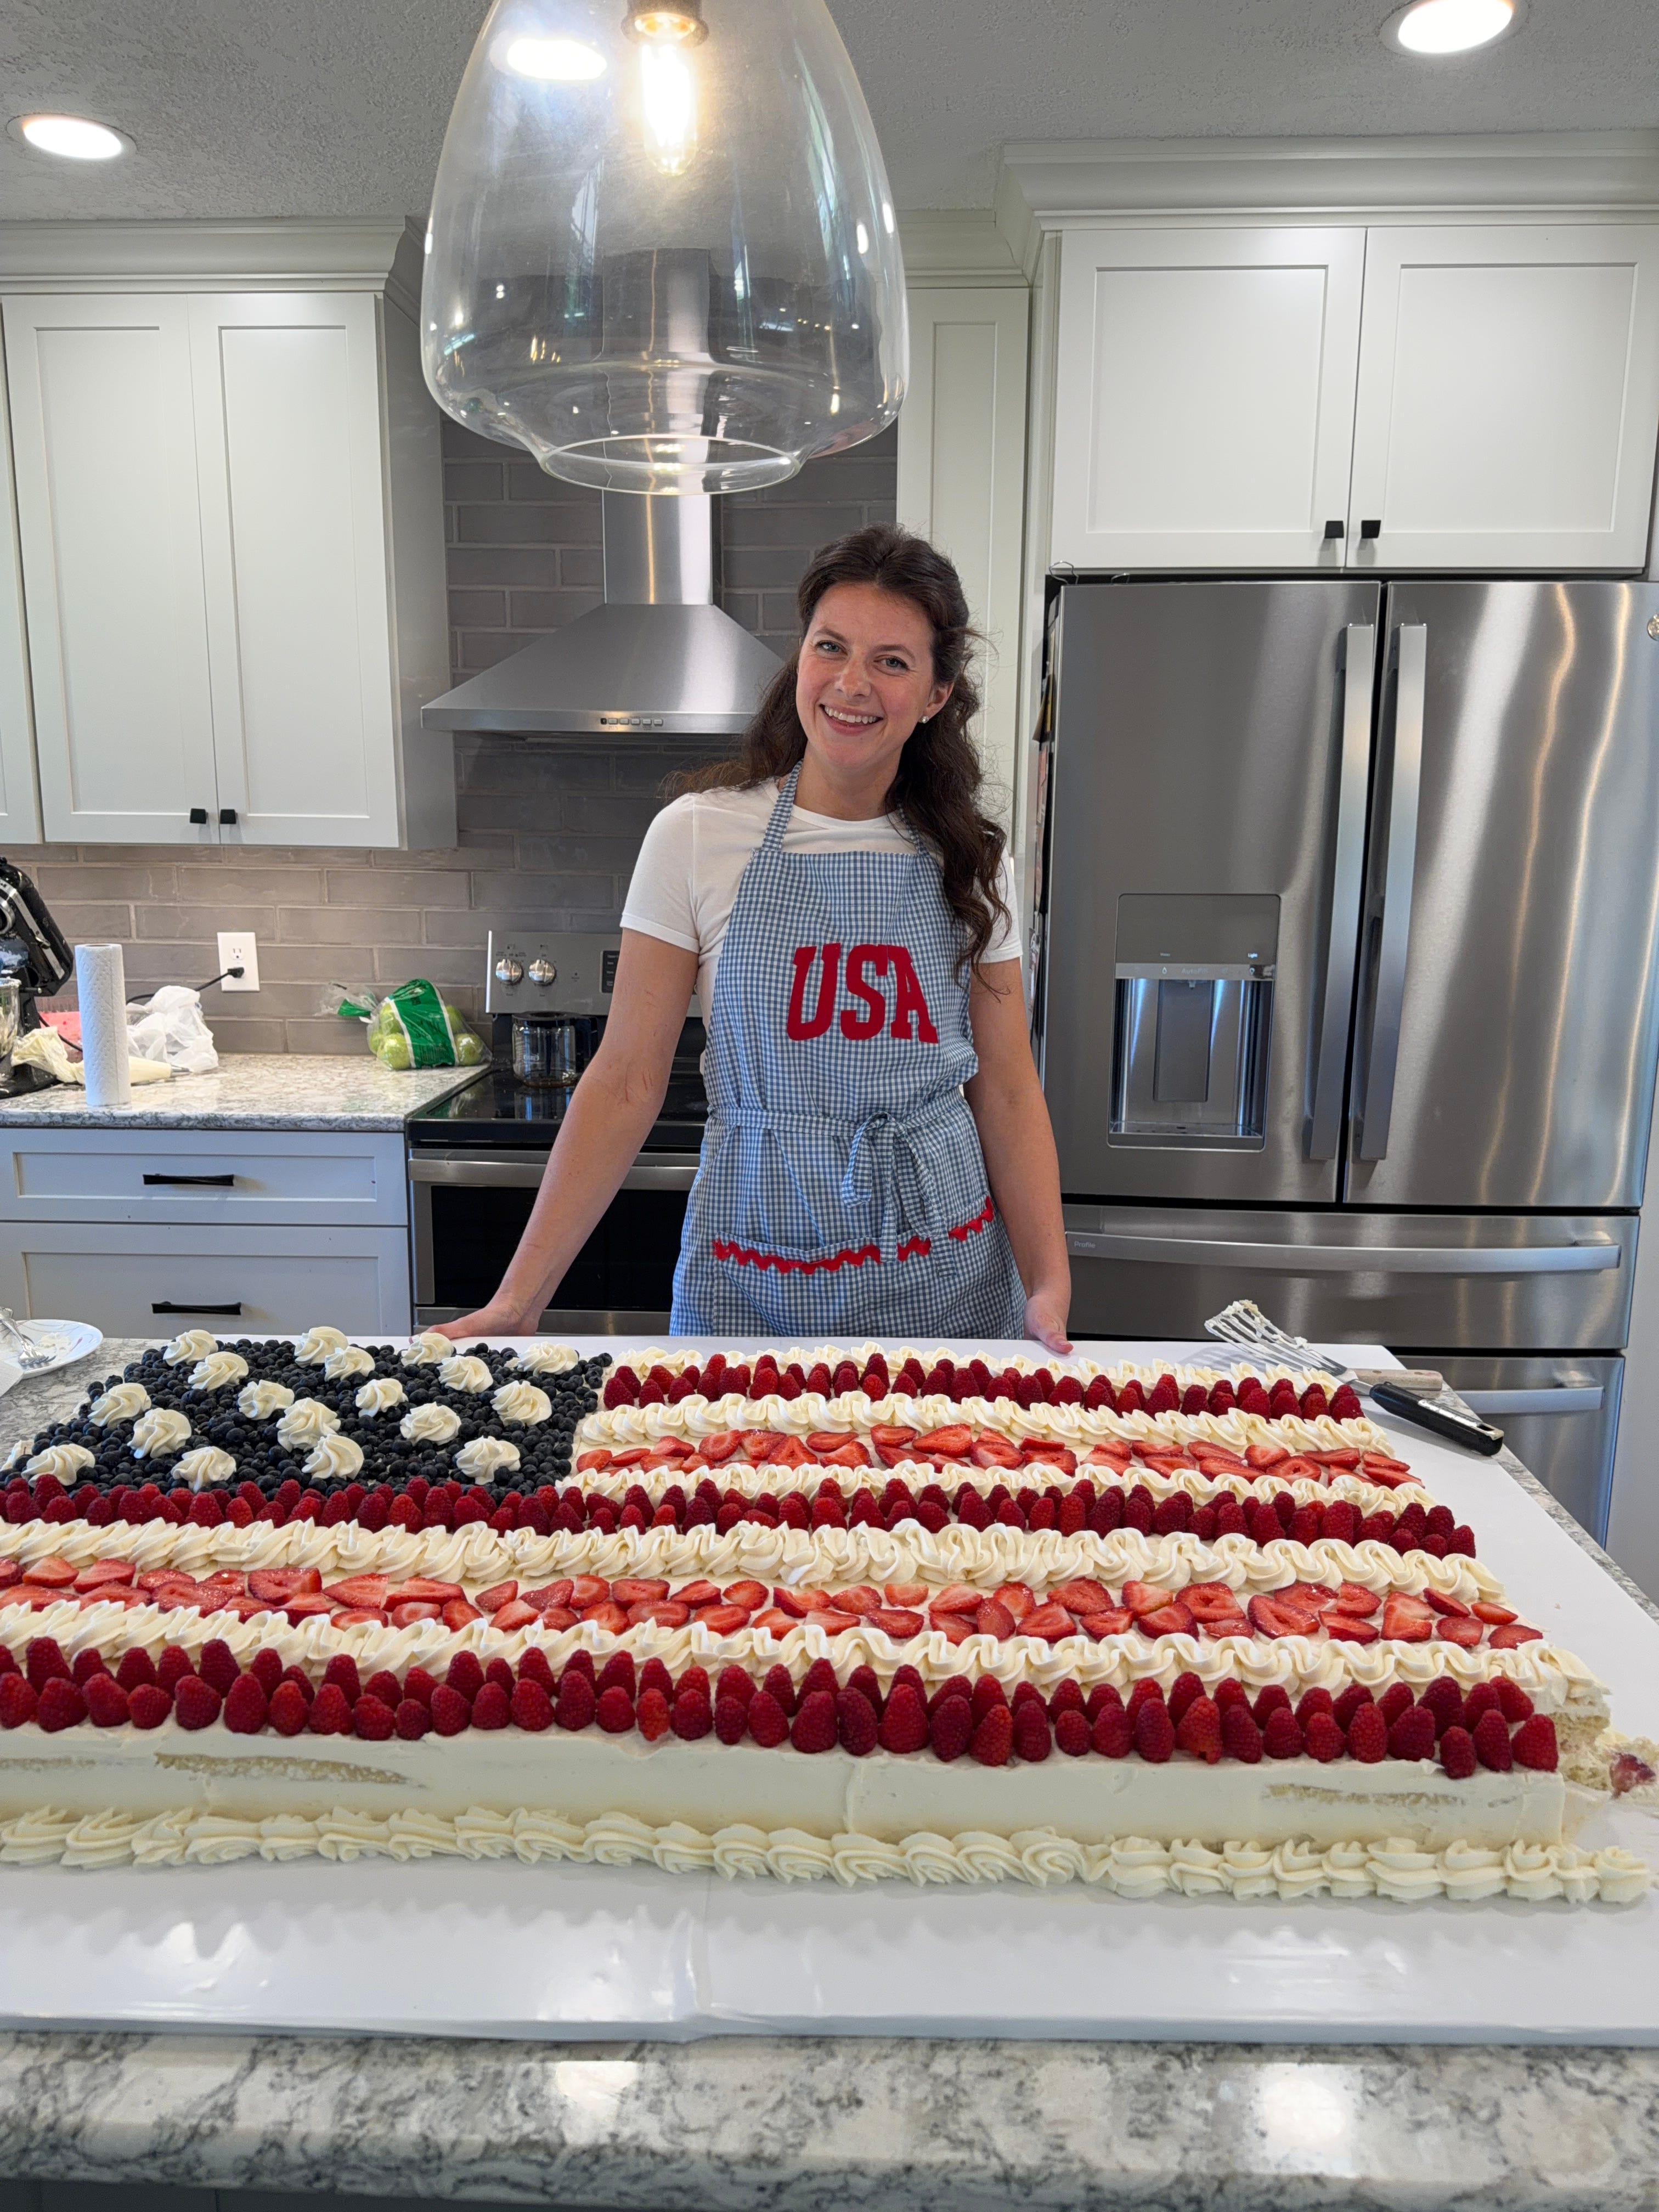
We’re making a flag cake together… but the best part is: you get to decide how big.
This was inspired by a giant version I saw, but I wanted to make it feel doable—whether you’re baking one cake for your family or building something that takes up your whole table.
Today is simple: we bake the cakes.
Everything in this series is built off one “block”:
👉 One 13 x 18 inch cake… stacked into two layers
So for every “block,” you’ll actually bake 2 cakes (so you can stack them).
Here are a few options depending on how big you want to go:
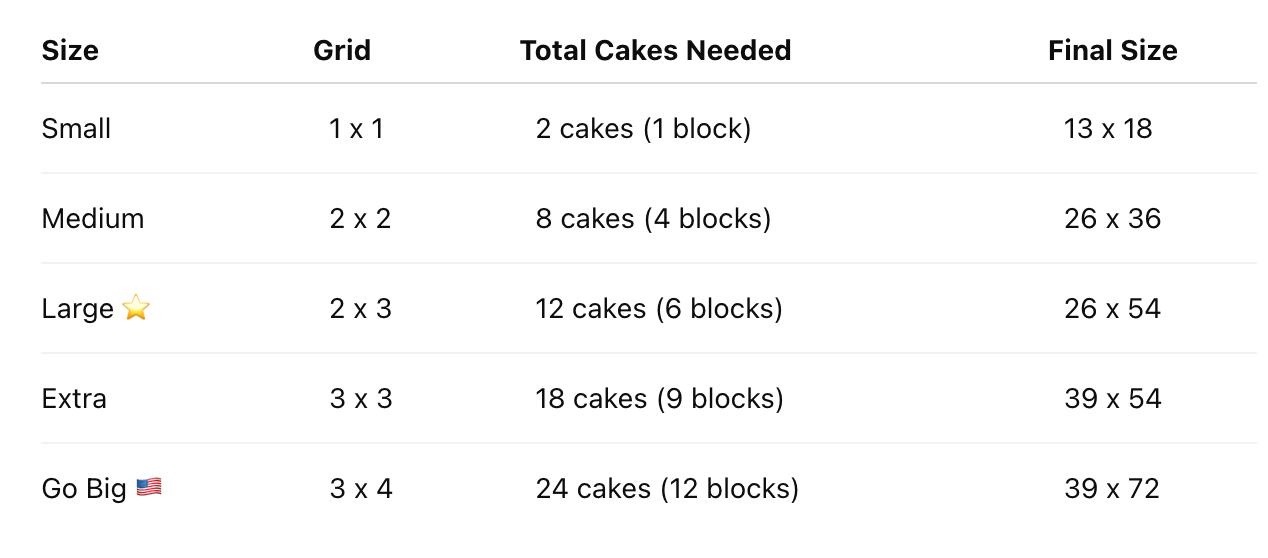
👉 I’m making the 2 x 3, which means:
6 blocks
12 total cakes (since each block is 2 layers)
I’m keeping this super simple and using box cake mix.
Here’s how I make it taste homemade:
For each box mix:
Add ½ cup sour cream
Add 2 teaspoons vanilla extract
That’s it. It gives you a richer flavor and softer texture.
Since box mixes don’t usually include directions for this size, here’s what I recommend:
Bake at the temperature listed on the box
Start checking at 15 minutes
Most cakes will be done around 15–18 minutes
👉 If you’re baking multiple pans at once, it may take a little longer—just rotate the pans halfway through and keep an eye on them.
You’re looking for the center to be set and a toothpick to come out clean.
I’m using my whipped vanilla frosting, which is like a stabilized whipped cream:
heavy whipping cream
cream cheese
powdered sugar
vanilla
It’s light, not too sweet, but still sturdy enough to stack and frost.
You can use your favorite frosting too—just make sure it’s spreadable and stable.
Once your cakes are baked and cooled:
Place each cake on a cardboard cake board
Add a layer of parchment underneath
Flip the cake onto the board
Wrap tightly in plastic wrap
You can:
Leave them at room temp short-term
Refrigerate
Or freeze them (they freeze beautifully)
👉 I’m assembling tomorrow, so I’m not too worried about storage—but freezing is a great option if you want to get ahead.
Here’s our simple timeline:
July 2 (today): Bake the cakes
July 3: Stack and prep
July 4: Frost and assemble the flag 🇺🇸
And real life note—this is going out a little late in the day, so if you don’t get to baking today:
👉 You can absolutely bake tomorrow morning, let them cool, pop them in the freezer, and still do both Day 1 and Day 2 tomorrow.
This is meant to be fun, not stressful.
Don’t overthink it.
Just decide your size…
and bake your cakes.
Whether you’re making one or twelve, the process is the same—and we’ll build it together step by step.
Today is where it starts to feel like something 🤍
We took all 12 cake layers and turned them into 6 stacked cakes.
Whipped vanilla frosting (I used 1 batch per cake)
Fresh strawberries
About 1 pound of strawberries per cake (so per 2 layers)
I lightly sugared the strawberries (about ¼ cup sugar per pound) to bring out the juices and sweetness.
For each cake:
Place your first cake layer down
Spread a layer of whipped vanilla frosting
Press sliced strawberries into the frosting
Add the second cake layer on top and gently press
That’s it. Simple.
I used an offset spatula to clean up and straighten the edges after stacking each cake.
You definitely don’t have to do this, but it makes a difference when we go to assemble everything tomorrow.
Tomorrow we’ll:
Frost all the cakes (I’m planning about 1 batch of frosting per cake, so 6 total)
Arrange everything into the flag
Top with blueberries + raspberries
Add a simple piped border + a little detail on the stripes
It’s not going to be perfect—and that’s not the goal. Just something fun and celebratory.
I’ll see you tomorrow for the final assembly 🇺🇸✨
No posts
Comments
Nothing yet. Say the first thing.
Sign in to join the conversation.