

If you’re new to floral designing, be sure to take a look at my ten must-know tips for your floral design journey before you get started.


In the 1970s, the U.S. produced 1.2 billion blooms annually while importing only 100 million cut flowers. “Flower power” wasn’t just a slogan referring to the opposition of the Vietnam war; it also reflected the reality of the cut flower industry at that time. However, things have drastically changed since then. Gone are the days when the majority of purchased cut flowers in the U.S. began as seedlings in parts of Florida and coastal California, Oregon, and Washington. Today, 80% of cut flowers purchased in the U.S. are imported, mostly from Colombia and sadly, they are treated with a mix of chemicals, including fungicides and preservatives, to survive the journey. Once they arrive at Miami International Airport, they are inspected by the Department of Homeland security (although they aren’t tested for illegal pesticide residues, as they aren’t intended for human consumption) and then sent to their final destination. It’s safe to say that convenient, inexpensive flowers found at grocery stores come at a cost.
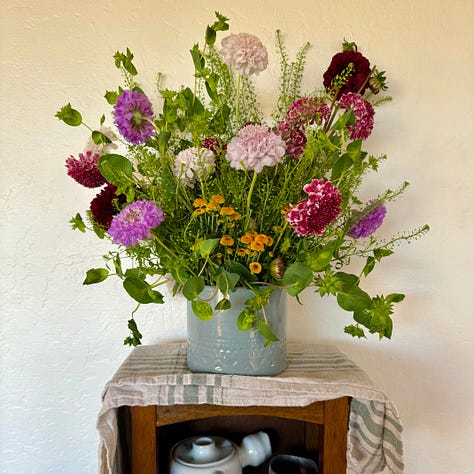
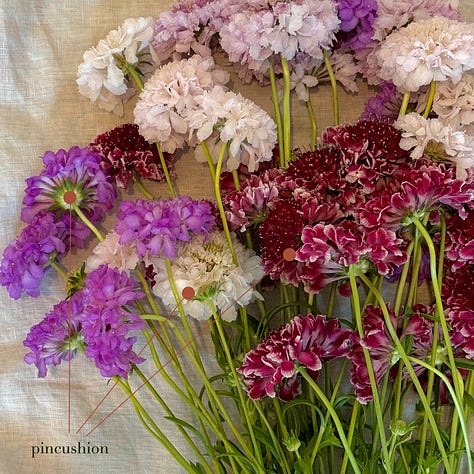
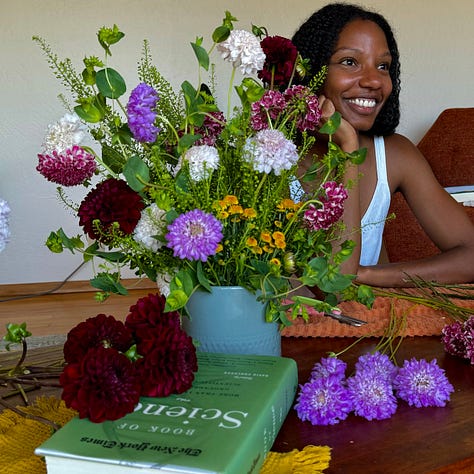
If you look hard enough, you can find locally-grown, organic cut flowers. This particular arrangement features pincushions (Scabiosa spp.) from Bluma Flower Farm in Berkeley, California. At $0.88 per stem, these organic and whimsical scabiosa flowers cost the same as gladioli, roses, or large chrysanthemums from Trader Joe’s.

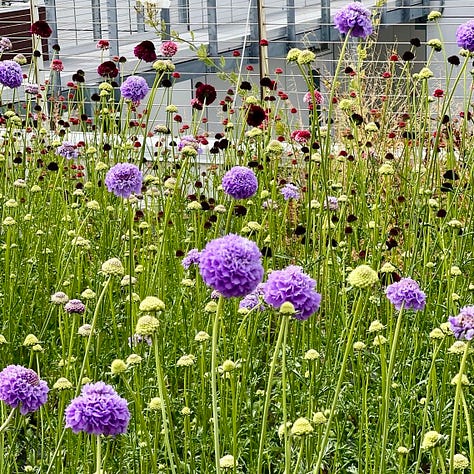
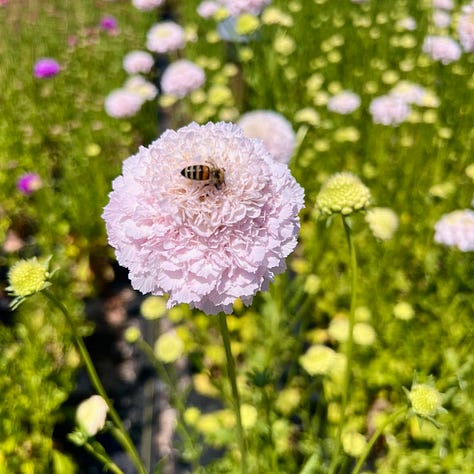
Owned and operated by Oakland native Joanna Letz, Bluma Flower Farm spans the rooftop of over fifteen apartment buildings, connected by steel bridges. Bluma—meaning “flower” in Yiddish—covers less than a quarter-acre in total, yet its production of roughly 50 flower varieties is robust. Bees, butterflies, flies, and other pollinators visit the farm’s zinnias, cosmos, dahlias, and chocolate cosmos in search of nectar. In return for this sweet treat, they carry pollen on their bodies, aiding in the production of seeds, fruits, and the next generation of plants.

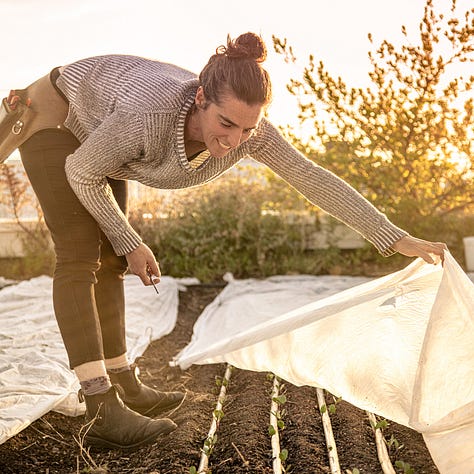
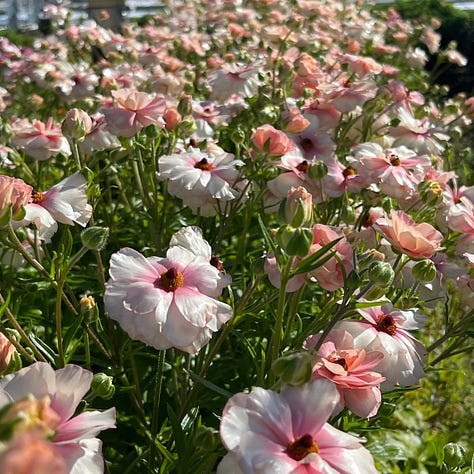
Joanna, the granddaughter of Holocaust survivors, is deeply familiar with the therapeutic power of plants. Her grandfather, who had endured a very hard life, introduced her to gardening. Joanna recalls that “something lifted for him when he was in the garden,” recognizing that working with plants is an act of healing. This aspect of Joanna’s story deeply resonated with me, as loss and pain led me to floral design and eventually starting Jas and Olive.
My foray into floral design and Joanna’s work as a flower farmer are both fueled by good ol’ trial and error, and Joanna has the deep expertise to prove it. She knows which seeds need darkness to germinate—like larkspur and phlox—and which need light. If you were trying to germinate sweet peas, she’d quickly tell you how they like to be soaked in water overnight. Her mastery of rooftop cut flower farming is truly something to admire. I lived in Brooklyn, New York, before coming to Berkeley and frankly, I assumed that starting my own cut flower garden was impossible. I decided that accumulating houseplants and growing a few herbs indoors would be the extent of my horticulture experience, but Joanna’s farm reminds me that with a little creativity and a lot of patience, we can all grow our own food or flowers—even if it means doing so on a rooftop.
Let’s design this whimsical, meadow-like arrangement featuring Bluma Flower Farm’s pincushions together.
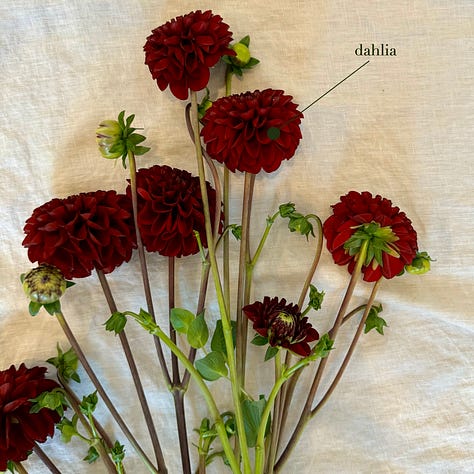

1 bunch (4 stems) of green dragon (Lepidium spp.): $3.99 at Trader Joe’s
1 bunch (7 stems) of micro pompons (Chrysanthemum spp.): $4.99 at Trader Joe’s
1 bunch (5 stems) of filler: $3.99 at Trader Joe’s
(Optional) 1 bunch (6 stems) of dahlias: $5.99 at Trader Joe’s
1 bunch (40 stems) of pincushions: $35 from Bluma Flower Farm
Floral snips
Waterproof or cellophane tape
I had over twenty stems of pincushions and three stems of yellow micro pompons remaining after this arrangement since one design needs only 10-15 pincushions. Looking back, it would have made more sense to make two arrangements. You’d just need an additional bunch of green dragon and filler, coming out to $30.97 per arrangement – so grab a friend and make this arrangement together!
You can substitute the micro pompons, filler, and dahlias for other flowers but the green dragon and pincushions carry the whimsical and airy feel of this design so I recommend specifically sourcing those two.
When you’re sourcing your filler, look for stems with small, flexible leaves and avoid fillers with rigid stems like eucalyptus, lemon leaf, and goldenrod.
I can often find 4-5” wide vases at Goodwill for around $4, so be sure to stop by your local thrift stores if you don’t have a small vase on hand.
As soon as you get home, process your pincushions, micro pompons, green dragon, dahlias, and filler.
Fill a tall, wide vase or bucket with 1-2 inches of cool water.
Green dragon usually is found with bare stems but if necessary, remove any leaves on the bottom three inches of the stem.
Remove some of the long, thin leaves toward the top of the stem so that mostly the thin spikes are remaining. This will help achieve an airy aesthetic.
Using your snips, make a sharp, angled cut one inch above the bottom of the stem or above any signs of discoloration or browning. Place the stem into a vase or bucket of cool water. This is your first cut. You’ll cut the stems to your desired length once you begin arranging.
Repeat steps 2-4 for each of your green dragon stems.
Micro pompons are part of the larger chrysanthemum family and tend to have many small leaves along the entire length of the stem. I recommend removing most, if not all, of the small leaves so that only the little flower heads remain. This will leave you with airy micro pompons that align better with the whimsical aesthetic of the arrangement.
Make a sharp, angled cut one inch above the bottom of the stem or above any signs of discoloration or browning. Place the stem into a vase or bucket of cool water. This is your first cut. You’ll cut the stems to your desired length after you prepare all of your flowers.
Repeat steps 1 and 2 for each micropompon stem.
Pincushion and dahlia stems are mostly bare except for a few leaves toward the bottom. Using your hands, gently remove all leaves along the stem. Be careful—pincushions have long, thin, flexible stems that support relatively large flower heads so you don’t want to bend or damage them. I like to hold the stem directly beneath the flower head while removing the leaves to ensure I don’t damage it.
Make a sharp, angled cut one inch above the bottom of the stem or above any signs of discoloration or browning. Place the stem into a vase or bucket of cool water. This is your first cut. You’ll cut the stems to your desired length after you prepare all of your flowers.
Repeat steps 1 and 2 for each pincushion and dahlia.
If your filler has leaves on the bottom three inches of the stem, remove them using your hands. Depending on how airy you’d like your arrangement to be, you can remove additional leaves along the stem but, I prefer to keep the leaves intact, as they add a different textural element to the design.
Make a sharp, angled cut one inch above the bottom of the stem or above any signs of discoloration or browning. Place the stem into a vase or bucket of cool water. This is your first cut. You’ll cut the stems to your desired length after you prepare all of your flowers.
Repeat steps 1 and 2 for each stem of filler.
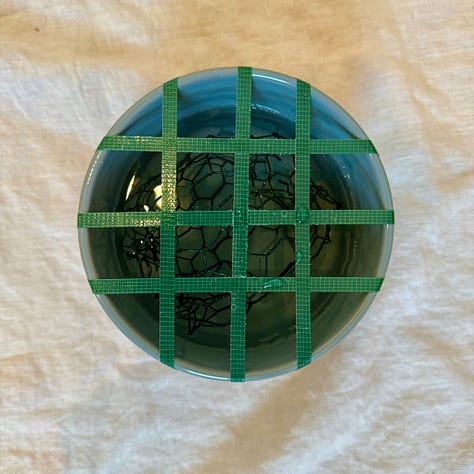


First, add structural support to your vase by placing a ball of chicken wire inside. To do this, begin by unrolling your chicken wire and placing it atop your vase. Cut a piece so that the width is slightly wider than your vase. You can keep the height as is. Remember to be very careful when handling cut chicken wire. If you have garden gloves at home, you can also wear them to protect your hands.
Bring two diagonal sides together and tie their ends together. Using your hands, bend the wire so that the two tied ends stay in place.
Tie the opposing diagonal ends together, forming a circular shape. Continue to use your hands to mold the shape into a ball. Be careful not to make the ball too compact; you want it to be big enough that it fits snuggly in your vase. If it can move around in your vase, it’s too small.
If the top of your chicken wire ball is sticking out of your vase, gently press it down. You want the top of your ball to hit the top of your base. If it’s shorter, that’s okay too.
Pour a packet of flower food in your vase, with your chicken wire ball already inside, and fill it ¾ full with water. Dry the bottom and sides so that the waterproof tape can adhere to your vase.
Make a grid on your vase using waterproof tape, only allowing the tape to extend ¼ inch down the sides. This will help maintain the structural integrity of the arrangement. I usually start with one line of tape down the middle and then add a line of tape on the left and right side of the centered line. Turn your vase sideways and do this again, leaving you with three vertical lines of tape and three horizontal lines of tape.
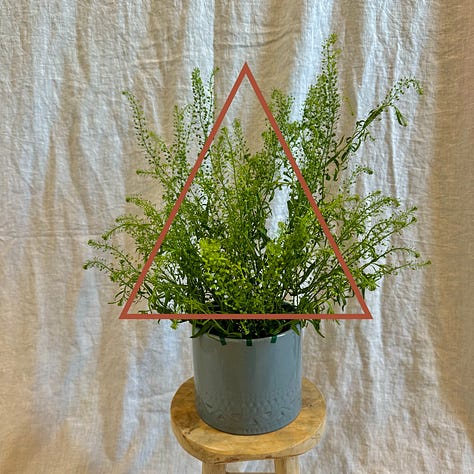
Now we’ll create a light and airy base with your green dragon stems. We’re aiming to create a full and compact center that becomes increasingly sparse in all directions.
I like to use a few stems to make the general shape of the design. To do this, take one of your green dragon stems and hold it up against your vase so you can determine how tall you’d like your arrangement to be. A good rule of thumb is to aim for a design that, when measured from the bottom of the vase to the tallest stem, is 1.5-2.5 times the height of the vase. Using your floral snips, cut the stem accordingly, making sure there won’t be any leaves submerged in water when you place the stem in your vase.
Repeat step 8 with your remaining stems to outline the height of your arrangement and to determine how far to the left and right you’d like your design to extend. I usually make my side stems much smaller so the density of the design loosely resembles a triangle.
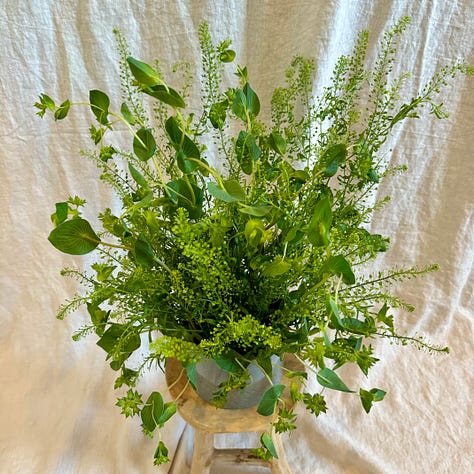
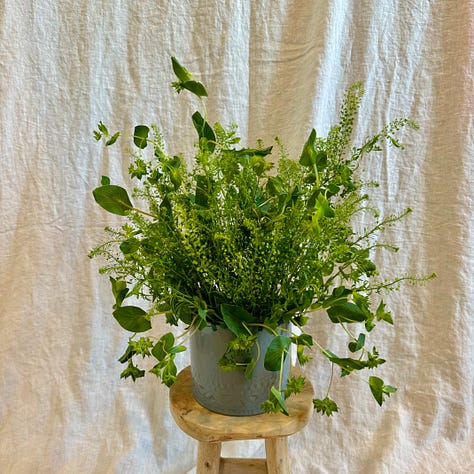
Take one of your filler stems and observe the way the stem and leaves naturally fall. You want to take advantage of that natural curvature for your design. For example, if you find a stem that falls dramatically downward, consider placing it in the front or side of your vase so that it drapes downward over your vase. On the other hand, if you find a more rigid stem that slightly leans outward, think about placing it in the middle or toward the back so it can add movement to the top or center of your design.
Hold the stem up against your arrangement to get a sense of where you need to cut it to achieve your desired look. You don’t need to strictly adhere to the triangular skeleton we created with the green dragon; it’s more important that you follow the cues of your stems to invite movement into your design. Cut the stem accordingly with your snips, making sure no leaves will be submerged in water when you place the stem in your vase.
Repeat steps 1-2 for your filler.
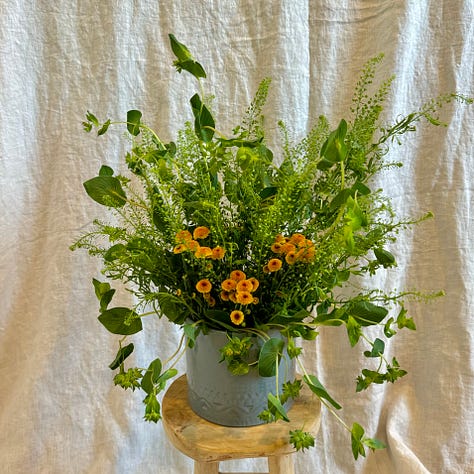
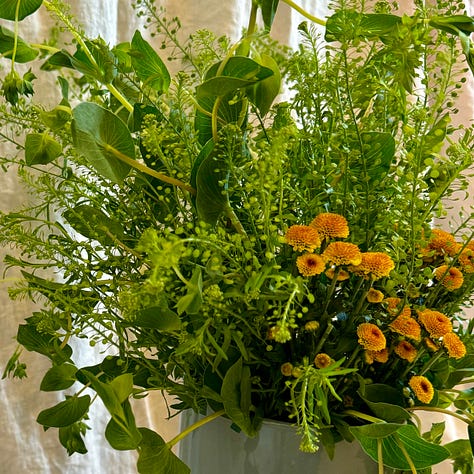
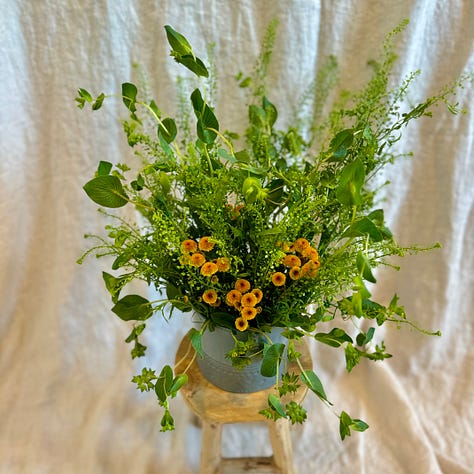
If you’re making a single arrangement, you’ll have a few processed stems of micro pompons remaining after you’re done designing. If you’re making two arrangements, divide your processed stems in half. This should leave you with 3-4 stems for each arrangement.
Focus on positioning your micro pompons so that the flowers are closer to the base of your design. To achieve a meadow-like look, keep your groupings of flowers together, mimicking how they’d appear in the wild if pollination occurred naturally. To do this, take one of your micro pompon stems and cut off any lateral branches at the fork with your snips. This will allow you to group individual flowers more easily and have control over your shape.
Hold a grouping of 3-6 flowers up against your design and take note of where to cut the stems so that the flower heads fall at the base of the arrangement.
Make a sharp, angled cut based on your observation from step 3 and place the group of micro pompons into your vase.
Repeat steps 2-4. Note that a single stem should give you 2-3 groupings of micro pompons.

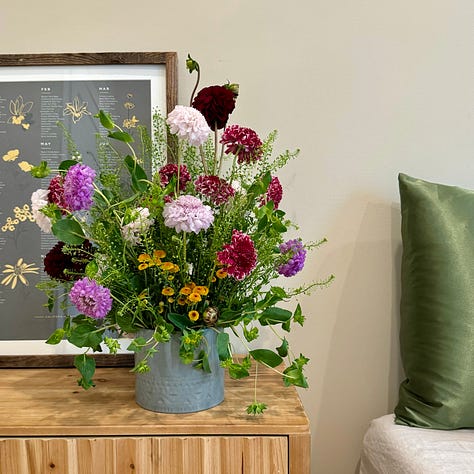
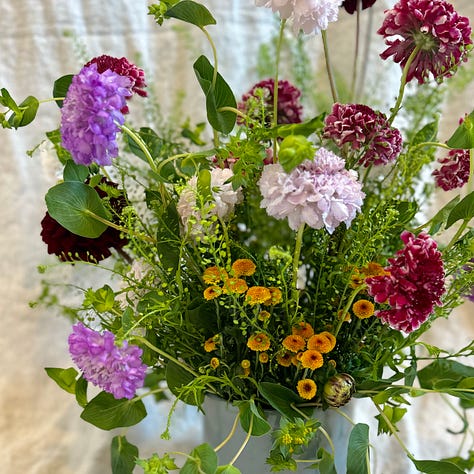
Just as you did for your filler, pay attention to how your pincushion stems gently curve in interesting directions. The movement of their stem will guide you in positioning each pincushion. I like to place stems that curve heavily downward toward the bottom of my design. If I see a stem that curves slightly to the left, I’ll usually place it on the left side of my design and hold it up against my vase to decide how tall I’d like it to be. First, take one of your pincushion stems and hold it roughly three inches below the flower head to get an idea of its natural curvature.
Hold it up against your design to decide where you’d like the flower head to be placed and note where you’ll need to cut the stem. Remember that the chicken wire in your vase may prevent your stem from reaching the bottom, so you may need to recut the stem if it doesn’t fall exactly where you intended.
When you come across a pincushion hat has lateral branches, I recommend cutting off the lateral branches at the fork and using them as individual stems so you have control over your shape.
Repeat steps 1-3 until you’ve added 10-15 pincushions to your design.
Adding dahlias is optional but I like to incorporate a dahlia with a color that compliments my pincushion color scheme. Pincushions usually come in blue, pink, purple, red, or white, so a deep red dahlia really enhances the color palette in my opinion. If you’d like, add 1-3 dahlia stems to your arrangement. Be sure to place them asymmetrically for a natural look, or group them together for a more meadow-like appearance.
Lastly, add a handful of stems with small, unopened flower heads to your design! These will give your arrangement a rustic and wild feel.
Remember to change the water every two days to keep your stems happy.


If you’ve tried this design and ran into any issues or have questions, let me know in the comments. Feel free to share pictures of your work too, it’s always worth celebrating!
Stay curious. — Jas
Comments
Nothing yet. Say the first thing.
Sign in to join the conversation.