
Welcome to the 17 new subscribers who have joined Jas and Olive over the past few weeks! The J&O community now serves two different audiences—those interested in floral design and those interested in creating a climate-focused community biology lab. If you fall into the latter group, feel free to ignore this post and stay tuned for a deep dive into various business structures that could be a good fit for a community biolab.
If you’re new to floral design, take a look at my ten must-know tips for your floral design journey before starting this arrangement.
An ode to the free and loose tendencies of nature, garden-style arrangements embody the whimsical, soft, and asymmetrical features of an unrestrained garden in full bloom. Unstructured yet effortlessly elegant, this design style softly reminds us that beauty can be found amidst chaos.
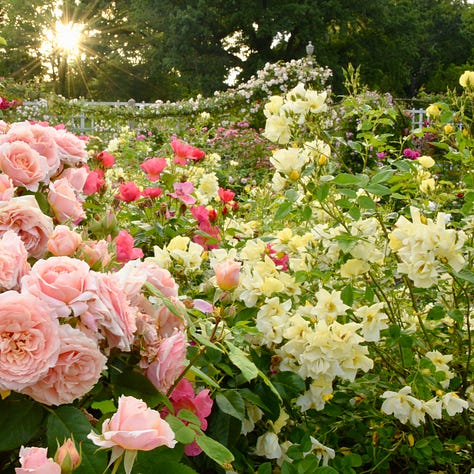
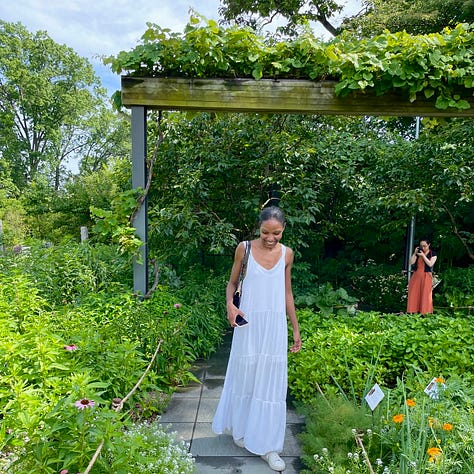
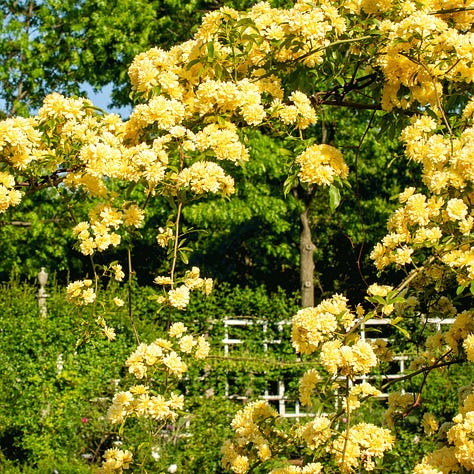
Although there aren’t explicit requirements for garden-style arrangements, they tend to share a few elements:
A wide range of flowers and foliage mimics the diversity of a garden. I like to use at least three different types of base foliage, one or two types of delicate filler flowers, and one focal flower. A mix of textures is important too. You can choose leaves or petals that are smooth, glossy, feathery, spiky, soft, papery, rough, or waxy. The options are endless – embrace them!
Soft color palettes resemble the natural aesthetics of a garden. Muted tones blend harmoniously, and using seasonal blooms gives your arrangement an authentic feel. If you insist on using vibrant colors, balance them with plenty of greenery.
Unlike tightly packed arrangements that strive for balance and uniformity, such as the pavé design style, garden-style designs embrace a loose, airy, and asymmetric structure, creating a dynamic, natural look. Space between the flowers allows each bloom to stand out and breathe.
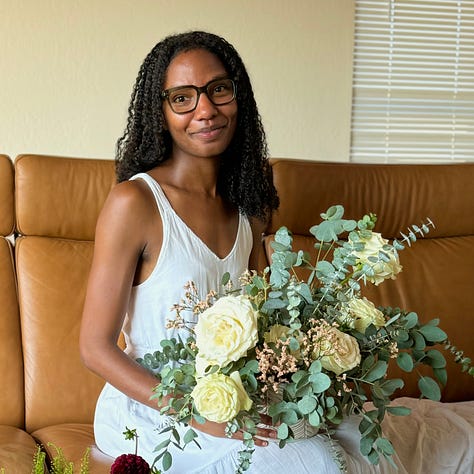

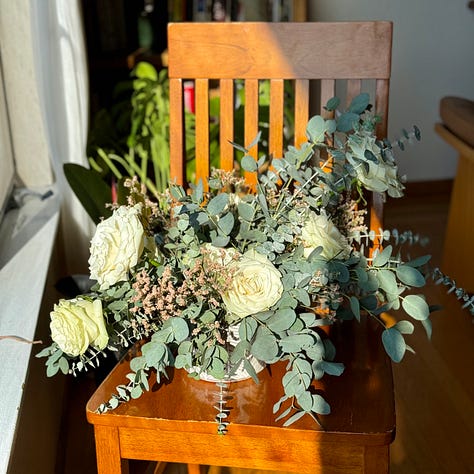
This specific arrangement is a nod to Asian gardens which tend to be more meditative and less reliant on big, bold blooms like we often see in the West. I decided to incorporate a significant amount of eucalyptus in this design for a few reasons:
Eucalyptus varieties can usually be found year-round.
Its familiar, therapeutic fragrance makes the design process deeply relaxing.
The dominant greenery is easy on the eyes, while the varying textures, heights, and depths of different eucalyptus varieties creates visual interest and a sense of movement.
Whenever I’m particularly stressed, this is my go-to arrangement. Engaging your sense of sight, touch, and smell, this combination of flowers is sure to invite a sense of peace into your mind and home.
Let’s design this garden-style arrangement together.

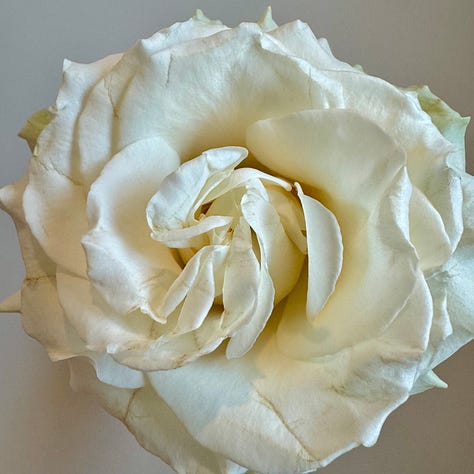

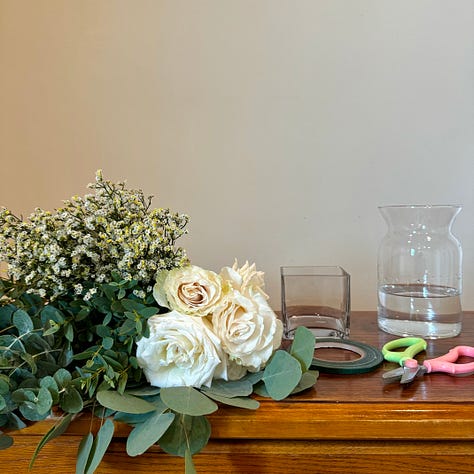
1 bunch (8 stems) of garden roses: $9.99 at Trader Joe’s
4 bunches (24 stems) of eucalyptus: $15.96 at Trader Joe’s
1 bunch (4 stems) of sea lavender: $4.99 at Trader Joe’s
Floral snips
Waterproof or cellophane tape
(Optional) gloves to prepare eucalyptus stems
I can often find 4” diameter vases at Goodwill for around $4, so stop by your local thrift stores if you don’t have a small vase on hand.
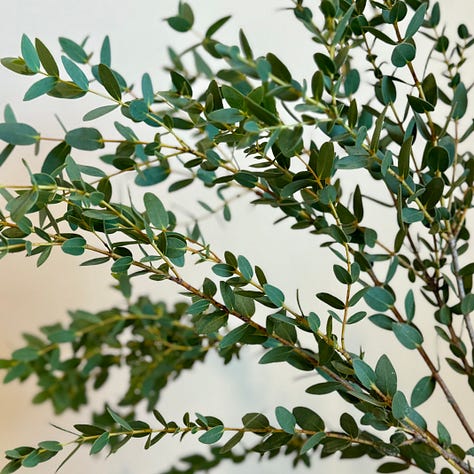
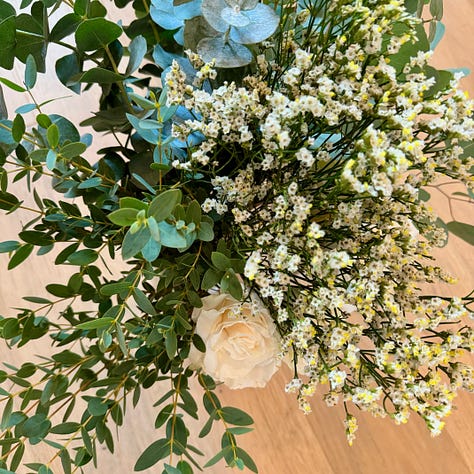
To mimic the natural and diverse look of the greenery you’d see in a garden, purchase at least two different eucalyptus varieties. I tend to buy two bunches of the baby blue variety (Eucalyptus pulverulenta), one bunch of the silver dollar variety (Eucalyptus cinerea), and one bunch of the parvifolia variety (Eucalyptus parvifolia).


Some florists avoid sea lavender (Limonium spp.) because it has a smell that’s reminiscent of, well, the sea. However, I’ve found that when paired with fresh eucalyptus, the scent is barely noticeable. If you prefer, you can replace it with goldenrod (Solidago spp.), baby's breath (Gypsophila spp.), chamomile (Matricaria spp. or Chamaemelum spp.), or another light, airy flower.
If garden roses aren’t available, use standard roses, which are typically found year-round. You can also substitute roses with another round, bold bloom in season, such as chrysanthemum (Chrysanthemum spp.), peony (Paeonia spp.), or marigold (Tagetes spp.).
As soon as you get home, process your roses, eucalyptus, and sea lavender.
Fill a tall, wide vase or bucket with 1-2 inches of cool water.
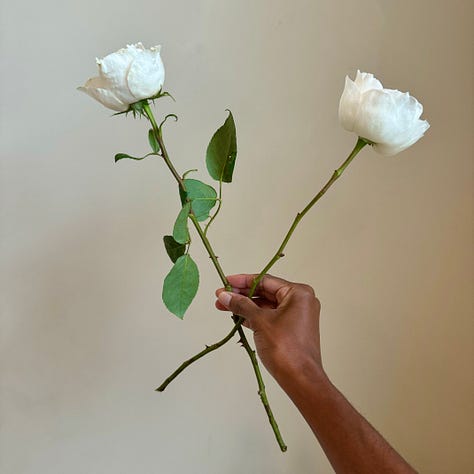
Holding the stem near the flower head and being careful of thorns, prepare your first rose by removing all of the leaves from the stems with your hands or snips. I like to keep the sepals—the five green leaves underneath the petals—intact to achieve a natural look.
With your hands, remove any bruised petals.
Make a sharp angled cut one inch above the bottom of the stem or above any signs of discoloration or browning. Place the stem into a vase or bucket of cool water. This is your first cut. You’ll cut the stems to your desired length after you prepare all of your roses.
Repeat steps 2–4 for each rose.
If you have time, I recommend leaving your roses in water for at least 2 hours before arranging to ensure they’re fully hydrated.
Grab a eucalyptus stem and check whether any leaves are on the bottom three inches of the stem.
If so, remove them with your hands by placing your pointer finger and thumb three inches above the stem’s end. Hold the top of the stem in your other hand, then firmly slide your fingers down the stem to strip the leaves. Since eucalyptus releases sticky sap when handled, you may want to wear gloves to keep your hands clean.
Make a sharp, angled cut one inch above the bottom of the stem or above any signs of discoloration or browning. Eucalyptus stems are tough, so if you have garden pruners, use those. Otherwise, use both hands with floral snips to apply extra force. Place the stem into a vase or bucket of cool water. This is your first cut—you’ll trim the stems to your desired length when you start arranging.
Repeat steps 1–3 for each eucalyptus stem.
Using your snips, make a sharp, angled cut one inch above the bottom of the stem or above any signs of discoloration or browning. Place the stem into a vase or bucket of cool water. This is your first cut—you’ll trim the stems to your desired length when you start arranging.
Repeat for each sea lavender stem.
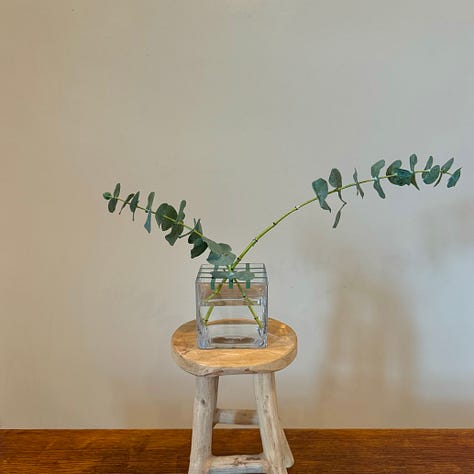
Create a grid on your 4” vase using waterproof tape, only allowing the tape to extend ¼ inch down the sides. This will help maintain the arrangement’s structure. Start with one line of tape down the center, then add a line of tape on each side. Rotate the vase and repeat, creating a grid with three vertical and three horizontal lines.
Pour a packet of flower food into your vase and fill it ¾ full with water.
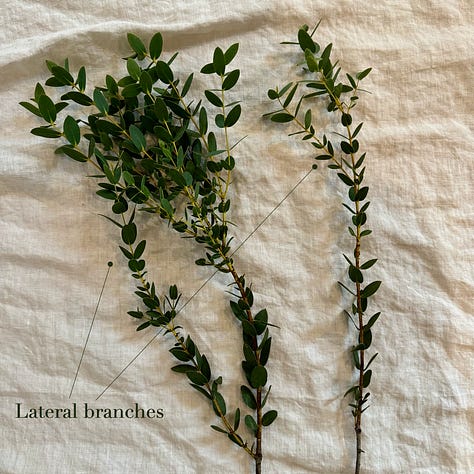
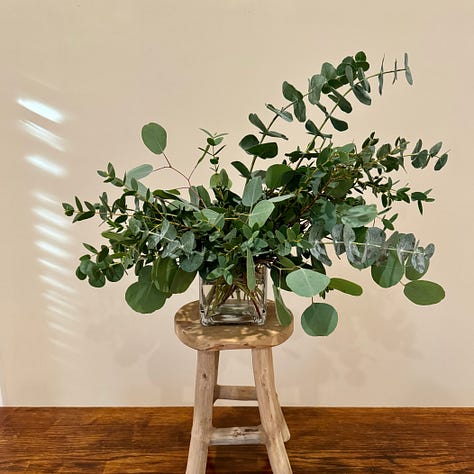
To build the arrangement, start with a skeleton shape where the right side is slightly higher and wider than the left. To do this, use two long eucalyptus stems without lateral branches—baby blue eucalyptus works well. Cut one stem a few inches shorter than the other and remove any lower leaves if necessary. Place the longer stem in the center, leaning to the right, and repeat for the shorter stem so that it’s leaning to the left.
Now, for the fun part! Continue adding eucalyptus stems at varying heights and angles, letting some drape over your vase—silver dollar eucalyptus is great for draping. Don’t overthink this process; aim for a wild, natural, and asymmetrical look. If you want to group stems of the same variety in specific areas, go for it! Use your first two stems as a guide to shape and fill the space.
If you find stems with lateral branches, cut them off and use the branches as individual stems to maintain control over the shape. This is particularly useful for baby blue and parvifolia eucalyptus.
Remember to rotate your vase as you arrange so that the design feels dynamic from all sides.
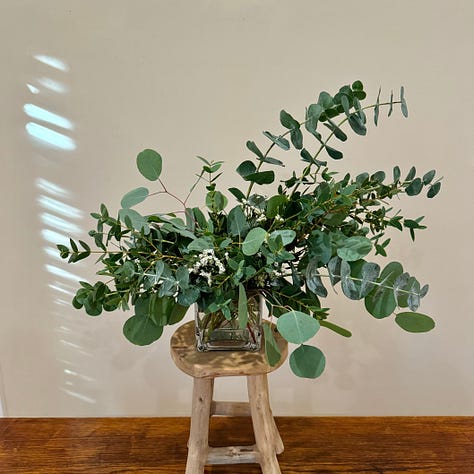
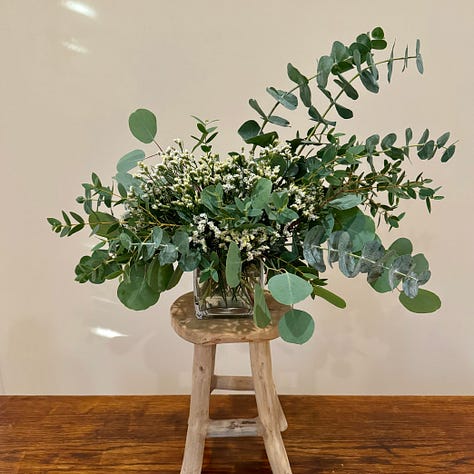
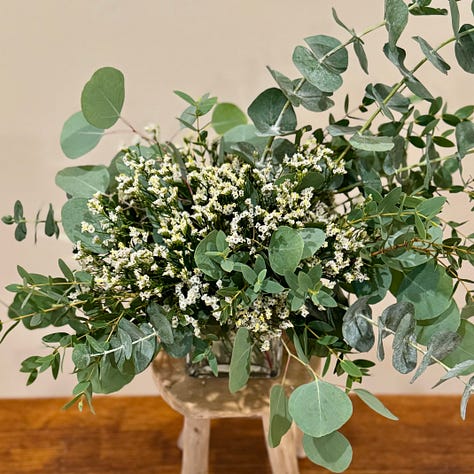
Using your floral snips, cut a few lateral branches from one of your sea lavender stems with a sharp, angled cut.
You can remove branches without flowers, but I recommend leaving them intact as they add texture to your arrangement.
Group the lateral branches in twos or threes, and place sea lavender throughout your arrangement. Rotate your vase while arranging so that you see a pop of color and texture from all angles. Aim to place your sea lavender stems near the center of the arrangement.
Repeat steps 1–3 for each of your sea lavender stems.
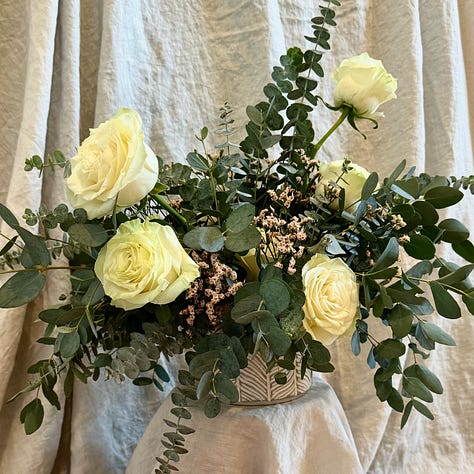
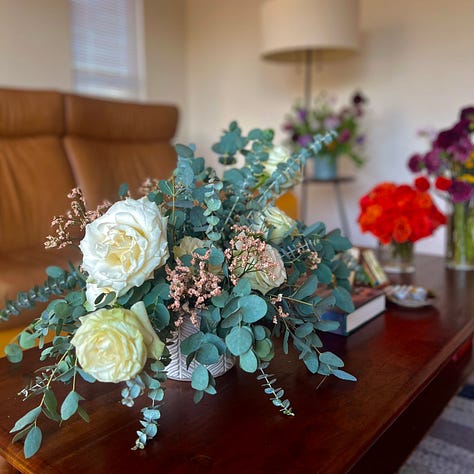
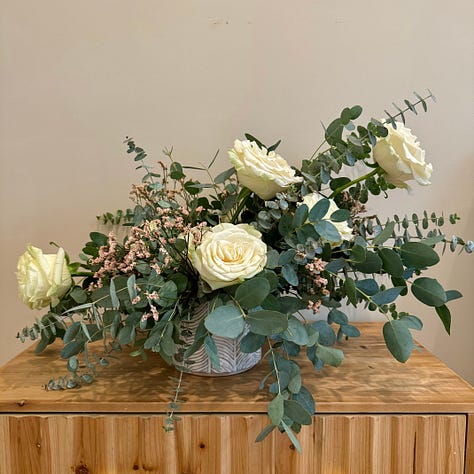
To stay consistent with the asymmetric shape we created with the eucalyptus, add one tall rose so that it’s leaning 45 degrees to the right. To do this, turn the flower upside down and roll the stem between your hands to open up the flower head. Hold the stem in front of your vase to gauge where it needs to be cut in order to match the height and shape of your arrangement. Make a sharp, angled cut and place it in your vase so that it’s leaning 45 degrees to the right.
Tip: It’s helpful to cut above a thorn. This will make it easier to reposition the stem if needed.
Do the same for another rose so that it’s heavily leaning to the left, with the flower head closer to the center of the vase.
Rotate your vase and place your roses at varying heights and angles, keeping the placement in odd numbers for a natural feel. For example, I like to place three roses on the right side and two on the left, or four on the right and one on the left, saving the rest for the back. Play around with this until your design feels wild but charming.
Step back and look at your arrangement from all angles. If anything feels off, make some edits—trim your eucalyptus stems or reposition your roses!
Remember to change the water every two days to keep your flowers fresh.
If you’ve tried this design and ran into any issues or have questions, let me know in the comments. Feel free to share pictures of your work too, it’s always worth celebrating!
Stay curious. — Jas
Comments
Nothing yet. Say the first thing.
Sign in to join the conversation.