
Before I dive into today’s post and recipe I want to thank everyone who commented or shared my last post about the Beatrix Bakes book! Winners were selected and contacted last week. It was so fun to be able to do my first cookbook giveaway, look froward to more in the future!
Happy Pi Day! 🥧
March has proven to be a busy month for me but I wanted to squeeze in something in honor of the day dedicated to mathematics and delicious pie. I still remember being served pie on March 14th when I was in the 3rd grade. I don’t remember the exact pie but I remember being so happy that the routine of class had been interrupted and that we got to gather around on the carpet of the classroom to eat dessert before lunch. I did not learn what pi meant on that day but I did gain an appreciate for pie.
I posted about this last year but I always like to mention that Pi Day originated in San Francisco in 1988. Larry Shaw organized the first celebration at the Exploratorium and before long the day was celebrated across the world. Larry was an interesting guy and I love learning more about the day’s quirky history.
Read more here.
For those of you in Brooklyn this weekend - I’ll be popping up at East Fork Pottery on Sunday from 1-4 and would love to see you!

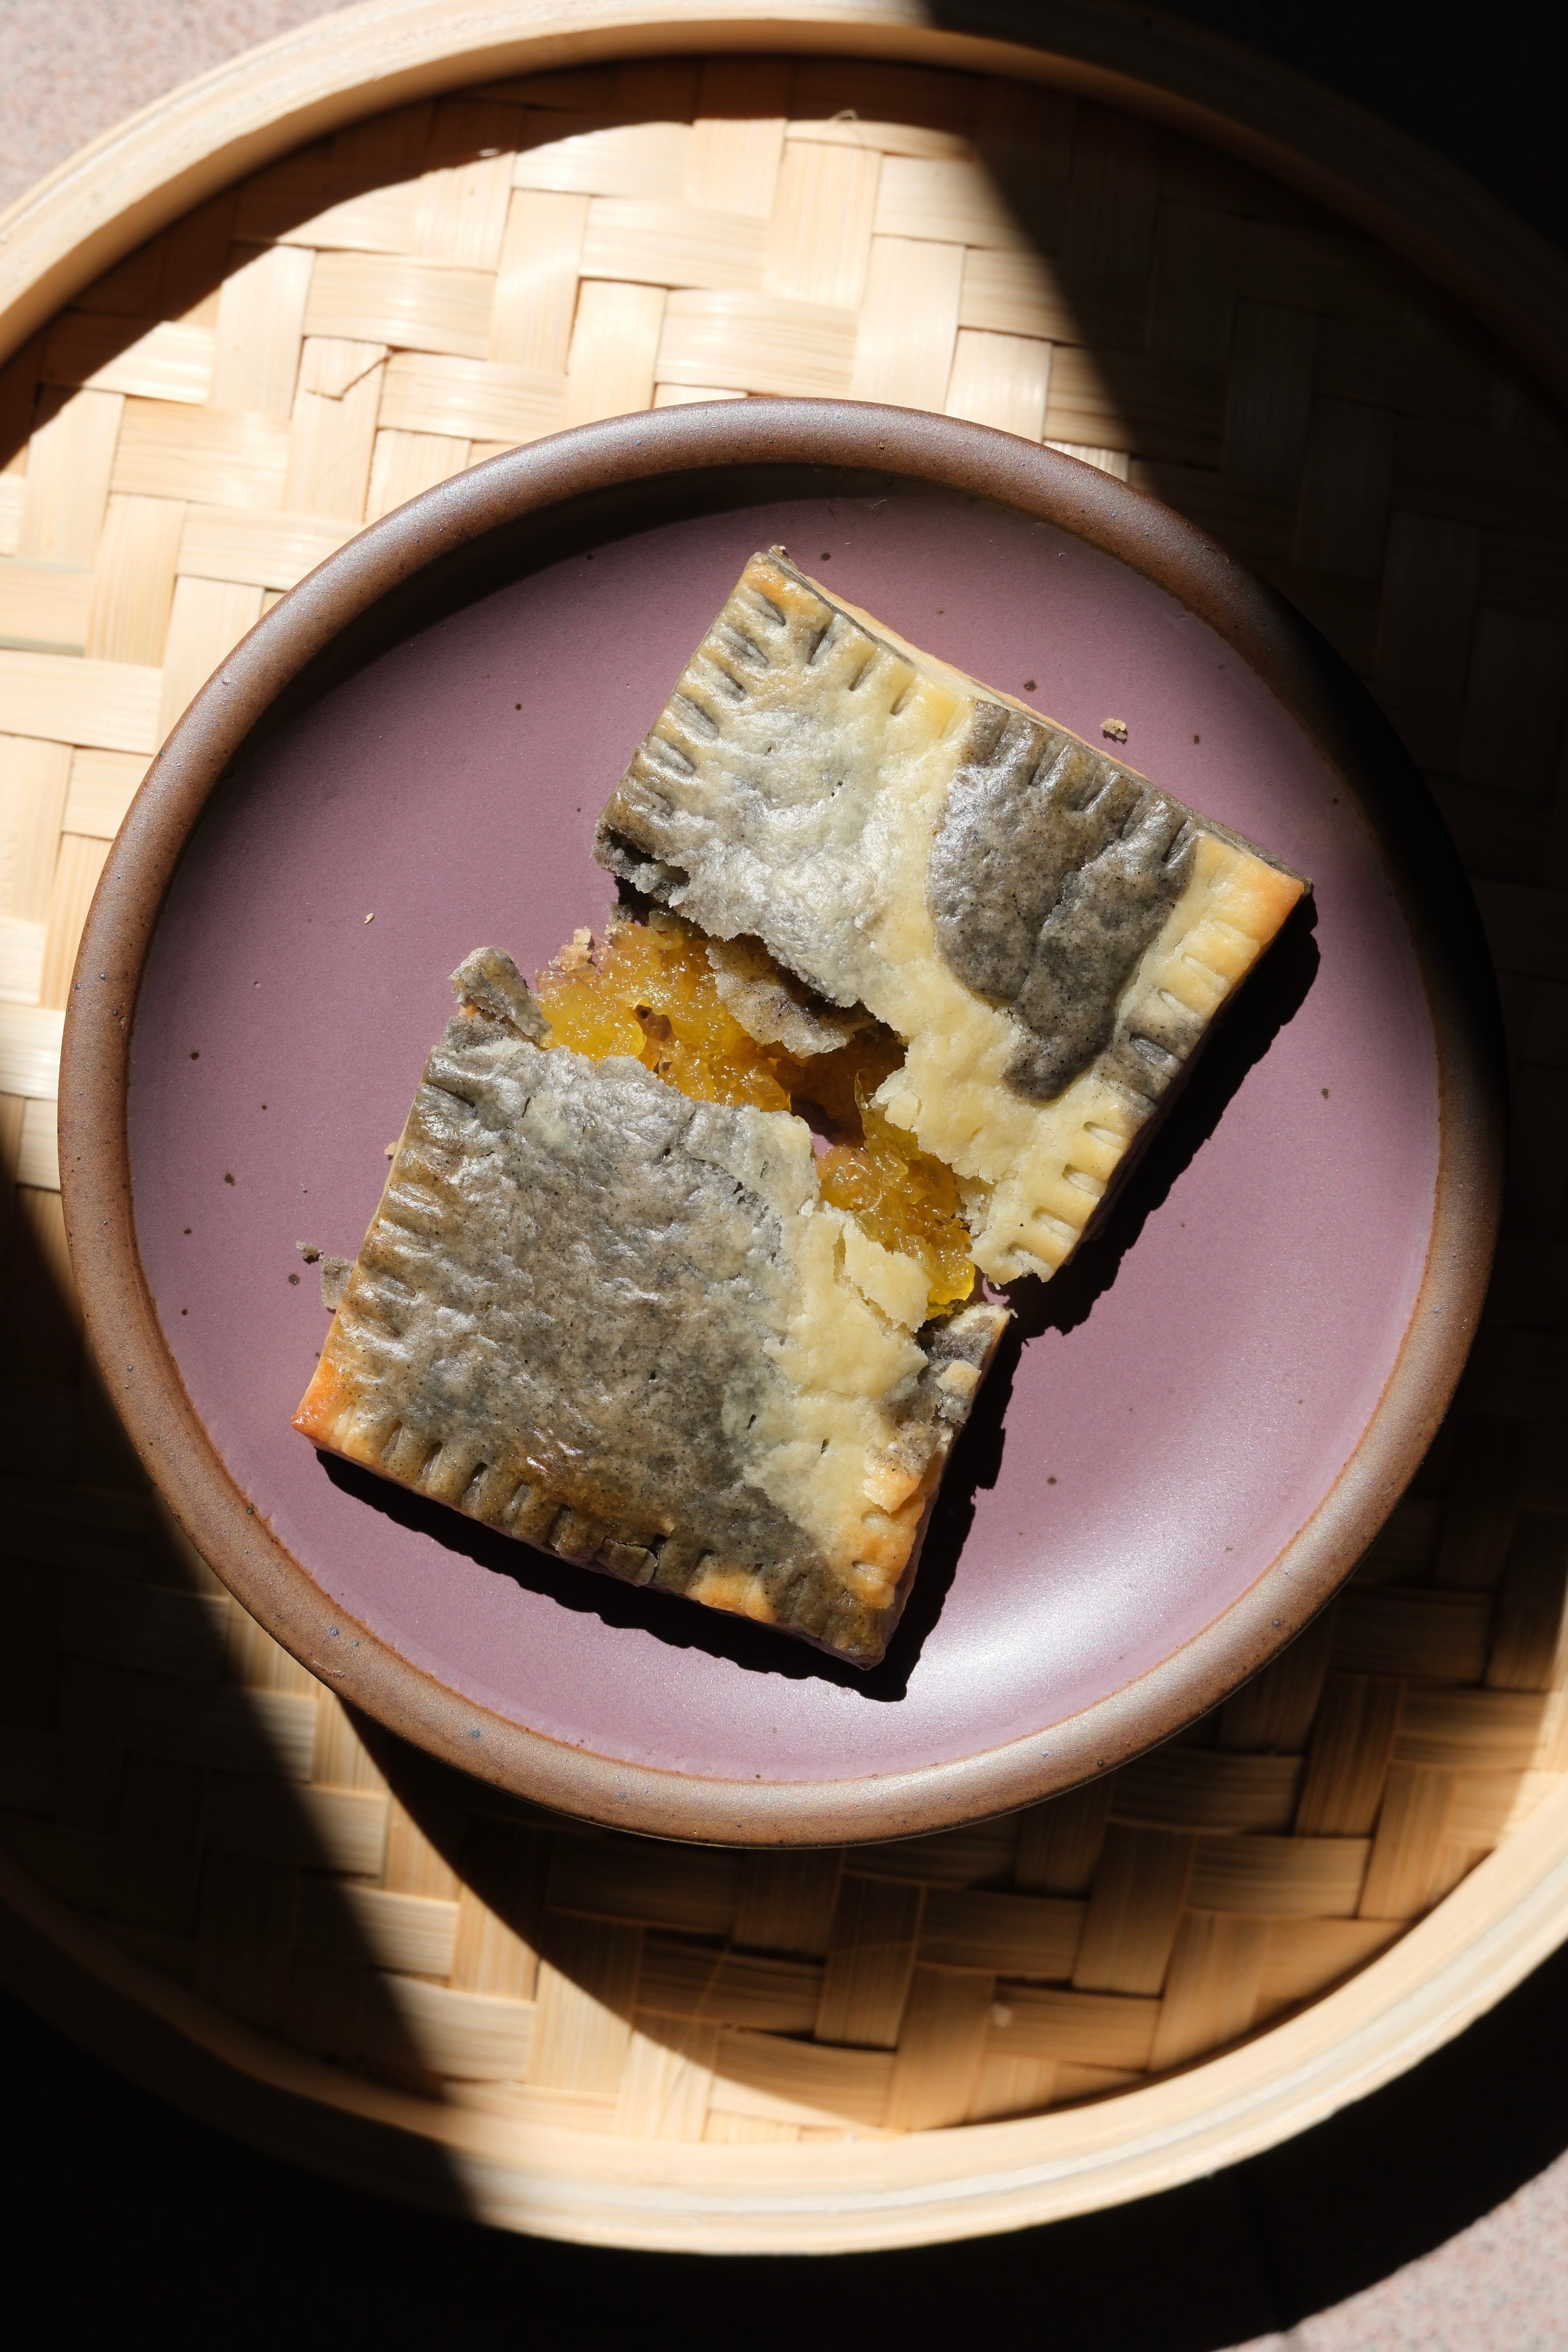
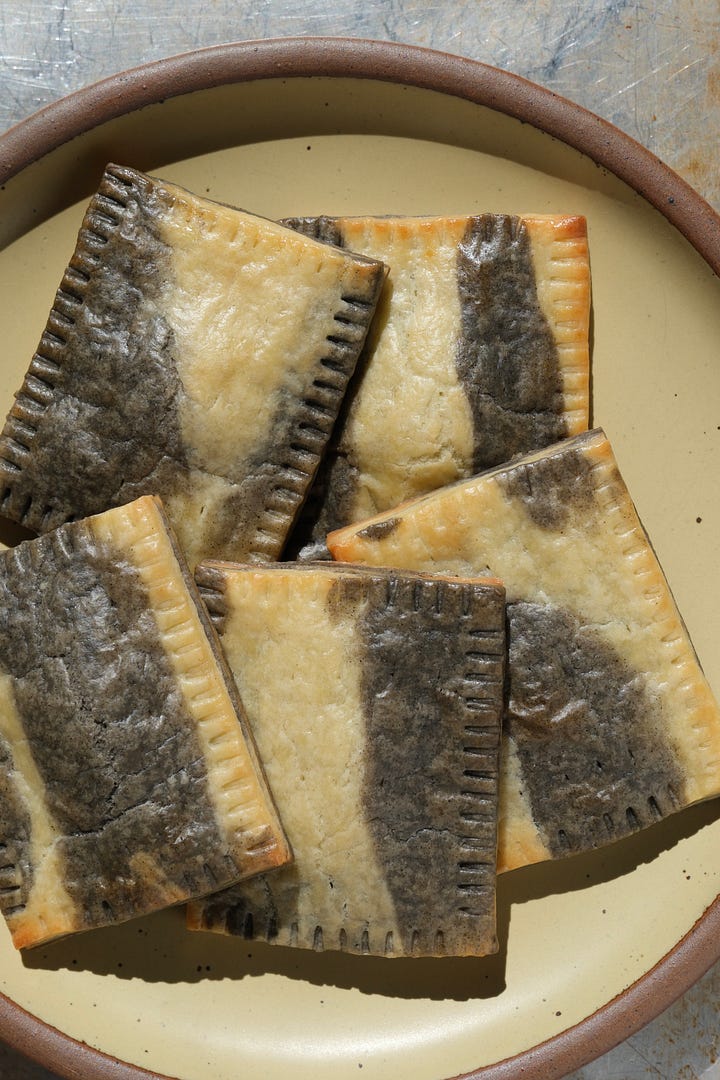
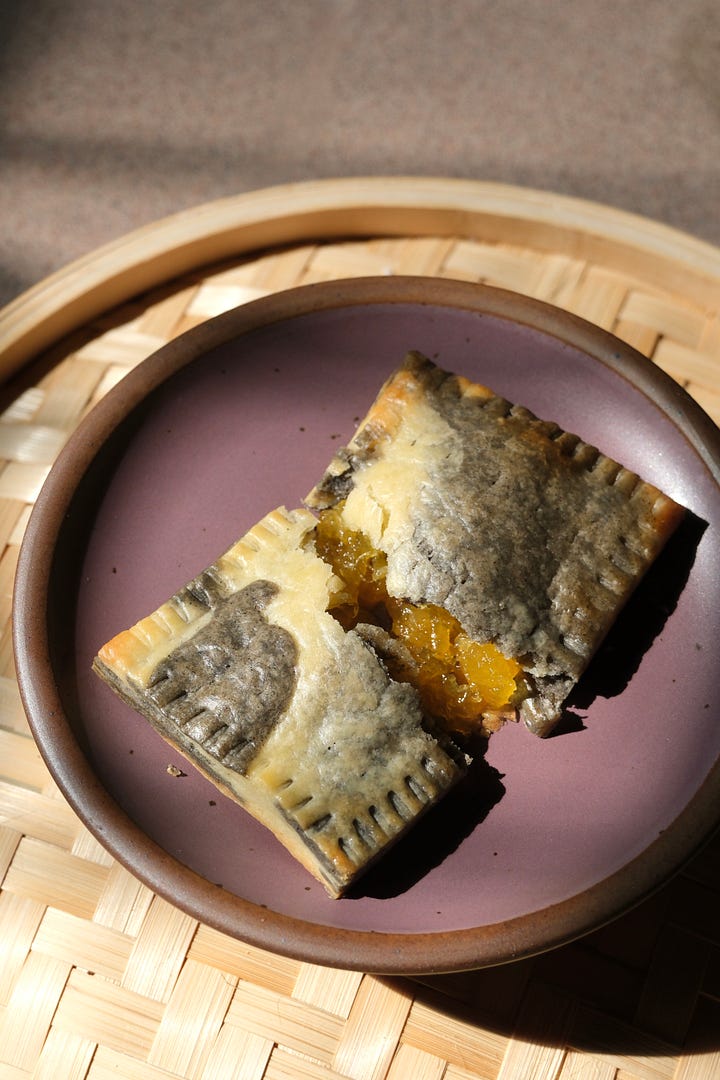
Today’s recipe is inspired by Taiwanese pineapple cakes which have a thick pineapple jam wrapped in a buttery shortcrust dough. Usually shaped into small rectangles, they’ve always reminded me of delicious little building blocks. These hand pies are marbled with nutty black sesame and take the nostalgic form of a pop tart sans glaze. They take a little bit of effort in rolling and assembling but you’ll be rewarded with little pockets of sunshine that would pair wonderfully with a scoop of vanilla ice cream.
A few notes…
The cream cheese in the hand pie dough adds tenderness and flexibility which makes this dough a little easier to handle. It’s also there for flavor and works well with the tart pineapple and nutty/bitter black sesame.
If you trim the edges of the dough as you roll it out, you can add it back on top of the dough to be reincorporated as you continue rolling as long as the dough isn’t covered in too much flour. Use a clean brush to dust the surface of the dough and knead the trimmed pieces in your hand a bit before adding and reincorporating.
The pineapple jam recipe is based on an easy ratio of 25% sugar and 3% lemon juice. I used one very large pineapple but if your fruit is smaller, just weigh it and multiply the weight (in grams) by .25 for the amount of sugar and .03 for the amount of lemon juice.
If you don’t want to make the pineapple jam, a thick store-bought jam will work fine. Just be sure it’s not a super thin or runny jam. A marmalade or fruit butter would work well!
yield depends on the amount of pineapple used (see note above)
1175g fresh pineapple, cut into quarters lengthwise and cored
293g white sugar
35g lemon juice
1 tablespoon orange blossom water
Use the large holes on a box grater or a food processor to turn the pineapple into an almost-puree. Strands of pineapple and small chunks the size of peas are okay but larger pieces won’t cook down into a smooth jam.
Combine the processed pineapple, sugar, and lemon juice into a large enameled cast iron or stainless steel pot. Place over high heat until the mixture bowls, then lower to medium-high and stir frequently with a silicone spatula.
The jam will boil aggressively for the first 20 to 30 minutes and then as the water cooks off, the bubbles and surface will be glossy and will react more like a lazy lava. Cook, stirring constantly, until you can run your spatula along the bottom of the pan leaving a clean path with the jam slowly moving back into place on each side without any liquid rushing in to fill the void first. In the last 5 to 10 minutes the jam will stop bubbling and will move more like a large mass rather than a liquid. Continue to stir to prevent burning.
Remove from the heat and allow to cool for 20 minutes before stirring in the orange blossom water. Cool the jam completely in the fridge before assembling the hand pies.
makes 8 hand pies
212g all-purpose flour
20g powdered sugar
1 teaspoon kosher salt
170g unsalted butter cut into 1/2 inch cubes, cold
113g cream cheese cut into 1/2 inch cubes, cold
1 large egg yolk
20g unsweetened black sesame paste
1 large egg white to finish
In the bowl of a food processor, combine the flour, sugar, salt, butter, and cream cheese. Pulse the processor until you have a mixture that resembles wet crumbly sand. The mixture should still be loose without discernible clumps.
Remove half (about 258g) of the sandy mixture into a small bowl. To the half that remains in the food processor, add the egg yolk and continue to pulse until the dough comes together and clears the inner walls of the food processor.
Pour this half of dough from the machine onto a piece of parchment, set aside. Empty the small bowl of reserved dough back into the processor followed by the black sesame paste. Process until the dough comes together into a large mass, clearing itself from the walls of the machine. Pour this mixture out into a separate pile on the parchment.
Knead each mound separately with clean hands to create two smooth round balls of dough. There shouldn’t be any noticeable specks of cream cheese in either portion of dough.
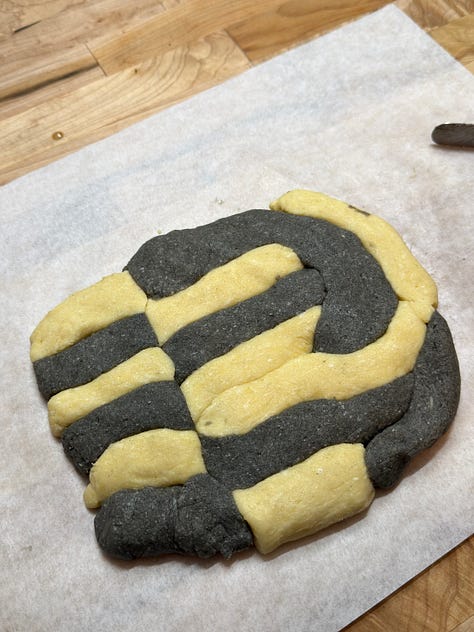
Alternating between each dough, tear off a portion and shape into a long snake. Arrange the snakes onto the parchment in alternating rows with twists and curves. Be sure to leave no interior open spaces. You can make nearly any design you’d like as long as the finished arrangement has no gaps between the pieces of dough.
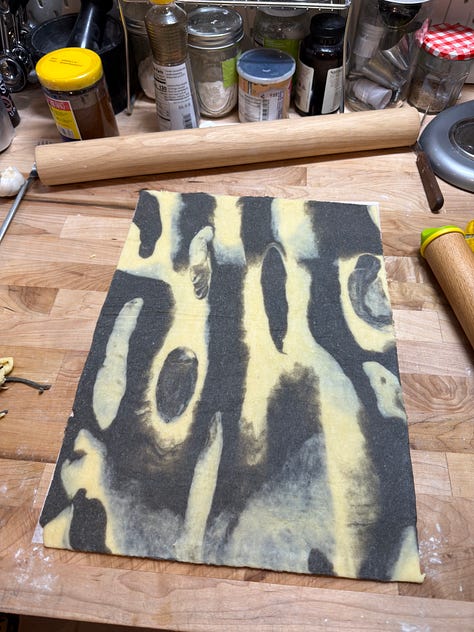
Very lightly dust the arrangement of coils with flour then place a second piece of parchment on top and use a rolling pin to roll the dough out to 1/8 inch thick. Lift, move, and rearrange the parchment as often as needed. Flip the dough over and lift the back parchment to lightly dust with flour as well. If the dough sticks to the parchment too much, you’ll get wrinkles. Once rolled out, the dough should be roughly 13 x 18 inches. Chill the dough between the sheets of parchment for 1 hour in the fridge or freezer.
To assemble… Place the dough onto a flat surface. Use a ruler and small paring knife to divide the sheet of dough into 16 4x3 inch rectangles. (four rows of four running lengthwise) Choose eight of the rectangles that you like best, these will be the outer facing top pieces on each of your hand pies.
Pair the tops with the bottoms across your surface in two lines. Spoon about 1 tablespoon of jam onto the center of each bottom piece and use a butter knife or offset spatula to spread the jam into a rectangle about 2x3 inches and about 1/4 inch thick. You should have about a 1/2 inch of jam-free dough running around all sides.
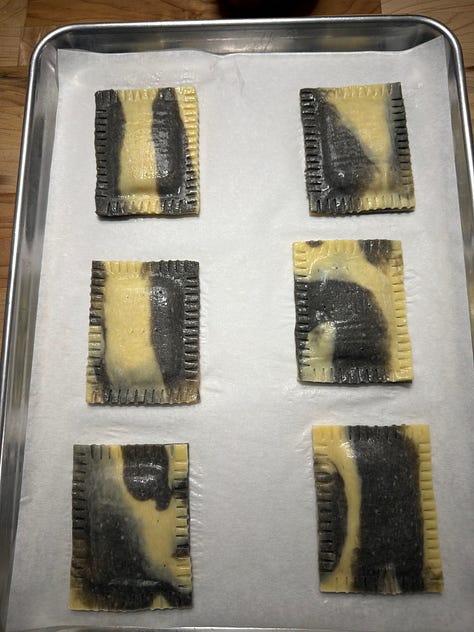
Use a small knife to poke vents into the top pieces of dough. I create three rows of five punctures in each piece. Lift one top piece of dough at a time and use your fingers to apply a small amount of water to the underside about 1/2 an inch in on all edges. Place the top piece onto the bottom and gently press around the edges watching for air bubbles and gently pressing them out when they appear.
When all hand pies are assembled, chill them for 15 minutes or so to make the next step easier. Use a fork to press and seal the edges of each pie. Press gently and downward with the fork held close to the tines by your thumb and finger rather than holding the fork by the handle. This will give you more control. When all eight are complete, chill them while you preheat the oven to 375F.
When the oven is preheated, very lightly brush each hand pie with the whisked egg white and arrange them on a parchment lined sheet tray. Bake for 23 to 25 minutes, rotating once halfway. The hand pies are finished when the dough looks opaque and slightly golden with lightly browned bottoms and firm edges. Cool for 10 minutes before carefully moving each hand pie to a wire rack.
Comments
Nothing yet. Say the first thing.
Sign in to join the conversation.