
This week I made progress on the sharpening station I’m making. I also did the layout for my Krenov-style sawhorses and milled some wood for projects to come.
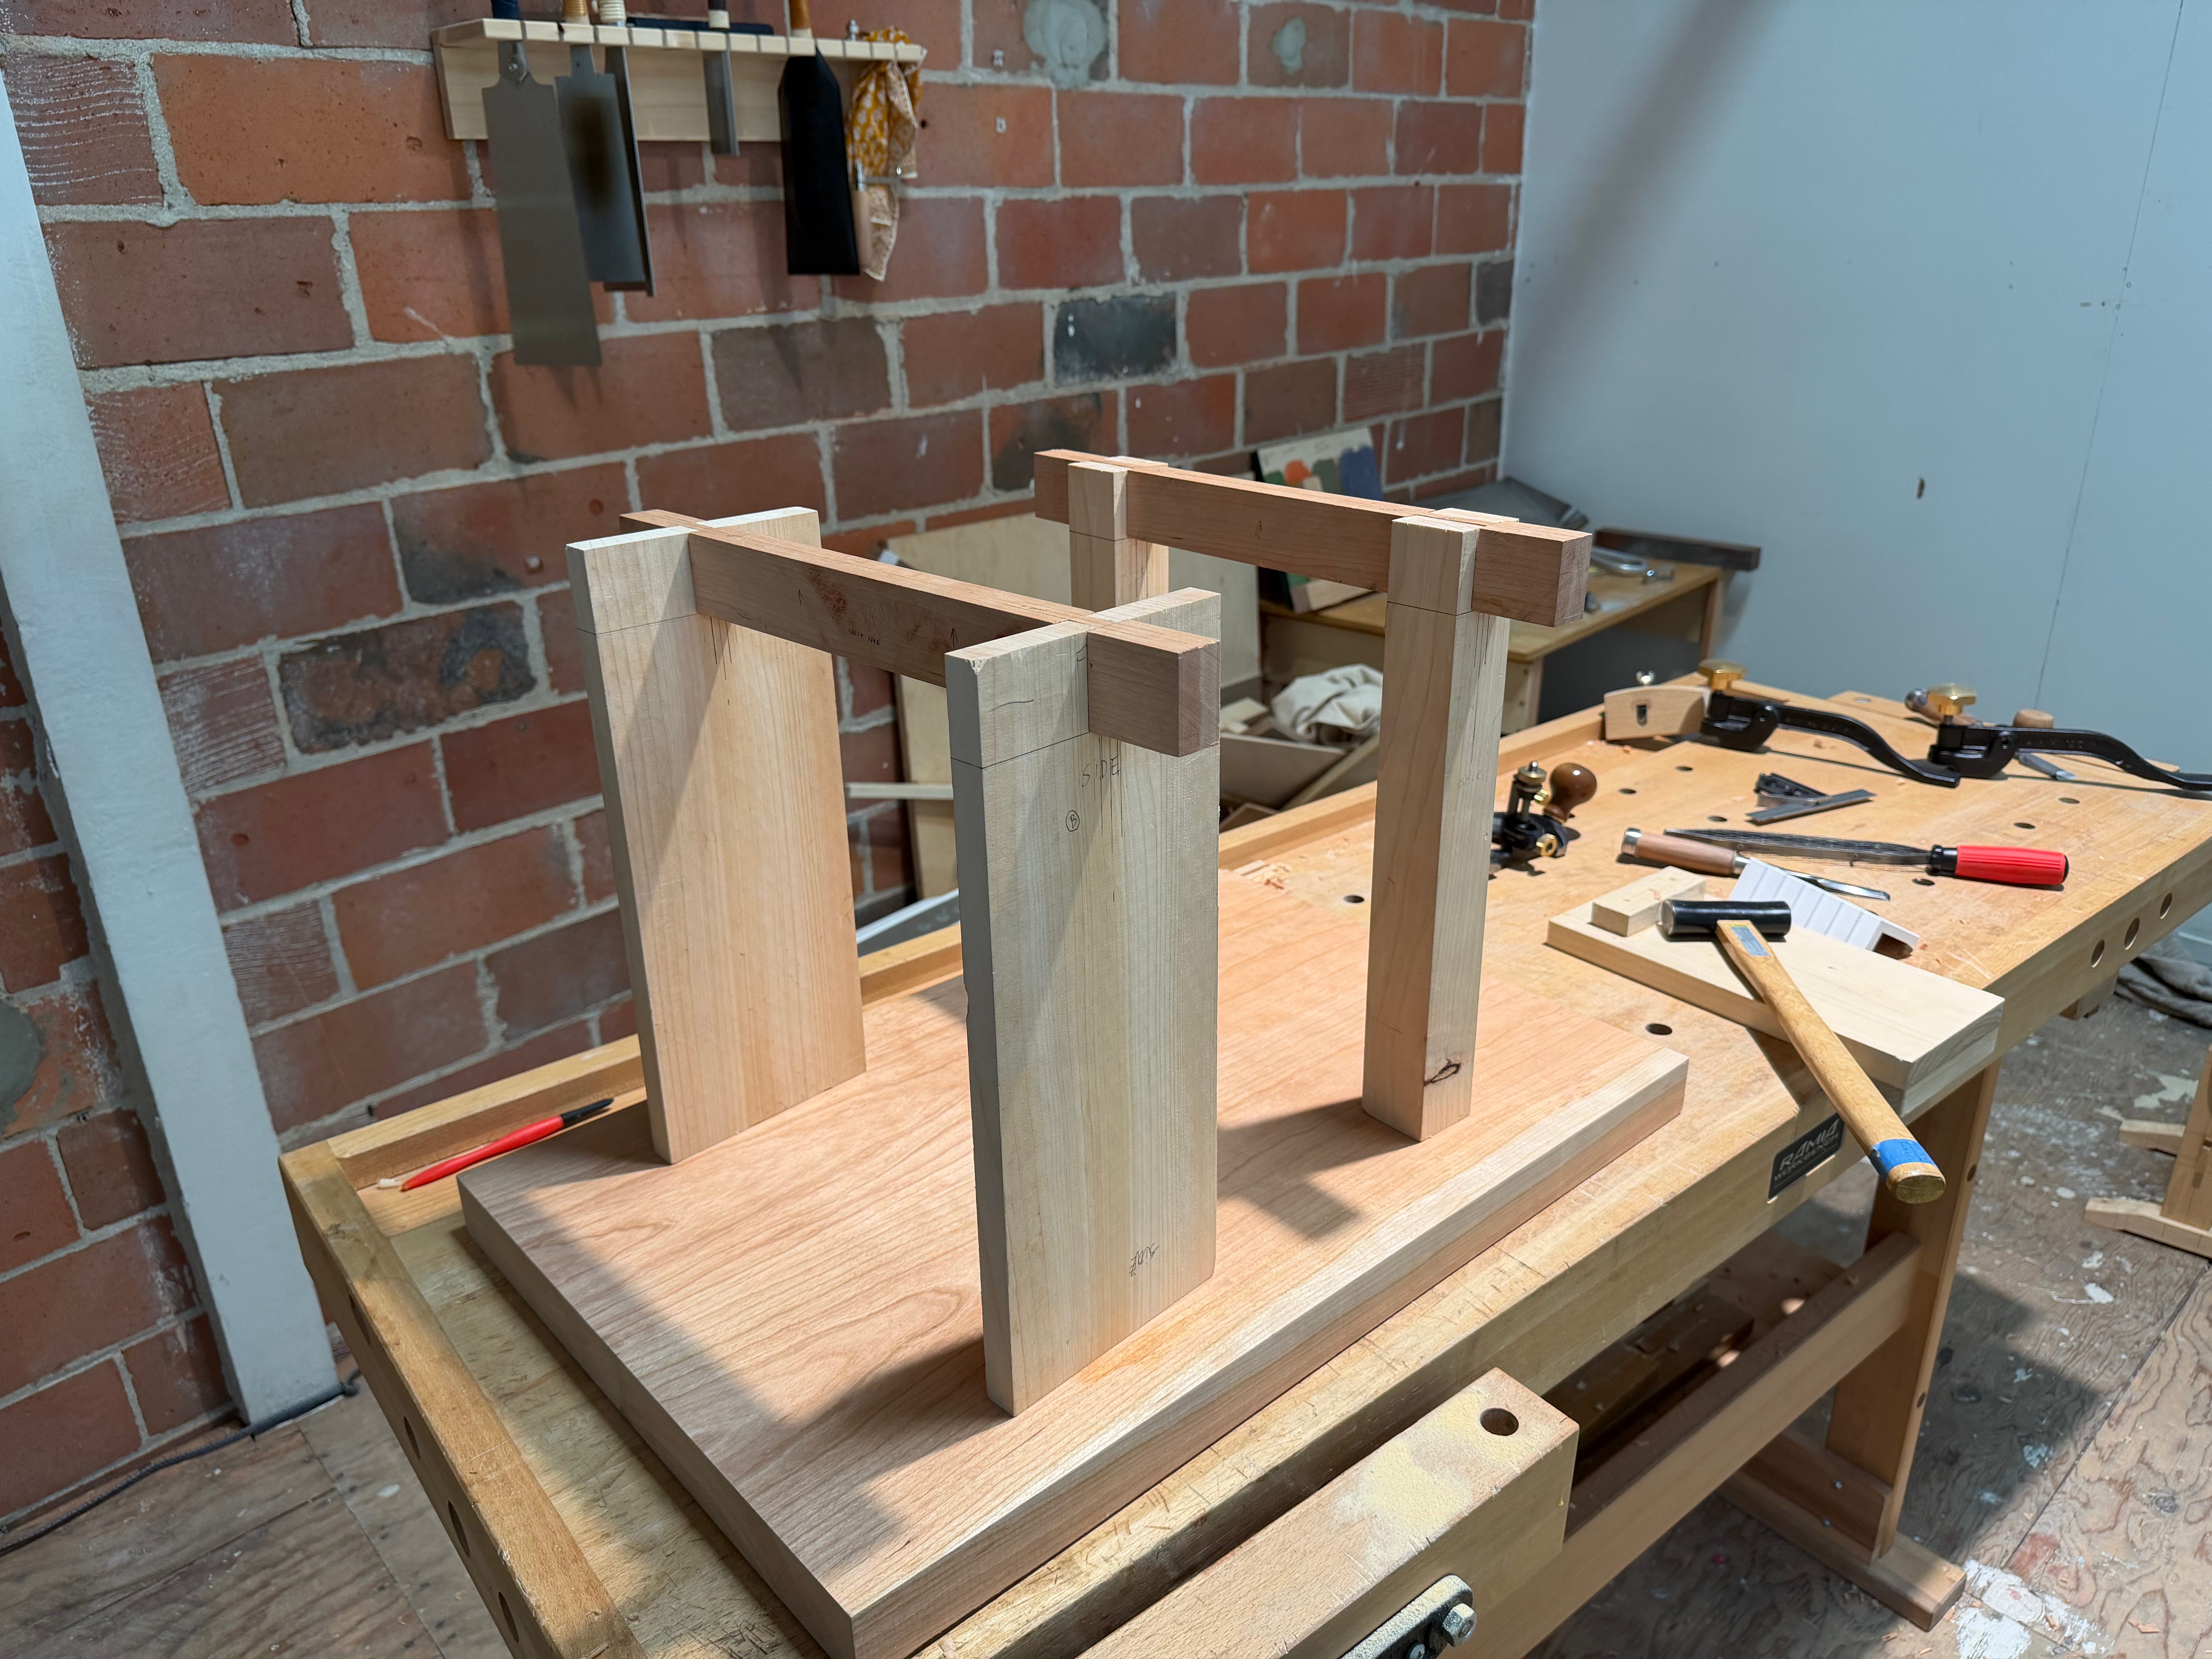
The end is in sight for my sharpening station, after many false starts and redos. Today I cut out the bridle joints, shown above. Now all I have to do is cut out the piece that will go across the two sides to connect them, install a shelf or two in the wider piece on the left, and attach the top. You can see the top in the image above, it is the thick piece of cherry that the base pieces are sitting on. I can’t wait for this thing to come to life!
This is the first time I’ve used a bridle joint (diagram shown above) in a project. I really like how it looks and I think it will make for a very sturdy base for my sharpening table. I had planned to make the “open” side of the joint the same width as the wood itself, i.e. to not cut a skinnier section into the rail (the top piece in the image above). But I chatted about with my former woodworking teacher, Jason, on Saturday, and he told me that cutting that section out makes the joint much more rigid.
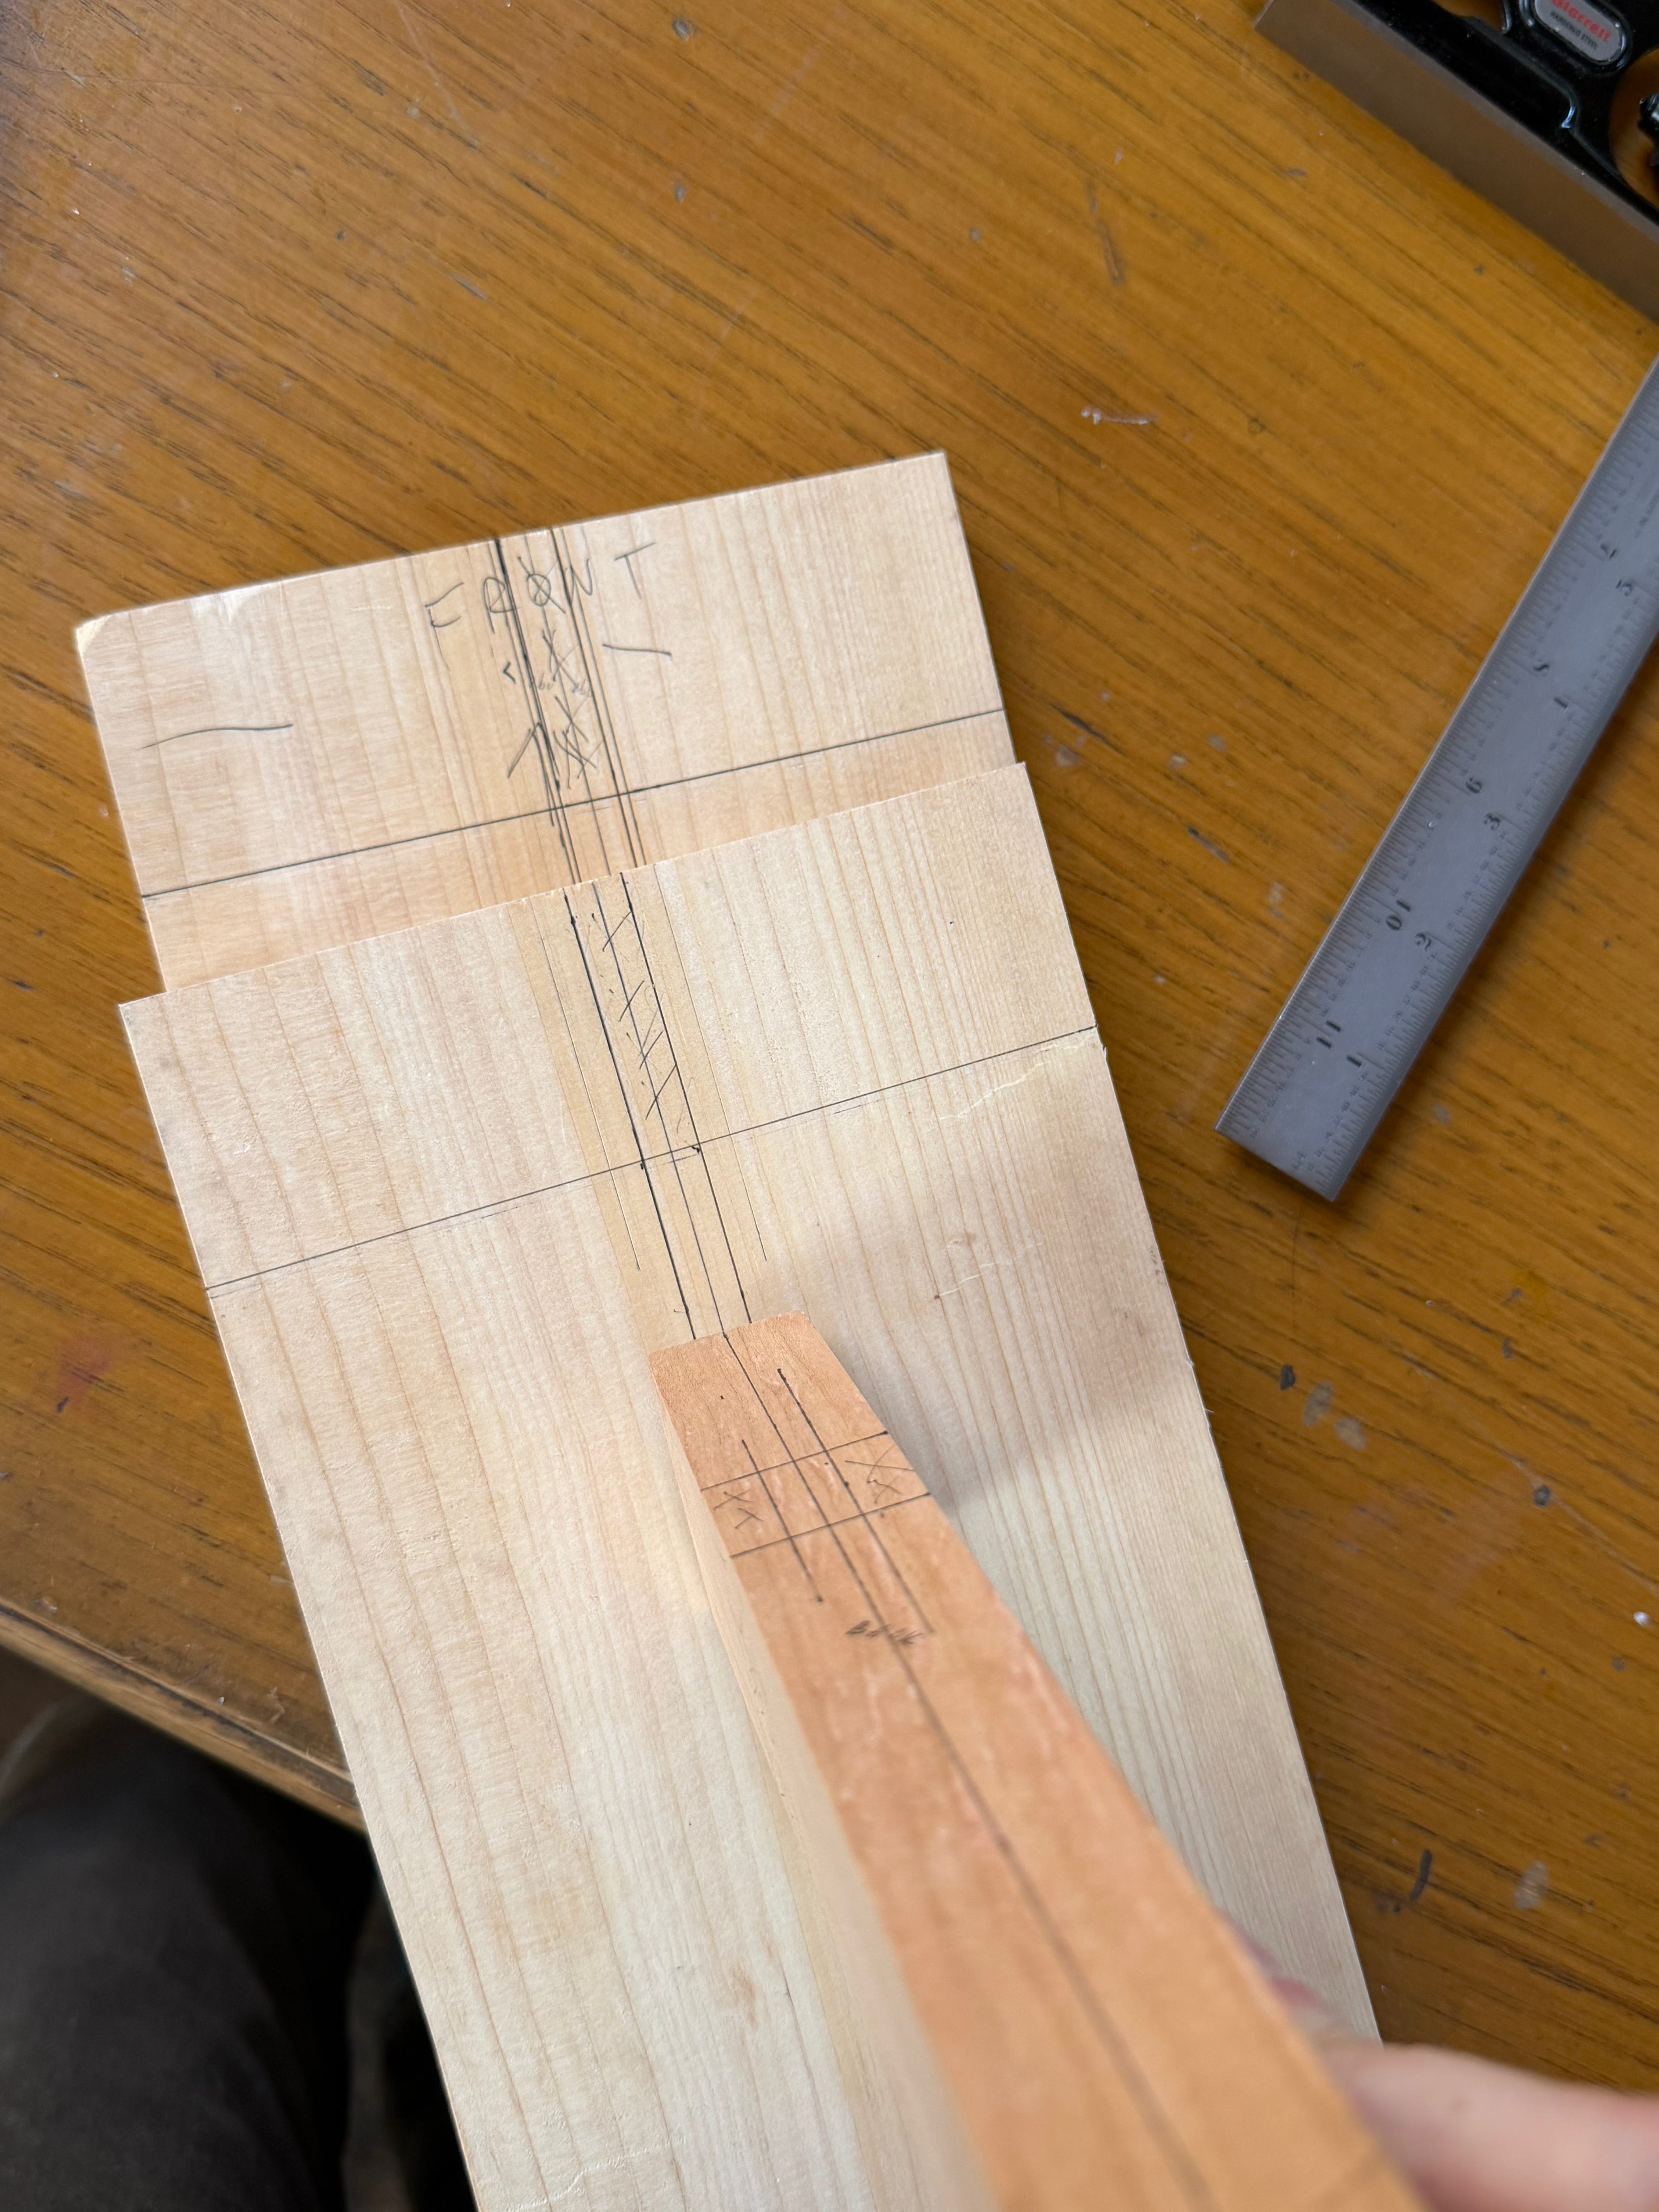
It’s a pretty straightforward joint to mark and cut out. The first step is to mark out the “common area” on both pieces. In other words, the places where the two pieces of wood will intersect, if not the joint itself. On the wider piece, the common area is denoted by the horizontal line — it is as far from the top as the piece that goes into it is tall. On the narrow piece, the width of the board that it will go into is represented by the two horizontal lines.
The next step is to find the center of the two pieces that will go together. Then it’s just a matter of measuring the same distance off of both center lines. On the wider piece, I simply cut down the lines with a saw and then chopped and split with my chisel. On the narrower piece, I sawed down the shoulders, chiseled out the waste, then got perfectly flat with a router plane.
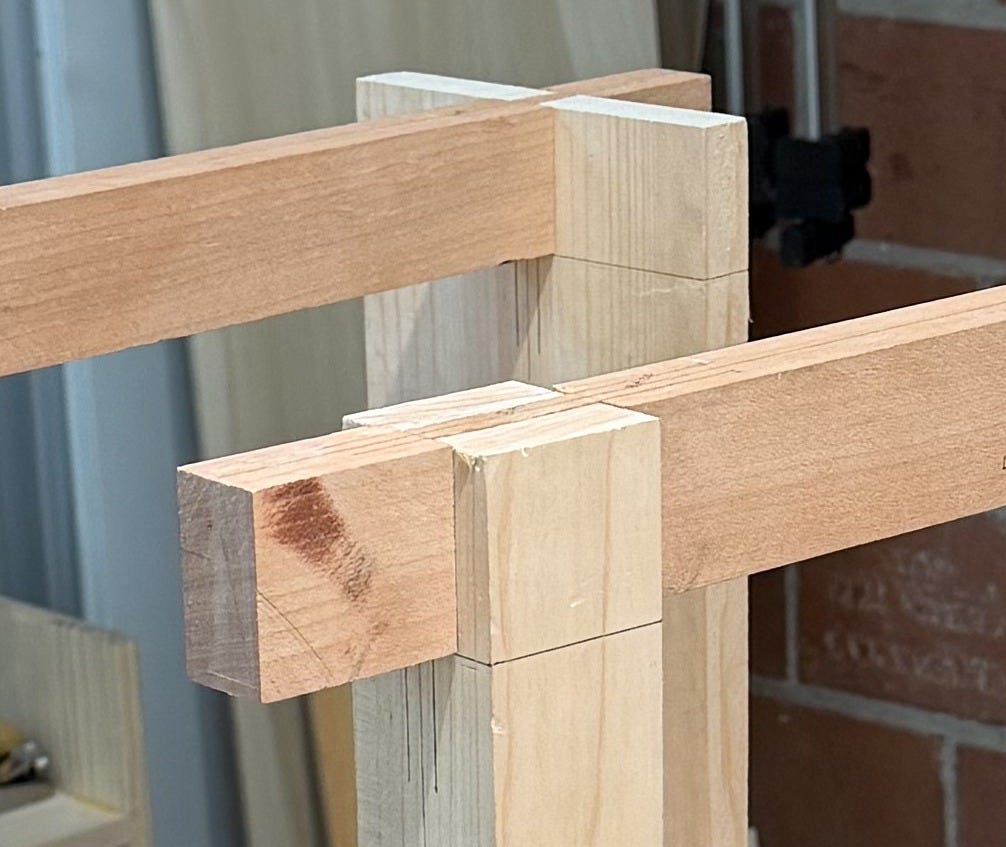
It’s a very satisfying joint to put together. The wood I’m using here is Port Orford Cedar for the upright pieces and cherry for the cross pieces. I had planned to use Port Orford Cedar for the whole thing but I made so many mistakes that I ran out of it and opted to use cherry I had on hand.
The way I’ve learned to lay out joinery always starts with a center line. By finding the center of pieces of wood you want to put together, you can precisely mark how they fit together based on how the joint relates to the center. I like this method a lot, it makes intuitive sense to me, unlike 90% of the other woodworking concepts I’ve encountered.
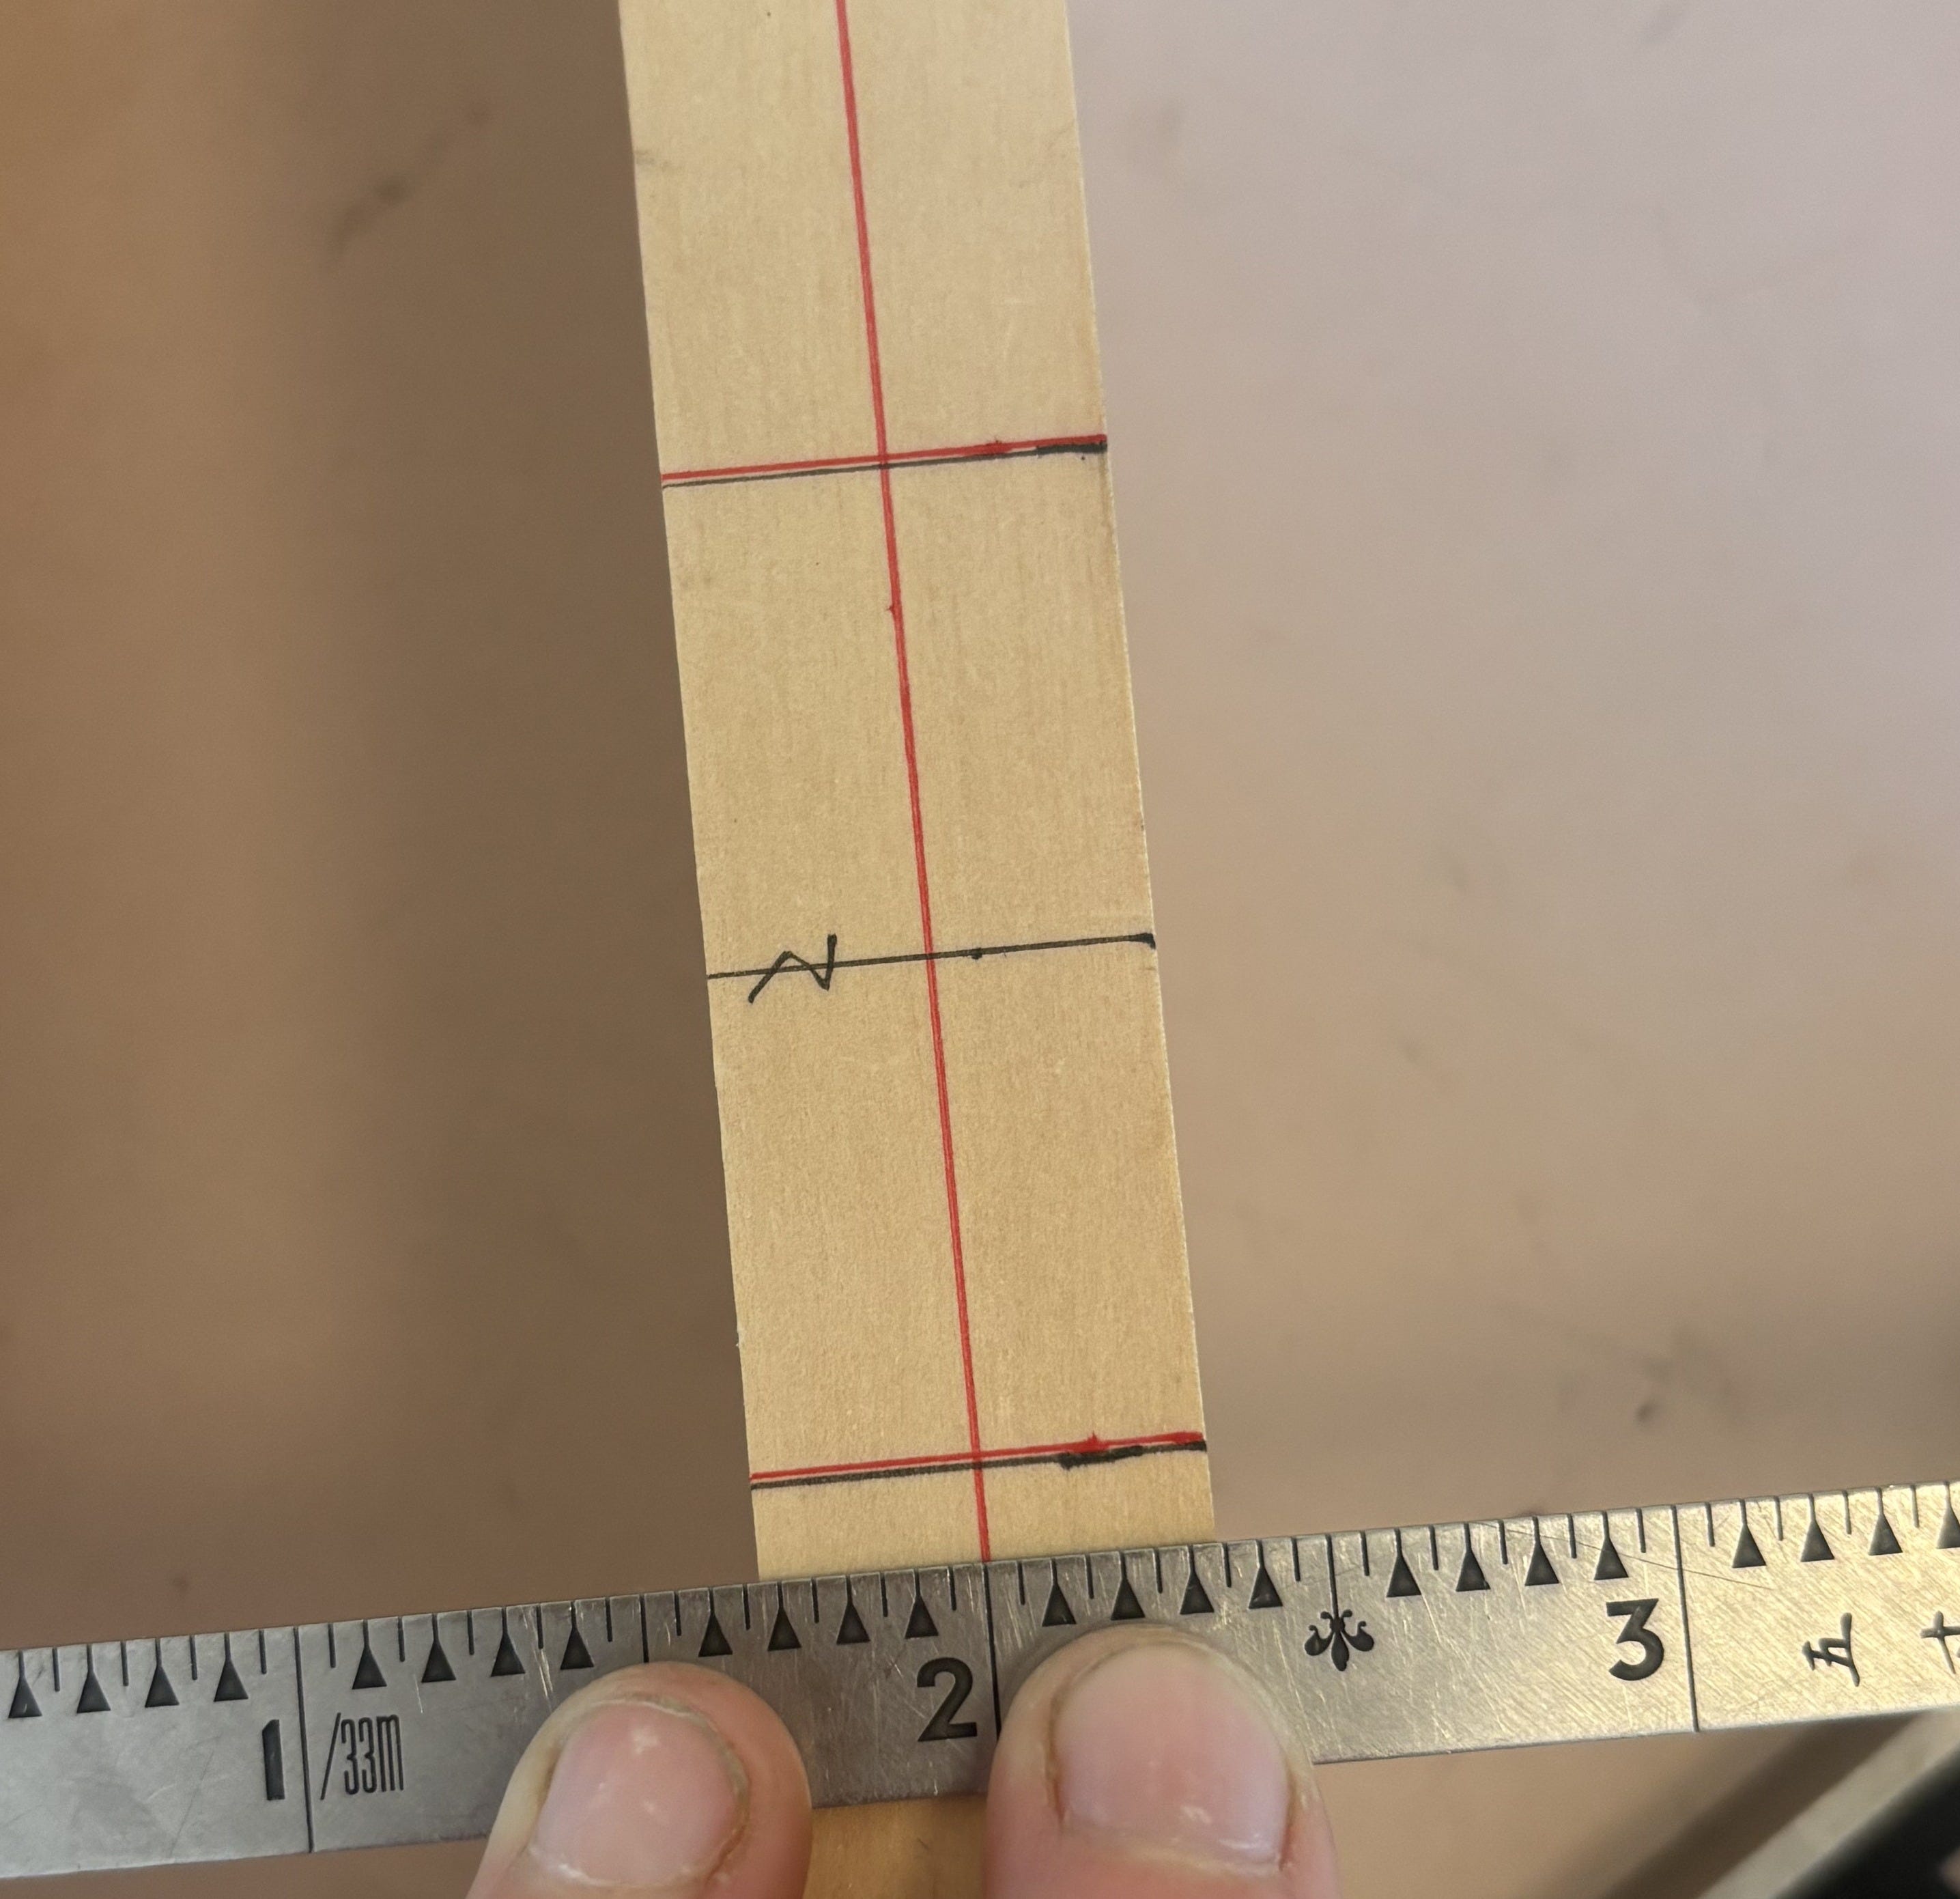
I like that working from the center line involves little to no math. The way I usually find the center is by taking a ruler, picking some whole number that I want to be the center, and then “balancing” the two sides ‘till there are an equal number of tick marks on either side. If the edges fall between tick marks, your eye is surprisingly good at lining up so the same gap exists on both sides. You do this a few times across the piece, connect the dots with a straight edge, and voila — a center line. I find this much easier and more sane than measuring the width and dividing by two and then trying to mark some hellish fraction.
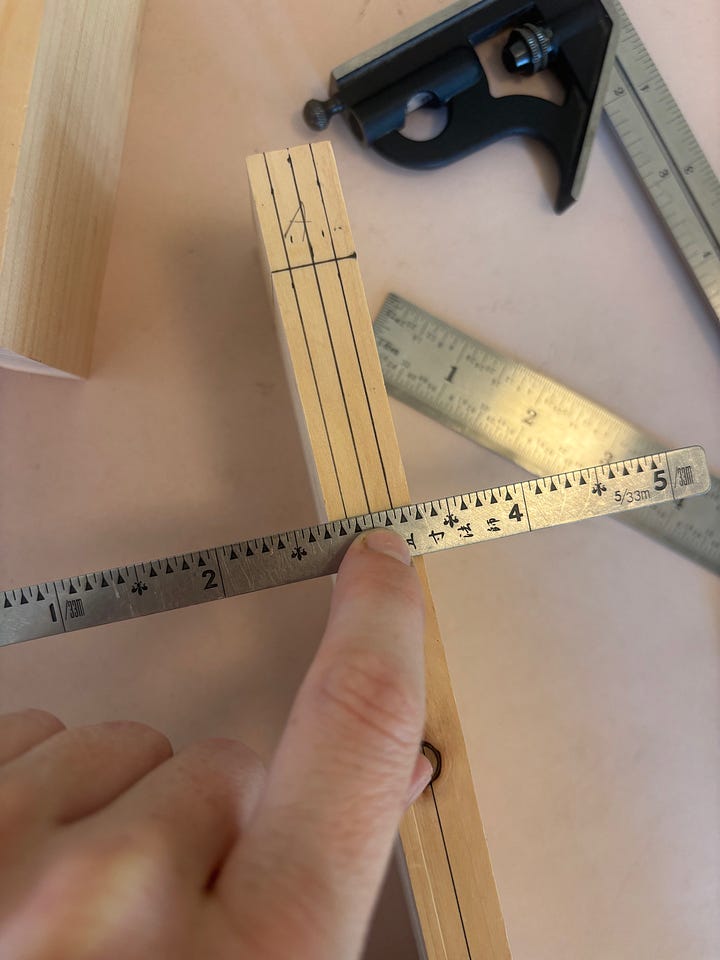
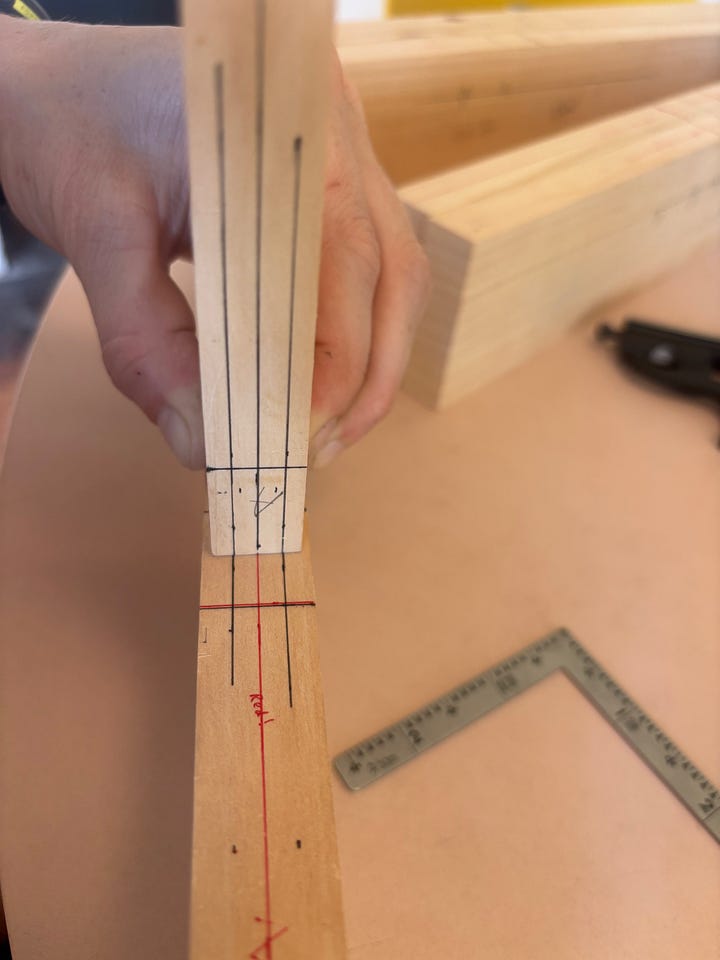
This makes laying out joinery easy. For example, for the mortise and a tenon layout above I just found the center, marked the same amount off each, and then they will fit together perfectly (assuming my sawing and chiseling skills are up to snuff, which is never a guarantee…).
Anyway, I learned a cool trick for another way of finding the center line this week from a great video series by Philip Morley on building Krenov-style sawhorses.
You take your combination square and draw a line anywhere on the piece. Then you flip it to the 45 degree setting and place a corner on one side of the line, strike a line, then the opposite side, strike a line. The place where the two lines intersect is the center. I wish I had taken a picture of this because I fear what I just wrote is impossible to understand….
I was having trouble visualizing some details of my sharpening table so I decided to make some scaled drawings. I used a 1:4 scale. I found this pretty fun and useful. But it meant that I did more with fractions this week than I have since elementary school. I’ll admit I had to Google a few embarrassingly elementary concepts (e.g. that to divide a fraction you flip it over and multiply it, the existence of improper fractions, etc.), but once I had refreshed my memory I was off to the races. My woodworking notebook now resembles a second grader’s homework worksheet, but nonetheless.
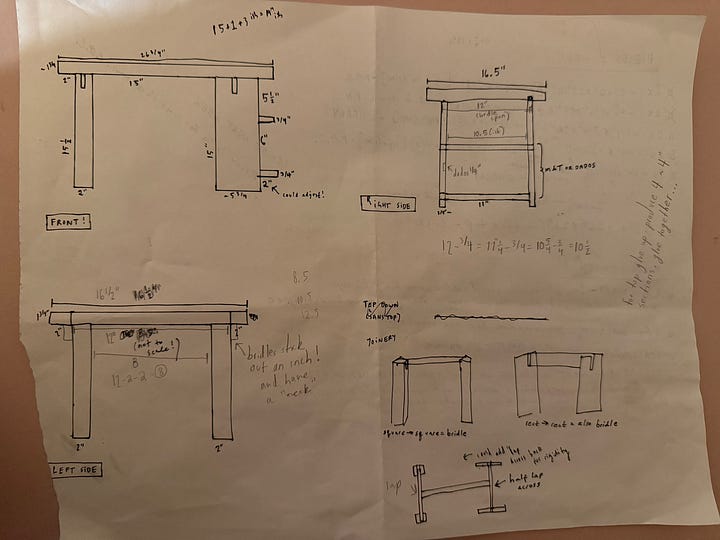

I spent a very peaceful morning with just a calculator, my notebook, a ruler with 1/64” increments, and my pencil. One of my favorite things about woodworking is the degree to which it gets me away from the Brain Poison Delivery Mechanism that is an iPhone, so it’s nice to have drawing as an option to absorb my attention for moments when I can’t be in my studio.
Next week I will hopefully finish my sharpening table.
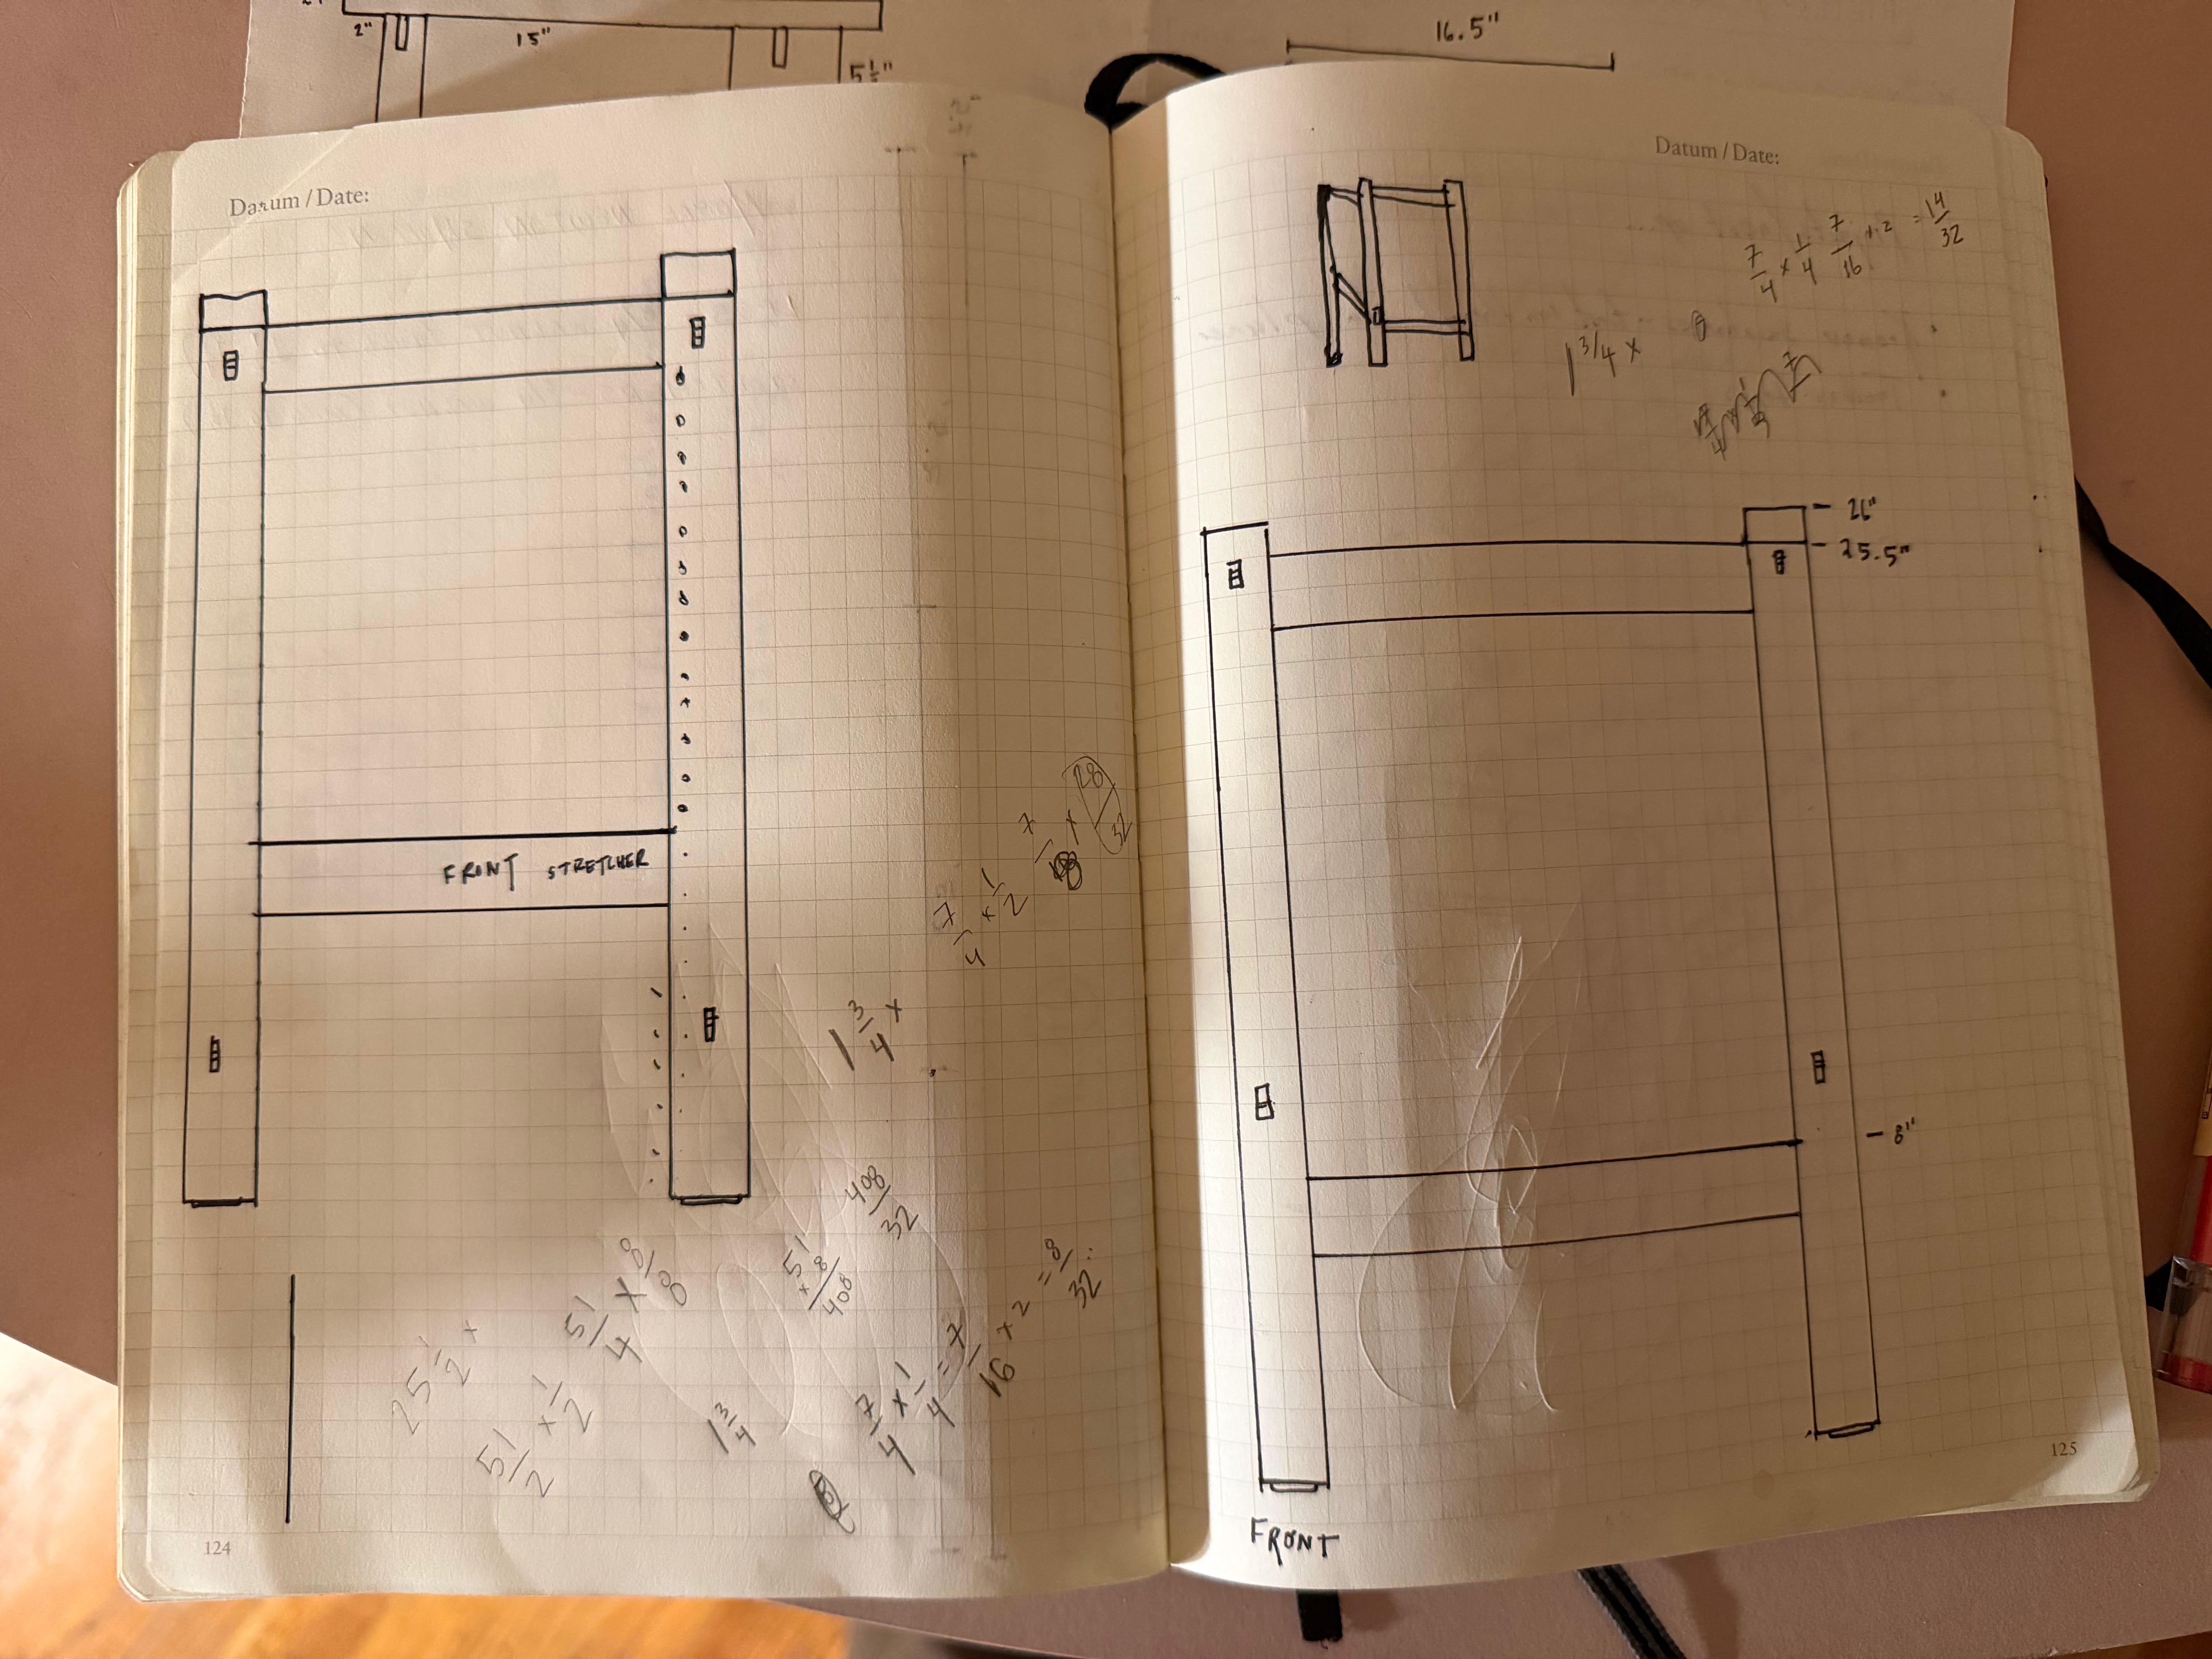
I’m also hoping to pick up a bunch of walnut for a project I’m making for some friends — three counter-height stools. I basically have the form figured out already, as it’s based on a smaller stool I made for myself last year. But I did a little bit of sketching (above) to think about where to put the footrests, which will be necessary for a taller stool. I can’t wait to get started!
That’s all for this week, folks. Over and out 🫡
No posts
Comments
Nothing yet. Say the first thing.
Sign in to join the conversation.