
Spyrix is a commercial monitoring and surveillance software designed for covert remote observation of user activities in real time.

It operates as spyware, meaning it runs hidden on the target system without the user’s knowledge. Once installed, Spyrix transmits captured data to a secure web-based dashboard where the monitoring party can review all recorded activity.
Disclaimer: This guide is intended for educational purposes only. Installing monitoring software on systems without authorization is illegal and may result in criminal prosecution. The author is not responsible for misuse of this information.
Overview
Disclaimer
Core Capabilities
Stealth Features
Detecting Spyrix on a System
Installation Requirements
Spyrix Demo: Surveillance on Windows
Part 1: Setting Up Spyrix on the Attacker Machine
Part 2: Establish Remote Desktop Connection to Target
Part 3: Installing Spyrix on the Target System
Part 4: Verifying the Connection
Part 5: Generating Target User Activity
Part 6: Monitoring User Activity from Spyrix
Part 7: Generating a Monitoring Report
Understanding the Collected Data
Summary
Spyrix provides a comprehensive suite of monitoring features:
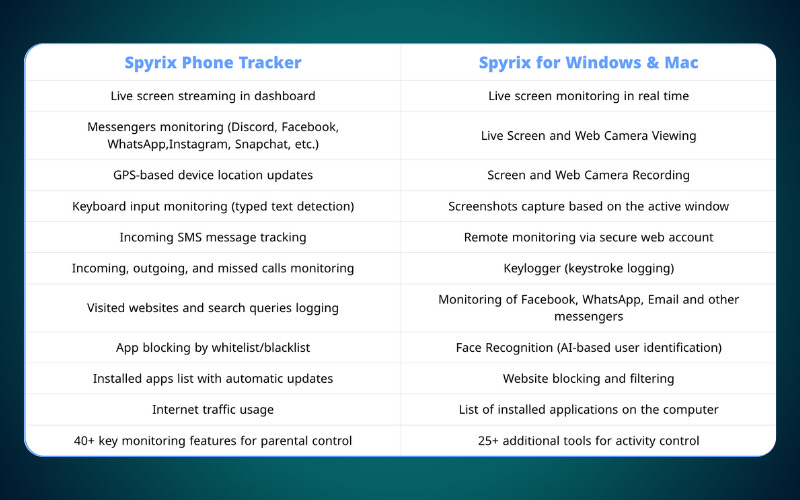
Keystroke logging captures every key pressed on the target system, including passwords, messages, search queries, and any other typed content. This data is logged with timestamps and associated application context, so you can see exactly what was typed and where.
Platform monitoring tracks activity across popular communication applications including Facebook, WhatsApp, Skype, and email clients. This allows surveillance of social media interactions, instant messages, and email correspondence.
Screenshot capture automatically takes periodic screenshots of the target system’s display. These images provide visual confirmation of what the user was viewing at any given time.
Live viewing enables real-time observation of the target screen as the user works. This feature streams the current display to your monitoring dashboard, allowing you to watch activity as it happens.
Webcam monitoring captures images or video from the target system’s webcam, either on demand or through continuous recording.
Screen recording provides continuous video capture of all on-screen activity, creating a complete visual record that can be reviewed later.
Web browsing history logs all websites visited, including URLs, page titles, and visit timestamps.
Application monitoring tracks which programs are launched, how long they remain active, and when they are closed.
Call recording captures video calls from WhatsApp, Facebook, Viber, Skype, Slack, Zoom, and Telegram.
Face recognition, available in PRO and Business tiers, photographs and identifies everyone who accesses the monitored device.
Spyrix operates in a hidden mode by default. It does not appear in the Windows Start Menu, Desktop, or the Add/Remove Programs list in Control Panel.
The software runs as a background process with a non-descriptive name to avoid drawing attention in Task Manager.
Spyrix is detectable on a system due to the following factors:
Antivirus and anti-malware software frequently flag Spyrix as a Potentially Unwanted Program (PUP) or outright malware. Most commercial security solutions maintain signatures for known spyware applications, and Spyrix is well-documented in these databases. Before installation, attackers typically disable or create exclusions in the target system’s security software.
Network traffic analysis can reveal Spyrix activity. The software must transmit captured data to remote servers, generating outbound network connections that security monitoring tools or firewalls may flag as suspicious. The traffic patterns, destination addresses, and data volumes can indicate surveillance software is present.
Process and service enumeration can uncover Spyrix. While the process names are designed to appear innocuous, detailed inspection of running processes, loaded DLLs, and system services can reveal the software’s presence.
Registry entries and file system artifacts remain on the target system. Forensic analysis of the Windows Registry, installed services, scheduled tasks, and file system can identify Spyrix installation even when the software attempts to hide.
Behavioral indicators such as unusual system behavior such as slowdowns, unexpected disk activity, webcam lights activating without user action, or unexplained network traffic may alert observant users to surveillance activity.
Installing Spyrix requires administrative privileges on the target system.
The installer must be executed with elevated permissions, which means you need either physical access to an unlocked administrator session or valid administrator credentials for remote installation.
The installation process requires user interaction unless specifically configured for silent deployment.
Enterprise versions of similar monitoring software often support silent installation through command-line parameters or Group Policy deployment, but the standard Spyrix Personal Monitor installer presents a graphical wizard.
In the following demo, we will install Spyrix Personal Monitor on a target Windows system using Remote Desktop access and then use the web dashboard to monitor user activity. Our attacker machine is also on Windows.
This section covers installing Spyrix on a target machine and creating the monitoring account that will receive captured data.
Log in to your attacker workstation, which will serve as the system where you monitor the collected surveillance data.
Download Spyrix from https://www.spyrix.com/download.php and navigate to the installation folder. Double-click the installer file to launch the installation wizard.
The installation wizard begins with a Welcome screen that requests an email address for online monitoring. Leave this field blank for now and click Next. You will register for an account separately in the following steps.
Proceed through the remaining installation screens using the default options. On the final screen, ensure the checkbox labeled “Sign in your Online Monitoring account” is selected. This option opens the Spyrix web portal after installation completes. Click Finish.
Your default web browser opens to the Spyrix web portal. Since you do not yet have an account, click Register to create one.
On the Account Registration page, enter an email address and create a password. This account will serve as your central dashboard for monitoring all systems where Spyrix is installed.
Click Sign Up to complete registration. After the account is created, minimize the browser window but keep it open for later use.
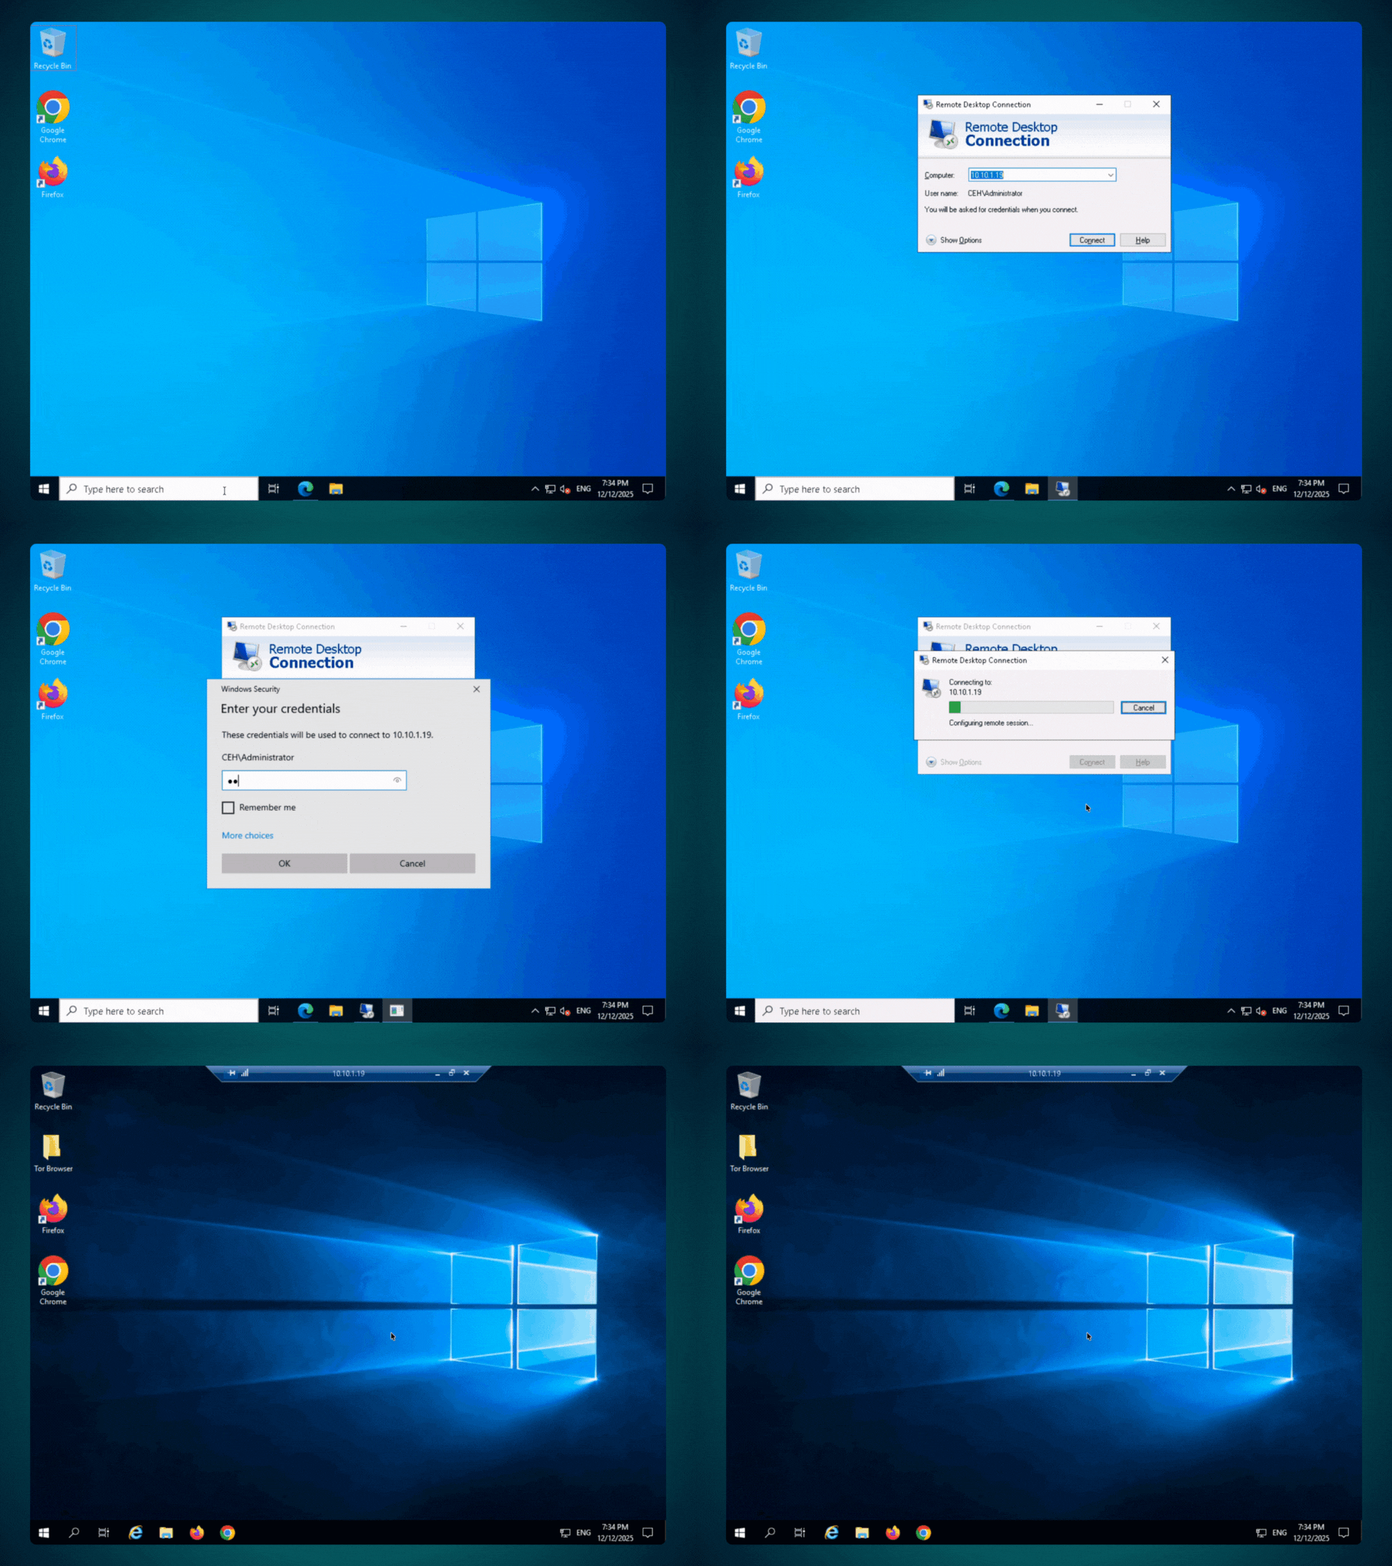
To install Spyrix on the target system, you need remote or physical access to that machine. In this demo, we’ll use Windows Remote Desktop Protocol (RDP) to connect to the target. In a real scenario, these credentials would have been obtained through techniques such as password cracking, phishing, or credential harvesting.
On your attacker machine, click the search field in the taskbar, type Remote, and select Remote Desktop Connection from the search results.
The Remote Desktop Connection window opens. In the Computer field, enter the IP address of your target system click ‘Connect’.
A Windows Security prompt appears requesting the password. Enter the password for the compromised account and click OK.
A security warning dialog appears indicating that the identity of the remote computer cannot be verified. This warning appears because the connection is not using a trusted certificate. Click Yes to proceed.
Important: Remote Desktop connections require the target machine to be powered on and accessible over the network. If the connection fails, verify that the target system is running.
The Remote Desktop session establishes successfully, and you now see the Desktop of the target system. A Networks prompt may appear asking whether you want your PC to be discoverable by other devices on this network. Click Yes to dismiss this prompt.
If Server Manager launches automatically, close it to clear your workspace. Minimize the Remote Desktop Connection window but keep the session active.
With remote access established, you can now deploy the Spyrix monitoring software to the target machine. This simulates how an attacker with remote access would install surveillance tools.
Before downloading and installing Spyrix, you must disable Windows Defender and add an exclusion for the Spyrix installation folder on the target system.
Spyrix is flagged as a Potentially Unwanted Program by most security software, and the installation will fail or be quarantined if these steps are not completed.
To disable the antivirus on the target system, press Win+R to open the Run dialog. Type windowsdefender://threat in the Open field and press Enter. This opens the Virus & threat protection settings directly. Alternatively, you can open Settings, navigate to Update & Security, select Windows Security, and then click Virus & threat protection.
In the Virus & threat protection window, click “Manage settings” under Virus & threat protection settings.
Locate the Real-time protection toggle and turn it off. Windows may display a User Account Control prompt, so click Yes to confirm.
Scroll down to the Exclusions section and click “Add or remove exclusions” to add an exclusion for the Spyrix installation folder.
Click “+ Add an exclusion” and select “Folder” from the dropdown menu. Enter the path C:\ProgramData\Security Monitor\ and click “Select folder” to add the exclusion.
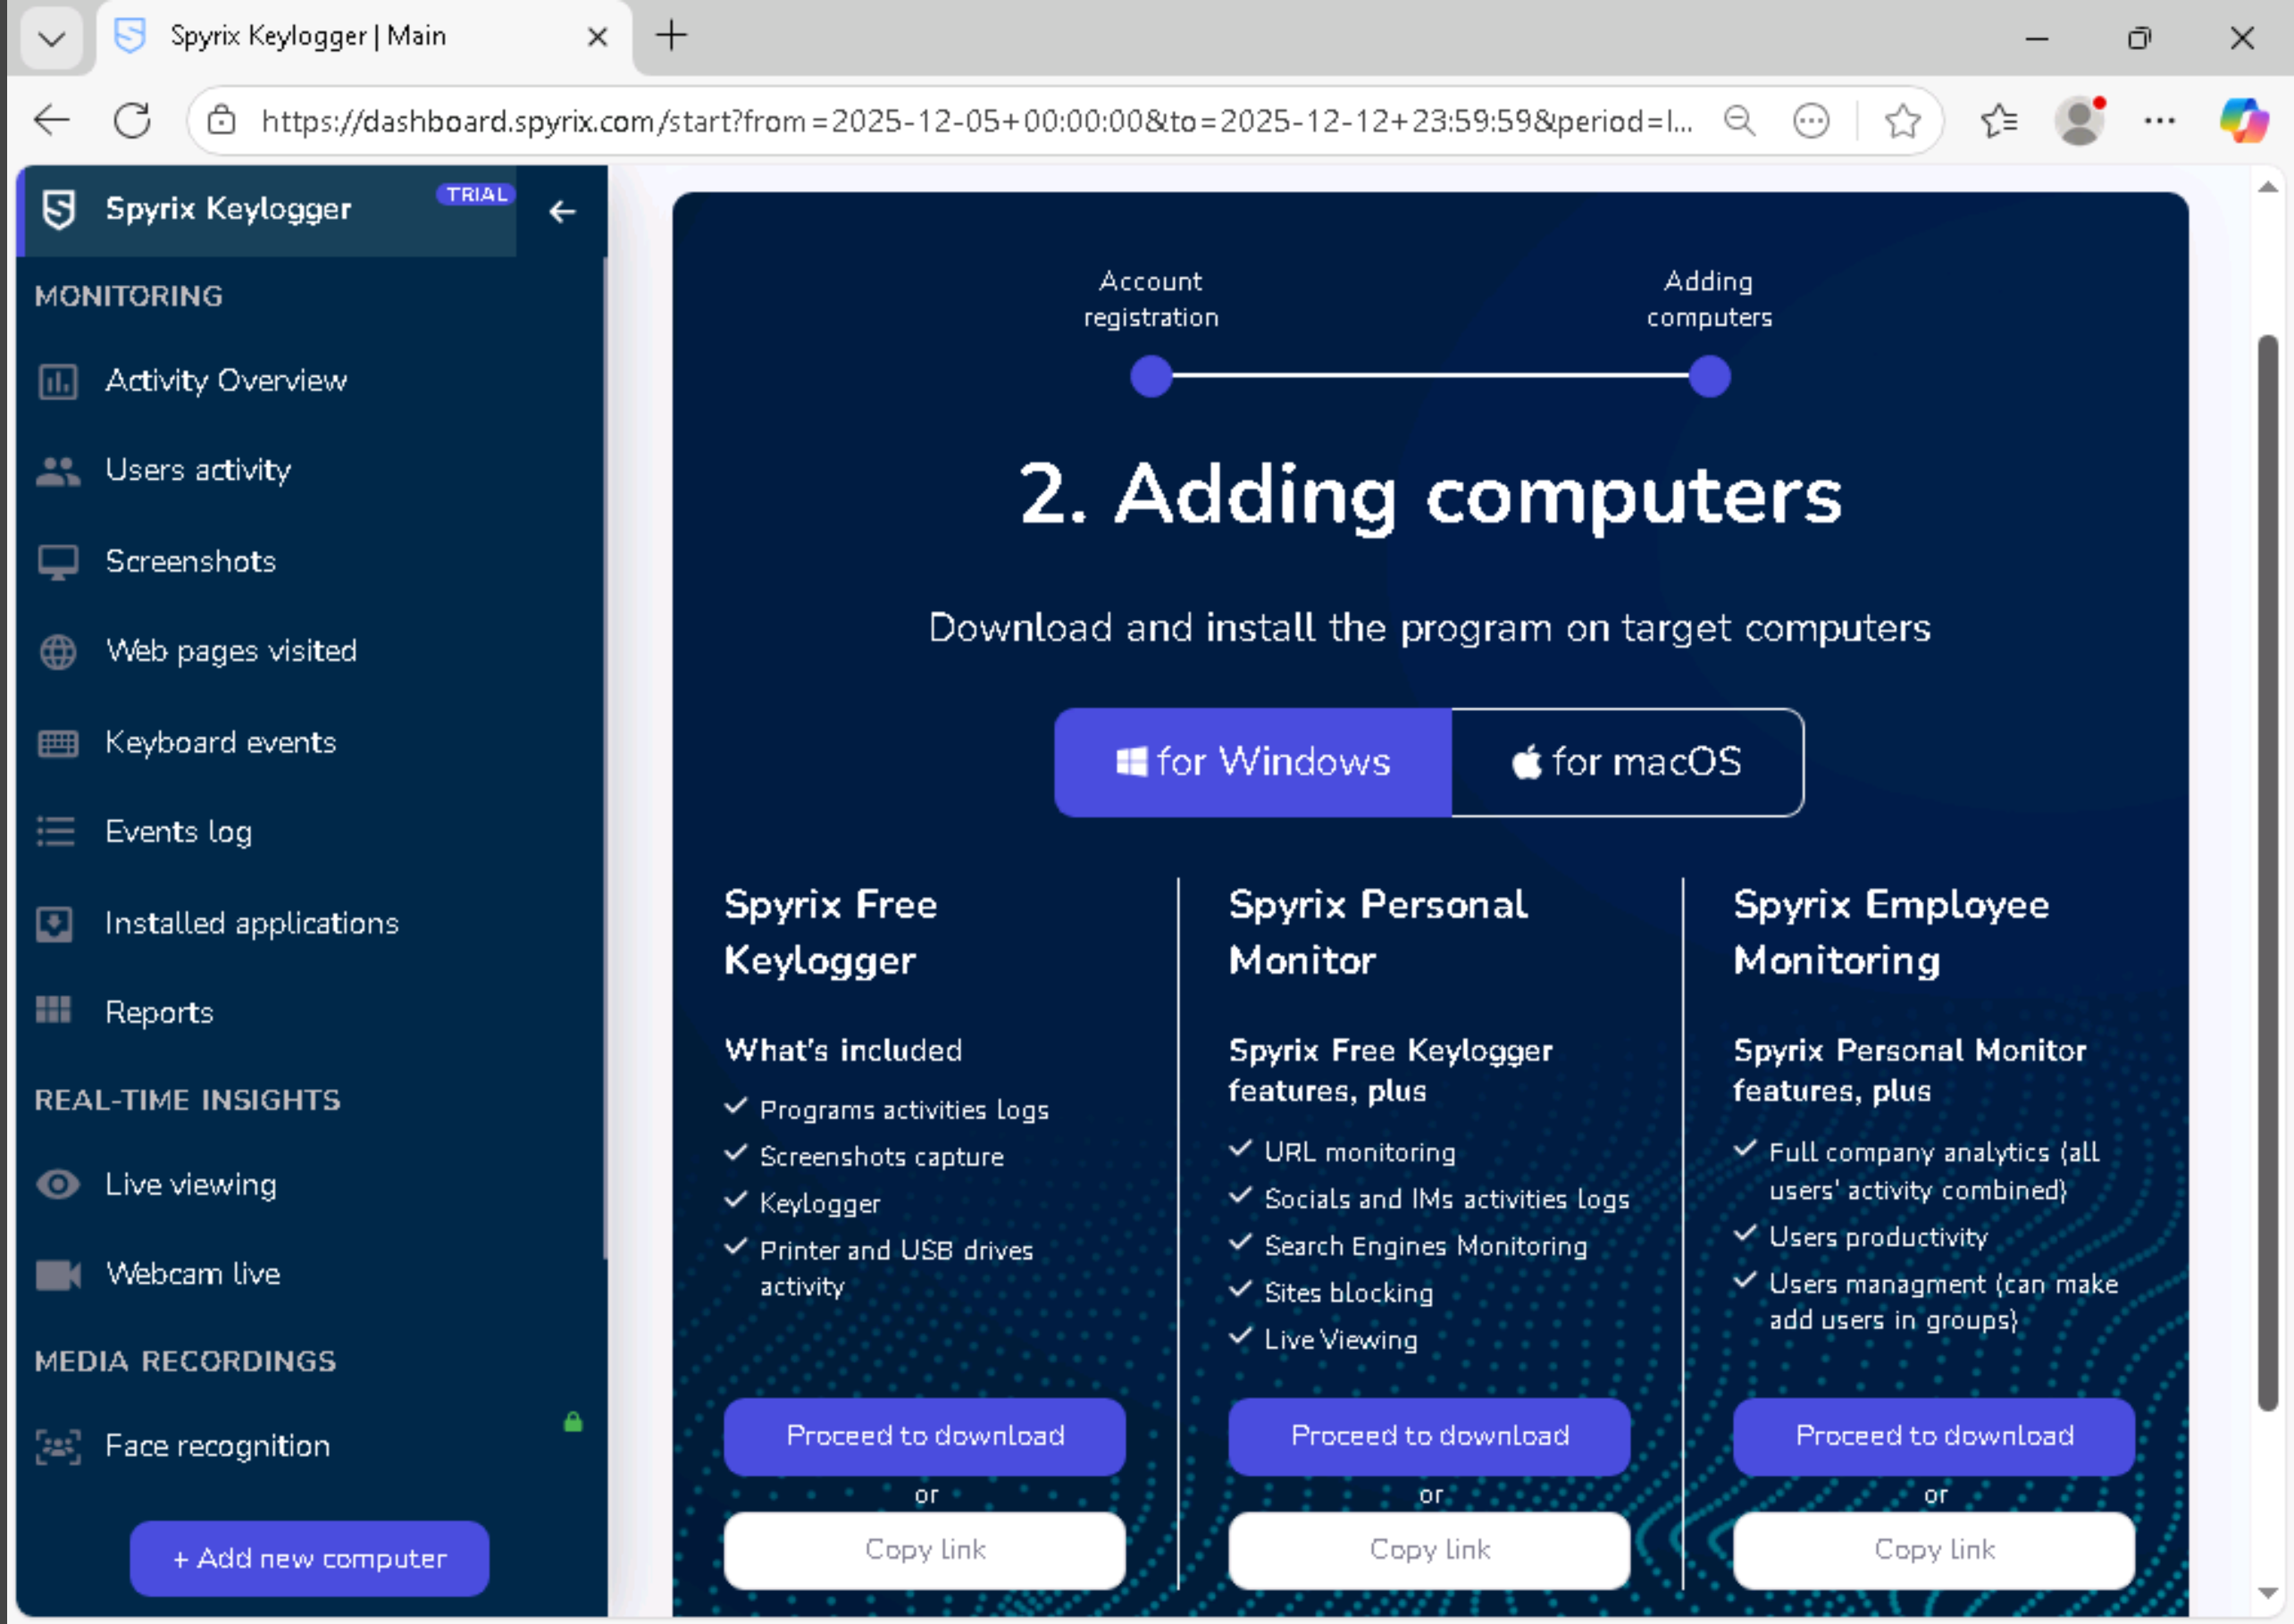
On your attacker machine, return to the Spyrix dashboard in your browser. After logging in, you will see the “Adding computers” section which displays download options. Select your target platform (Windows or macOS) and choose the appropriate product tier. Click “Proceed to download” to download the installer file.
The download page displays a password required to extract the downloaded ZIP file. Make note of this password before proceeding.
Navigate to the folder where the installer was downloaded and extract the ZIP file using the password provided.
Right-click on the extracted installer file and select Copy.
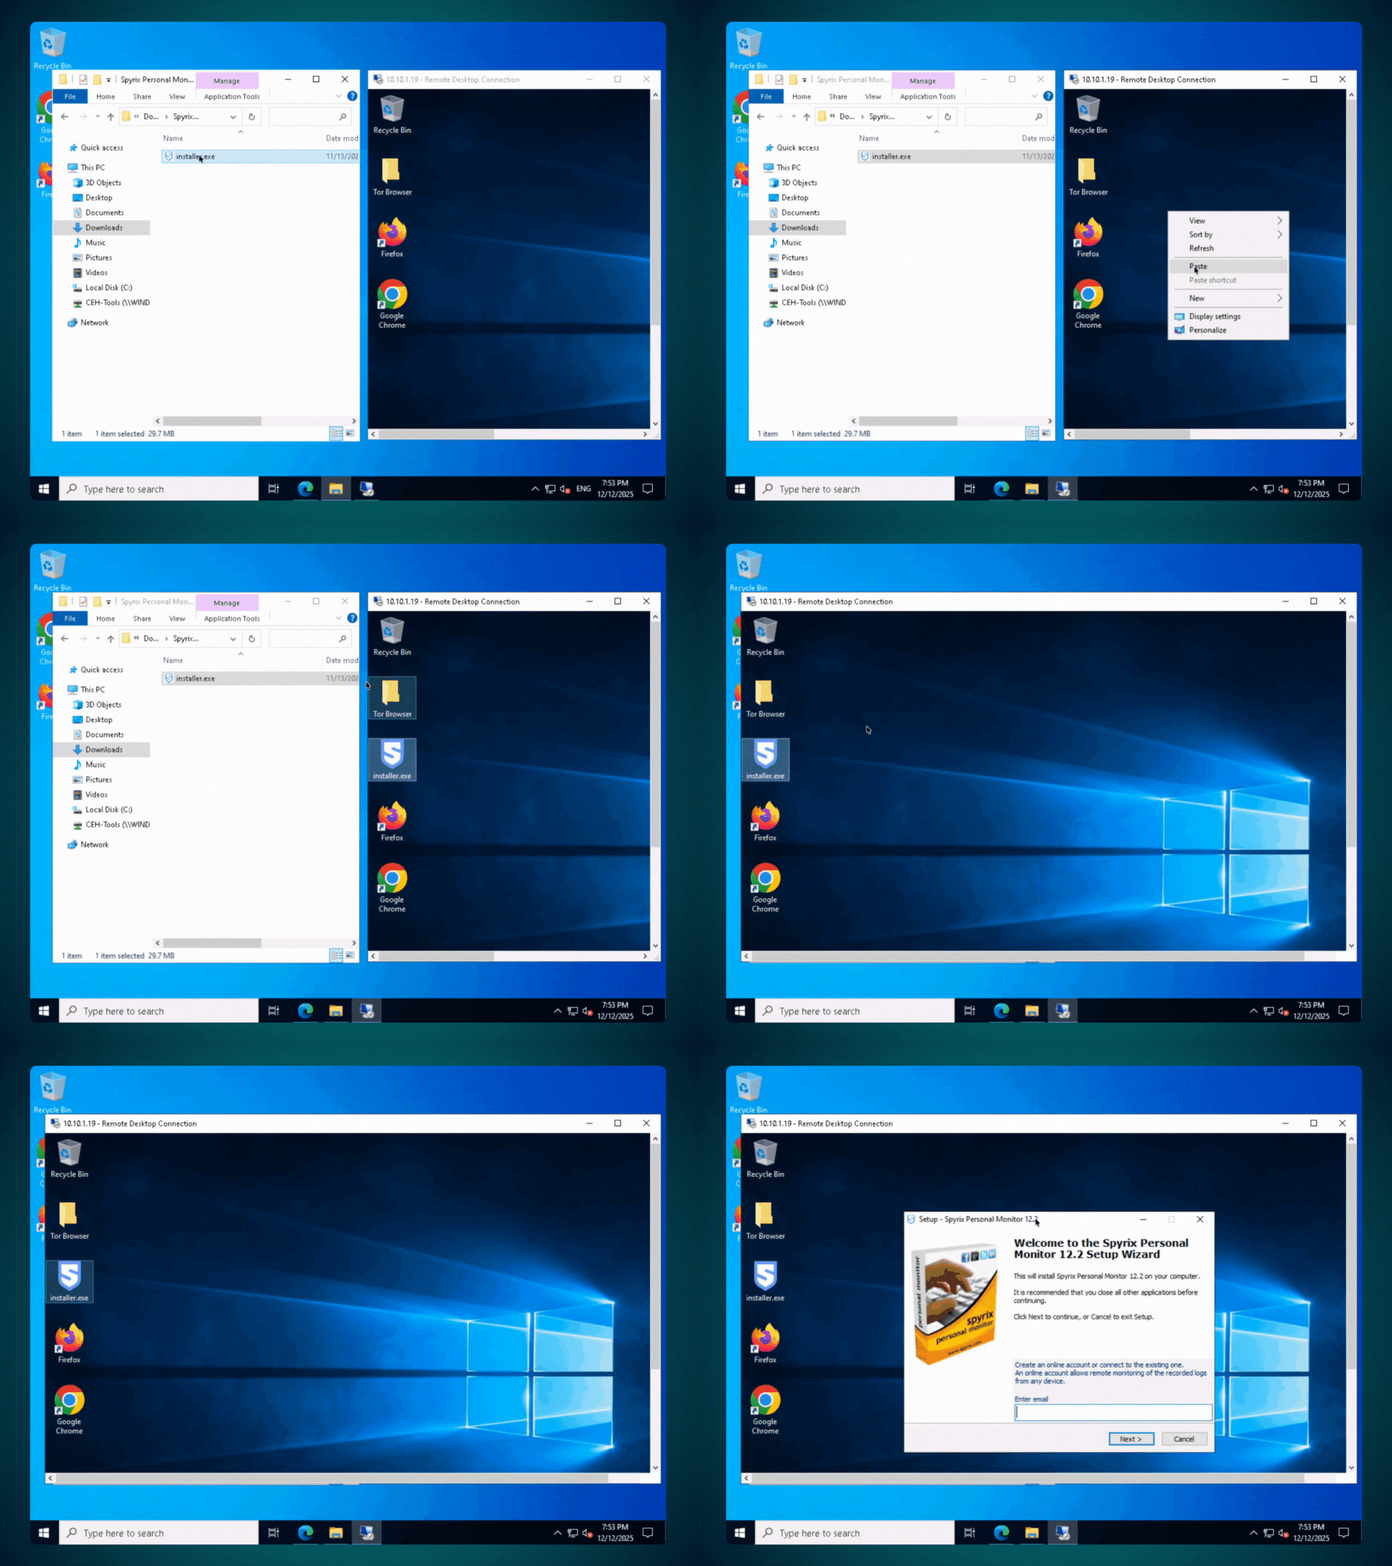
Restore the minimized Remote Desktop Connection window to view the target system’s Desktop. Right-click on an empty area of the Desktop and select Paste. The Spyrix installer copies from your local machine to the target system through the Remote Desktop session. RDP allows clipboard sharing between the local and remote systems, which facilitates file transfer during attacks.
On the target system’s Desktop, double-click the installer file to launch it. If Windows displays a User Account Control prompt asking whether you want to allow this application to make changes, click Yes. This step requires the remote session to have administrative privileges.
A language selection dialog appears. Keep the default selection and click OK.
The installation wizard’s Welcome screen appears. Enter the email address you registered earlier. This links the target system’s Spyrix installation to your monitoring account, ensuring all captured data transmits to your dashboard. Click Next to continue.
Complete the remaining installation steps using default options. On the final screen, select the radio button labeled “No, I will restart the computer later” and click Finish.
Delete the installer file from the Desktop to remove evidence of the installation.
Manually restart the target machine by right-clicking the Start button, selecting Shut down or sign out, then clicking Restart. Restarting ensures Spyrix initializes properly and begins running in hidden mode.
After the target system restarts, Spyrix begins operating in hidden mode and establishes communication with your monitoring account. This section verifies that the connection is working.
Return to Windows Server 2022 and maximize the browser window containing the Spyrix web portal. A notification should appear indicating that a new computer has connected to your account. Close this notification popup.
If the notification does not appear automatically, refresh the page by pressing F5 or clicking the browser’s reload button.
If the connected computer still does not appear, click your email address in the top-right corner of the page and select Computers from the dropdown menu. This displays a list of all systems linked to your monitoring account.
Troubleshooting: If the target computer does not appear in your Computers list after refreshing, the Spyrix service may not have started properly after the restart.
Establish a new Remote Desktop session the target, following Steps 8 through 12, which forces the system to fully initialize. Close the Remote Desktop window after connecting, then return to the browser and refresh the Spyrix dashboard.
To demonstrate Spyrix’s monitoring capabilities, you need to generate activity on the target system that the software can capture. This section simulates a legitimate user performing normal tasks.
Switch to the target machine directly rather than through Remote Desktop. Press Ctrl+Alt+Delete to reach the login screen. Select Jason from the user list on the left side and enter the password qwerty.
After logging in, open a web browser such as Google Chrome. Browse to any website of your choice. For this demonstration, we navigate to Gmail. The goal is to generate typical user activity including web browsing, typing, and interacting with applications.
Spend a few minutes performing various activities on the target system. Visit multiple websites, type text into search fields or forms, and open different applications. Each of these actions generates data that Spyrix captures and transmits to your monitoring account. After generating sufficient activity, leave the machine as is and proceed to the next section.
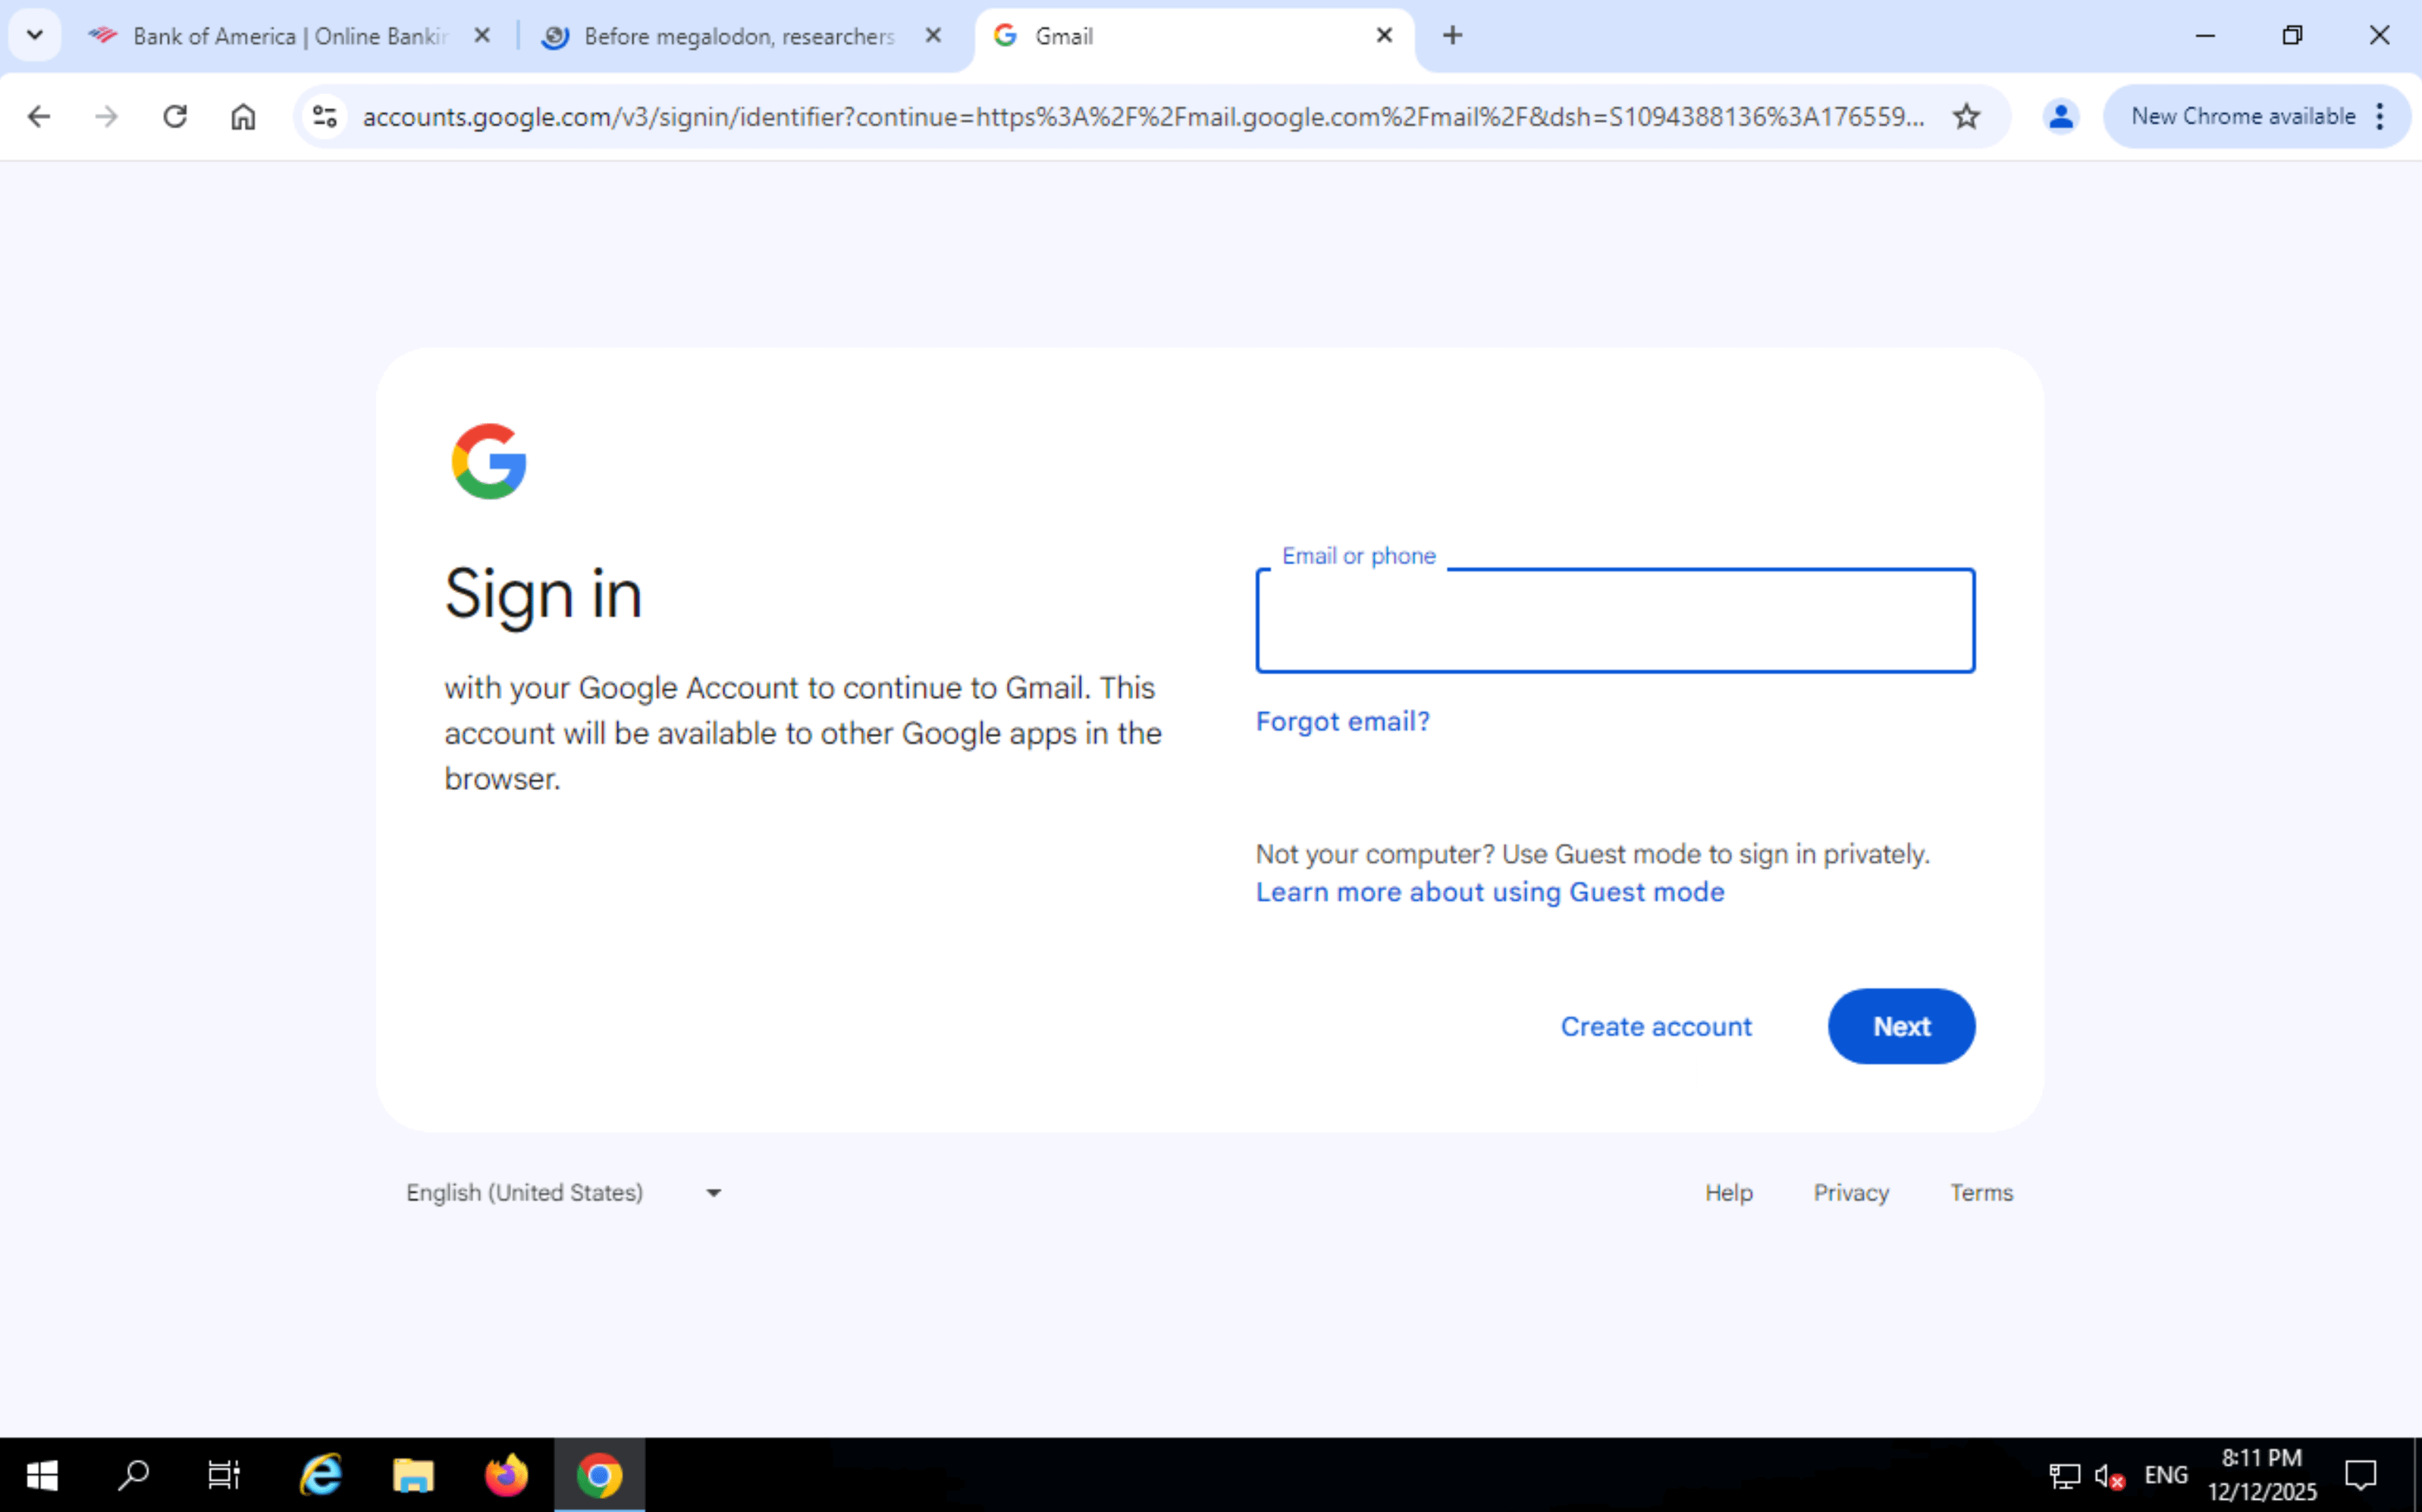
With activity generated on the target system, you can now examine the captured data through the Spyrix web dashboard. This section explores the various monitoring features.
Switch back to your attacker machine and maximize the browser containing the Spyrix Personal Monitor web portal. Click the reload button to refresh the dashboard and load the latest captured data from the target system.
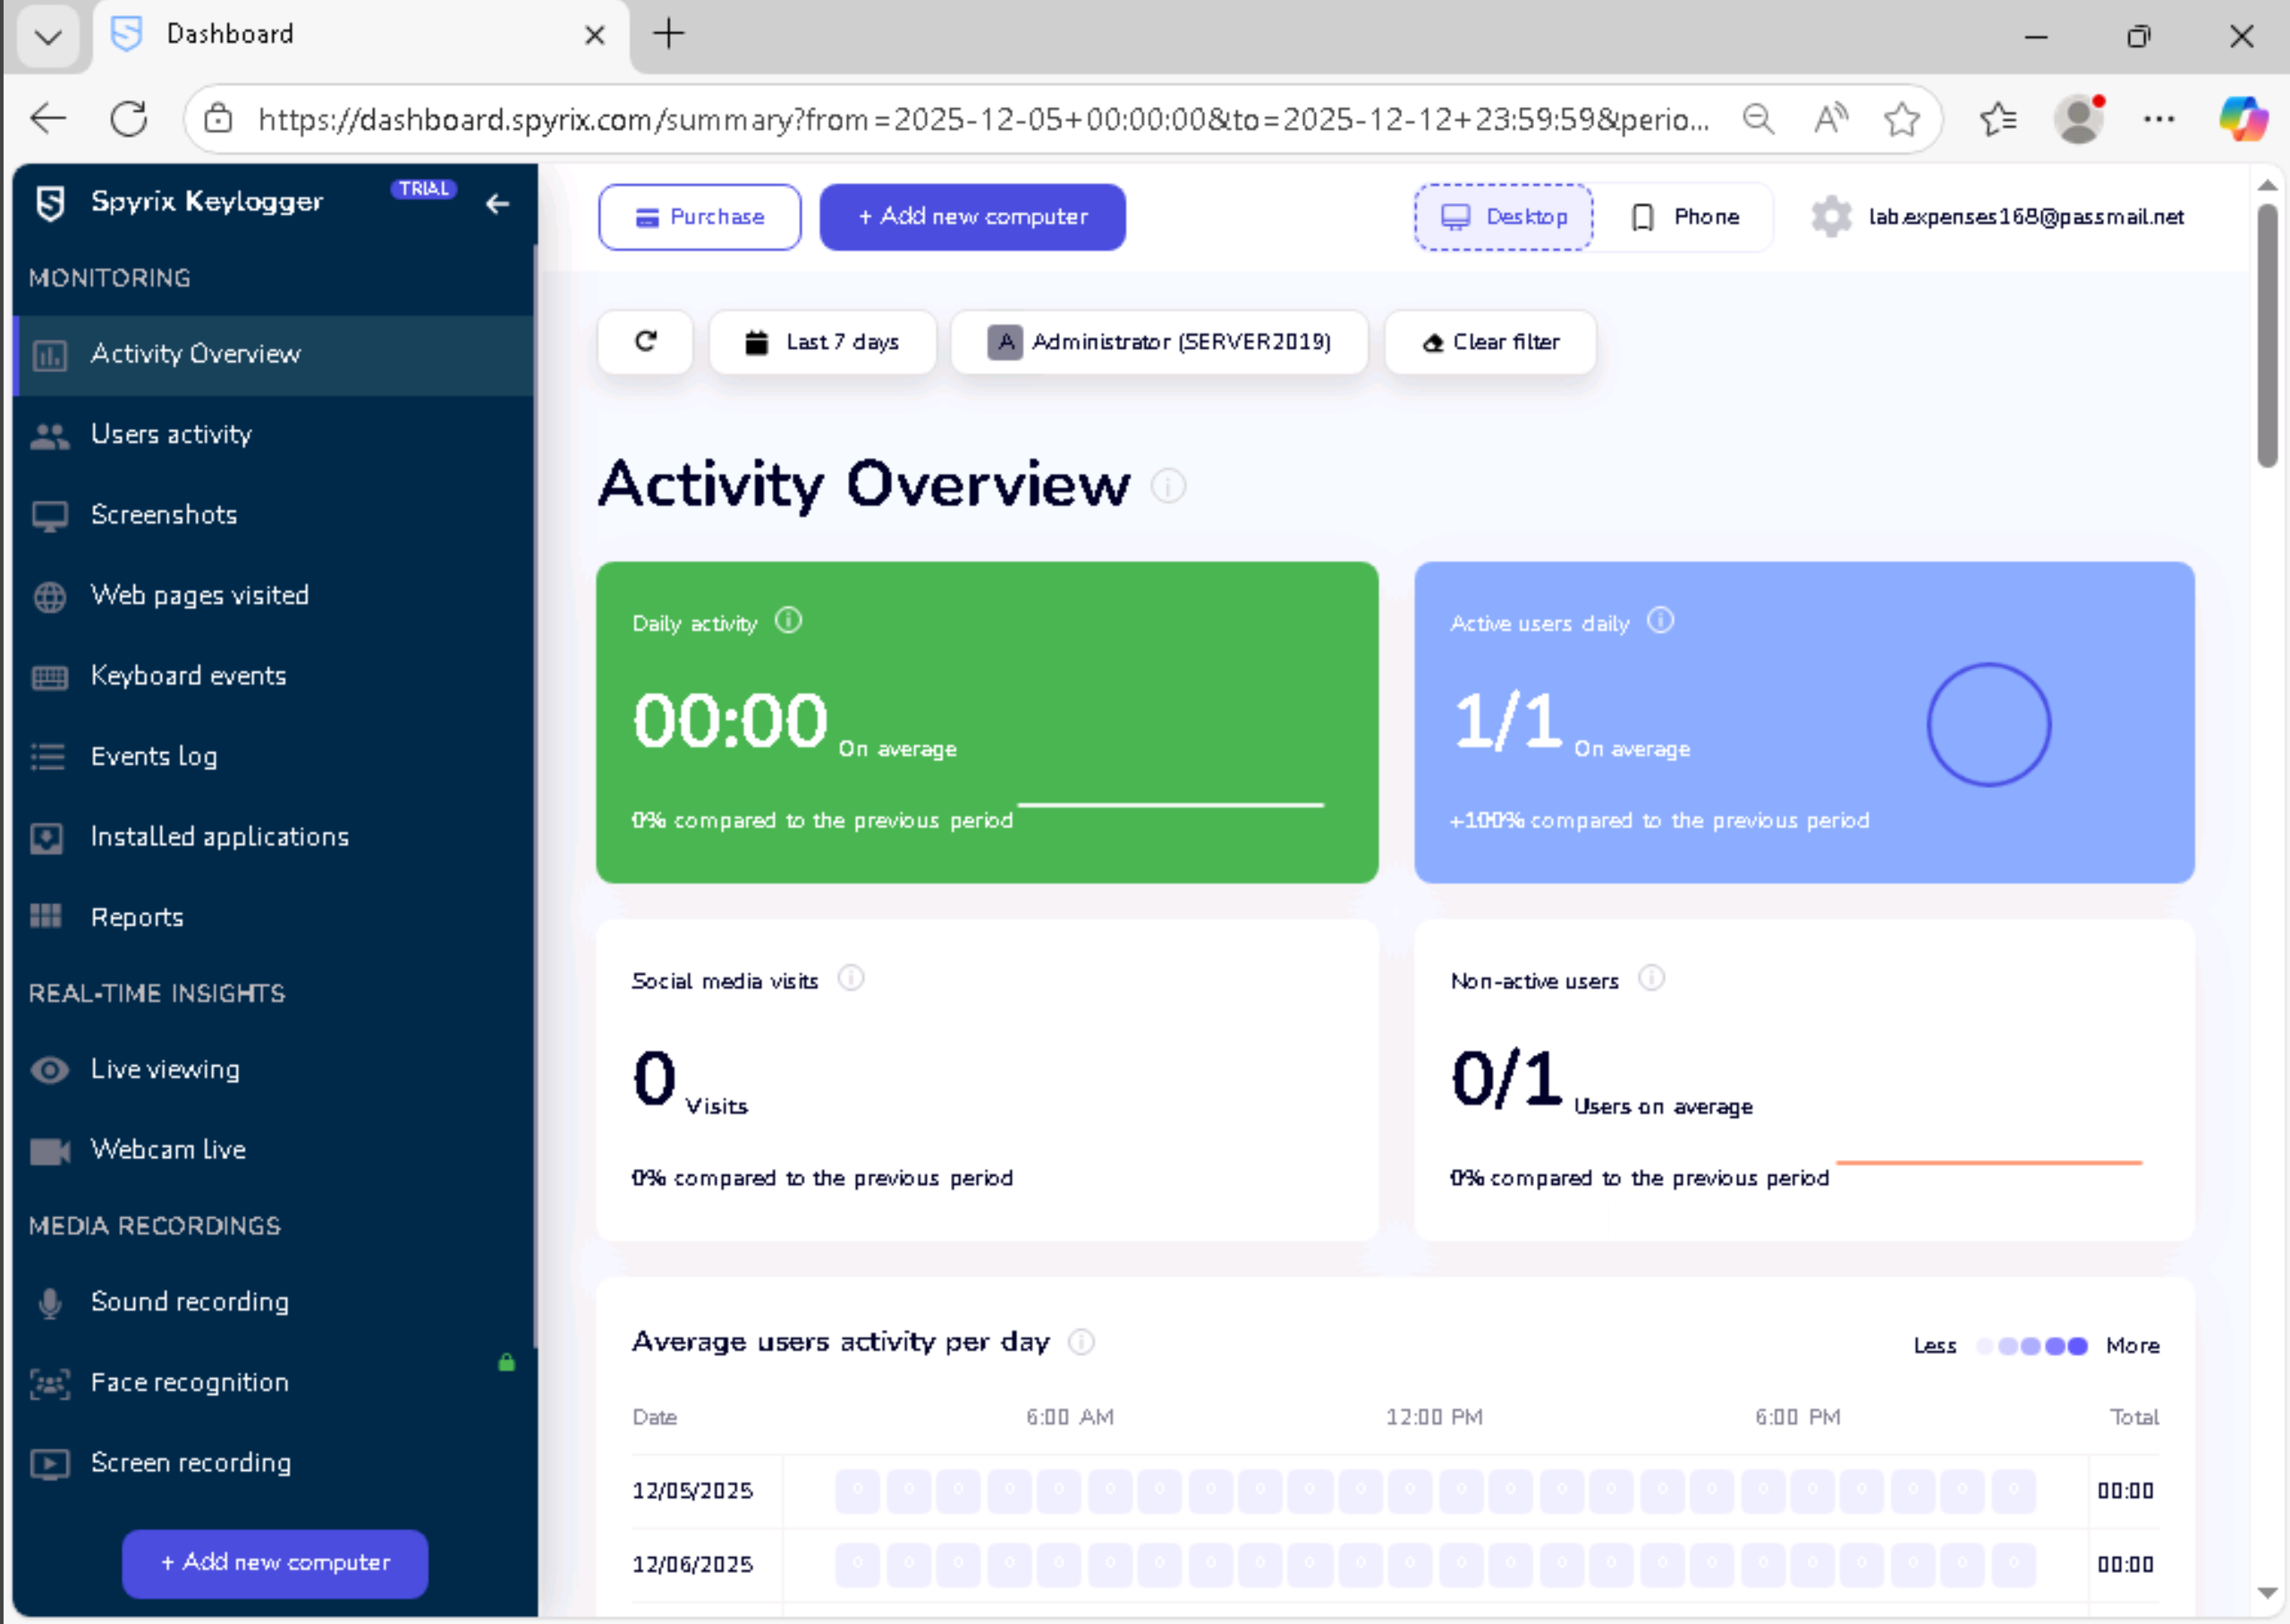
Click Activity Overview in the navigation menu. This section provides a summary dashboard showing all events captured from the target machine. The overview displays statistics and recent activity across all monitoring categories.
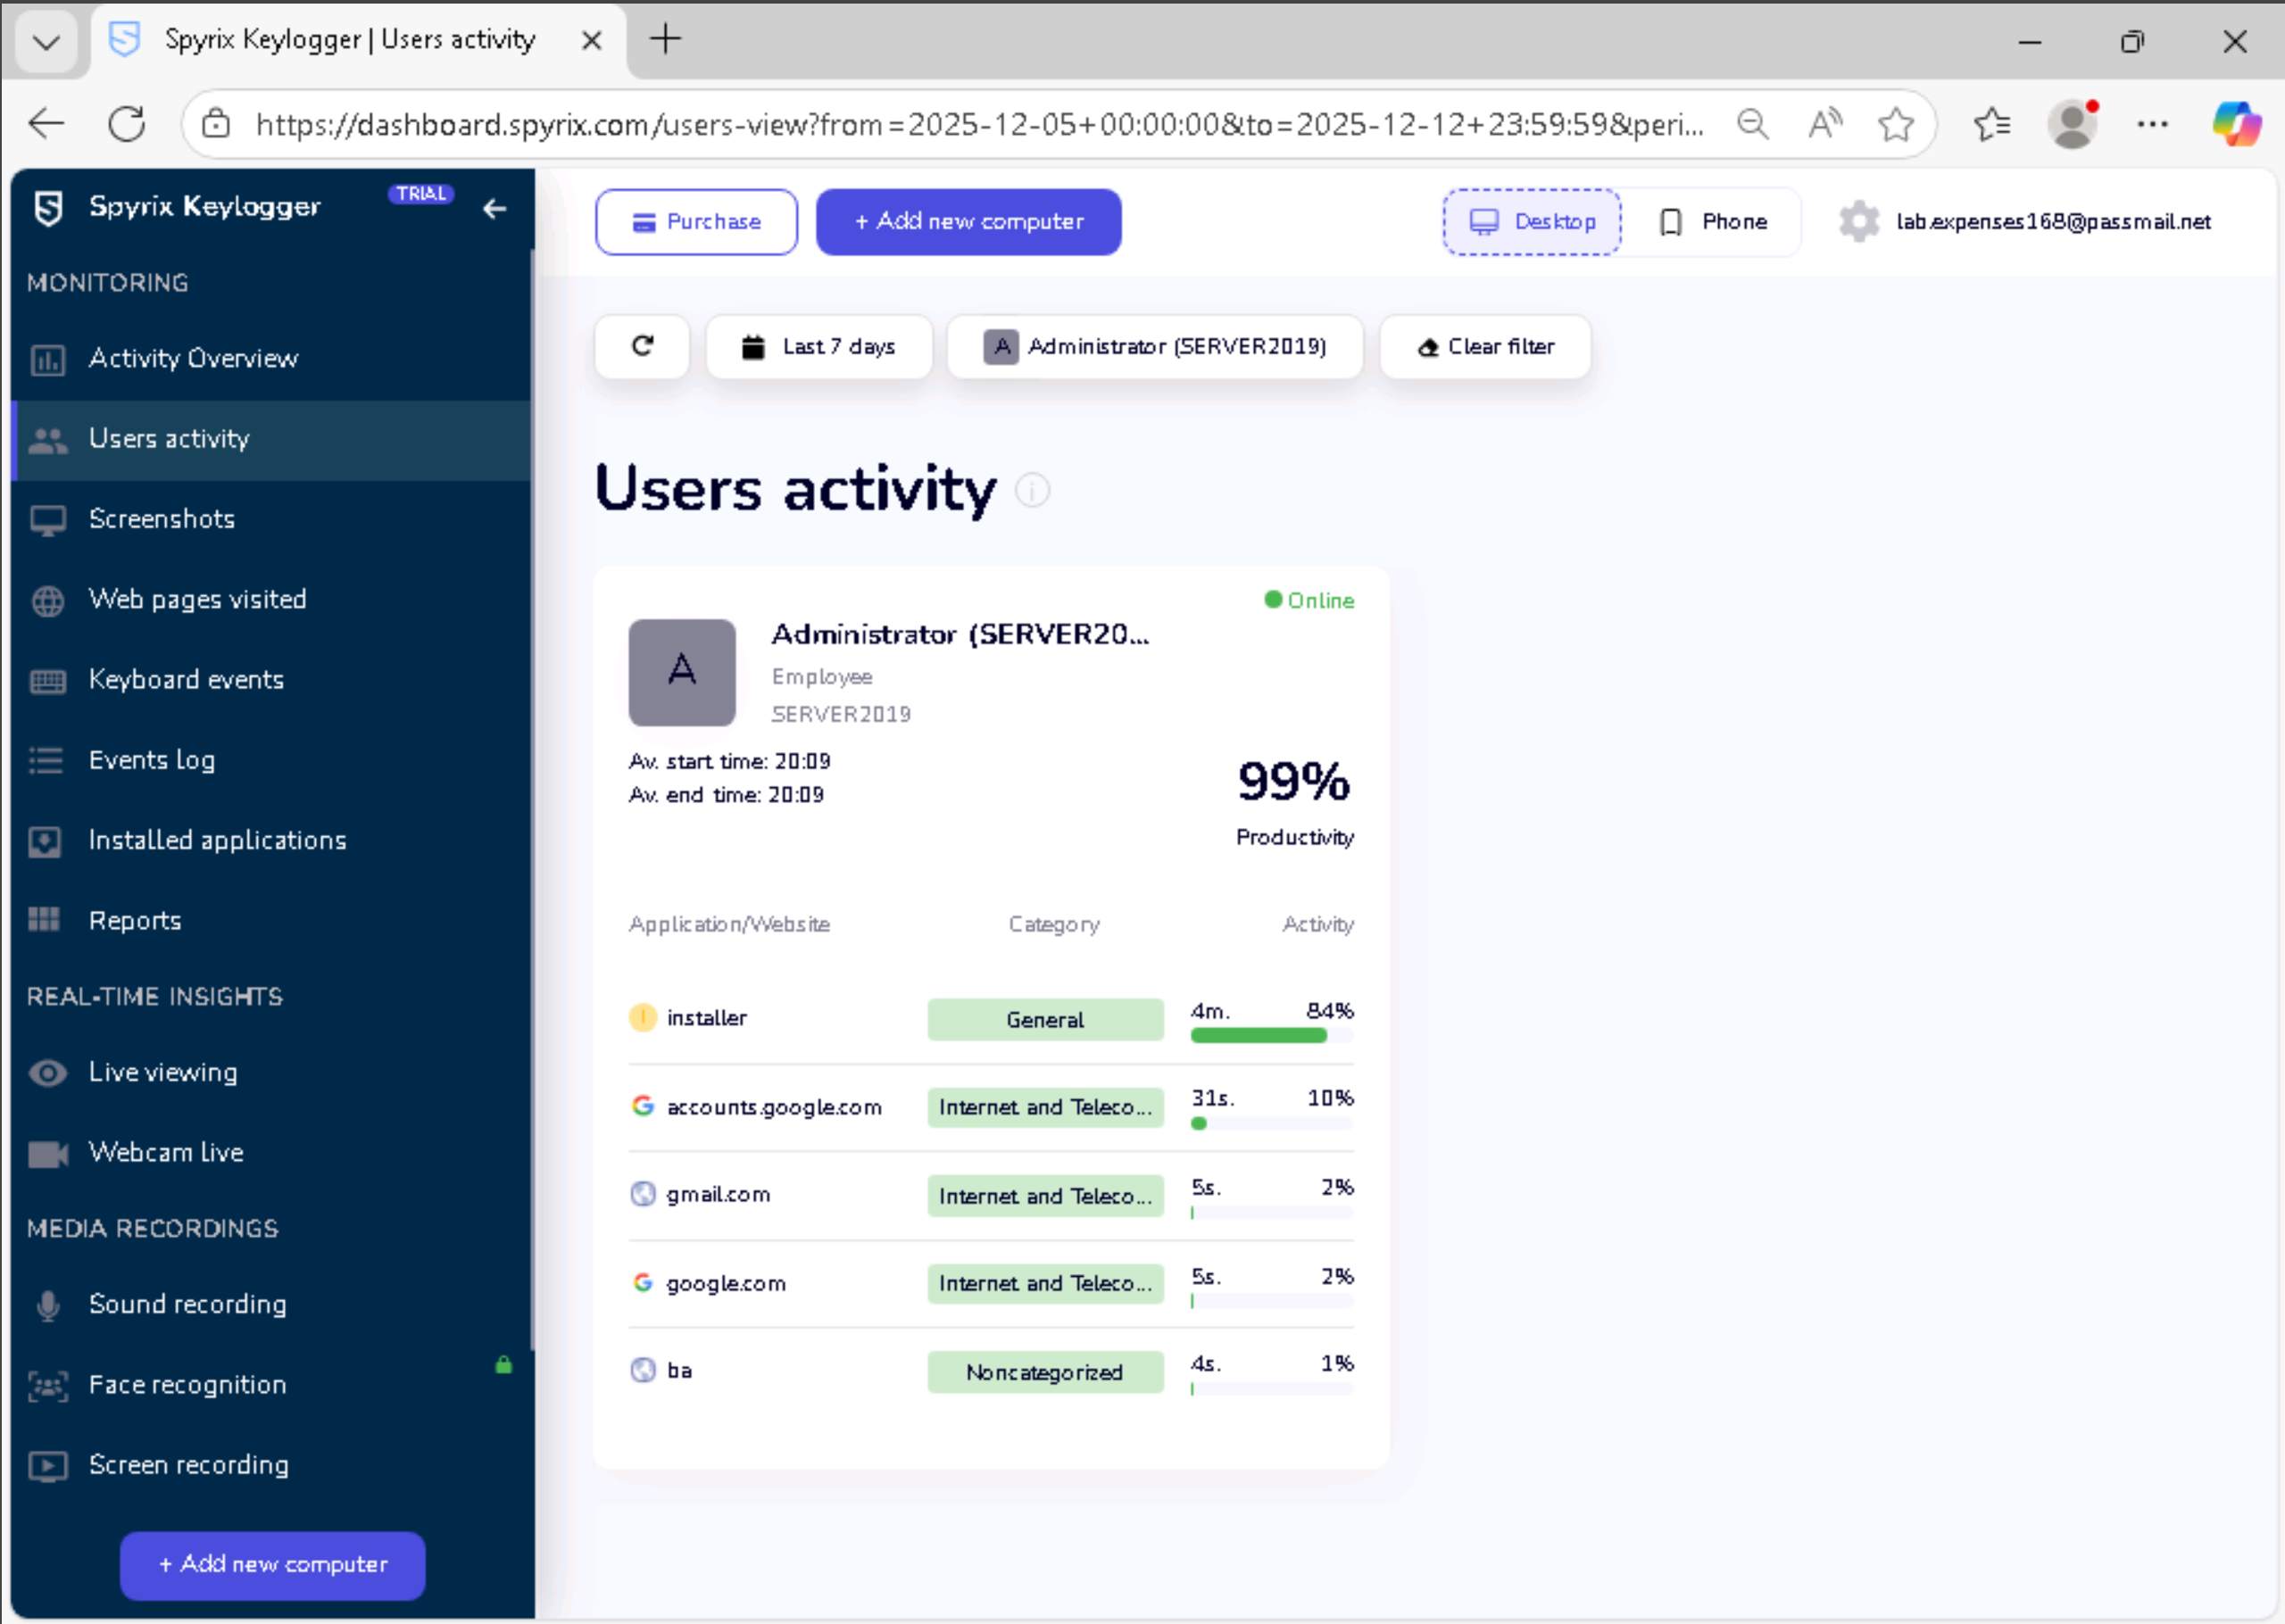
In the left navigation pane, click Users Activity. This section displays detailed logs of user interactions including login times, session duration, and activity patterns.
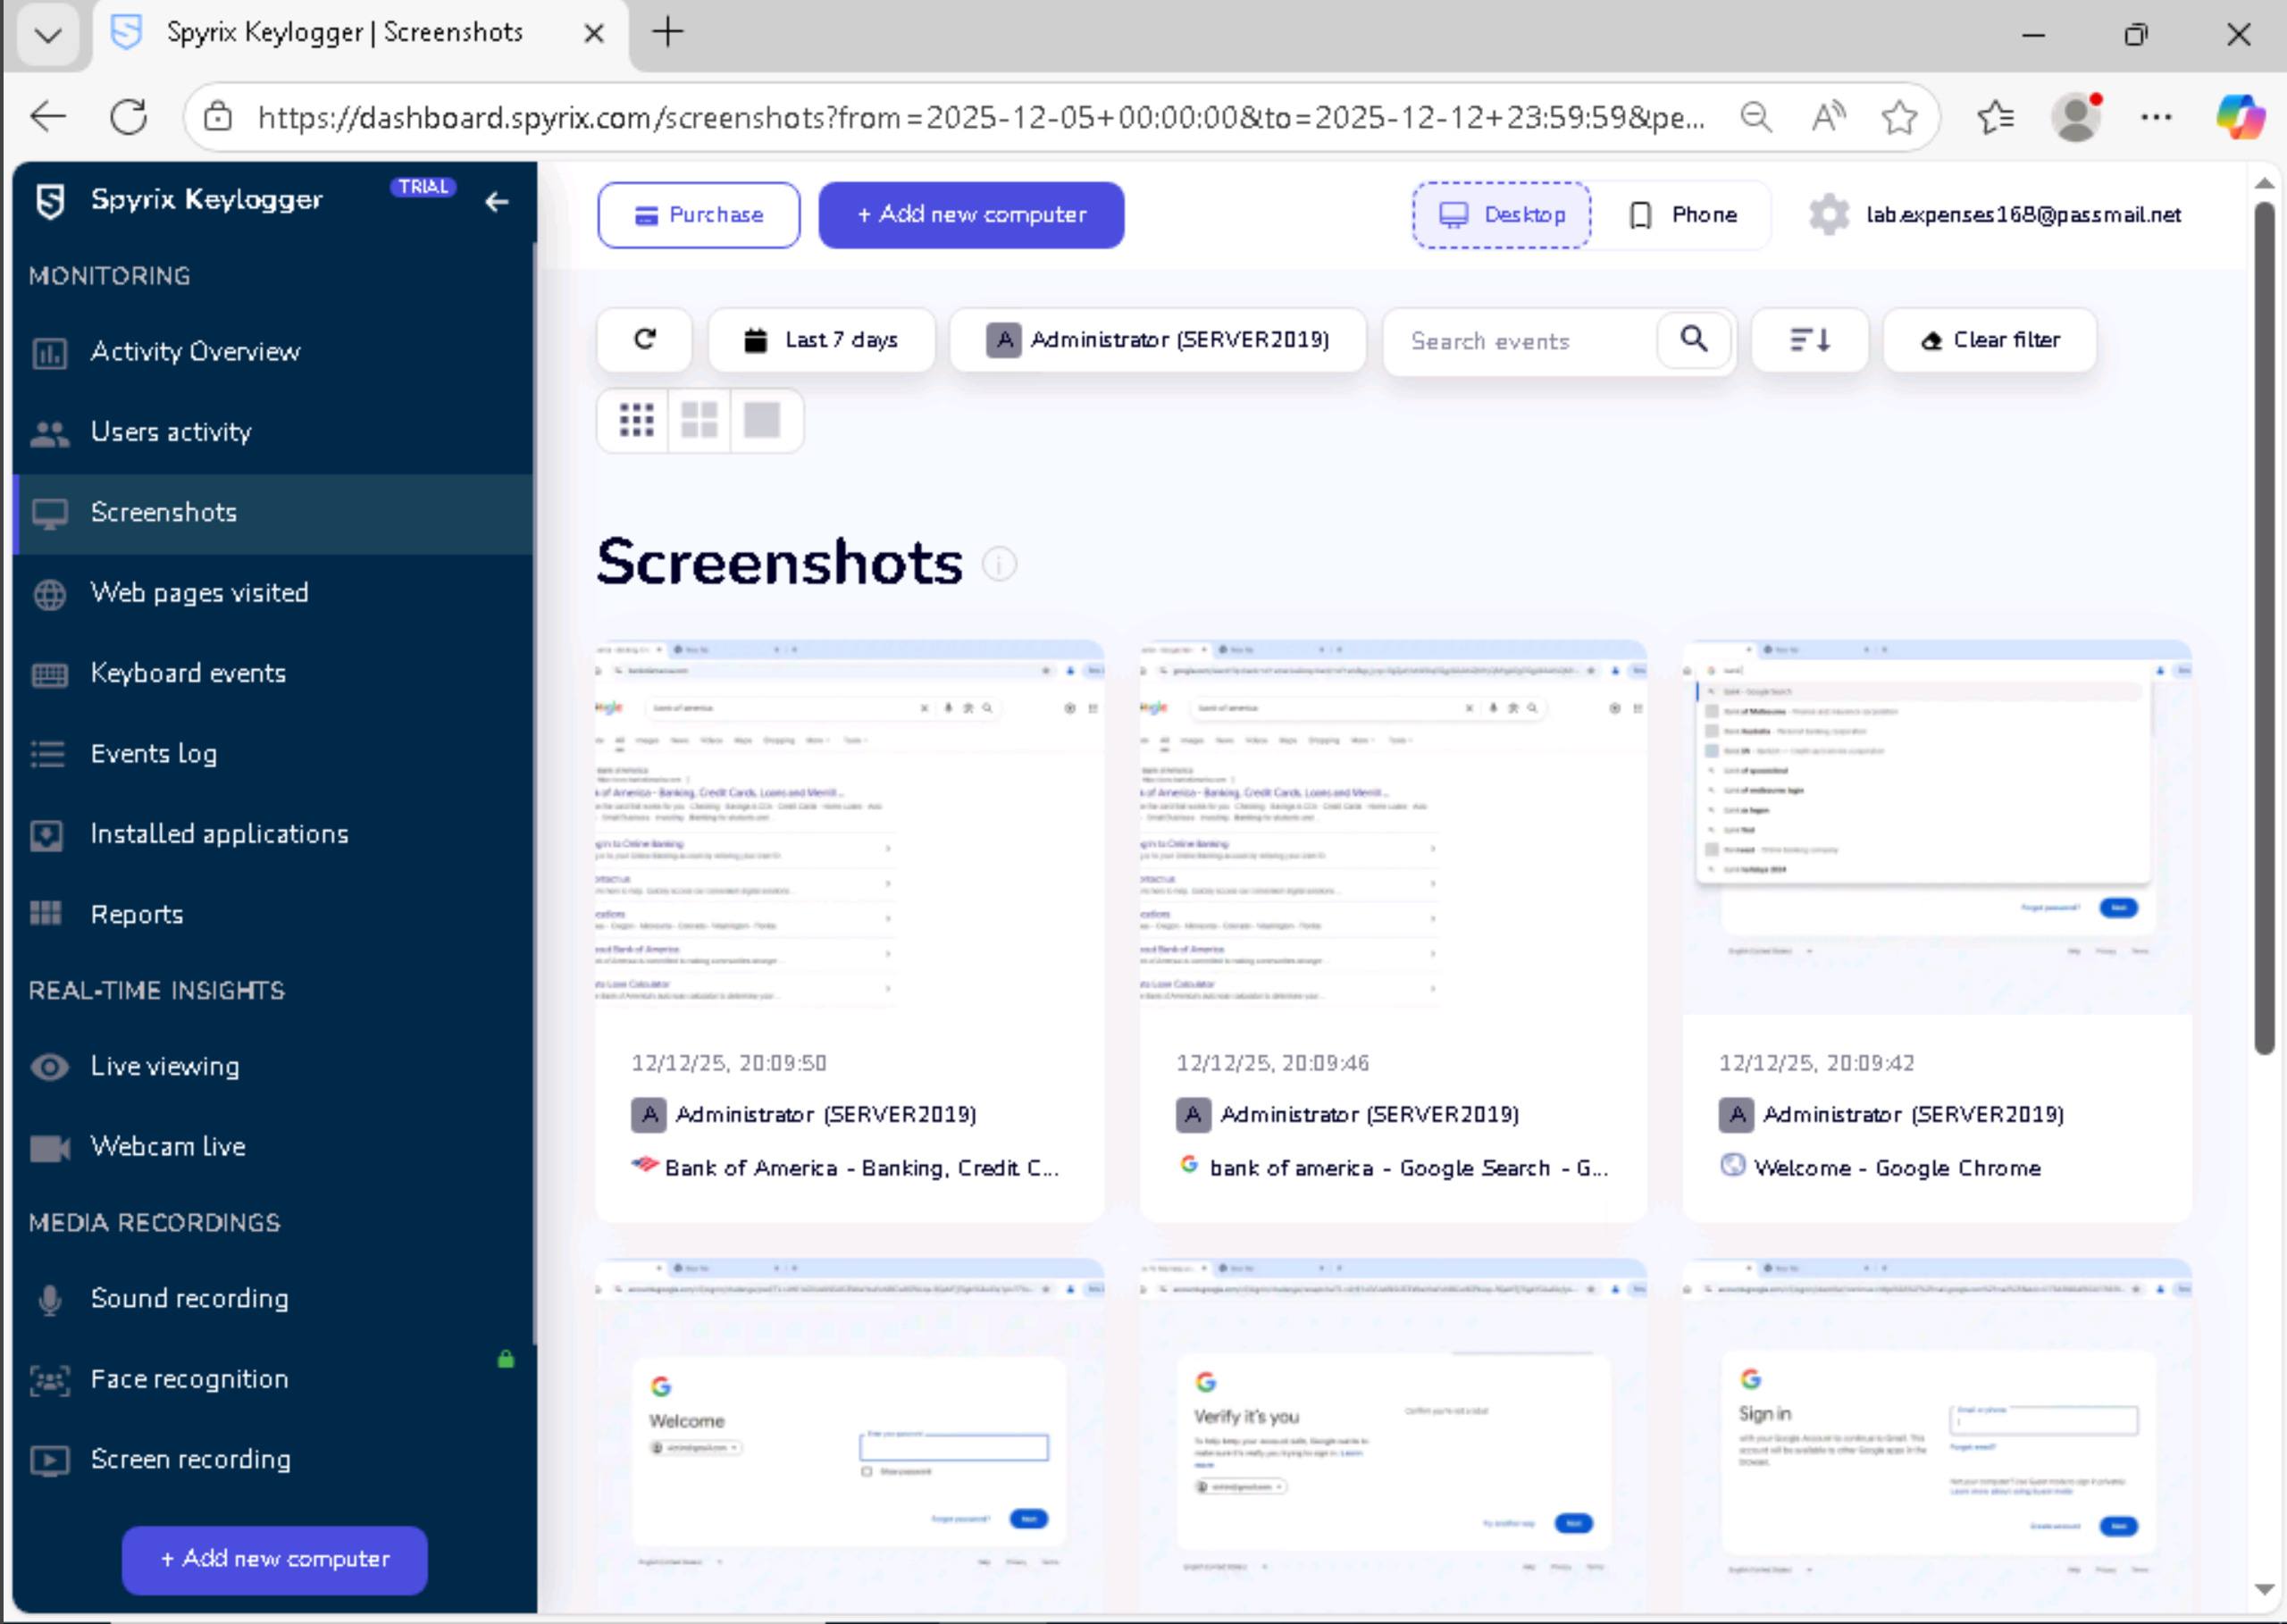
Click Screenshots to view the images automatically captured from the target system’s display. Spyrix periodically takes screenshots based on configured intervals or triggered events. Each screenshot includes a timestamp and shows exactly what appeared on the user’s screen at that moment.
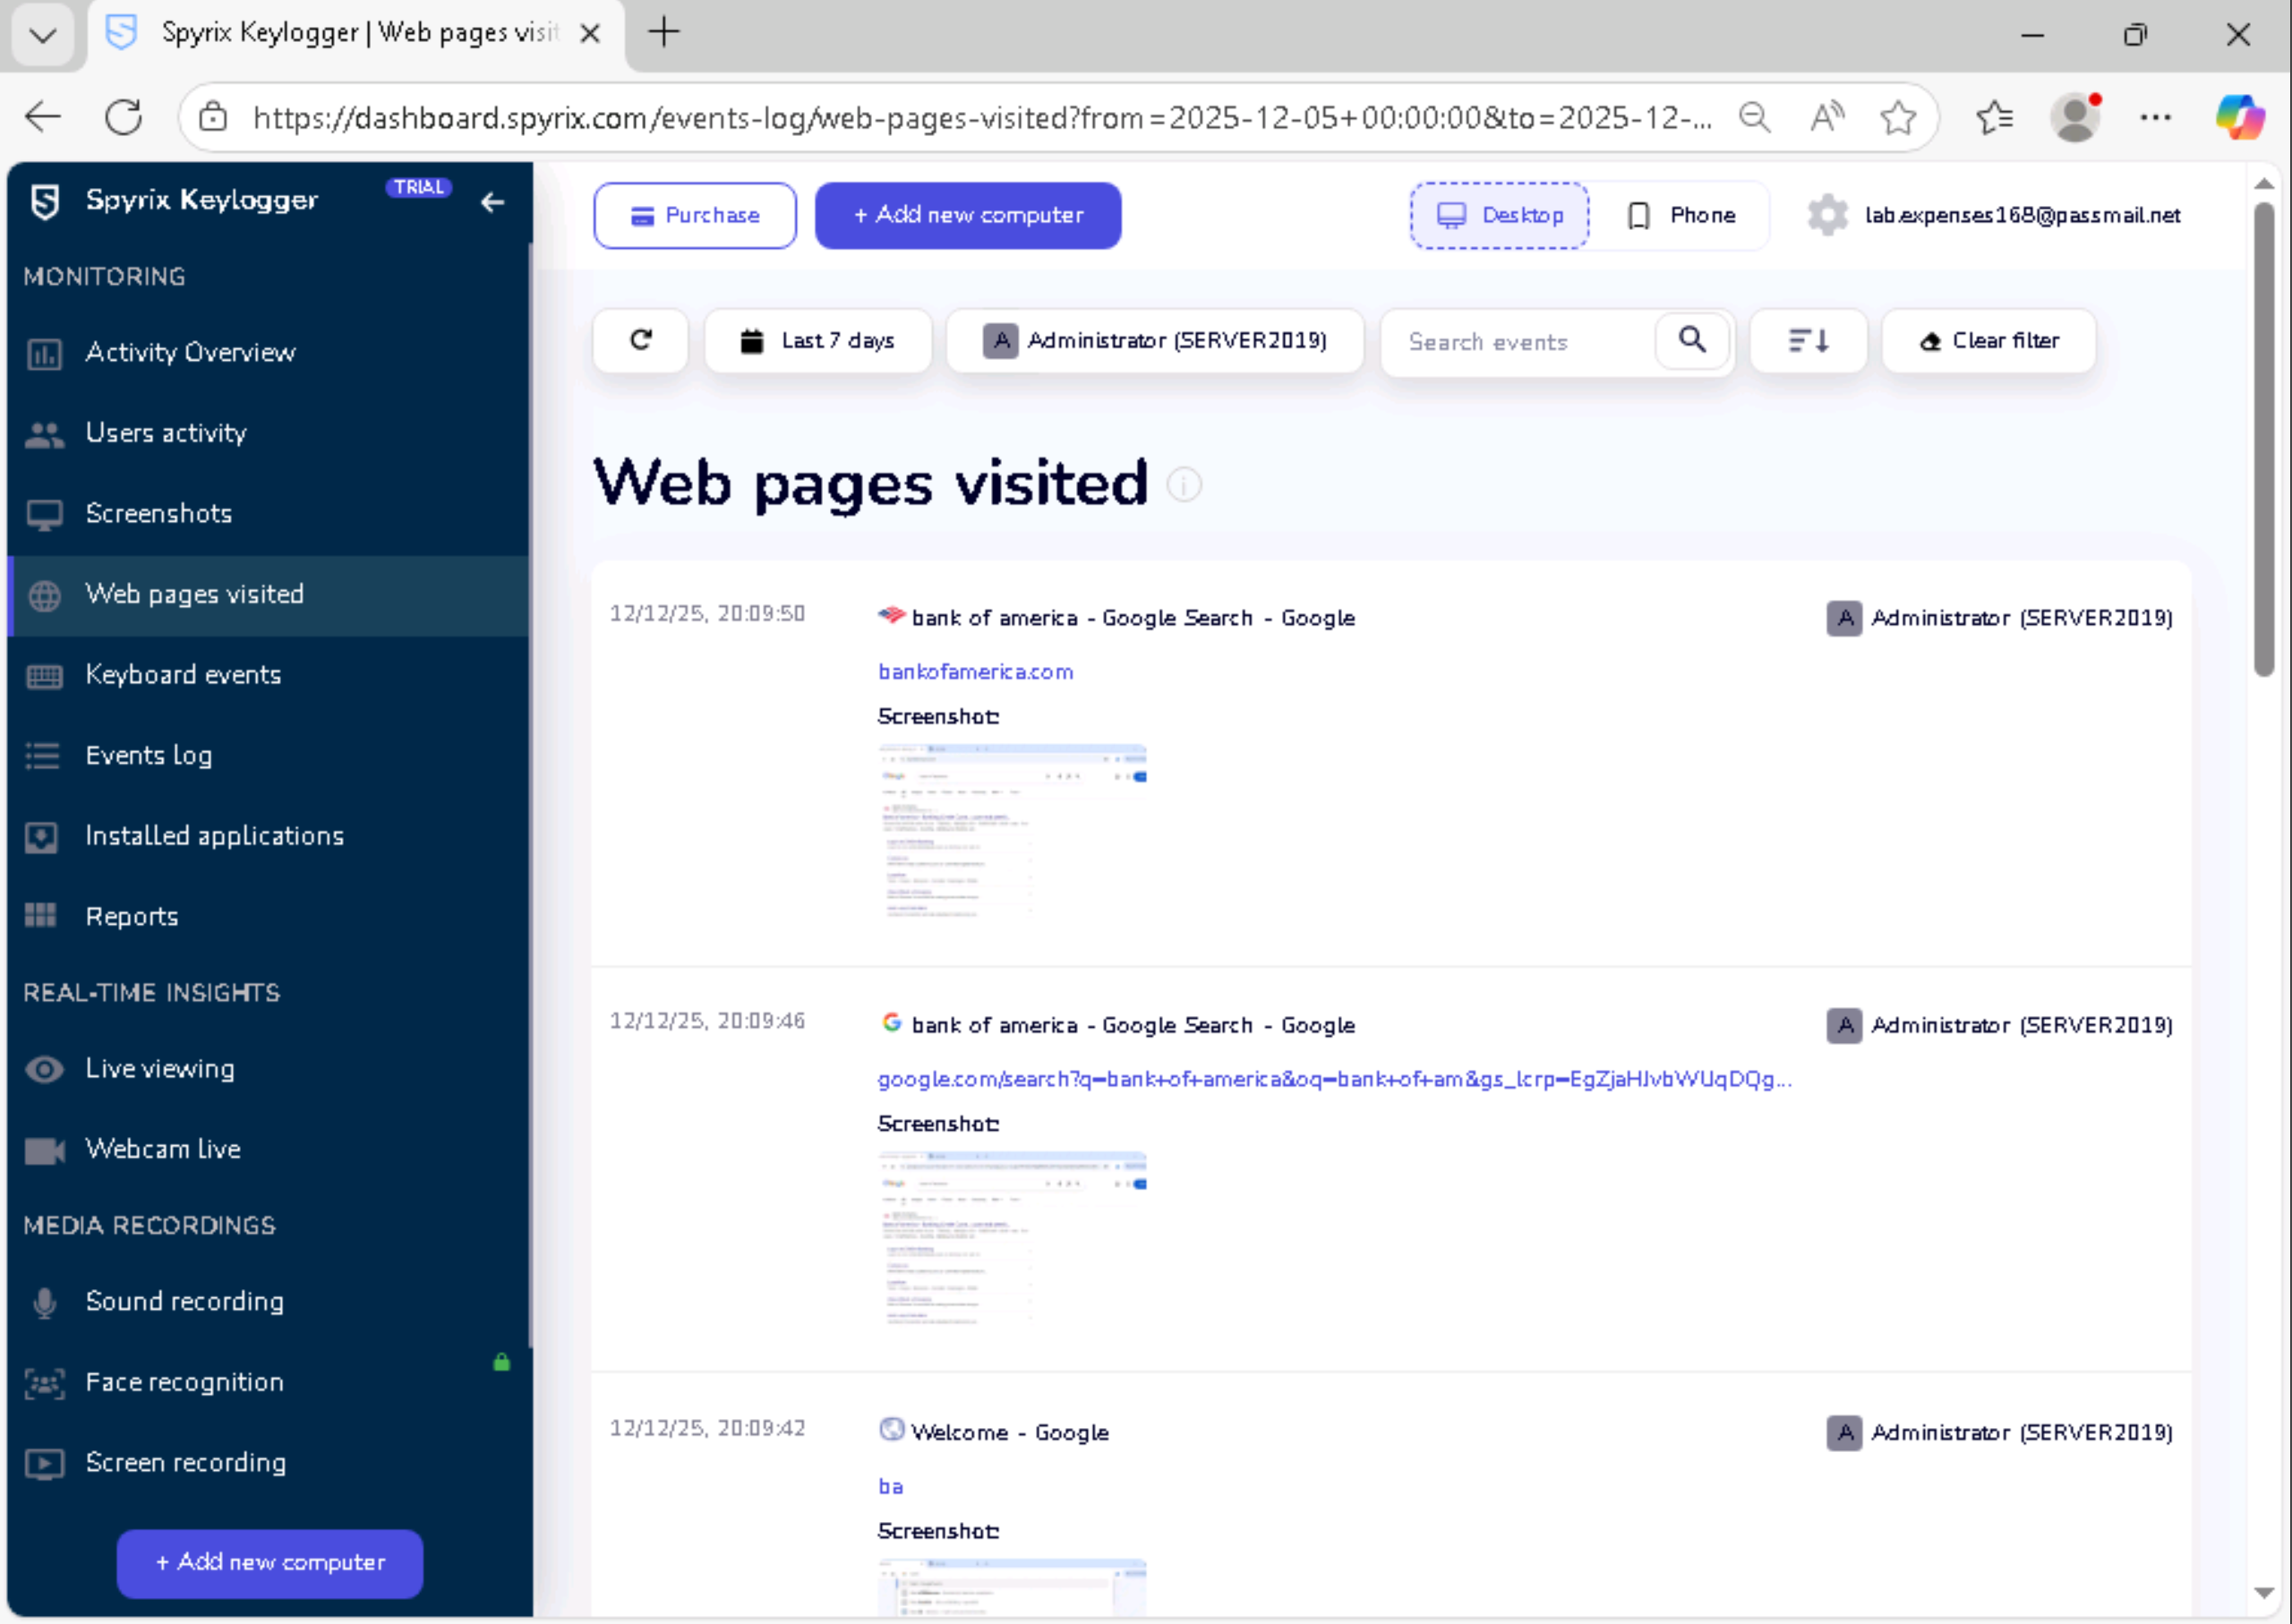
Click Web Pages Visited to see a comprehensive log of the target user’s browsing history. This section lists every URL accessed, the page title, the browser used, and timestamps for each visit.
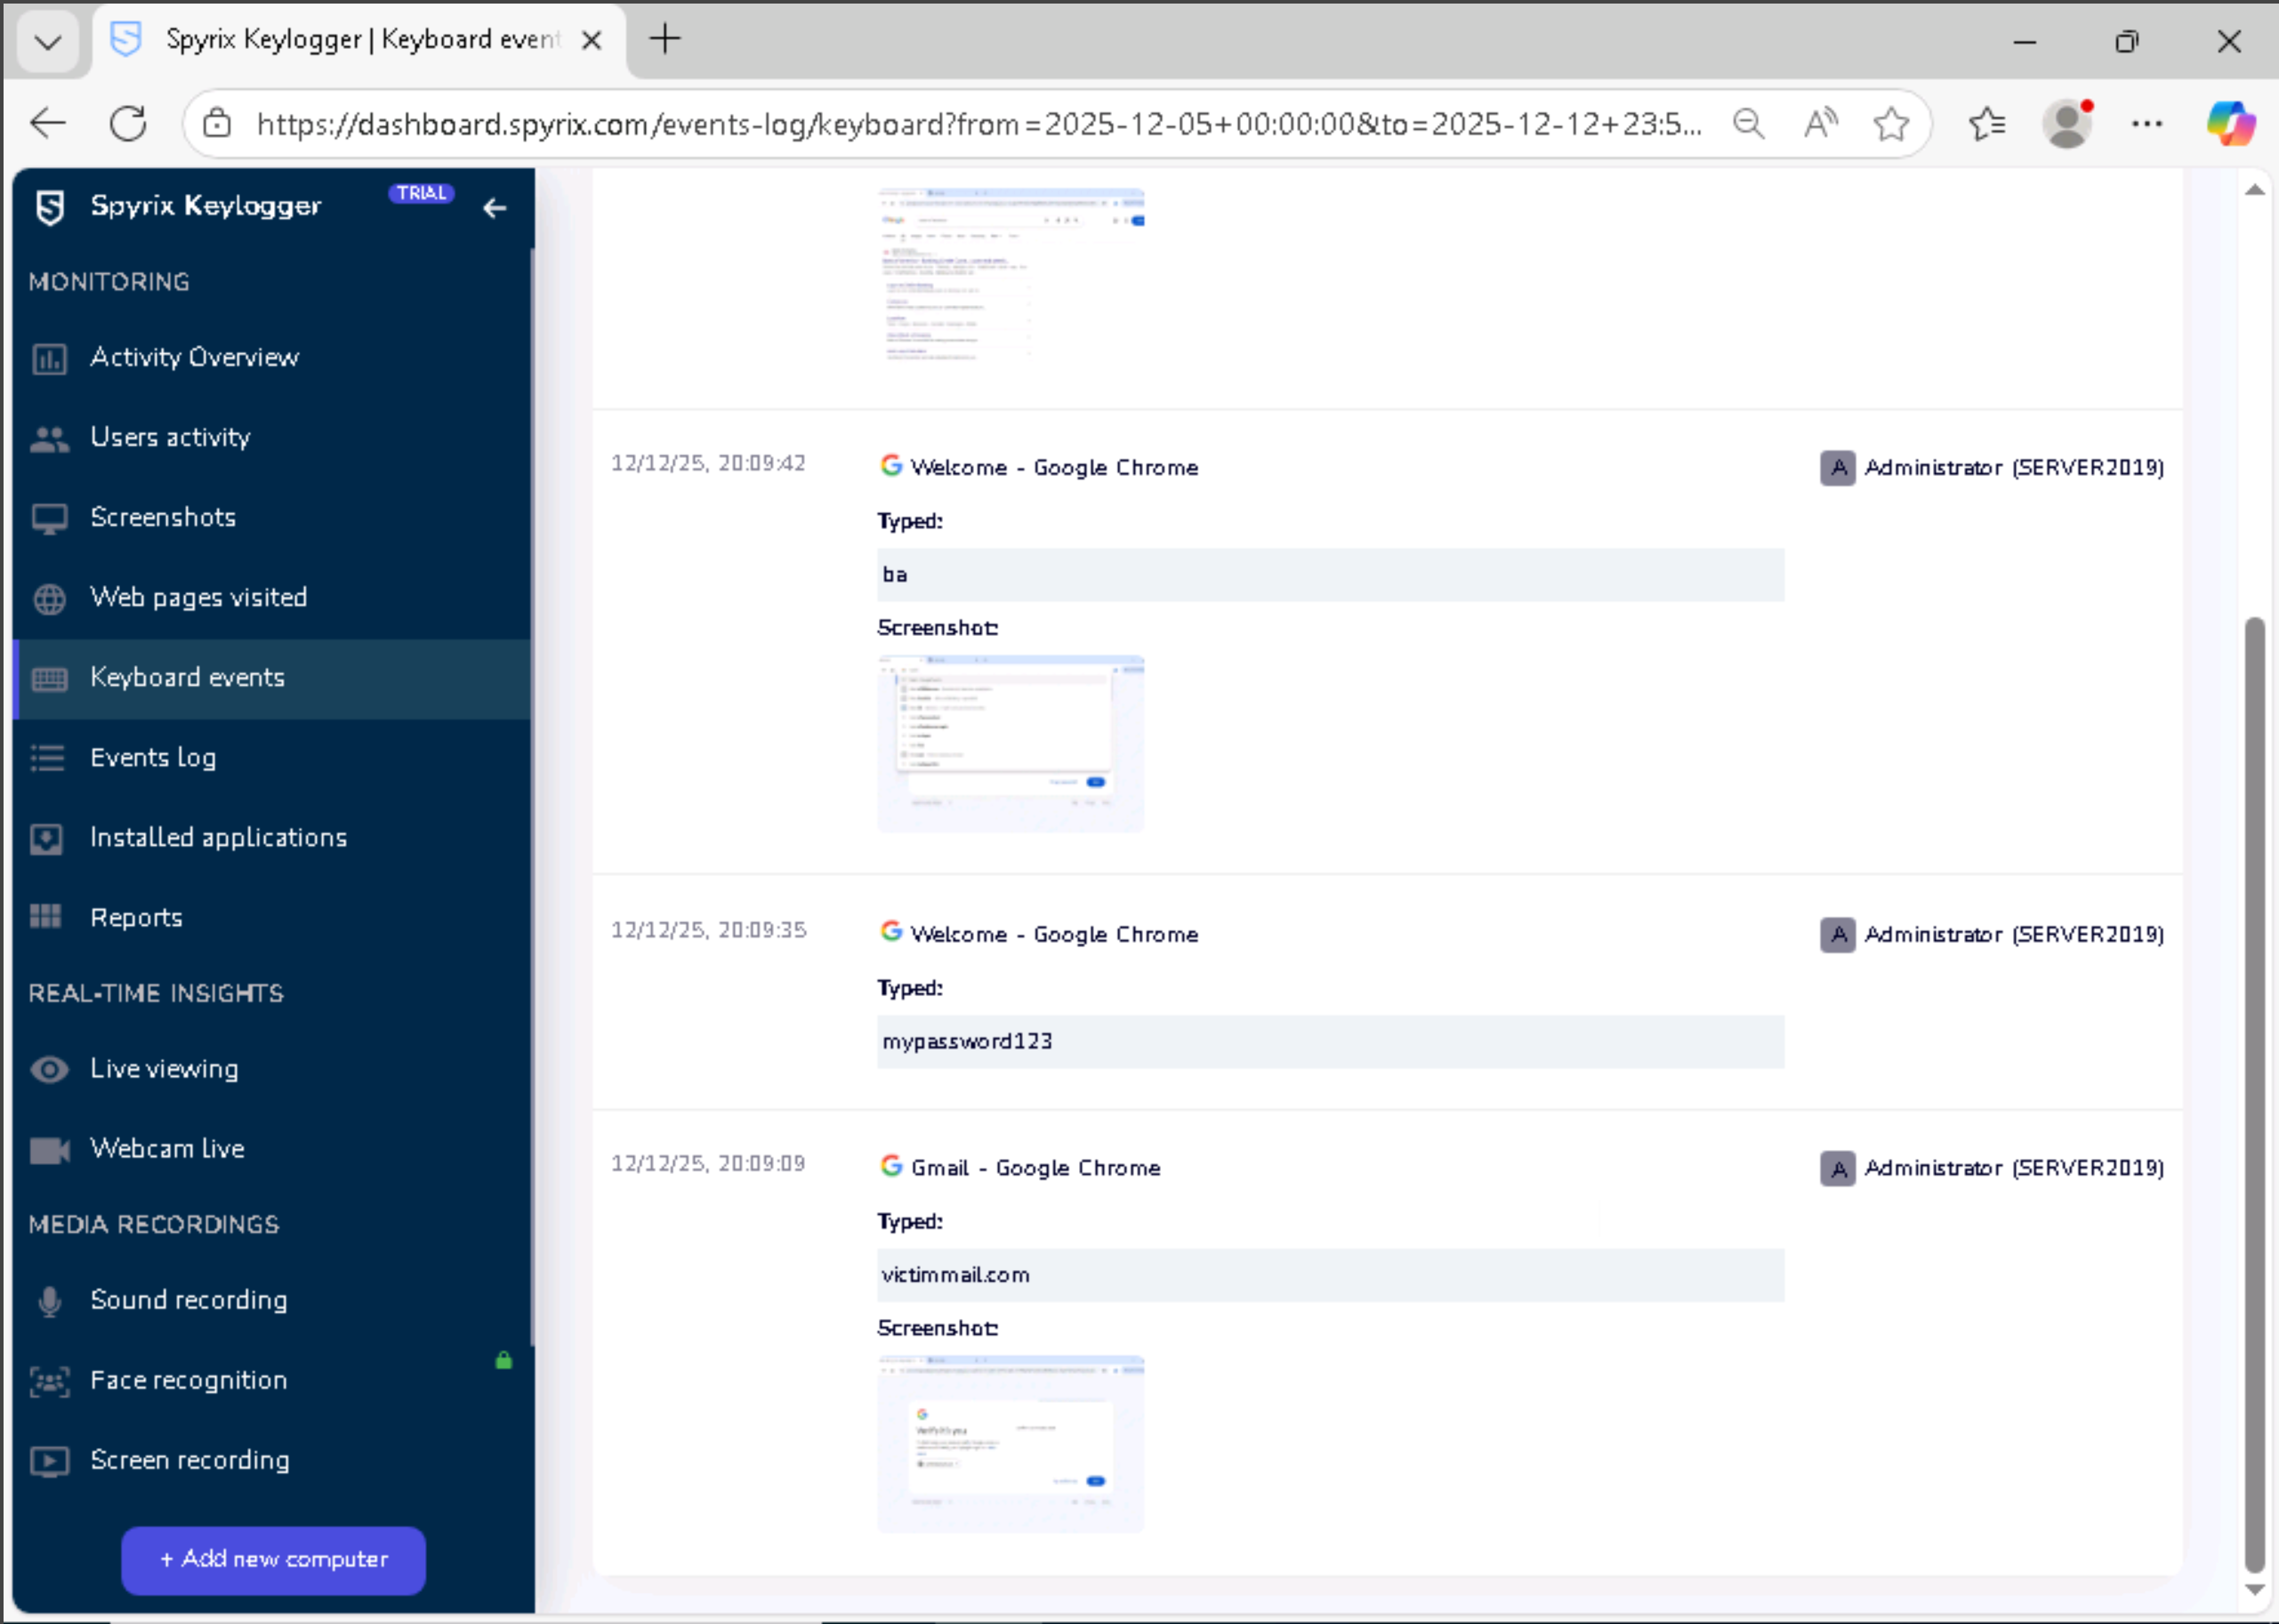
Click Keyboard Events to examine the keystroke log. This section displays every key pressed on the target system, organized by timestamp and application context. The keystroke data is one of the most valuable outputs of surveillance software because it captures information the user intended to keep private.
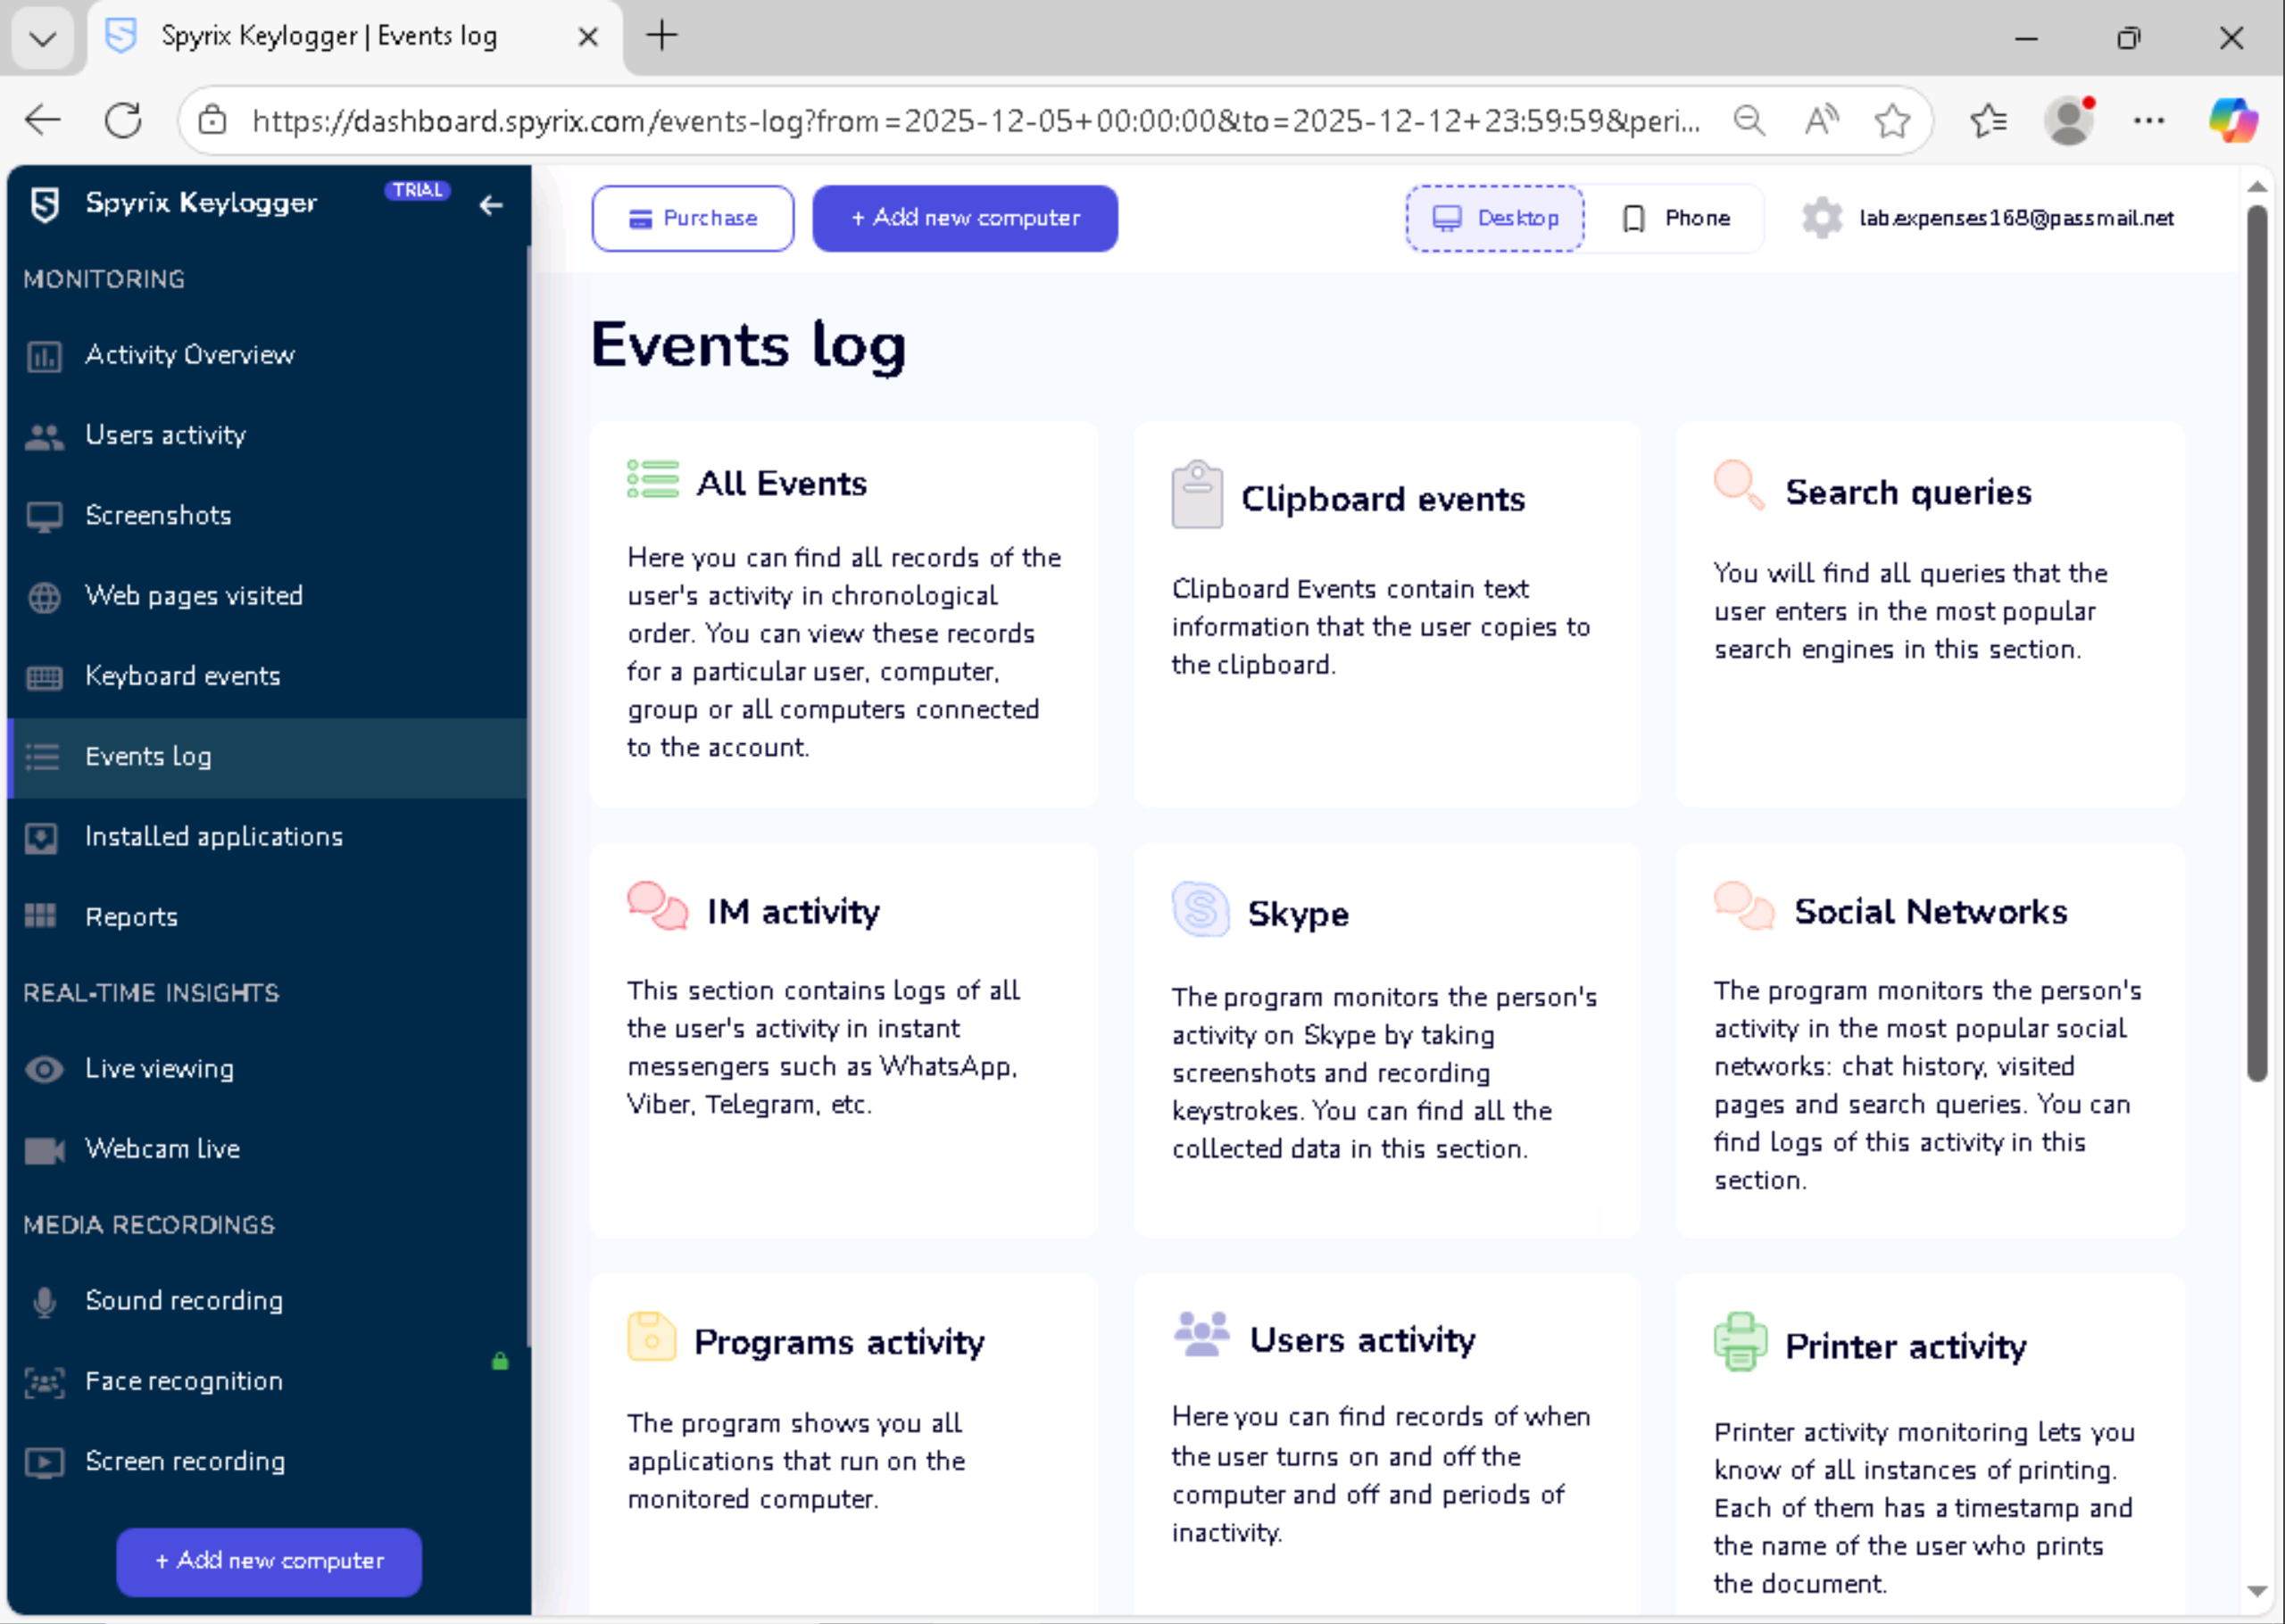
Click Events Log to access the comprehensive event timeline. Click All Events to display every recorded event in chronological order. This unified view combines screenshots, keystrokes, application usage, and web activity into a single timeline that reconstructs the user’s complete session.
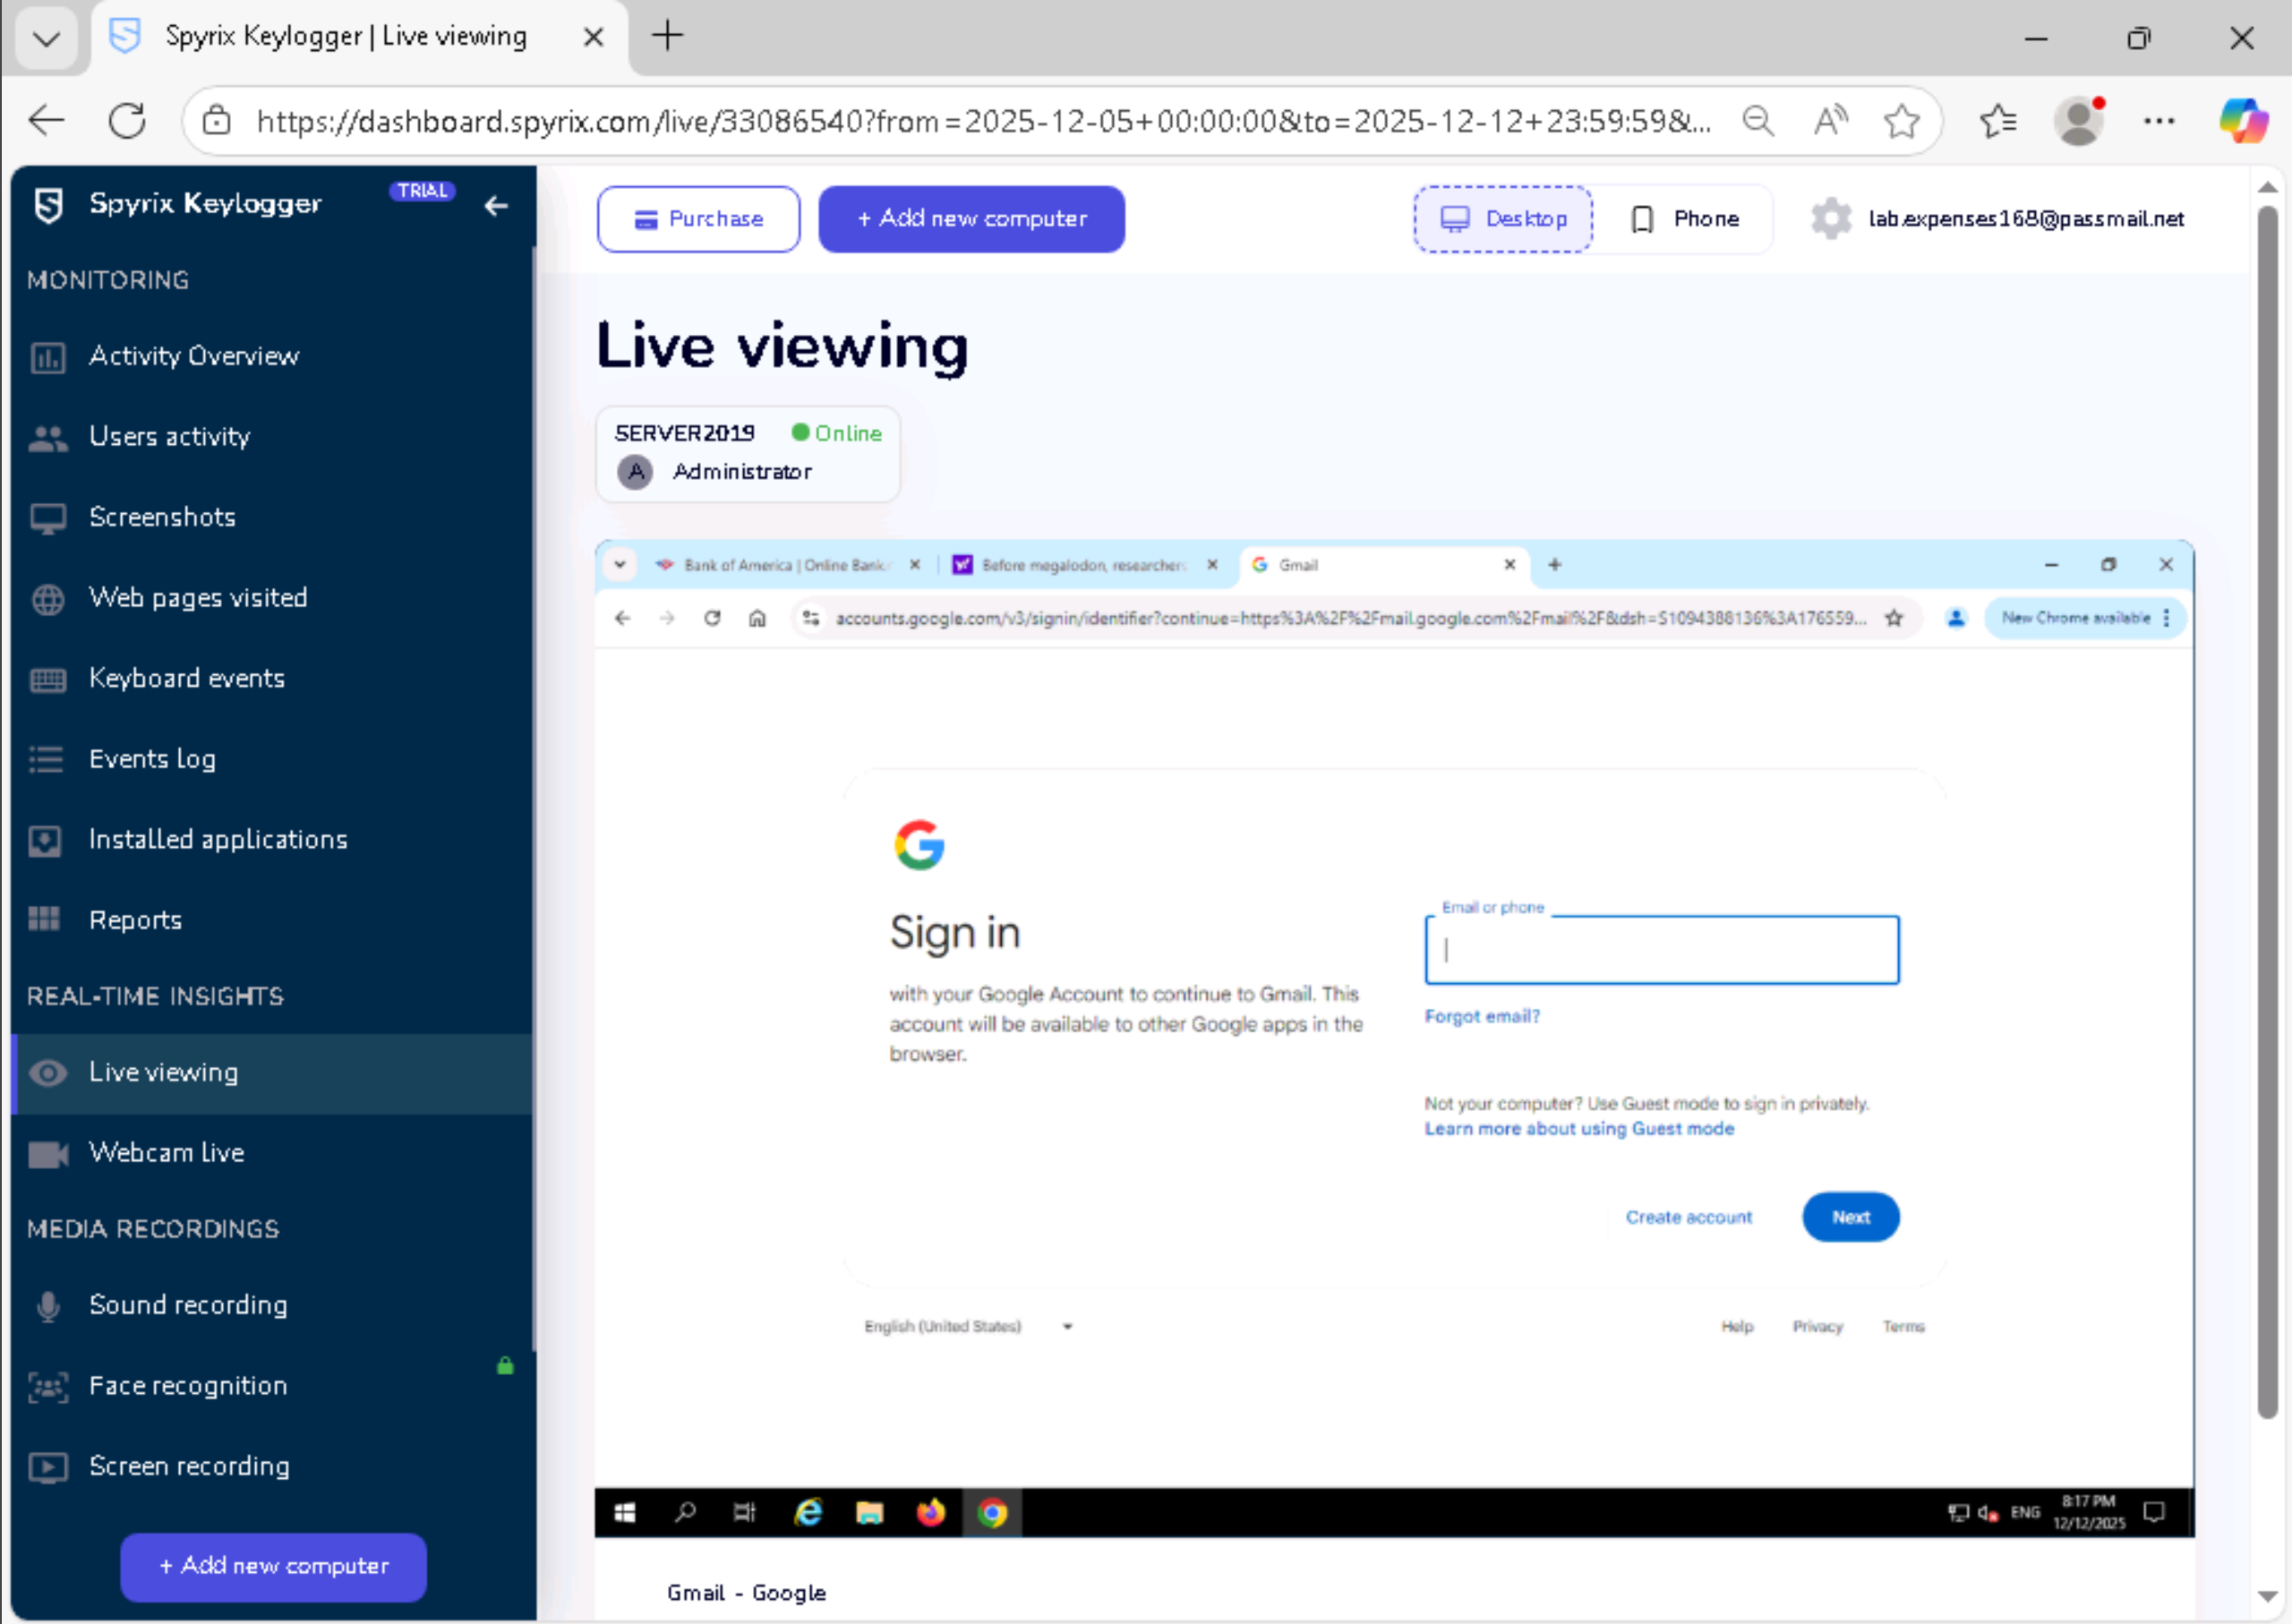
Click Live Viewing to watch the target system’s screen in real time. This feature streams the current display from the target machine to your browser, allowing you to observe activity as it happens.
Spyrix can compile captured data into formatted reports for documentation, analysis, or evidence purposes. This section demonstrates the report generation feature.
In the Spyrix dashboard, click the Reports section in the navigation menu. Then click the + Request New Report button to create a new report.
The Request New Report dialog appears. Click the text box under Select Period to choose the date range for the report. For this demonstration, keep the default date settings which should include today’s activity. Click Request Smart Report to begin generating the report.
Report generation takes a few moments depending on the amount of captured data. Wait several seconds, then click the reload button next to + Request New Report to refresh the report status.
The report list displays the status of your requested report. Initially the status shows Running while the report compiles. Continue refreshing until the status changes to Ready. Once ready, click Download to save the report file.
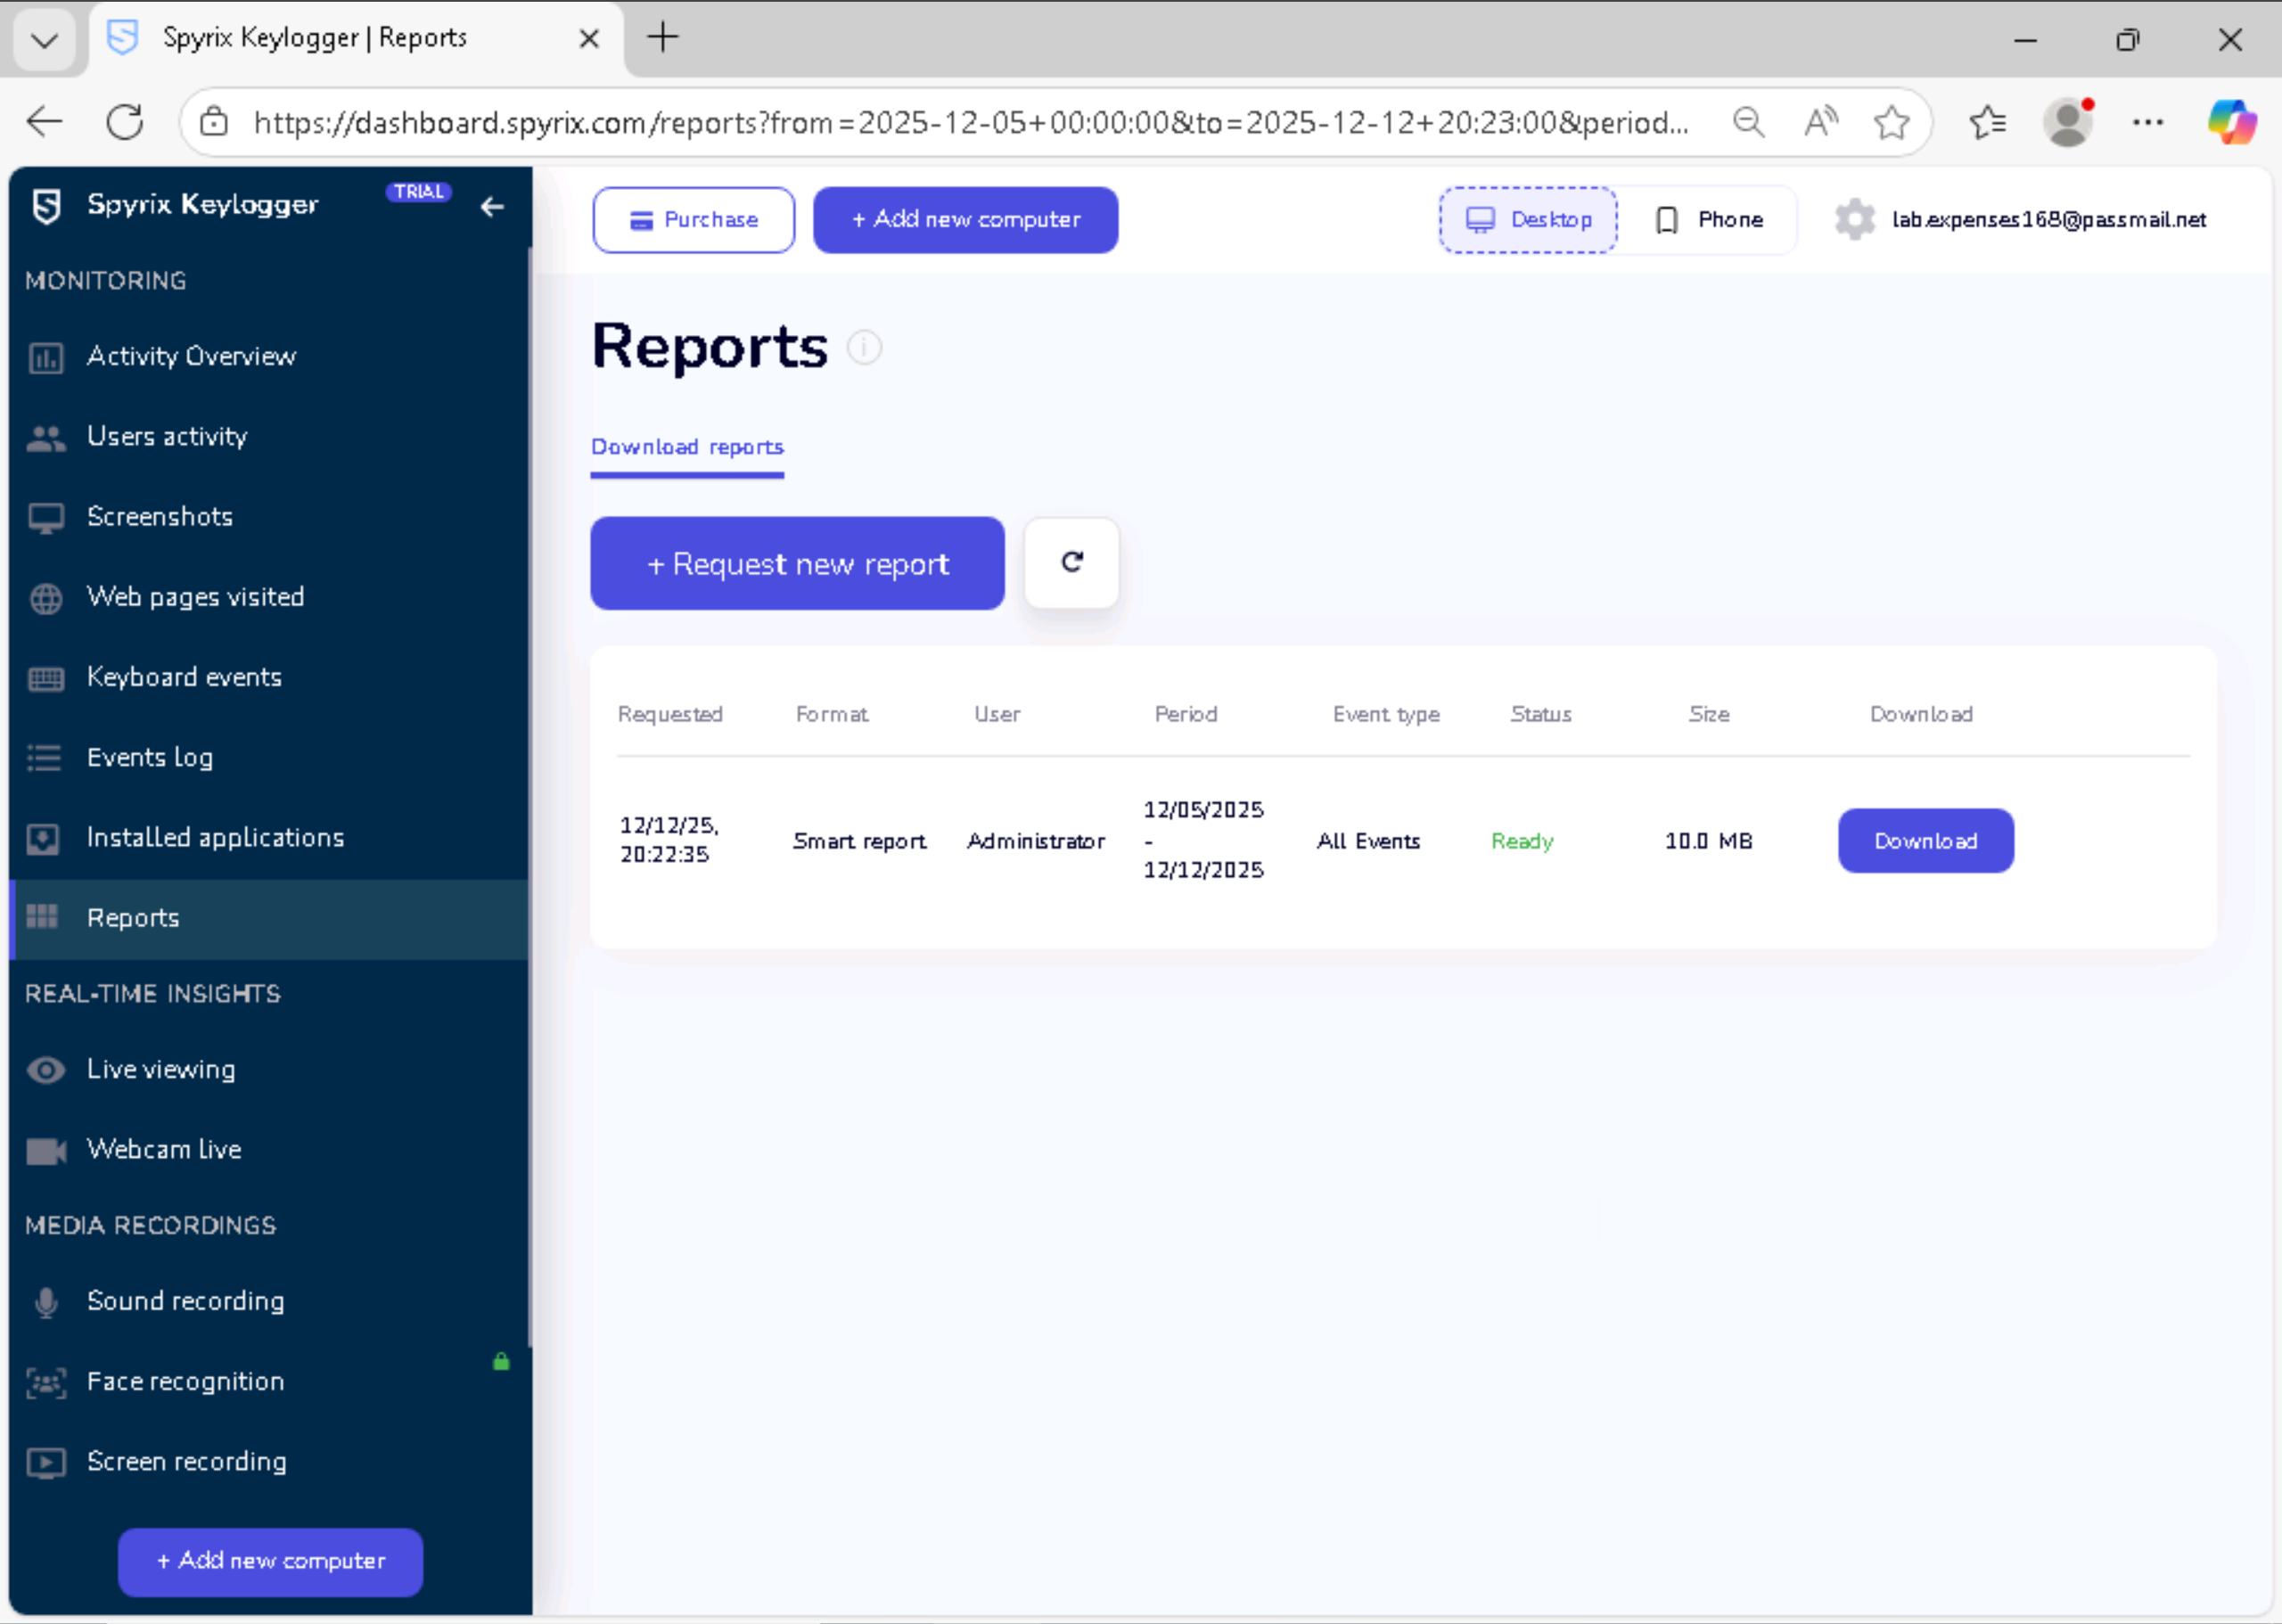
The downloaded file is a ZIP archive. Extract the contents using Windows Explorer or your preferred archive utility. Navigate into the extracted report folder and double-click report.html to open the report in your web browser.
The Spyrix Smart Report presents a comprehensive document containing all captured surveillance data organized into sections.
The report includes screenshots arranged chronologically, program activity showing applications used, keyboard activity displaying typed content, and URLs listing all websites visited. This report format is useful for documenting findings, conducting analysis offline, or presenting evidence.
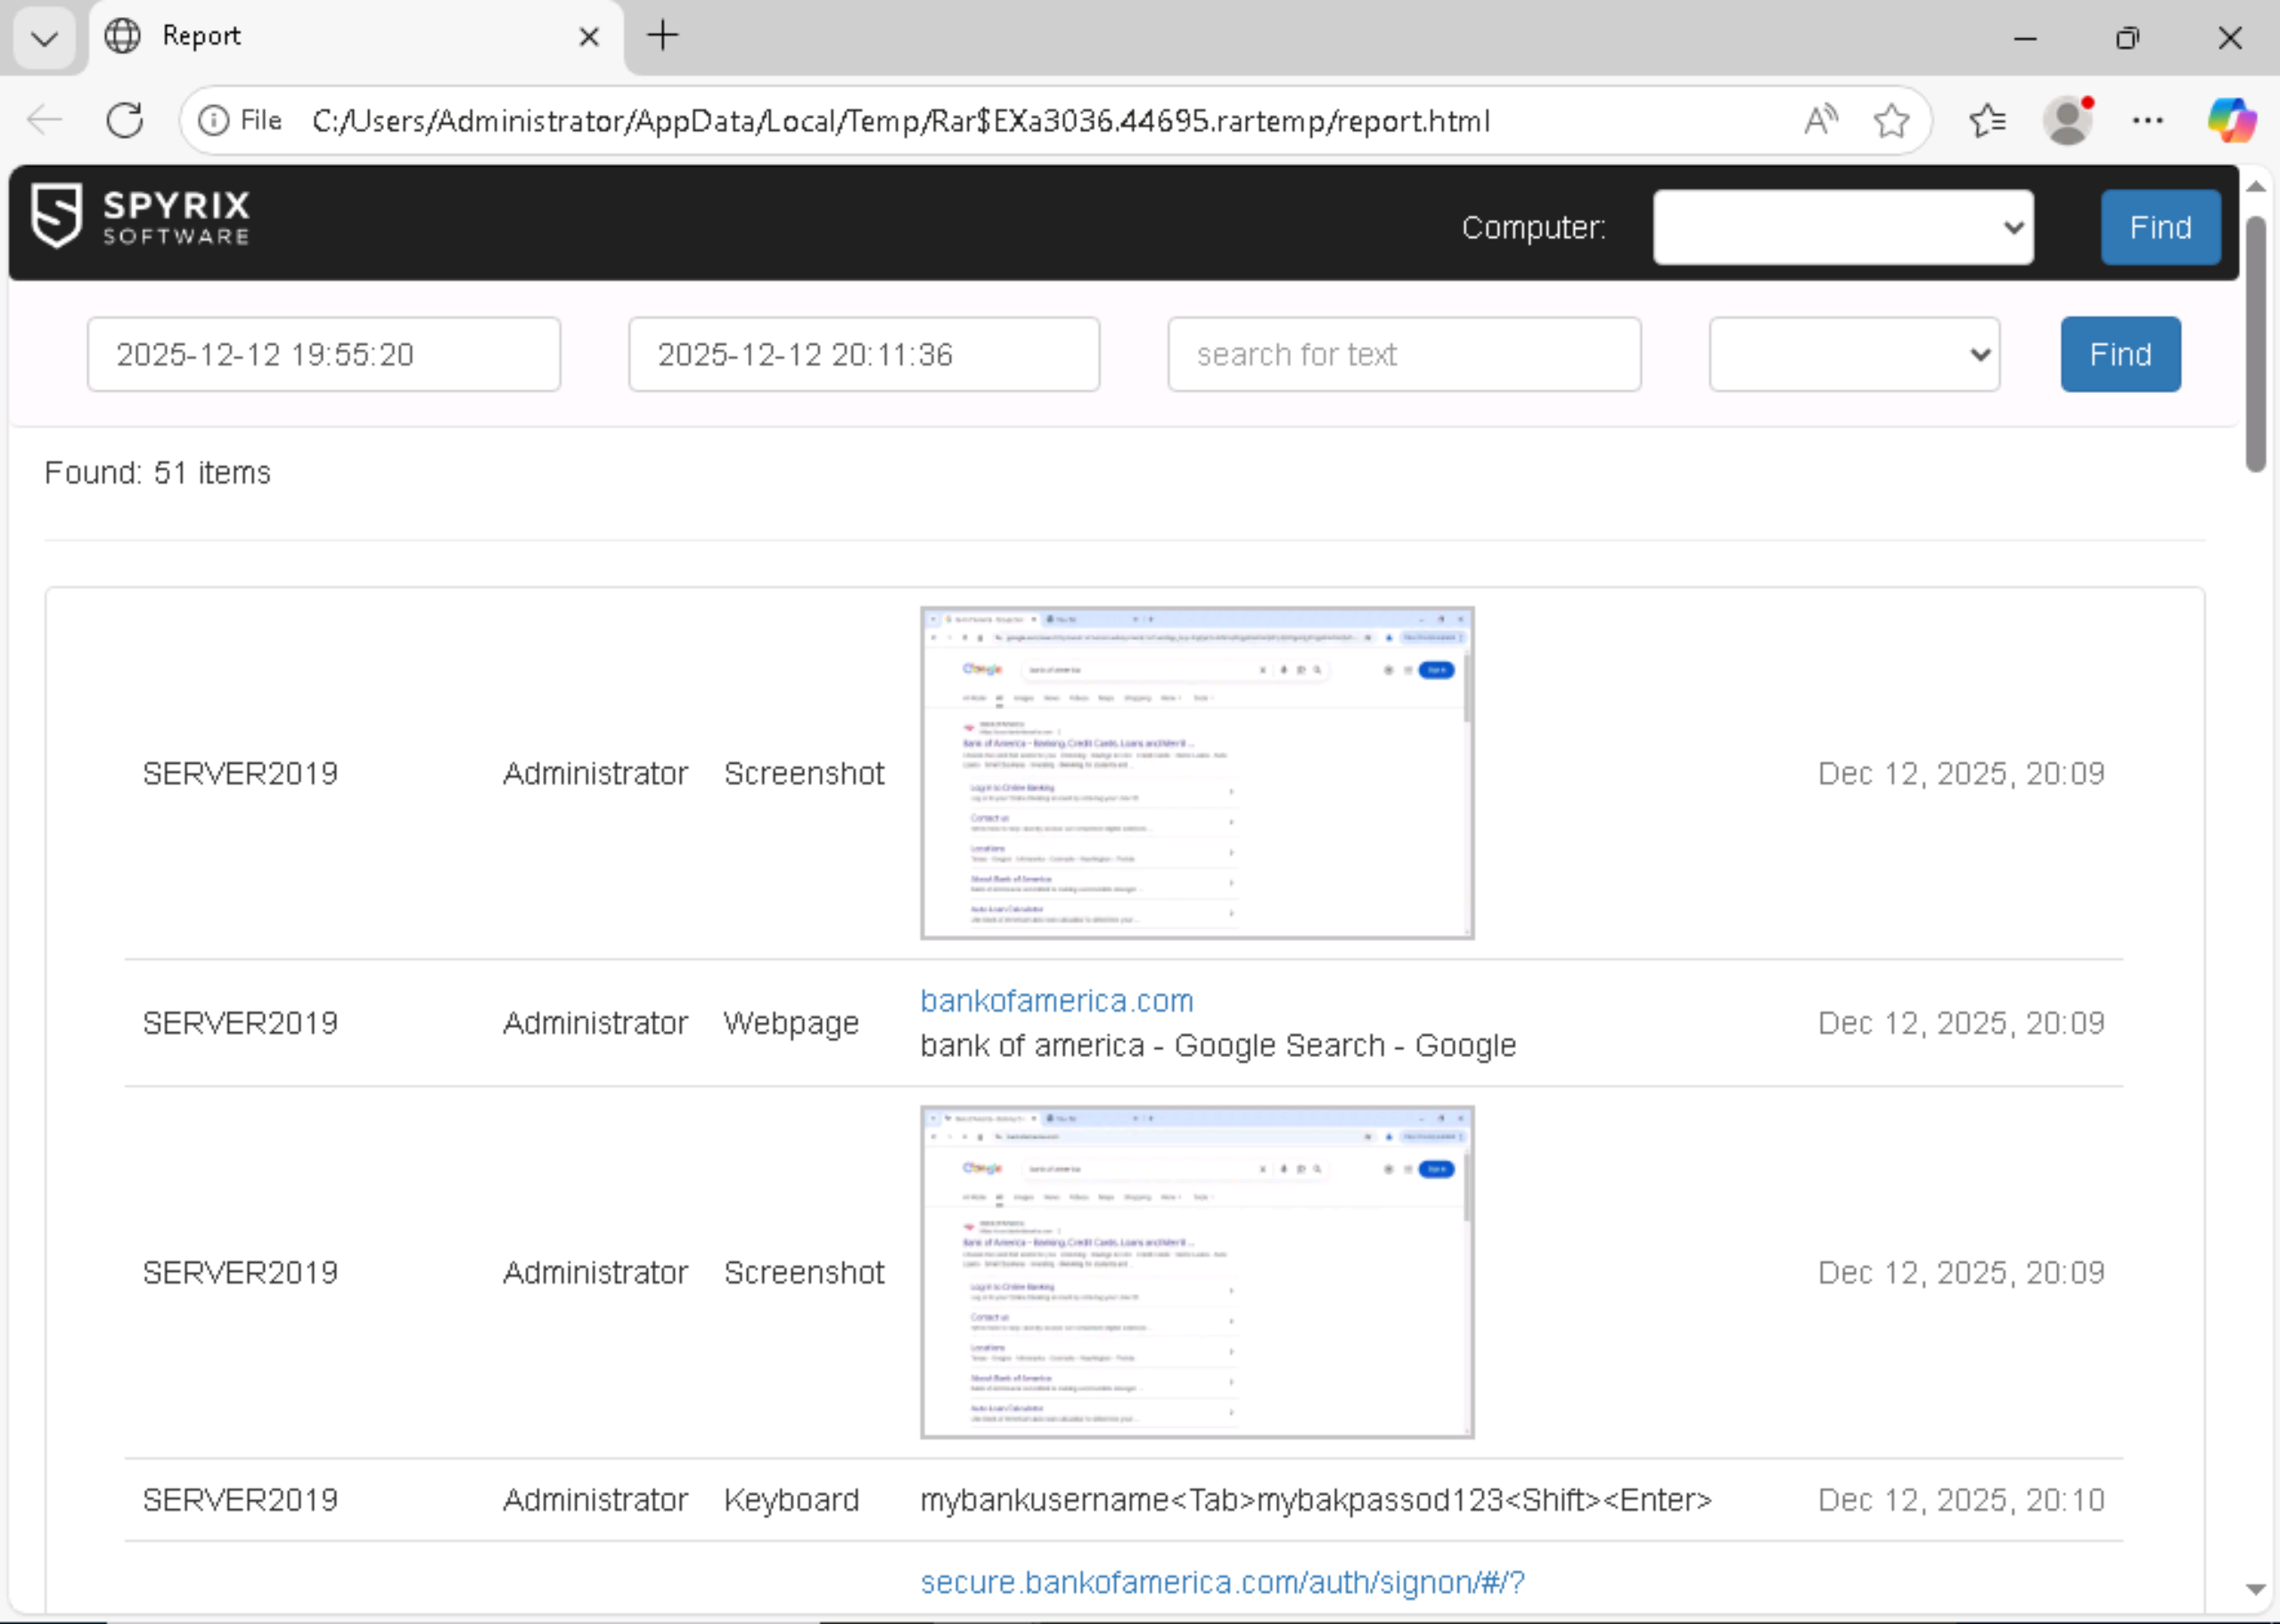
The data captured by Spyrix demonstrates the extensive visibility that monitoring software provides into user activity. Consider what an attacker or unauthorized monitor could learn from this information:
Keystroke logs reveal passwords, private messages, personal thoughts typed into documents, search queries, and any other typed content. Even brief monitoring periods can capture credentials for email accounts, banking sites, and corporate systems.
Screenshots provide visual context that keystrokes alone cannot capture. They reveal the content of documents being read, images being viewed, video being watched, and the overall context of user activity.
Web browsing history exposes personal interests, financial activities, health concerns, political views, and any other information accessed through the web. Combined with keystroke logging of form submissions, this data can reveal login credentials and personal information entered into websites.
Application monitoring shows work patterns, software usage, and potentially unauthorized or policy-violating activities.
This demo shows what an attacker can achieve once they gain access to a system. A compromised system with monitoring software installed provides an attacker with near-complete visibility into the victim’s digital life.
Spyrix is a commercial surveillance tool that enables covert monitoring of user activity across Windows, macOS, and Android platforms.
It captures keystrokes, screenshots, web browsing history, application usage, and communications from platforms like WhatsApp, Skype, and Facebook. The software operates in hidden mode and transmits collected data to a secure web dashboard.
In this demo, we installed Spyrix on a target Windows system using Remote Desktop access. We disabled Windows Defender, added folder exclusions, deployed the monitoring client, and observed captured data through the web dashboard.
We learned how to deploy surveillance software on a compromised system, configure antivirus exclusions to prevent detection, link a monitoring client to a remote dashboard, and review captured keystrokes, screenshots, browsing history, and live screen activity.
Understanding how monitoring software operates is essential for both offensive security testing and defensive security measures. Security professionals should know how to identify signs of surveillance software and protect systems against unauthorized monitoring.
Happy Hacking!
No posts
Comments
Nothing yet. Say the first thing.
Sign in to join the conversation.