
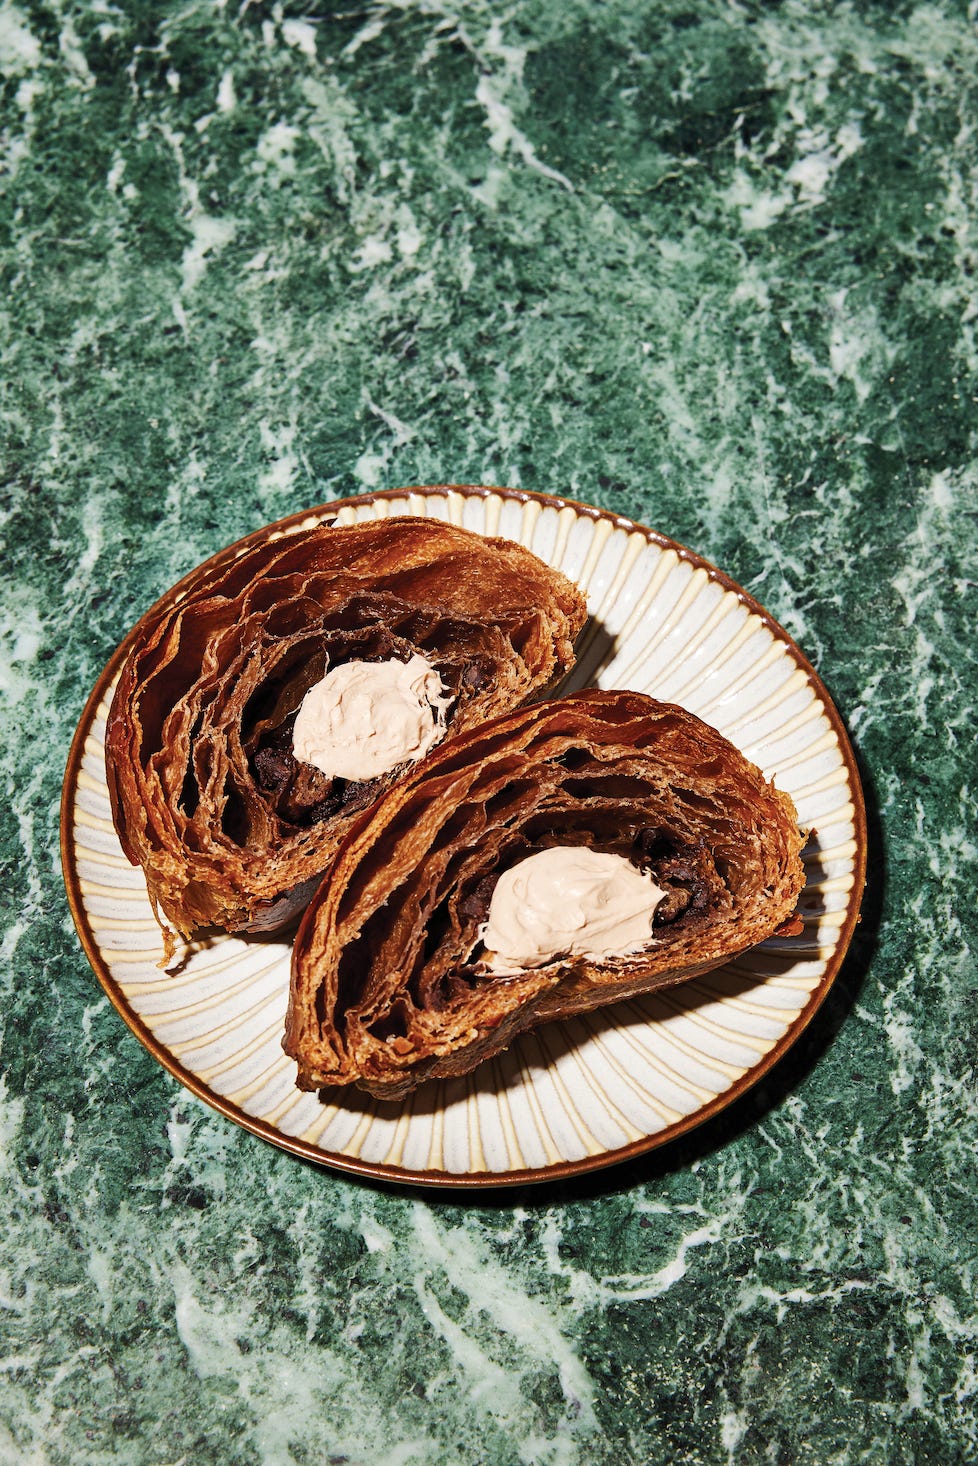
I’ve never cared for a traditional pain au chocolat. I’m too in love with chocolate to have just a little slab of it in the center of an otherwise plain croissant! This recipe is for serious chocolate lovers, as it includes chocolate in the dough itself, has mini chocolate chips throughout the pastry, and is then filled with a whipped chocolate ganache post-bake.
—Christina Wood

Makes 12 pastries
For the biga
226 grams flour
187 grams water
Very small pinch of yeast
Oil, for greasing
For the chocolate croissant dough
500 grams European-style butter, for the butter block
188 grams cold water
153 grams milk
644 grams flour
187 grams water
88 grams sugar
25 grams brute cocoa powder
21 grams butter, cold
21 grams salt
13 grams yeast
30 grams dark chocolate, melted
For the chocolate whipped ganache
3 grams sheet gelatin
Cold water, for blooming
392 grams heavy cream, divided
88 grams high-quality milk chocolate, chopped
For the egg wash
1 egg yolk
2 tablespoons heavy cream or milk
Mini chocolate chips, for sprinkling
TIMELINE:
Day One: mixing biga (5 minutes), fermenting biga (12 to 14 hours)
Day Two: making butter block (20 minutes), mixing dough (25 minutes), fermenting dough (12 to 16 hours)
Day Three: laminating dough (2 hours), making chocolate whipped ganache (20 minutes), shaping dough (30 minutes), proofing dough (2 to 3 hours), baking croissants (27 to 30 minutes), filling croissants (5 minutes)
Catch Christina talking about this recipe on our baking pod!
MAKE THE BIGA: Two days before you want to eat the croissants, mix the flour, the water, and the yeast together until homogenous. Let it ferment in a covered lightly oiled bowl at room temperature for 12 to 14 hours.
MAKE THE BUTTER BLOCK: Cut 500 grams of room-temperature butter into roughly 1-inch cubes and lightly dust with flour. Place them close together on a piece of parchment paper and cover with a piece of plastic wrap. Use your hands and then a rolling pin to smash the butter cubes together; let some aggression out here and really let ’er rip.
Now start rolling the butter out into a flat 8-by-8-inch square for puff or 10-by-7-inch rectangle for croissant. Use a metal bench scraper to make the corners squared off and pay special attention to making the entire thing very flat and of even thickness. You can lift the plastic wrap off and rearrange it as necessary to achieve this.
Keep the butter block in the fridge and pull it out to come up to room temperature about 30 minutes to 1 hour before you need it, depending on the ambient temperature of your kitchen. When laminating with it, it should be cold but flexible.
MAKE THE CHOCOLATE CROISSANT DOUGH: Place the cold water, milk, flour, sugar, cocoa powder, butter, salt, and yeast in a stand mixer fitted with the hook attachment. Add in all the biga and melted chocolate, and start the mixer right away so the chocolate doesn’t have time to solidify. Mix on low speed for 25 minutes. If the dough climbs up the hook, simply stop the mixer, scrape it down, and begin mixing again. The dough should be somewhat smooth, although it may still have a few craggy pockets.
Roll this moderately developed dough into an egg shape, place on a parchment-lined baking sheet, and wrap the whole sheet with plastic. Even though the dough is cold, the yeast will still show some activity during the overnight cold fermentation and will likely nearly double in size. Put it in the fridge and let it ferment for at least 12 hours and up to 16. The dough should be a light brown color without any visible chunks of chocolate after its rest.
LAMINATE THE DOUGH: Take the croissant dough out of the fridge and transfer it to a lightly floured surface. Orient the egg so that its short side is toward you. De–gas the dough by pushing your rolling pin into the center; repeat pressing it into the dough, moving from the center toward the edges. Then roll it out to create a flat rectangle. There should be no large air bubbles in the dough. Roll the dough into a 21-by-7-inch rectangle of even thickness. Please note: The dimensions I took may differ slightly for you. The main things to focus on are keeping the dough of even thickness in each step and trying to achieve a rectangular shape that is rolled out thinly enough.
Rotate the dough so its long side is toward you. Visually divide the dough into four pieces and place the butter block in the middle two sections. Fold the left flap over the top of the butter; it should land at the center line of the butter. Make sure the dough is hugging the butter quite tightly at the point where it folds over.
Press gently but firmly on the corners of the dough to secure it to the butter. Now do the same with the right flap of dough, having the two dough flaps meet each other in the center of the butter.
This is called locking in the butter. What you’re looking for here is an even thickness of dough all the way around an even layer of butter. When you look at this dough block from the side, you should see layers of dough/butter/dough that are all the same size. The more fastidious you are about making these layers perfectly even and symmetrical, the easier the rest of the process will be, but you must not fuss over it too much or the warmth from your hands and the air will make the butter get too soft. If you don’t achieve perfection on the first try, just know this is something I still work on with my own lamination, so don’t be discouraged!
PERFORM A LETTER FOLD: Now with the seam in the dough going perpendicular to you, start rolling the dough to lengthen it. You will only want to roll up and down, not sideways or diagonally; you’re just lengthening it, not widening it. Roll it to ⅓-inch thick, which should give you a 25-by-11-inch rectangle. If the top and bottom of the rectangle are not straight sides, use a paring knife to trim the edges so you end up with a rectangle shape. Do not trim the long sides of the rectangle.
Rotate the dough 90 degrees so the long side is toward you. Visually divide the dough into thirds, and fold the left third over to cover the middle third. Make sure the edges of the dough are lined up with each other. Then fold the right third over the middle third to finish your letter fold. Place on a baking sheet, wrap with plastic, and refrigerate for 30 minutes.
PERFORM A BOOK FOLD: Take the dough out and place on a lightly floured surface, orienting the spine of the dough block to be on your left. Now you’ll roll this out to ⅓-inch thickness, lengthening it only, ending up with a 30-by-8½-inch rectangle. Trim the short ends if necessary to make a nice rectangle. Visually divide the dough into fourths, and fold both outer fourths to the middle, where they will meet. Fold the right half over the left half. That’s it! You’re done laminating! Wrap it up in plastic and and let it chill in the fridge for at least 1 hour before rolling it out to shape.
MAKE THE CHOCOLATE WHIPPED GANACHE: Bloom the gelatin in ice water. Meanwhile, heat 204 grams of the cream in a small saucepan over medium-high heat.
When the gelatin has bloomed, squeeze excess water out of it and put it in a heatproof bowl with the chocolate. When the cream comes to a boil, pour it over the chocolate and gelatin. Gently stir to melt the chocolate completely. Immersion blend this mixture to make sure it is homogenous, scraping the bottom and sides of the bowl to ensure there’s no chocolate hiding there.
With the immersion blender running, stream in the remaining 188 grams of cream. Transfer this to a container and place plastic wrap directly on top of it to prevent any sweating. Refrigerate overnight.
SHAPE, PROOF, AND BAKE THE PASTRIES: Roll the laminated dough out to a 16-by-19-inch rectangle about ¼ inch thick. You’re going to be cutting 7-by-3-inch rectangles out of this dough. To get the most out of this dough, trim the bottom edge using a ruler as a guide to keep it straight.
From that first cut, measure 7 inches up from it, make a little mark in the dough, and then measure 7 more inches from that mark. Do it again in a different spot on the dough so you have two points to cut along. Line the ruler up along the middle two marks (these are the ones 7 inches up from the bottom trim) and cut the dough lengthwise.
Now do the same thing where the marks are 14 inches up from the bottom trim. This will leave you with two 7-inch-wide strips of dough.
You’re going to do the same thing going crosswise now. Start at the right side of the strips. Trim an edge off. Now from that edge, make a mark every 3 inches. Cut crosswise at all the 3-inch marks. You should now have about twelve 7-by-3-inch rectangles.
Egg wash the pastry, and sprinkle the chocolate chips all over the rectangles. To roll up the pastries, start with one of the short ends and start rolling it up like you would a cinnamon roll. It’s OK if some chocolate chips escape, just gather them up and push them back on unrolled pastries.
You’ll end up with a cylinder shape, and the seam should be on the bottom. Repeat this with all the rectangles.
If you don’t want to bake all of them today, you can freeze some. Tightly wrap them in plastic and keep them frozen for up to 3 weeks.
Put up to six croissants on a parchment-lined baking sheet. Proof the pastries.
Preheat the oven to 350 degrees Fahrenheit. Egg wash each pastry. Bake in the center of the oven for 27 to 30 minutes. Let cool completely.
Once the pastries are cool, transfer the ganache into a stand mixer fitted with the whisk attachment. Whisk on medium-high speed until stiff peaks form. Transfer the whipped ganache to a piping bag.
FILL THE PASTRIES: Take a paring knife, poke the pastry where you want to fill it, and then twist it in a circular motion to bore a hole into the pastry. You can push the knife farther into a doughnut to create space for the filling, and for a croissant, you just need to bore through the bottom layer of pastry. To fill the pastry, insert the tip of your piping bag into the hole and give it a squeeze. It can sometimes be deceiving when filling pastries. You’ll think you’re getting a ton of filling in there and then when you bite into it, nothing. To combat this, place the empty pastry on a scale and tare it out. Fill it, then put it back on the scale. You’ll want 30 to 40 grams of filling.
Serve croissants immediately.
From Pastry Temple: Baking with Inspired Flavors by Christina Wood. Reprinted by permission of Sasquatch Books.
Please note, some of our links may earn us a small commission.
Comments
Nothing yet. Say the first thing.
Sign in to join the conversation.