
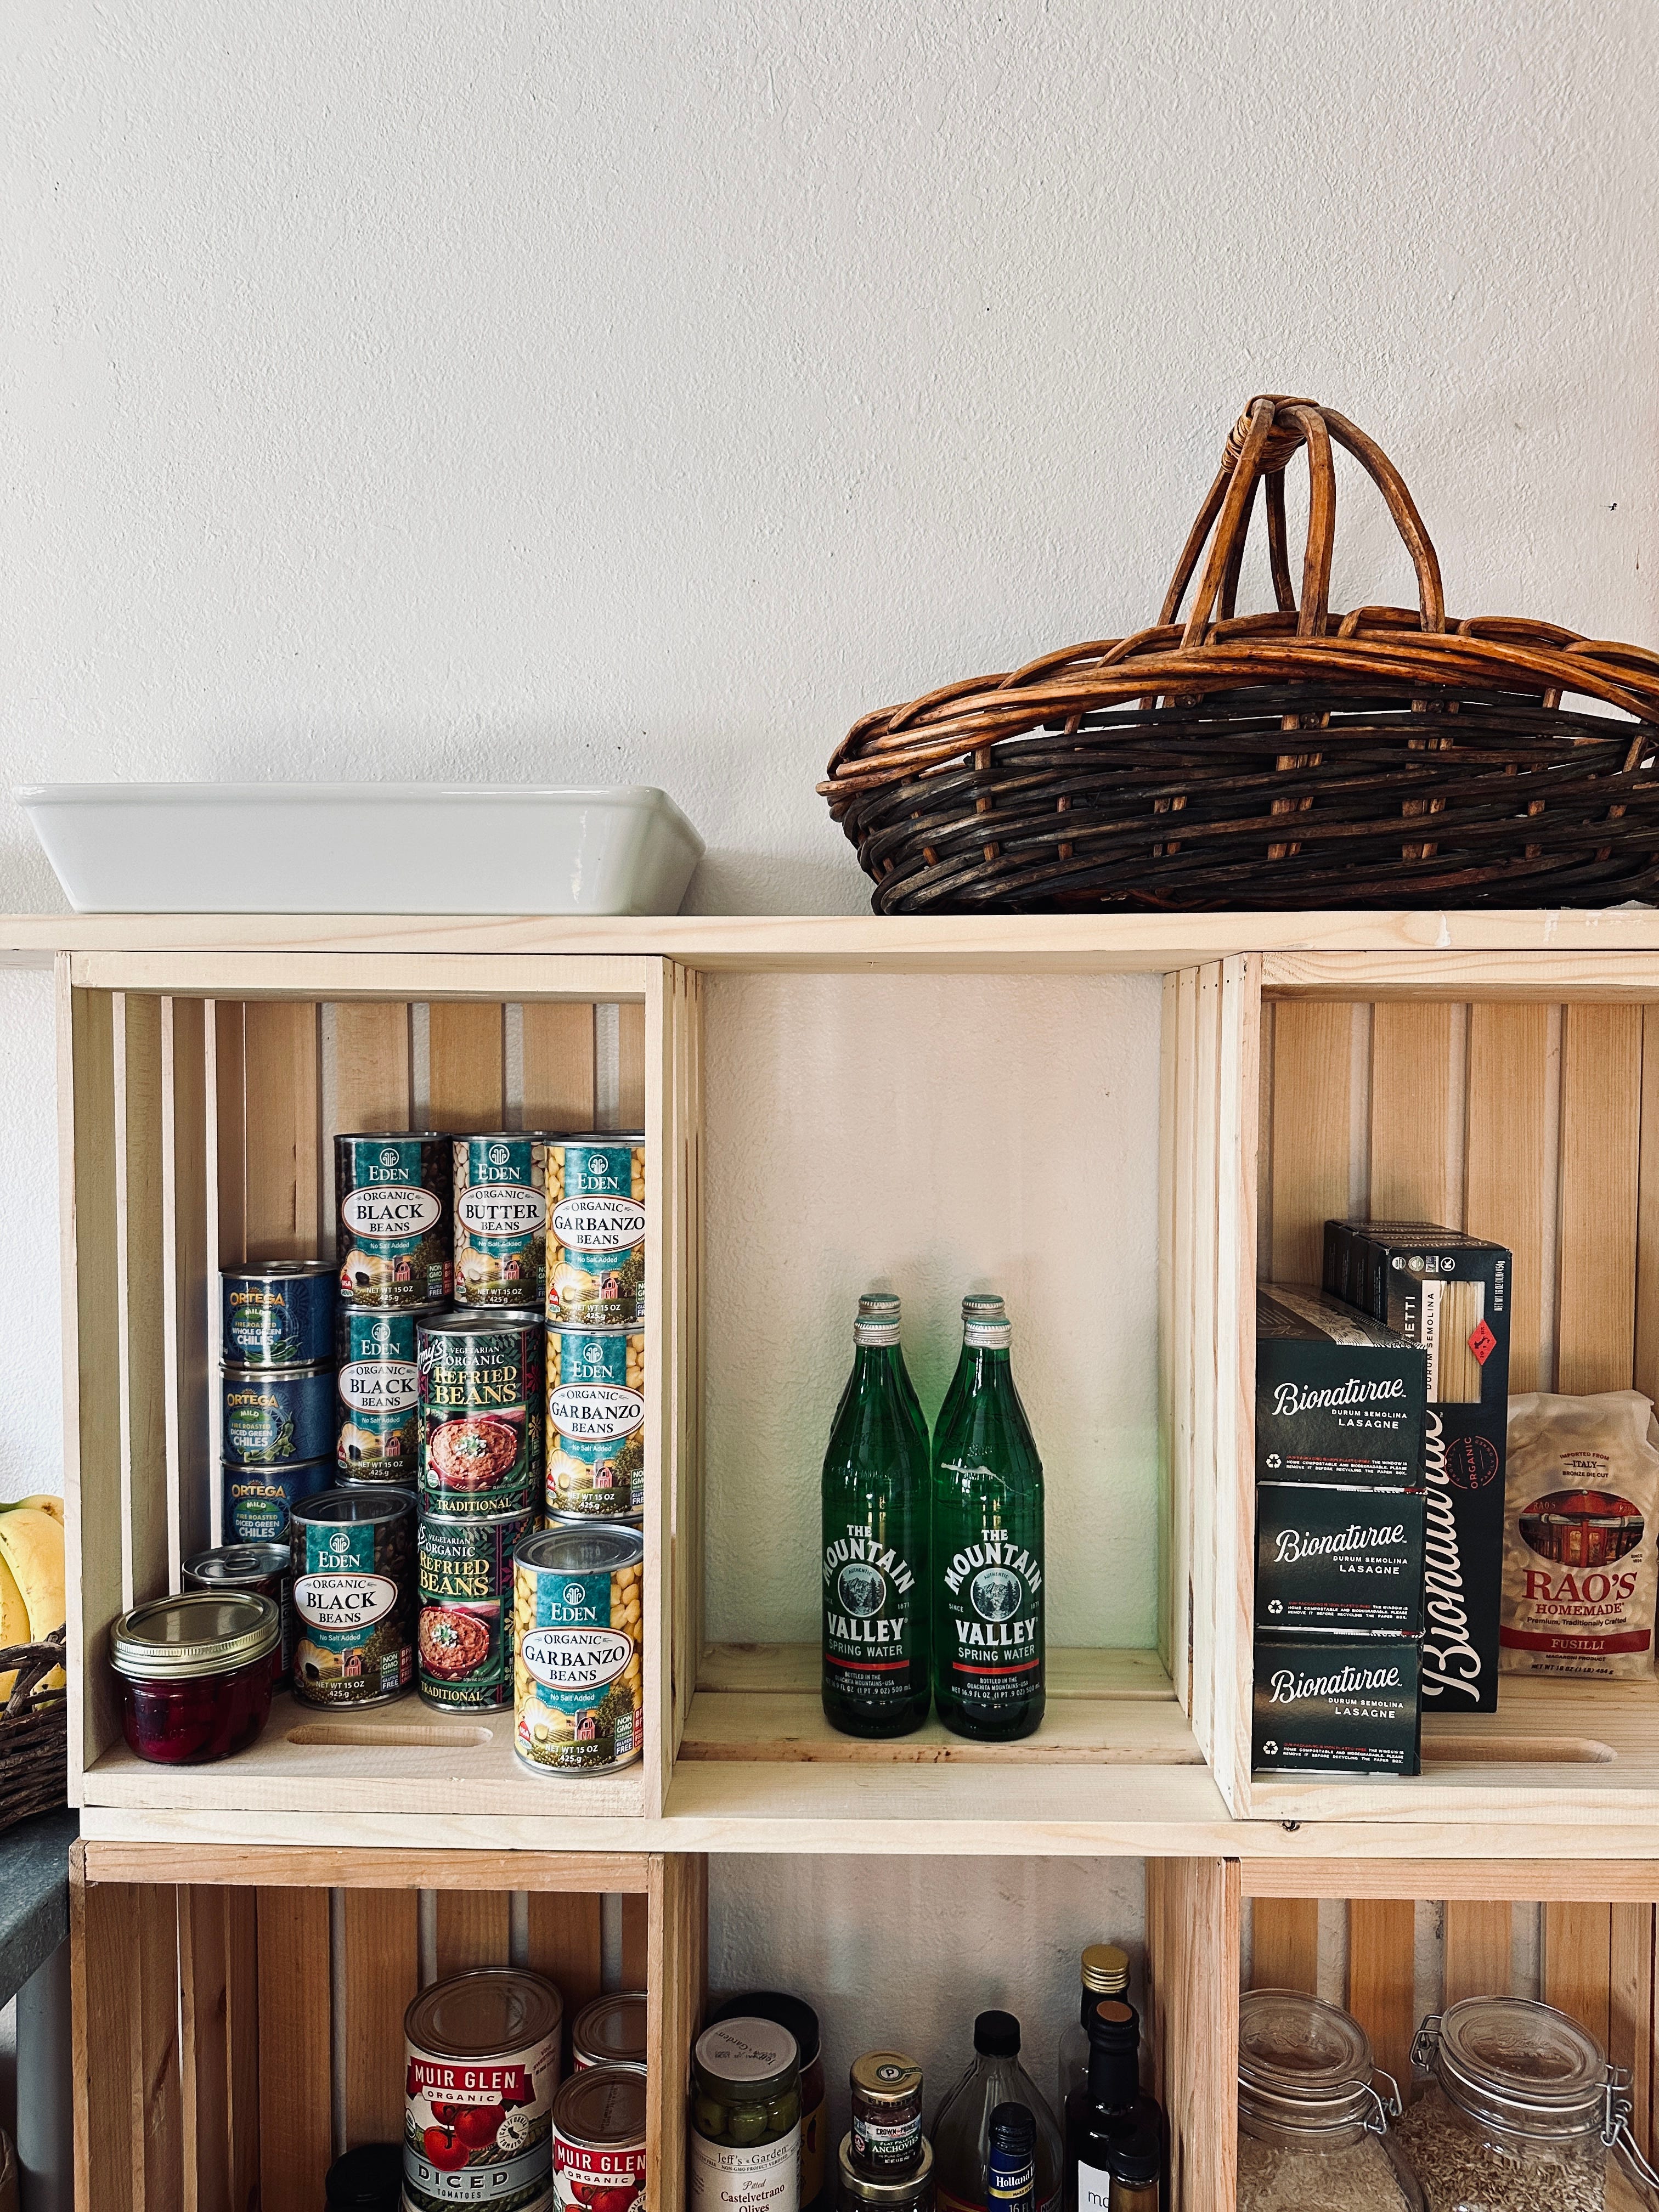
Take a stack of wooden crates, some lumber cut to length, and a day or two and settle the larder. Even (especially) if the construction on Pond House Studio is not yet complete (Oy vey). And by “settle the larder,” I mean settle your mind (and dance a hallelujah that something is complete!) By “larder,” I mean a perpendicular set of walls in one room in the unremodeled house.
Pantry? Larder? Which is it? To avoid confusion, I refer to cabinet space in a kitchen that holds close-at-hand, everyday food, as the pantry, and a separate room, area, or space designated to keeping a larger back-stock of food, as the larder.
Can I be so bossy as to say that everyone should have both? Having a larder is like having your own tiny grocery store. Imagine! Your own First Bloom! You can even keep a shopping basket there! (Proof: the gathering basket on the top shelf above!)
In fact, I’ve organized my larder similar to a store. On the right side of the table, there is pasta and dried beans, canned vegetables and fish, broth, oils and vinegars, and jars of pickled or spicy things. Snacks are decanted into bin baskets (protein bars, meat sticks). All things sweet, fruit, nuts, and baking are on the crate-shelves on the left side of the table. On a perpendicular wall are crate-shelves holding extra canned/bottled drinks and disposable baking and picnic ware.
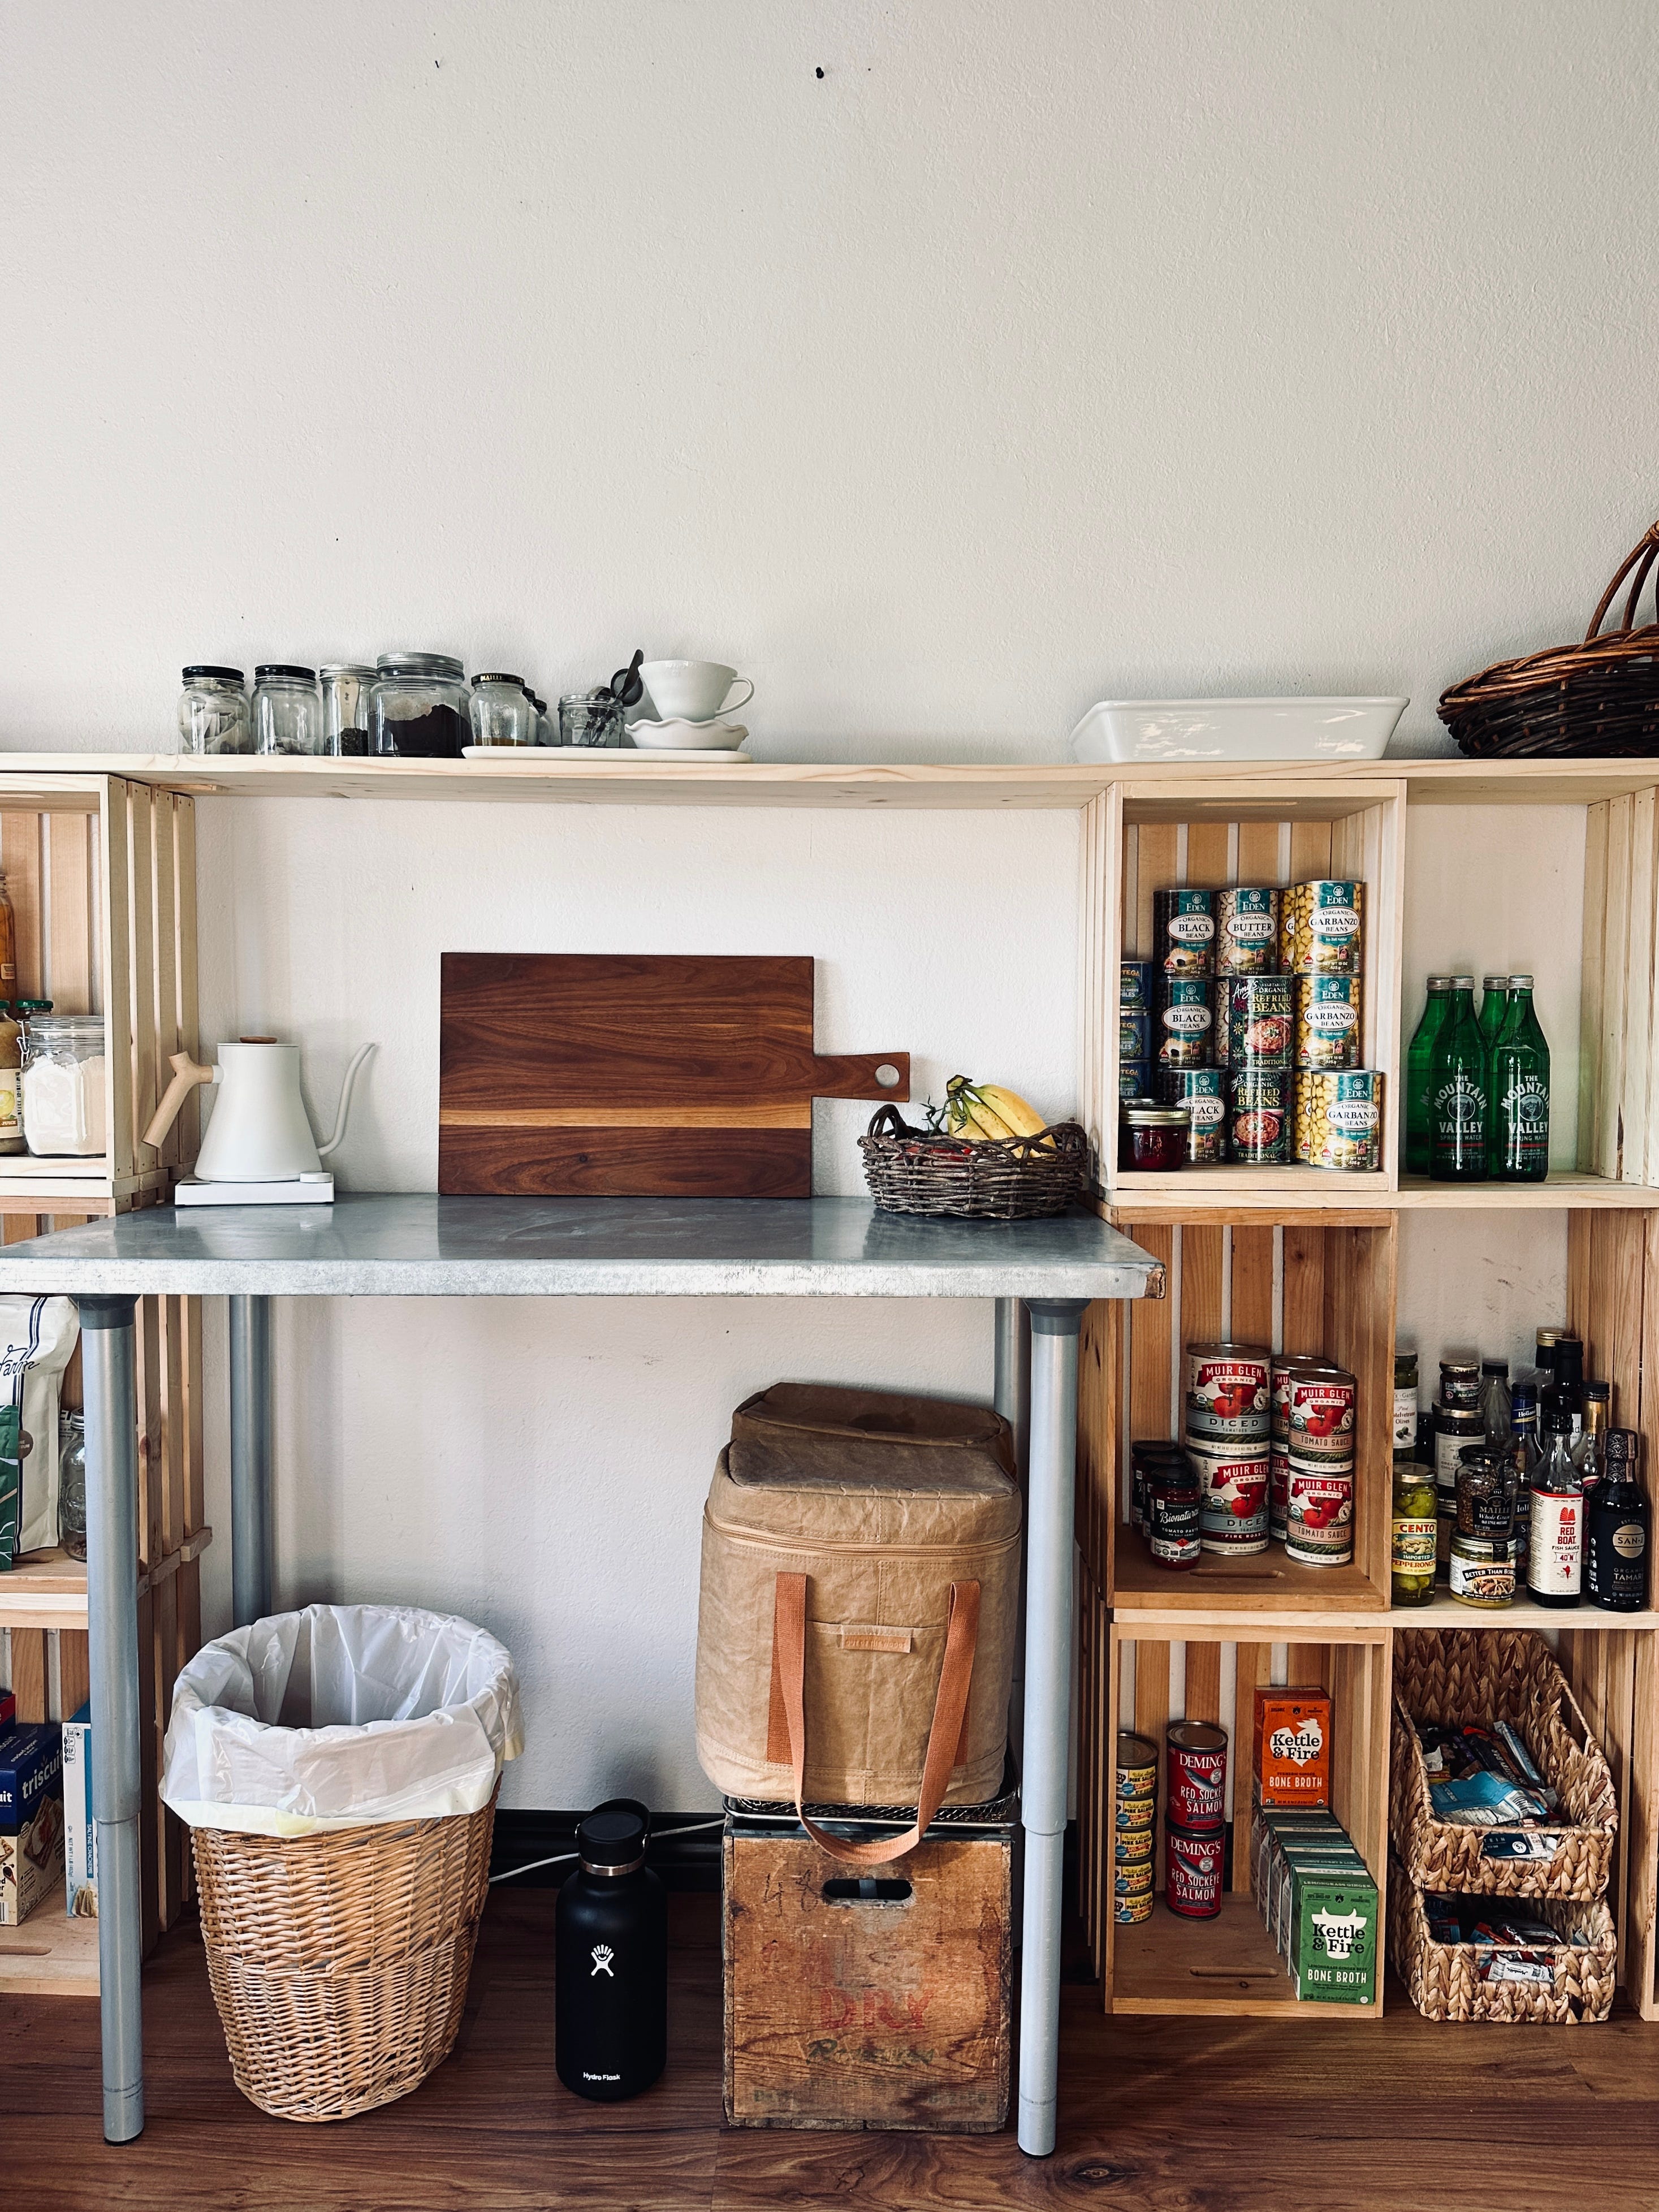
To create a larder, you’ll need shelves, of course, and I’m not sure of another way to get pretty, solid wood, inexpensive, easy to assemble shelves than wooden crates set on end with lumber “bridges” between them. (You may recognize this idea from our little house larder in Wyoming, seen in the background here.) Create a custom fit by cutting the bridges to the length that fits your space. No hardware is needed, just set the bottom crates on the floor, add a bridge that’s the length of space from the outside of the right crate to the outside of the left one, set the next course of crates, add a bridge, and so on until you’ve reached your desired height. The weight of goods on the shelves will hold everything in place.
In this larder space, I created two sections of crate-and-bridge shelving with a work table in between, and a solid plank going across the full length at the top, creating a handy shelf above the table where I have jars of tea and coffee and a tray holding the hot beverage-making accoutrements.
For the bridges, I had my local lumber yard (support the local yard, if you can!) rip 1x6 pine lengthwise, and used three of these resulting narrow boards per bridge, leaving gaps between the boards that mimic the gaps in the slats of the crates. Using three narrow boards is more cost effective than using a solid board for the bridges. I did, however, use a solid 1x10 as the top bridge to cap the whole affair and give it some stabilization.
The table, we’ve had for years, and it keeps coming in handy. I had a local fabricator wrap a sheet of OSB cut to my specification in galvanized steel, then I attached adjustable height legs from IKEA (similar). It’s been used as a desk, nightstand, a lemonade stand (the boys and their friend-girl sold gallons back in the day!), an extra serving surface for picnics, and now a larder table.
If you’re curious, here are the sources of things you see:*
The trash can basket I’ve had since I was a teenager (if you buy quality, it will last).
The wooden crate below the table was a yard sale find (I store jugs of olive and avocado oil in it so they can be out of the light).
The shopping basket is thrifted
The fruit basket is thrifted
The cutting board is custom made
*Some links are affiliate.
Thank you for reading here! Your paid subscriptions keep these words flowing. Your reposts and shares help others find their way here. Because of you, my writing is available to all. Enjoy!
Comments
Nothing yet. Say the first thing.
Sign in to join the conversation.