
Introduction
Redis is one of the most useful infrastructure pieces you can add to a Laravel app.
In Laravel, Redis is not just “a cache thing.” It is a practical fit for:
- cache
- queues
- sessions
- rate limiting
- direct key-value or pub/sub style work through the Redis facade
If you only remember one thing from this guide, make it this:
Use Redis in Laravel when you need fast shared state that should survive between requests.
This walkthrough shows the real setup and the four jobs that matter most in day-to-day Laravel work.
This is the simplest way to picture the role Redis plays in a Laravel app:
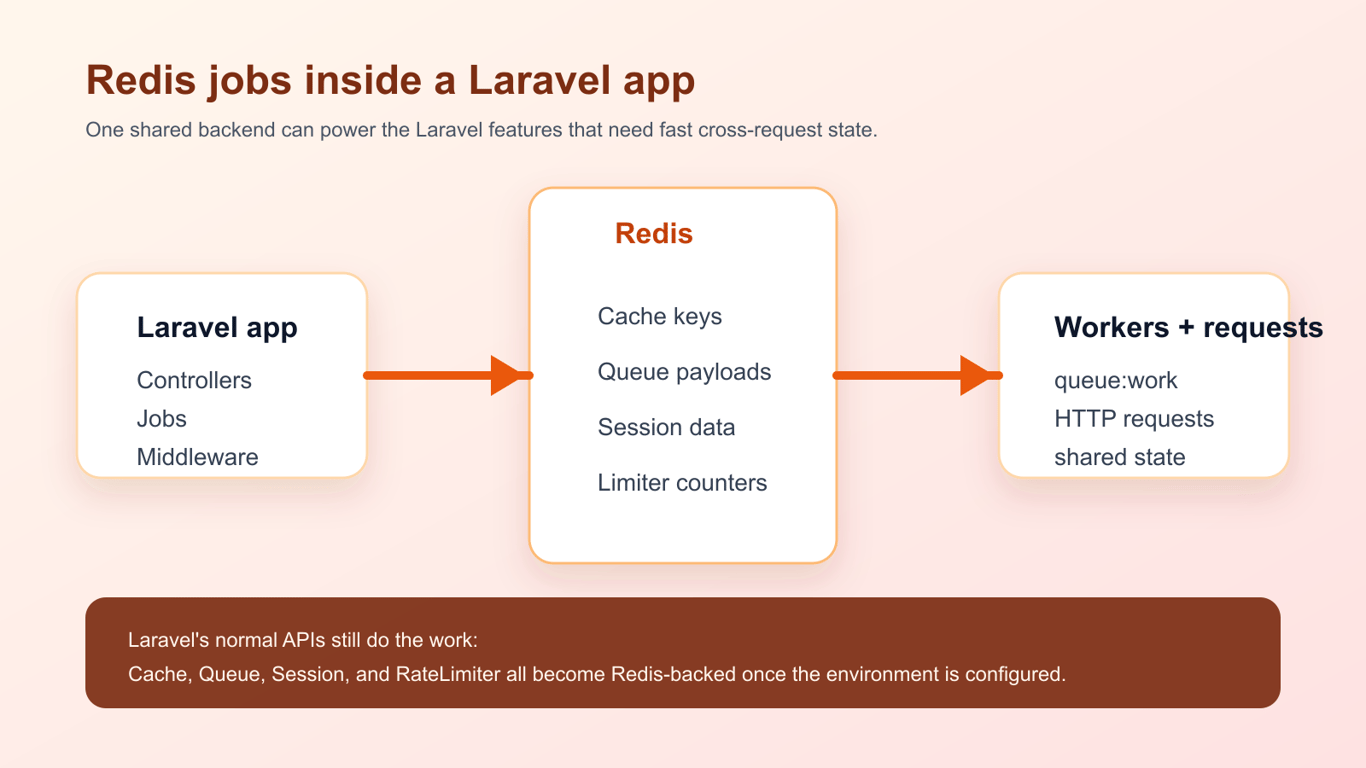
When Redis makes sense in Laravel
Redis is a good fit when:
- cached data should be fast and shared across app servers
- queue workers need a reliable central backend
- sessions must work across multiple app instances
- rate limits need to be enforced consistently
If you are running a tiny local app on one machine, file or database-backed options can still be fine. Redis becomes more valuable as soon as the app has real traffic, multiple workers, or more than one server.
Choose your Redis client
Laravel supports two main Redis clients:
phpredispredis/predis
The Laravel docs recommend configuring the client through REDIS_CLIENT in your environment file.
Typical default:
REDIS_CLIENT=phpredis
REDIS_HOST=127.0.0.1
REDIS_PASSWORD=null
REDIS_PORT=6379
phpredis is usually the better default because it is a native PHP extension and tends to be the faster option.
If you need a pure-PHP client instead, you can use Predis.
Laravel Redis configuration
Laravel keeps Redis configuration in config/database.php.
In a standard app, you will usually see connections like these:
'redis' => [
    'client' => env('REDIS_CLIENT', 'phpredis'),
    'default' => [
        'host' => env('REDIS_HOST', '127.0.0.1'),
        'password' => env('REDIS_PASSWORD'),
        'port' => env('REDIS_PORT', 6379),
        'database' => env('REDIS_DB', 0),
    ],
    'cache' => [
        'host' => env('REDIS_HOST', '127.0.0.1'),
        'password' => env('REDIS_PASSWORD'),
        'port' => env('REDIS_PORT', 6379),
        'database' => env('REDIS_CACHE_DB', 1),
    ],
],
The split between default and cache is useful because it keeps cache keys separate from other Redis-backed app state.
Use Redis for cache
This is the easiest win.
Set the cache store to Redis in your .env file:
CACHE_STORE=redis
Then use Laravel’s normal cache API:
use Illuminate\Support\Facades\Cache;
$stats = Cache::remember('dashboard:stats', now()->addMinutes(10), function () {
    return [
        'users' => User::count(),
        'orders' => Order::count(),
    ];
});
That gives you the speed of Redis without coupling your application code to Redis commands directly.
If cache freshness and background refresh are part of the problem, this flexible caching in Laravel article is the relevant next read.
Use Redis for queues
Redis is also a strong queue backend because it is fast and works well with multiple workers.
Set the queue connection:
QUEUE_CONNECTION=redis
Laravel’s queue configuration already includes a Redis connection entry in config/queue.php:
'redis' => [
    'driver' => 'redis',
    'connection' => env('REDIS_QUEUE_CONNECTION', 'default'),
    'queue' => env('REDIS_QUEUE', 'default'),
    'retry_after' => (int) env('REDIS_QUEUE_RETRY_AFTER', 90),
    'block_for' => null,
],
Dispatching jobs stays exactly the same:
ProcessInvoice::dispatch($invoice);
And your worker stays standard too:
php artisan queue:work redis
A practical detail from the docs: block_for controls how long the worker should block while waiting for jobs. That can help reduce busy polling.
Use Redis for sessions
If your app runs on multiple servers or containers, Redis is a much better session backend than local files.
Set the session driver:
SESSION_DRIVER=redis
SESSION_CONNECTION=default
After that, Laravel stores session data in Redis and every app instance can read the same session state.
This matters for:
- load-balanced apps
- Horizon or worker-heavy apps
- deployments where local disk is not shared
If sessions randomly disappear across nodes, this is one of the first things to check.
Use Redis for rate limiting
Laravel’s rate limiter uses the cache layer. So if you want Redis-backed rate limiting, the important setting is the cache limiter store.
In config/cache.php, Laravel exposes a limiter store:
'default' => env('CACHE_STORE', 'database'),
'limiter' => env('CACHE_LIMITER', 'database'),
Set that to Redis:
CACHE_LIMITER=redis
Then define your limits normally:
use Illuminate\Cache\RateLimiting\Limit;
use Illuminate\Support\Facades\RateLimiter;
RateLimiter::for('api', function ($request) {
    return Limit::perMinute(60)->by($request->user()?->id ?: $request->ip());
});
You can also use RateLimiter::attempt() directly:
use Illuminate\Support\Facades\RateLimiter;
$executed = RateLimiter::attempt(
    'send-message:'.$user->id,
    $perMinute = 5,
    fn () => Message::create([...]),
);
Redis is a strong fit here because the limit state needs to be fast and shared.
Use the Redis facade directly
Sometimes you do need direct Redis operations.
Laravel gives you the Redis facade for that:
use Illuminate\Support\Facades\Redis;
Redis::set('feature:beta-banner', 'enabled');
$value = Redis::get('feature:beta-banner');
You can also target a specific configured connection:
$value = Redis::connection('cache')->get('feature:beta-banner');
That is useful for lightweight key-value state, counters, or lower-level Redis features that do not map cleanly to Laravel’s higher abstractions.
Common pitfalls
Forgetting that cache and rate limiting are separate settings
Setting CACHE_STORE=redis does not automatically mean the limiter store uses Redis too. If you want both on Redis, set both values explicitly.
Using sync-style infrastructure assumptions on local-only Redis
If your queue, cache, or sessions rely on Redis in production, make sure your local and staging environments are close enough to catch configuration mistakes early.
Storing everything in one Redis database
Laravel supports separate Redis databases or named connections for a reason. Splitting app state can make debugging and maintenance much easier.
Reaching for direct Redis commands too early
For cache, queues, sessions, and rate limiting, prefer Laravel’s higher-level APIs first. They keep the codebase more portable and easier to reason about.
A practical default setup
If I were wiring Redis into a normal Laravel app today, the baseline would look like this:
REDIS_CLIENT=phpredis
REDIS_HOST=127.0.0.1
REDIS_PASSWORD=null
REDIS_PORT=6379
CACHE_STORE=redis
QUEUE_CONNECTION=redis
SESSION_DRIVER=redis
SESSION_CONNECTION=default
CACHE_LIMITER=redis
That gives you the main benefits immediately without overcomplicating the setup.
Conclusion
Redis is most useful in Laravel when you treat it as a practical shared backend for the jobs Laravel already knows how to do well: cache, queues, sessions, and rate limiting.
Start there first. Reach for direct Redis commands only when the higher-level Laravel API is no longer enough.
If you are still tightening the infrastructure side of a Laravel app after this, these are the next reads I would keep open:
Comments
Nothing yet. Say the first thing.
Sign in to join the conversation.