
Hi there, and welcome back to Bake Experiments. A home for joyful, elegant home baking. With a smattering of history, folklore and kitchen stories.
For those new here, I’m Shell. Once I worked in press, now I’m a baker, food photographer and Mama, based near London.
I am so thrilled to have you here. And if you like what you read, please do press that heart, share, or subscribe. Thank you.
For regular readers, I hope you enjoy this little return of my love letter series, with a special guest. For the uninitiated, last year, I wrote a series of love letters, exploring some slightly more unusual flavour combinations, from Orange & Rosemary to Lemon & Lavender.
At the end of the year, the wonderfully creative recipe developer, and flavour guru Sophia Real | Real Simple Food approached me, and asked if I fancied taking on a flavour combination together as a collaboration.
The premise was simple, we would decide a flavour combination, both go away and come up with a recipe to showcase it. It’s two recipes, for the price of one! Aren’t we good to you?
Sophia and I had previously discussed taking on lime leaves, used widely in Thai cuisine, in a sweet bake. So, when she suggested lime leaf and coconut, it was the obvious choice.
It is such a thrill that we came up with such wildly different takes on the flavour combination. With me giving some classic French patisserie a flavour twist with these fragrant buns, by crushing crystallised lime leaf into craquelin to top my choux. And Sophia’s genius take on Portokalopita, giving this Greek cake a Thai-ish twist.
All about Sophia:
I was born in Germany just after my family returned from living in Morocco. Growing up, ingredients like orange blossom water and preserved lemons were therefore pantry staples for me. I have also spent the majority of my life abroad - from the UK to Austria, Argentina, Italy and now Belgium. I have always enjoyed experimenting with different flavours and ingredients inspired by the many places I have called home and lots of trips across the world to create delicious new treats.
The food blog I initially started as a creative outlet while working as a junior lawyer in a leading international law firm in London led to a supper club, cooking classes and pop-up events here in Brussels and now my weekly newsletter on Substack featuring recipes for cakes, desserts and other sweet treats that make the most of the flavour bombs seemingly hidden in our modern pantries.
Jump to Sophia’s Portkalopita Recipe here.
You can read Sophia’s version of this newsletter here.
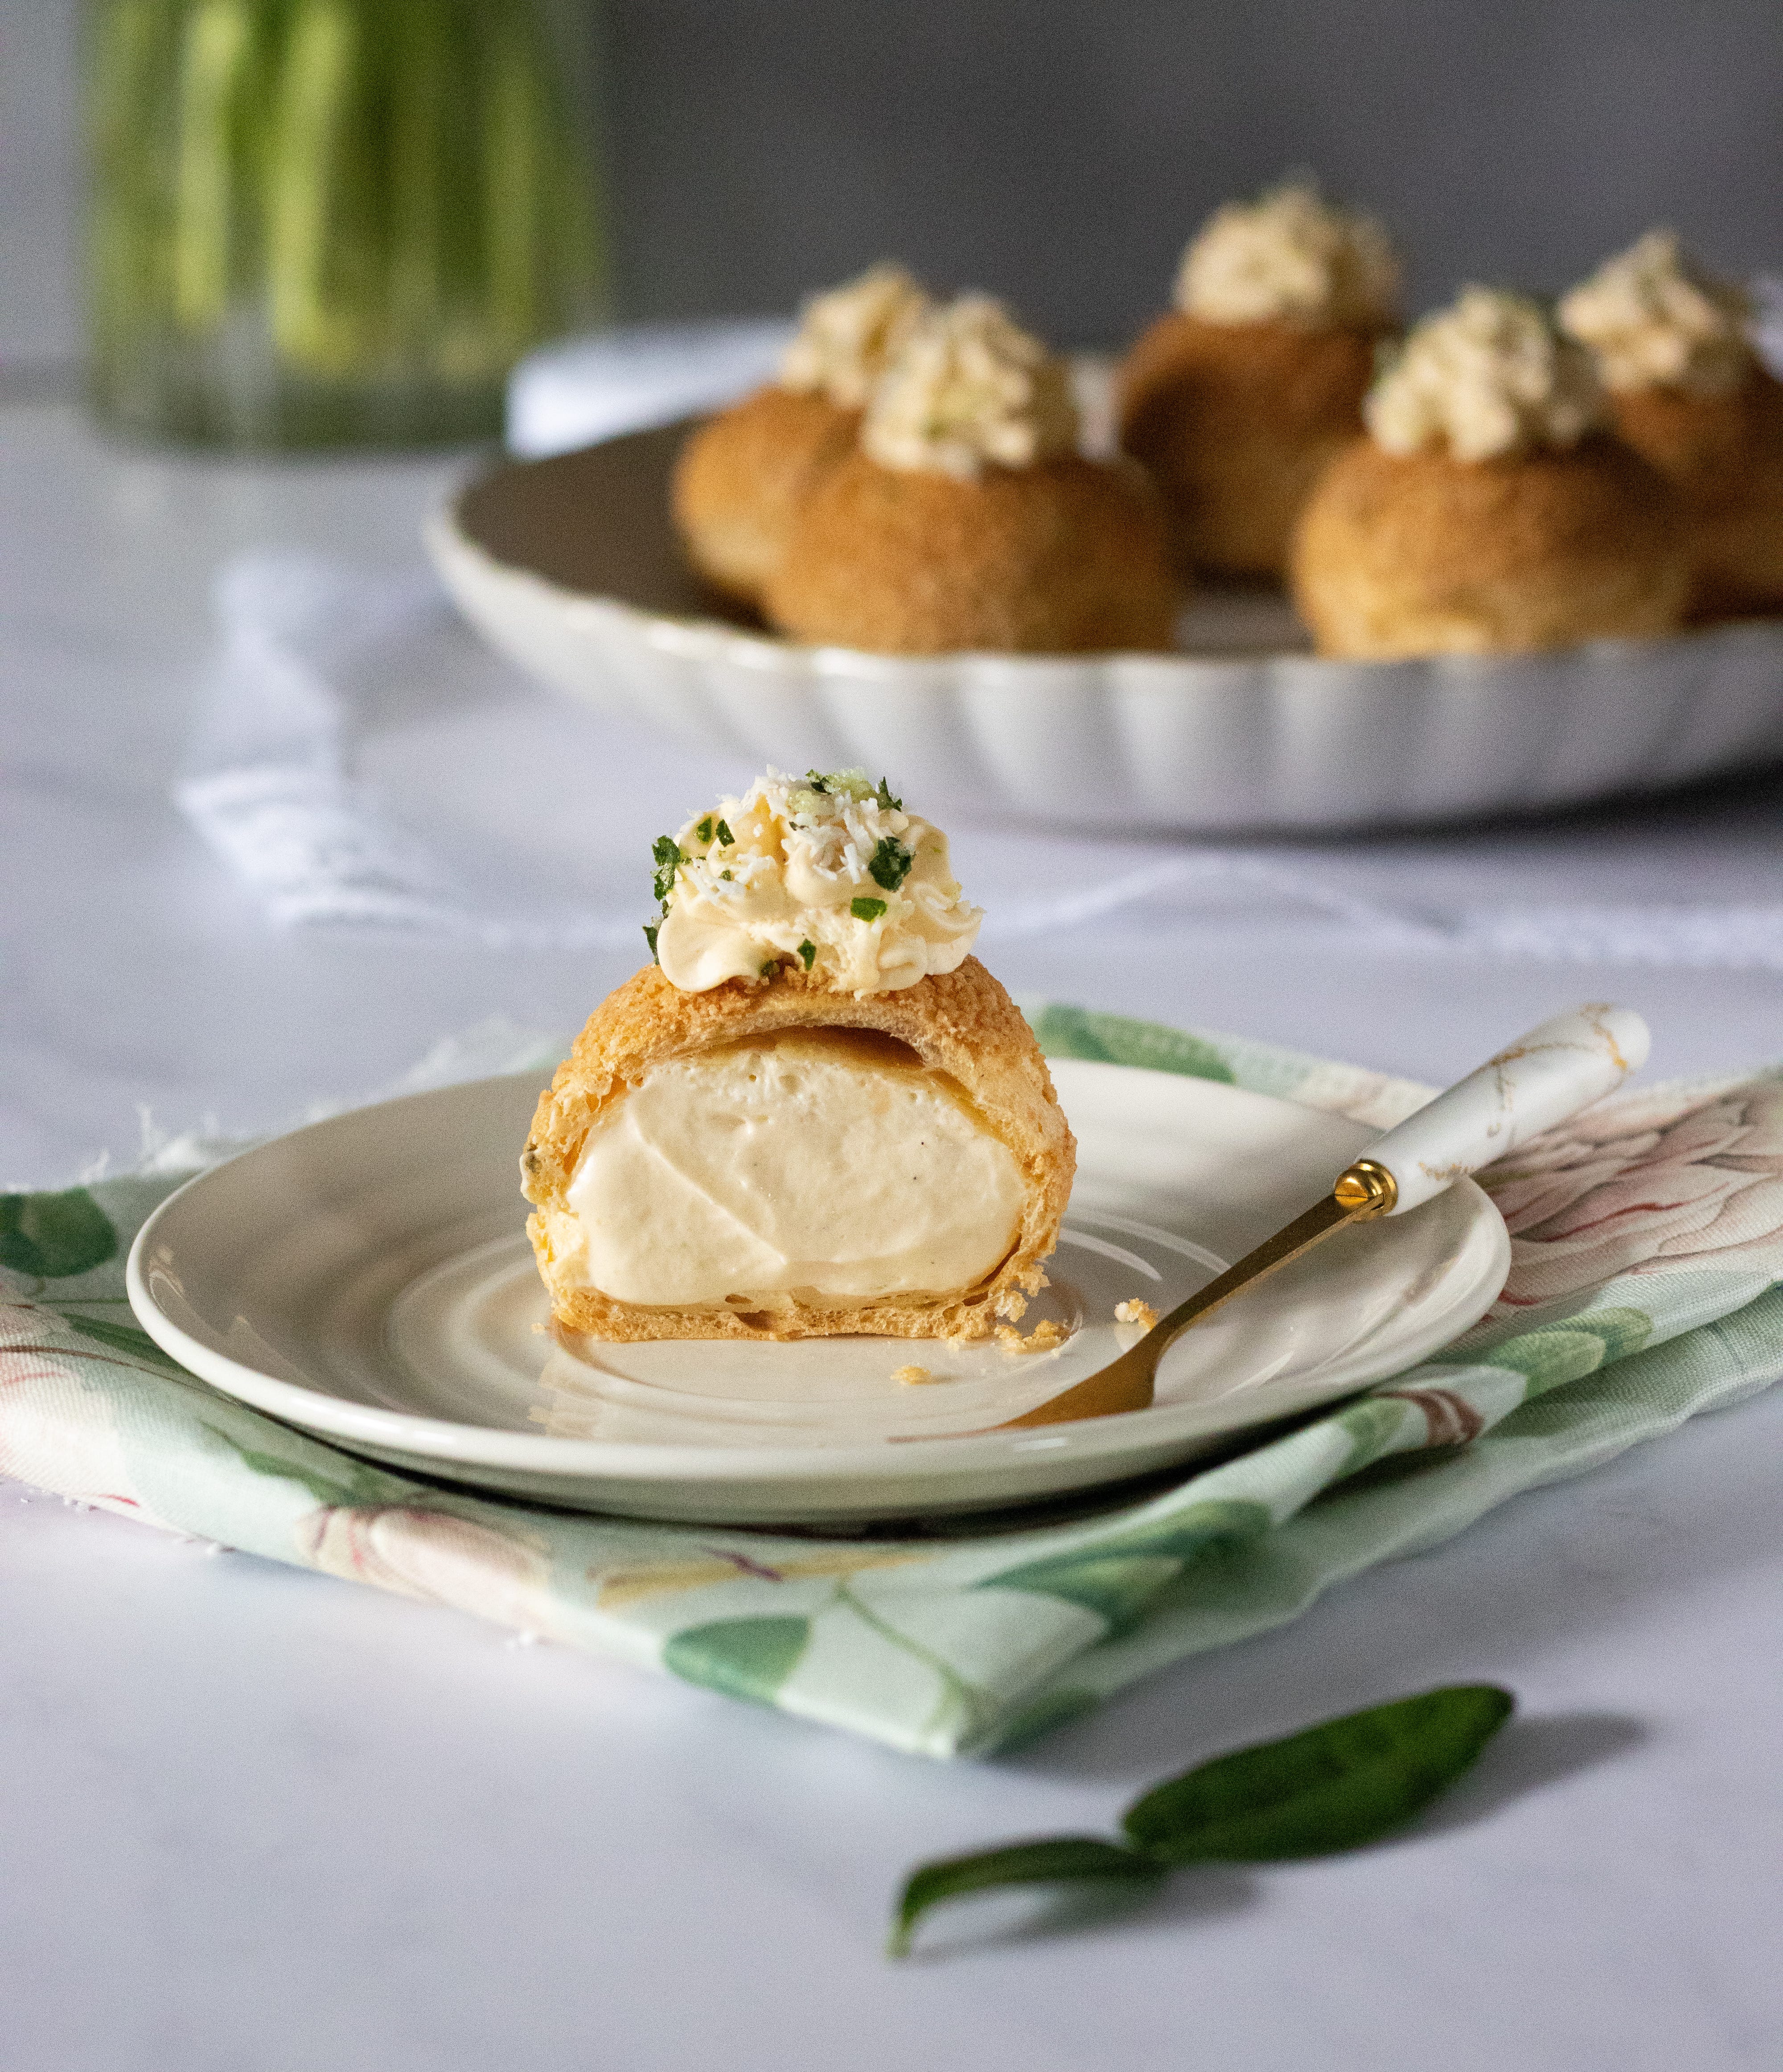
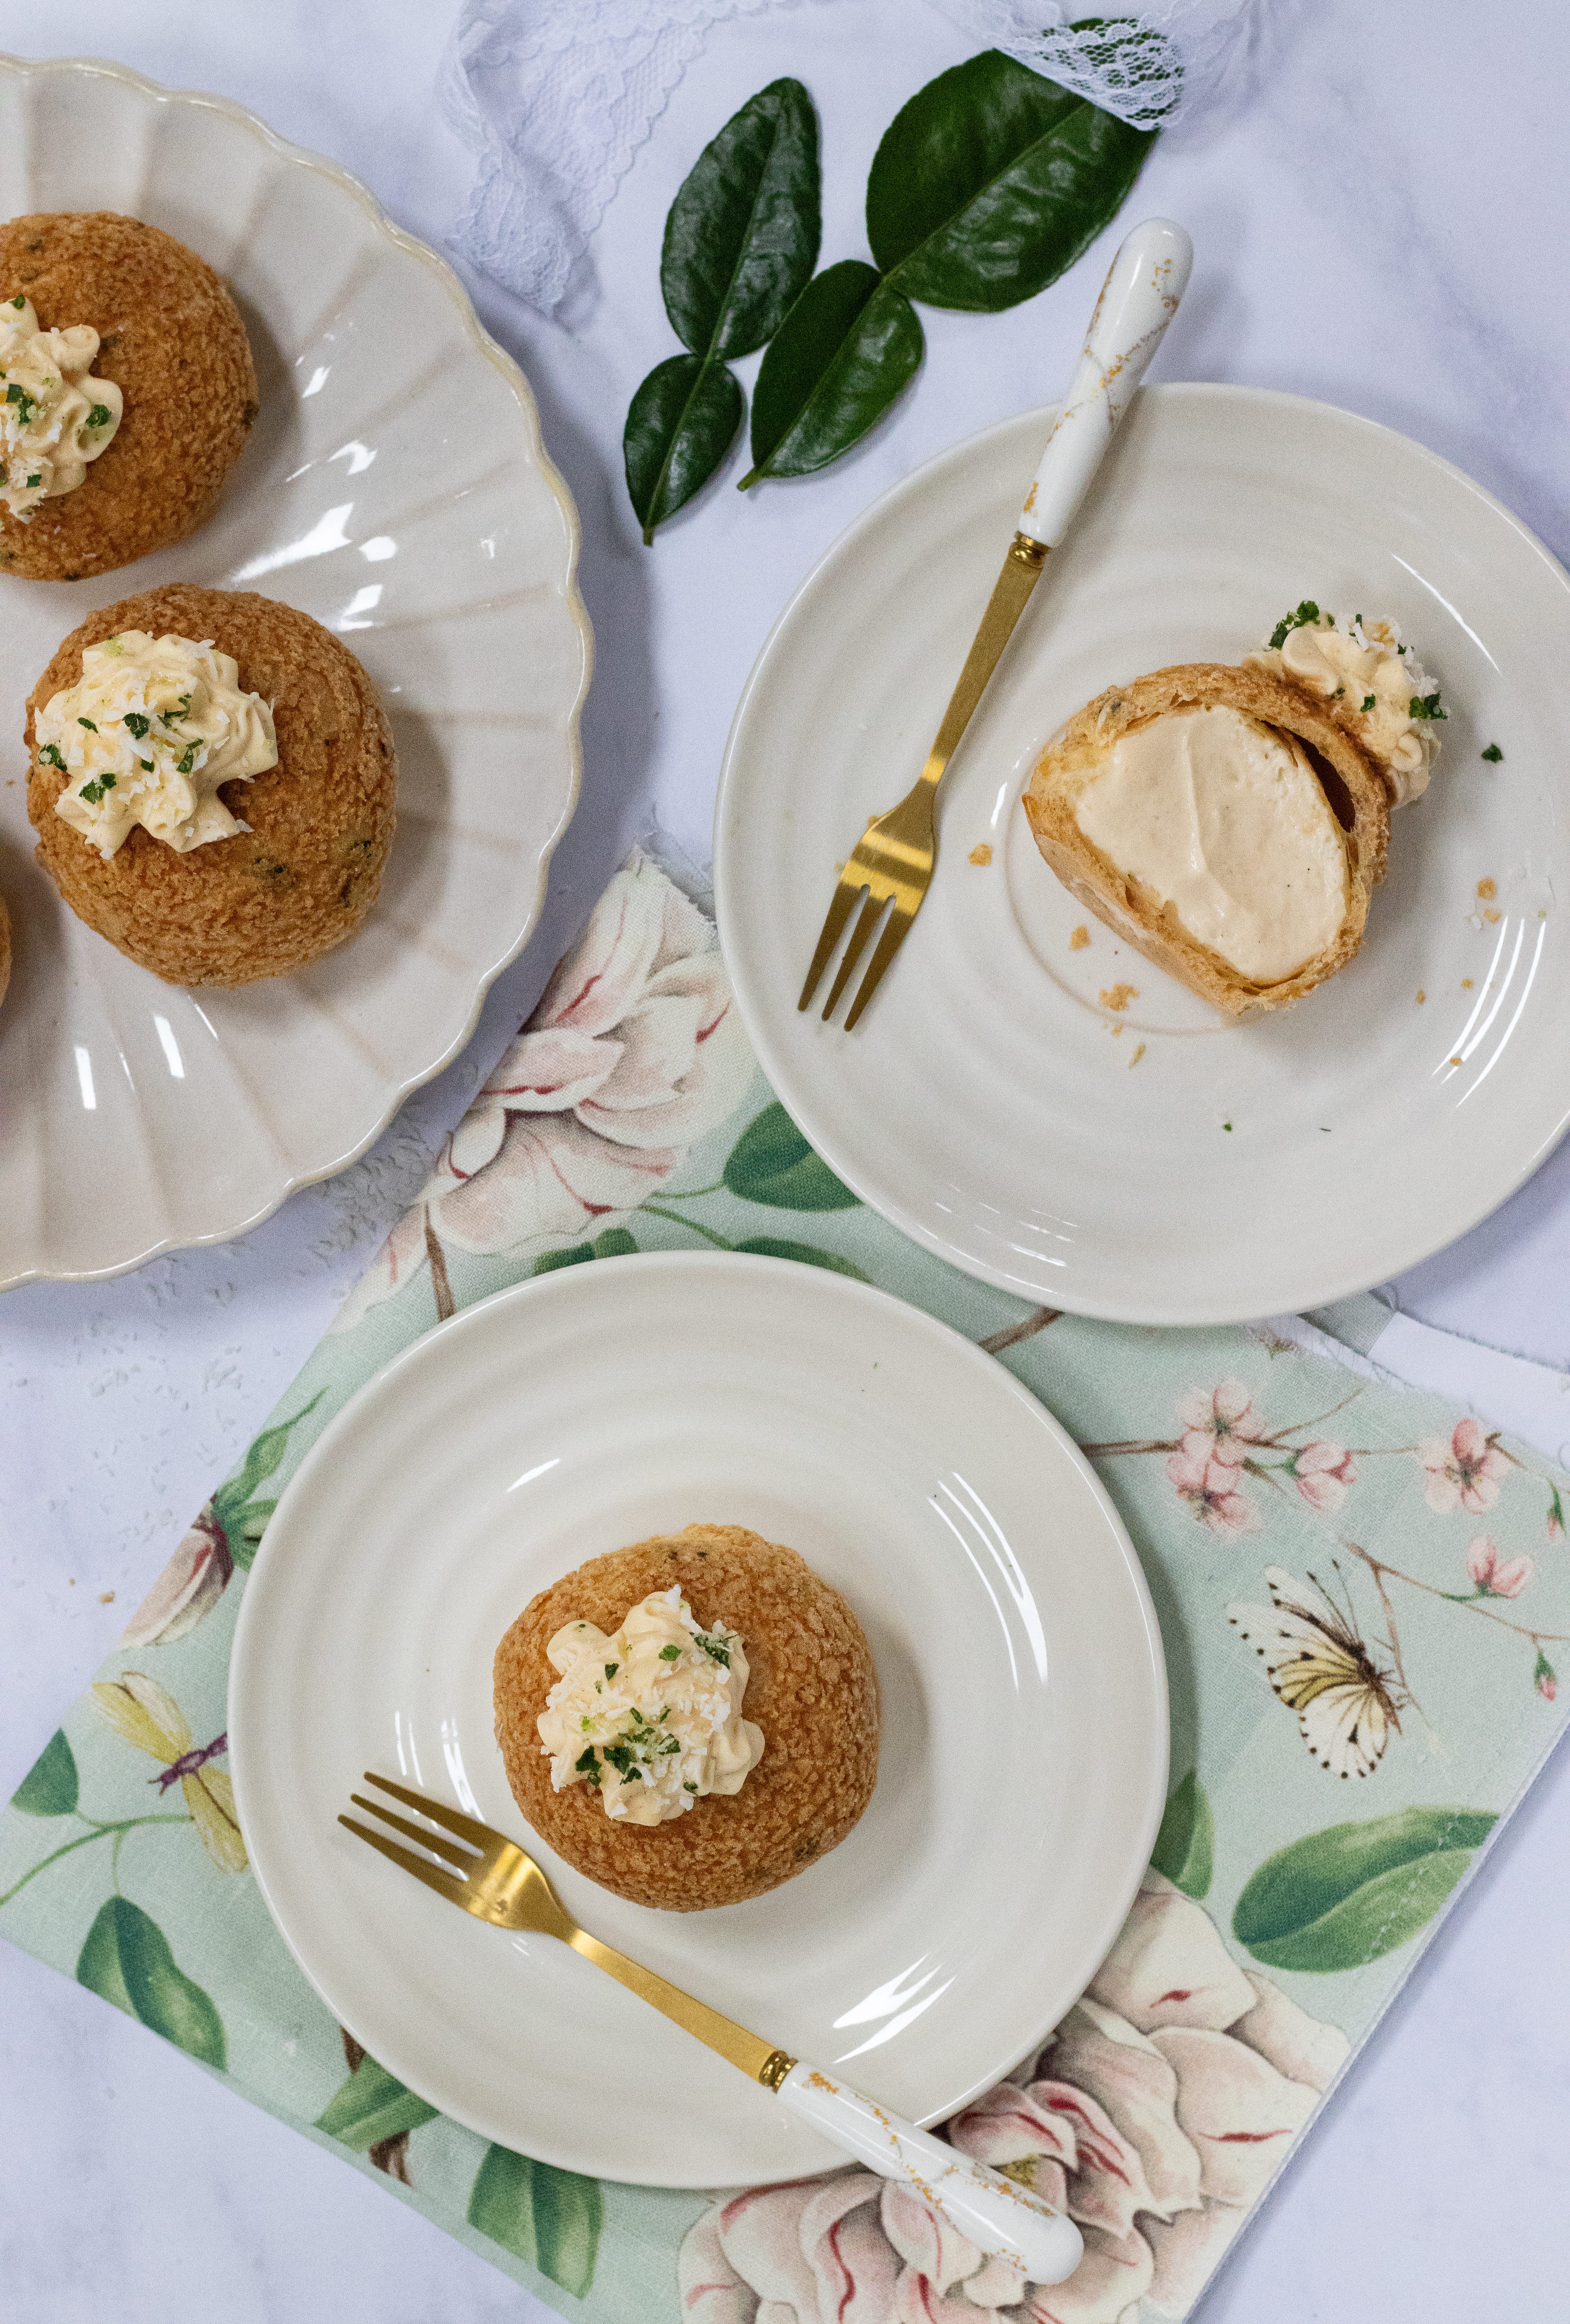
These buns are perfectly crisp on the outside, and filled with a smooth crème pat delicately flavoured with coconut rum. Fragrant lime leaf runs throughout, as a back note in the coconut rum crème pat, a key component of the craquelin on the choux, and as a sprinkle on top. Best enjoyed with a pretty plate, a little golden fork and maybe even a friend you like a great deal to join you.
This crème pat uses a lot of egg yolks, so I have included some egg white recipes at the end for your leftovers. Or you can freeze your whites for another day.
Time: Approx. 4 hours, with 6 hours for lime leaf crystallising.
Serves: Makes 12-14 buns
Specialist equipment:
Pastry brush
Food processor
Stand mixer or electric whisk
Kitchen thermometer recommended (although not essential)
5-6cm cookie cutter
Flat baking trays recommended (not essential)
A choux bun mat or template can be helpful
Piping tips – I use a Savoy 3R, Wilton #2, Wilton #10 and Wilton #2D, and piping bags
Ingredients
For the crystallised lime leaves
4 double-lobed lime leaves
1 egg white
50g caster sugar
For the coconut crème pâtissière
360ml coconut milk (full fat and good quality)
1/2 tsp vanilla paste
6 egg yolks
100g caster sugar (you can use the leftovers from crystallising your lime leaves)
14g cornflour (cornstarch)
14g strong bread flour
300ml double cream
4 tsp white coconut rum
For your craquelin
37g butter, room temperature
37g plain flour
40g demerara sugar
6g crystallised lime leaf powder (a generous tsp)
Choux
125ml water
50g unsalted butter
Pinch of sugar
Pinch of salt
75g strong bread flour (All purpose will also work if you are in the US)
2-3 large eggs
Desiccated coconut, for sprinkling
Method
Crystallising the lime leaves
Place your egg white in a little bowl. With your sugar in another little bowl.
Using a pastry brush, paint each of the lime leaves before dunking them in the sugar. Ensure they are well covered before shaking off the excess sugar and spreading out on a piece of baking parchment or silicone mat.
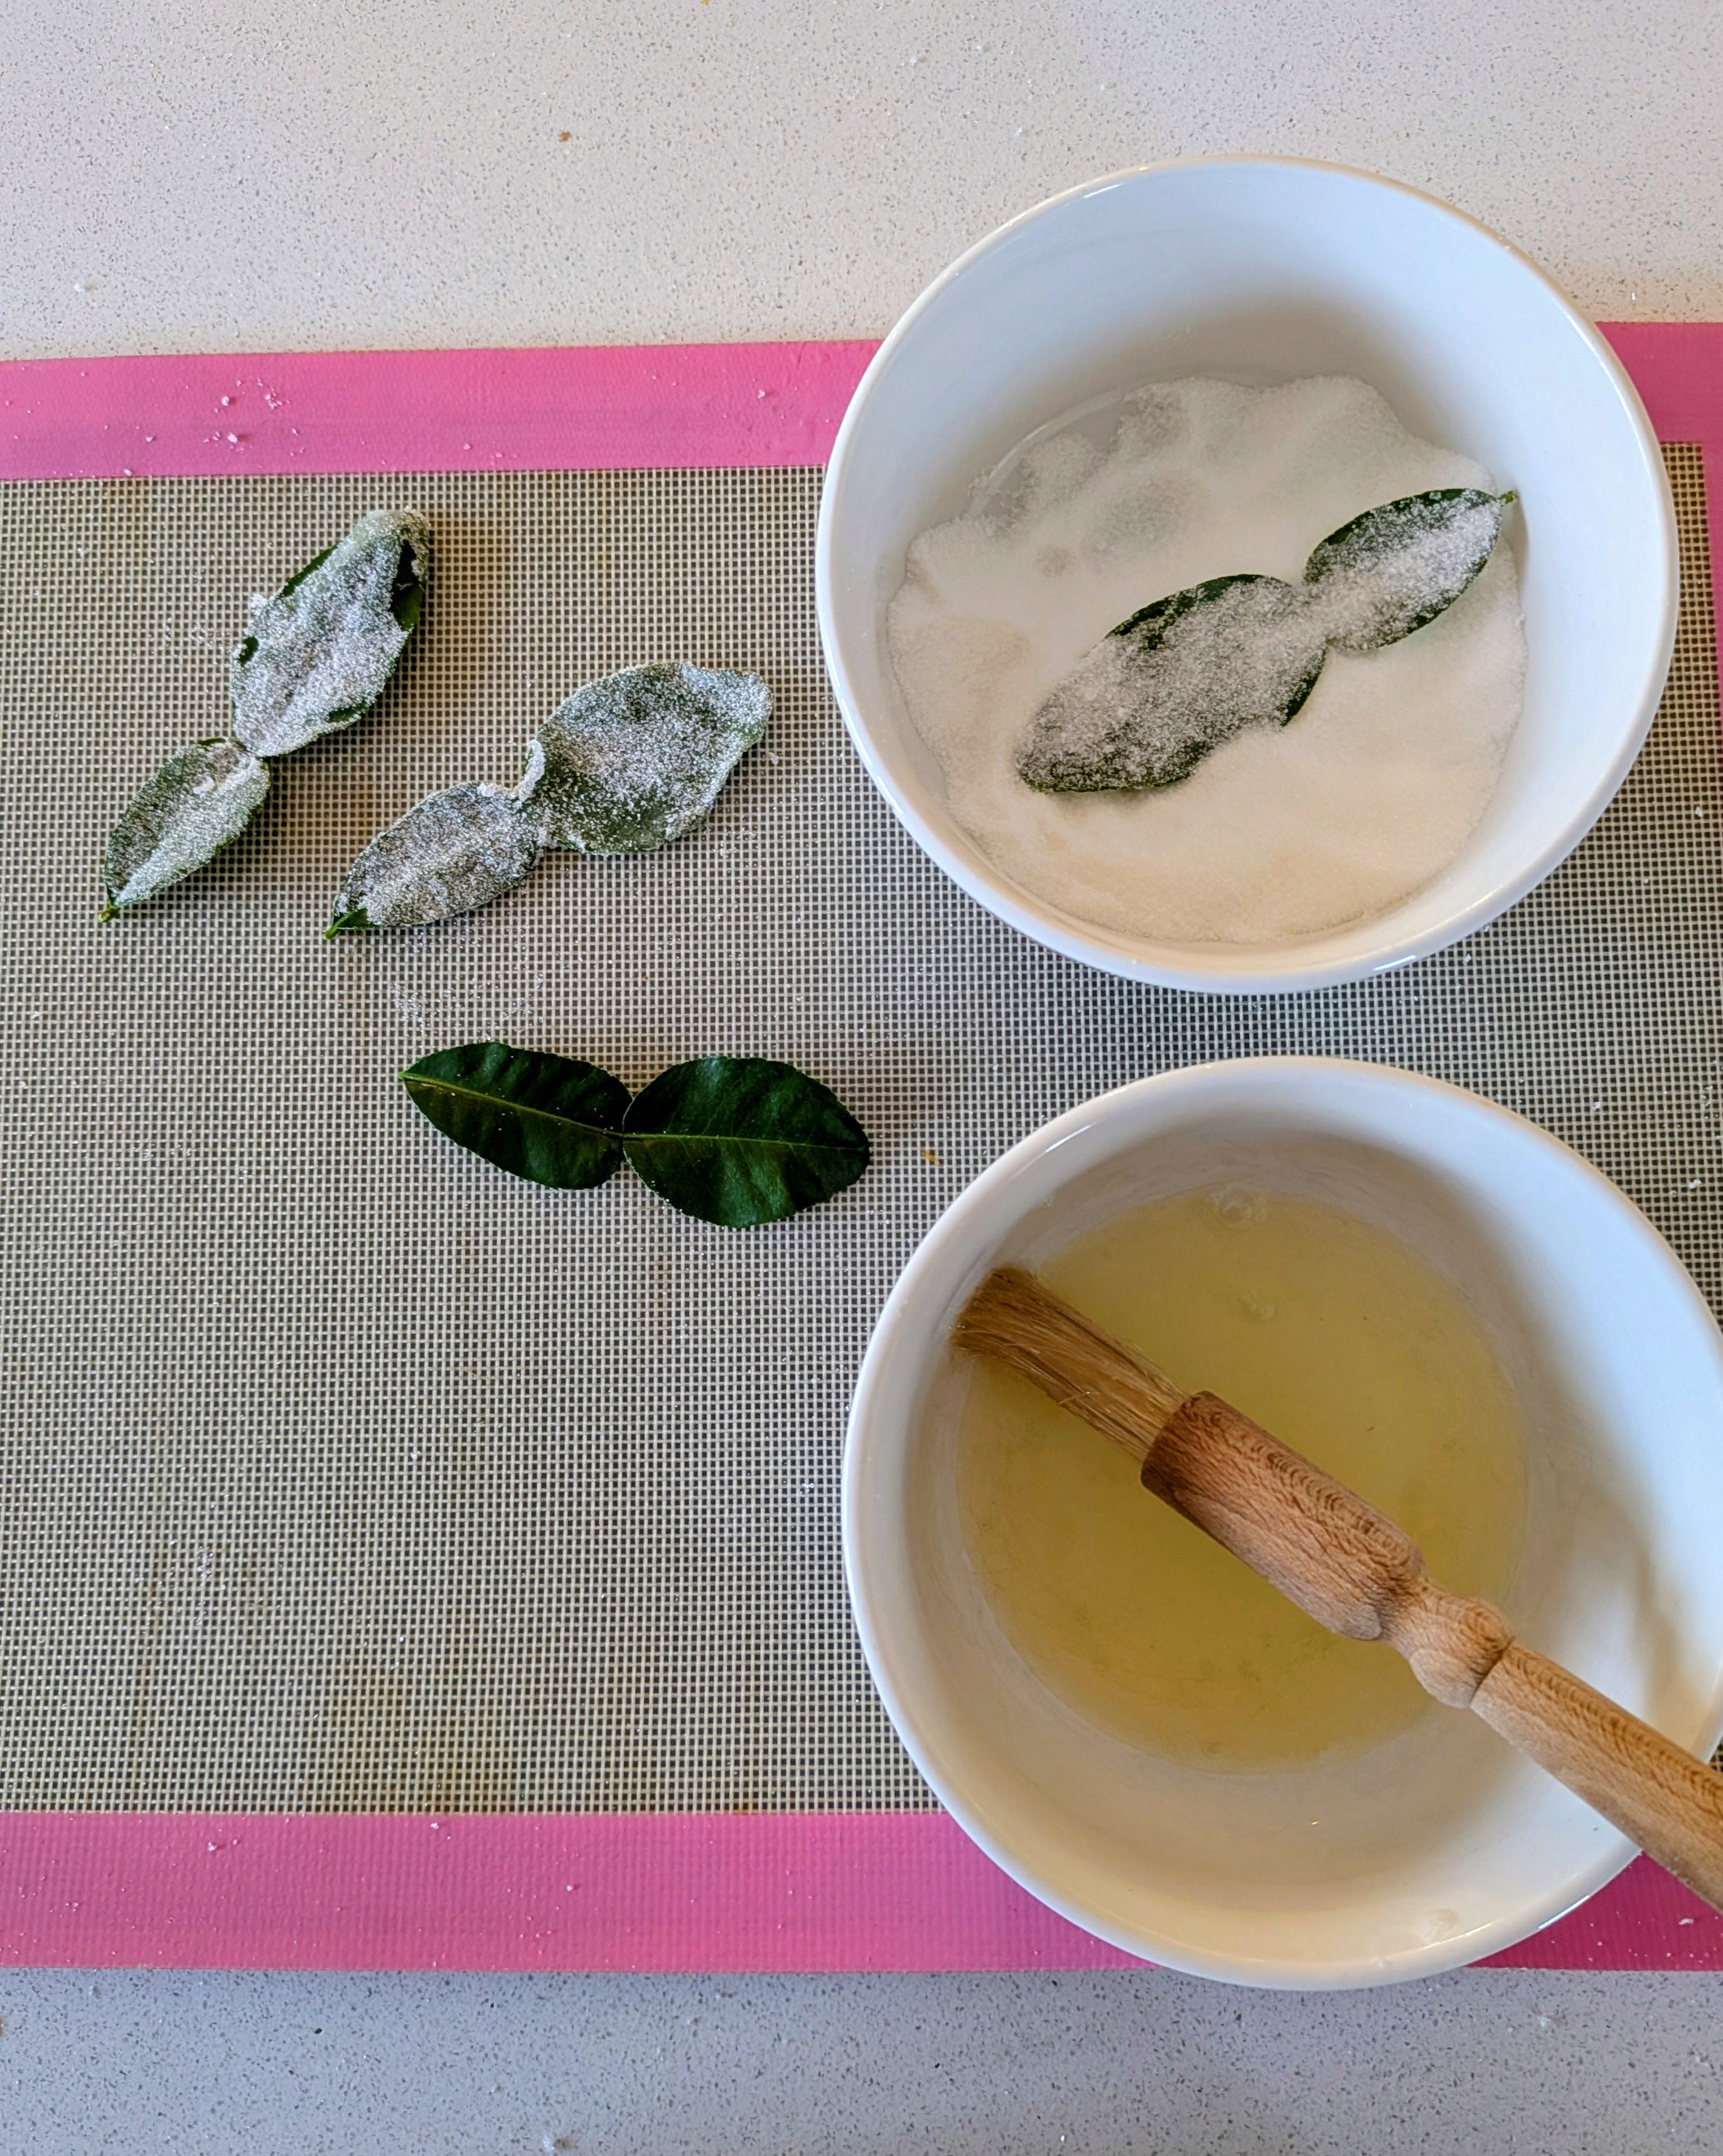
They will take six hours to set. I often leave them in the fridge overnight.
Once set, pulse in the food processor until they resemble a chunky powder. You may have to take out some stringy bits of lime leaf.
The Crème Pâtissière.
Shake up your can of coconut milk to ensure it hasn’t separated, you may need to give it a further stir once you’ve opened the can. Place in a saucepan. Add your vanilla paste and stir.
Place the egg, sugar, flour and cornflour in a bowl and either with an electric whisk or stand mixer, whisk until very thick and pale.
Place the milk on the gas hob and bring to the boil.
As soon as the milk is boiled, pour around a third of the mixture into your egg and sugar mix, whisk hard. (Be careful here with the hot milk.)
While you are doing this, place the rest of your milk back on the heat to boil again.
When the remaining milk has re boiled, pour your egg and sugar mix into the saucepan, turn down the temperature to a medium heat and again whisk hard until the mixture is thick and almost gluey in consistency. Your thermometer should reach 75-80°C. This should take around 5-10 minutes.
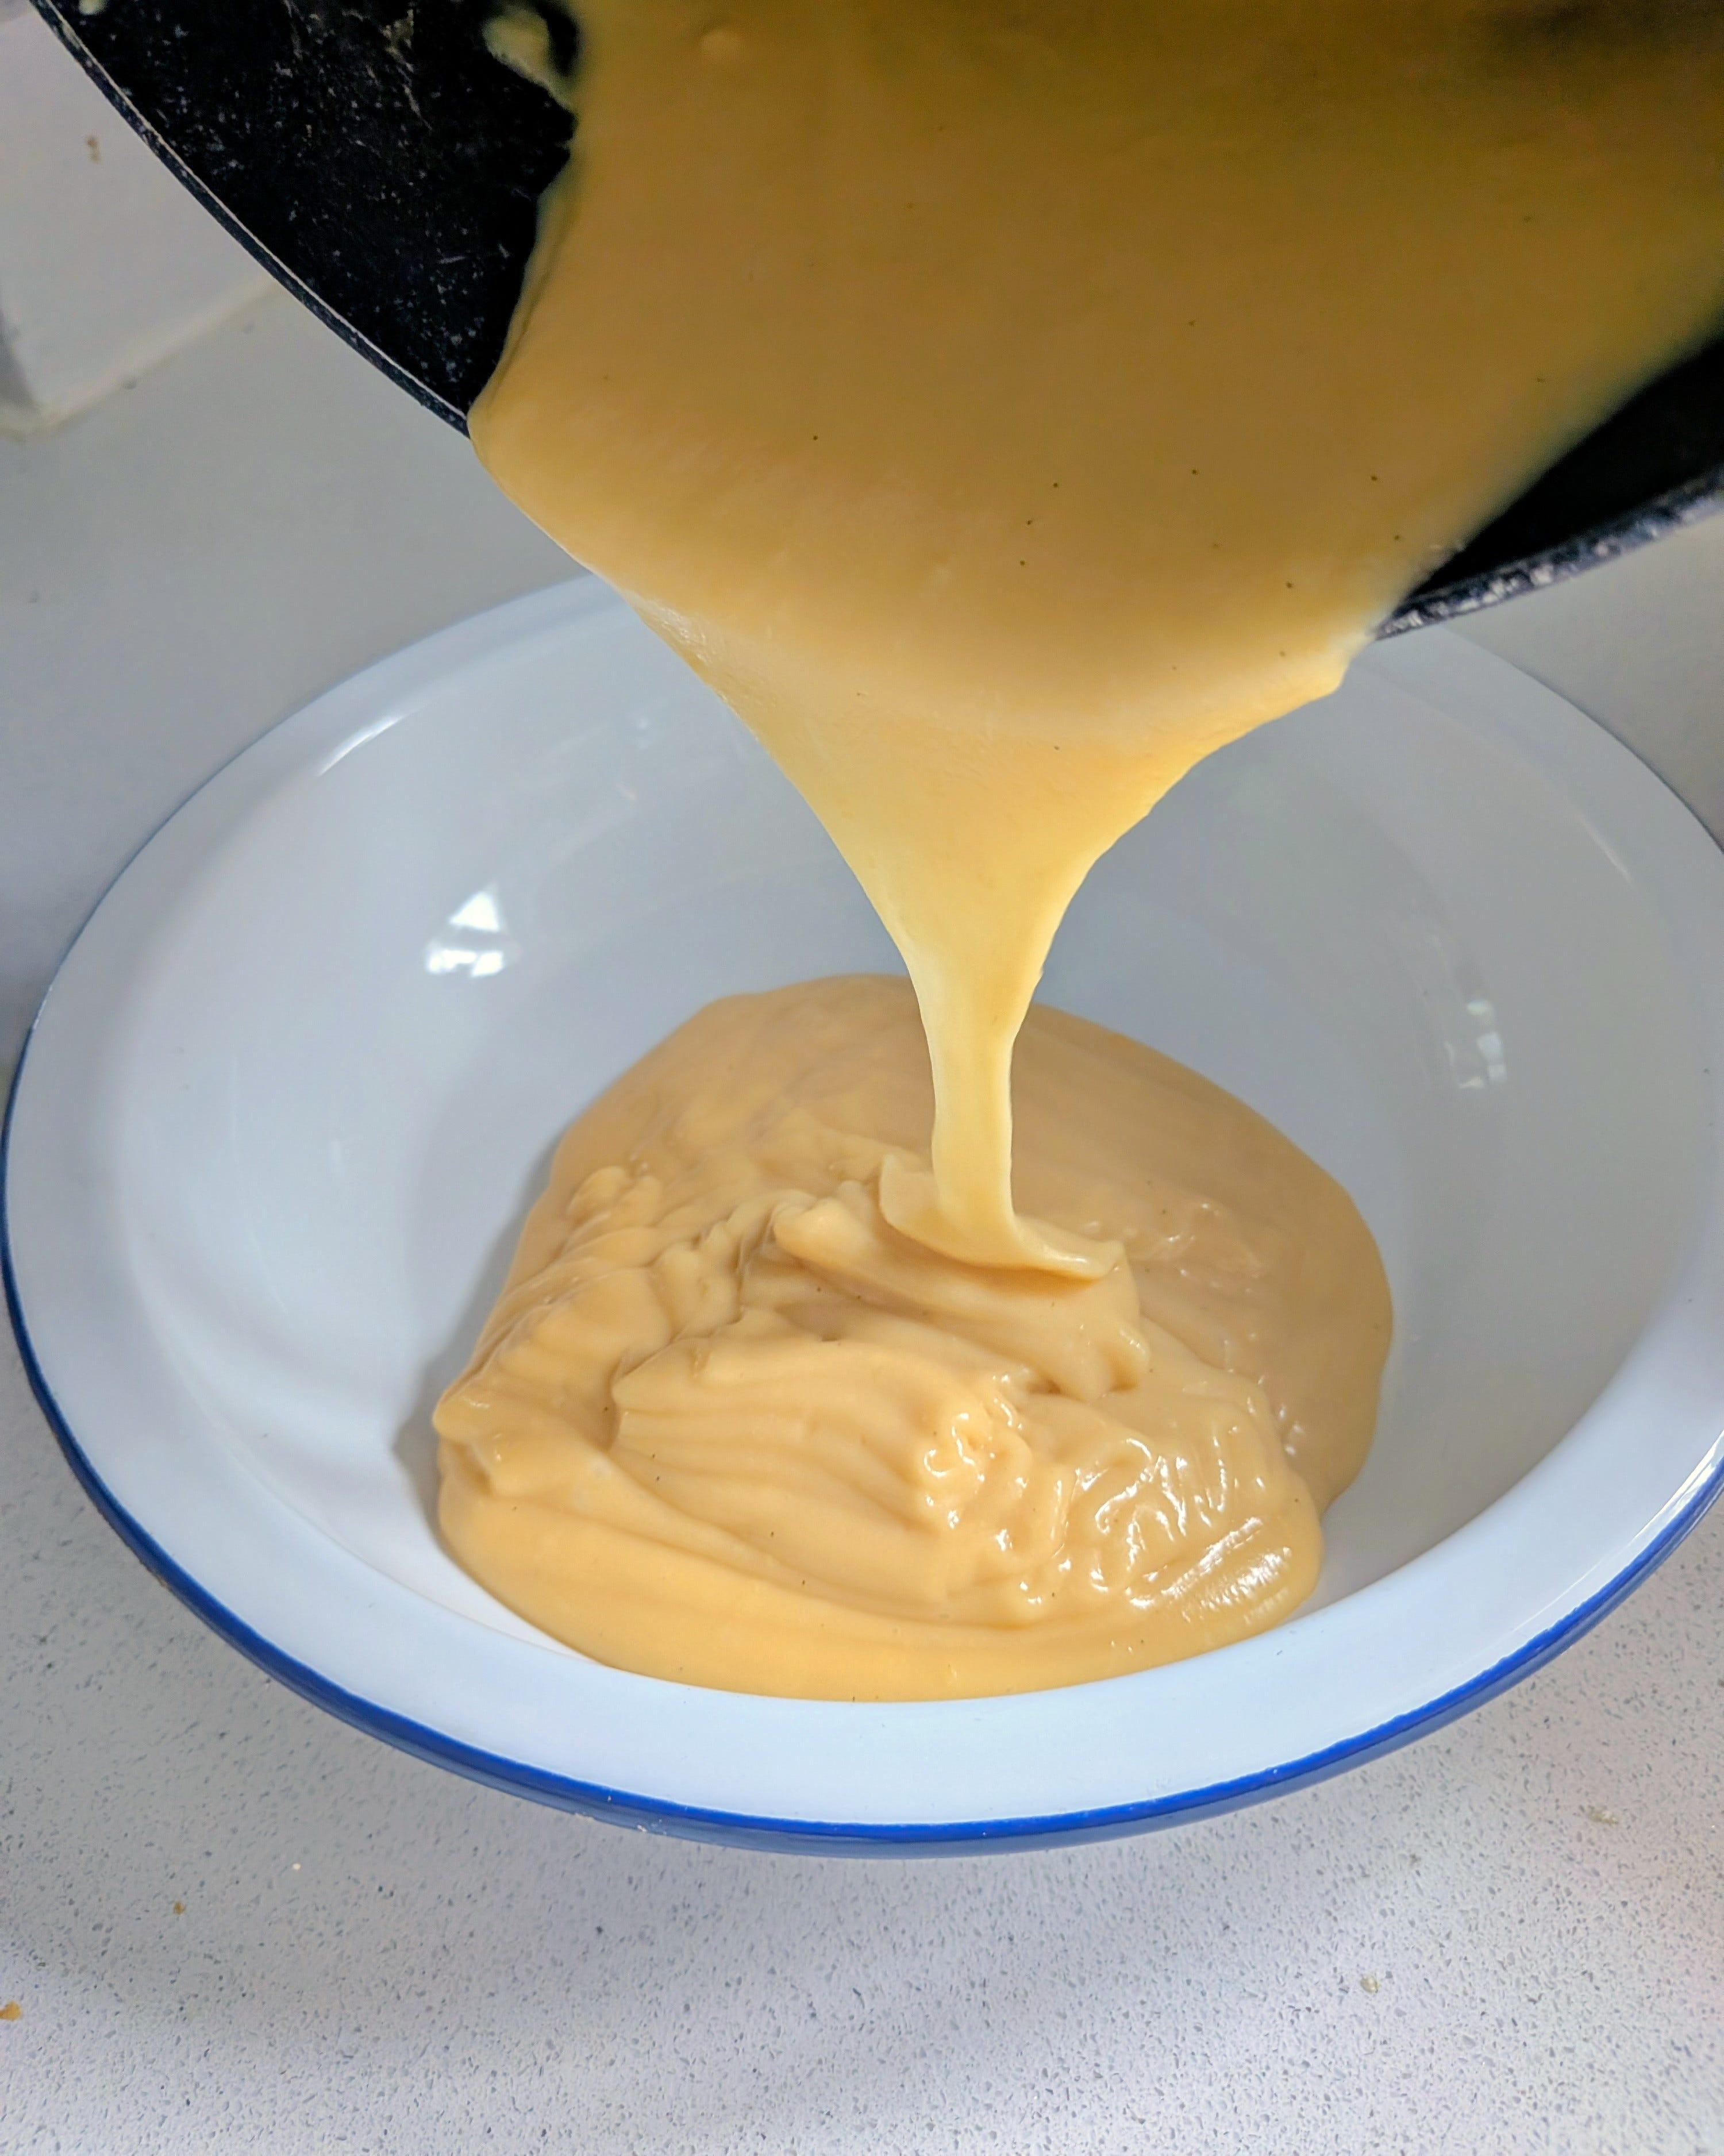
Place on a tray, cover with cling film and press down onto the crème pat to stop it developing a skin, and chill in the fridge until needed.
The Craquelin
Combine your butter, sugar, flour and generous tsp of ground lime leaves in a bowl (leave the rest of the lime leaf aside to go in your crème pat and as a sprinkle to decorate) and mix together with your fingers to form a dough.
Next you will need to ‘fraiser’ your dough to a smooth consistency. This involves smearing it on your work surface and pulling it back together again, a bit like kneading bread. It won’t take long, a few minutes.
Refrigerate your dough ball for 15 minutes, before using a rolling pin to roll out quite thinly between two pieces of baking parchment. Refrigerate again for another twenty minutes.
Once cold and fairly solid, use a 5-6cm cookie cutter to cut your craquelin into rounds. Pop them back in the fridge until needed.
The Choux Pastry
Preheat your oven to 190°C/374°F. Don’t use a fan oven, it pushes your rising buns over.
Chop up your butter into little cubes and place in a saucepan with the water, butter, sugar and salt. Bring it all up to a boil.
Quickly add your flour, turning the heat to medium. Stir with a wooden spoon until the dough forms a smooth ball, cooking out the flour for 5-10 minutes until you reach 75-80°C on the thermometer, or there is a thin film on the base of your pan.
Your next step is to spread it over a clean tray and let it cool. This step takes patience, you have to let it cool until it is body temperature (about 37°C).
Whisk together two of your eggs. Slowly add the egg into the bowl and keep mixing, keep mixing… your dough at one point will look awful, just sludgy blobs, but keep going! You can also use a stand mixer for this bit, to save your arms.
You may or may not need the third egg. If you do use it, you should have some left over for egg wash.
Once your dough resembles a dropping consistency – which means that it falls fairly quickly off your wooden spoon - the remaining dough will leave a V shape on the spoon. Don’t go overboard, you don’t want it too runny. It has to hold its shape.
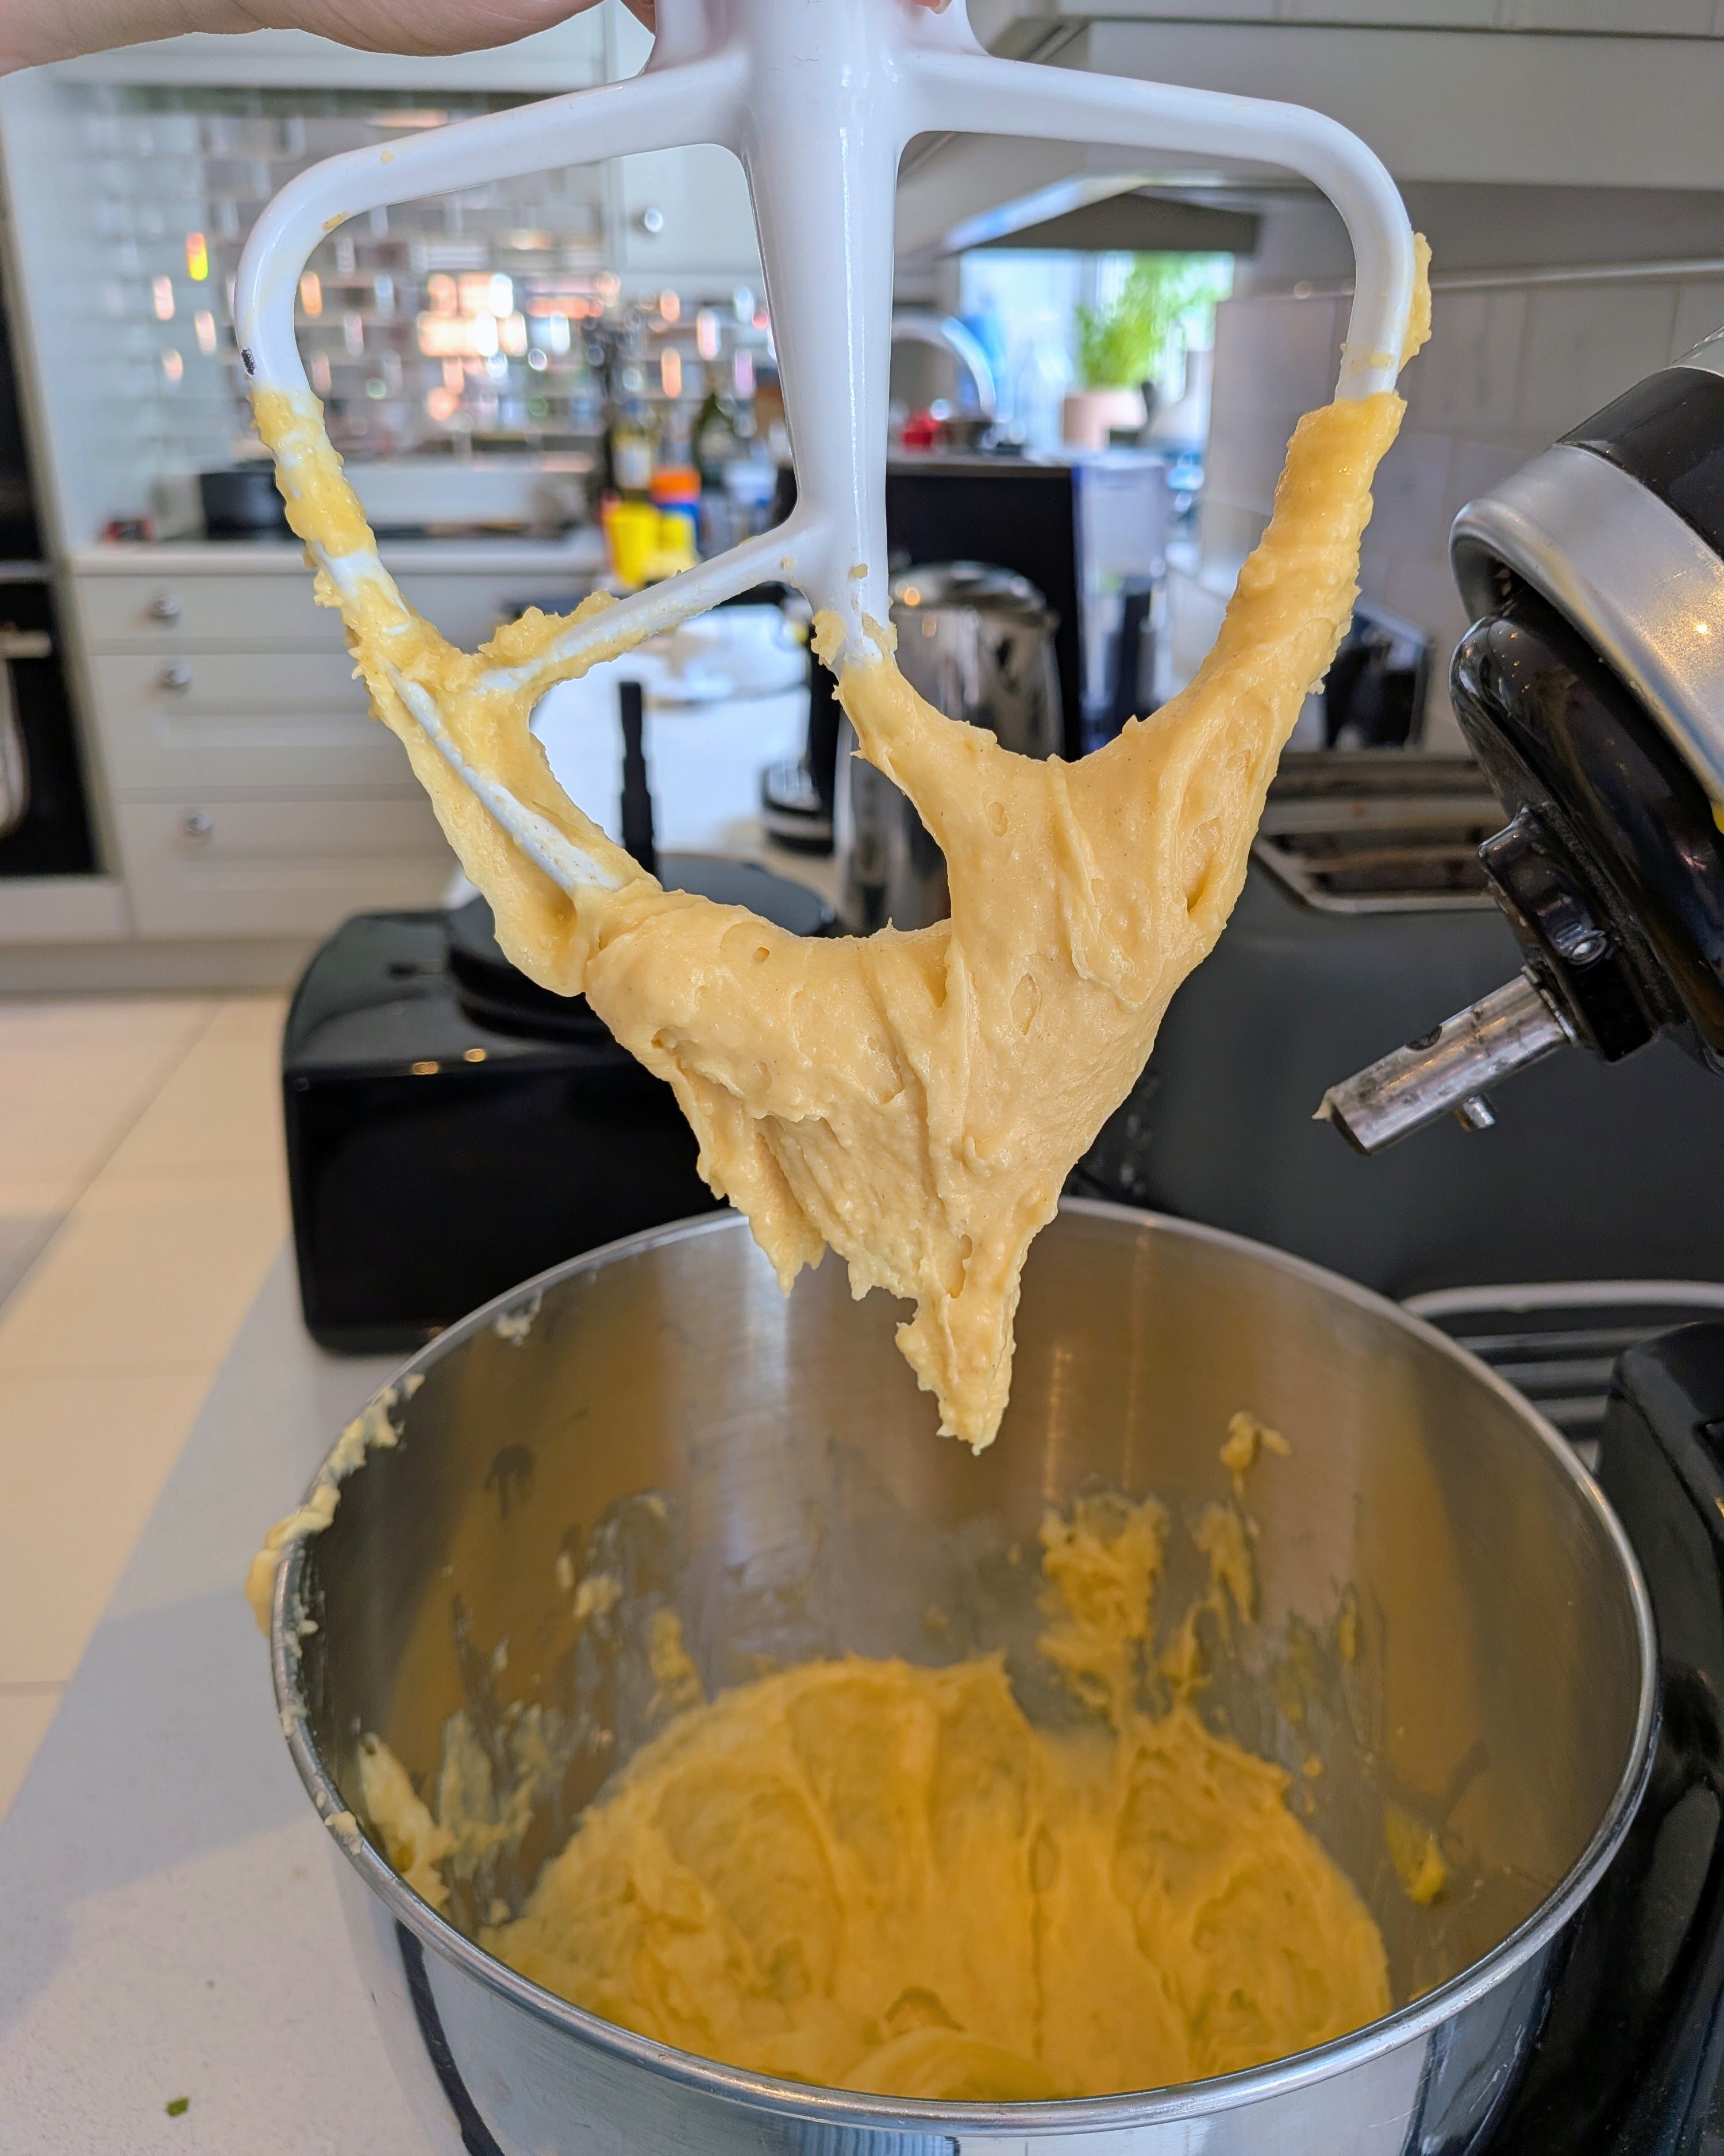
Grab your piping bag and a large round nozzle – I use a no. 3R Savoy nozzle.
Line a flat baking tray with parchment (it’s a good idea to weigh your parchment down) or a perforated silicone mat and fill your piping bag with the choux mixture.
Pipe your buns to 3.5cms wide and high. While piping with gentle pressure, I count to three before twisting off (this video is a good guide). If you have a choux bun mat, these can be helpful. Or you can print off a template.
Pipe them far apart, they will grow! This will also allow the air to circulate well around your buns during baking, which will help with rise. If you make any mistakes, don’t worry, as choux can be re-piped.
Gently egg wash your buns with a pastry brush, gently pressing down any peaks. Take your craquelin rounds from the fridge and place one on top of each of your buns.
Sprinkle the tray with a little water. This will help encourage some steam in the oven while the choux bakes and help them rise.
Place in the oven for 15 minutes, before turning down to 180°C/356°F and bake for another 20 minutes. Until risen, golden and hollow sounding when you tap on the bottom.
For the last 5-10 minutes, prick each bun with a cocktail stick, to allow the middles to dry out.
Leave to cool on a wire rack.
Filling your buns
Once the choux is cool, grab your crème pat from the fridge and place in a bowl. Give it a little whisk so it’s smooth.
Whip your double cream and coconut rum. You want it to be a firm consistency but still glossy.
Gently fold your crème pat into your double cream, alongside a generous tsp of lime leaf powder, until well combined and smooth.
Using a small piping nozzle, I use a Wilton #2, make a small hole in the underside of the buns.
At this point, place your slightly larger nozzle, I use a Wilton #10, in a piping bag. Fill your piping bag with two-thirds of the crème pat.
Gently fill the bun through your previously made hole. Gently swirl it round to ensure all corners of the bun are filled.
Finally, to decorate!
Place a drop flower piping tip, I use a Wilton #2D, in a piping bag and fill with the final third of your crème pat.
Top each bun with a tall frill. To create this effect, pipe straight, apply pressure and gently twist the bag while staying in the same spot. Stop squeezing, and then pull your bag away. Here's a video to demonstrate…
Sprinkle on your remaining lime leaf powder and desiccated coconut.
While these last up to three days in the fridge once filled, I’ve found they are best enjoyed the day they are made, while the pastry is crisp.
Choux buns are no mean feat, so now give yourself a pat on the back and feel exceptionally smug at your patisserie skills.
Egg White Recipes:
If you have caught the patisserie bug, Macarons are an obvious choice for leftover egg whites.
For something easier, there’s summery Peach and Lime Pavlova.
Or even easier, are these Forgotten Cookies.
If you are after savoury recipes for your egg whites, there are Frittata’s, Muffins and even Spaghetti here.
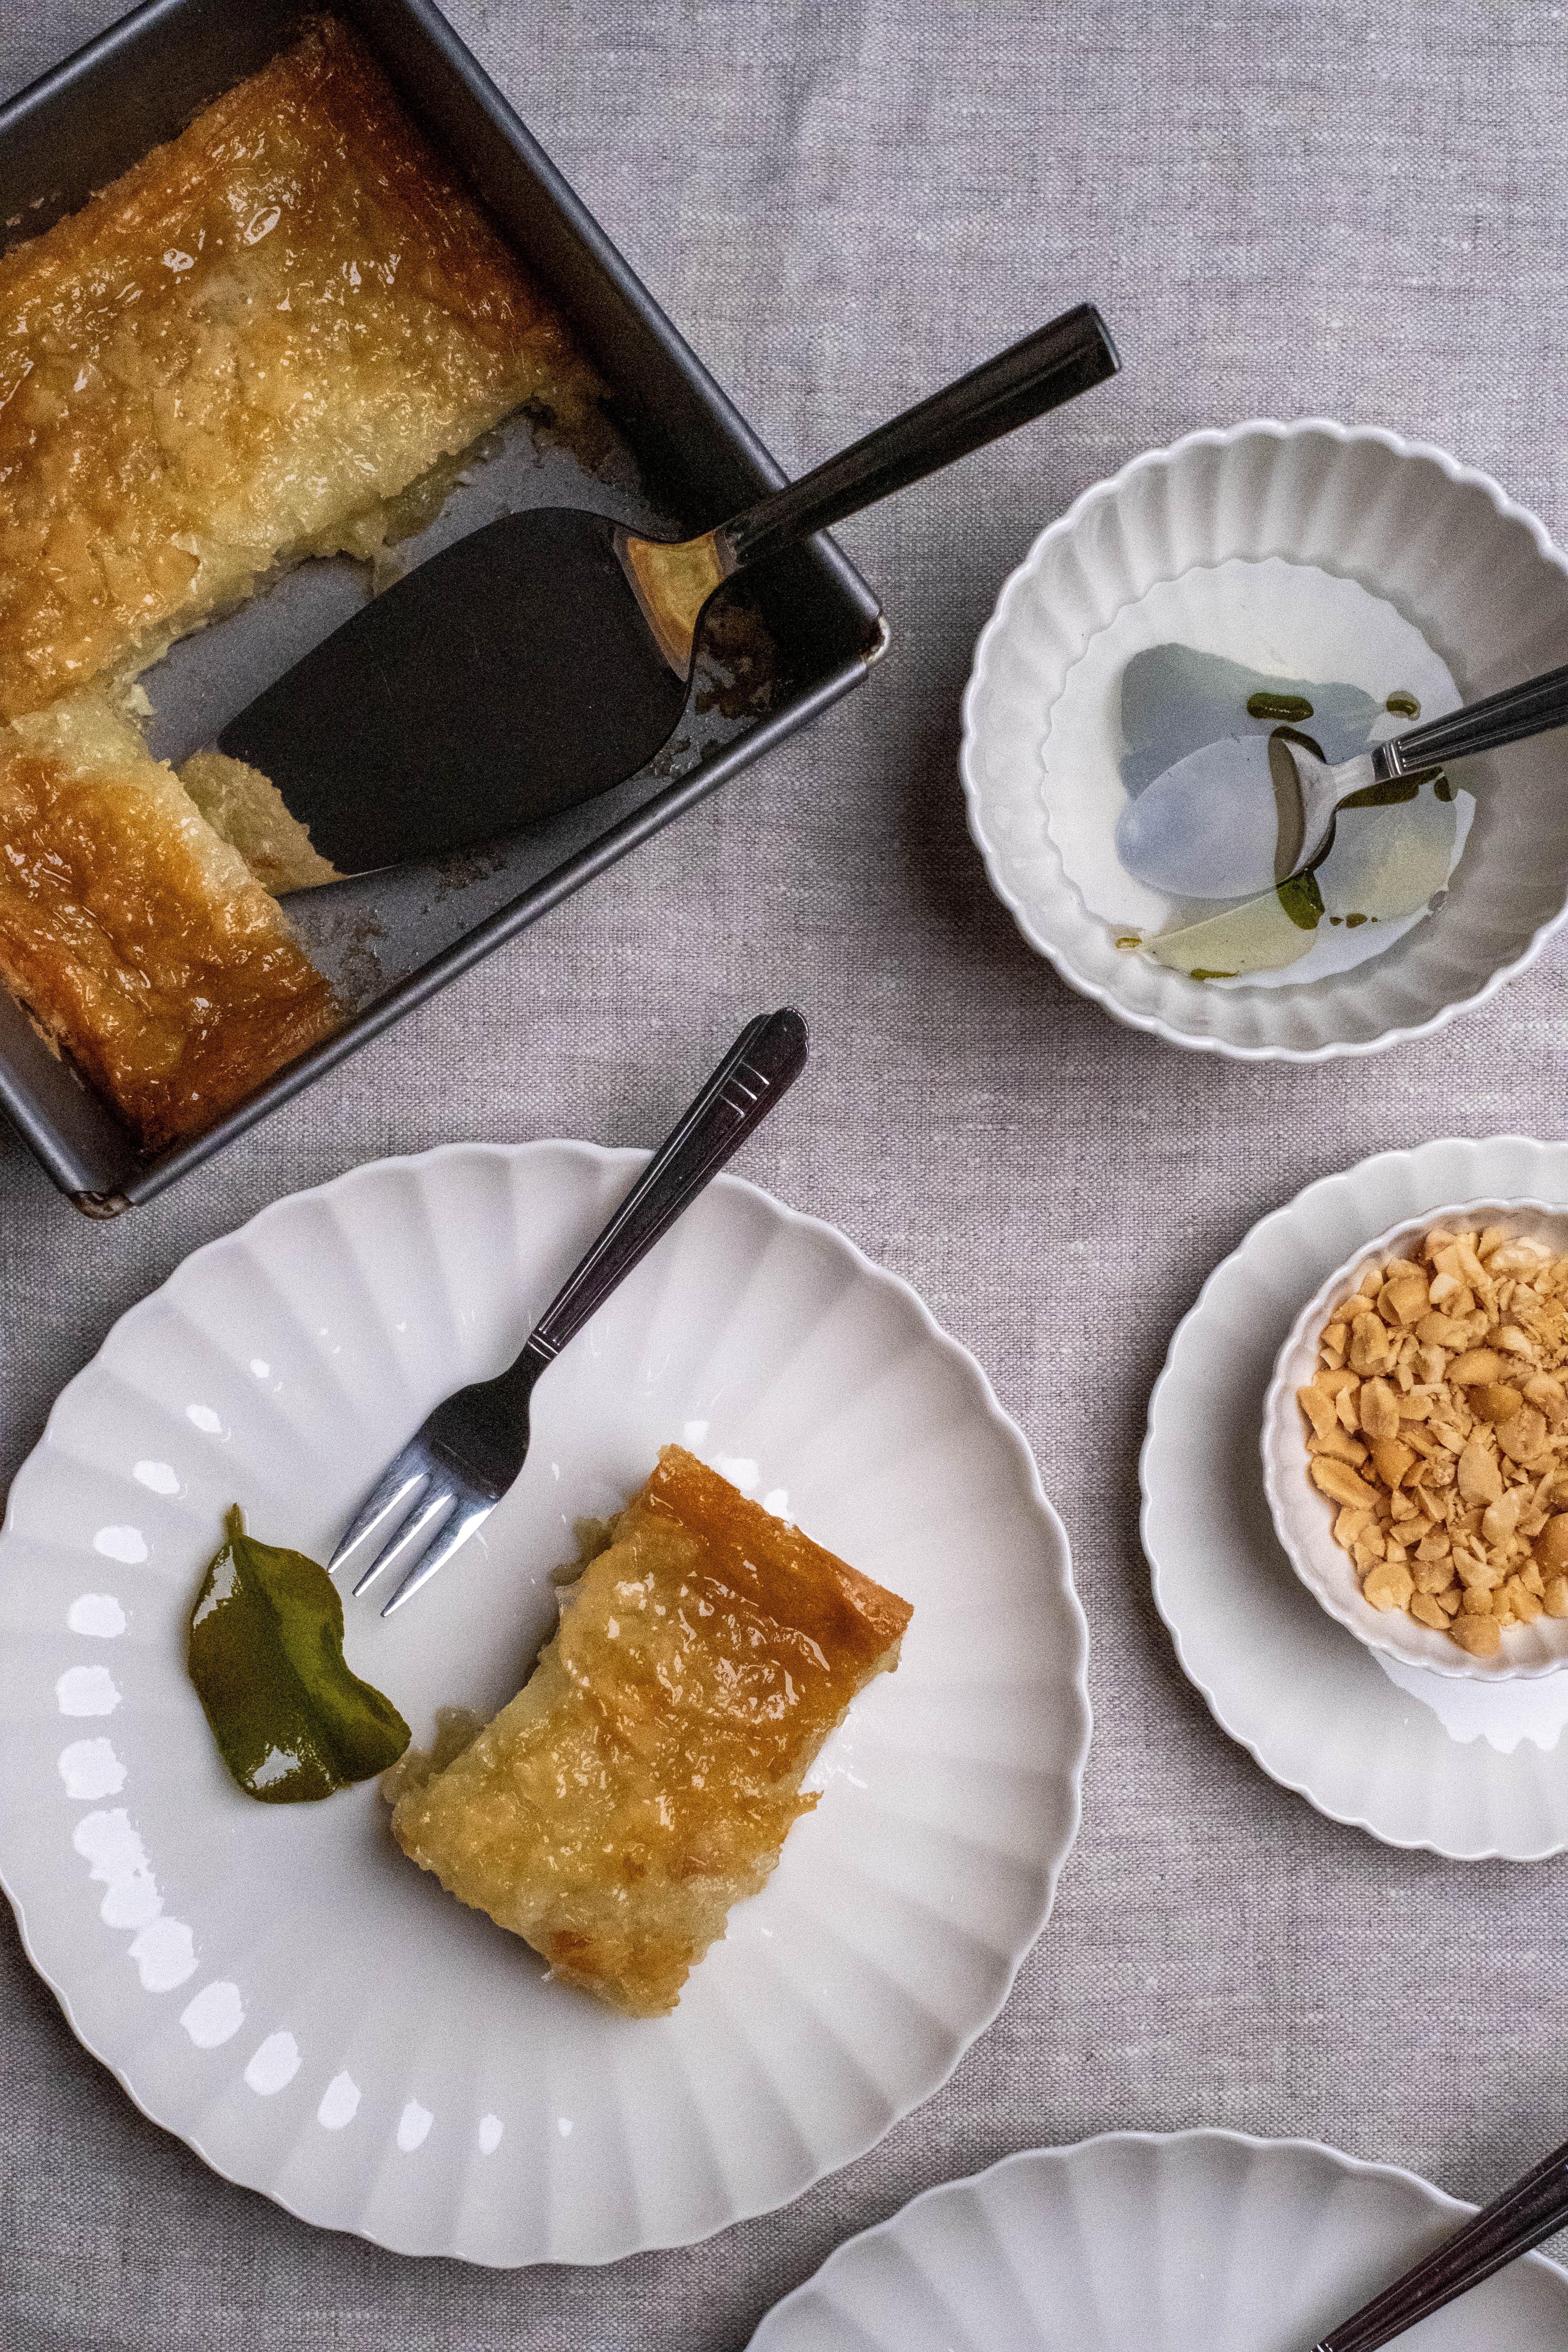
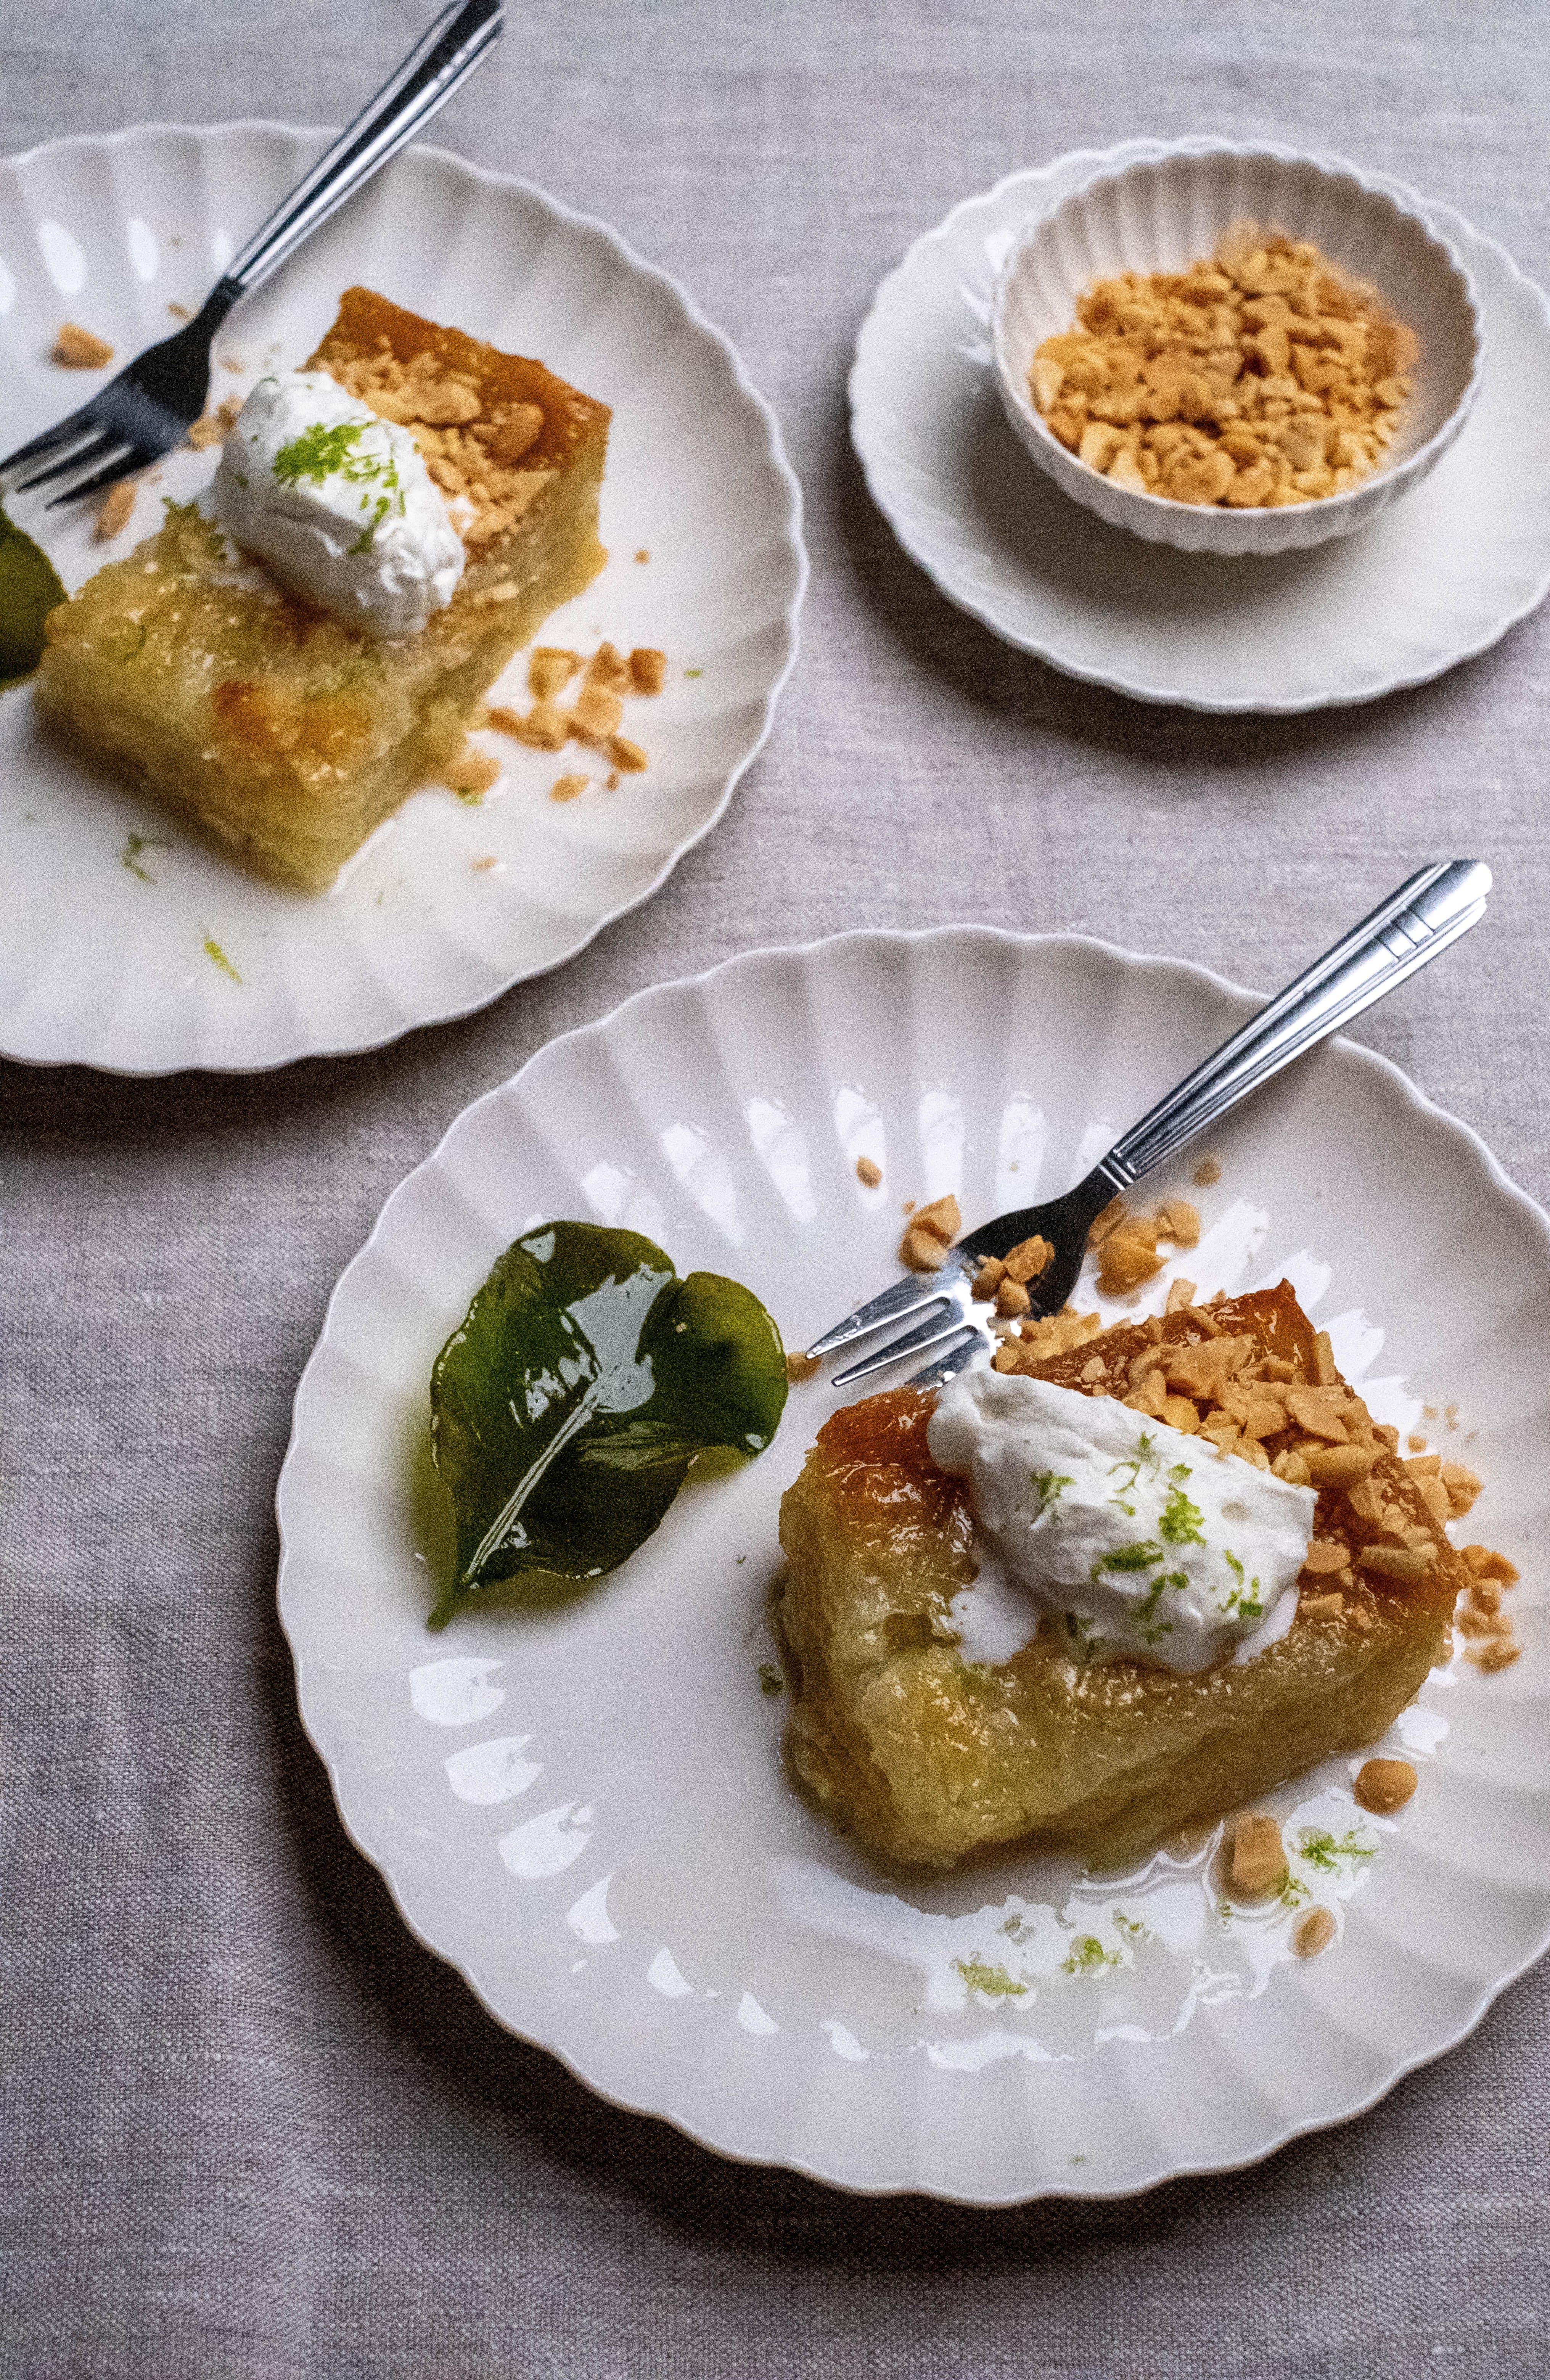
For those not familiar with Portokalopita, it is an orange-scented and syrup-laden Greek cake. If that is not enough to convince you of its deliciousness, Portokalopita is also a rather intriguing cake. Because instead of flour it is made with dried crushed up bits of phyllo. As much as I like the original I was curious to see whether I could replace the phyllo with rice paper sheets (something I am much more likely to have in my pantry than phyllo sheets) and if so, give the whole thing a Thai-ish flavour profile using coconut milk in the batter and dousing the cake in a lime leaf sugar syrup.
It took me a few tries to perfect this recipe (and figure out the best way to break the rice paper sheets into smaller pieces without covering the whole kitchen in rice paper shards!) but the end result is worth it if you ask me. You get a soft yet slightly chewy cake - those with an East- or South-Asian background would probably describe the texture as Q or QQ - exceptionally moist from the sugar syrup bath and wonderfully fragrant thanks to the coconut milk in the batter and the lime leaves in the syrup. To serve I opted for a barely sweetened whipped cream and chopped salted peanuts as well as some lime zest which really round out the flavours and textures here. Both my husband and I could not stop eating this when I made it and I am already planning on making this for my next dinner with friends.
This a very simple cake to prepare yet one bursting with flavour. It is best eaten the day it is made but will keep until the next day. In addition to serving it with whipped cream and salted peanuts it would also work alongside a tropical fruit salad or maybe a coconut sorbet. The cake itself is gluten and dairy free.
For the Cake
200g rice paper sheets
3 eggs
100g sugar
Pinch of salt
1.5 tsp baking powder
400ml can of coconut milk
For the Lime Leaf Syrup
150g sugar
150ml water
3 double-lobed leaves
Juice of ½ lime (or more to taste)
To serve: barely sweetened whipped cream, chopped salted peanuts
Directions
Pre-heat the oven to 180 degrees Celsius and grease a 16x16cm square cake tin with vegetable oil.
In a food processor chop the rice paper sheets into small shreds.
In a large mixing bowl whisk the eggs with the sugar until tripled in volume, ca. 5 minutes. Add the salt, baking powder and coconut milk and whisk to combine. Lastly, fold in the shredded rice paper.
Pour into the prepared cake tin and bake for ca. 45 minutes or until puffy and golden brown in colour and a wooden skewer inserted into the centre comes out mostly clean.
While the cake is baking, prepare the syrup. Bring the sugar, water and lime leaves to a boil just long enough for the sugar to fully dissolve. Add lime juice to taste.
Once the cake is out of the oven, pierce all over with the wooden skewer then pour over half the sugar syrup. Leave to soak in for a few minutes then add a bit more if the cake looks dry (but try and reserve some syrup to serve).
To serve, place a small square of the cake on each plate, spoon a little extra syrup on the cake and top each piece of cake with a spoon of whipped cream, a spoon of chopped salted peanuts and some grated lime zest.
Until next time…
Have you heard about the Bake Experiments Recipe Index? An easily searchable one stop shop for all Bake Experiments recipes and experiments.
I’m also on instagram @shellandginger
Comments
Nothing yet. Say the first thing.
Sign in to join the conversation.