
Create a Budget
Your budget will determine the size of your garden.
My pollinator garden was…gulp…nearly $1,000.
But wait, wait, wait!
Don’t leave!
You can do a Pollinator Garden for less than $100 if you have more patience than I do. You see, I am an older millennial, almost not a millennial. I’m so on the line that I can’t seem to get a clear answer on which generation I belong to. Kind of like our old address that sat on the county line. They went back and forth for months on who would pick up our trash. Anyway, I digress…My point is, in millennial fashion, I crave instant gratification, even with the things I cultivate.
Instant gratification costs more than patience. Quite literally.
In my defense, we’re also a military family. So, we have a finite amount of time in one place. We have to make friends quickly, decorate our house quickly, and plant quickly. Or choose not to do it at all. Those who move more often than we do, often choose the latter. It makes for a very bland, wasted life in my opinion. Make lots of friends, buy the curtains, invest in the plants, sis!
Back to budgeting…
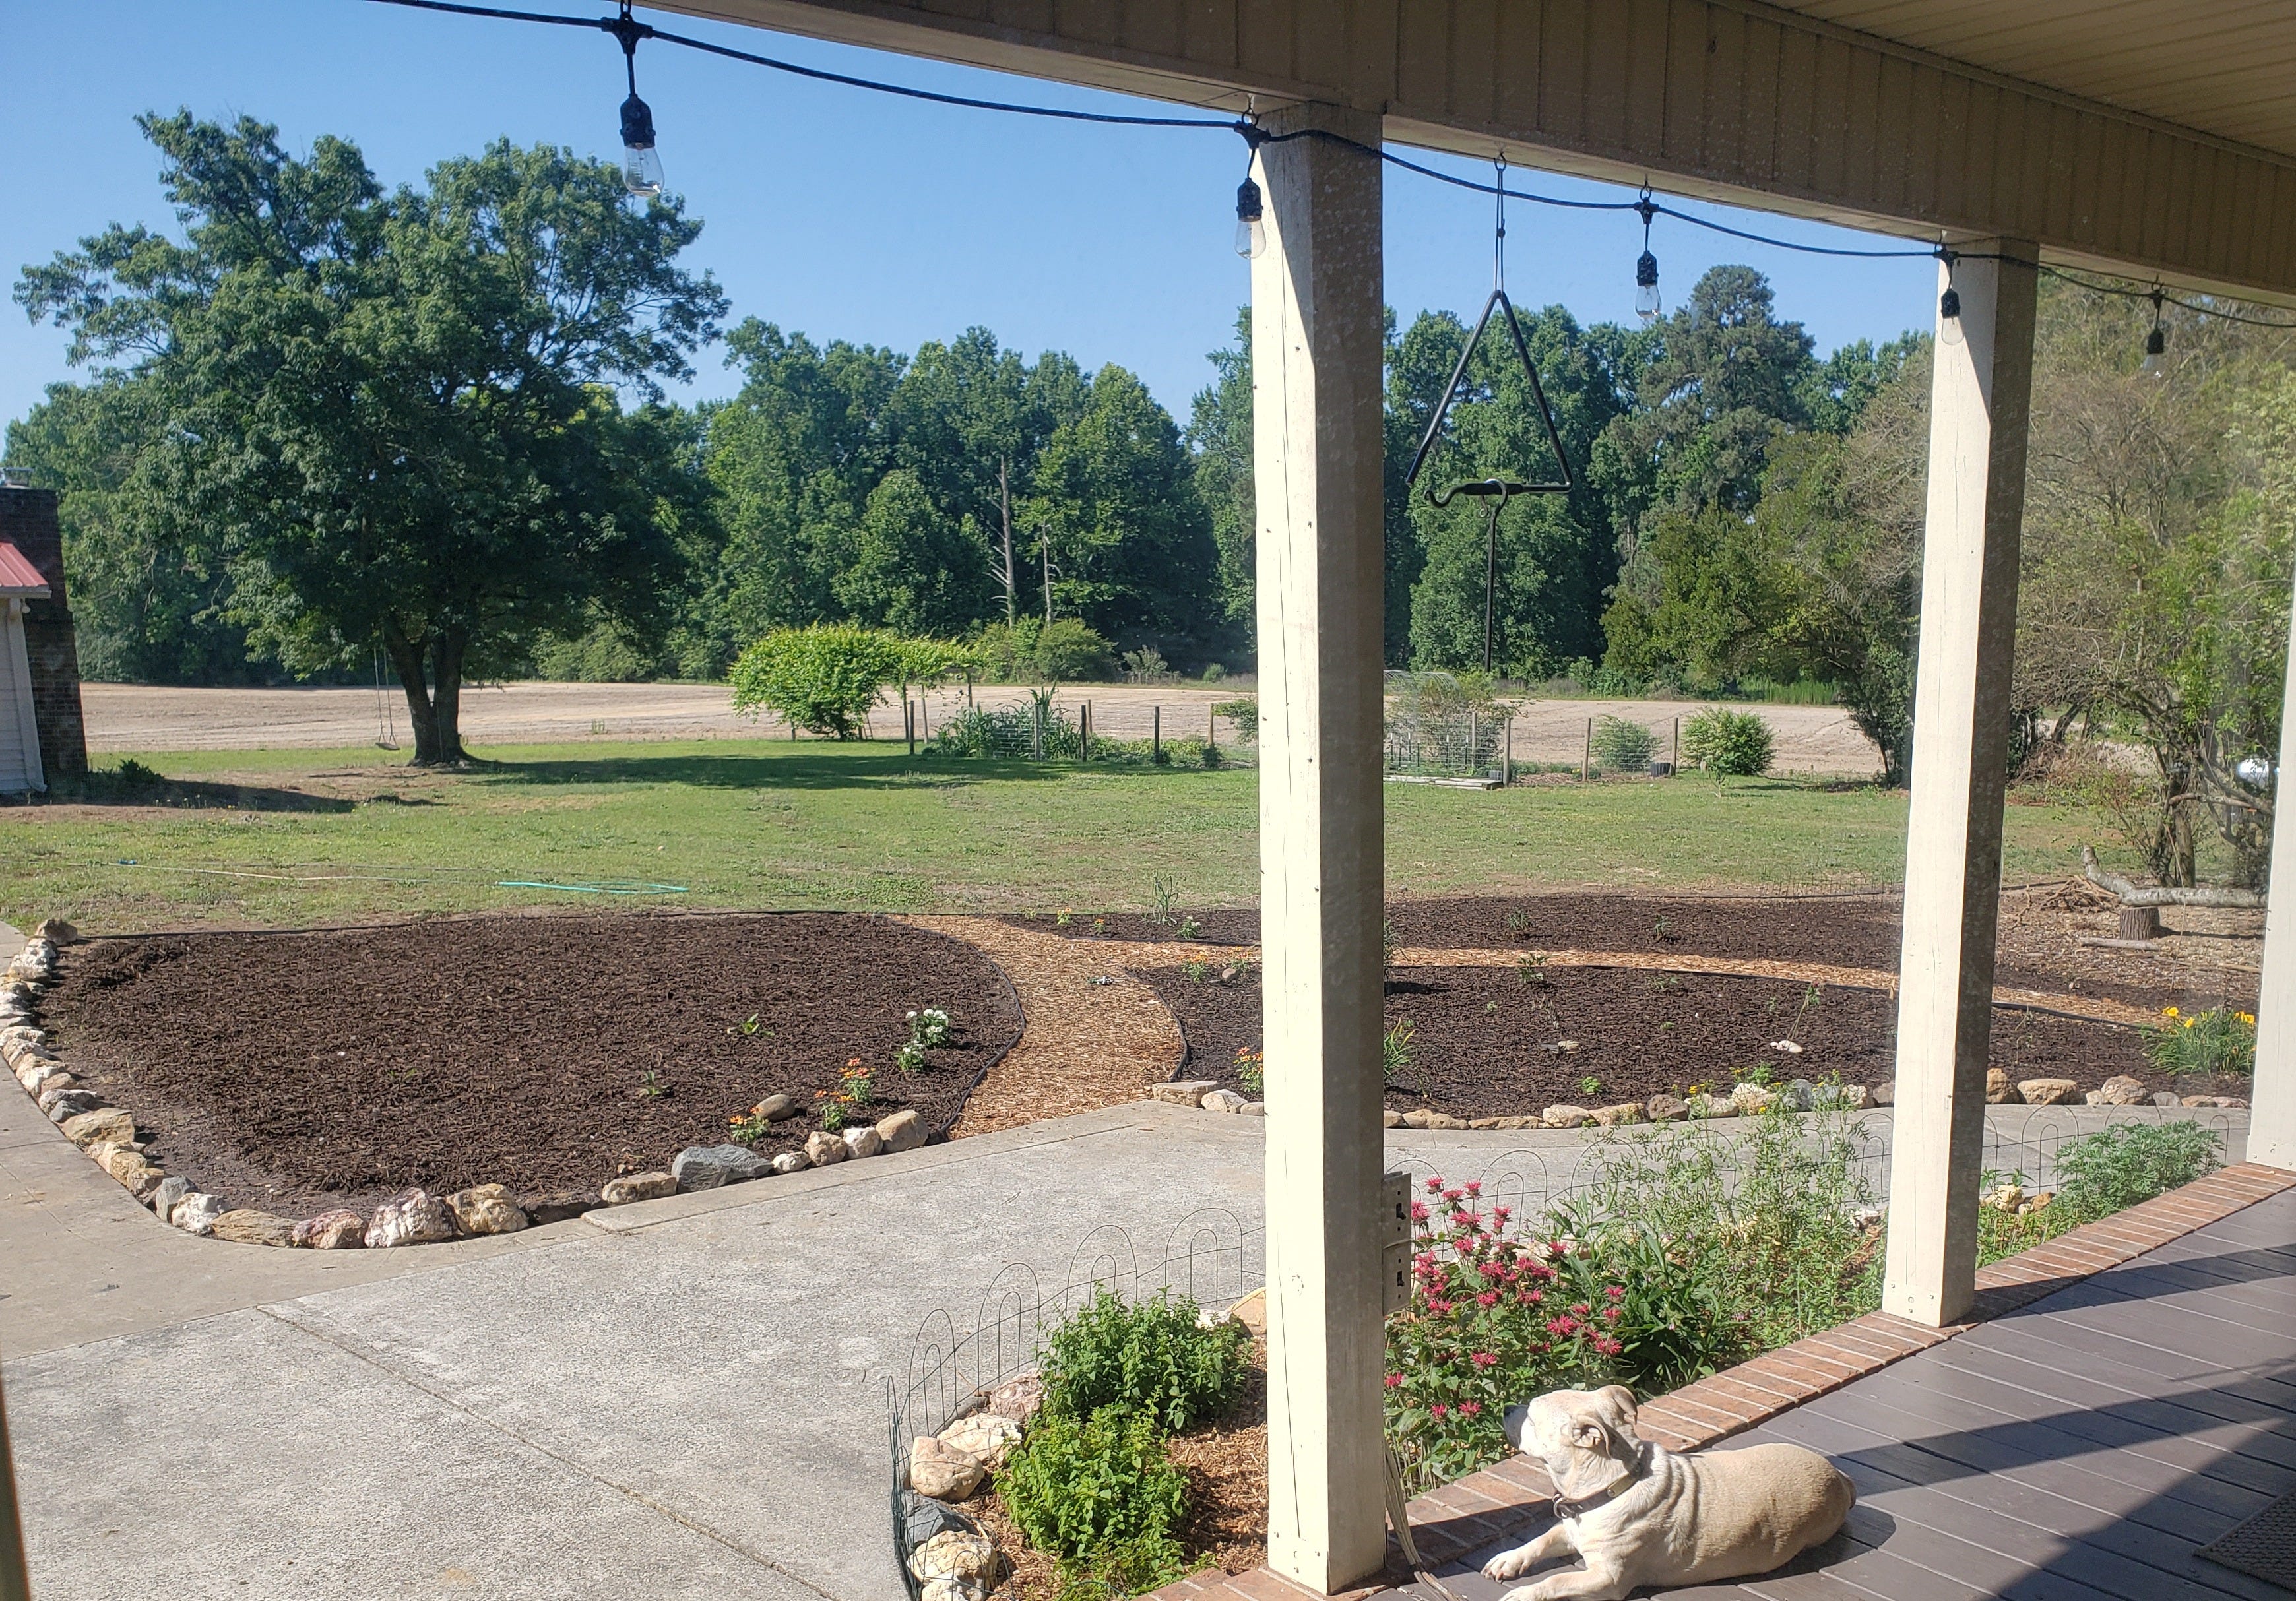
You see, I very well could have done a small 20x20 garden and added on each year. By the time it was done, we’d be moving soon. So, we went all in on a 40x80 (ish) space. 3 small gardens in one large garden broken up by paths. Paths are important, we’ll discuss momentarily.
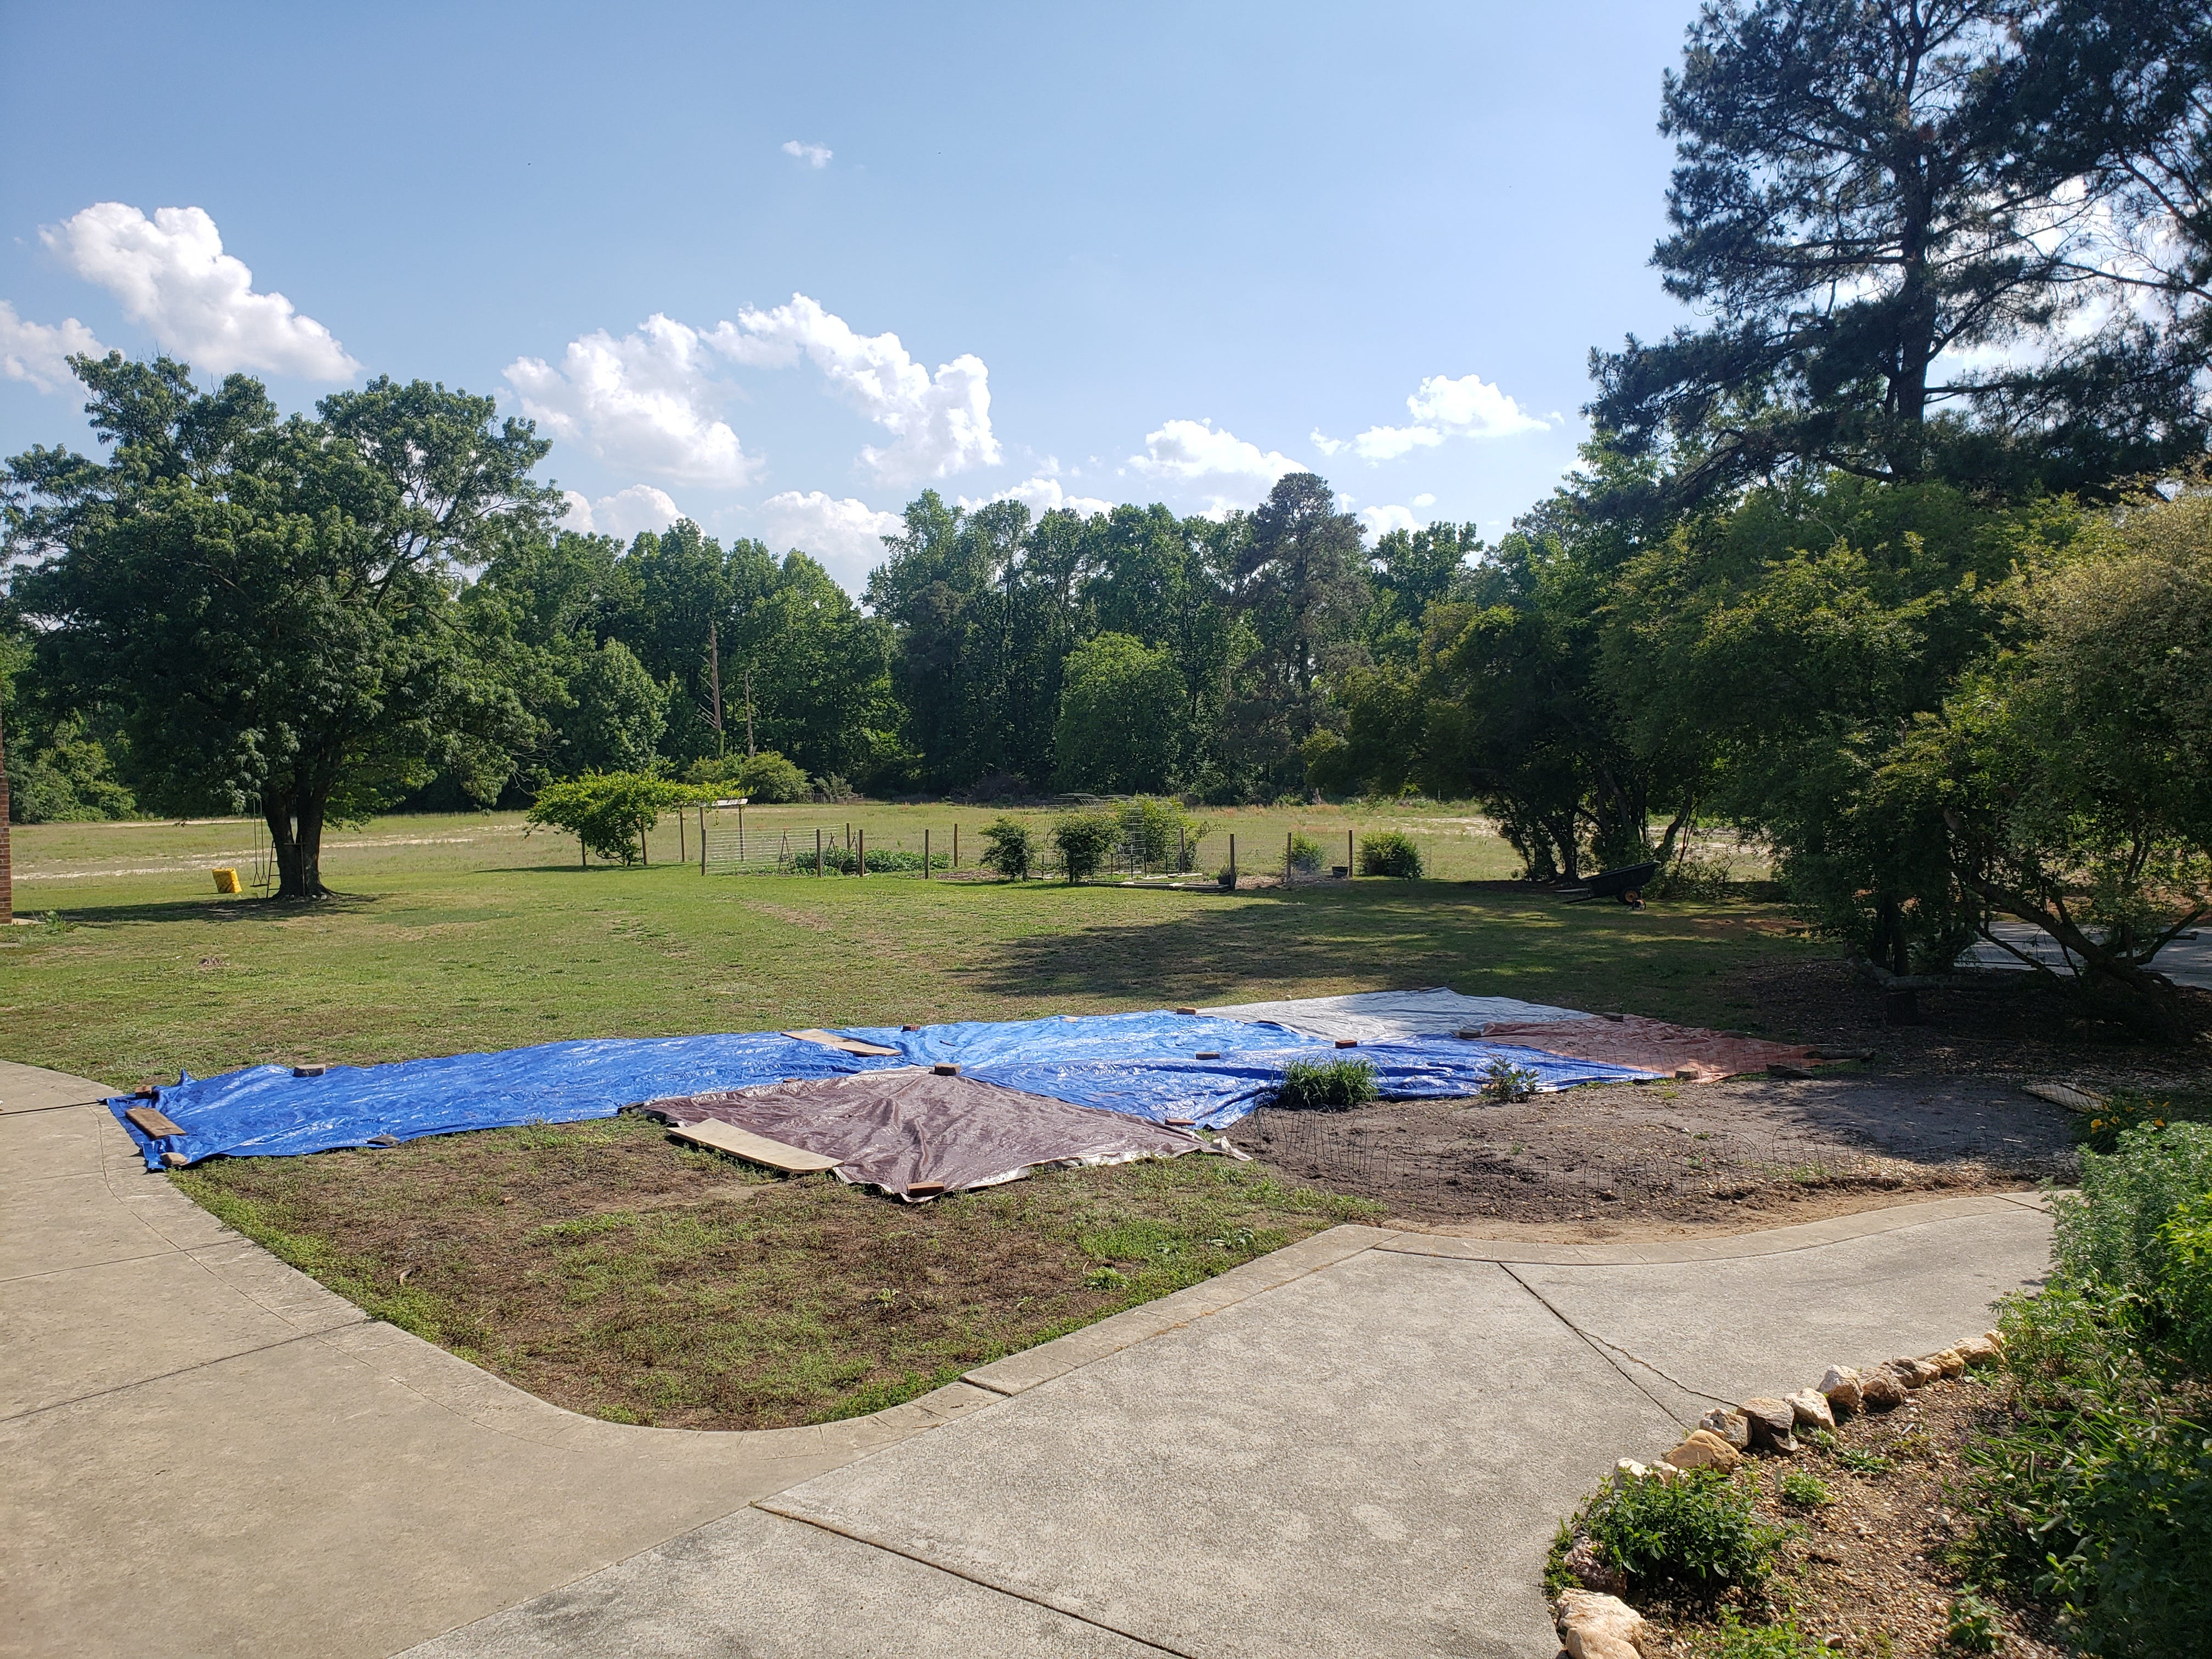
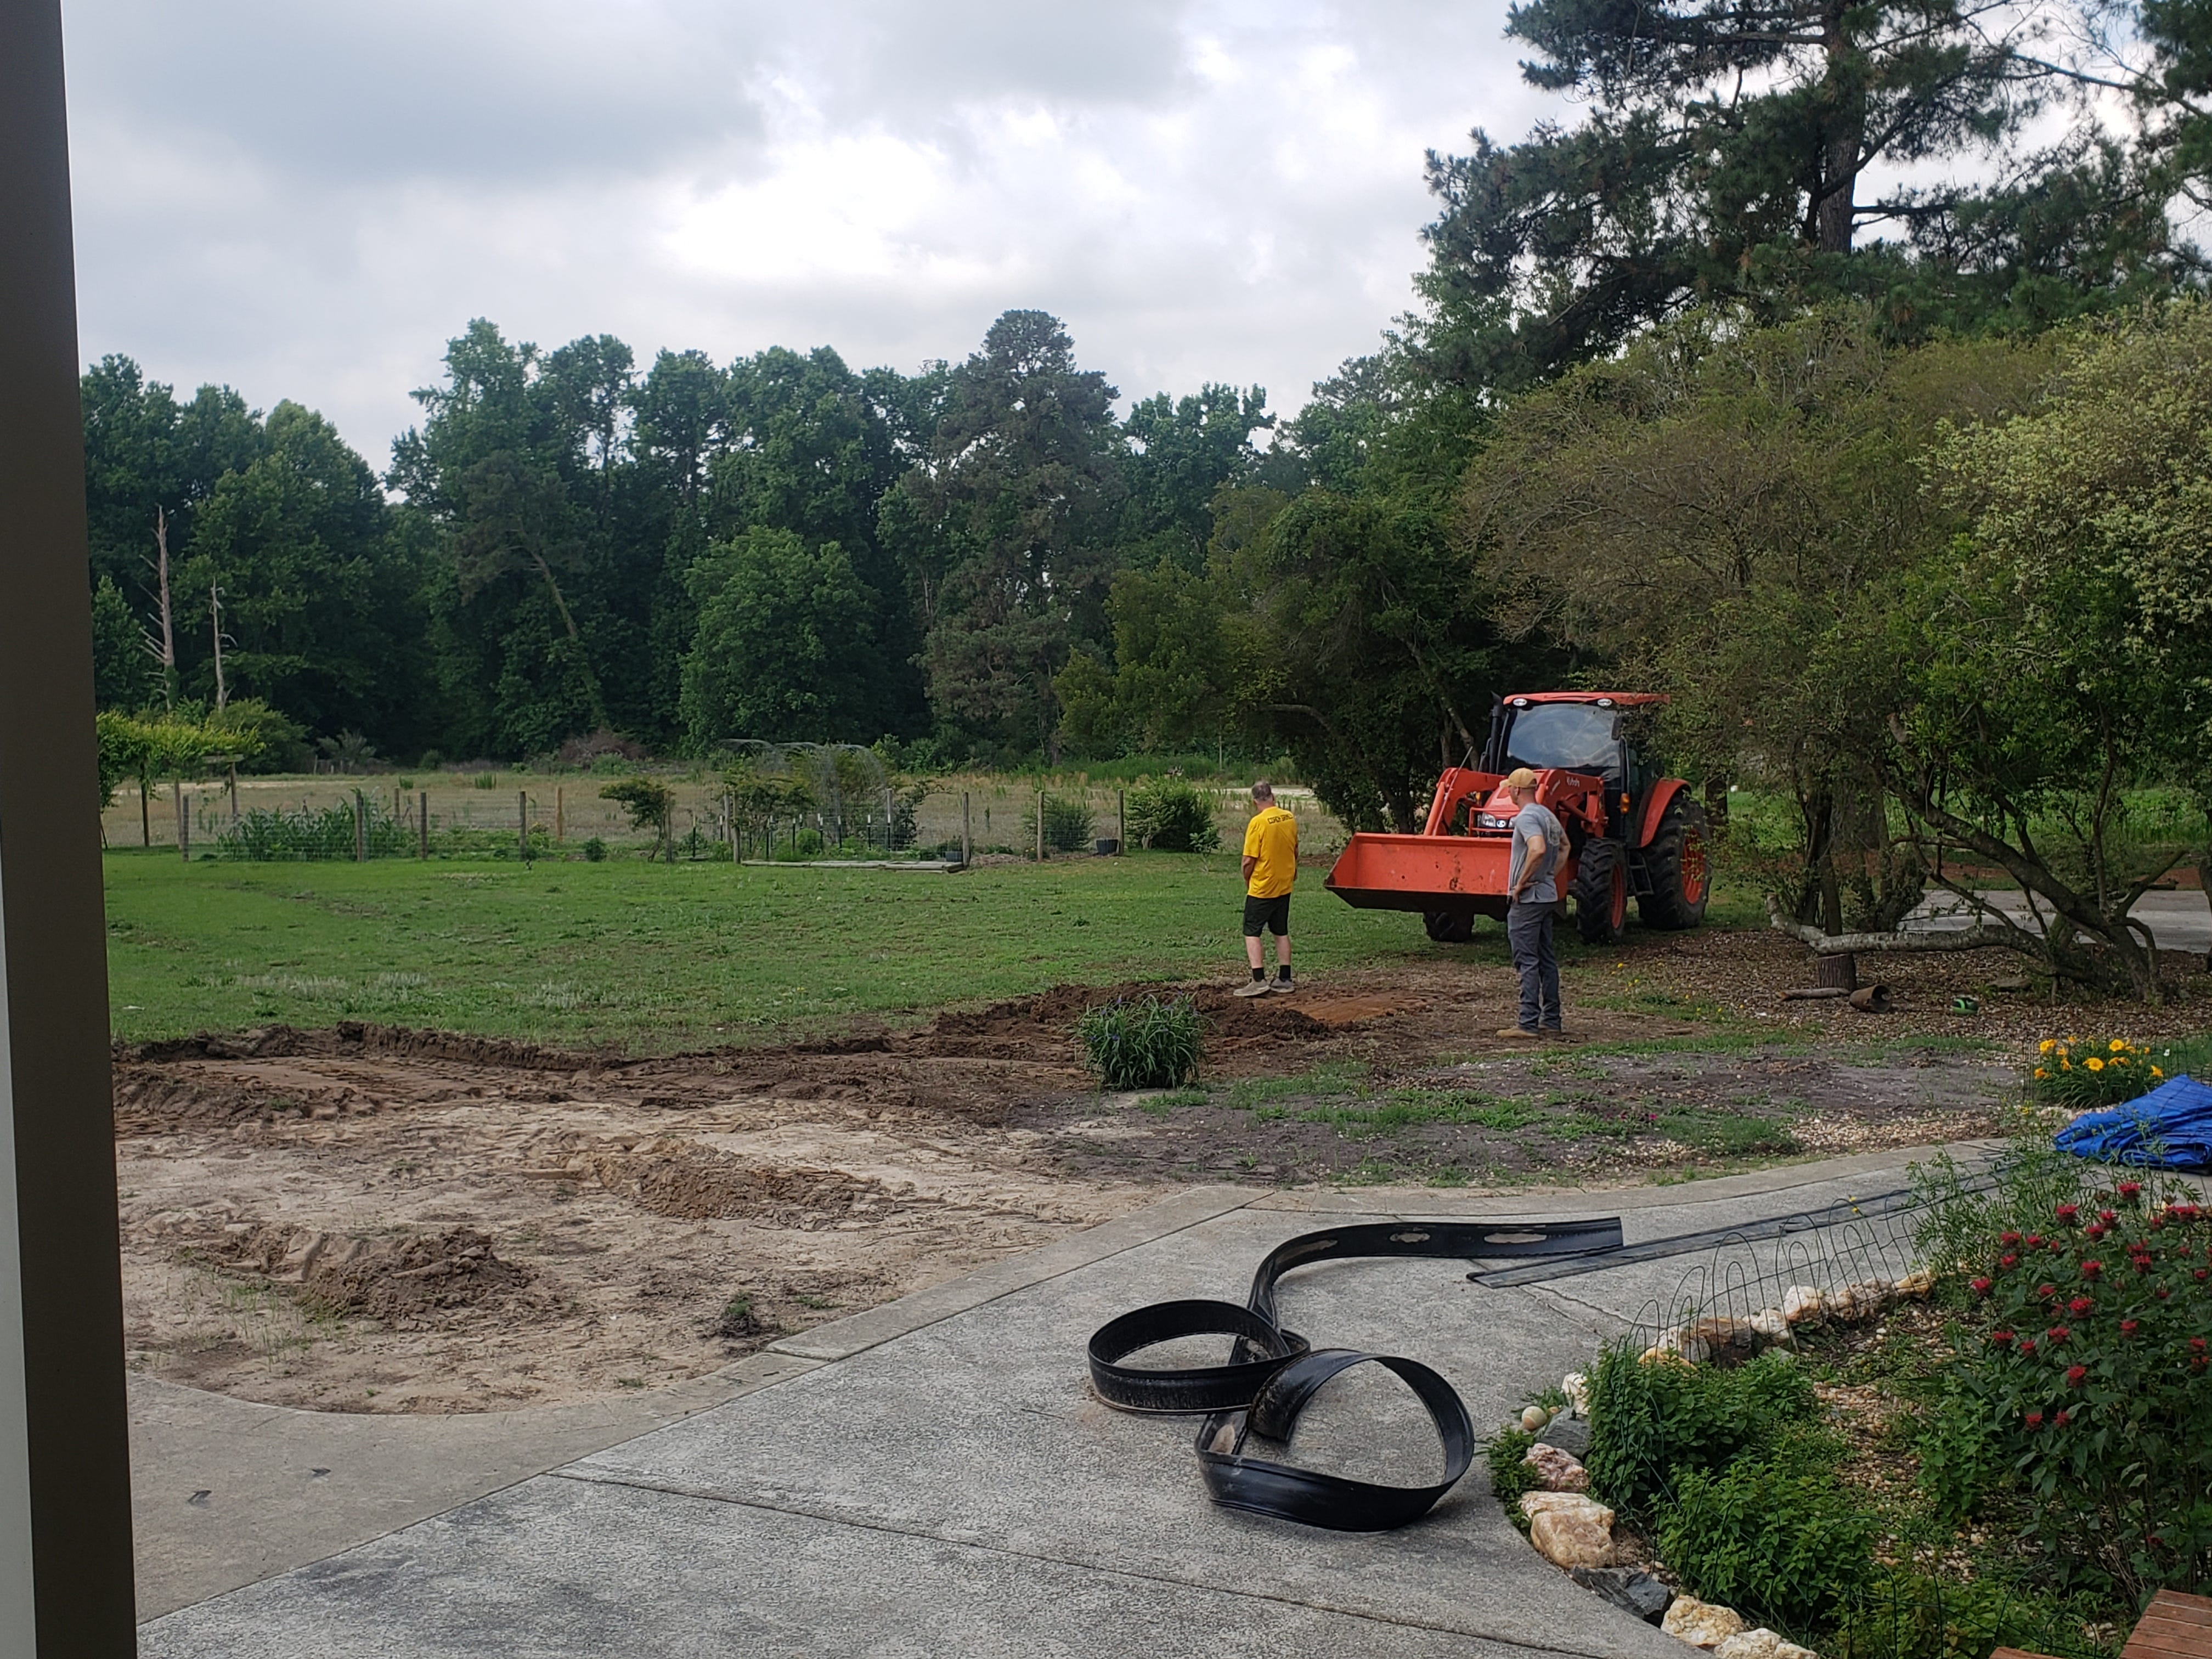
A big factor that drove up our budget was that the piece of land we chose to cultivate our garden on needed…well…cultivating. We were planning to cover up an old rock garden from the previous owners. The problem with that area is that it was too sloped in parts and not deep enough in others. The shallow dirt sat on about 2 feet of old decorative rock. Making planting anything besides Coneflower impossible. So we had to bring in machinery to pull up the sod in half the area, till up the rocks in the rest, and level the landscape.
Then there was the soil. So, we had delivered…wait, let’s play a game…
How much dirt do you think we needed for a 40x80 space?
1 truck bed load?
2 truck bed loads?
3?
No, no, no…
20,000 pounds of dirt!
A dump truck had to be brought in. That cost was about $400.
We paid the neighbor’s 15 year old son to come do all the work for $100.
We paid only $40 for a trailer load of mulch. But you can get free mulch from the guys who cut down the trees by power lines and roads. They’ll even deliver it to your location for free.
We did invest in $90 worth of cedar mulch for the pathways. We’re happy we went with cedar mulch instead of rocks. It seems to be keeping the bugs at bay. Plus, it is a lovely contrast to the brown mulch in the garden beds.
If we had gone with a professional landscaper, it would have cost us closer to $1500 for the dirt and work our neighbor did.
You can save here by either working with the land you have, or pick a spot that doesn’t need much cultivating. Meaning you have a pretty level area that has good soil already.
You’ll also save by doing all the hard work yourself. You can even rent machinery if your garden is bigger than a 20x20. Or do what we did and hire a teenager to help you out.
The rest of the cost was the plants themselves. I spent about $500 on plants. I have about a dozen different kinds of plants in my garden. Each plant cost an average of $10. Times that by about 50 plants.
Here’s how you can save a whole lot on plants if you have more time and patience, and how I could have saved a little in the short run…
Instead of paying $10 for a 4 inch starter, you can plant yours from seed in pots before you even break ground. Once they are about 4 inches, you can transfer them into the ground.
You can also save money on plants by propagating from plants you already have, or foraging for plants, or getting cuttings from your friends. I did all these things as well to save money.
My last part of advice on budgeting…
Focus on your core plants first and add your border plants later. Let’s discuss what I mean…
Start Small
Your core plants are going to be your larger perennials. Sunflower, Milkweed, Bee Balm, Goldenrod, Catnip, Hyssop, Mountain Mint are a few examples of your larger pollinator plants.
Your border plants will be the flowers and grasses that are smaller and will literally border your garden. Coneflower, Iris, Aster, Blanket flower, Black-eyed Susan, Yarrow, Day Lily, and Peony to name a few.
I mentioned focusing on border plants after your core plants have fully established. Border plants can easily be directly sowed from seed. You don’t have to only do perennials. You can sow annual seeds like zinnias, cosmos, and salivas.
Side note about annuals…my petunias, marigolds, and lantanas have come back every year. Just saying.
Anyway…
I do recommend beginning with a smaller space and expanding each year if you’re able. This will not only save you money, it will save you time and energy.
Layout
Where to plant each plant matters. And this can be overwhelming.
You could just throw plants down willy-nilly wherever, but you may not be happy with your result once everything has fully established. Unless you are going for a more wild vibe, a pollinator garden should have an aesthetic. A flow. A pattern even.
Like all my gardens, I research and map it out on paper first.
Here are the computer examples of my drawings. (I’m out of town on vacation and not near my desk to show you my hand maps.)
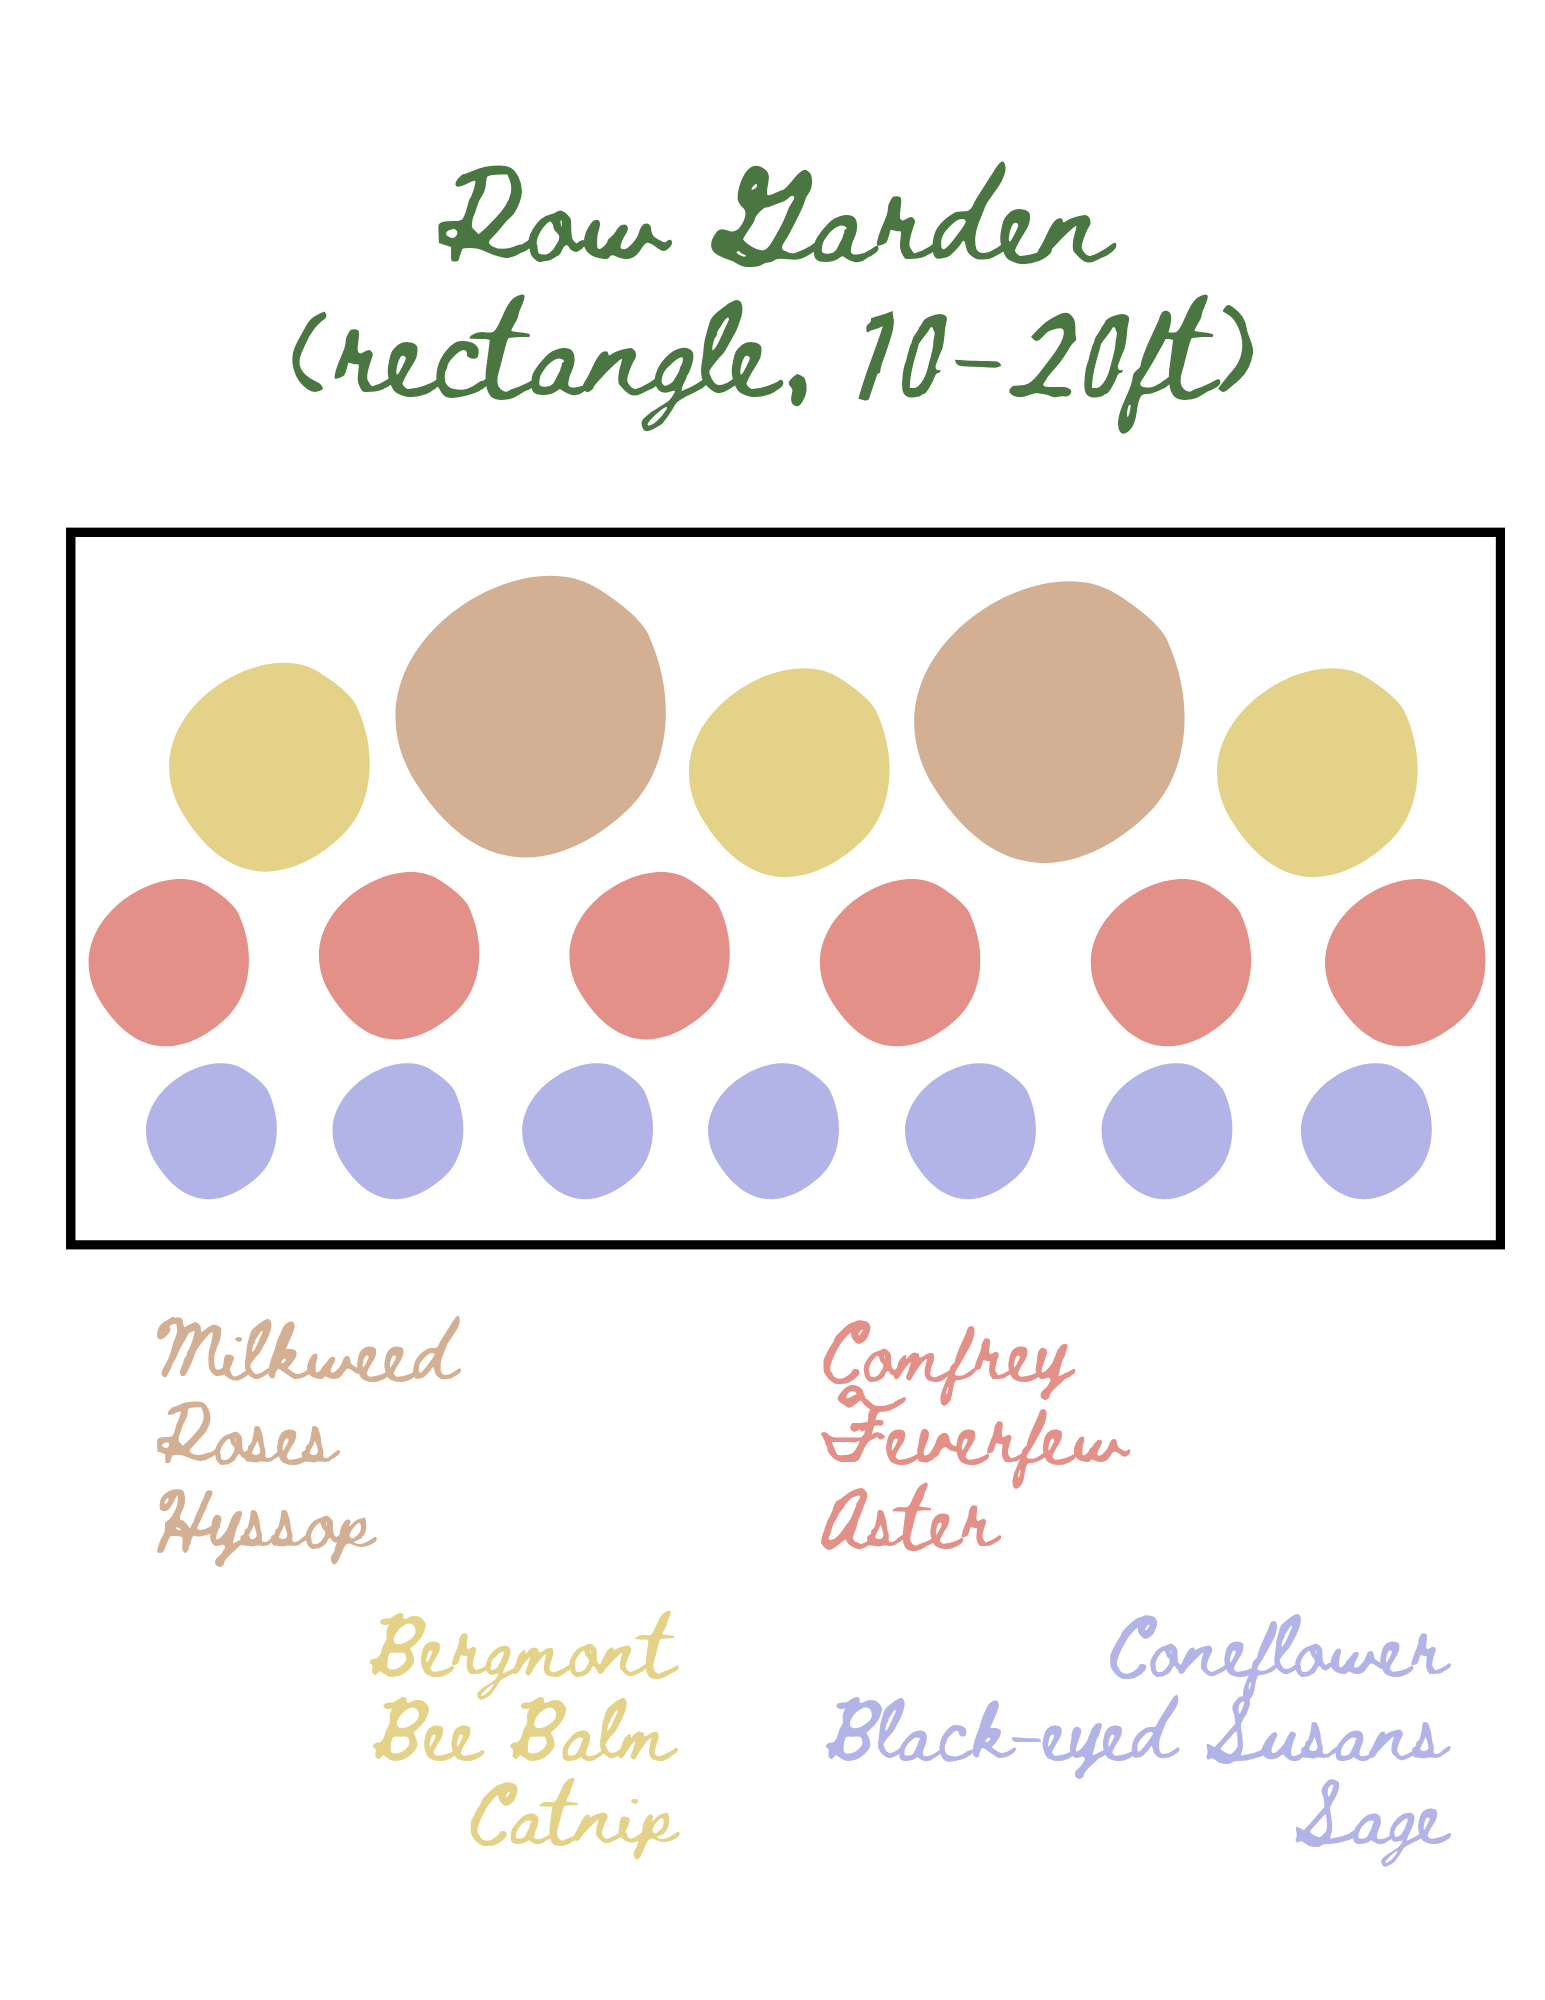
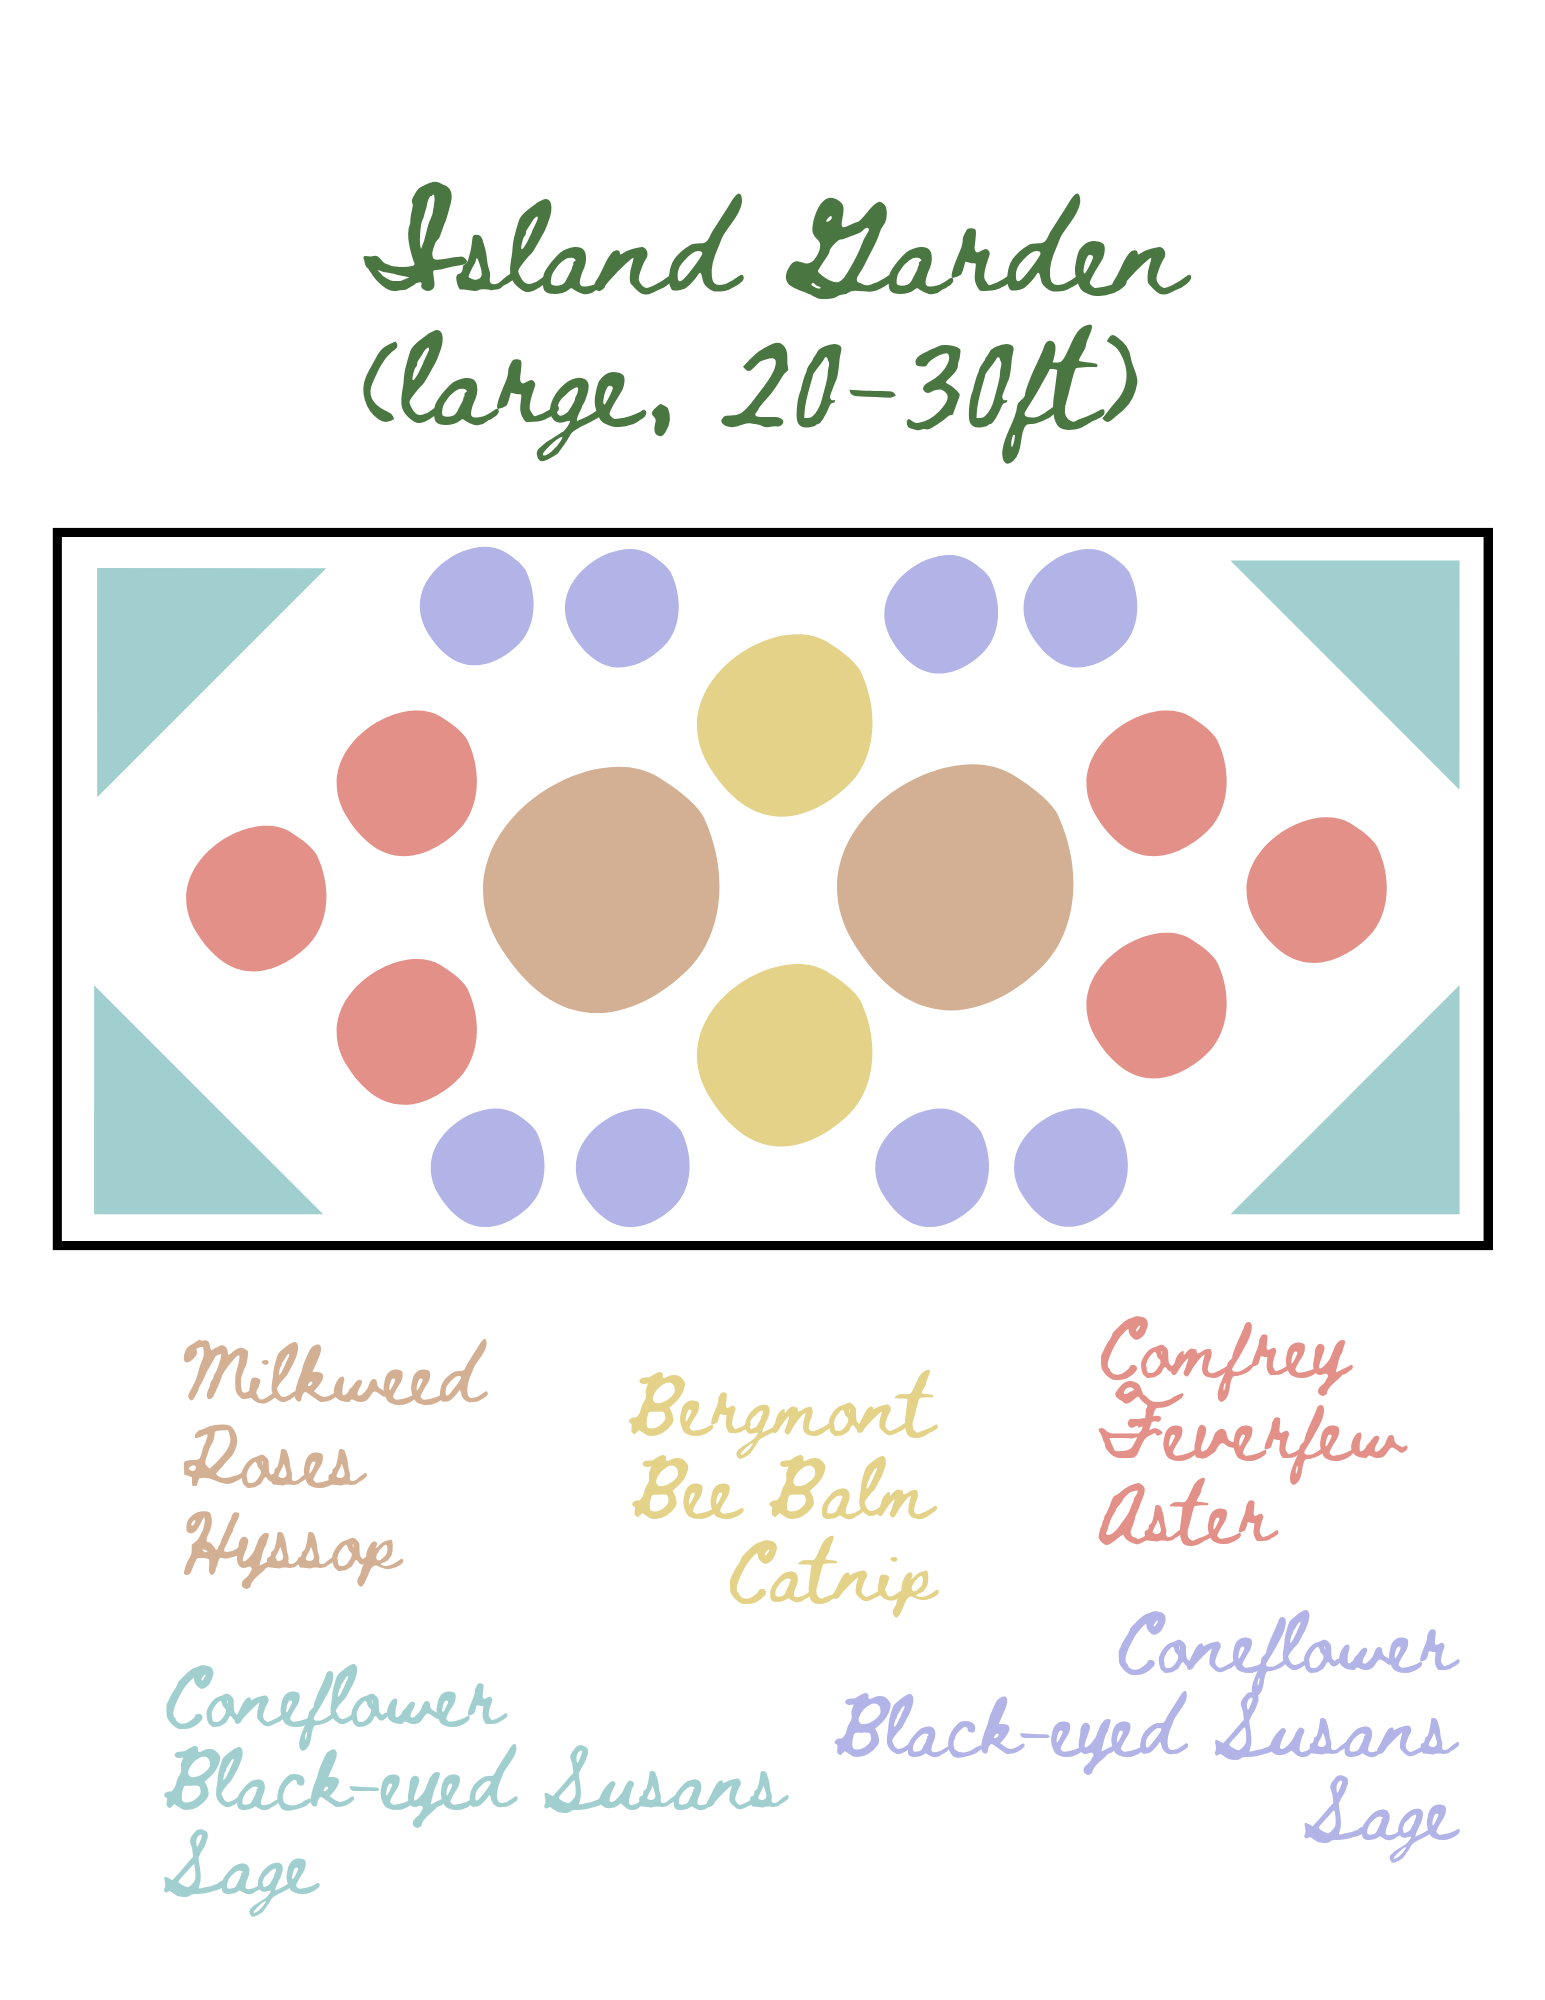
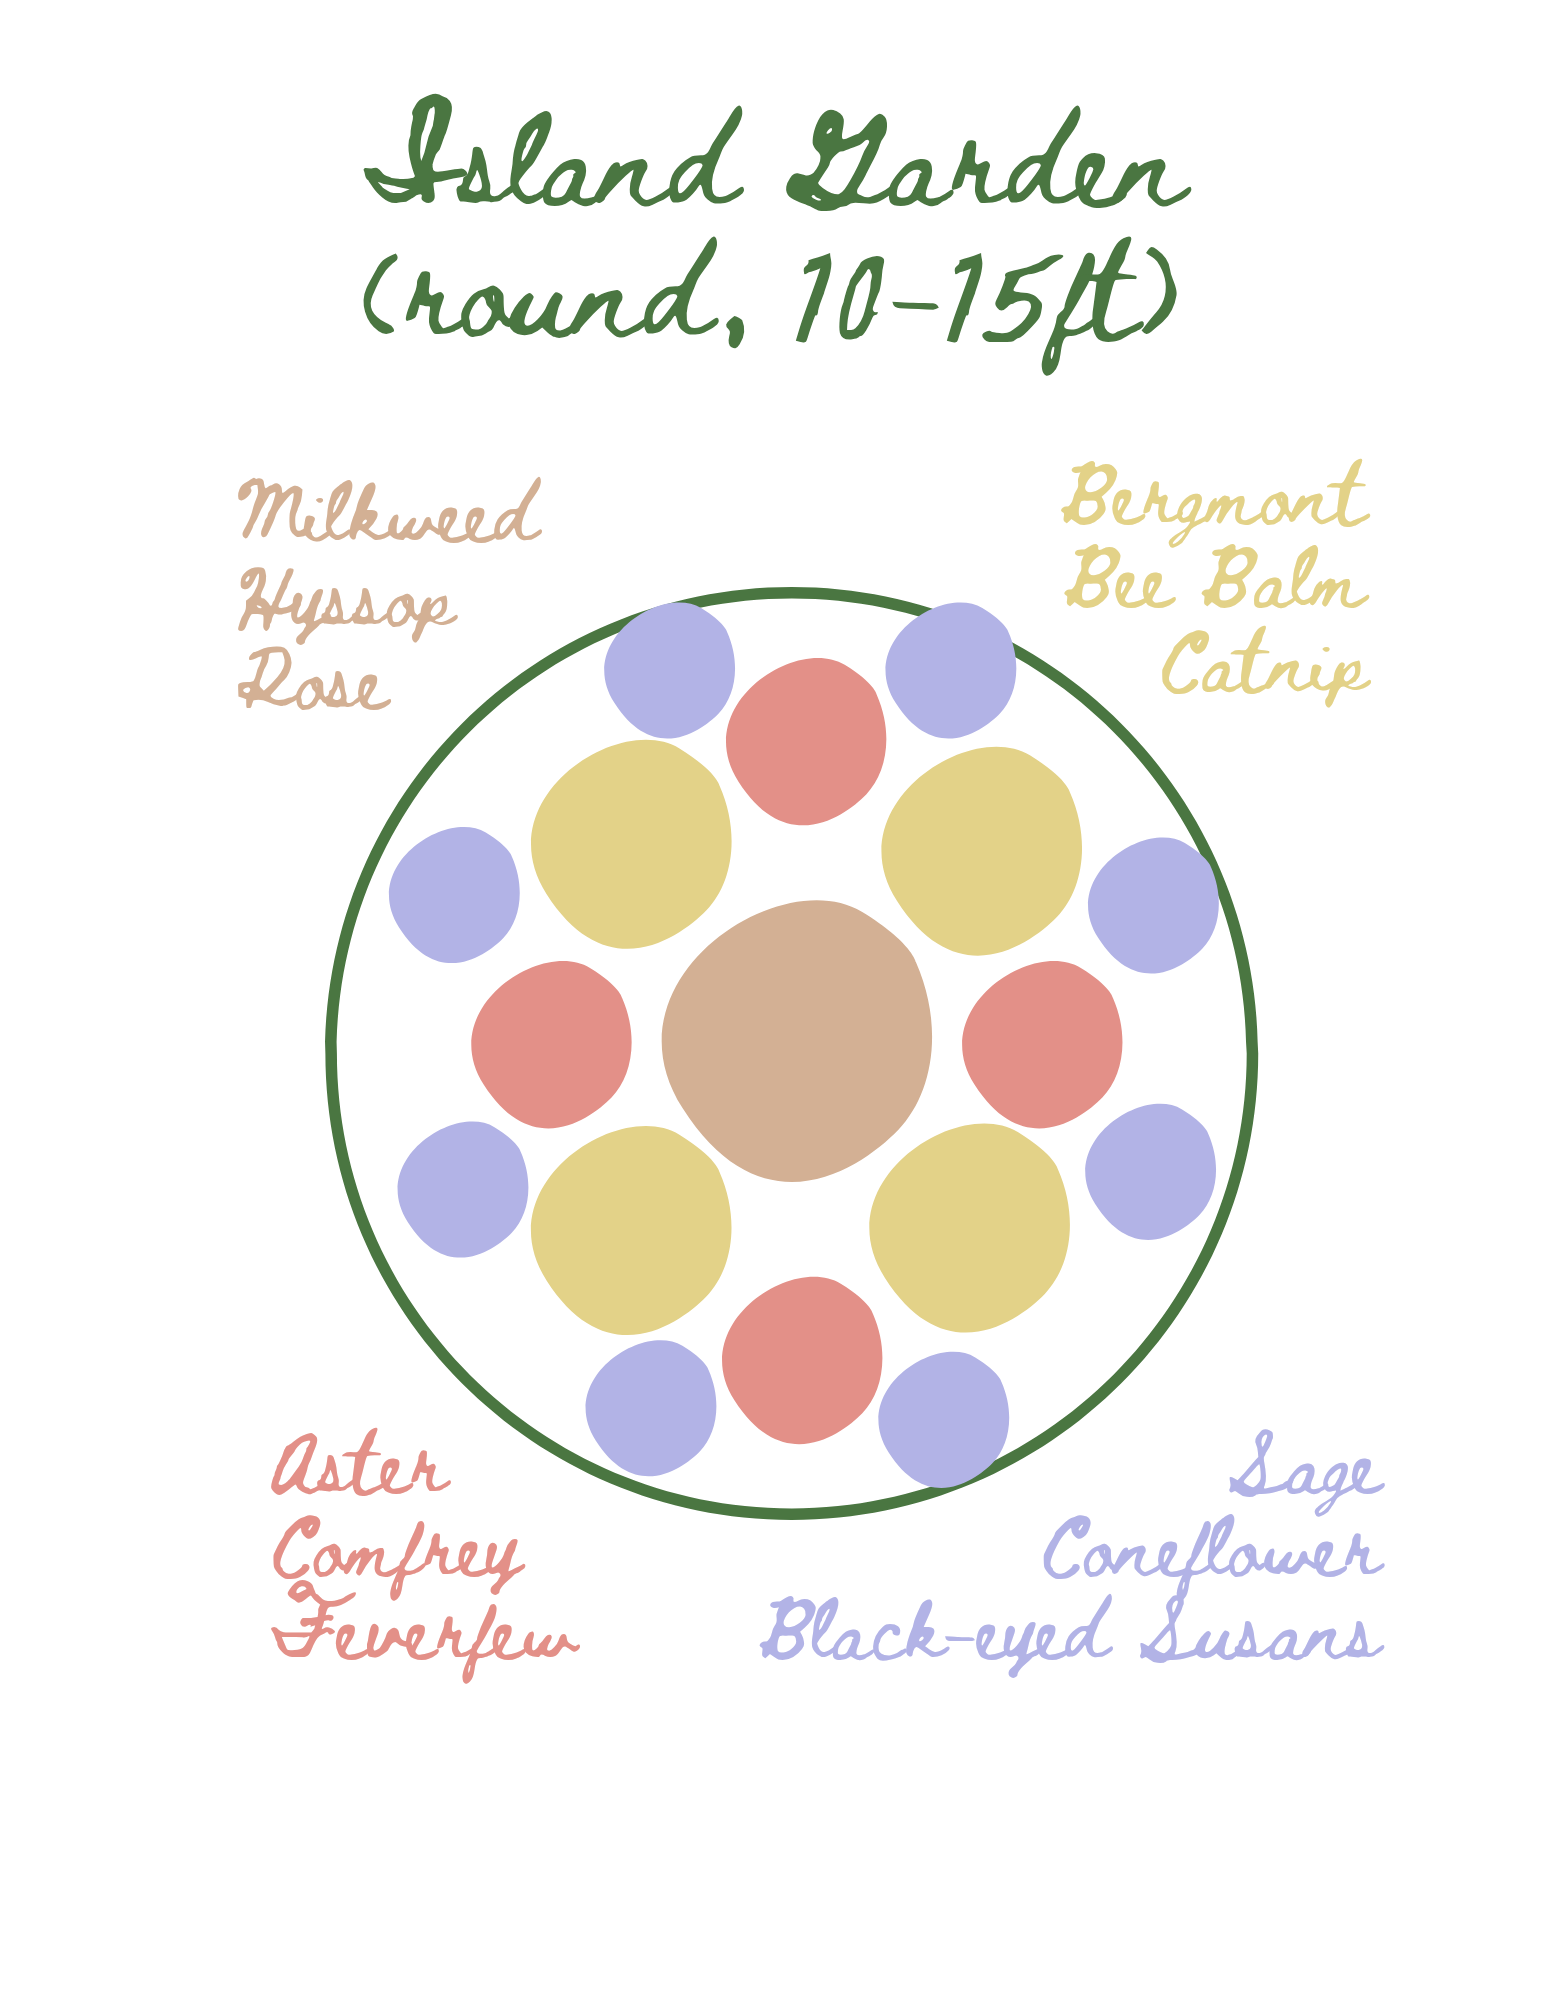
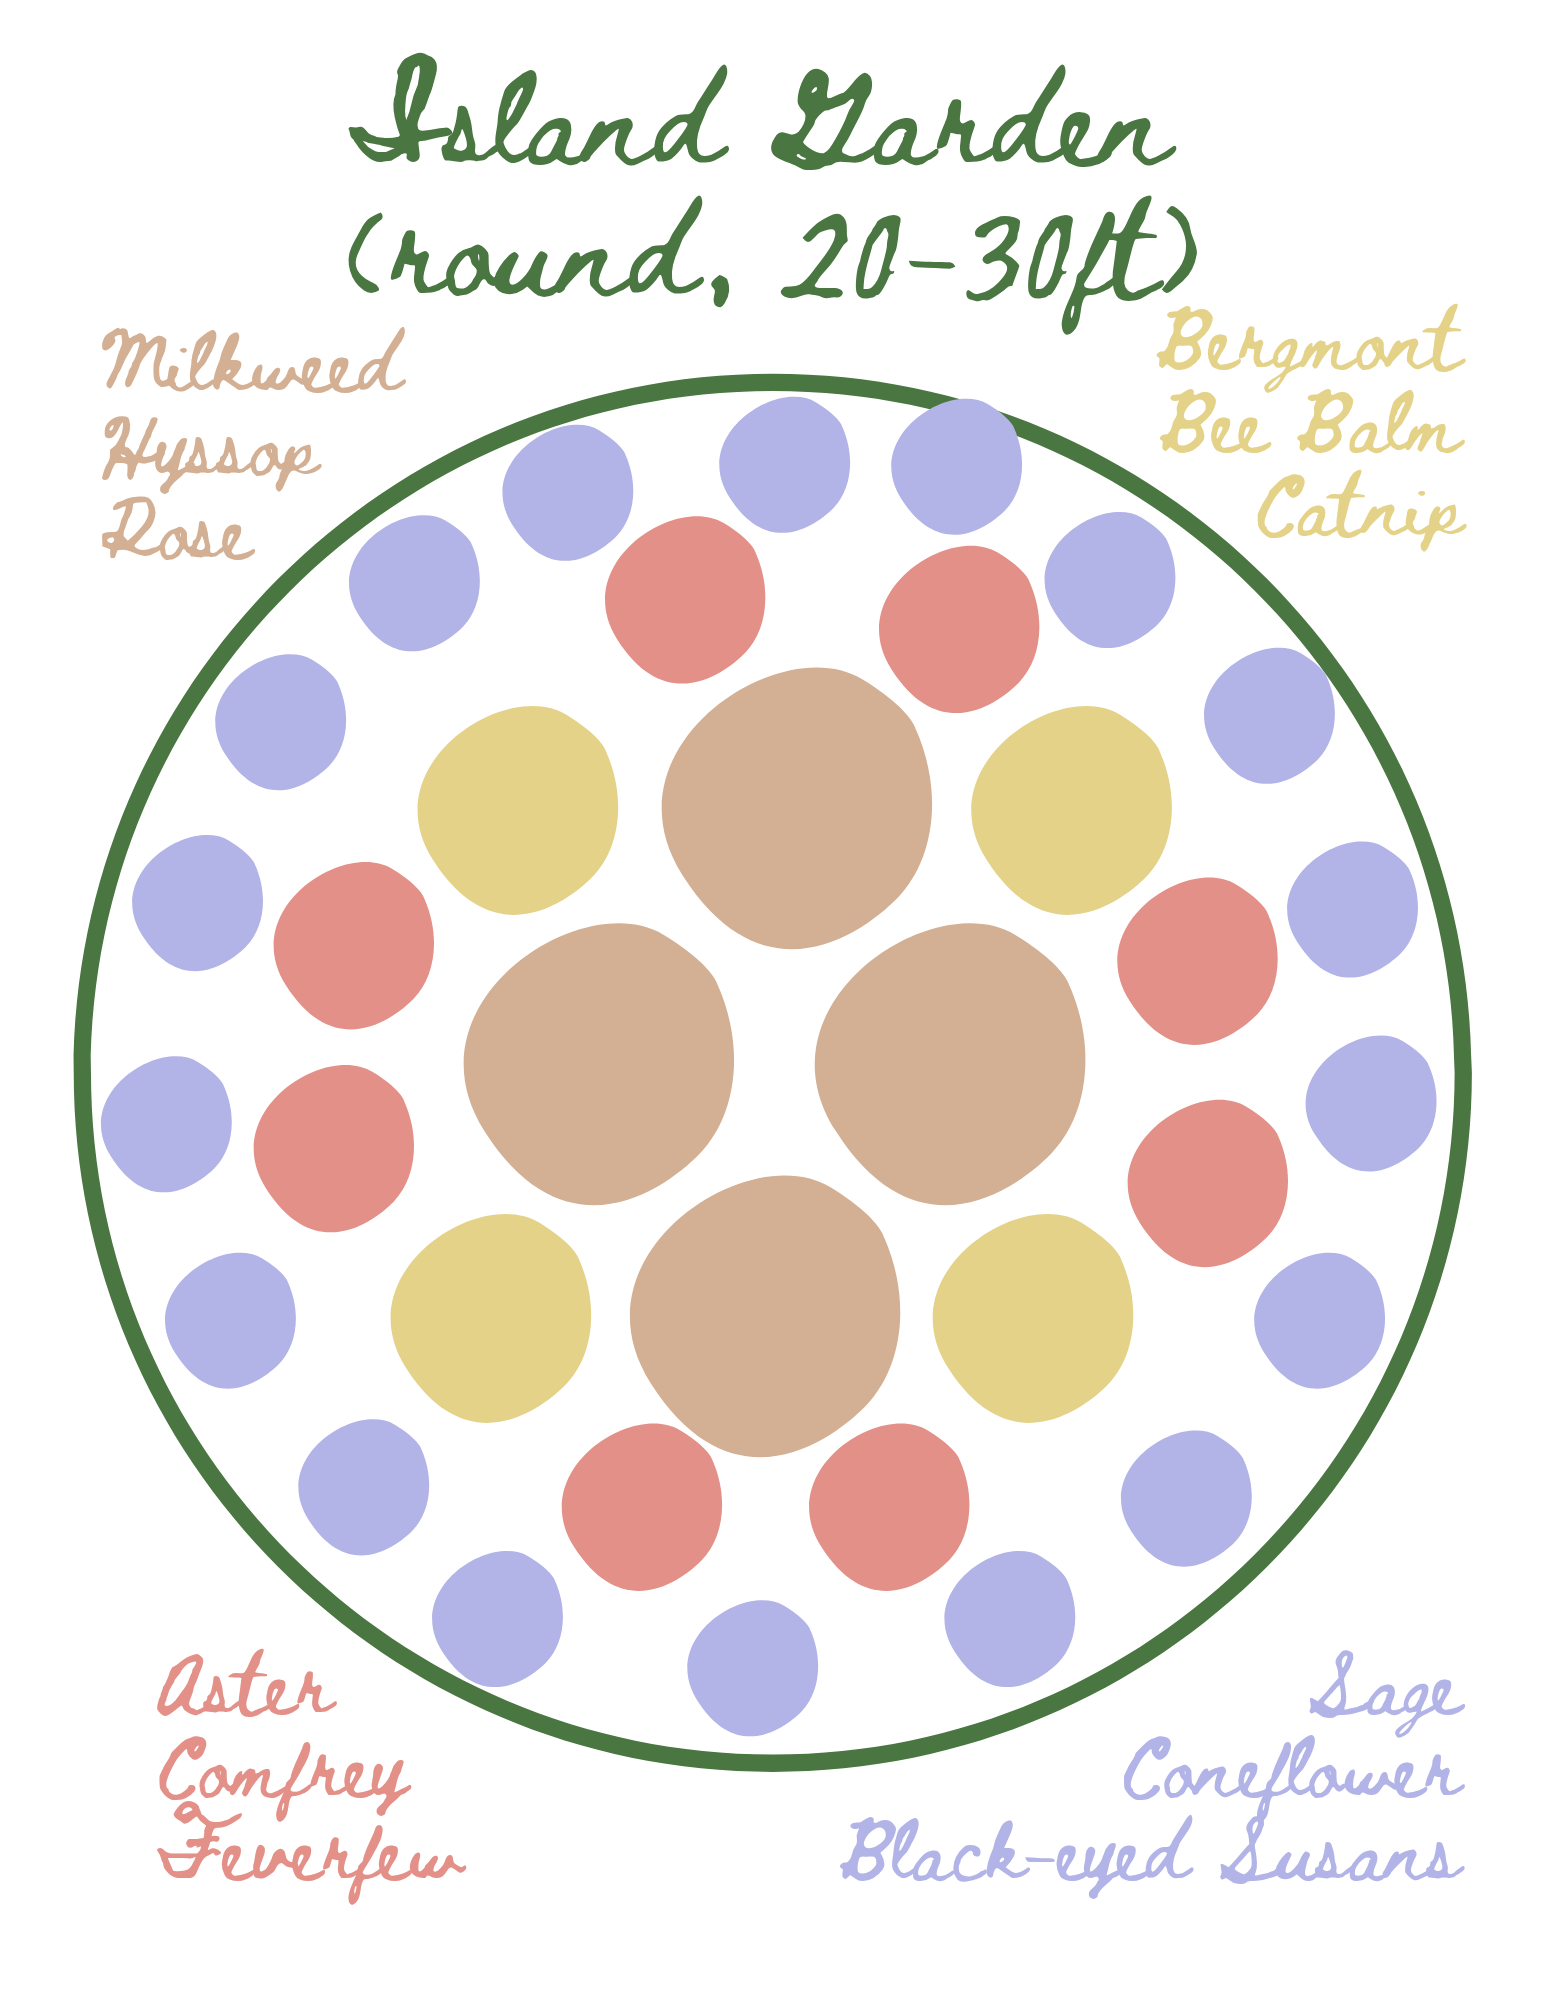
A last piece of advice on the layout…
Thoroughly research where each plant will thrive best.
Part of my garden is higher elevated in full sun. The opposite end of the garden is shaded by a row of some type of Asian trees I can’t quite remember the name of.
Here’s an example of not researching thoroughly enough…
When I was choosing plants for my garden, I just had to have button bush shrubs. With a little research, I learned they needed extra water and shade. So I ordered them and planted 3 of them at the bottom of the slope, under the shade of the 12 foot Asian trees. After a few weeks of seeing little growth, I hopped back online to do some further research. Oops…they didn’t just need more water, they needed a “water source” like a creek or lake. I also missed that they could reach up to 12 feet tall themselves. Under the trees was a bad idea. And since we do not have a water source on our property, they were happily re-homed to my friend’s creek-side property where they will prayerfully grow big and live happily-ever-after.
Moral of the story…don’t just choose plants that you want or think look pretty. Choose plants that will thrive in your specific location…
Natives
Speaking of plants that will thrive. Let’s briefly talk about why planting native plants is best…
Native plants sustain biodiversity, provide vital food and shelter for pollinators and birds, and require far less water, fertilizer, or maintenance than non-native species. Native pollinator plants set deeper roots so they capture and filter higher amounts of storm water runoff. This helps reduce flooding during extreme weather events and saves water since these require less watering after being established. Gardeners benefit because these plants are more resilient to drought, climate change and other adverse conditions.
~North Carolina Wildlife Federation
Although I didn’t plant all native plants, I did focus on core perennial pollinator plants that would do well in my planting zone.
Education
Pollinator gardens are a wonderful way to educate visitors how important these gardens are for wildlife and for us humans.
Consider adding garden labels with the name and information about each plant for identification purposes. If you have the room, you can install larger informational signs explaining the benefits of pollinator gardens.
Add garden features like a bench, trellis, water fountain, bird bath, bee watering station, bird house, bug hotel, wind chime, sundial, or subtle lights for pathways.
Be mindful of your layout! A haphazard layout can be confusing and unappealing for visitors. If you do intend to share your garden as an educational resource, space each plant about 1-2 apart.
Add paths throughout larger gardens so visitors can easily appreciate each plant up close.
My very last piece of advice…
Appreciate and enjoy your garden daily.
Walk in your garden, talk to your plants, and commune with The Father.
Coming Soon…
No posts
Comments
Nothing yet. Say the first thing.
Sign in to join the conversation.