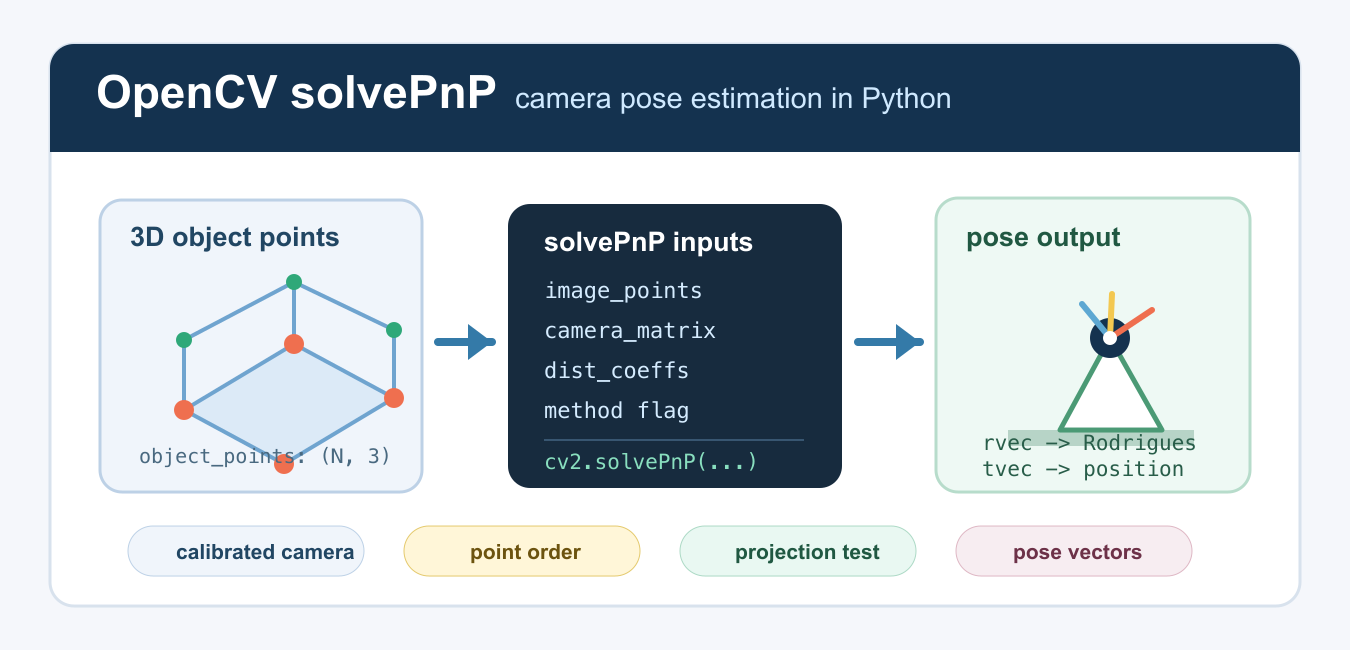
Quick answer: Use cv2.solvePnP() to estimate camera pose from corresponding 3D object points and 2D image points plus a calibrated camera matrix and distortion coefficients. Choose the method from the point geometry and validate reprojection error.
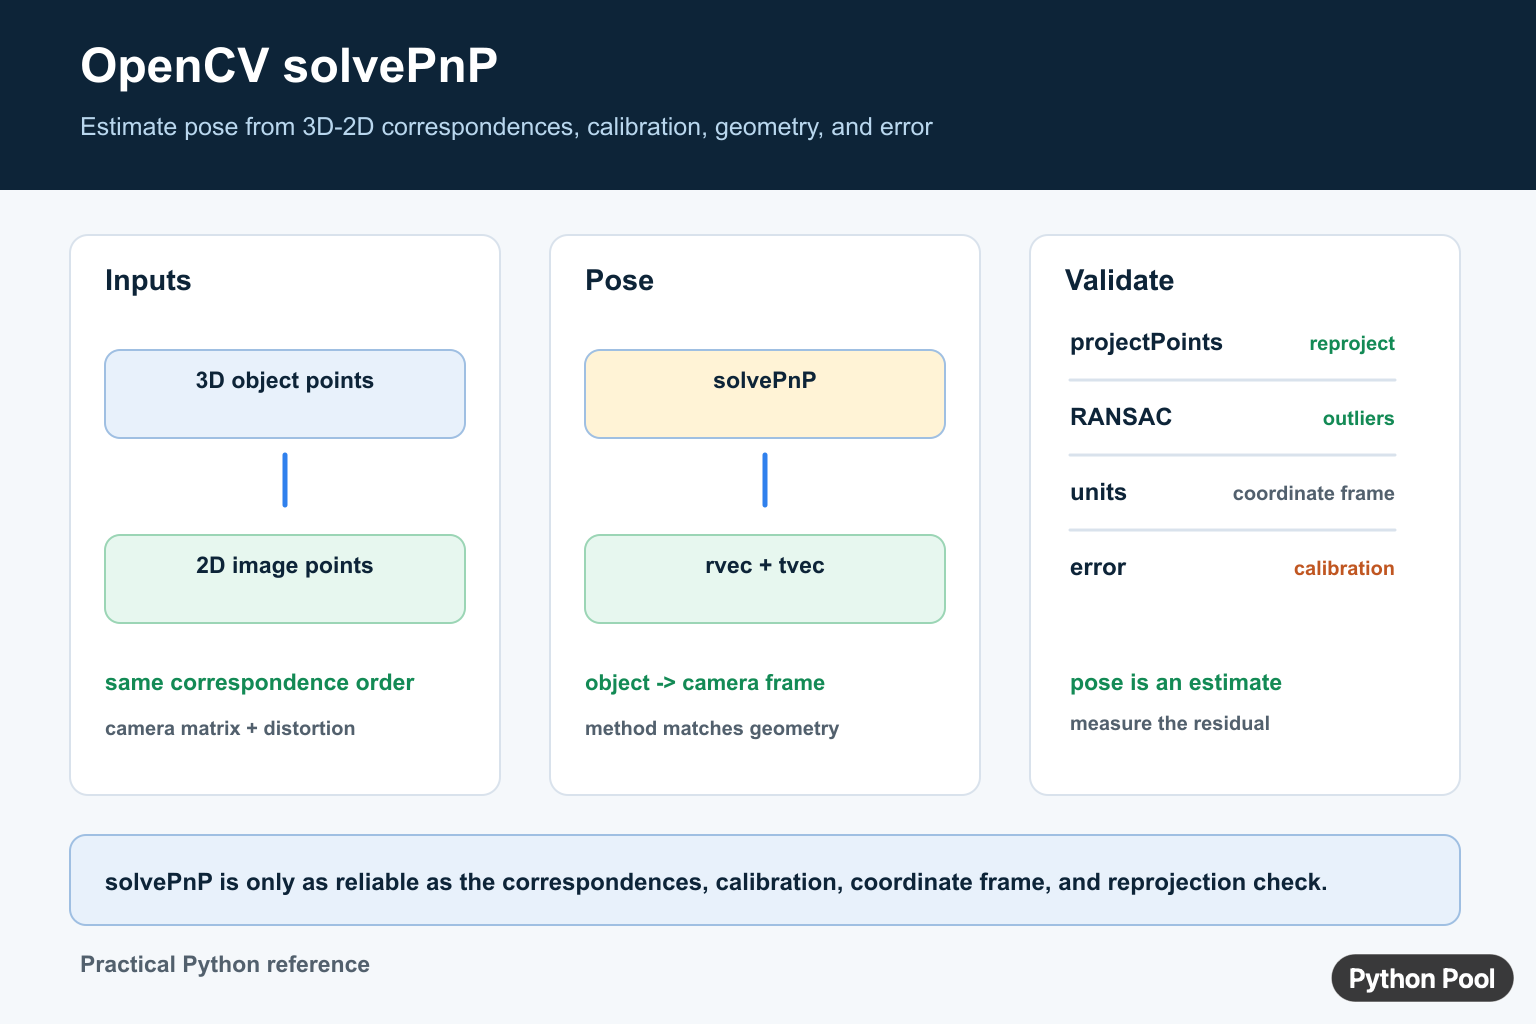
OpenCV solvePnP estimates the pose of a calibrated camera from matched 3D world points and 2D pixel points. In practical terms, it answers this question: where was the camera, and how was it rotated, when it saw known points in the scene? The function returns a rotation vector and a translation vector that map object coordinates into the camera coordinate system.
The official OpenCV references are the Perspective-n-Point pose computation guide and the Python camera calibration tutorial.
The minimum inputs are object points, image points, a camera matrix, and distortion coefficients. Object points are known 3D coordinates in a model coordinate system, such as the corners of a square marker, a chessboard, a box, or measured feature locations on a part. Image points are the matching 2D pixel coordinates found in the current frame. The camera matrix contains focal lengths and the optical center. Distortion coefficients describe lens distortion from calibration.
Coordinate order is a frequent source of mistakes. OpenCV image points use (x, y), which means column first and row second. NumPy indexing usually uses row first. Object points use whatever model coordinate system you define, but all distances must use one consistent unit. If a marker is measured in meters, the returned translation vector is in meters. If the same marker is measured in millimeters, the translation vector is in millimeters.
The returned rotation vector is an axis-angle representation. Use cv2.Rodrigues() to convert it to a 3 by 3 rotation matrix when you need camera axes, a view transform, or an inverse pose. The translation vector is not directly the camera center in world coordinates. It is the offset that moves object coordinates into the camera coordinate system. To recover the camera center in object coordinates, invert the pose with -R.T @ tvec.
Set Up Points And A Camera Matrix
A simple test case starts with a known square on the z = 0 plane and a pinhole camera matrix. This does not need files or display windows, and it gives you the exact array shapes that solvePnP expects.
try:
    import numpy as np
except ModuleNotFoundError as exc:
    print(f"Install {exc.name} to run this example.")
else:
    object_points = np.array(
        [
            [-0.5, -0.5, 0.0],
            [0.5, -0.5, 0.0],
            [0.5, 0.5, 0.0],
            [-0.5, 0.5, 0.0],
        ],
        dtype=np.float64,
    )

    image_points = np.array(
        [
            [305.0, 215.0],
            [435.0, 220.0],
            [430.0, 350.0],
            [300.0, 345.0],
        ],
        dtype=np.float64,
    )

    camera_matrix = np.array(
        [
            [800.0, 0.0, 320.0],
            [0.0, 800.0, 240.0],
            [0.0, 0.0, 1.0],
        ],
        dtype=np.float64,
    )
    dist_coeffs = np.zeros((4, 1), dtype=np.float64)

    print(object_points.shape)
    print(image_points.shape)
    print(camera_matrix.tolist())
    print(dist_coeffs.ravel().tolist())
The four object points form a unit square centered at the model origin. The image points must be in the same order. If the object point order and image point order do not match, the returned pose can be wrong even when the function reports success.
Estimate Pose With solvePnP
The next example creates synthetic image points from a known pose, then asks solvePnP to estimate that pose. Synthetic data is useful for tests because no detector, camera, or file path is involved.
try:
    import cv2
    import numpy as np
except ModuleNotFoundError as exc:
    print(f"Install {exc.name} to run this example.")
else:
    object_points = np.array(
        [
            [-0.5, -0.5, 0.0],
            [0.5, -0.5, 0.0],
            [0.5, 0.5, 0.0],
            [-0.5, 0.5, 0.0],
        ],
        dtype=np.float64,
    )
    camera_matrix = np.array(
        [
            [800.0, 0.0, 320.0],
            [0.0, 800.0, 240.0],
            [0.0, 0.0, 1.0],
        ],
        dtype=np.float64,
    )
    dist_coeffs = np.zeros((4, 1), dtype=np.float64)

    true_rvec = np.array([[0.20], [-0.12], [0.08]], dtype=np.float64)
    true_tvec = np.array([[0.10], [0.05], [4.00]], dtype=np.float64)
    image_points, _ = cv2.projectPoints(
        object_points,
        true_rvec,
        true_tvec,
        camera_matrix,
        dist_coeffs,
    )
    image_points = image_points.reshape(-1, 2)

    ok, rvec, tvec = cv2.solvePnP(
        object_points,
        image_points,
        camera_matrix,
        dist_coeffs,
        flags=cv2.SOLVEPNP_ITERATIVE,
    )

    print(ok)
    print(np.round(rvec.ravel(), 4).tolist())
    print(np.round(tvec.ravel(), 4).tolist())
rvec and tvec are returned as column vectors. The exact values can shift slightly with noise, point layout, and algorithm choice. In a real camera pipeline, check the boolean return value before using the pose.
Choose A solvePnP Method
OpenCV exposes several methods through the flags argument. SOLVEPNP_ITERATIVE is a strong default for many calibrated workflows. SOLVEPNP_EPNP is often useful as a fast direct method. SOLVEPNP_SQPNP is available in recent OpenCV builds and is designed as a globally optimal method for enough points.
try:
    import cv2
    import numpy as np
except ModuleNotFoundError as exc:
    print(f"Install {exc.name} to run this example.")
else:
    object_points = np.array(
        [
            [-0.5, -0.5, 0.0],
            [0.5, -0.5, 0.0],
            [0.5, 0.5, 0.0],
            [-0.5, 0.5, 0.0],
            [-0.5, -0.5, 1.0],
            [0.5, -0.5, 1.0],
            [0.5, 0.5, 1.0],
            [-0.5, 0.5, 1.0],
        ],
        dtype=np.float64,
    )
    camera_matrix = np.array(
        [[900.0, 0.0, 320.0], [0.0, 900.0, 240.0], [0.0, 0.0, 1.0]],
        dtype=np.float64,
    )
    dist_coeffs = np.zeros((4, 1), dtype=np.float64)
    seed_rvec = np.array([[0.18], [0.05], [-0.10]], dtype=np.float64)
    seed_tvec = np.array([[0.05], [-0.04], [5.00]], dtype=np.float64)
    image_points, _ = cv2.projectPoints(
        object_points,
        seed_rvec,
        seed_tvec,
        camera_matrix,
        dist_coeffs,
    )
    image_points = image_points.reshape(-1, 2)

    methods = {
        "ITERATIVE": cv2.SOLVEPNP_ITERATIVE,
        "EPNP": cv2.SOLVEPNP_EPNP,
        "SQPNP": getattr(cv2, "SOLVEPNP_SQPNP", cv2.SOLVEPNP_EPNP),
    }

    for name, flag in methods.items():
        ok, rvec, tvec = cv2.solvePnP(
            object_points,
            image_points,
            camera_matrix,
            dist_coeffs,
            flags=flag,
        )
        print(name, ok, np.round(tvec.ravel(), 3).tolist())
Do not switch methods only because one name sounds newer. The point count, whether the points are planar, the noise level, and whether you can provide a good initial pose all matter. For a flat square marker, also read the dedicated planar methods in the OpenCV guide before choosing a production flag.
Convert The Pose To A Camera Position
solvePnP maps object coordinates into the camera coordinate system. If you want the camera center expressed in object coordinates, convert the rotation vector to a matrix and invert that rigid transform.
try:
    import cv2
    import numpy as np
except ModuleNotFoundError as exc:
    print(f"Install {exc.name} to run this example.")
else:
    rvec = np.array([[0.20], [-0.12], [0.08]], dtype=np.float64)
    tvec = np.array([[0.10], [0.05], [4.00]], dtype=np.float64)

    rotation_matrix, _ = cv2.Rodrigues(rvec)
    camera_position = -rotation_matrix.T @ tvec

    print(np.round(rotation_matrix, 3))
    print(np.round(camera_position.ravel(), 3).tolist())
This distinction is important for augmented reality overlays, robotics, and multi-camera calibration. The translation vector says where the object origin lands in camera coordinates. The inverted pose says where the camera center sits in the object coordinate system.
Check Reprojection Error
A pose should be checked by projecting the object points back into the image and measuring the pixel difference from the observed points. This reprojection error is a practical quality signal.
try:
    import cv2
    import numpy as np
except ModuleNotFoundError as exc:
    print(f"Install {exc.name} to run this example.")
else:
    object_points = np.array(
        [
            [-0.5, -0.5, 0.0],
            [0.5, -0.5, 0.0],
            [0.5, 0.5, 0.0],
            [-0.5, 0.5, 0.0],
            [0.0, 0.0, 0.8],
            [0.4, -0.2, 0.6],
        ],
        dtype=np.float64,
    )
    camera_matrix = np.array(
        [[780.0, 0.0, 320.0], [0.0, 780.0, 240.0], [0.0, 0.0, 1.0]],
        dtype=np.float64,
    )
    dist_coeffs = np.zeros((4, 1), dtype=np.float64)
    rvec_true = np.array([[0.12], [-0.08], [0.16]], dtype=np.float64)
    tvec_true = np.array([[0.02], [0.03], [3.50]], dtype=np.float64)
    image_points, _ = cv2.projectPoints(
        object_points,
        rvec_true,
        tvec_true,
        camera_matrix,
        dist_coeffs,
    )
    image_points = image_points.reshape(-1, 2)
    image_points += np.array(
        [[0.2, -0.1], [-0.1, 0.2], [0.1, 0.1], [-0.2, -0.1], [0.0, 0.2], [0.1, -0.2]]
    )

    ok, rvec, tvec = cv2.solvePnP(object_points, image_points, camera_matrix, dist_coeffs)
    reprojected, _ = cv2.projectPoints(object_points, rvec, tvec, camera_matrix, dist_coeffs)
    reprojected = reprojected.reshape(-1, 2)
    errors = np.linalg.norm(reprojected - image_points, axis=1)

    print(ok)
    print(round(float(errors.mean()), 4))
    print(np.round(errors, 4).tolist())
A low reprojection error does not prove the pose is physically correct in every case, but a high error is a clear warning. Common causes include mismatched point order, a poor camera matrix, ignored distortion, swapped row and column coordinates, inaccurate detected points, or using too few points for the selected method.
Wrap solvePnP In A Small Helper
Production code is easier to debug when the pose step has shape checks, a clear return structure, and a reprojection score. The helper below accepts arrays that are already prepared by an upstream detector or marker finder.
try:
    import cv2
    import numpy as np
except ModuleNotFoundError as exc:
    print(f"Install {exc.name} to run this example.")
else:
    def estimate_pose(object_points, image_points, camera_matrix, dist_coeffs=None):
        object_points = np.asarray(object_points, dtype=np.float64)
        image_points = np.asarray(image_points, dtype=np.float64)
        camera_matrix = np.asarray(camera_matrix, dtype=np.float64)

        if object_points.ndim != 2 or object_points.shape[1] != 3:
            raise ValueError("object_points must have shape (N, 3)")
        if image_points.ndim != 2 or image_points.shape[1] != 2:
            raise ValueError("image_points must have shape (N, 2)")
        if len(object_points) != len(image_points):
            raise ValueError("point arrays must have the same length")
        if len(object_points) < 4:
            raise ValueError("solvePnP needs at least four matched points")

        if dist_coeffs is None:
            dist_coeffs = np.zeros((4, 1), dtype=np.float64)

        ok, rvec, tvec = cv2.solvePnP(
            object_points,
            image_points,
            camera_matrix,
            dist_coeffs,
            flags=cv2.SOLVEPNP_ITERATIVE,
        )
        if not ok:
            raise RuntimeError("solvePnP did not return a pose")

        projected, _ = cv2.projectPoints(object_points, rvec, tvec, camera_matrix, dist_coeffs)
        projected = projected.reshape(-1, 2)
        mean_error = float(np.linalg.norm(projected - image_points, axis=1).mean())
        return {"rvec": rvec, "tvec": tvec, "mean_error": mean_error}

    marker_points = np.array(
        [[-0.5, -0.5, 0.0], [0.5, -0.5, 0.0], [0.5, 0.5, 0.0], [-0.5, 0.5, 0.0]],
        dtype=np.float64,
    )
    camera_matrix = np.array(
        [[800.0, 0.0, 320.0], [0.0, 800.0, 240.0], [0.0, 0.0, 1.0]],
        dtype=np.float64,
    )
    image_points = np.array([[300.0, 215.0], [438.0, 218.0], [432.0, 354.0], [296.0, 348.0]])
    pose = estimate_pose(marker_points, image_points, camera_matrix)

    print(np.round(pose["tvec"].ravel(), 3).tolist())
    print(round(pose["mean_error"], 3))
This helper keeps the solve step separate from detection. That separation makes it easier to test a marker detector, camera calibration, and pose estimation independently. It also makes the failure cases explicit instead of letting a later rendering or robotics step receive a malformed pose.
A reliable solvePnP workflow is usually straightforward: calibrate the camera, keep point order consistent, use enough accurate correspondences, choose a method that matches your point geometry, check the returned status, and calculate reprojection error. Once those checks are in place, rvec and tvec become dependable inputs for projection, measuring object location, augmented reality overlays, or camera-position reporting.
What solvePnP Estimates
Perspective-n-Point estimates a rotation vector and translation vector that transform object-frame points into the camera frame. The inputs are not just two arbitrary arrays: object points, image points, camera intrinsics, and distortion coefficients must describe the same coordinate and calibration model.
import cv2
import numpy as np

object_points = np.array([[0, 0, 0], [1, 0, 0], [0, 1, 0], [0, 0, 1]], dtype=np.float32)
image_points = np.array([[320, 240], [420, 240], [320, 340], [300, 220]], dtype=np.float32)
camera_matrix = np.array([[800, 0, 320], [0, 800, 240], [0, 0, 1]], dtype=np.float64)
dist_coeffs = np.zeros((4, 1), dtype=np.float64)
ok, rvec, tvec = cv2.solvePnP(object_points, image_points, camera_matrix, dist_coeffs)
print(ok, rvec.shape, tvec.shape)
Choose The Method From Geometry
The default iterative method uses optimization and an initial estimate. P3P and AP3P have specific point-count requirements, IPPE is for coplanar points, and IPPE_SQUARE expects four points in a defined square order. Match the method to the actual scene geometry.
Validate Reprojection And Coordinate Conventions
Use cv2.projectPoints() with the estimated pose and compare projected pixels with observations. Large reprojection error can indicate bad correspondences, calibration, units, point order, or coordinate-frame assumptions. RANSAC can help when image correspondences contain outliers, but it does not repair a consistently wrong calibration model.
For related OpenCV geometry workflows, compare solvePnP with moments and keypoints. Read opencv moments and opencv keypoint for the related workflow.
Frequently Asked Questions
What does cv2.solvePnP() return?
It returns a success flag plus a rotation vector and translation vector that describe the object-to-camera pose.
What inputs does solvePnP need?
Provide corresponding 3D object points, 2D image points, a camera intrinsic matrix, and distortion coefficients.
How many points does solvePnP need?
The minimum depends on the chosen method and point geometry; general methods commonly need at least four points, while P3P variants have specific requirements.
How do I check whether solvePnP is accurate?
Reproject the object points with cv2.projectPoints() and measure reprojection error while checking calibration, units, correspondences, and coordinate conventions.
I have the following questions
1. Is there a robust method to get face landmarks for non-frontal faces?
2. How to stabilize face landmarks
dlib module in Python has an in-built method to detect faces and their alignment. The good thing is that its robust and uses complex algorithms to provide greater accuracy. Unfortunately, I would say, you’ll have to shift from OpenCV to dlib for both these purposes.
1. dlib is very much capable of identifying non-frontal faces and also detects faces close to profile. Following code can help you –
image = cv2.imread('image.jpg')
detector = dlib.get_frontal_face_detector()
dets = detector(image, 1)
Moreover, you can use
predictor = dlib.shape_predictor(args["shape_predictor"])to get facial landmark predictor.2. Using the predictor mentioned above, you can work around stabilizing face landmarks.
Regards,
Pratik
Thanks for the prompt answer
I am currently using dlib frontal face detector, so you think its performance is good compared to others.
on the other hand, I am using the dlib shape predictor, but for stabilization, I used Lucas Kanade optical flow estimator and Kalman filter and they improve the stability of the landmarks.
Regards
Hossam Alzomor
Yes, for ideal scenarios, these two methods would be best. Unfortunately, I have no idea about the performances of these two classes as I’ve never used them. But I’ve seen many big projects use them for the purposes you mentioned. Try using these algorithms and let me know how it goes.
Let me know if you need any other help.
Regards,
Pratik
how can i know camera_matrix in above code.
i want example
i know camera matrix concept
Camera matrix is array of format –
fx 0 cx
0 fy cy
0 0 1
This can be obtained by cv2.getOptimalNewCameraMatrix() method.
Can I get the camera’s distance from the object?
where did you get the 3d points for the face from?
For camera distance, maybe you’ll have to use a different algorithm. The points are manually entered into points_2D and points_3D.