
Dear friends,
This week, we go over steps 4, 5 and 6 of the book making process, including my favorite: making a photo book dummy!
It’s when we move from laying test print out on a table, to turning prints into a book-like object so we can feel how things work truly work together (or not!).
Also in this issue: the COVER REVEAL of Volume Two, and very special news about next Sunday.
As you may remember from our last step, test prints are our images printed on cheap regular paper in a small size, so we can lay them all out and get an overview of the story. They’re not the size they will be in the book.
A book dummy is a rough, cheap version of your book. Regular paper, folded and stapled, so you can hold it and turn its pages. It’s not a hand-made copy of the real thing. It’s just a way to feel the flow of the story in your hands, in a book object.
To make the Volume Two dummy, I took the final selection of my images, in sequence, and taped them in with washi tape. See below.
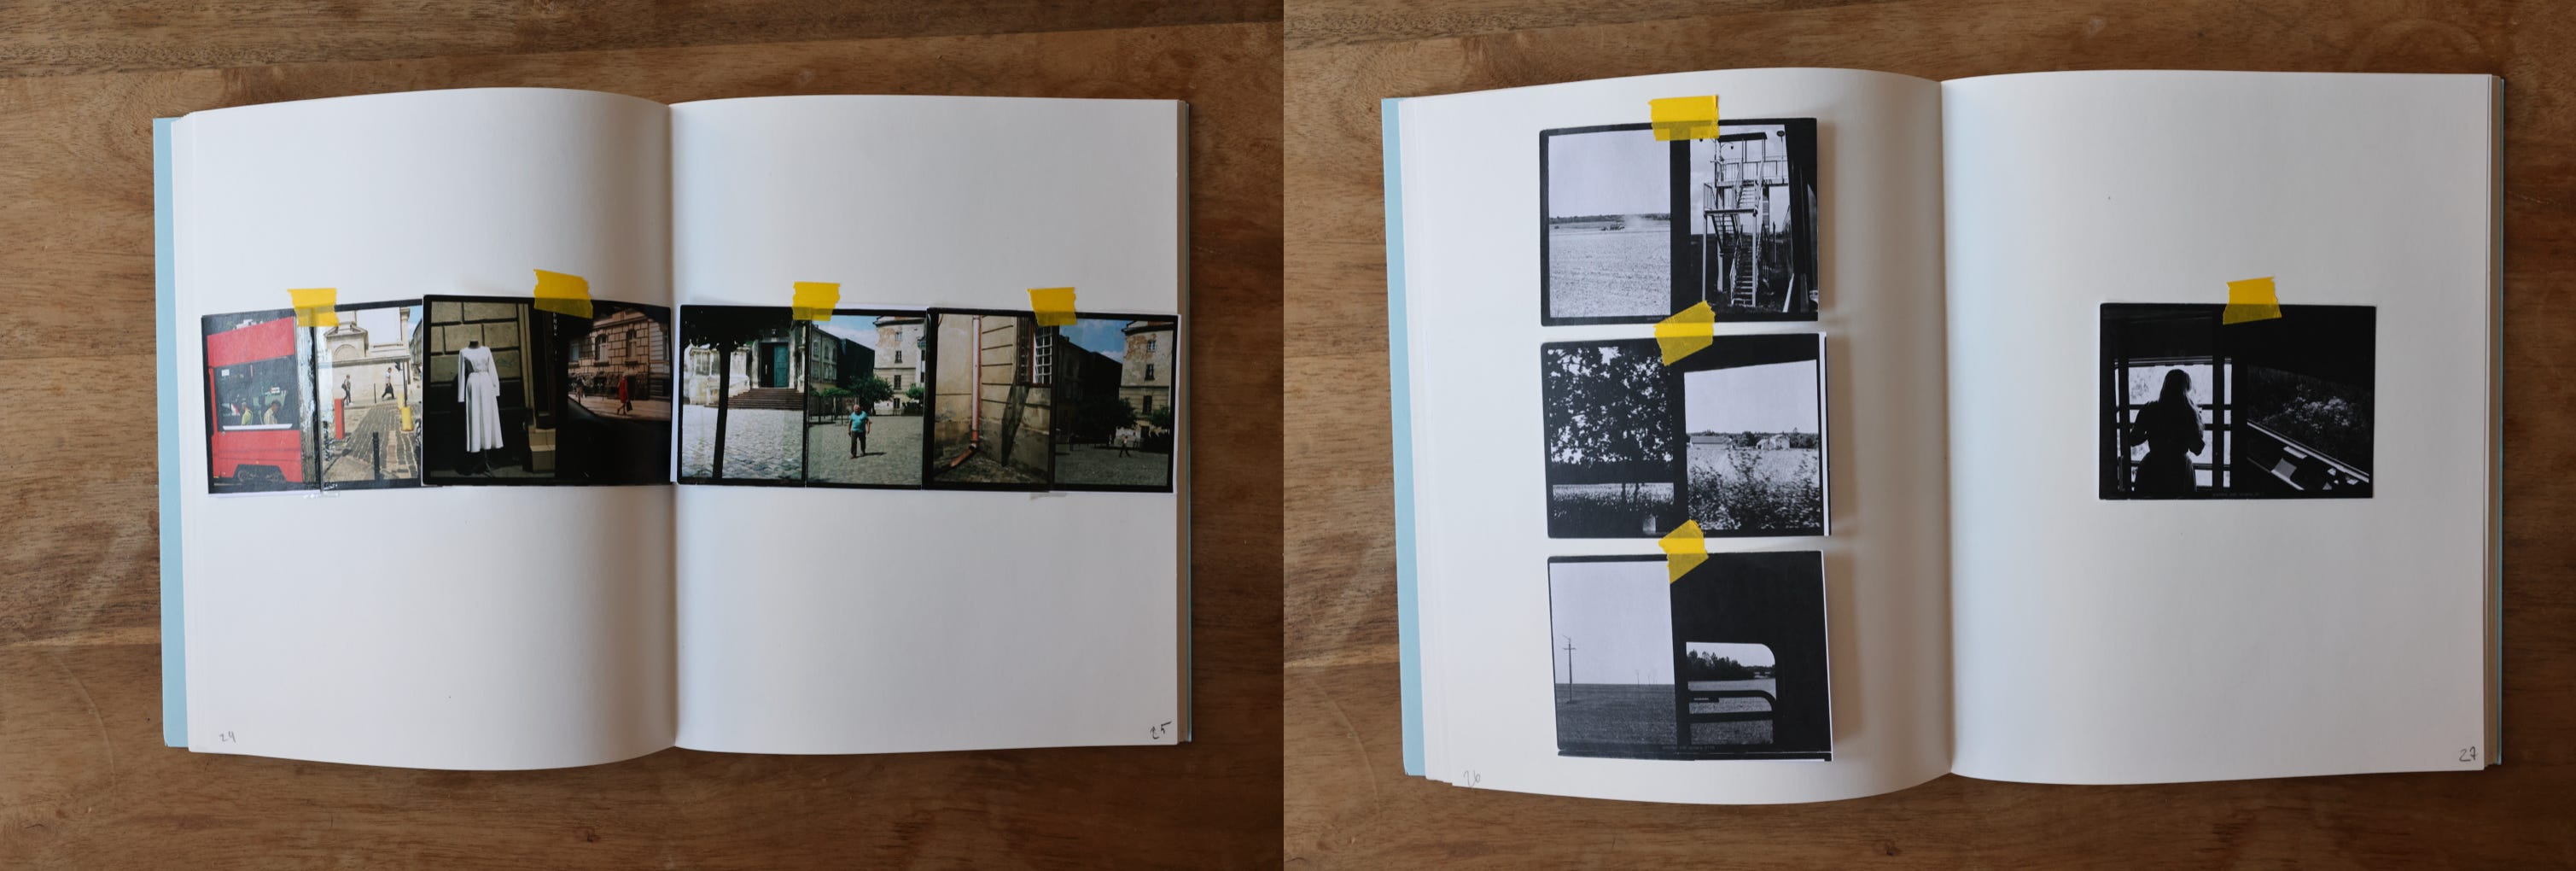
By making this dummy, I figured out some new things about the book that I would not have been able to figure out on screen or with a laid out set of test prints. I’ll get back to this in a sec.
I used an actual empty dummy copy of Volume One from two years ago, but your dummy can just some sheets of A4 printer paper, folded in half, and stapled down the middle.
Stick your images in, in order, with some tape. Once you’re done, go sit somewhere quiet and flip through the pages, trying to feel the arc of your story again.
Ask yourself questions that help you make it better. Does the opening image make you want to turn the page? Does the rhythm feel too slow or too fast anywhere? Do two photographs feel like they’re competing when they’re actually next to each other? Does the end leave you with the feeling you were after?
Next, give it to someone who isn’t a photographer and watch where they slow down and it they understand how you’re trying to guide them through your story.
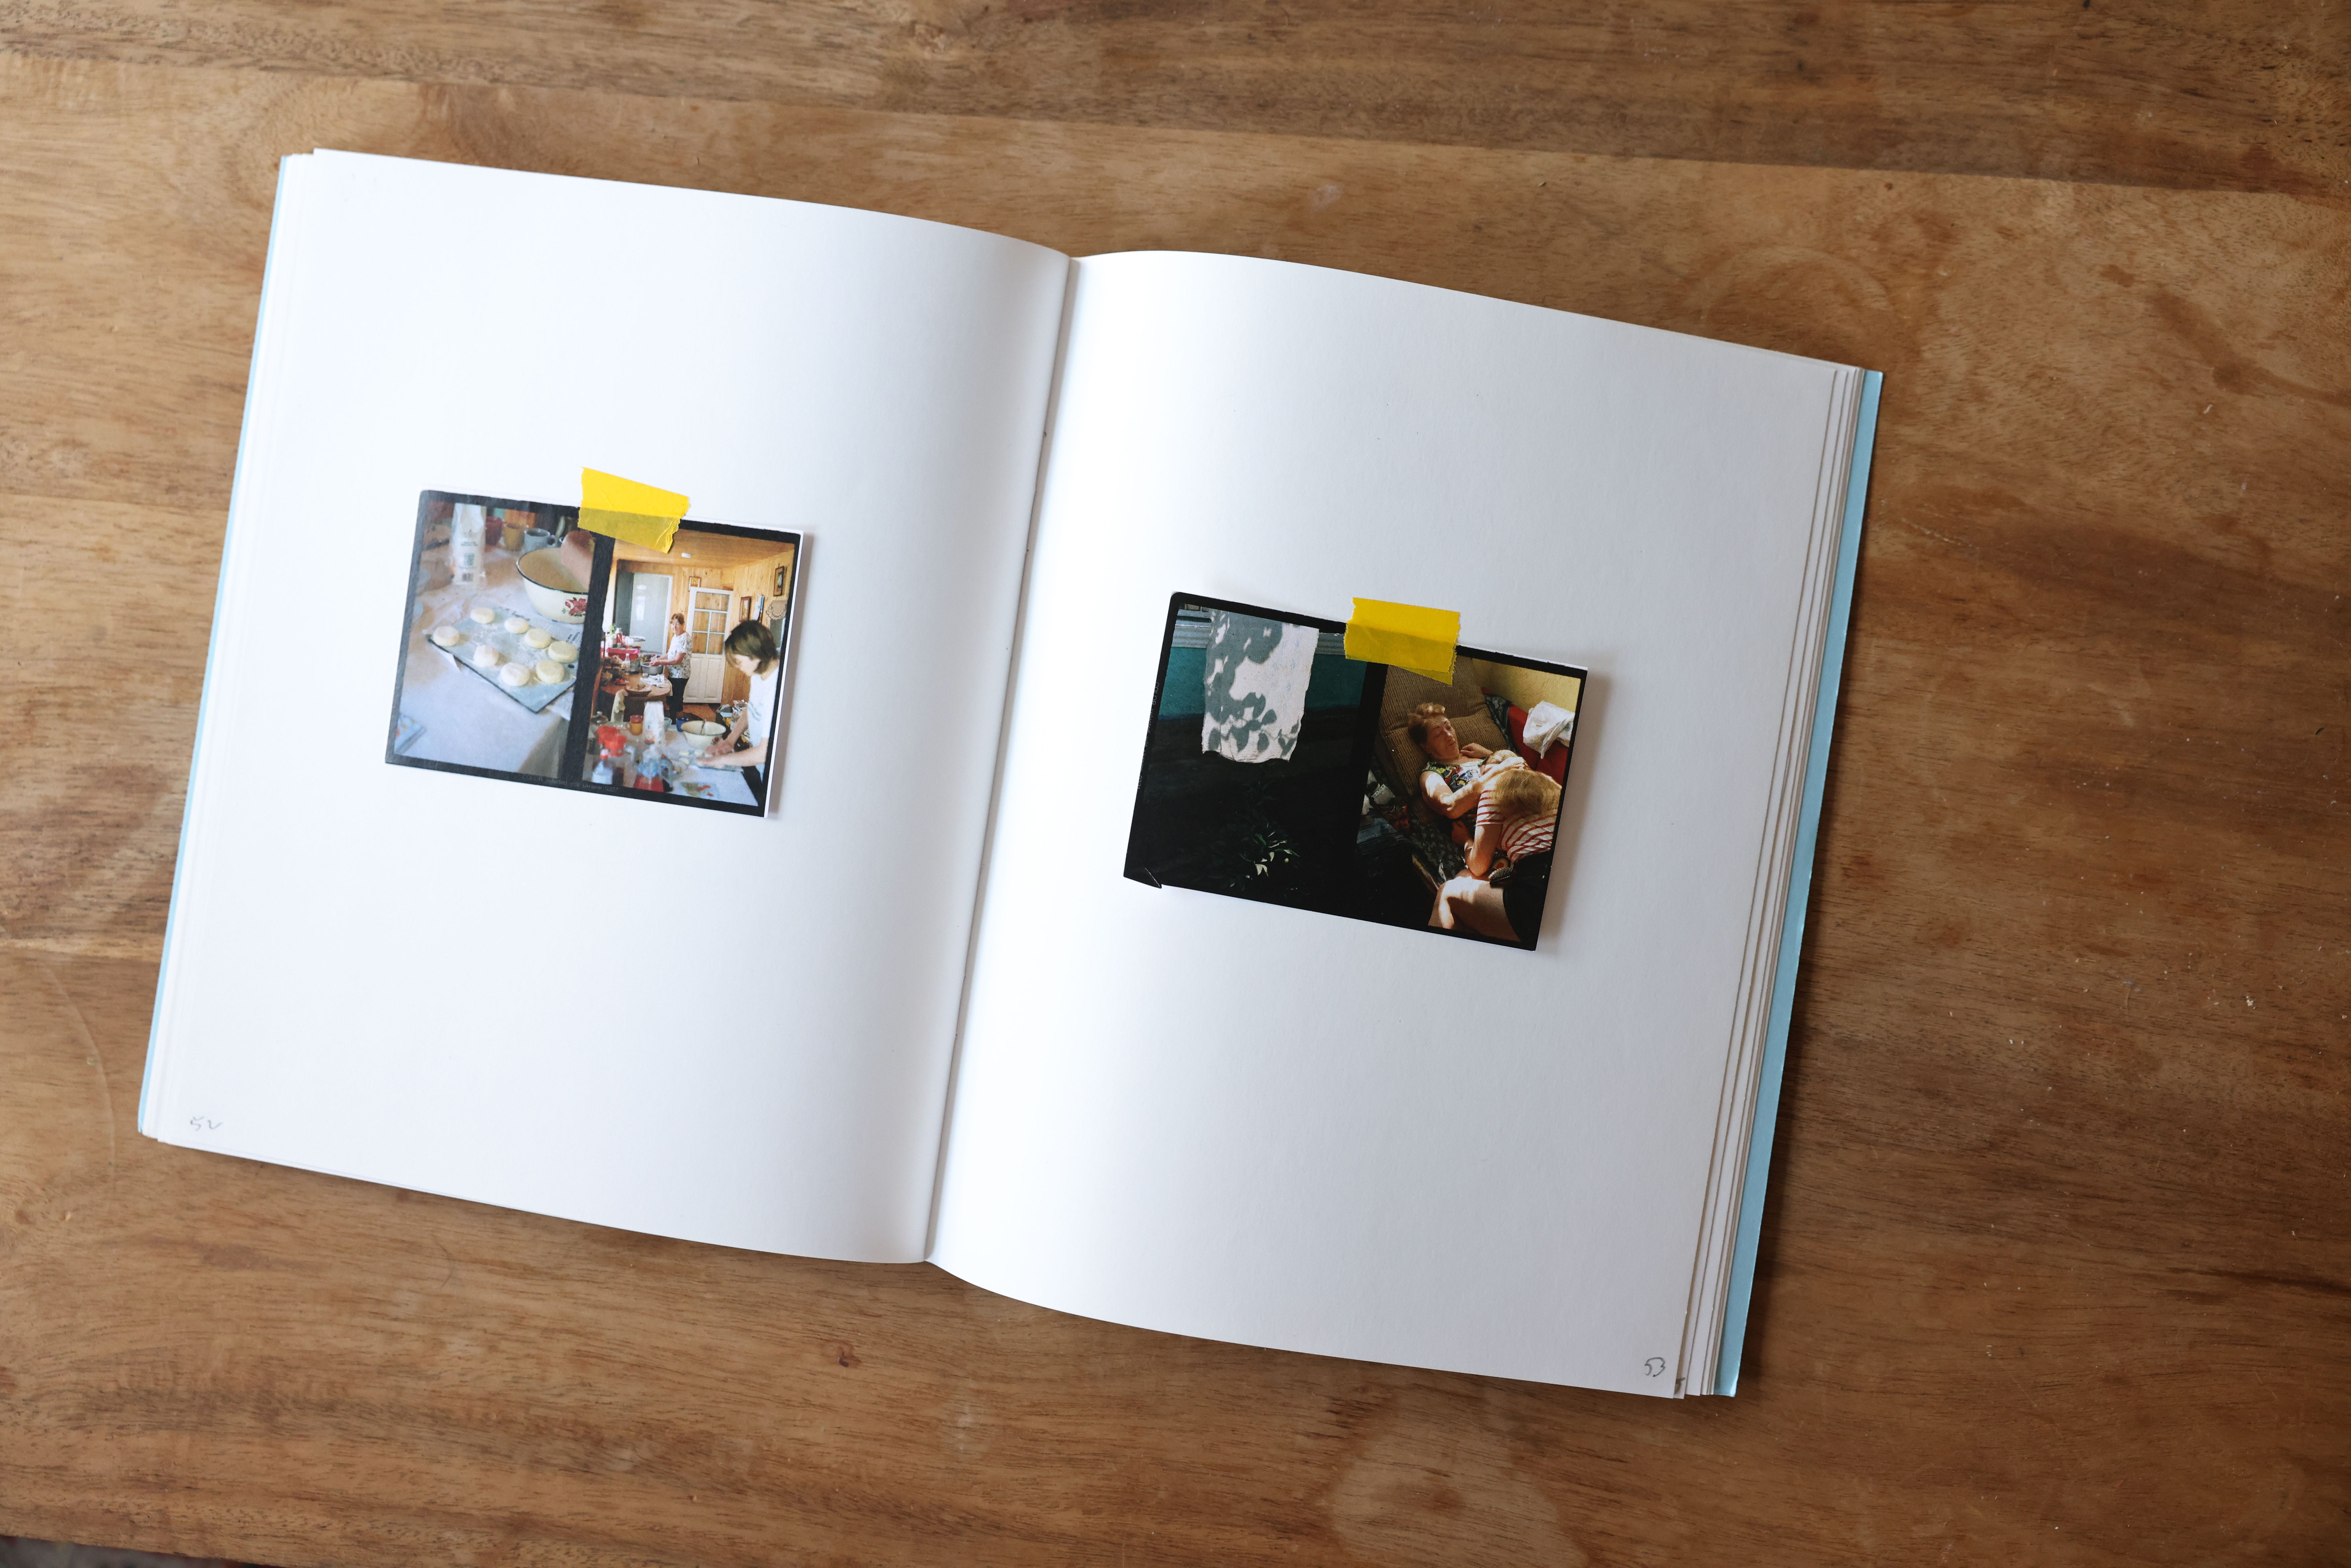
Layout is step 4 in the workbook, but I decided to cover it after step 5 in this issue because it made more sense this time. I'll keep this part short. It all comes down to one big idea:
Where an image sits on the page changes what the image means.
A small photograph with a lot of room around it feels quiet and thoughtful. The same photograph filling the page edge to edge feels like it’s coming right at you. Both can be great, depending on your project. The question you should ask yourself is what the picture is doing and what you want the reader to feel when they see it in the context of your book or zine.
For Volume Two, Maxwell George and I kept the airy system Dan Rubin built for Volume One. Generous white space, images that hover a little. Volume One was about therapeutic quiet walks around Amsterdam and that space fit this idea. Volume Two has many quiet moments too, but it also has kitchens, food, joy, city moments, country side moments, and people. There is a more happening in these images, and more tension between neighboring diptychs. Providing that space around the images gives all of that somewhere to live. Here are mock ups side by side for Volume One and Two.
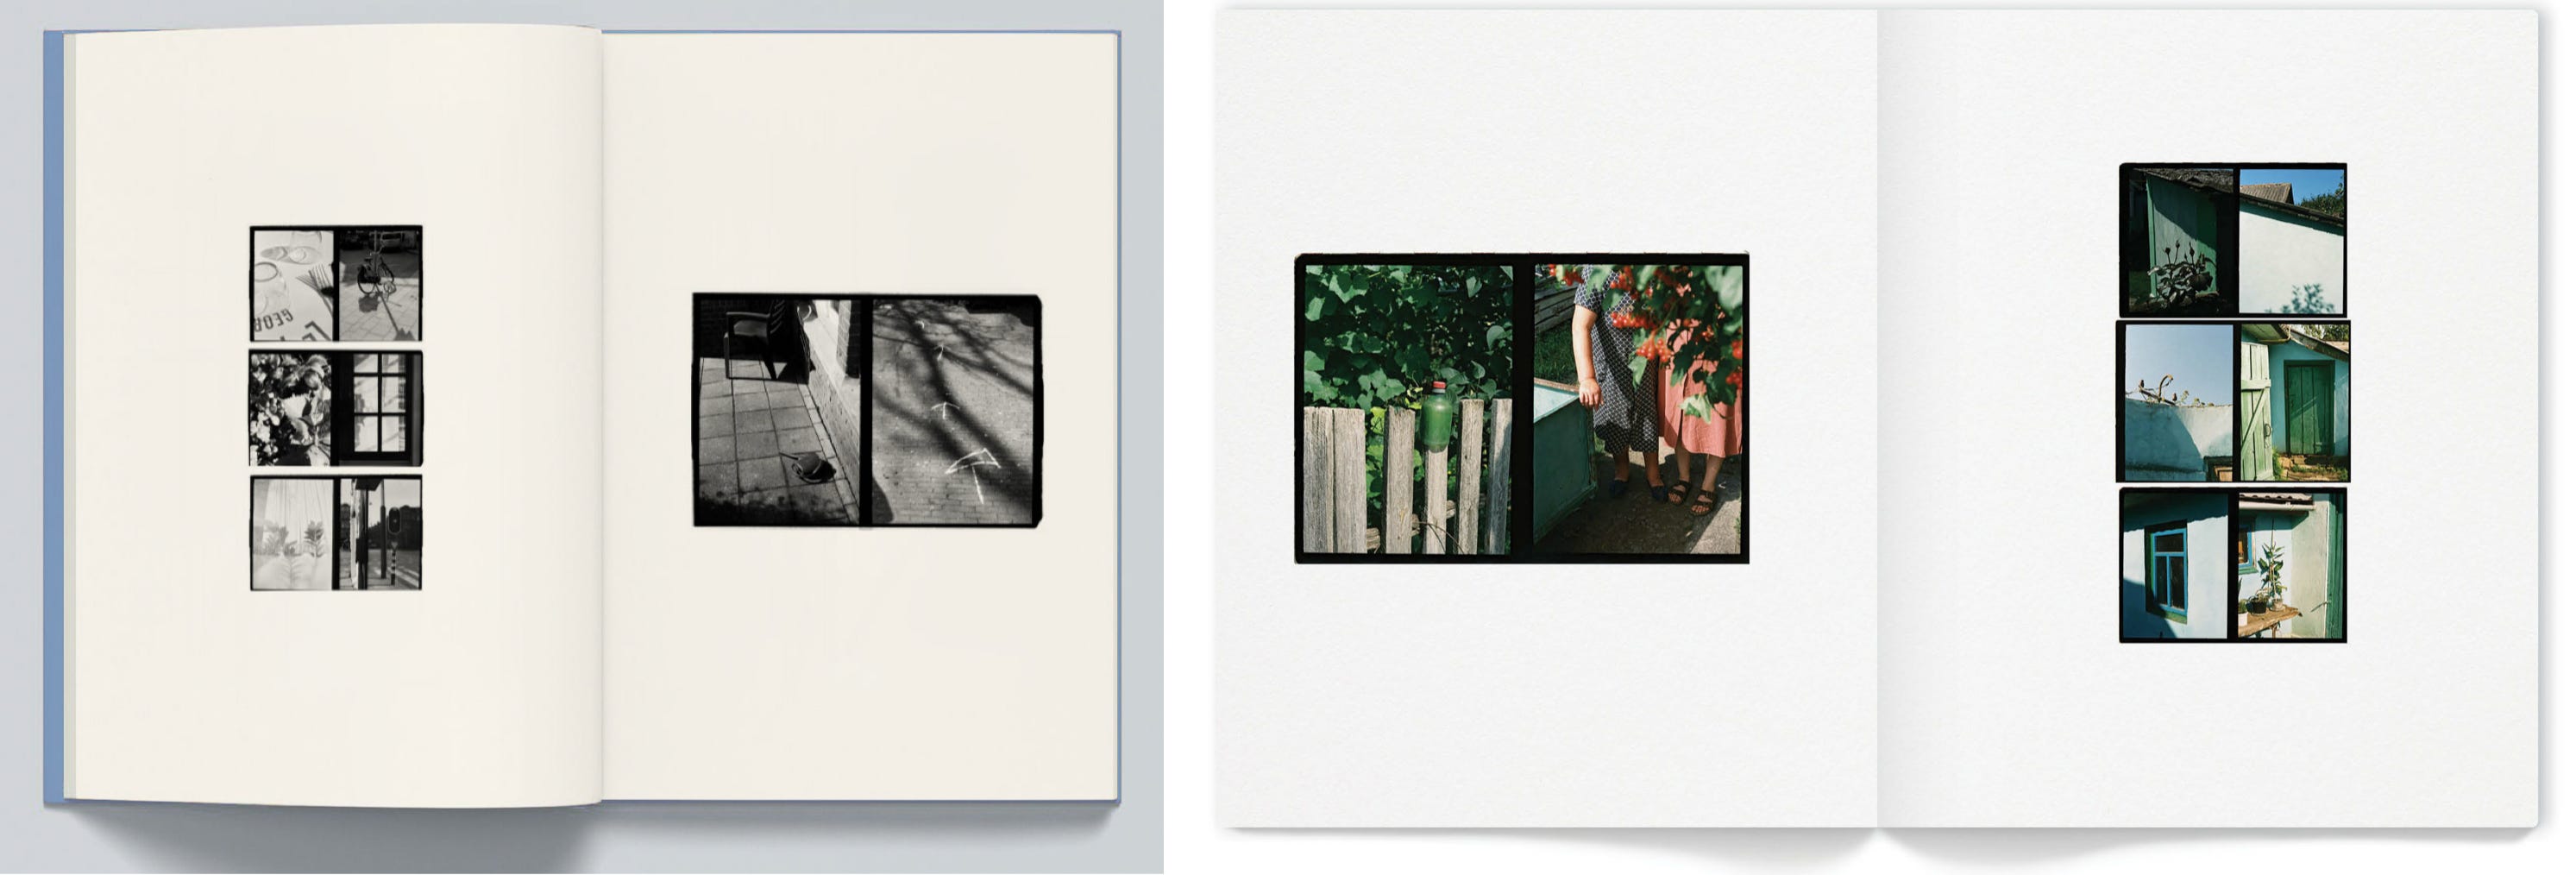
Other books might need exactly the opposite feeling with pictures that fully fill the page, because you might want the reader to feel claustrophobic or under pressure. But this series, with noticing at its center, will always be more about space and calmness.
Step 6 is the strangest one to write about, because it looks it’s not actually a step.
Once you have the dummy, read through it a few times, and maybe made some changes, walk away from it for a few days. Try to not think about it, make some other stuff, read the new Matt Haig novel, go swimming. (Or is that just my summer?)
When you’ve been staring at the same pictures for months you stop seeing what’s there and start seeing what you meant. I’ve been in this part for the last week and it has been super productive. Some images ended up moving to another part of the sequence, which gave the new sequence more breathing room and a lovelier arc.
One spread got split up when I realized two pictures that were paired up were saying the same thing. So I dropped another image in to replace one of the old ones. That new image had not made it in the original “final” selection. It was a maybe, that turned into a must-have because it connects one part of the story to the next.
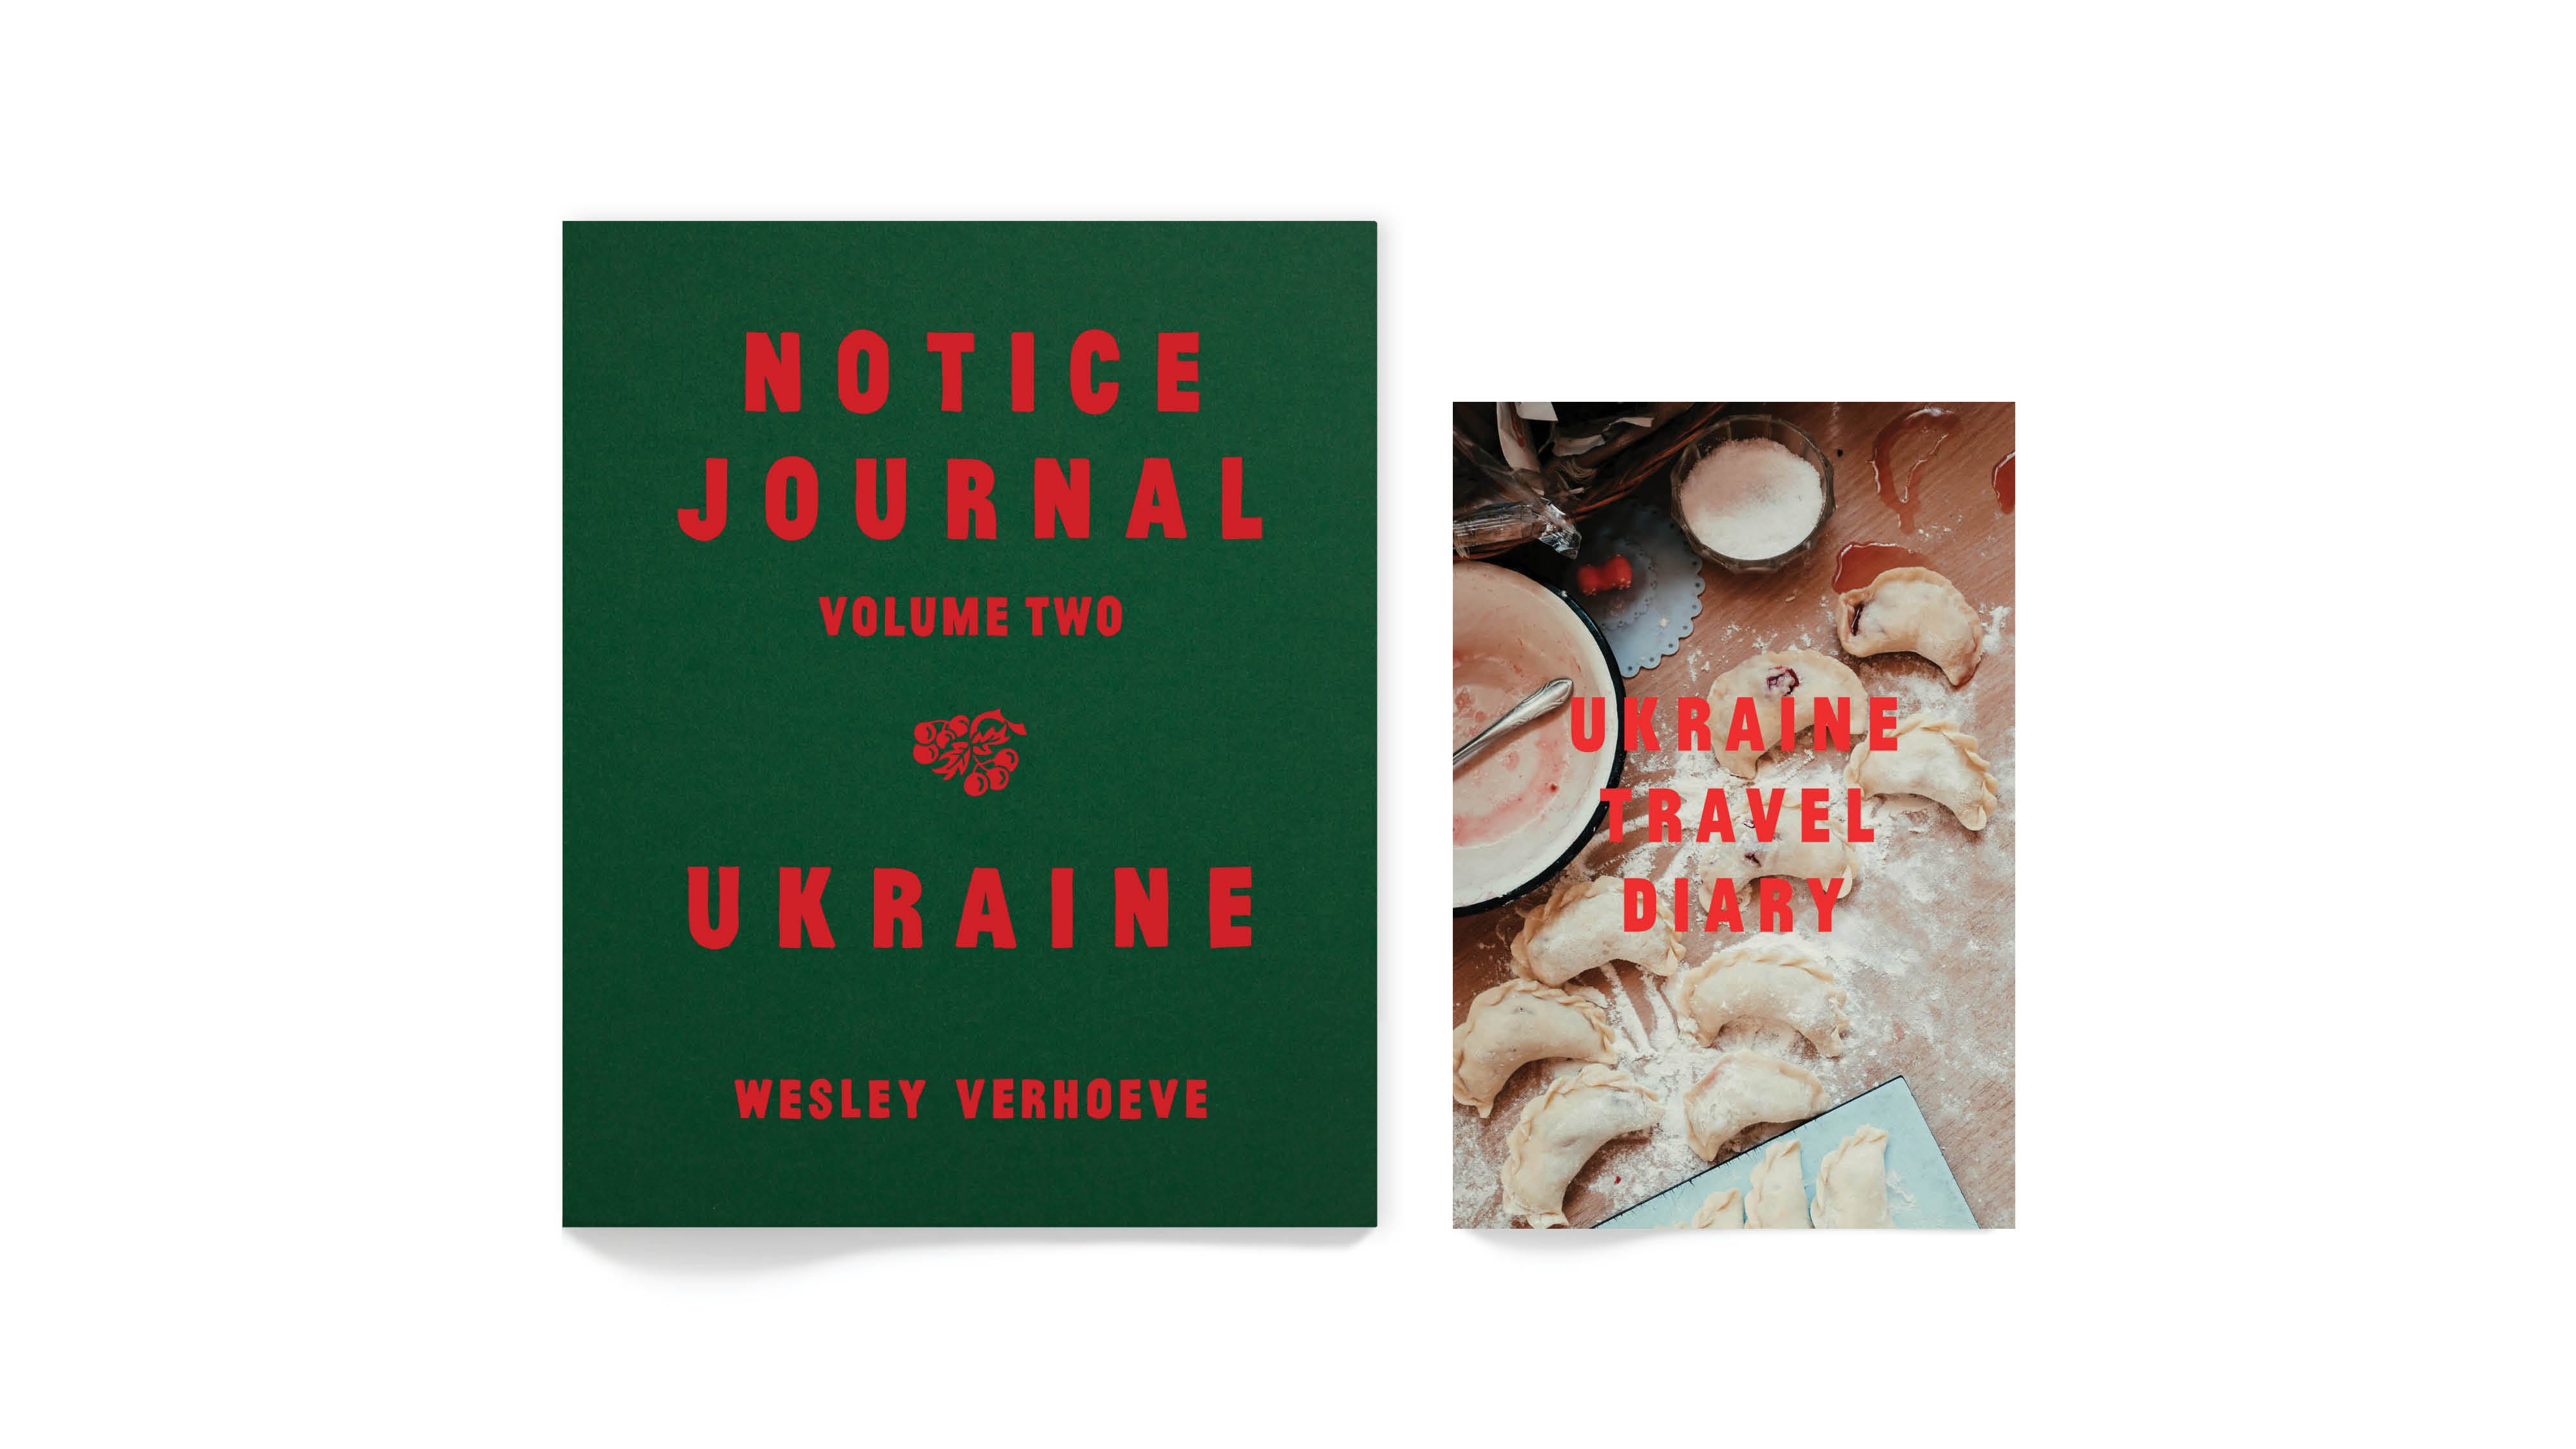
I’m SO excited to share the cover with you today. Maxwell and I worked on it for weeks and there’s a good longer story behind it, which I’ll save for its own issue.

Two colors, dark green and red, taken from the kalyna berry and its leaves which can be seen in several photos in the book. The kalyna is a Ukrainian national symbol tied to family, soil, and beauty, which is what the photographs inside are about. It’s my most meaningful work yet, and we did a lot of research to honor that with this cover. More soon.
Next Sunday, August 16, this book goes up for preorder. It’s a big step for me, and it makes me feel excited and nervous and then excited again.
The book goes to press on August 20, just four days later, and preorder money goes straight into paying for the print run. Printing is expensive. I’ll write about the actual numbers in a future issue, but the short version is that the only reason I get to make this book at robstolk, one of the best printers in the world, is because of your support.
Which is why I’ve made you something special as a thank you.
Anyone who orders in the first two weeks, August 16 through 31, also receives the Ukraine Travel Diary. It’s a 32-page zine, a little smaller than the book. It will be a different selection of images, shot in a very different way (not in half-frame). It will also include notes from my own travel diary from those weeks.
This zine won’t be sold on its own, it won’t be reprinted, and it won’t be available digitally later. This is the only way to get it.
More next Sunday!
I am so proud of this work and happy to share every step of the way with you. In case you missed it, here are the earlier steps in this book-making diary:
Step 1 - Process 248 - What is your book about?
Step 2a - Process 251 - How to pick your images
Step 2b - Process 252 - The fear of getting it wrong
Step 3 - Process 253 - Sequencing your pictures
Warmly,
Wesley
P.S. Process is a free weekly newsletter, and always will be. Support from the Process Photo Club is how the free part is possible. Not a member yet? Join here.
Members get 30-50%-off my photo books and 100% off all five Process Workbooks.
P.P.S. All my film is developed by Carmencita Film Lab. They’re the best and they love what they do. Use code PROCESS for a free upgrade.
Browse the Process Archive for more articles.
Check out the Process Photo Club perks page.
Upcoming Workshops: London (Sept 5), Paris (Nov 15). More info here.
Comments
Nothing yet. Say the first thing.
Sign in to join the conversation.