
Nowadays trunk-based development as a branching model is preferred compared to something like Git Flow. But creating a CI/CD pipeline is more challenging since we deploy to every environment from the same branch. In this post, I create a CI/CD pipeline with GitHub actions that deploys to multiple environments. We will start with a basic implementation and improve it step by step.
This post will not be about the basics of GitHub actions and won’t go into details about trunk-based development. We start with a basic introduction to trunk-based development in order to have a shared understanding:
A Brief Introduction to Trunk-Based Development
Trunk-based development involves frequent, small code check-ins to a shared code repository, typically known as the
“trunk”. This approach contrasts traditional development models (like
Git Flow), which often involve long,
isolated development cycles followed by large code merges. In trunk-based development, teams are encouraged to commit
their code to the trunk frequently, often multiple times per day. This allows for continuous integration and continuous
deployment (CI/CD), as well as easier collaboration and code reviews. You also don’t have branches per environment like
a development branch that is deploying to a development environment. You integrate all code on the “trunk”.
Trunk-Based Development is considered the best practice nowadays. You can learn more about it on trunkbaseddevelopment.com.
Creating GitHub Actions Workflows
This is the basic CI/CD pipeline I’d like to create:
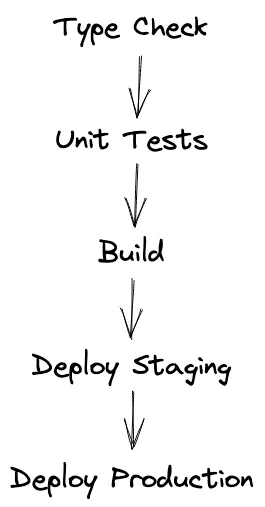
At first, we will run some basic checks, then we build the artifact(s) and after that, we deploy it to a staging and a production environment. Yes, we can do a lot more like integration and E2E tests, more environments etc. but this should be sufficient to showcase the main points.
I will be using an AWS CDK deployment as an example but the pipelines will be applicable for everything that creates
some kind of a deployable artifact (like a dist folder).
The Basic GitHub Action Workflow
Let us start with a very basic pipeline. We will build upon that and refine it in the following sections.
This is how the code for a basic GitHub Action that deploys to a staging and a production environment could look like:
on:
push:
branches:
- main # your "trunk" branch
jobs:
build-and-deploy:
name: Build & Deploy
runs-on: ubuntu-latest
# Required for GH OIDC
permissions:
id-token: write
contents: read
steps:
- name: Checkout
uses: actions/checkout@v3
- name: Setup Node and Cache
uses: actions/setup-node@v3
with:
node-version: 16.18
cache: npm
- name: Install dependencies
run: npm ci
- name: Type Check
run: npm run type-check
- name: Unit Tests
run: npm run test
- name: Create Artifact
run: npm run synth # often 'npm run build'
- name: Configure AWS credentials
uses: aws-actions/configure-aws-credentials@v1-node16
with:
role-to-assume: ${{ secrets.AWS_DEPLOY_ROLE_ARN }}
aws-region: eu-central-1
- name: Deploy Artifact to Staging
run:
npx cdk deploy --app "./cdk.out/assembly-Staging" --all --concurrency 10 --method=direct --require-approval
never
- name: Deploy Artifact to Production
run:
npx cdk deploy --app "./cdk.out/assembly-Prod" --all --concurrency 10 --method=direct --require-approval never
We trigger the pipeline on pushes to main (our “trunk”). Remember, we don’t have different branches per environment.
We deploy to all our environments from this branch.
We have one single job build-and-deploy that includes all our steps of the pipeline. The steps are implementing the
flow that is shown in the introduction of this chapter. We build the artifacts that should be deployed once and then
deploy them to the different environments. We store our secrets in the GitHub secrets of the repository
(AWS_DEPLOY_ROLE_ARN in this case).
Sidenote: I am using Open ID Connect to get short-lived credentials for my AWS account. This is a security best practice and safer than using long-lived credentials like a username and password via environment variables.
While this already works, we can do better by leveraging GitHub environments.
Leveraging GitHub Environments
GitHub environments provide some additional features like specifying different secrets per environment (with the same name), having a deployment history per environment, and more. You can learn more about environments and their features in the GitHub documentation.
Environments have to be configured per job in our GitHub Action workflow. Currently, we only have a single job. Now we
split it up into three distinct jobs: build, deploy-staging and deploy-production. This is what it looks like:
on:
push:
branches:
- main # your "trunk" branch
jobs:
build:
name: Build
runs-on: ubuntu-latest
steps:
- name: Checkout repo
uses: actions/checkout@v3
- name: Setup Node and Cache
uses: actions/setup-node@v3
with:
node-version: 16.18
cache: npm
- name: Install dependencies
run: npm ci
- name: Type Check
run: npm run type-check
- name: Unit Tests
run: npm run test
- name: Create Artifact
run: npm run synth # often 'npm run build'
- name: Upload Artifact
uses: actions/upload-artifact@v3
with:
name: cdk-out
path: cdk.out # often 'dist'
deploy-staging:
name: Deploy to Staging
runs-on: ubuntu-latest
needs: build
environment: staging
# required to interact with GitHub's OIDC Token endpoint
permissions:
id-token: write
contents: read
steps:
- name: Download Artifact
uses: actions/download-artifact@v3
with:
name: cdk-out
path: cdk.out
- name: Configure AWS credentials
uses: aws-actions/configure-aws-credentials@v1-node16
with:
role-to-assume: ${{ secrets.AWS_DEPLOY_ROLE_ARN }}
aws-region: eu-central-1
- name: Deploy Artifact
run:
npx cdk deploy --app "./cdk.out/assembly-Staging" --all --concurrency 10 --method=direct --require-approval
never
deploy-production:
name: Deploy to Production
runs-on: ubuntu-latest
needs: [build, deploy-staging] # build - if you want to deploy in parallel with Staging
environment: production
# required to interact with GitHub's OIDC Token endpoint
permissions:
id-token: write
contents: read
steps:
- name: Download Artifact
uses: actions/download-artifact@v3
with:
name: cdk-out
path: cdk.out
- name: Configure AWS credentials
uses: aws-actions/configure-aws-credentials@v1-node16
with:
role-to-assume: ${{ secrets.AWS_DEPLOY_ROLE_ARN }}
aws-region: eu-central-1
- name: Deploy Artifact
run:
npx cdk deploy --app "./cdk.out/assembly-Prod" --all --concurrency 10 --method=direct --require-approval never
The new parts are the uploading and downloading of the artifact that is created in the build job and the environment
per environment-specific job.
By uploading and downloading the initially created artifacts we only have to actually build the artifacts once and can be sure that they are stable (and not differ due to different builds).
After running this pipeline for the first time you’ll see the “Environments” section in the sidebar in your GitHub repository:
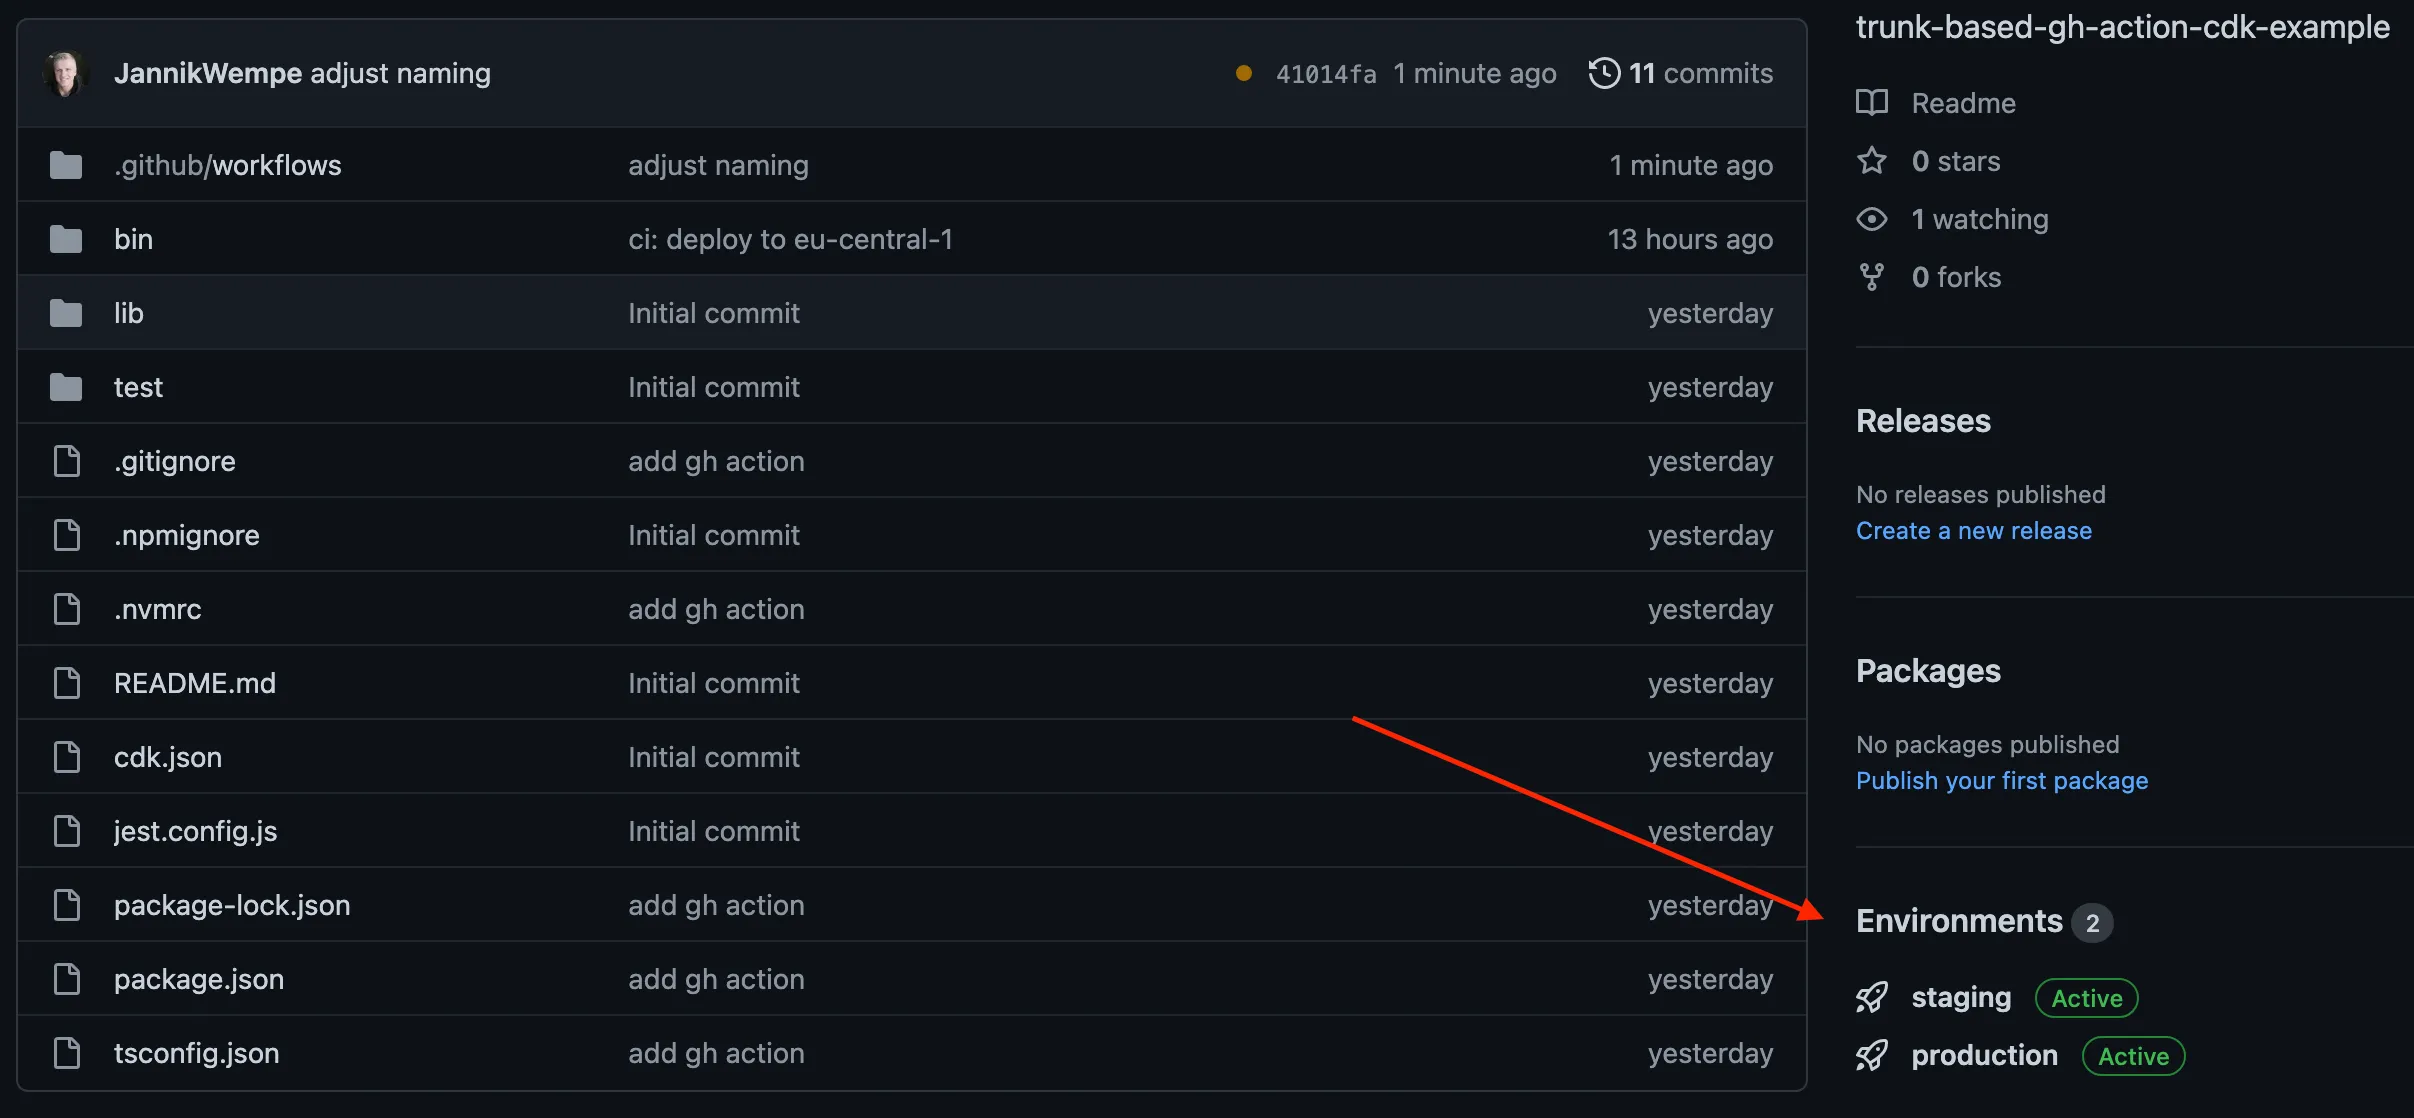
When clicking on it you will see the deployment history of that environment:
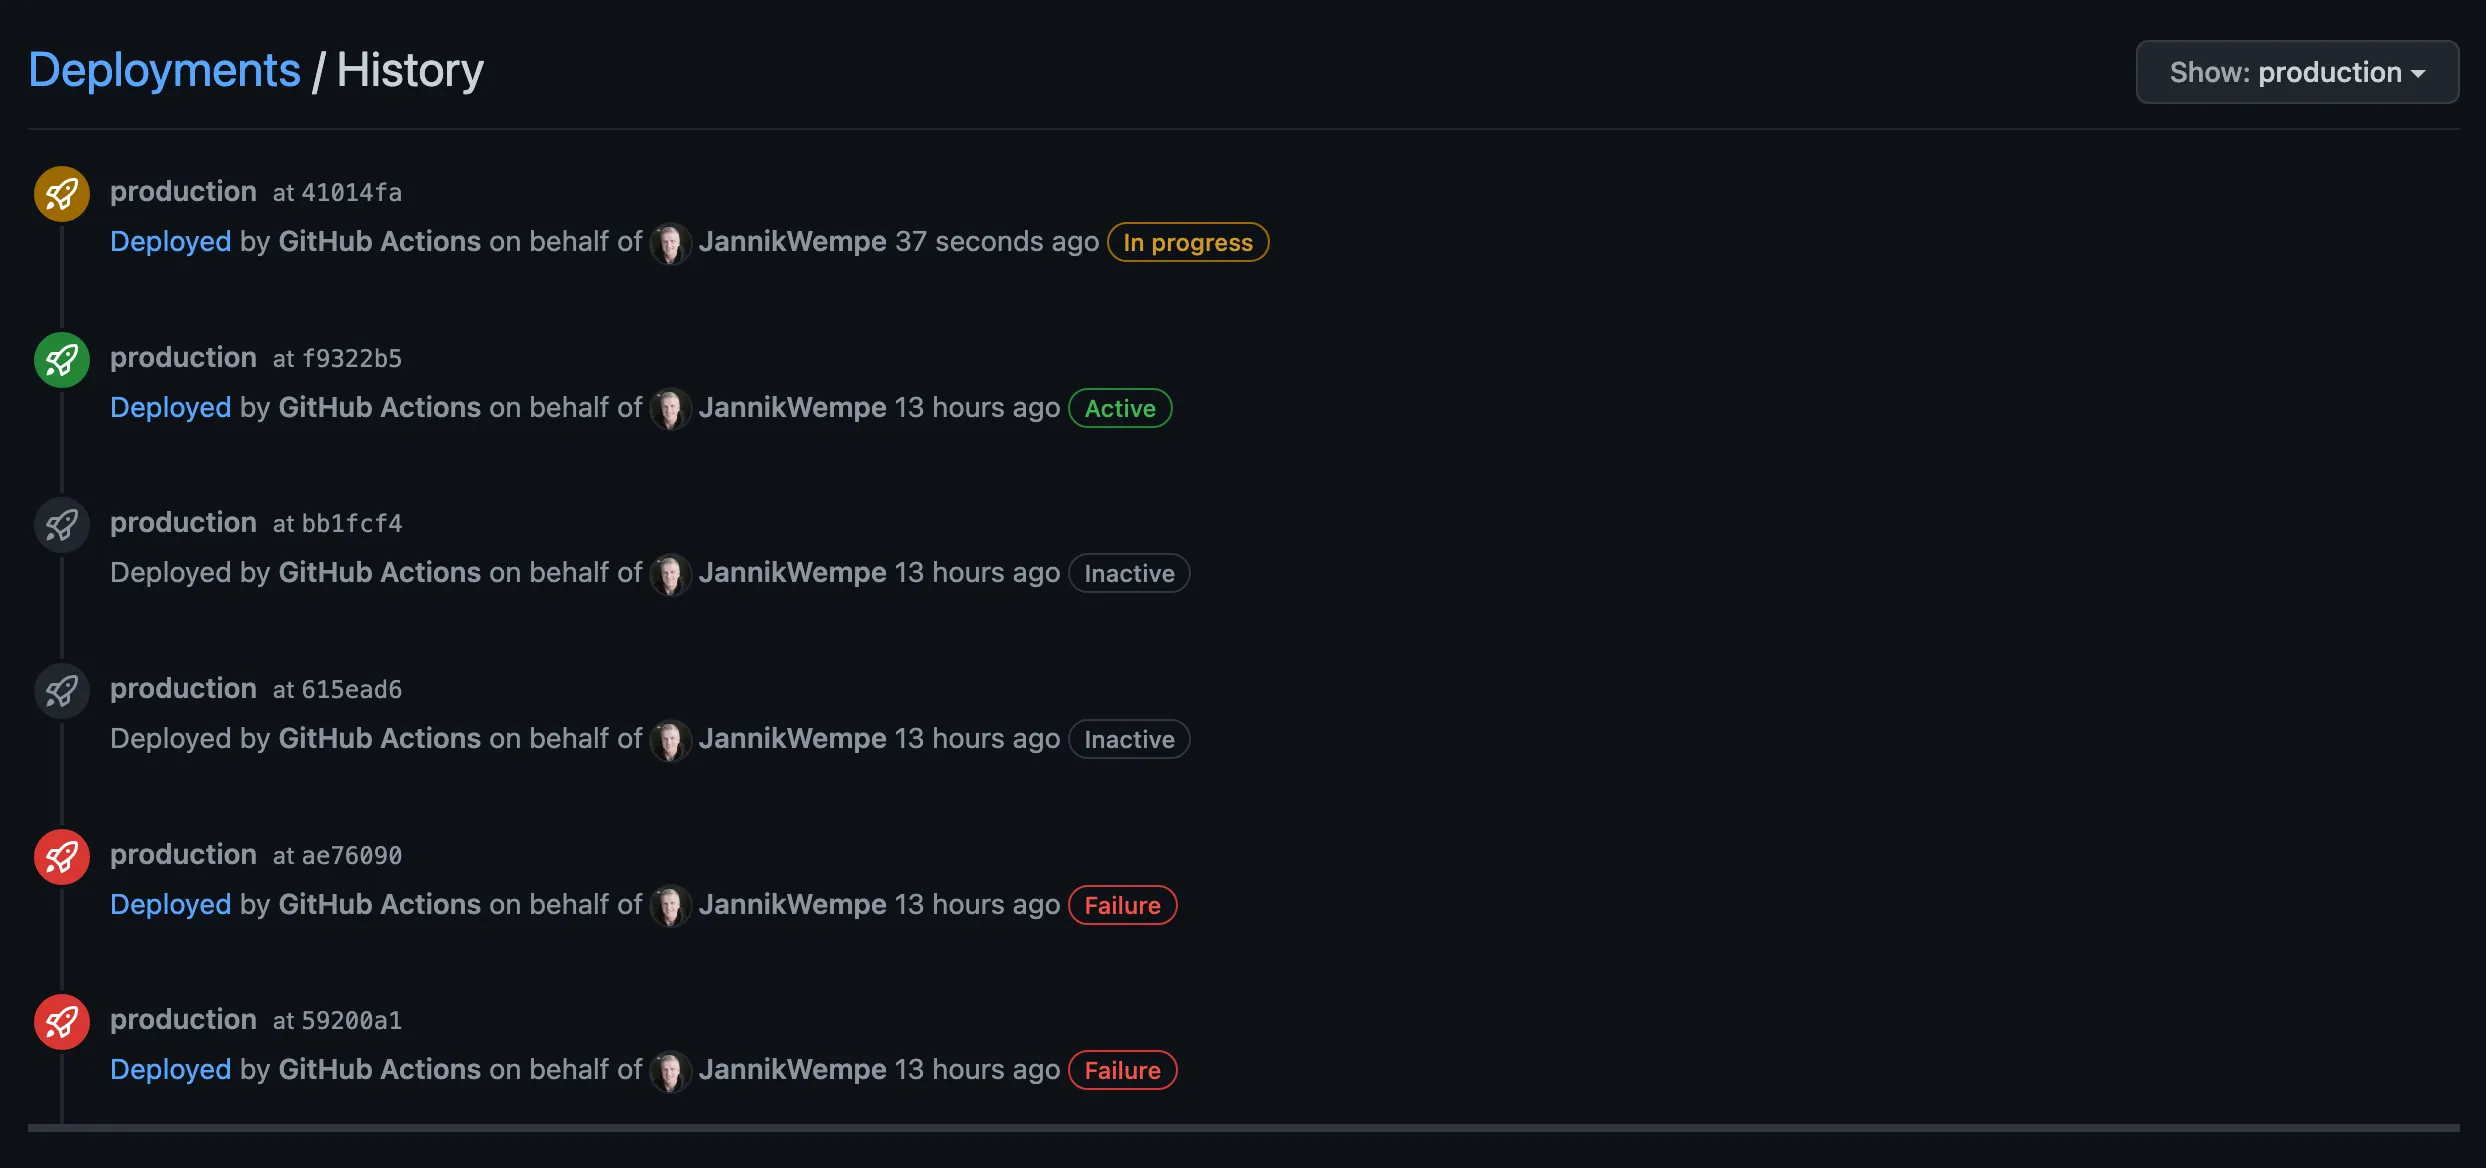
Ideally, your history looks a lot greener 😅
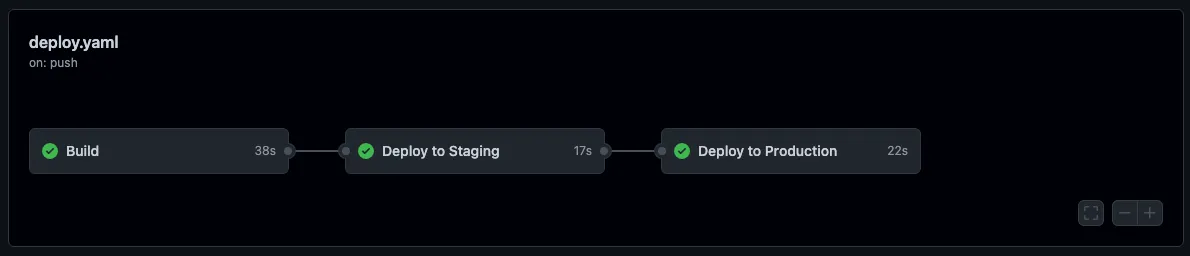
In addition to that, we can now re-run only the failed jobs (and not our whole pipeline). That was not possible with one job.
Okay, this is an improvement, but there is one more thing: Often you don’t want to automatically deploy to production but rather have a manual trigger in order to promote the artifact to production in order to have the opportunity to check the staging environment before actually releasing your changes to the user. How to do that with GitHub Actions?
Adding a Manual Trigger for a Production Deployment
You can activate the “Required reviewers” config for your production environment under Settings -> Environments -> production:
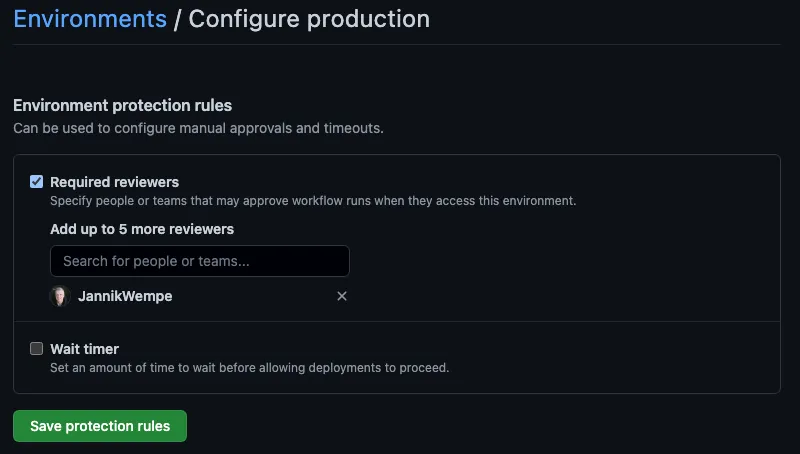
That way you don’t have to change anything in your pipeline. This is what it looks like:
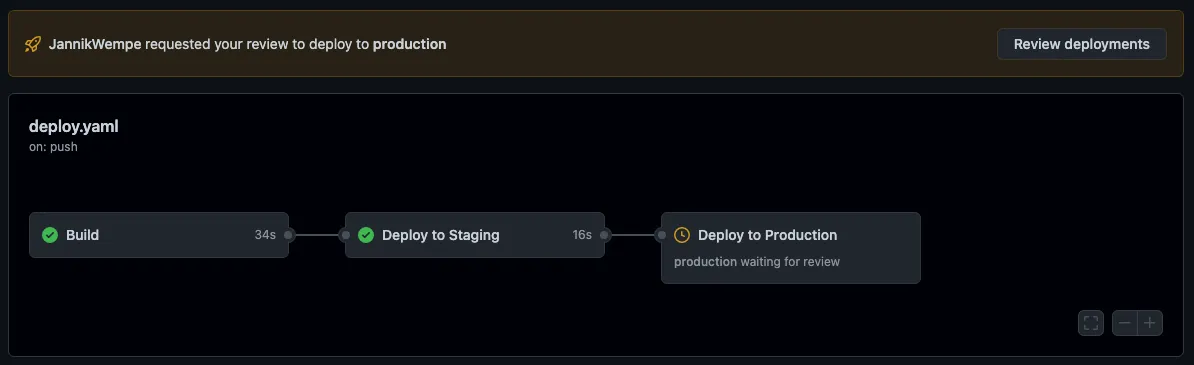
It will not be deployed to production without a review by an authorized person.
Unfortunately, this simple solution is often not an option. For private repositories, it is only available to GitHub Enterprise customers and it has some other limitations like max. 6 authorized reviewers (teams are also possible). You can learn more about reviewing deployments in the GitHub documentation.
There is an alternative to that using releases.
Using Releases for Manual Steps
Instead of one workflow with all of our jobs, we will now have two. One for building the artifacts, deploying to staging, and creating a release, and a second one for deploying to production if a specific release has been published.
This is how the first workflow now looks like:
on:
push:
branches:
- main # your "trunk" branch
jobs:
#
# the 'build' and 'deploy-staging' jobs stay exactly the same; omitted
#
create-release:
name: Create Release
runs-on: ubuntu-latest
needs: build
steps:
- name: Download Artifact
uses: actions/download-artifact@v3
with:
name: cdk-out
path: cdk.out
# we can't attach a folder to a release
- name: Zip Artifact
run: |
zip -r cdk.out.zip cdk.out
- name: Create Release Tag
id: create-release-tag
# left pads the run number with zeros to a length of 4; better alphabetical order
run: echo "tag_name=r-$(printf %04d $GITHUB_RUN_NUMBER)" >> $GITHUB_OUTPUT
- name: Create Draft Release
uses: softprops/action-gh-release@v1
with:
tag_name: ${{ steps.create-release-tag.outputs.tag_name }}
name: Release ${{ steps.create-release-tag.outputs.tag_name }}
body: |
## Info
Commit ${{ github.sha }} was deployed to `staging`. [See code diff](${{ github.event.compare }}).
It was initialized by [${{ github.event.sender.login }}](${{ github.event.sender.html_url }}).
## How to Promote?
In order to promote this to prod, edit the draft and press **"Publish release"**.
draft: true
files: cdk.out.zip
We download the artifact from the build job, zip it, and create a release as a draft attaching the zipped artifact.
The body of the release can be written in markdown. You can add additional information to the release itself. Here you
find a
reference to the information that is available in a push-triggered workflow.
Releases are always tied to tags. I have created a basic tag name that uses the GITHUB_RUN_NUMBER with a prefix. I
also added some left padding to have the releases show up in alphabetical order. If you use semver or any other
convention you can change the tag name there.
This is an example release that has been created with the previously shown workflow:
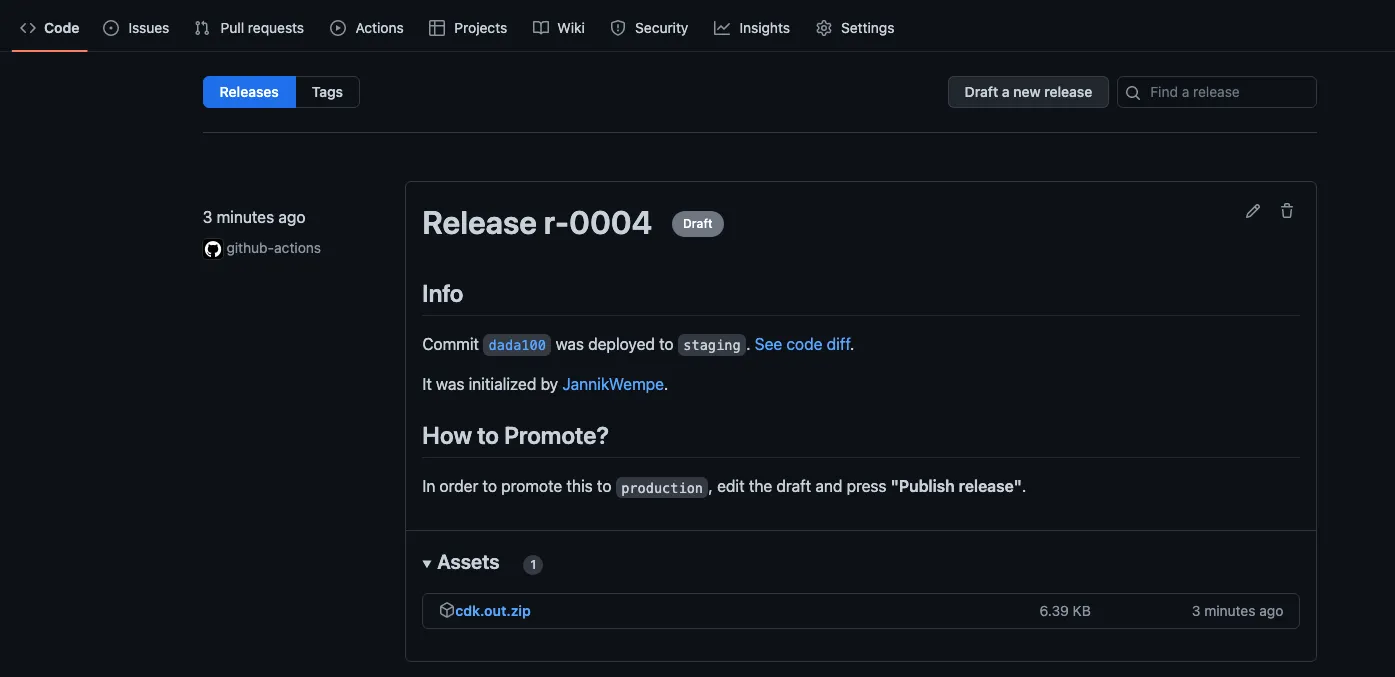
Editing that draft release and clicking on “Publish release” will trigger the next workflow that deploys the artifacts to production:
on:
release:
types: [published]
jobs:
release-production:
name: Release to Production
if: startsWith(github.ref_name, 'r-') # the prefix we have added to the tag
environment: production
runs-on: ubuntu-latest
permissions:
id-token: write
contents: read
steps:
- name: Get Artifact from Release
uses: dsaltares/fetch-gh-release-asset@master
with:
version: ${{ github.event.release.id }}
file: cdk.out.zip
- name: Unzip Artifact
run: unzip cdk.out.zip
- name: Configure AWS credentials
uses: aws-actions/configure-aws-credentials@v1-node16
with:
role-to-assume: ${{ secrets.AWS_DEPLOY_ROLE_ARN }}
aws-region: eu-central-1
- name: Deploy Artifact
run:
npx cdk deploy --app "./cdk.out/assembly-Prod" --all --concurrency 10 --method=direct --require-approval never
This workflow gets triggered on the release published event which gets triggered after a release, pre-release, or
draft of a release was published. You can look up the
details on the release published event in the GitHub documentation.
In addition to that, we only run the release-production job if the reference of the release that triggered the
workflow starts with the prefix for the tag we have created earlier.
That is it. You can see the published releases in the sidebar on the GitHub UI:
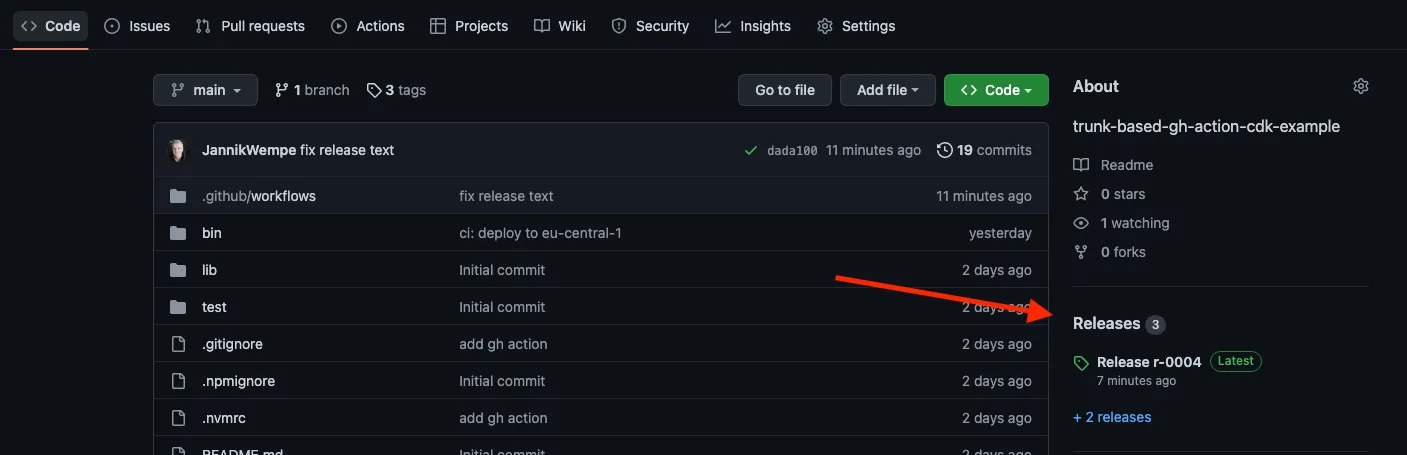
I like this approach since you have GitHub releases for your actual production releases. That releases have the deployed artifacts attached. That way you can re-deploy any previously deployed artifact easily. This enables rollbacks to previous releases.
Conclusion
GitHub Actions provide us with a lot of opportunities. I myself haven’t used features like up-/downloading artifacts, environments, creating releases etc. Knowing about them opens up new doors. I now prefer having multiple jobs that I can re-run independently instead of a single job that is doing everything. (I was actually wondering for a long time what the difference between “Re-run all jobs” vs. “Re-run failed jobs” is. There were none for me.)
Hopefully, you learned a thing and maybe can use it in your own GitHub Action workflows.
Comments
Nothing yet. Say the first thing.
Sign in to join the conversation.