
March 26, 2025 by Rob Conery, @robconery.com, Burke Holland, @burkeholland
Earlier this month, we announced the general availability of custom instructions in Visual Studio Code. Custom instructions are how you give Copilot specific context about your team's workflow, your particular style preferences, libraries the model may not know about, etc.
In this post we'll dive into what custom instructions are, how you can use them today to drastically improve your results with GitHub Copilot, and even a brand new preview feature called "prompt files" that you can try today.
Smaller prompts, better results with a simple Markdown file
Working with GitHub Copilot can supercharge your development process, but there is a learning curve when it comes to prompting effectively. It can take a few tries to get the right answer you want, which usually means rephrasing your question or prompt. Even then, Copilot will speed up your workflow!
But did you know that you can "tune" GitHub Copilot to better suit your needs? By using a simple Markdown file, you can provide Copilot with specific instructions that will help it understand your project better. In this post, we'll walk you through the process of creating and using custom instructions, a newly-released feature in VS Code.
Try this: create a file in your project called .github/copilot-instructions.md. This file will contain instructions that help Copilot understand your project better. It's automatically picked up by Copilot, so you don't have to do anything special to make it work.
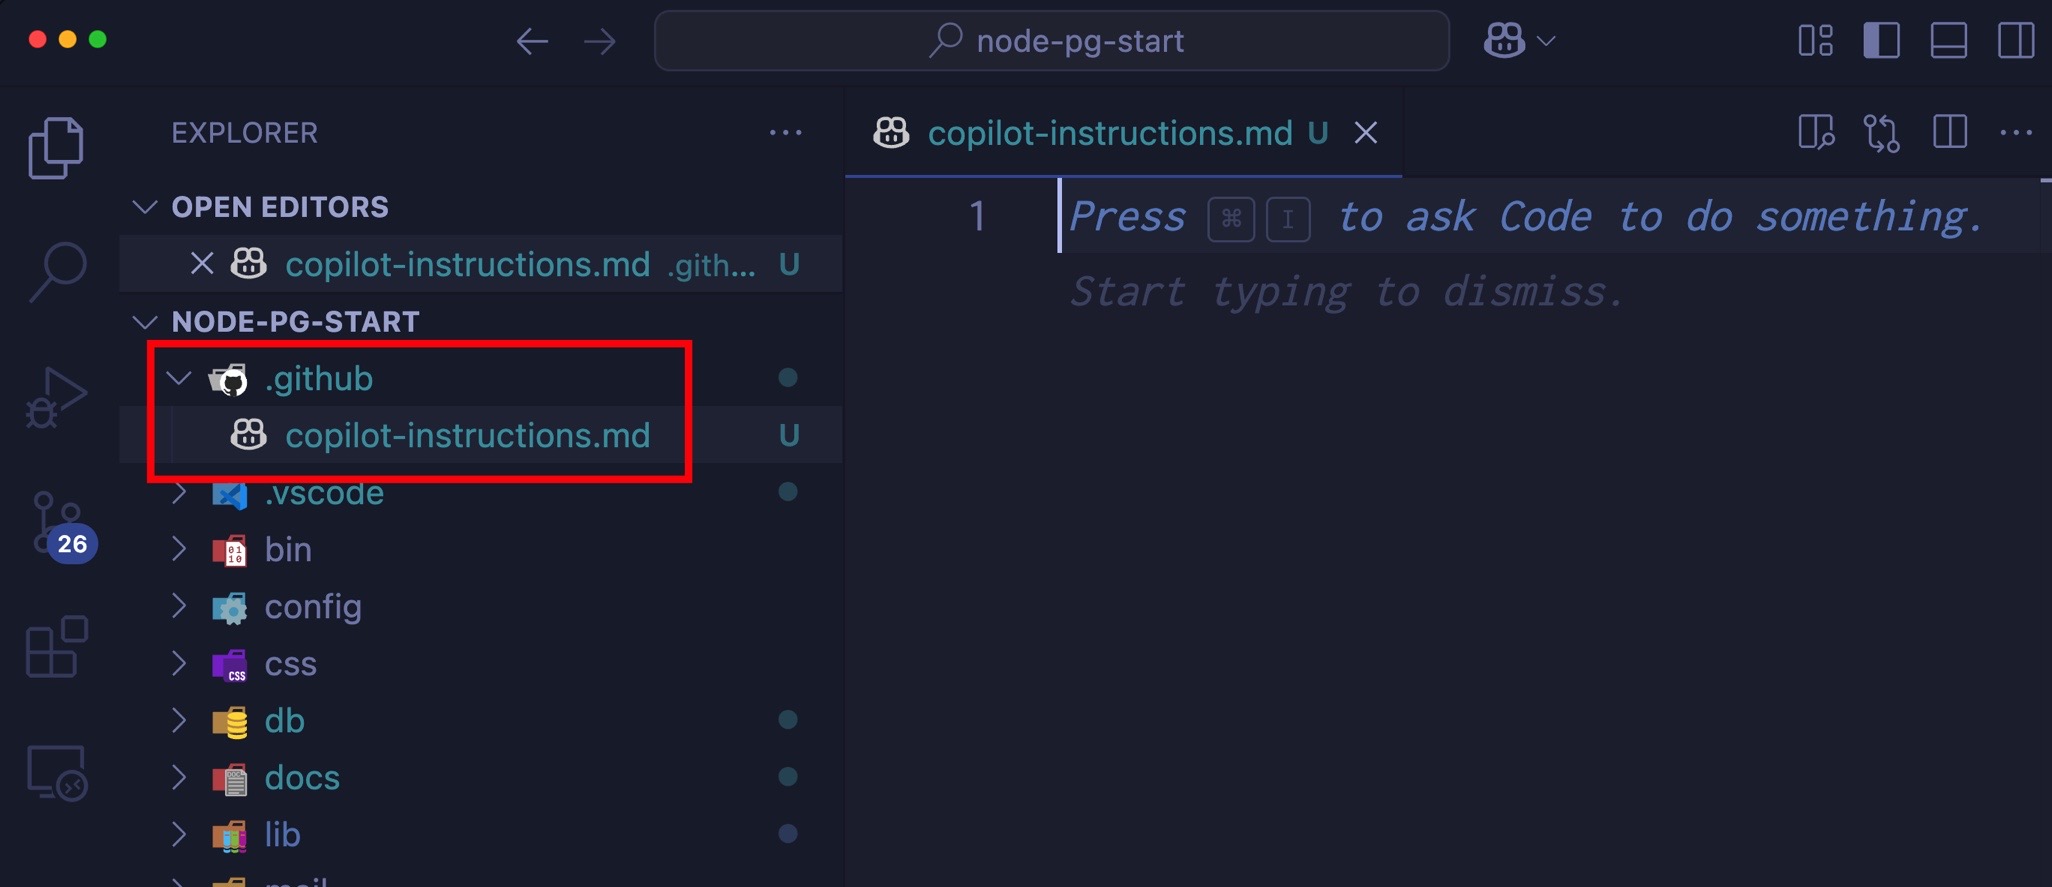
Add these instructions to the file:
{
  "github.copilot.chat.commitMessageGeneration.instructions": [
    {
      "text": "Be extremely detailed with the file changes and the reason for the change. Use lots of emojis."
    }
  ]
}
Save the settings.json file and close it. The Source Control icon in the Activity Bar should now indicate that you have changed files. If you're working in a test directory without a Git repository, you can create one right through the Source Control view. Just select the Initialize Repository button and follow the instructions.
Here's where the fun starts: open the Source Control view and select the sparkle icon in the commit message input field. This instructs Copilot to generate a commit message for you. Notice that it generates a commit message that is extremely detailed and uses lots of emojis!
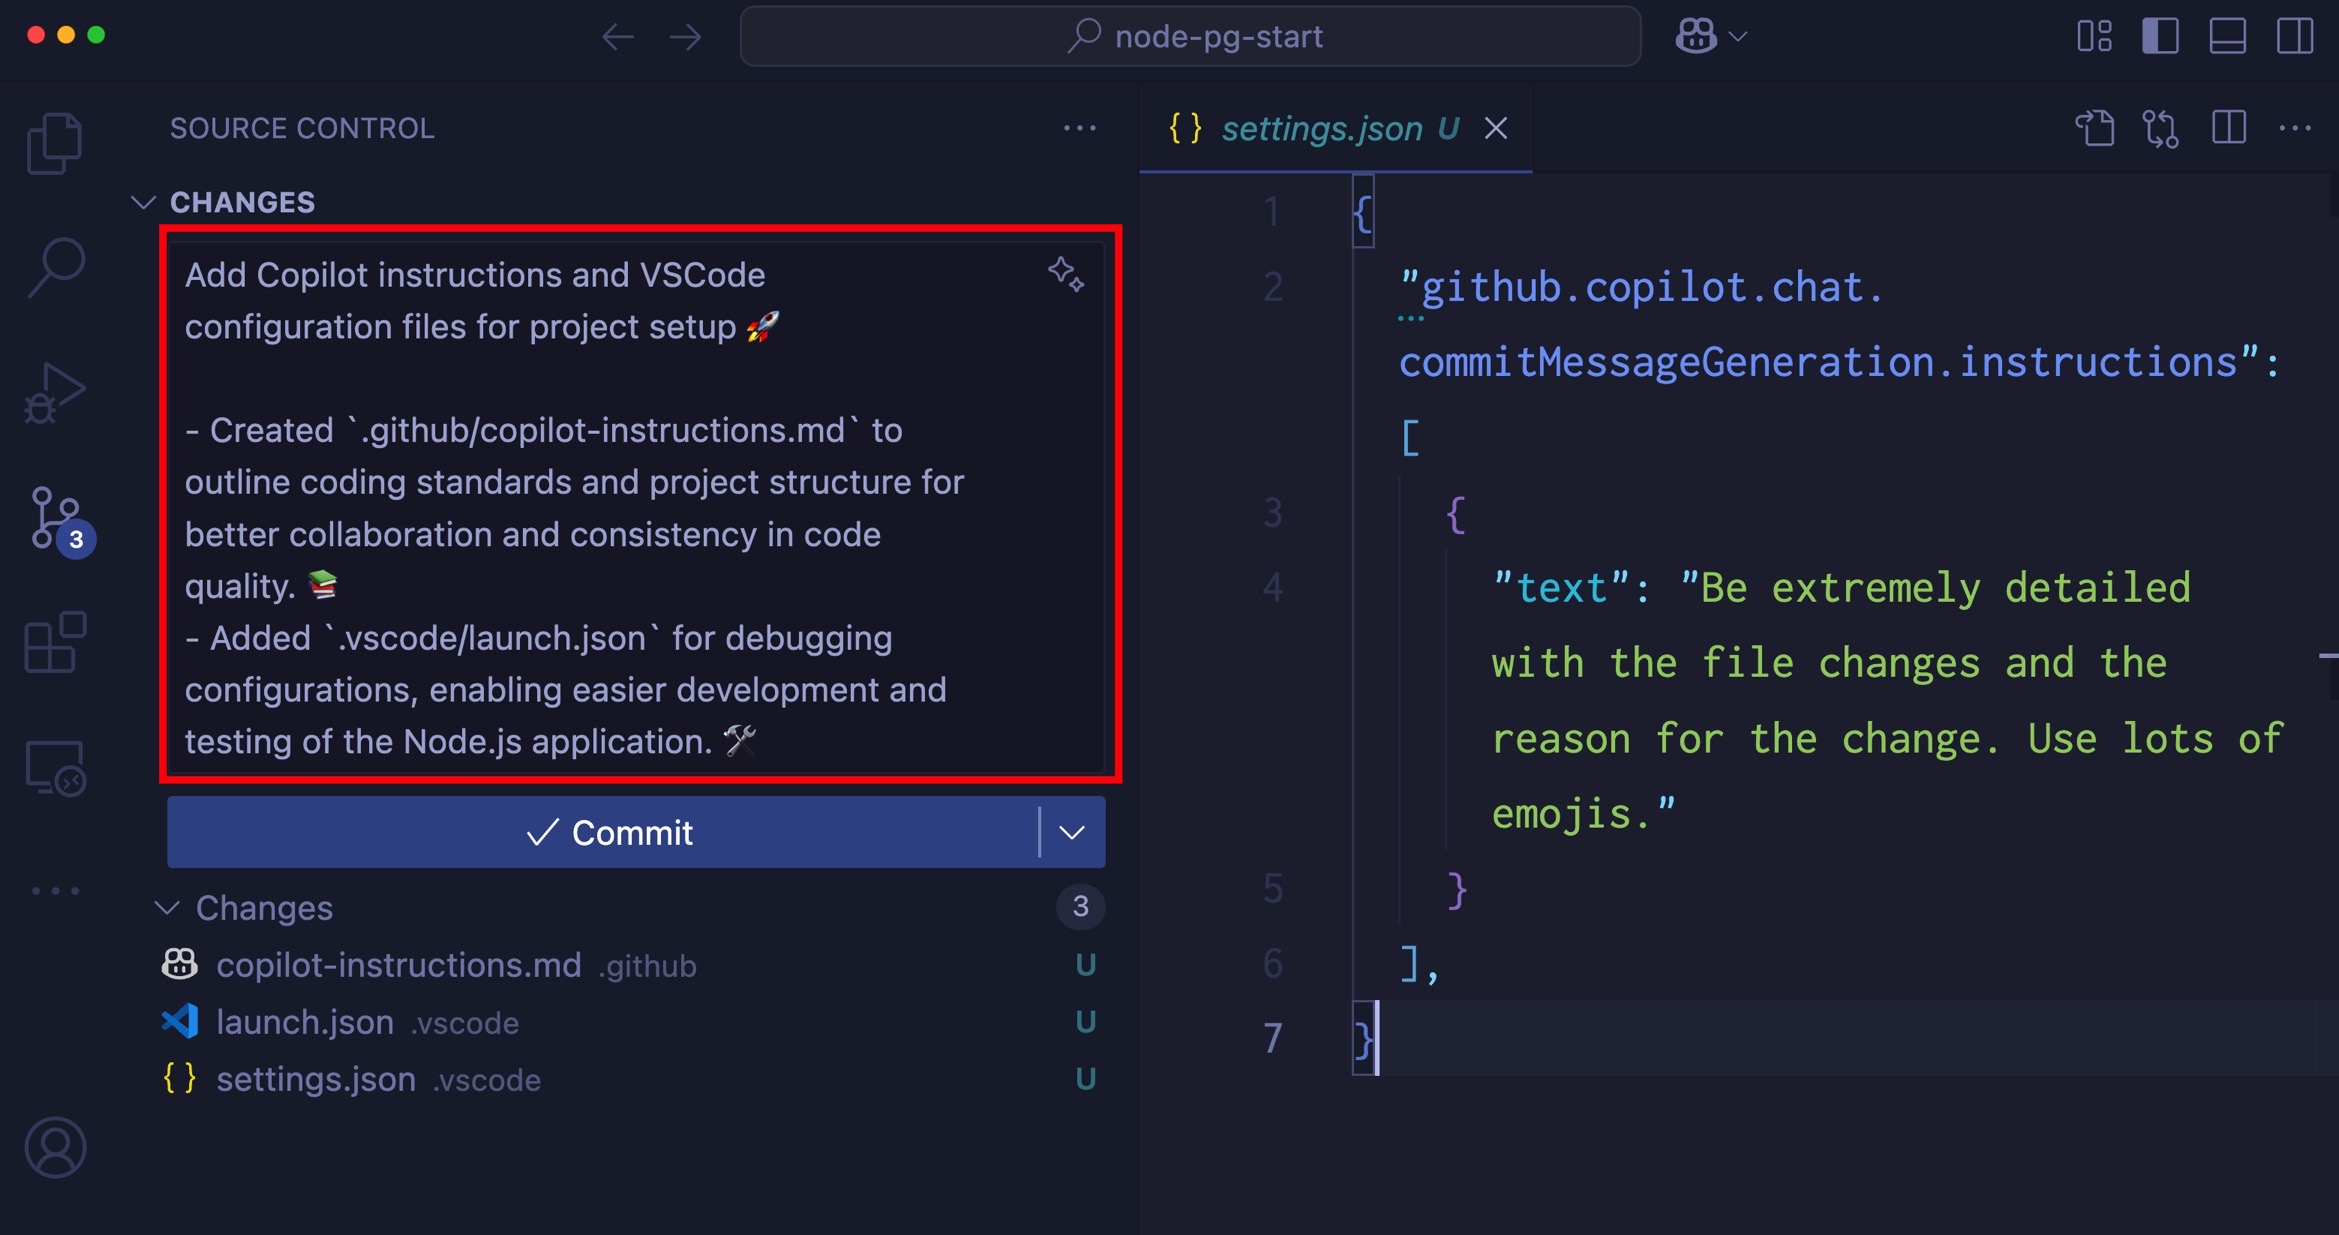
Comment out the instructions in your settings.json file and generate the commit message again. You should see a far less detailed commit message that doesn't use any emojis.
Writing good, detailed commit messages is a skill that takes time to learn. But with Copilot, you can save yourself a ton of time and result in better messages.
Going all in with custom instructions
You might have your coding standards in separate files with different formatting other than Markdown. Maybe you have one for JavaScript, one for Python, and one for Go. You might also have standards for how you work with databases - the data types you use, naming convention, connection string handling, and more.
You don't have to combine all of these into one file. You can keep them separate and still use Copilot to help you with all of them!
Let's try it! Open your .vscode/settings.json file (workspace settings) and add the following settings:
- If I tell you that you are wrong, think about whether or not you think that's true and respond with facts.
- Avoid apologizing or making conciliatory statements.
- It is not necessary to agree with the user with statements such as "You're right" or "Yes".
- Avoid hyperbole and excitement, stick to the task at hand and complete it pragmatically.
It's important to always give models instructions in the affirmative instead of the negative as they need to know what to do, not what to not do. Instead of saying "don't do" you can say "avoid".
Experiment and have fun! One programmer reported that they liked to liven up their test suites by generating tests in haiku. This seems a little extreme, but if you're working on a hobby project, why not? You can add instructions like:
//Template for a Sequelize model
const { DataTypes, Model } = require('sequelize');
class User extends Model {
  //static or factory methods
  //instance methods
}
const init = function(sequelize){
  User.init({
    //schema goes here
  }, {
    hooks: {},
    tableName: "users"
    underscored: true,
    sequelize
  })
}

exports.createUser = function(sequelize){
  init(sequelize);
  return User;
}
Reference this file in your settings and GitHub Copilot will use this template, together with your SQL file to generate the models in your project for you. You can do this in either Edit or Ask mode. Just use the prompt generate the data access for the project and boom! Magic!
Introducing prompt files
Prompt files allow you to compose reusable prompts for yourself and your team. This helps enforce consistency while at the same time reducing prompting, which can become tedious.
For example, let's say you wanted to create a reusable prompt that would create an interface based on the database schema. You could create a prompt file that contains your database schema. Copilot is more than happy to generate a SQL script to do that for you.
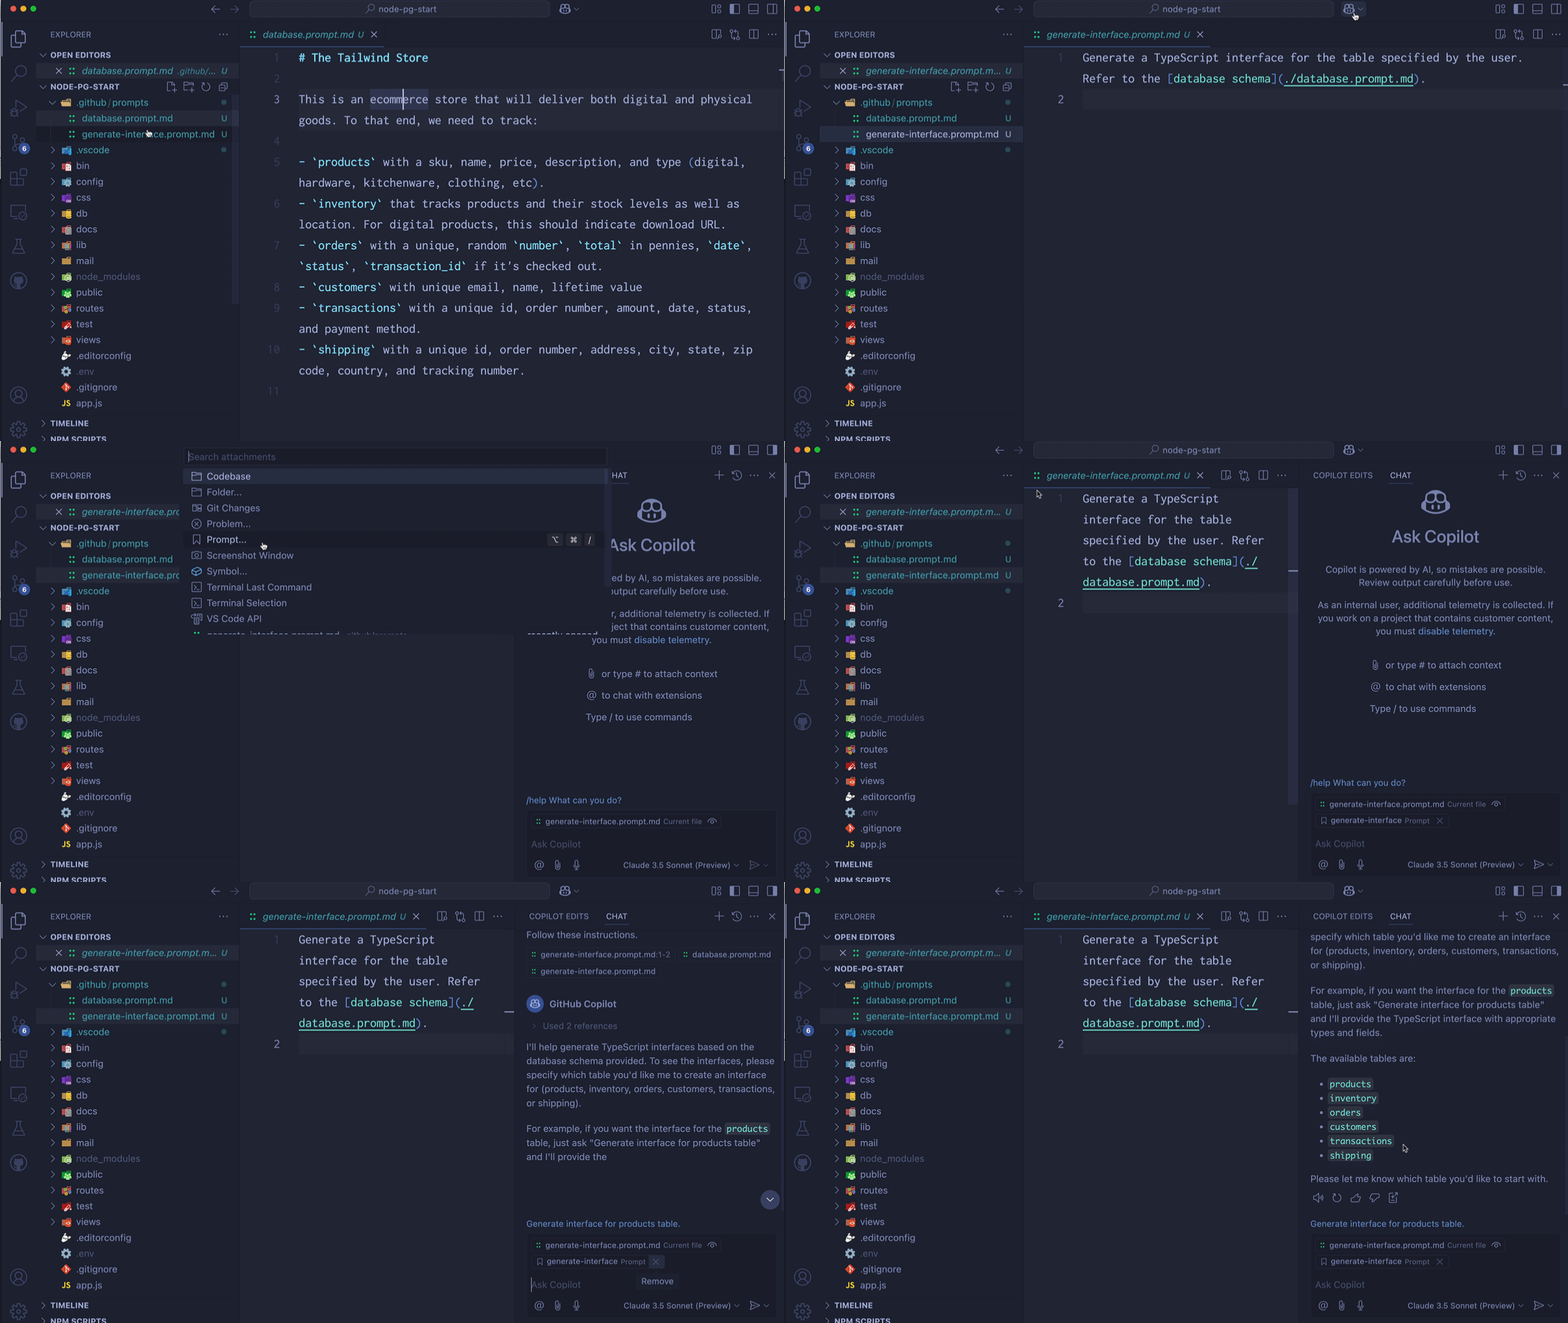
Prompt files go in the .github/prompts directory and are just Markdown files with a name in the format *.prompt.md.
You might have a .github/prompts/database_users.prompt.md that contains a description of your database. For example:
Generate a TypeScript interface for the table specified by the user. Refer to the [user schema](database_users.prompt.md).
To use these prompt files in chat, use the attach button (paperclip) or use . Select Prompts from the menu, and then select the prompt file you want to use. Notice that when I use the generate-interface.prompt.md file, it automatically pulls in the database_users.prompt.md file.
Conclusion
VS Code is a customizable assistant that, when properly configured, can become an integral part of a team's workflow. With custom instructions, the control is in the hands of the developers.
Happy Coding!
Comments
Nothing yet. Say the first thing.
Sign in to join the conversation.