
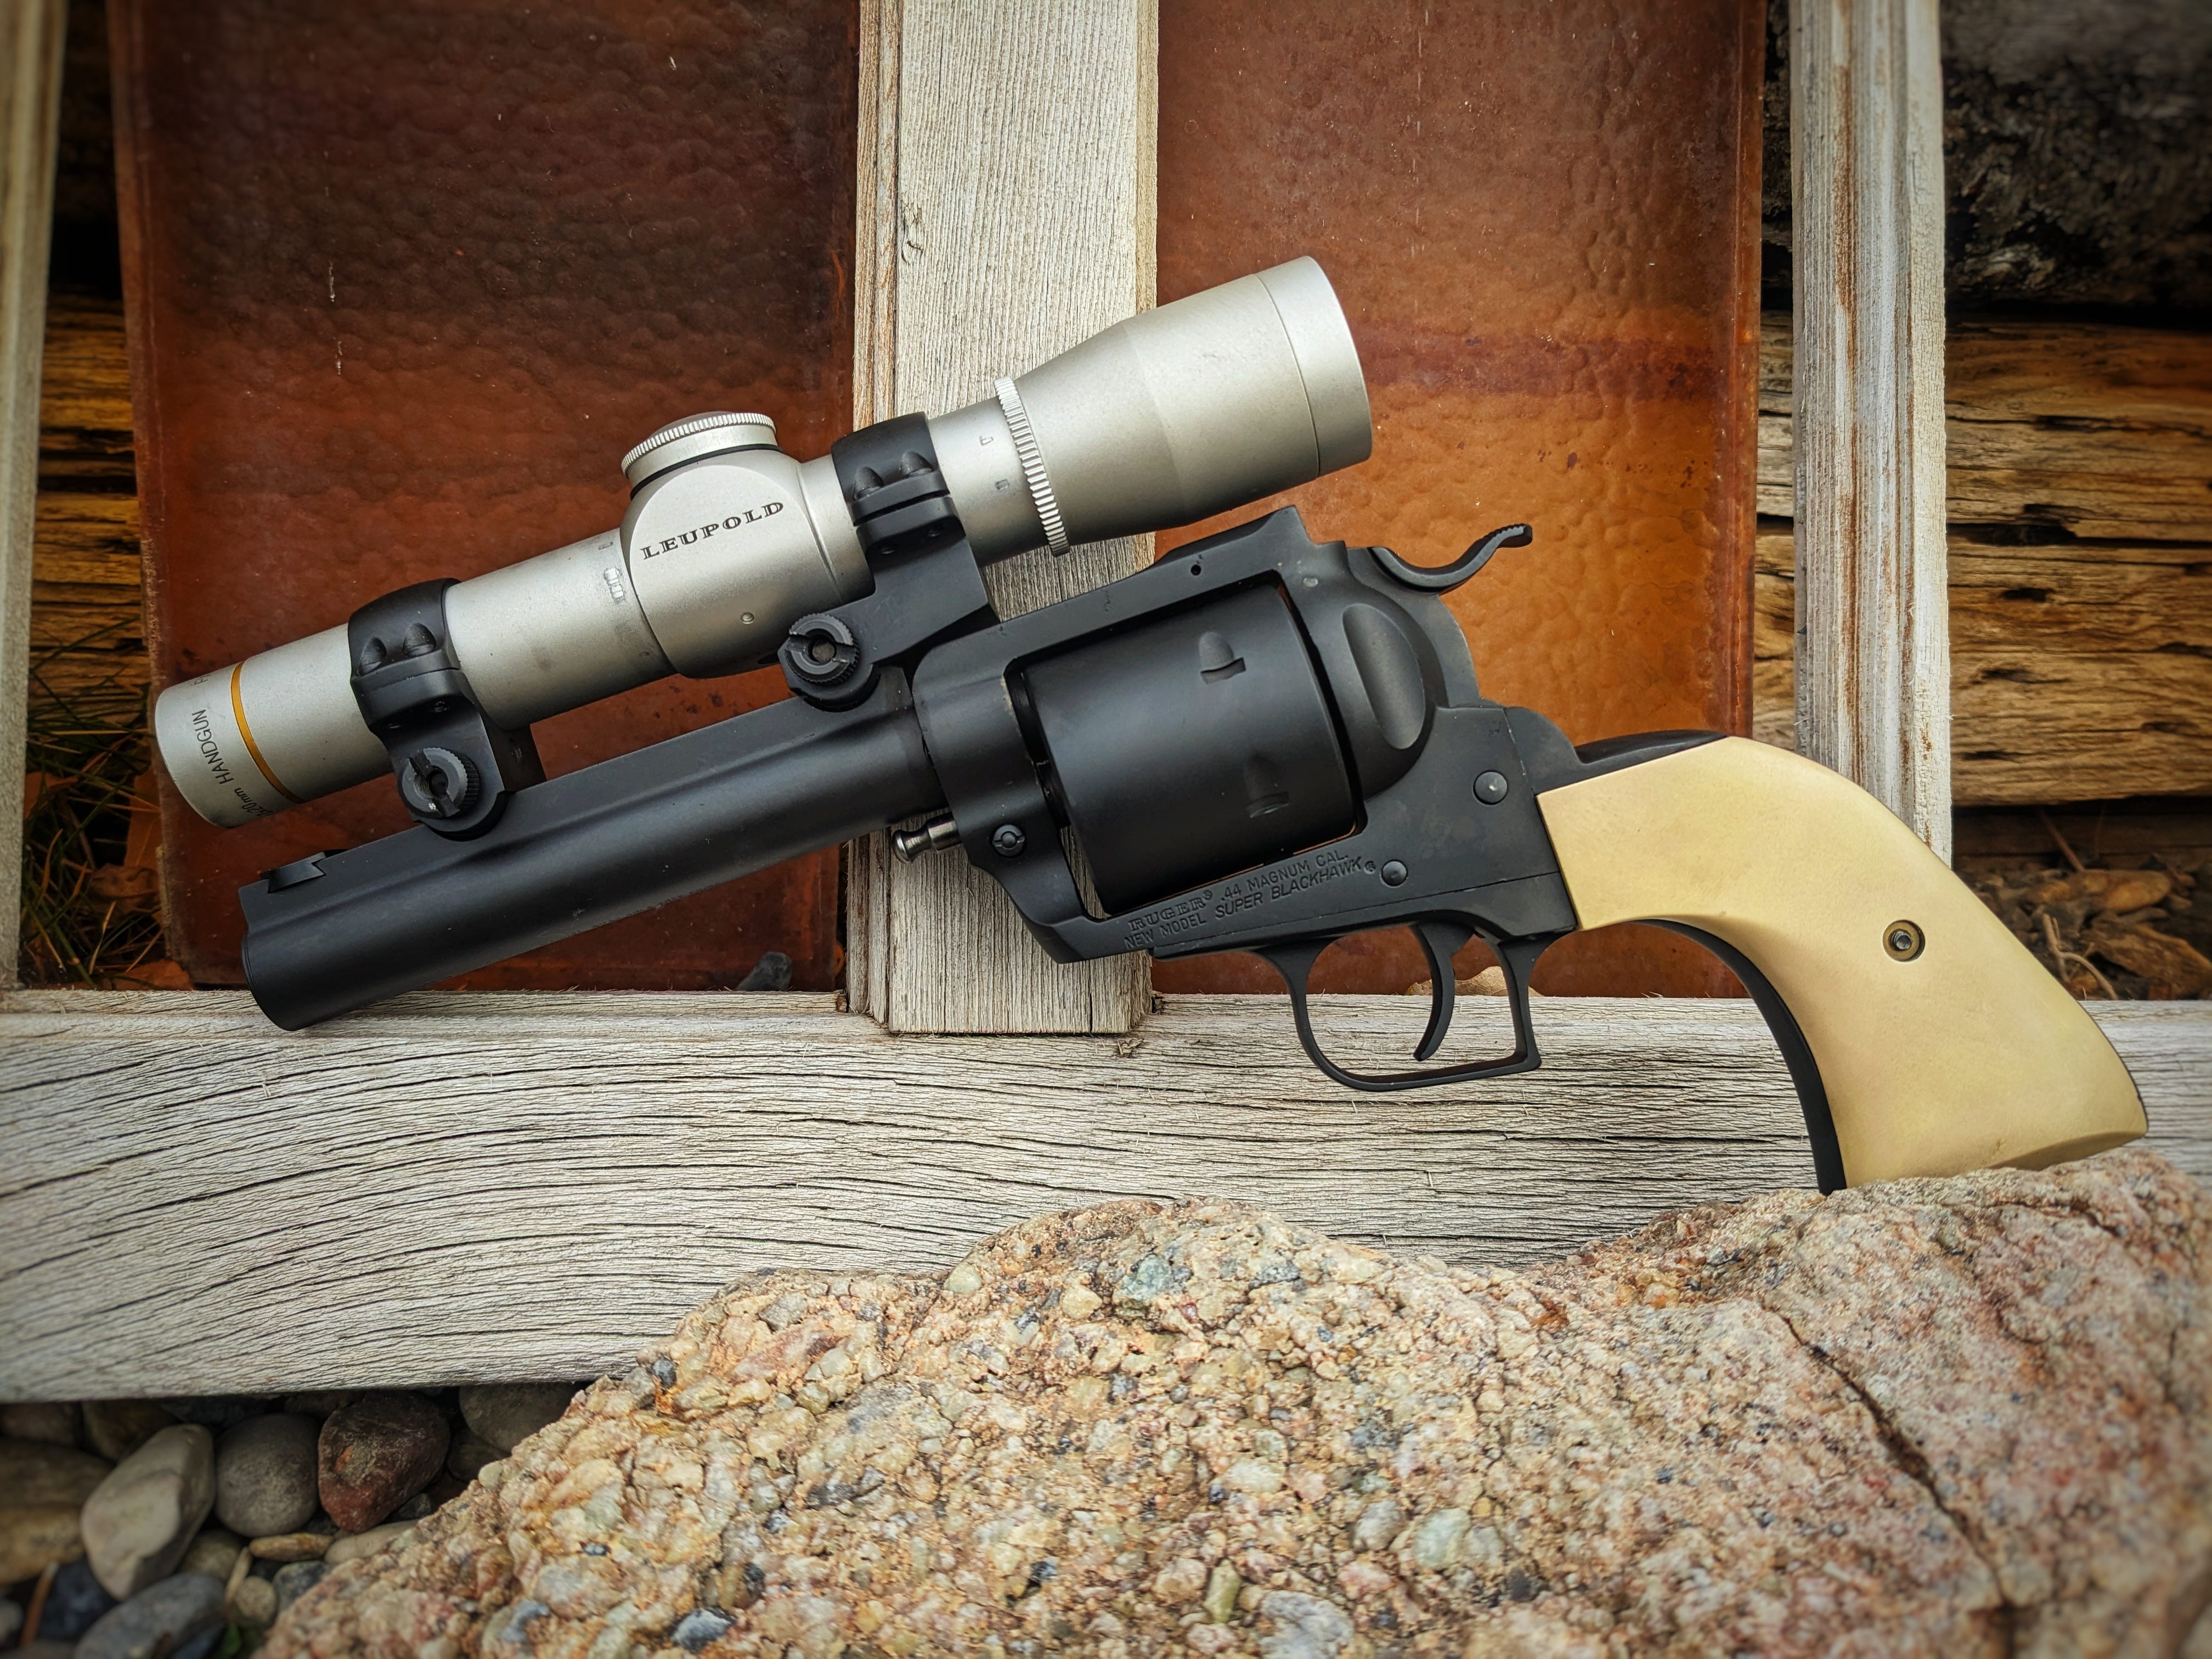
I’m not sure I would call myself a handgun hunter, but as time goes on, I am finding that I enjoy it very much. You may remember my Glock 50 GI project from last year. I took that as my primary weapon for Mule deer this previous October, and while I was not successful in getting a deer. I had some fun stalks and enjoyed it very much. My failure to bring home venison was due more to my lack of ability in finding good deer than it was the handgun.
One of the reasons I have been enjoying handgun hunting the most is going to kind of sound silly, but it’s the freedom. I have just been loving slipping a handgun in a holster on my hip, throwing on my binoculars, and heading out. It’s such a change from having to manage your rifle slung over your shoulder, and I enjoy the challenge of having to sneak into range for a handgun. All that being said, I have had the desire to stretch the distance on my handgun shooting just a little bit more. Many handgun hunters opt for handguns that are scoped and ready to shoot at distances that equal those of a rifle. The problem with most of those handguns is that, while yes, they are technically handguns, they are huge. For me, if my handgun is so large or heavy that I have to carry it around like a rifle, then it takes away some of the enjoyment of handgun hunting. After all, I do have a five-and-a-half-pound deer rifle. If my handgun weighs 4.5 pounds, I might as well pack the rifle.
So, what to do? I want a scoped handgun, but I still want something that can be packed around on the hip. I got to looking at my old Ruger Super Blackhawk in .44 Mag and thought to myself. I can make that work.
The Criteria.
If I was going to do this, then I needed some goals. First, I wanted a scope. I enjoy shooting iron sights, and I think I shoot them reasonably well, but it’s hard to argue with a crystal clear crosshair when shooting out at distance. Second, I want the gun to be as light and compact as possible. These are not features often associated with scoped handguns.
The Build.
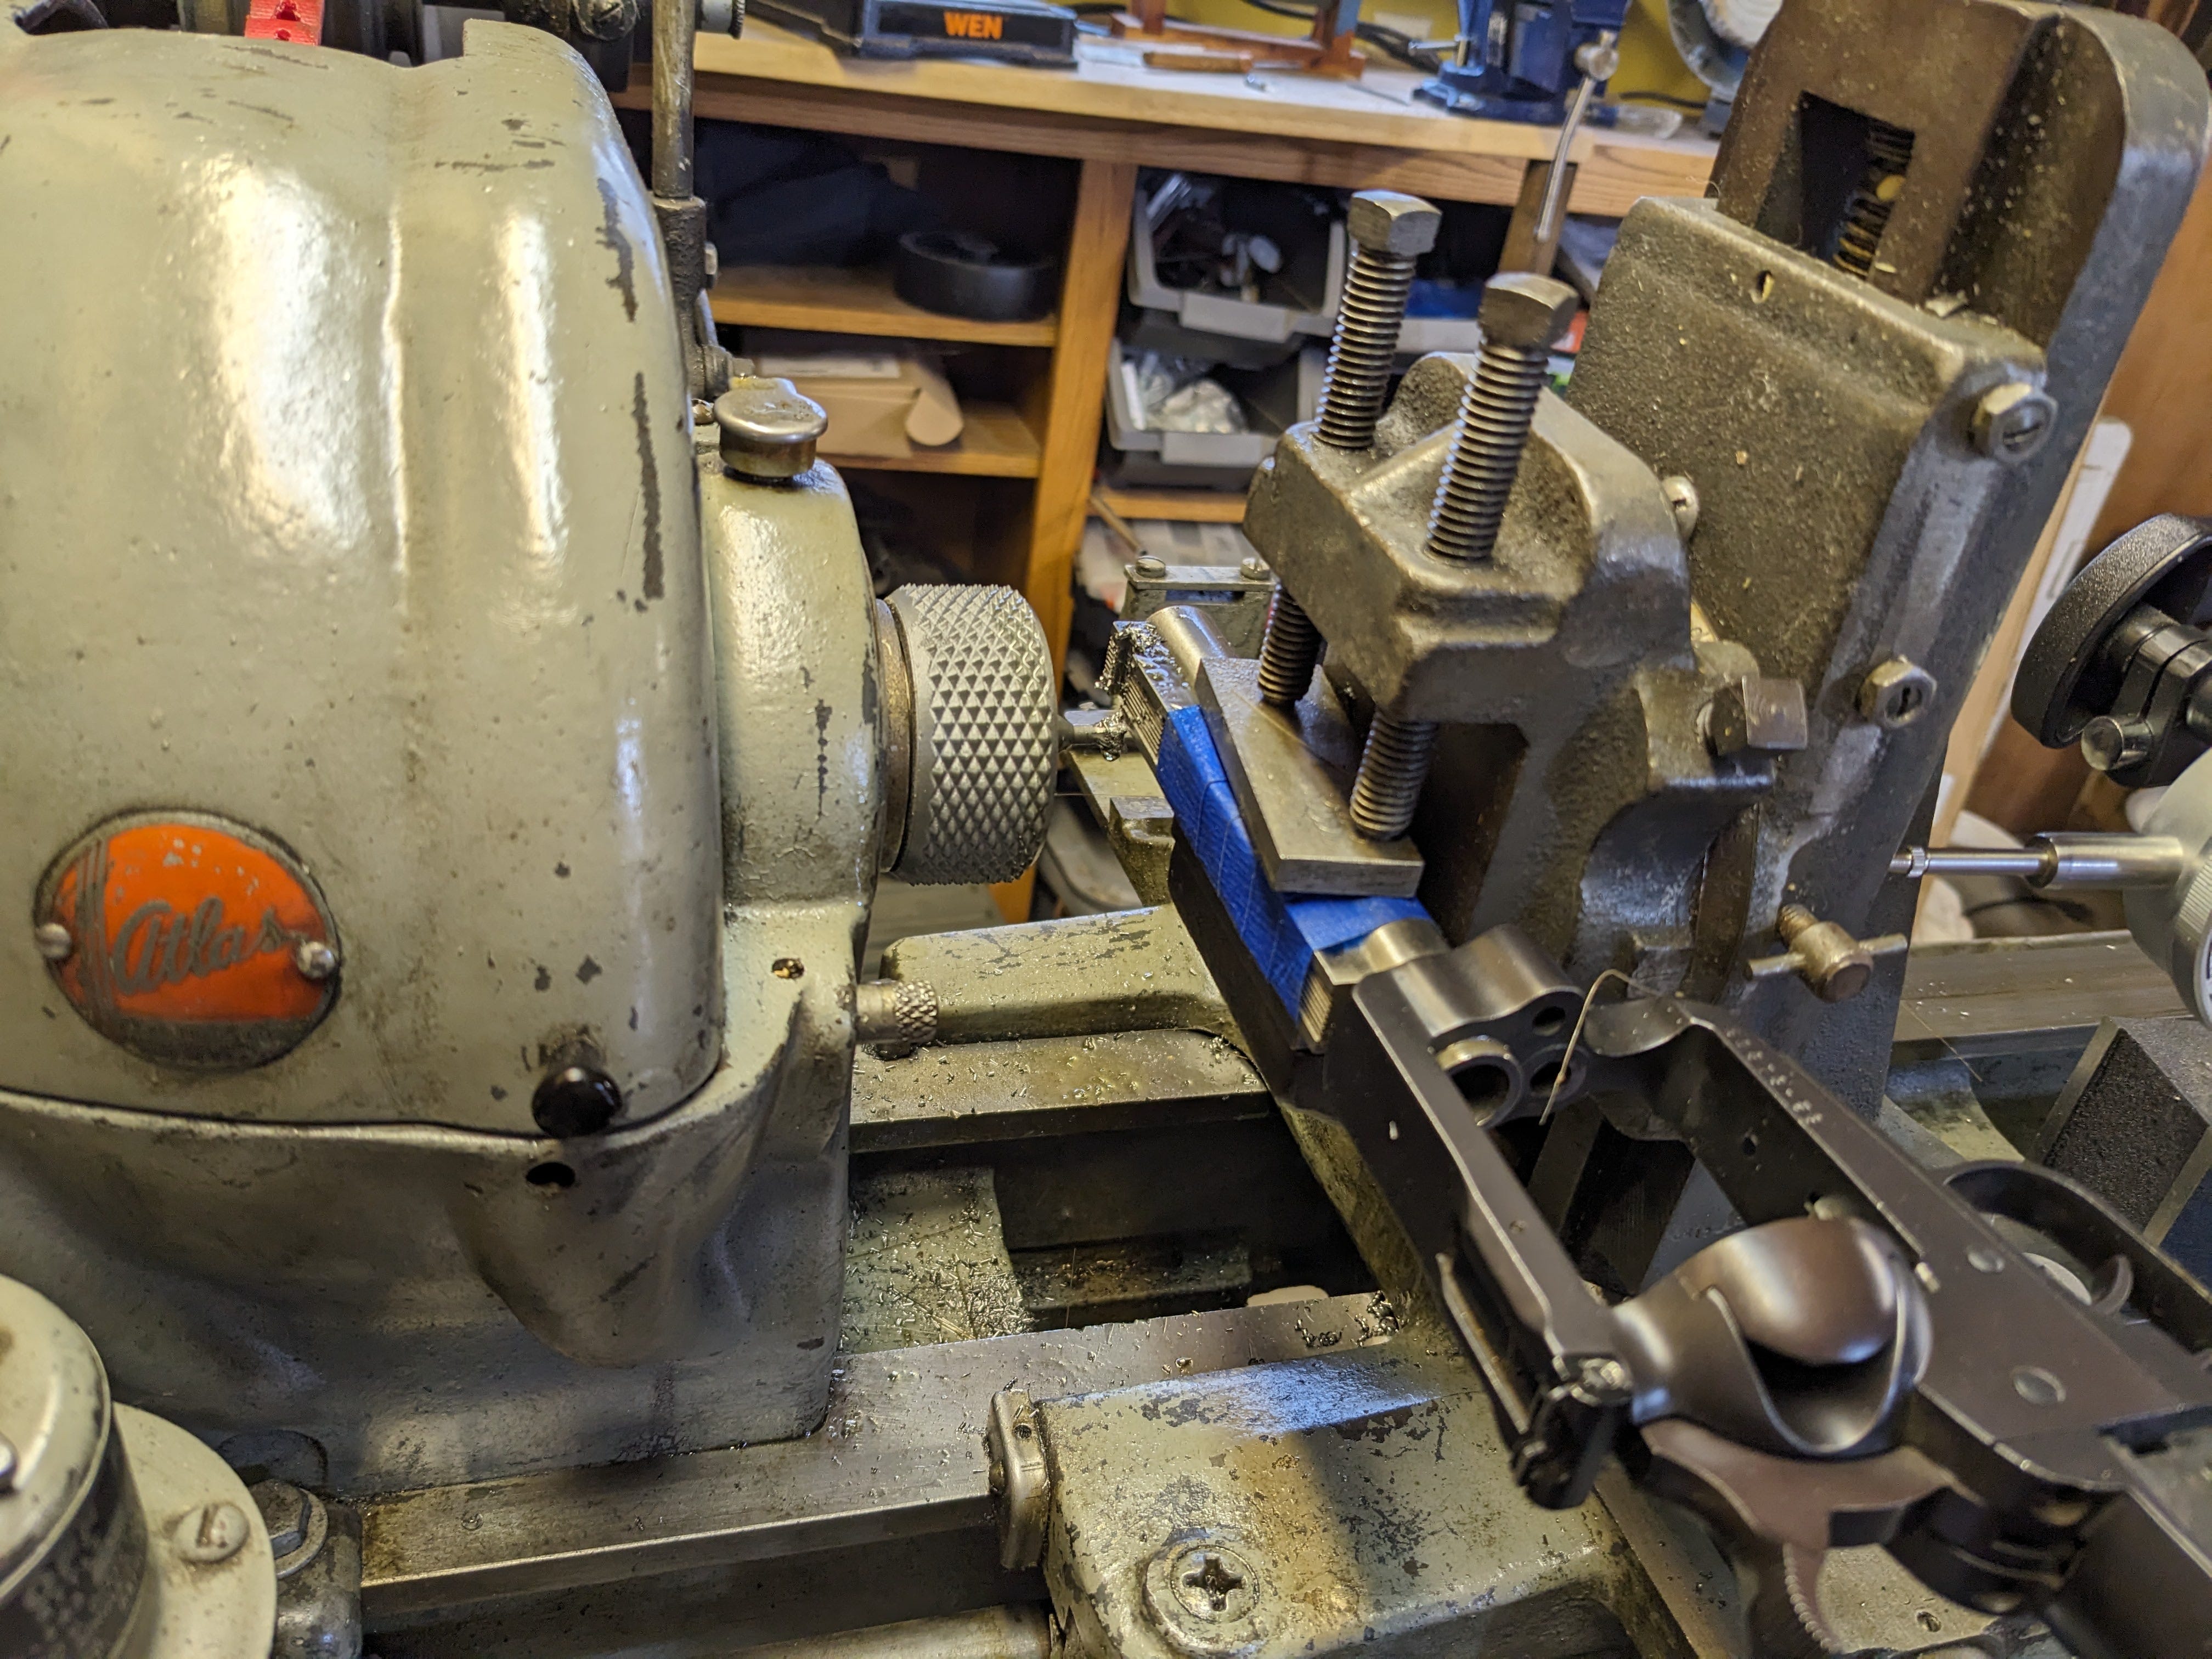
I knew I wanted a small Leupold scope to sit as low to the bore axis as possible, so I started by pulling the barrel. I then went on eBay and found a take-off barrel for a Ruger Super Blackhawk Hunter. These guns have grooves milled into the barrel for Ruger scope rings. Ruger scope rings are certainly not the lightest, but they are strong. I found a set that was low and offset, which allowed me to get the scope low to the bore axis and as far back as possible. Moving the scope back allowed me to cut off a decent chunk of barrel. I mounted the scope and then cut the barrel off, just slightly longer than the scope, to help protect it from muzzle blast.
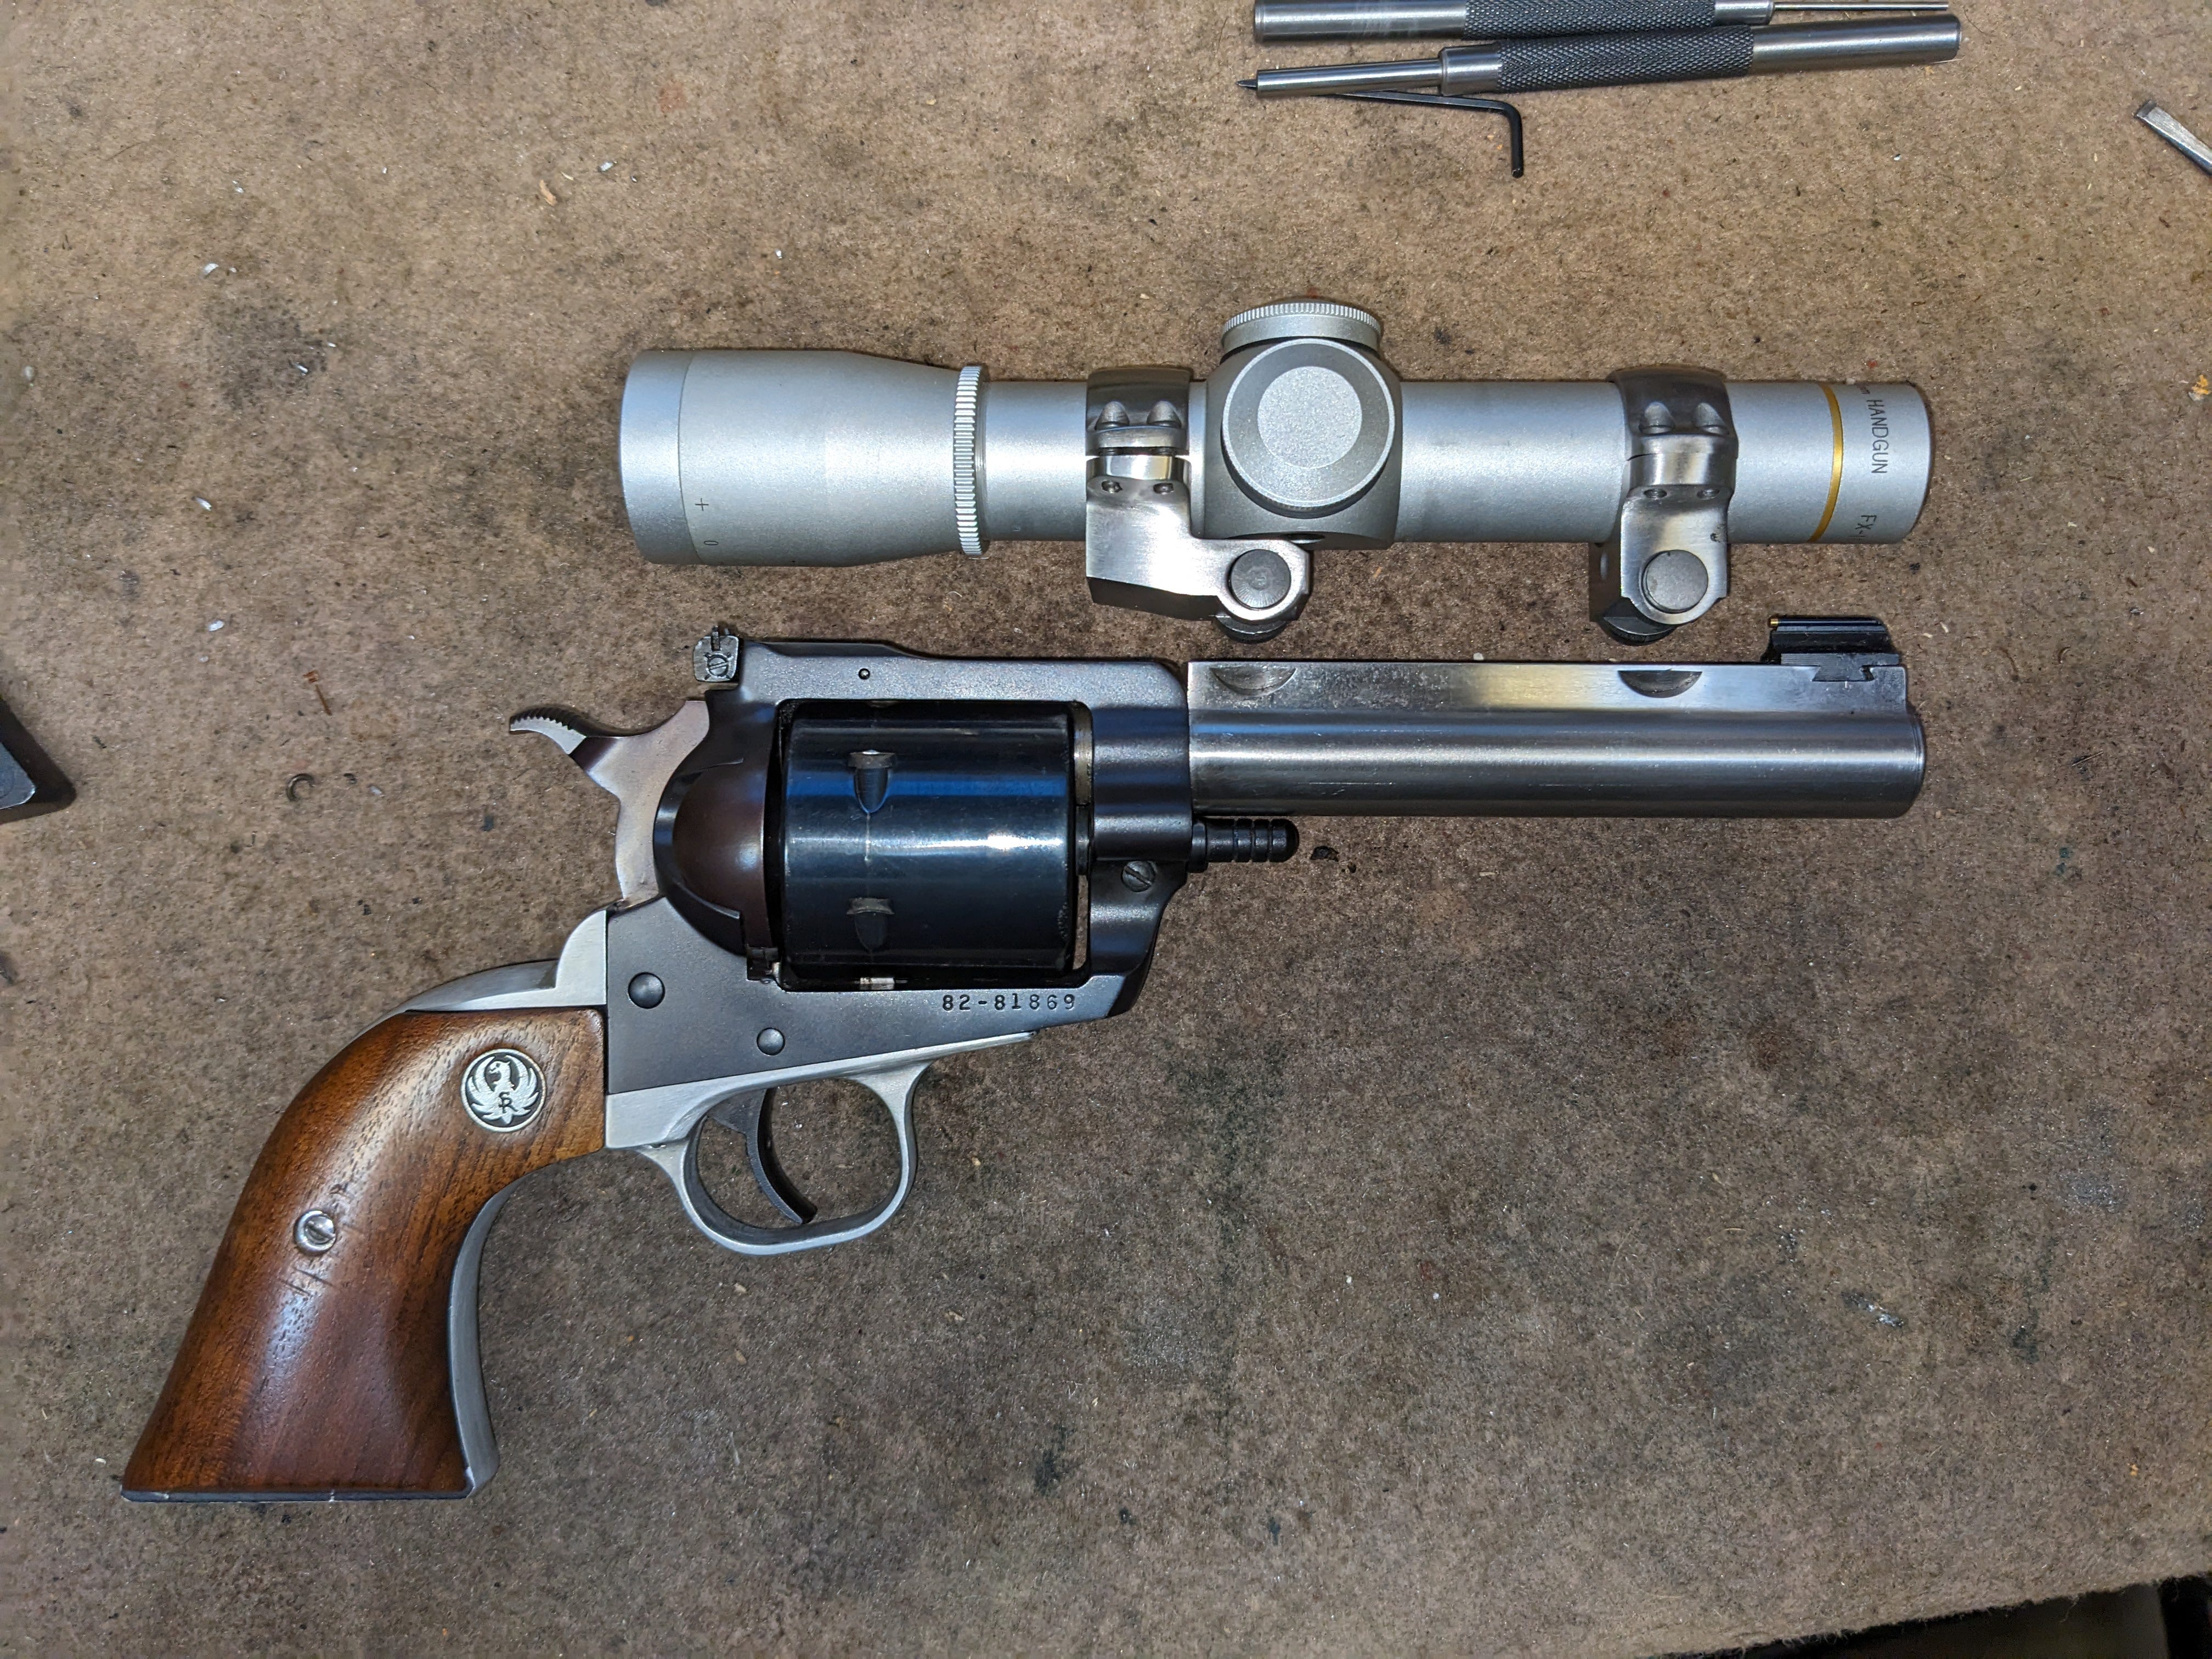
The barrel just happened to be cut off at the ejector-rod-housing screw. That decided for me to shave the ejector rod housing and the boss on the gun’s frame. I could have shortened the ejector rod and remounted it, but I really love the feel of a gun without one. Admittedly, it does create some inconvenience when unloading the gun, but it’s not as much as you think. As long as your empty shells do not stick in the chambers, then a light bop on the grip of the gun often sends them flying free. After that was all completed, I went searching for more weight to remove. I decided to scallop the recoil shields as well.
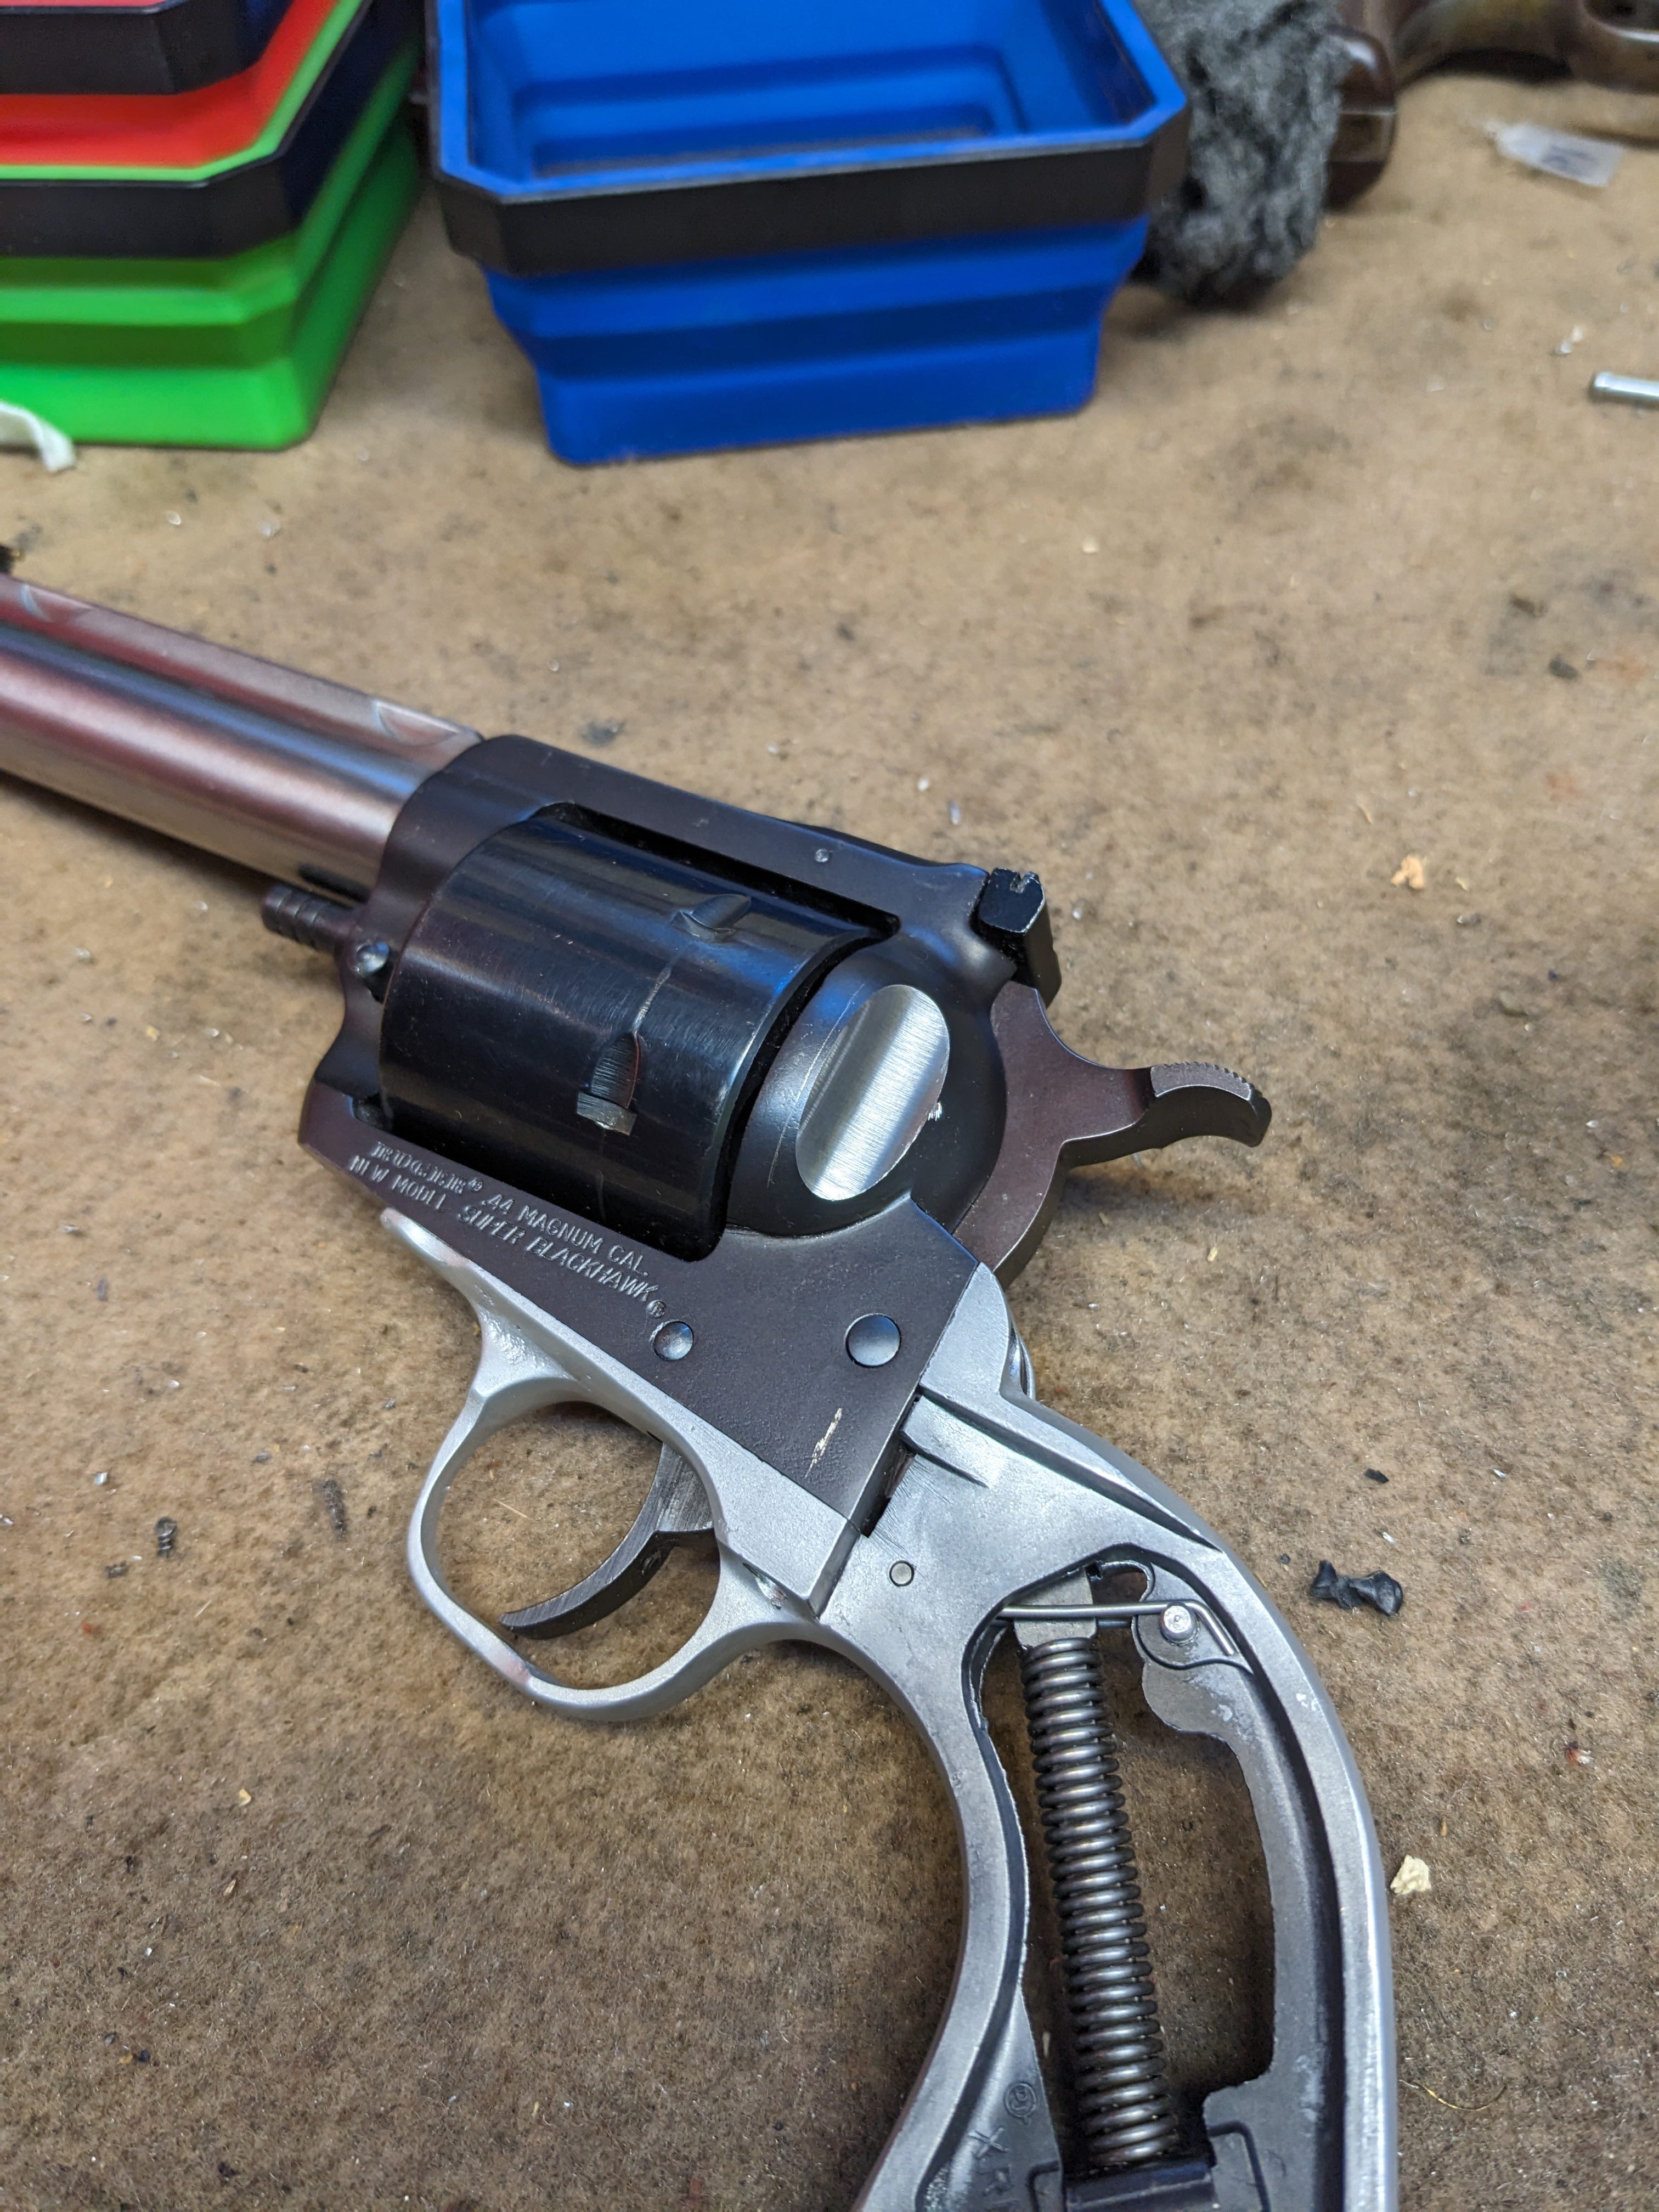
Since this gun would primarily be shot with a scope, I decided to replace the standard hammer with one from a Bisley model. The lower hammer would make the gun easier to cock and make more room for my thumb underneath the scope.
At this point, I was looking to remove even more weight, so I replaced the steel Dragoon-style grip frame with an aluminum Blackhawk grip frame, but I didn’t like it. The Blackhawk grip frame just didn’t have enough leverage to make holding the scoped gun comfortable. The problem was that I never liked the Dragoon-style frame. Like so many people, the grip feels too large for me, and that infernal trigger guard busts my knuckles on heavy recoil. The easy solution would be to replace the grip frame with one from a Bisley model, or better yet, a custom frame from RW Grip frames. Those were both great ideas, and this gun may still get an RW at some point, but it was more money than I wanted to spend. Even though the original frame was steel and weighed more, I decided it was worth keeping. I began filing on it and reshaped it to something I’m much happier with. First, I trimmed the point off the trigger guard, and then I rounded the grip’s rear. This gave the whole thing a more Bisley-like feel and, best of all, helped stop some of the pain from the trigger guard. It also preserved the classic frame’s look, which I appreciate, even if it isn’t my favorite frame.
Now that the gun was functionally where I wanted, I had the problem of several different metal materials. A blue job wasn’t going to cut it for a finish, so I sent the gun off to AB Prototype to be Black Nitrided. Black Nitride is an excellent gun finish, especially when you want to make several very different metals look the same. It’s also very tough and wear-resistant, so it’s perfect for a hunting gun. Plus, it’s pretty cheap to have done. I had to wait a couple of months to get it back, but it cost me less than 150 bucks (when combined with a second gun), even with shipping. After a bit of trigger work, she was ready to test fire.
Shooting.
Now, don’t get me wrong, I of course test-fired this gun before sending it off to get it finished. I ran a few rounds through it at 25 yards just to make sure everything was up to snuff before I got too far in, and the results were good. After sighting, I shot a 1.3-inch group at 25 yards using a 245g semi-wadcutter, powered by 19 grains of 2400, out of the 5-inch barrel; it produced 1,116 FPS. After the gun came back from finishing, it was time to get serious and stretch the legs on this little cannon and see what I could do with it.
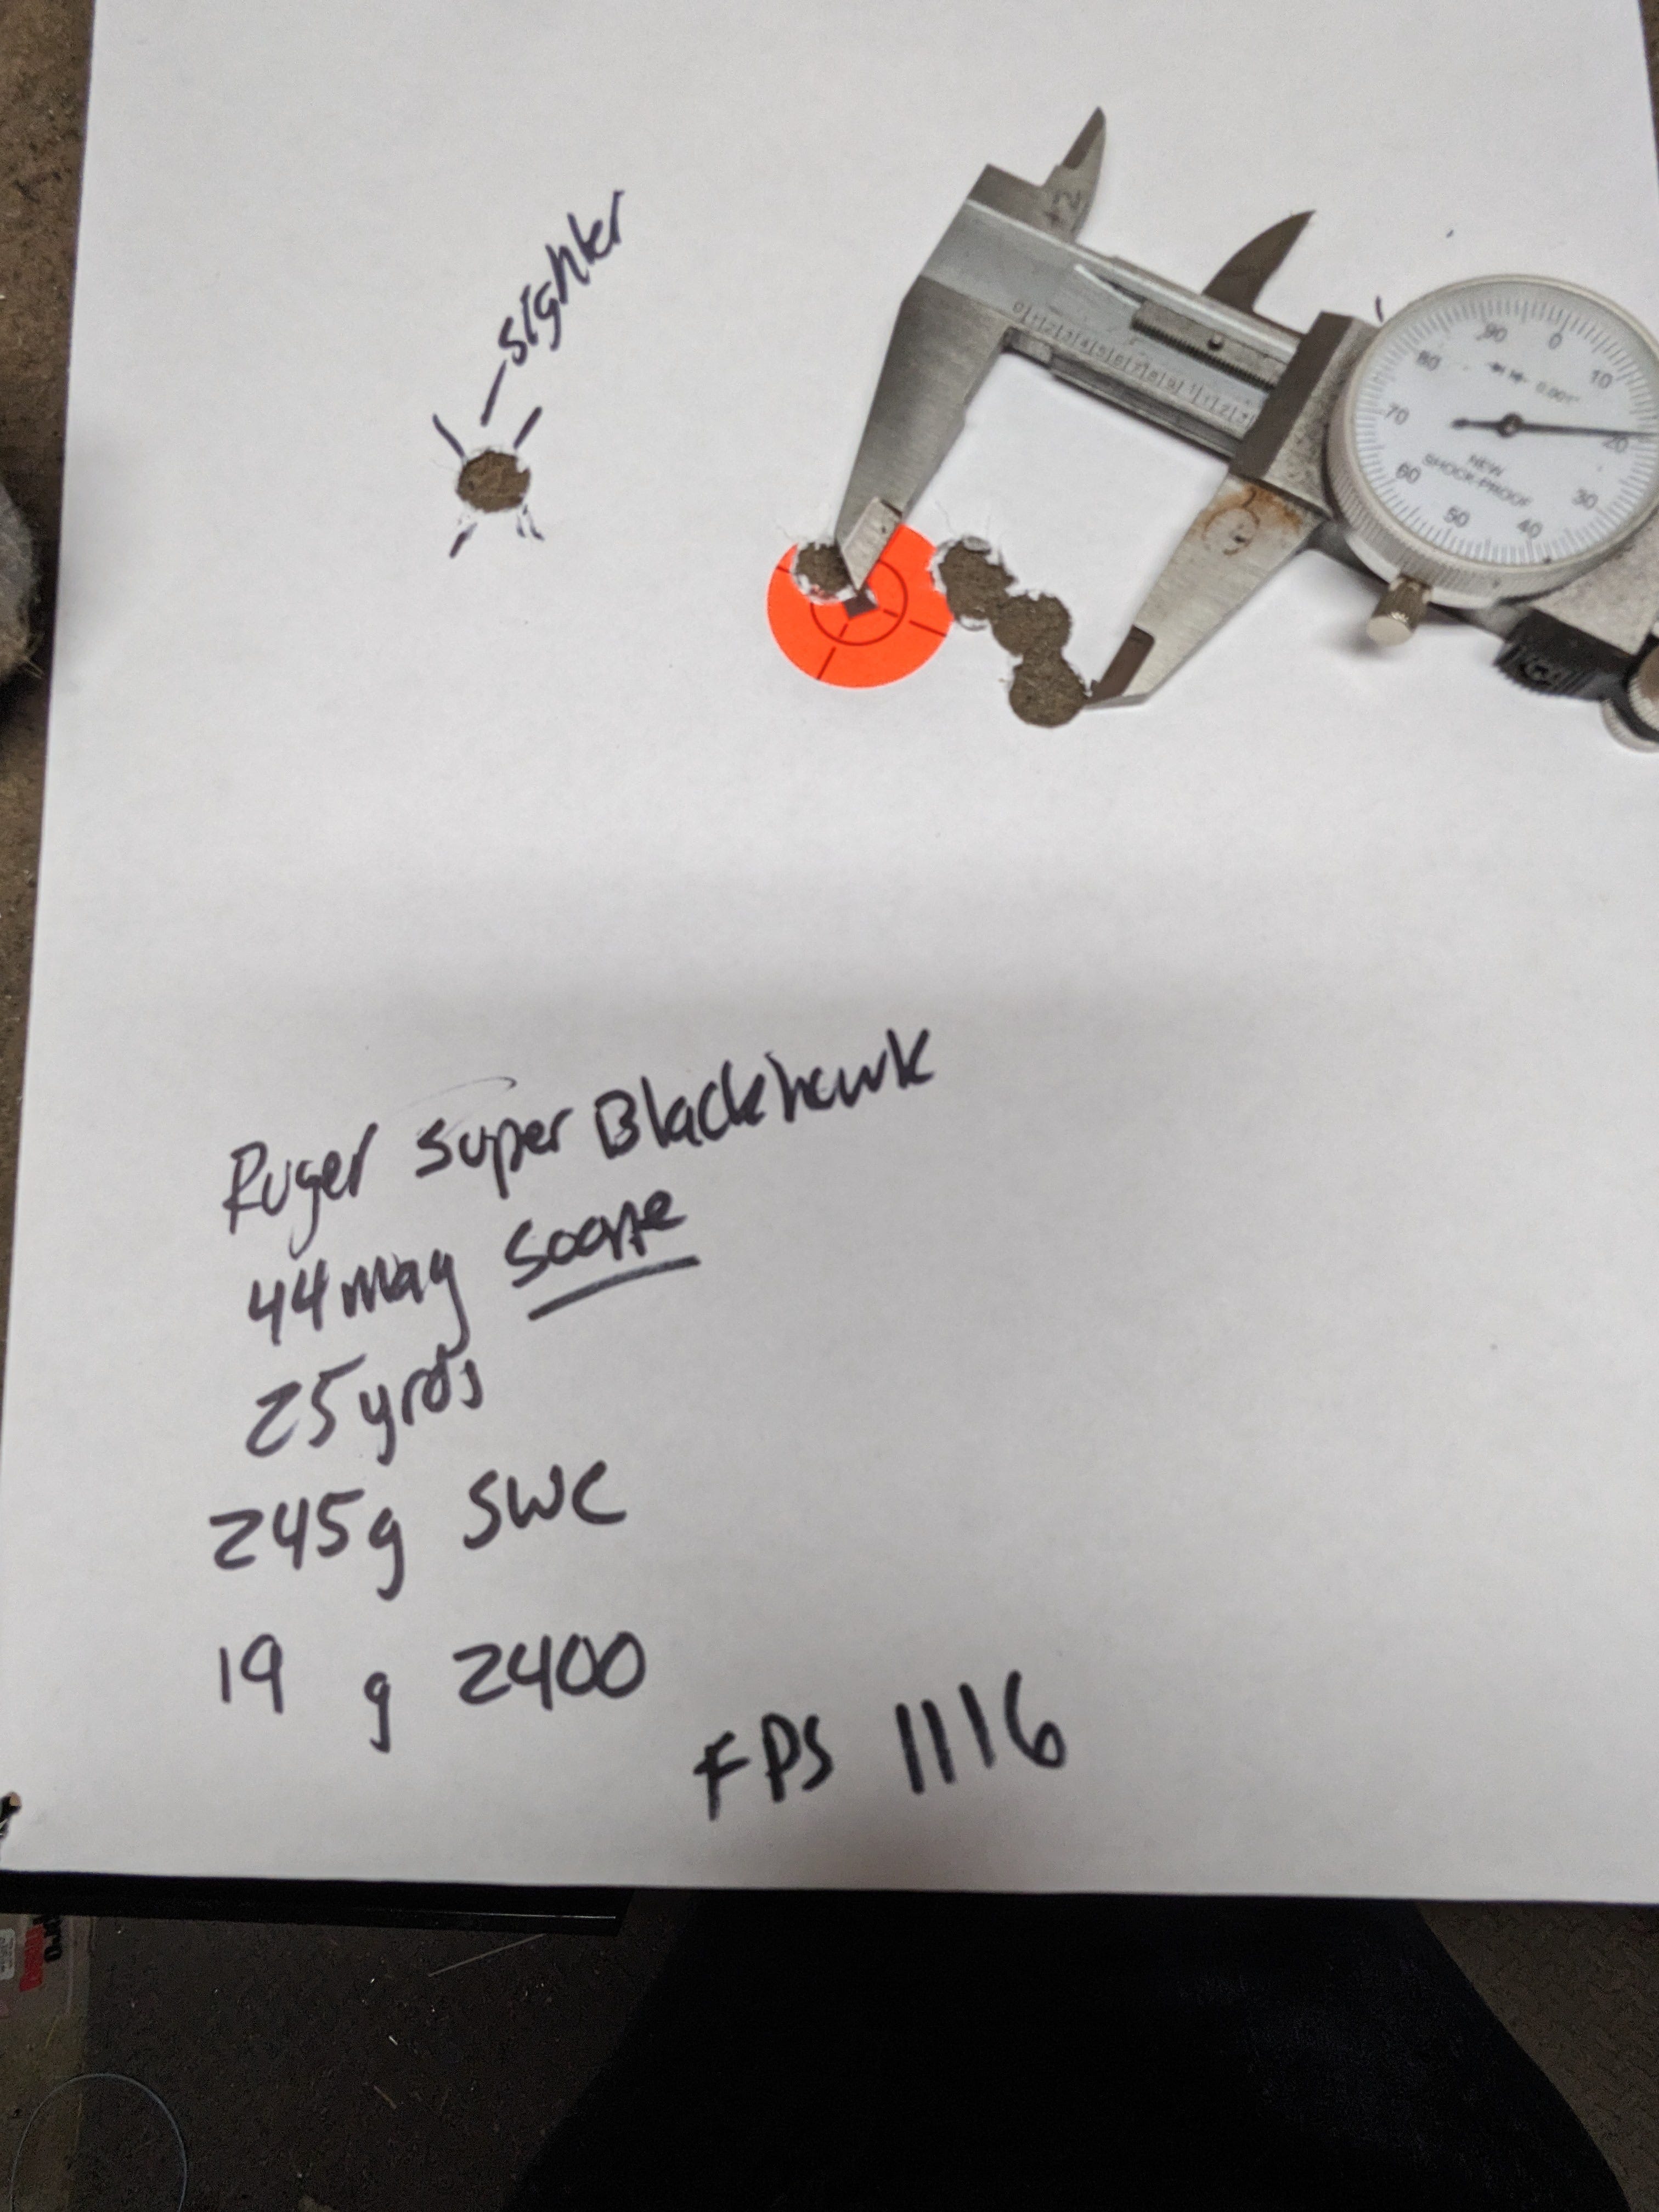
Unfortunately, it didn’t work! The exact same ammo from before shot a huge group. I ran a second cylinder through the gun, and it was better but still very disappointing. I don’t know what happened, but something happened. So I decided to shoot a few cylinders of jacketed ammo to see if I could work out whatever was causing the problem.
Sure enough, the Black Nitride must have caused a rough texture. After firing the jacketed rounds, a residue of copper jacket could be seen all throughout the barrel. I used JB bore compound to scrub out the copper and hopefully smooth the roughness even further. This seems to have solved the problem. My lead groups, while still not where they were before the Nitride treatment, are close enough not to matter. I’m sure with more shooting, they will come back into line. So that is something to think about if you plan on getting your firearm Black Nitrided. It does cause some dimensionality and a slight roughness that will show up on paper. For most people shooting at standard handgun distances, this will hardly be noticeable.
This was a fun project and has turned into a gun that I think will be a favorite. This summer, I will be competing in the Hangun Hunters Competition in Newcastle, Wyoming. One of the classes for competition is handgun with optic. This revolver is certainly not optimized for this class, but it will be what I am shooting, so stay tuned to find out how it performs. Or should I say, how I perform with it.
No posts
Comments
Nothing yet. Say the first thing.
Sign in to join the conversation.