
Part of the joy of building ukuleles for me is building (and improving) the jigs, fixtures, and tools that make the process easier, more accurate, or both. Eventually, I’ll dig deeper into it here, but I oscillate back and forth between the ideas that I’m an inventor at heart or I’m just obsessed with efficiency—trying to find ways of inventing more streamlined ways of doingg something. Most nights I fall asleep trying to work through jig or process in my mind. The goal is always to shave any available seconds off a task without sacrificing quality.
Carving the neck of an instrument is truly one of the more intimate tasks of lutherie. There are few places where a few shavings of wood can carry so much weight. Those few shavings can make or break the feel of an instrument; in turn, the playability of an instrument; and in turn, the musicality of an instrument. If a player has to work or struggle to play the instrument it is now impeding the intended process.
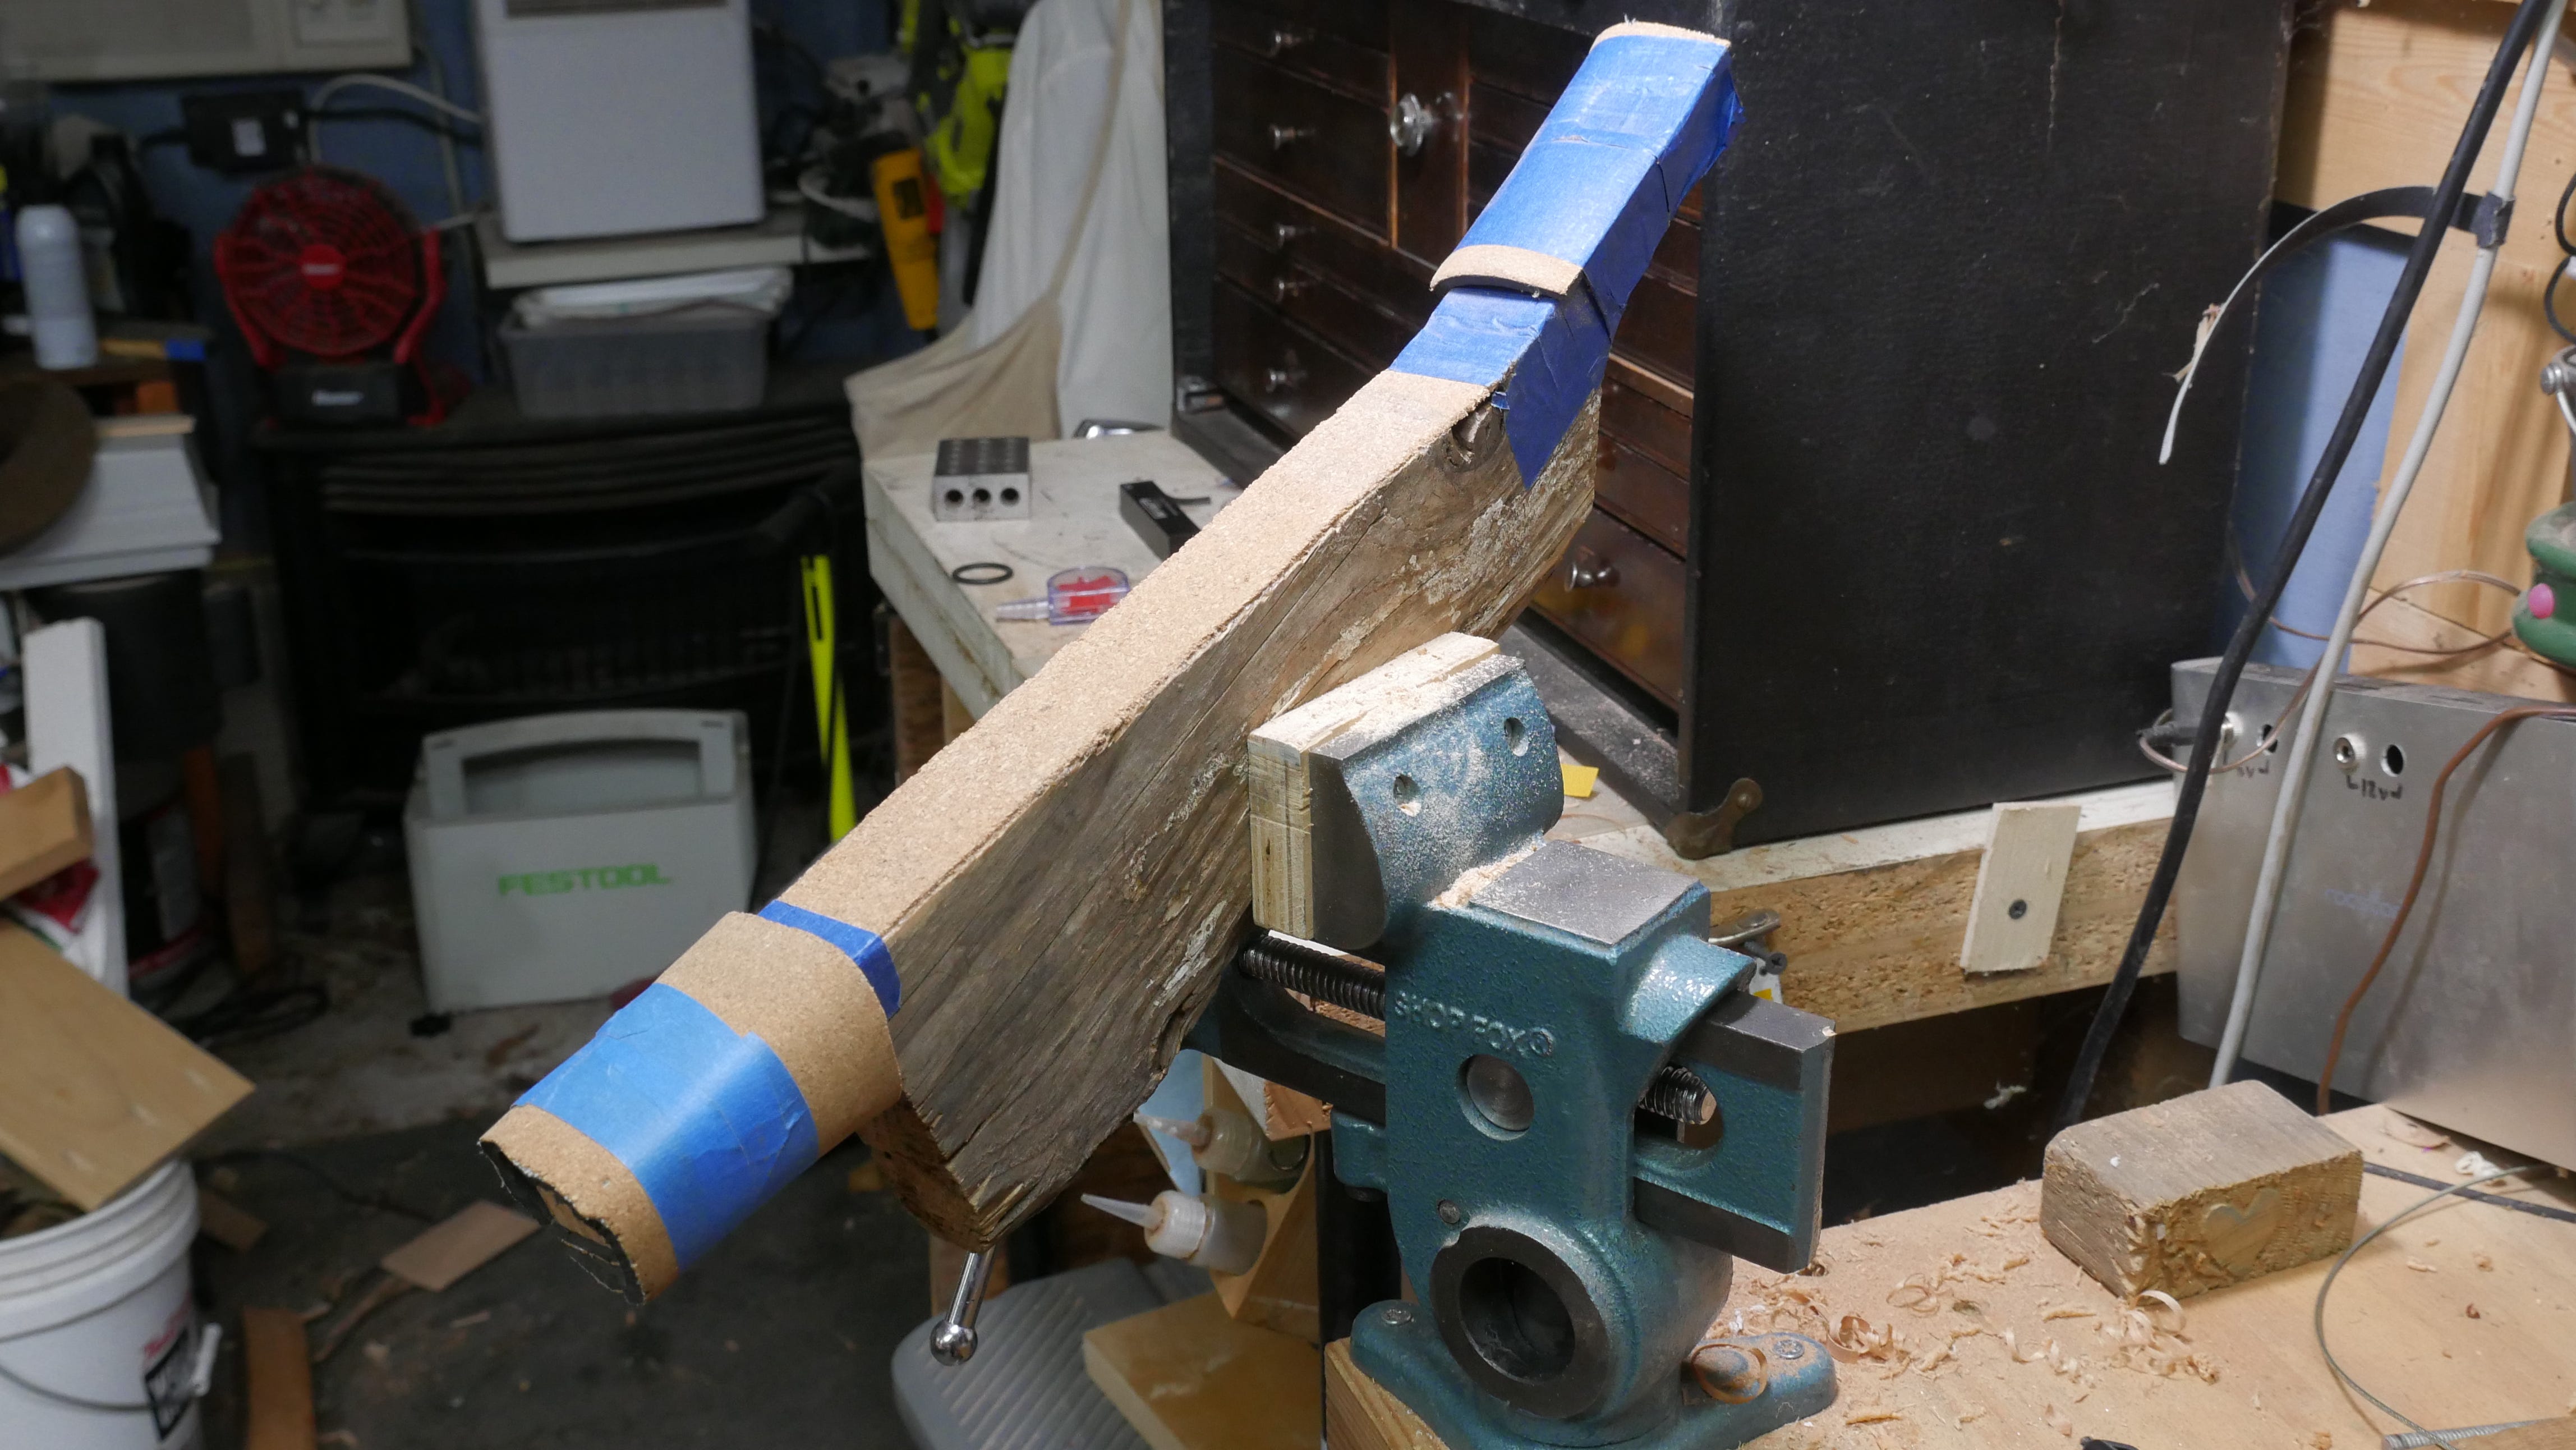
For my entire instrument-making career I’ve been using a beat-up 2x8 to hold ukulele necks while I carve them. Most often mounted in a parrot vise. The nice thing about the paring is that with the flick of the vise handle, you can move the board in the vise jaws or rotate the vise jaws to get a better angle. This vise (one of many in my shop) is mounted on the end of my “window bench”—a bench built into the wall (under the window, duh) that is taller than woodworking benches found in most shops. I like the extra height, and in the vise, this gets the neck I’m working on right up where I can see it. The problem comes in when I want to tilt the neck; one range of motion this combination doesn’t allow for.
At that point I add a wooden hand screw into the equation and… it works.
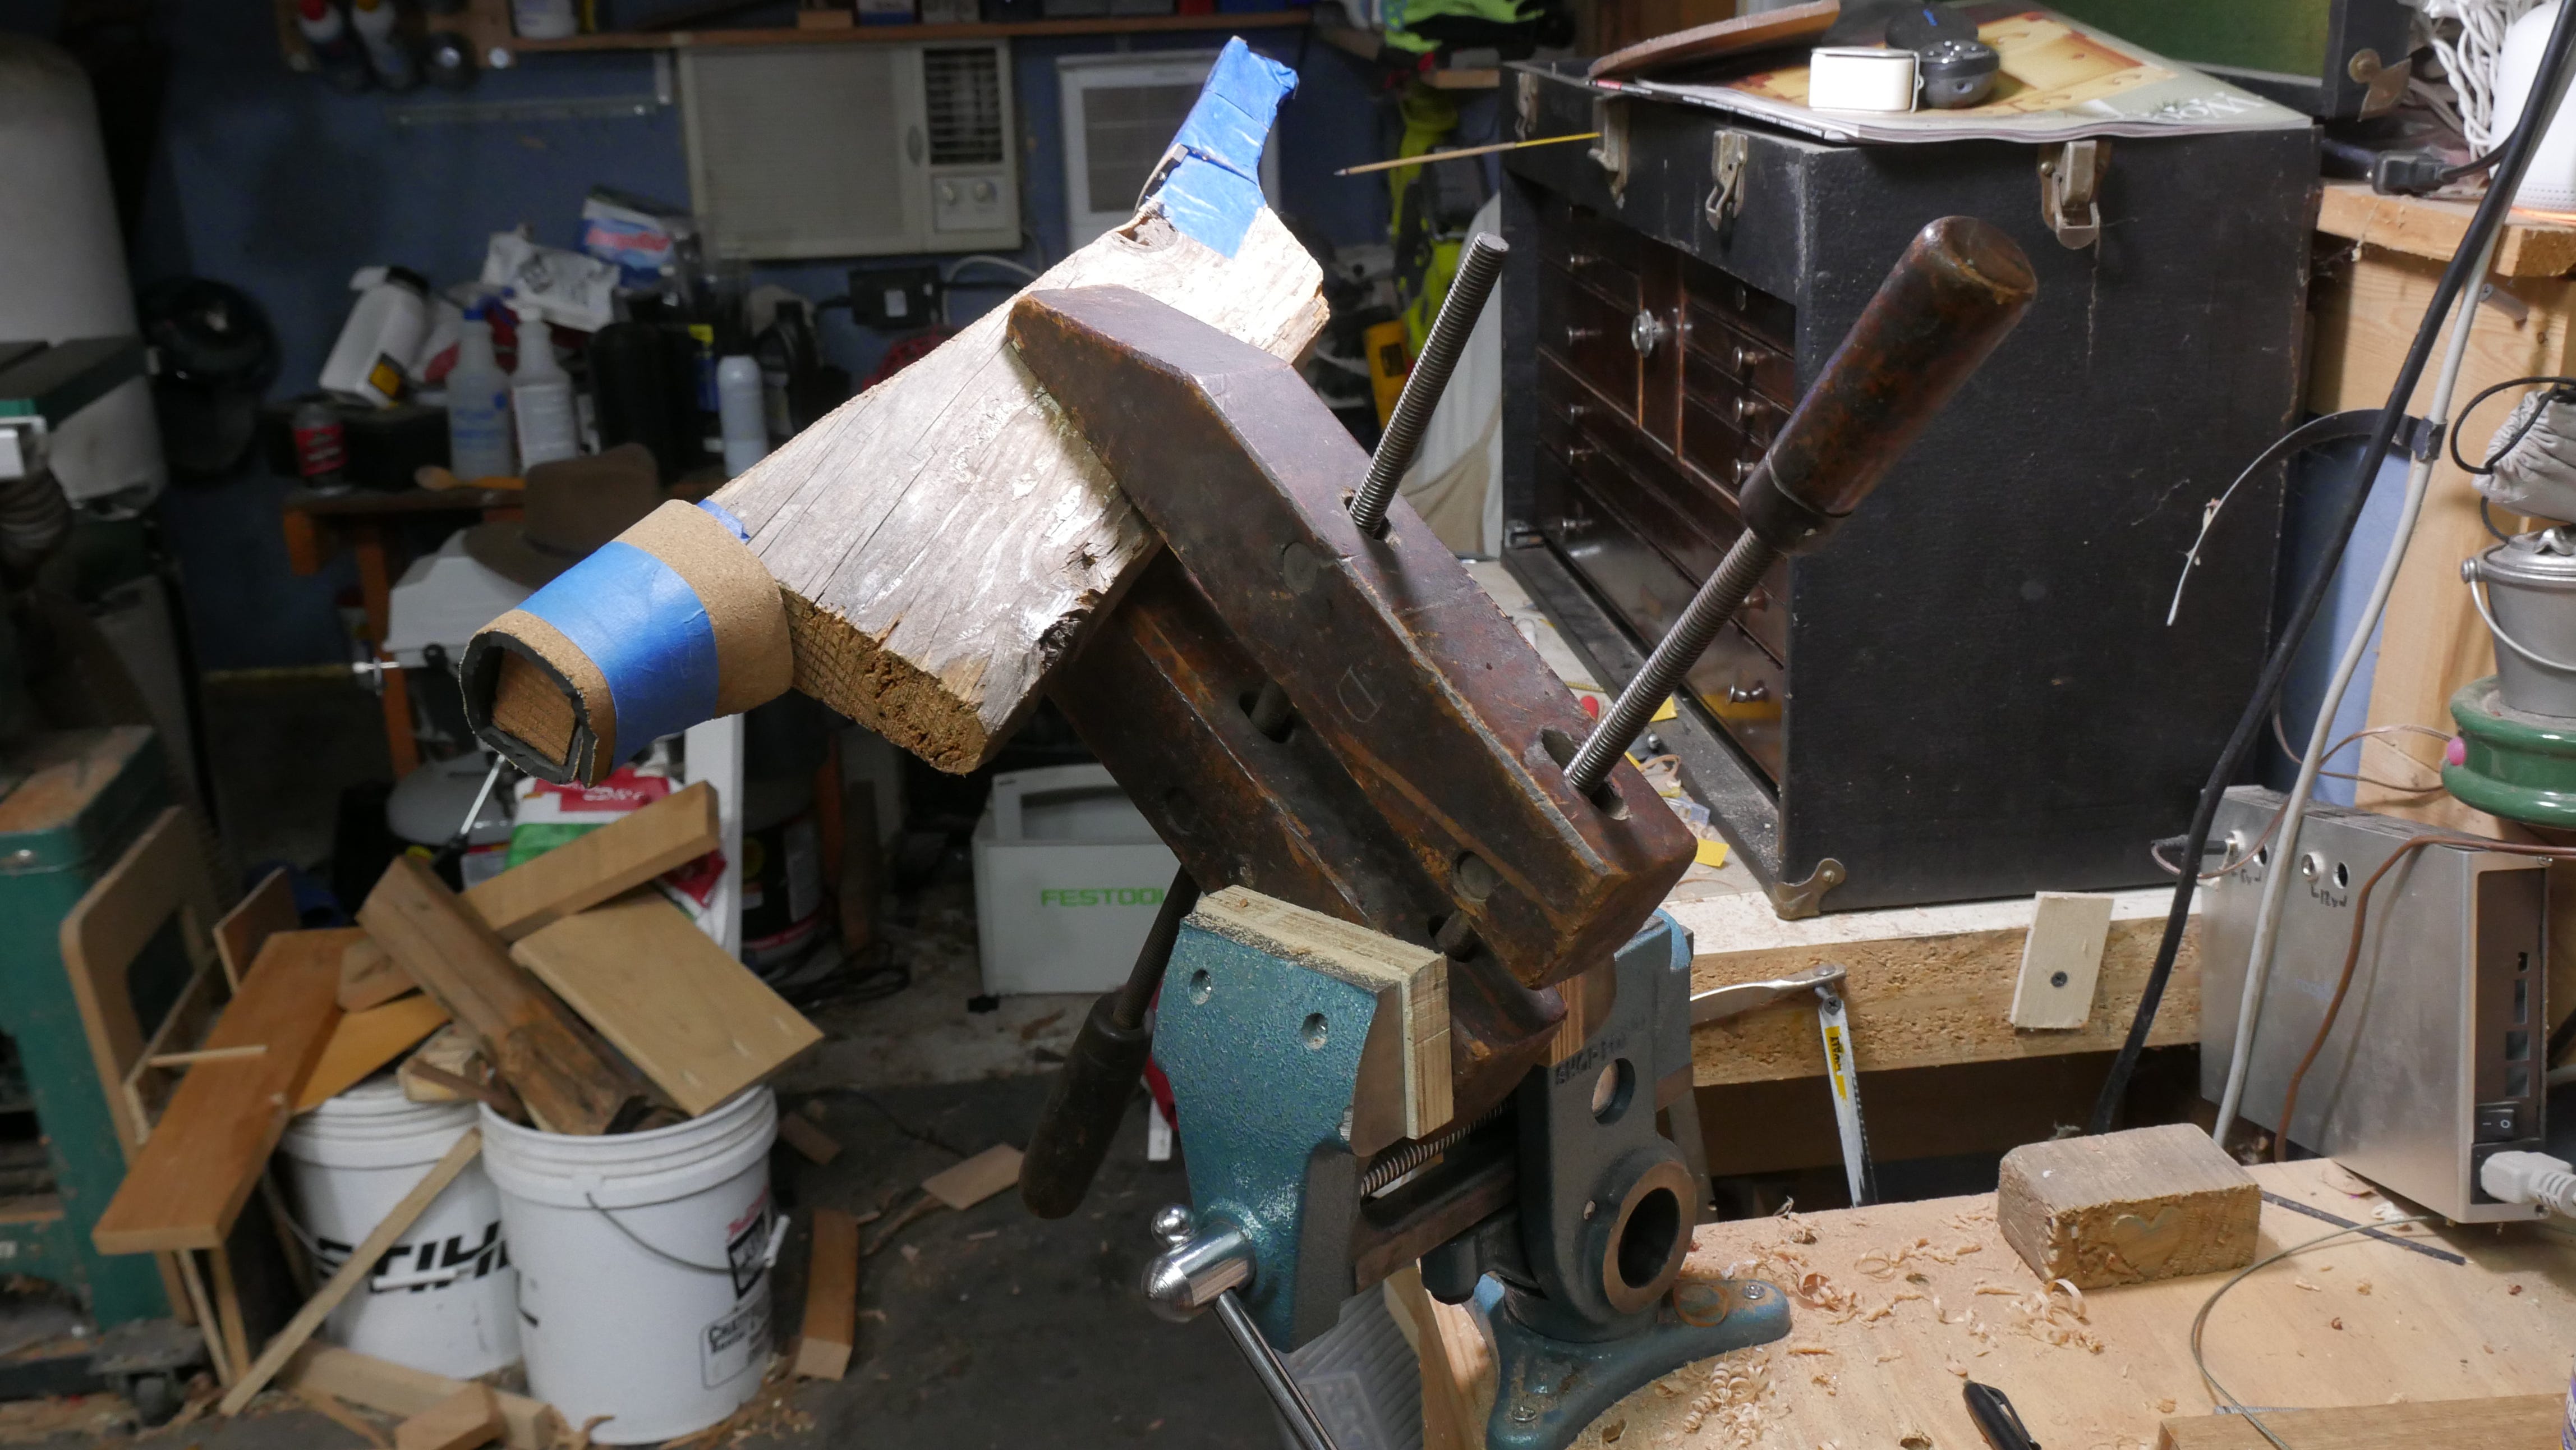
Pretty it is not. To make matters worse, it brings the workpiece up too high, past the point of workable, and the task is no longer comfortable.
So, here are the goals for my new neck carving fixture.
It needs to hold a neck securely. Ideally, it would allow the neck to be easily removed. It’s impossible to inspect the feel of a neck while it’s mounted upside down. The more you check it, the better off you are.
It needs to be able to adjust for discrepancies in the headstock angle. While I aim for a headstock angle that’s dead on… they likely aren’t. If I can adjust for that it’ll be all the better.
I need to be able to move it in more than two axis. Tilt is essential.
Looking at my Fusion 360 CAD model, I designed the essence of this fixture in January of ‘23. Shockingly, I didn’t make building it more of a priority, but I guess that speaks to the functionality of an old piece of wood stuck in a vise.
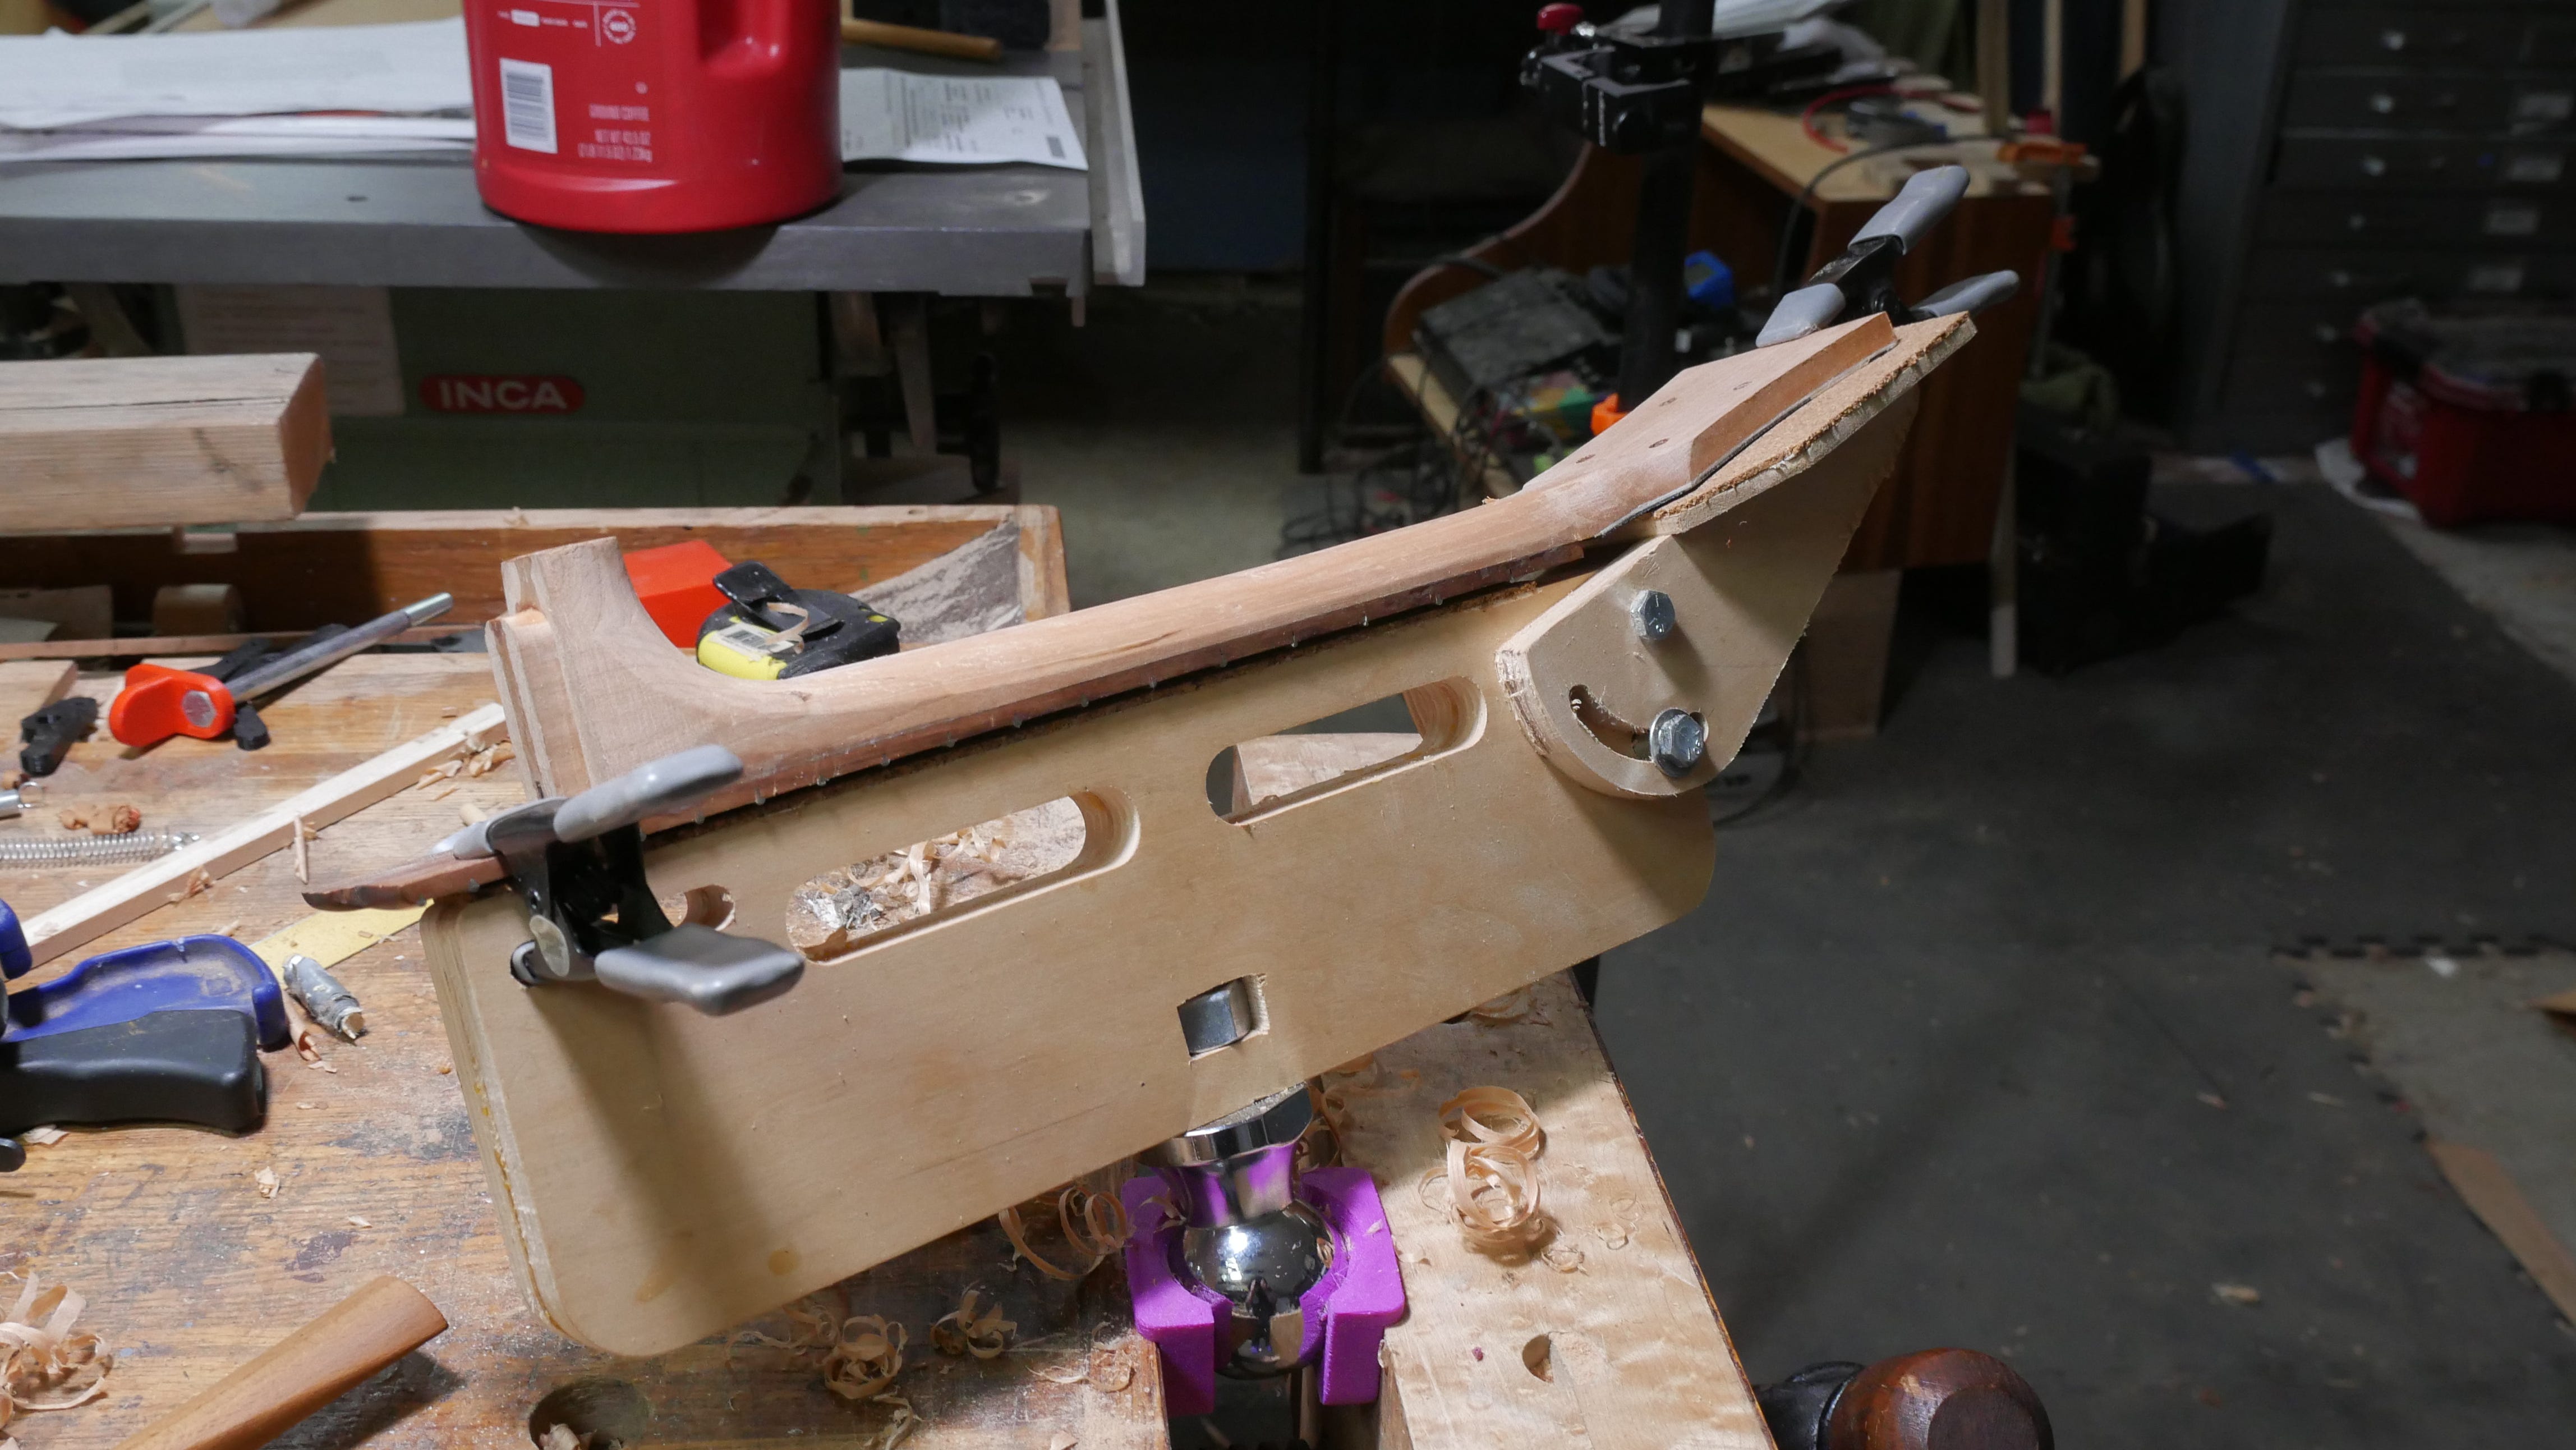
There are two main elements here. The first, the board that holds the neck is likely not very novel. As you can see in the photo, spring-clamp placement isn’t perfectly ideal, and there are a few tweaks in order. The elongated slots in the middle are meant for heavier-duty clamps to secure the middle of the neck during more aggressive shaping, but I think they’re overkill. The adjustable headstock platform works nicely. To make shaping easier, I’ll need to get rid of some of the material directly underneath the transition from the headstock to the neck. I have a plan for that.
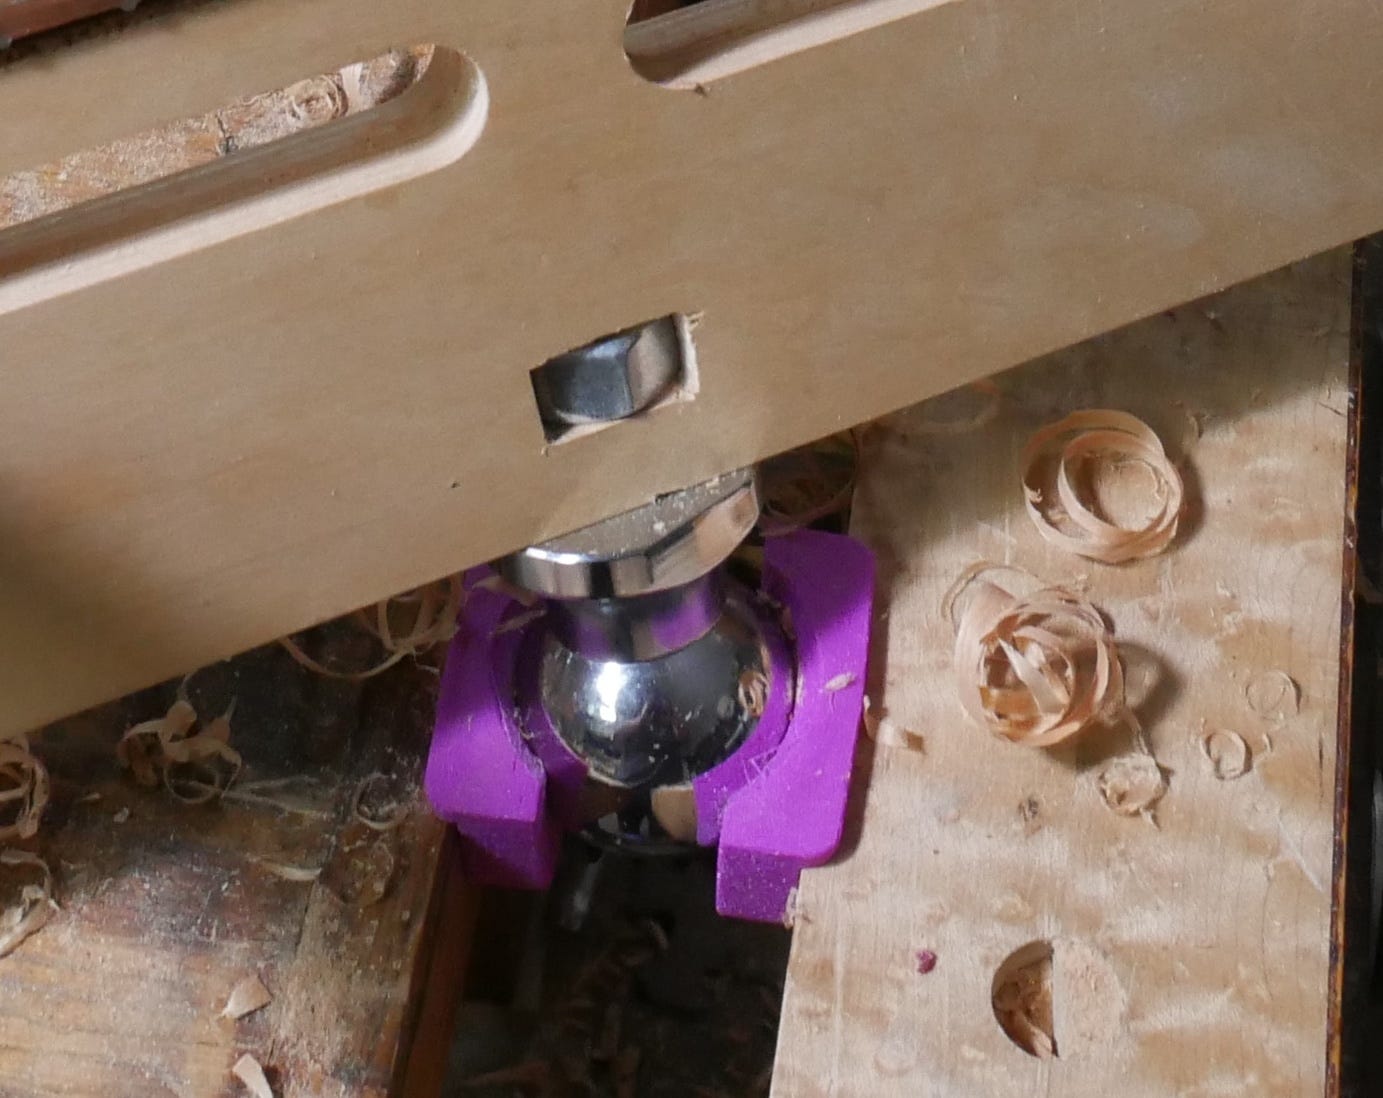
The second element is one that I think might be novel, but only time will tell if it is. Even more importantly, time will tell if it’s functional. In my desire to make a fixture that is easily moveable in all directions, I decided that a ball joint would cover the needed ground faster than all other options. After a few searches online I failed to come up with something that might work and be cheap enough to use on a proof of concept. Then I realized that the role of the ball could be played by a ball-hitch, something easily and economically found in any hardware store. 3D printed jaws would hold the ball and when pressure was transferred via a bench vise… well… ya!
I first printed the jaws out of PLA filament (basically hard plastic), lined them with cork, and eventually embedded a magnet to get them to stick to the ball hitch. While this worked, and secured the ball when tightened in a vise it became clear that eventually the PLA would be crushed in use. This version was printed in TPU filament which is essentially rubber and very flexible. Off the printer, when tightened in the vise, it barely held the ball in place, but a coating of rubber cement seems to have added gription and is working well. It’s not 100% as solid as I’d like, but it’s 75% and that’s a pretty good start.
As you can see in the above video, the interaction with the fixture is just about as perfect as I’ve always dreamed of—quick to adjust by loosening the vise handle. It doesn’t hold as firmly as I’d like though. At the very top of the video, you can see the neck start to move. It’s not that bad, but we can do better.
As always, I’m having fun and that’s about all that matters.
No posts
Comments
Nothing yet. Say the first thing.
Sign in to join the conversation.