
In this blog, I’ll show you the easiest way to make a 30-inch square puff quilt in just four easy steps. Your puff quilt will be created from sixteen 8.5-inch squares of fabric in a random mix of your favorite scrap fabrics.
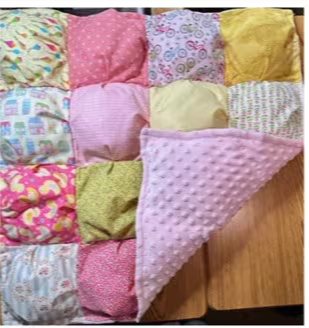
A puff quilt is known by many names: biscuit quilt, bubble quilt, or cloud quilt. These names come from the look of the soft and round blocks, which are joined together as if by magic. Let’s look closely at the construction of the puff quilt. Each quilt block is filled with stuffing, joined in rows, and then attached to a quilt backing. The top of the quilt is so dimensional that the seams and quilting are invisible to the eye.
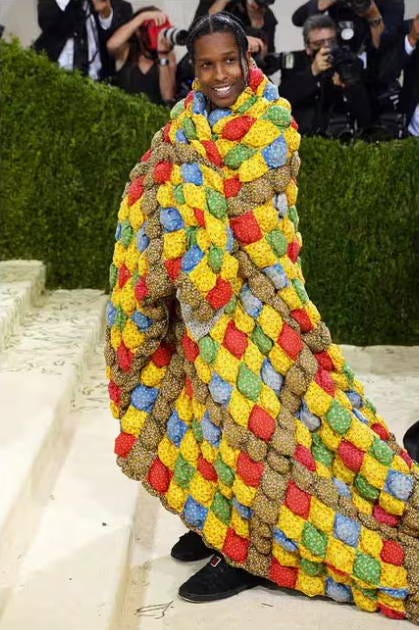
A small puff quilt makes the perfect tummy time quilt for babies, a larger size makes a cozy quilt for all ages, or an amazing cape! Rapper A$AP Rocky wore a puff quilt cape to the Met Gala in 2021.
The traditional puff quilt has 4.5-inch square blocks. I recommend 8.5-inch squares because you’ll finish your project faster.
I’ll also share with you my tried and true method to make a no batting quilt -- Dimpled minky backing fabric. You’ll save time and produce a lighter quilt that can be used year-round. Ask me how I know this!
Finally, a quilt is not finished unless it’s quilted. I’ll share detailed instructions on hand-tying a quilt.
Let’s get started with making a quick and easy puff quilt by getting prepared.
Be prepared for this project. See “Supplies”, “Fabric”, and “Getting Ready To Sew”.
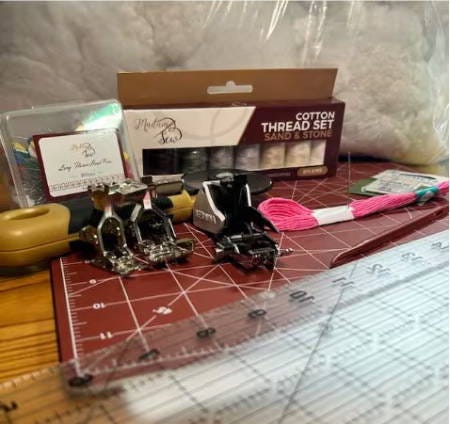
These are the tools and supplies that I used to make a fast and easy puff quilt.
One bag of pollyfill (Polyester fiberfill used for stuffing)
Embroidery Floss (This is thick embroidery thread with six strands) 9 yards is more than enough to hand-tie the puff quilt)
90/14 Sewing Machine Needle
Chenille Needle (Or any sharp pointed needle with a large eye). Use this for hand-tying the puff quilt
6-inch by 24-inch ruler, 8.5-inch square ruler (Optional), 7.5-inch square ruler (Optional)
Presser feet: a Quarter Inch Presser Foot for piecing the blocks, a Stitch-In-The-Ditch-Foot, a Walking Foot for topstitching
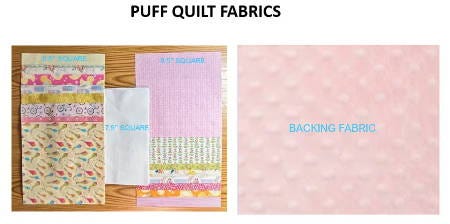
The finished puff quilt will be approximately 30 inches square. You will need the following fabric squares and fabric backing:
Sixteen 8.5-inch squares of assorted cotton scrap fabric or fat quarters.
Sixteen 7.5-inch squares of white cotton or muslin scrap fabric. Or any neutral fabric color that complements the color of the backing fabric.
One 30-inch square of dimpled minky fabric.
Use your favorite way to prep for a new project or try my proven, stress-free method. See “Getting Ready To Quilt-The Ultimate Checklist”.
The puff quilt is created in four steps.
Step One: Make sixteen puffy blocks.
Step Two: Make the puff quilt top.
Step Three: Join the puff quilt top to the minky backing.
Step Four: Quilt the puff quilt.
Let’s start by making one puffy quilt block. Once you make one, the other fifteen will be easy.
Take one 8.5-inch square of fabric and one 7.5-inch square of fabric.
Place the 7.5-inch square in your work area.
Place the 8.5-inch square on top of the 7.5-inch square. The 8.5-inch square must be right side up.
Align the top edges and pin in position about one inch down from the top. Ignore for now the uneven bottom edges of the two squares.
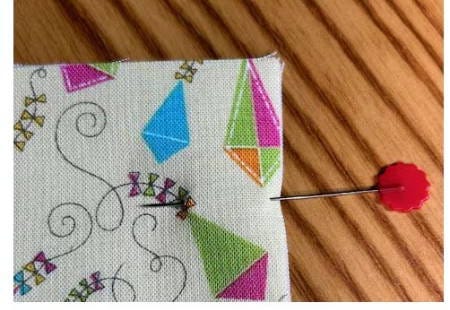
Start sewing a ¼-inch seam from the top aligned edges and stop sewing when you reach the pin.
Align the bottom edge of the squares. The excess fabric will form at the sewn 1-inch.
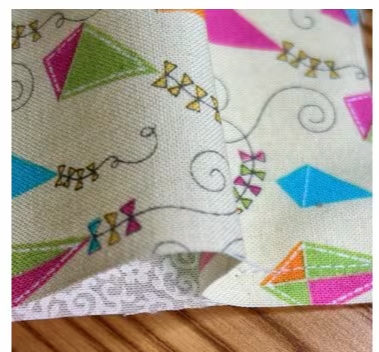
In the middle of the squares, create a pleat from the excess fabric.
Complete sewing the seam by sewing through the pleat and the rest of the side. Note: Whether you fold the pleat up or down is not important. Just apply your choice to all the pleats.
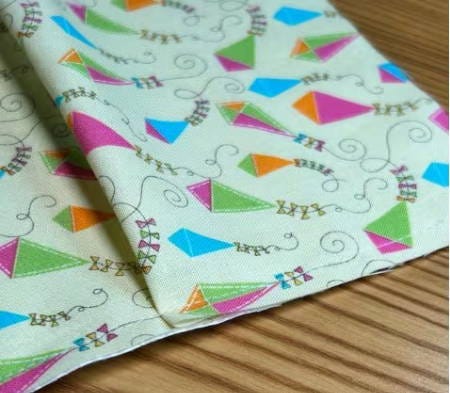
Repeat this sewing and pleating method for the second and third sides, going clockwise.
Your square has become a three-dimensional block with an opening. Next, you will use that opening to stuff in the polyfill.
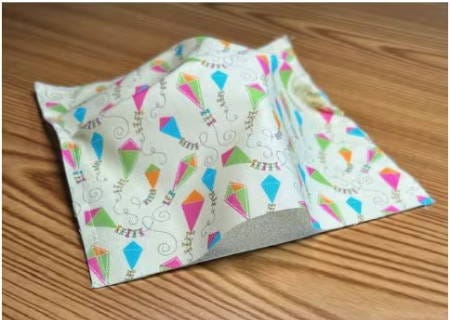
Stuff the square with the polyfill. Overstuffing will make the puffy blocks too full and will make sewing difficult. I used four heaping soup bowls as my polyfill measuring guide. Once you perfect the stuffing, then everything else is a breeze. Trust me on this.
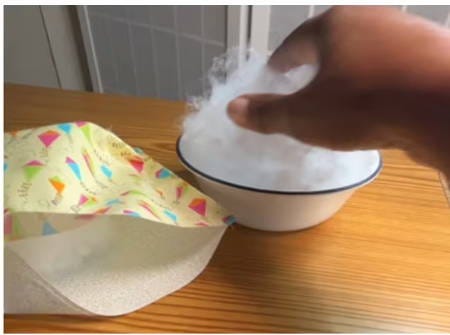
You have perfected making a puffy block. Make fifteen more blocks. And get ready to convert your puffy blocks into a quilt top.
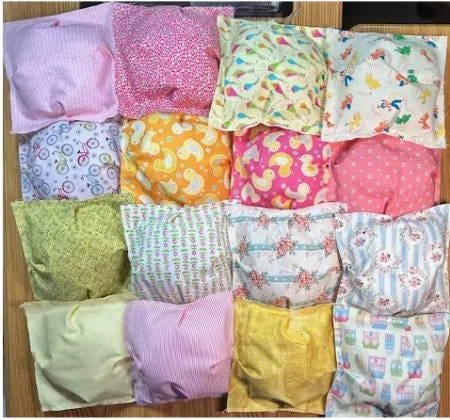
The next two steps require sewing straight stitches. I told you this was a fast and easy project!
Use a Stitch-In-The-Ditch Presser Foot to sew along the ¼-inch seam you made when creating the puffy blocks.
Tip: Move your needle a few positions to the left so that your ¼-inch seam stitches will be hidden.
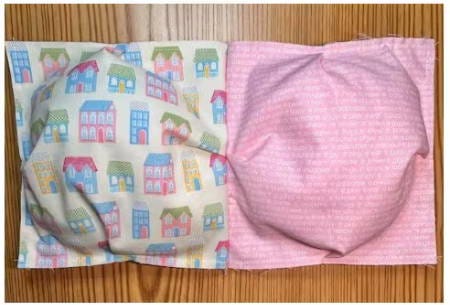
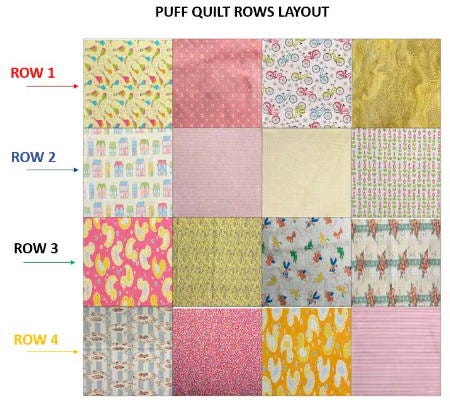
Follow the Puff Quilt Rows Layout to sew four rows of puffy blocks. Sew the puffy blocks right sides together. When finished, you will have four strips of puffy blocks.
Position the strips of puffy blocks vertically and sew them right sides together.
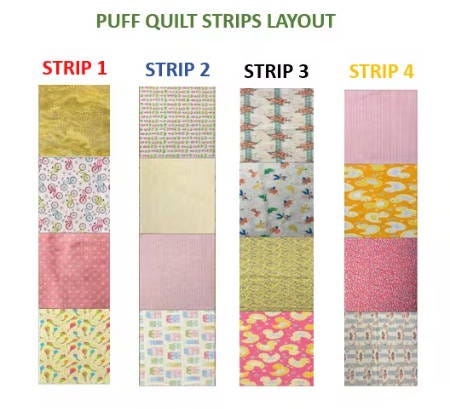
Use the Puff Quilt Strips Layout to finish creating the puff quilt top. Sew the strips in pairs and then sew the pairs together.
Sew strip 1 to strip 2.
Sew strip 3 to strip 4.
Sew strip pair 1 and 2 to strip pair 3 and 4.
Remember to ‘nest’ your seams for perfect seam alignment.
Tip: For detailed instructions on perfect seam alignment, see Madam Sew blog “How To Use A Walking Foot To Make A Quilt In A Day” section ‘Sew Row 2 Of The 4 Block Center Patch’.
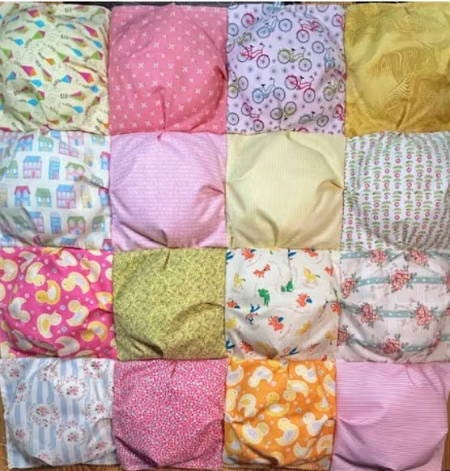
Well done! Your puff quilt top is finished. Now you are ready to add the dimpled minky fabric backing.
Minky fabric can be stretchy and slippery. A little patience and slow sewing will reap the ultimate reward – a luxuriously soft quilt backing!
If you’re familiar with my “How To Sew Minky Fabric With Ease” blog, then you know I highly recommend it as a quilt top backing.
Step three of making the puff quilt requires you to join the puff quilt top to the minky backing, like making a blanket. The versatile stitch-in-the-ditch presser foot enables you to easily follow the last stitches you made (The stitches to the far left) to join your quilt top and bottom. Remember to move your needle position two positions to the left. I used position -3
Place the puff quilt top and the minky fabric right sides together.
Sew around the perimeter.
Very Important: Leave a 12-inch opening so that you can turn the quilt right side out.
Turn the quilt right side out.
Sew the opening closed. Use a handstitched ladder stitch for an invisible close.
Topstitch the puff quilt using a ¼-inch seam with a walking foot.
Your puff quilt is ready to be quilted.
There are two ways to quilt a puff quilt: Stitch-in-the-ditch or Hand-tying. Choose the method that you prefer.
Stitching “in the ditch” is accomplished by sewing machine or by hand. This method results in neat squares on the back of your quilt and invisible quilting on the puff quilt top. Use a ‘stitch-in-the-ditch’ presser foot if machine stitching.
Hand-tying a puff quilt gives it a hand-made look. Let me show you how.
Use the Hand-tying Layout as your sequence guide. Starting in the middle of the quilt top avoids unsightly folds on the quilt back.
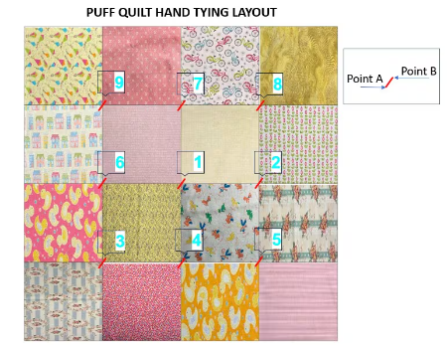
Cut about a yard of embroidery floss and thread your embroidery needle.
Pass your needle down through red intersection 1 at point A and pull the embroidery thread to the back of the puff quilt. Leave a 3-inch tail.
Position your needle on the back of the quilt so that it pops up into red intersection 1 at point B. Pull through and cut a three-inch length. Your point A and point B embroidery floss tails should be three inches.
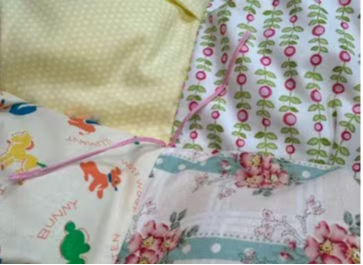
Hand-tie by making two knots. Trim the tails to about one inch.
Tip: The secret to successfully hand-tying a quilt is to avoid tying the knot too tightly. If the knot is too tight, the threads will pop during usage or washing.
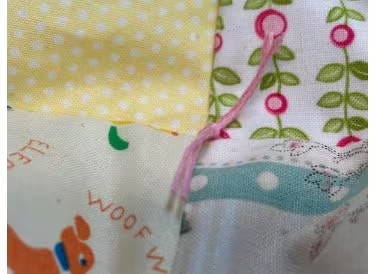
Congratulations, you just completed your first hand-tie. Repeat this method for the remaining eight red intersections.
Your gorgeous puff quilt is complete!
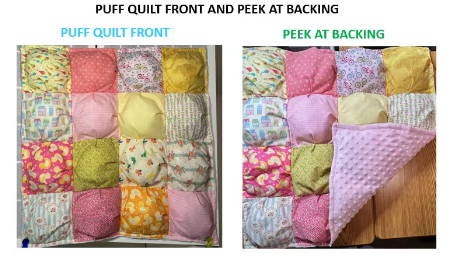
Look at what you accomplished! You know how to make a puff quilt and you…
Used the easiest and quickest way to make multiple puffy blocks.
Applied your straight stitching know-how to transform sixteen individual puffy blocks into a puff quilt top.
Tamed stretchy and slippery minky fabric to create the perfect puff quilt backing.
Displayed your unique quilting style by hand-tying your puff quilt.
Are you motivated to try some more unusual but deeply satisfying sewing projects? Madam Sew has lots of them. Here are tow others that you might like:
May your quilting always bring you joy!
Ernie Grant
Comments
Nothing yet. Say the first thing.
Sign in to join the conversation.