
Hello, builders, and welcome to the SLM-OCR Course! 👋
A few days ago we kicked the whole thing off: a 6-week, hands-on build of a real production OCR pipeline, with the full codebase free and open from day one. And we promised a bonus Friday article to get your cloud ready before Week 1. This is it.
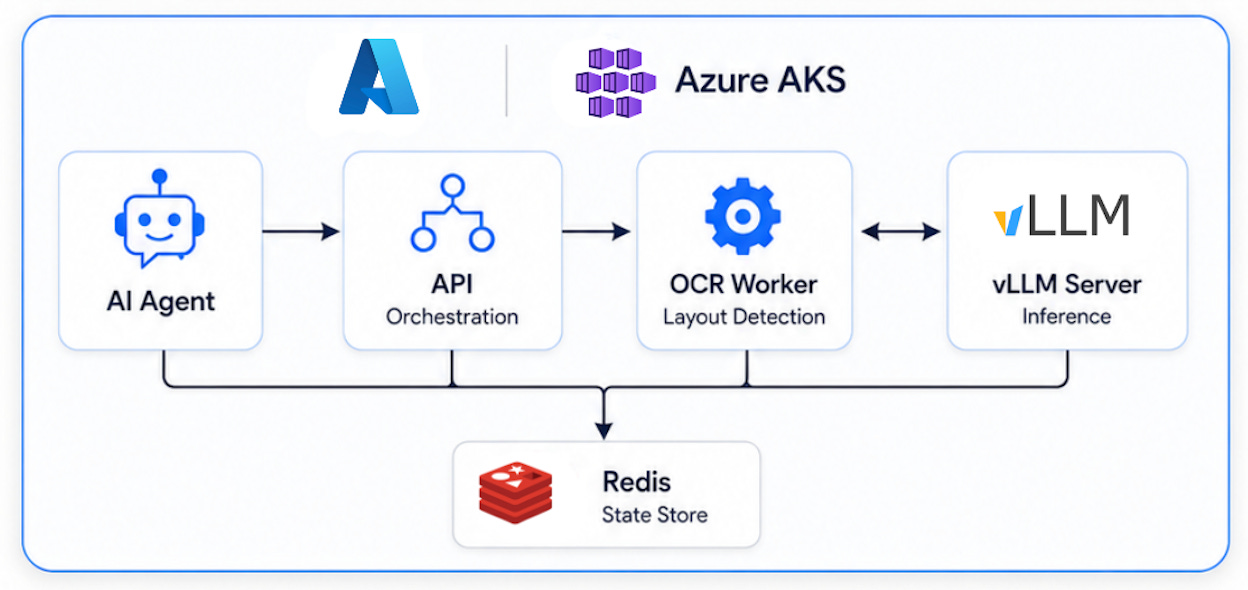
Before we touch a single Kubernetes manifest, your environment needs three things: an account created, the CLI installed, and GPU quota approved. This guide walks you through it on Azure, the cloud the course is built on, and covers the part nobody warns you about: the surprising friction between "I have an account" and "I actually have a GPU." (Prefer Google Cloud? We've got you covered too, in the repo, more on that at the end.)
Get this done this weekend and you'll walk into Week 1 with zero setup friction!
💡 The full step-by-step lives in the open-source repo: azure_onboarding.md, azure_gpu_prereqs.md, and their GCP counterparts, gcp_onboarding.md and gcp_gpu_prereqs.md. This article is the map; the repo is the territory. Once your cloud + quota are sorted, aks_deployment.md / gke_deployment.md pick up from here and build the cluster.
Because it's the step that silently eats two days of everyone's time. Getting a cloud provider to hand you a single A100 involves account upgrades, quota tickets, region hunting, and a capacity lottery. Here's the mental model that saves you the most pain, true on both Azure and GCP:
Free credits do not include GPUs. Your free trial is capped at zero GPU quota, and the increase button is disabled. You must convert the trial into a proper paid account first, and you keep whatever credit you had. Only then can you request GPU quota, and even then approval is a review, not a click.
Internalize that and nothing below will surprise you.
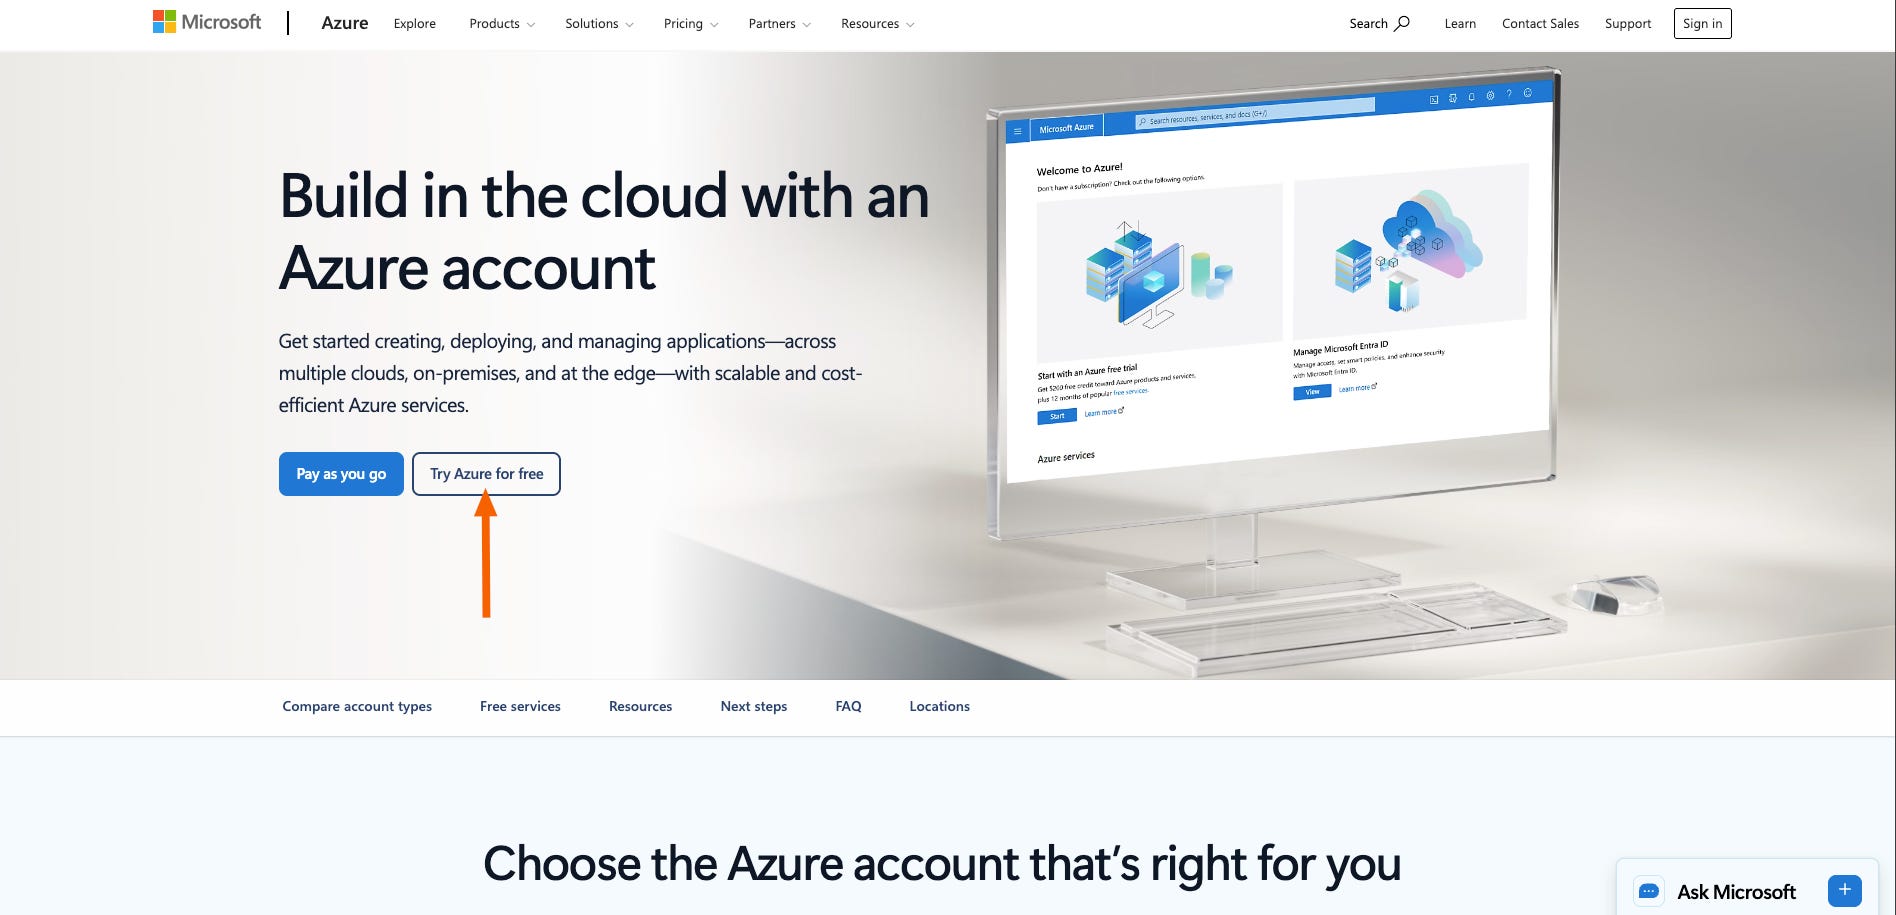
Head to azure.microsoft.com/free and click Start free. Sign in (or create a Microsoft account), verify your identity, and add a card.
The card is for verification, not billing. You won't be charged for creating the account. Use a real credit/debit card — prepaid and virtual cards get rejected.
You now have $200 of credit (30 days) and a set of always-free services.
Before any GPU quota is even visible, your subscription needs the Microsoft.Compute provider registered.
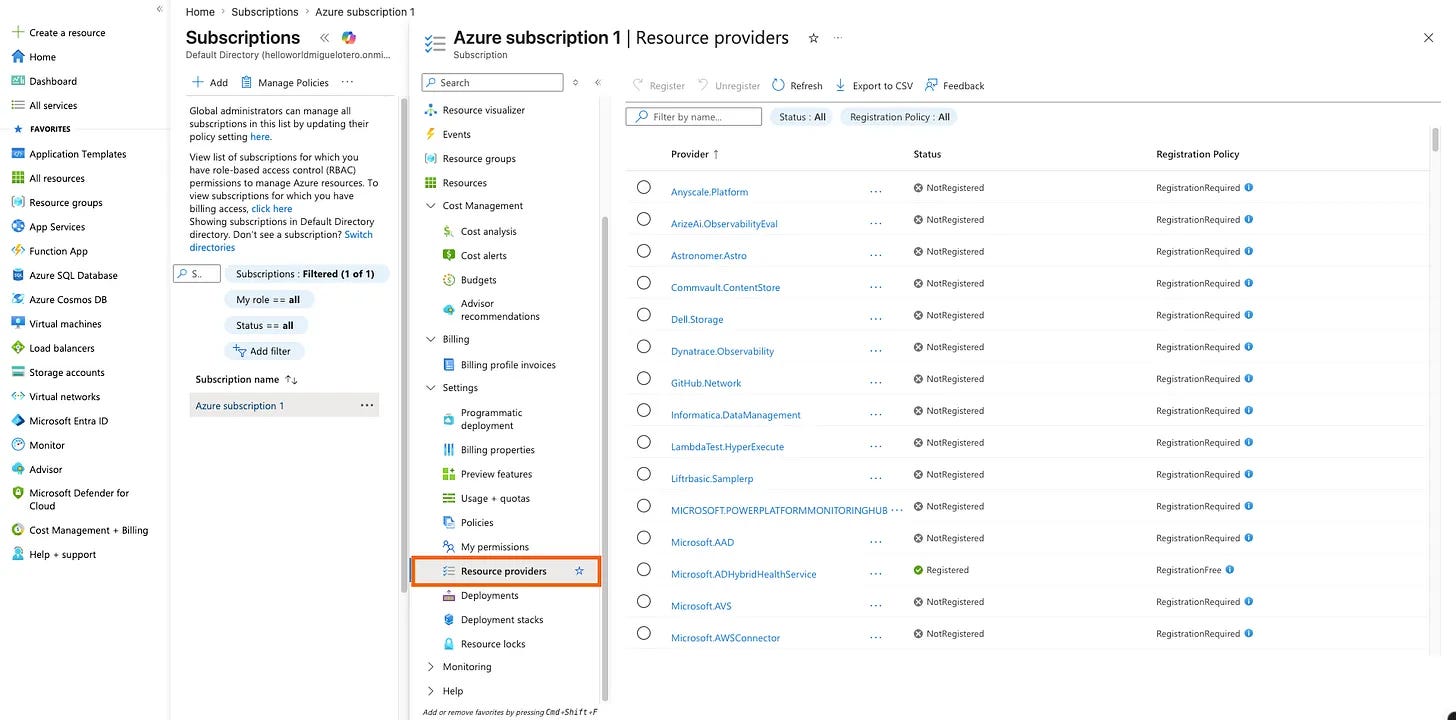
Search for Subscriptions, open your subscription, and in the left menu go to Settings → Resource providers.
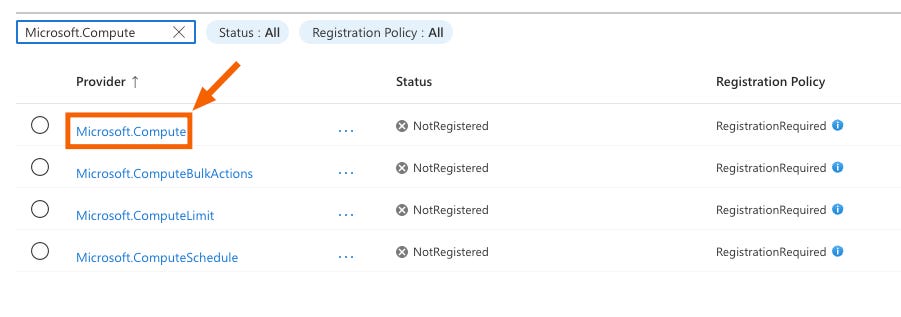
Filter for Microsoft.Compute, select the row, and click Register. Wait until the status flips from NotRegistered to Registered (1–2 min).
CLI equivalent:
az provider register --namespace Microsoft.Compute
Here's the trap: that $200 will not run GPUs. A free subscription is capped at 0 GPU quota, and the increase button is disabled. The fix is to upgrade to Pay-As-You-Go (you keep any remaining credit).
From the portal Home, find the credit banner at the top: "$200 in credits remaining" with an Upgrade to pay-as-you-go button. Click it.
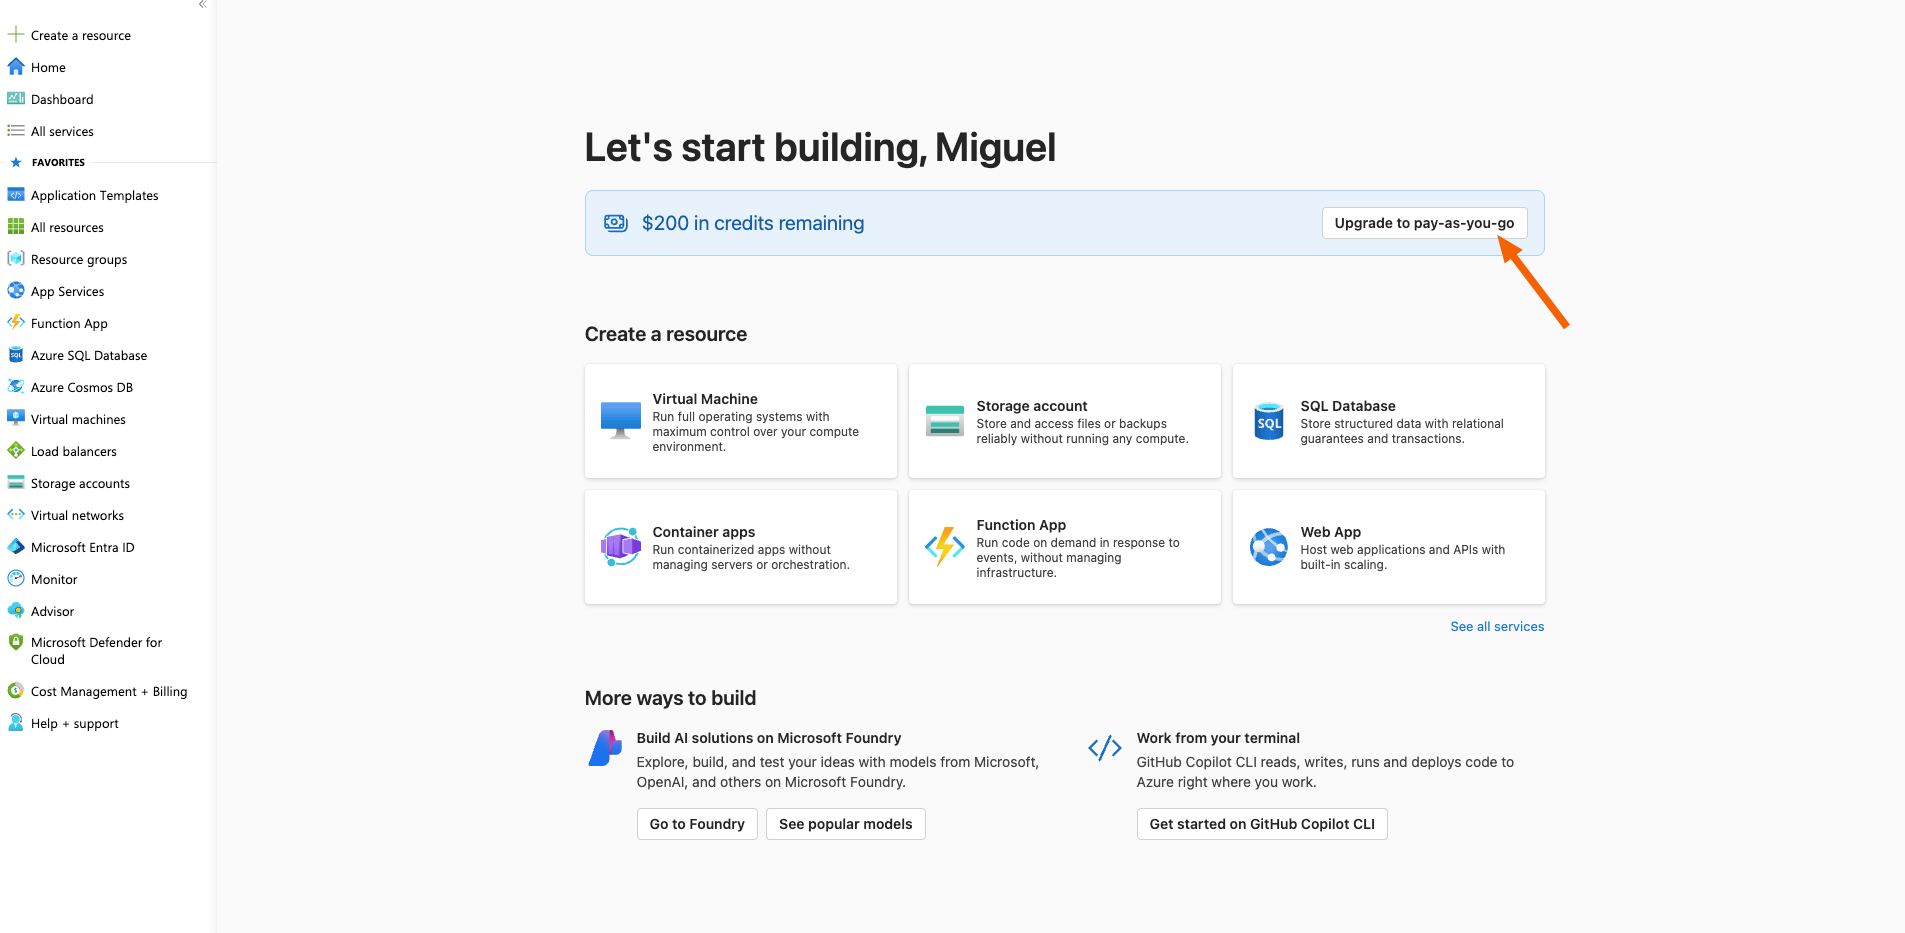
Follow the prompts (a real card is required). When it's done you'll land on a "You've upgraded" confirmation screen.
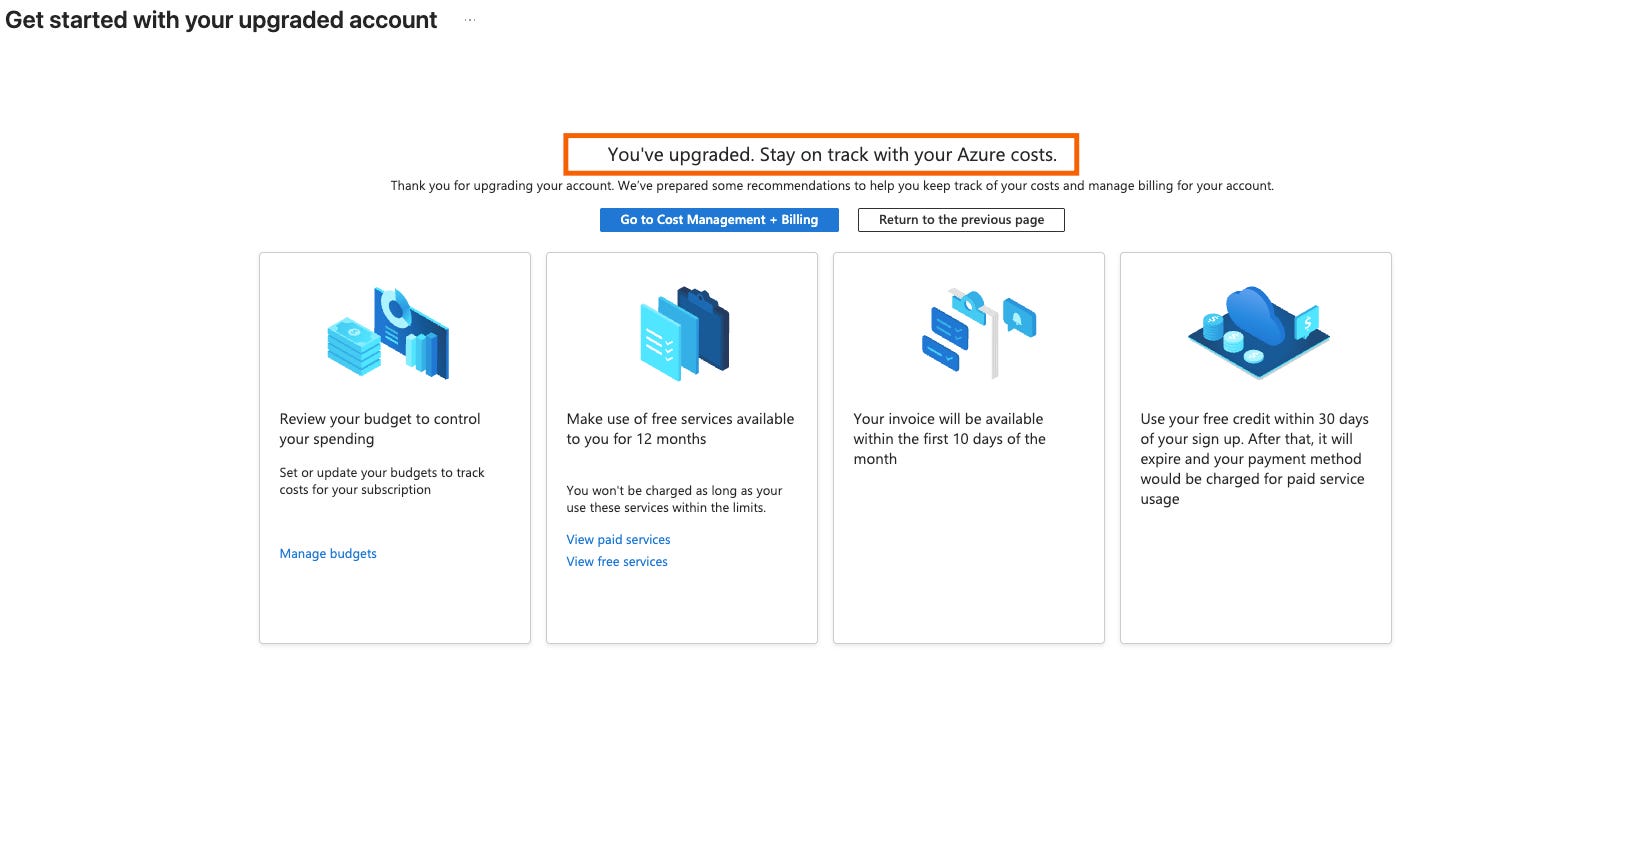
If the portal keeps acting like a trial afterward, sign out / switch directory to force a refresh. No Upgrade button at all? Open a Billing support request or create a fresh Pay-As-You-Go subscription.
Search Subscriptions in the top bar.
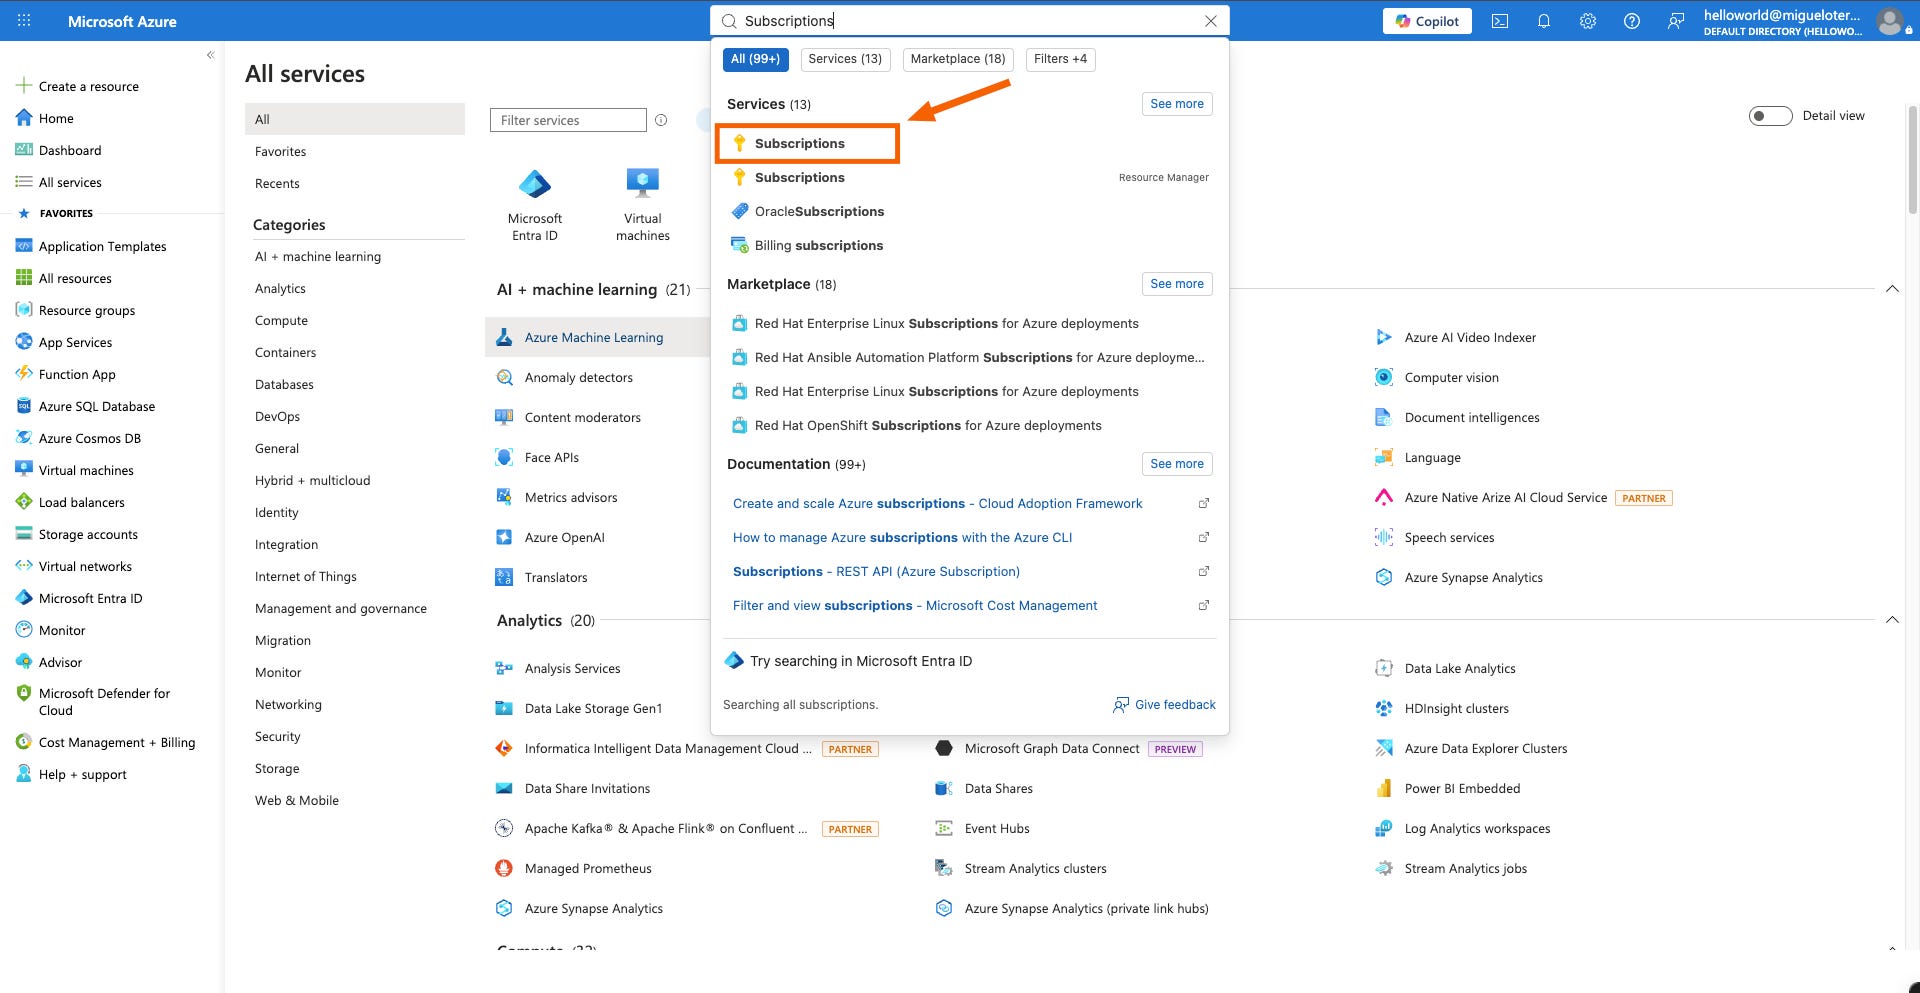
Open your subscription (I renamed it to Azure SLM OCR Course)…
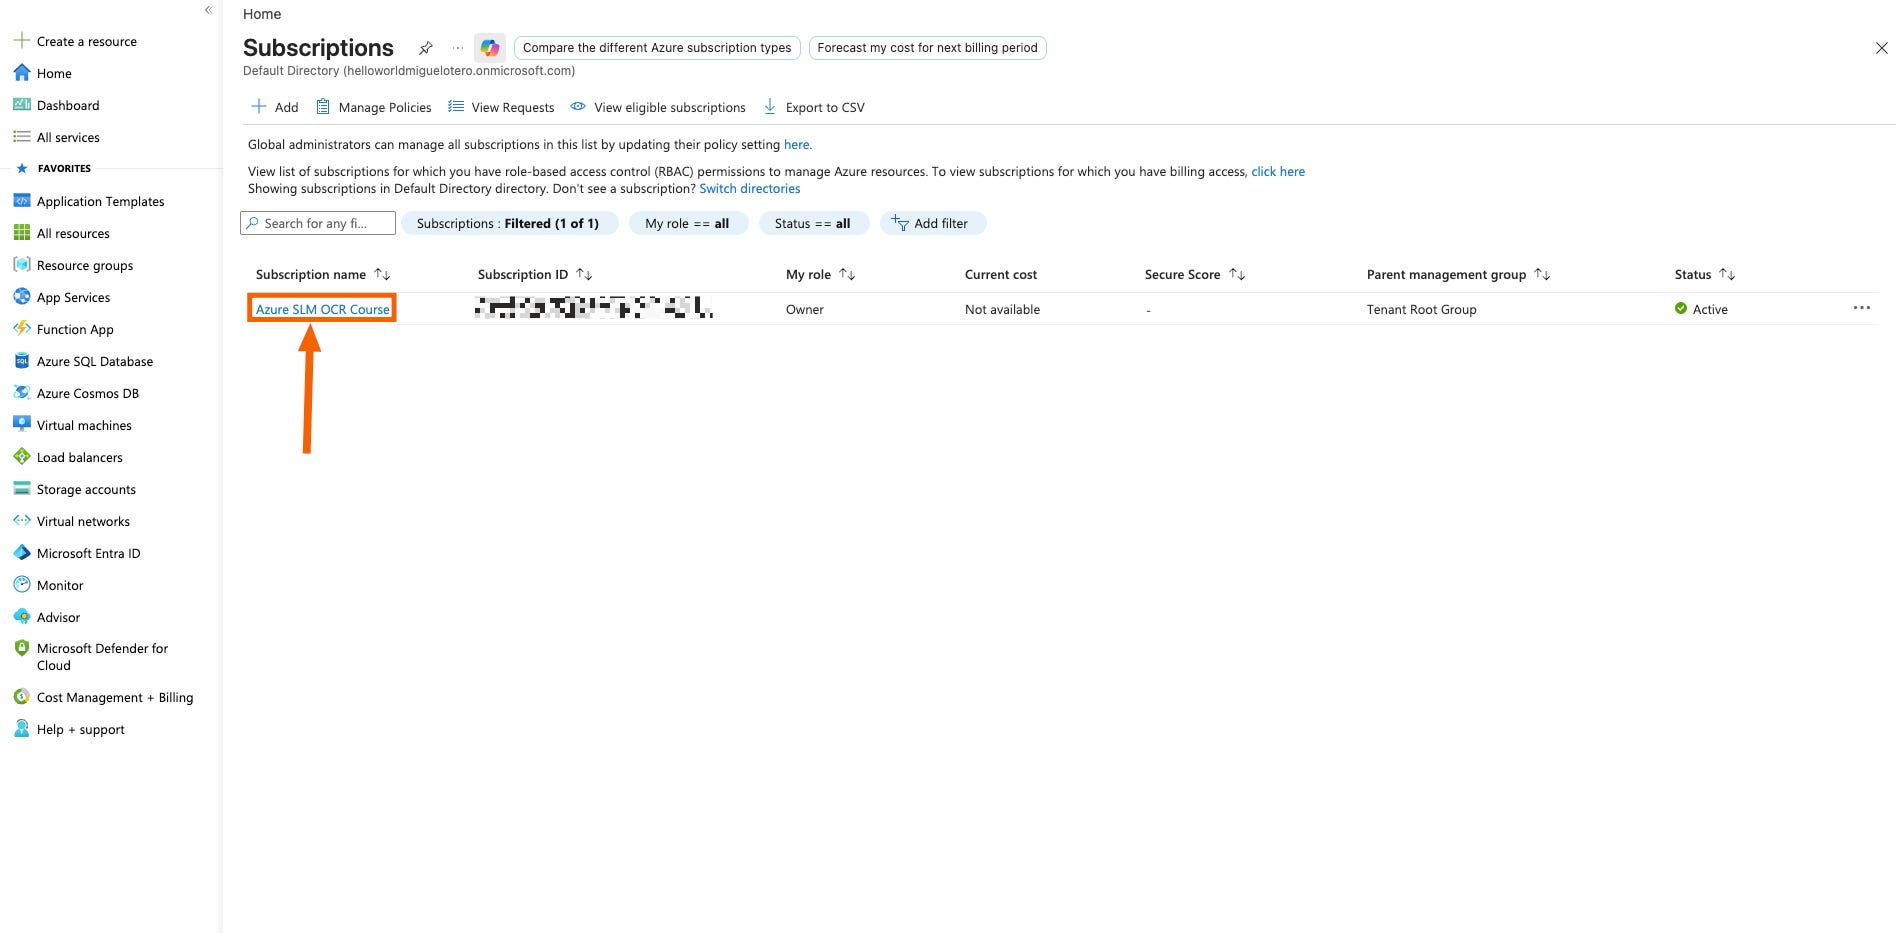
…and in the left menu open Settings → Usage + quotas.
First, a naming thing that confuses everyone.
Azure groups its VMs into families (all the NCADS_A100_v4 sizes are one family, all the NCASv3_T4 sizes are another) and it measures your quota in vCPUs, not in "number of GPUs." That's why the quota you'll be selecting is literally called "Standard NCADS_A100_v4 Family vCPUs": it means "the total vCPUs you're allowed to run across the NCADS_A100_v4 family." So you dot ask for "4 GPUs", you ask for the vCPUs that 4 of those VMs add up to:
T4 (light pool):
Standard_NC16as_T4_v3is 16 vCPU each → 4 GPUs = 64 vCPU on theNCASv3_T4familyA100 (heavy pool):
Standard_NC24ads_A100_v4is 24 vCPU each → 4 GPUs = 96 vCPU on theNCADS_A100_v4family
⚠️ Don’t confuse family with GPU model. Several families have "A100" in the name. You want the NC one (
NCADS_A100_v4, cost-optimized inference), not theND...A100families (NDAMSv4_A100,NDASv4_A100), which are the ND series for distributed multi-GPU training.
Now the clicks. Set Provider: Compute and Region: <YOUR_REGION>, then search NCASv3_T4 and tick Standard NCASv3_T4 Family vCPUs (you'll see it at 0 of 0).
In my case, for this project, I went with France Central: it has GPU availability for both the T4 and the A100 (more on how I checked that in a later section) and it's close to Spain, where I'm based. Pick whatever region works for you; just make sure it has both GPUs available before you commit.
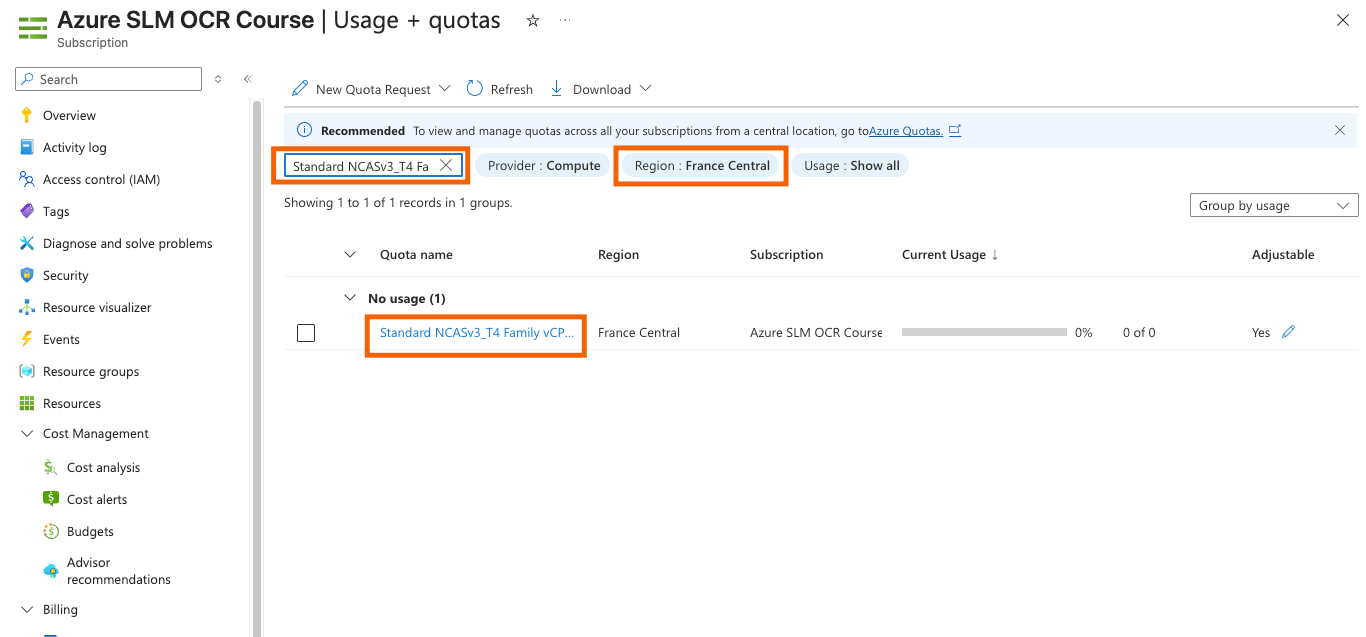
Click the pencil / New Quota Request, enter New limit = 64, and submit.
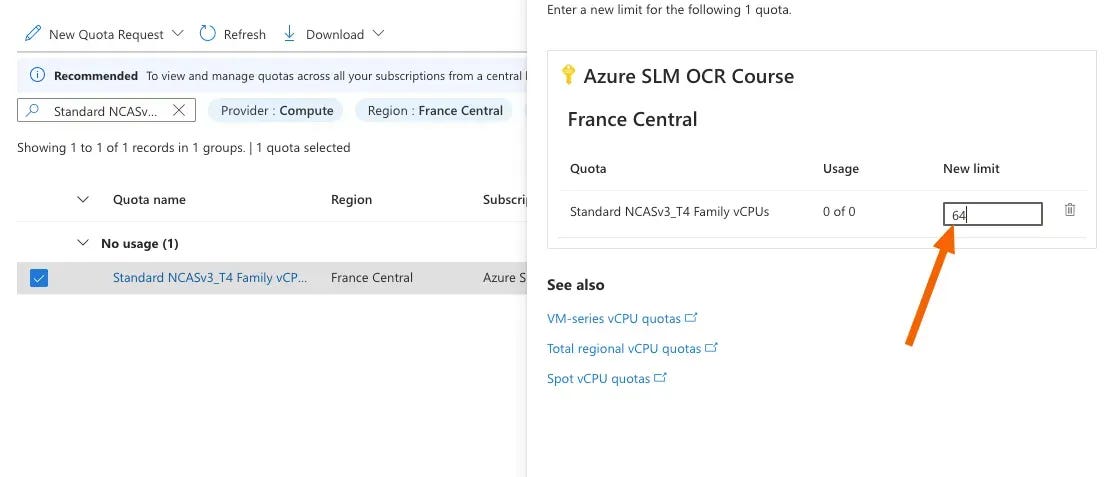
Then repeat for the A100: search NCADS_A100_v4, select Standard NCADS_A100_v4 Family vCPUs, set New limit = 96.
GPU quota almost never auto-approves. You'll be told to submit a support ticket, which is normal. T4 usually clears fast; A100 can take hours to a couple of days.
Approved quota means you're allowed to ask for the hardware. It does not mean the hardware is free right now. Before you commit to a region, scan a few:
An empty restriction column is a green light; NotAvailableForSubscription means pick another region.
And the only 100% proof is to deploy one VM, watch it boot, and delete it immediately (an A100 bills by the second):
How to read the result:
VM running→ the hardware is really there. You're good to build the cluster in this region.AllocationFailedorSkuNotAvailable→ the region has no free GPU at this moment. Pick another region that came back clean in the scan and try again. This is a capacity issue on Azure's side, not a mistake on yours.
The full walkthrough (plus the T4 version of this test) lives in azure_gpu_prereqs.md.
This article walks the Azure path end to end, since that's what the course builds on. If you'd rather run the pipeline on Google Cloud, the shape is identical: the same free-credits-don't-include-GPUs trap, the same "activate a paid account first," then request quota (GCP counts GPUs directly instead of vCPUs) and check availability per zone.
We've written the full GCP walkthrough so you don't have to figure it out alone. It lives in the repo:
We deliberately left AWS out of the course. Not because it's harder, because we want you to own it.
The challenge: take this exact architecture, two autoscaling GPU node pools (light + heavy), scale-to-zero, running the OCR pipeline, and get it working on AWS (EKS). Work out the instance-type equivalents, the Service Quotas dance for on-demand GPU limits, the Karpenter or Cluster Autoscaler setup, all of it.
The reward: the first person to send us a working AWS version gets a shout-out in an upcoming article, with a link to your write-up or repo. Show the community how it's done.
Reply to this email or tag us with your solution. 👀
Create your Azure account and install
az(azure_onboarding.md).Upgrade to Pay-As-You-Go and file your T4 + A100 quota tickets today. The A100 one can take a while, so start the clock now (azure_gpu_prereqs.md).
Run the smoke test once quota lands, to confirm real capacity.
Do that, and you'll walk into Week 1, Kubernetes for AI Systems, with a cluster-ready cloud account and zero setup friction, ready to pick up with aks_deployment.md (or gke_deployment.md if you went the GCP route).
See you next Wednesday, builders! 👋
Comments
Nothing yet. Say the first thing.
Sign in to join the conversation.