
Getting DuckLake “running” is easy, but getting DuckLake right is architecture. I wanted to create a mini-series about setting up a truly production-grade DuckLake based on real-life business scenarios. When choosing a lakehouse solution, it is important to set the right foundation. I believe simplicity is your best friend here, and DuckLake is the simplest lakehouse. Let’s get into it!
This article is made in partnership with MotherDuck. The cloud data warehouse built for answers, in SQL or natural language. Fast, serverless analytics powered by DuckDB–from production apps to internal insights.

Let’s say you’ve worked through the basics of setting up a DuckLake and have decided that it’s the lakehouse solution you’d like to implement. First off, congrats and great decision. Second, I have good news. The ease of use you felt when trying out DuckLake locally is also felt even with a production-grade DuckLake.
At a high level, a well-architected DuckLake is going to have three stages:
Catalog, storage, and compute engine setup (core DuckLake architecture)
Data, business logic, and ingestion needs codified (business logic)
Flushing, compaction, and checkpoint strategy implemented (maintenance)
Note: We might add a caching strategy to #3 as well for production.
For this article, we’re going to focus on stage 1, the core DuckLake architecture that includes catalog, storage, and compute engine. If you’re a CTO or platform architect, this is where important long term decisions show up. Concurrency expectations, latency targets, workload size, and ingestion patterns all shape what “production grade” means for your team.
The companions video for this article is here:
When choosing a lakehouse solution, it is important to set the right foundation. Decide where your catalog + metadata live, where your Parquet data live, and how your compute engine will access both. DuckLake’s core bet is that lakehouse metadata is a database problem, not a files-on-object-storage problem. Instead of thousands of small JSON and Avro reads like Iceberg and Delta, DuckLake keeps catalog and metadata in an ACID SQL database such as Postgres, SQLite, or DuckDB and stores data as Parquet on object storage. This sets it apart from other lakehouse designs. As I’ve worked with DuckLake over the last year, I’ve come to the conclusion that DuckLake isn’t trying to be different just for the sake of it. Its design choices are meant to take a fresh look at the problems that nag other lakehouse designs and resolve them with elegant solutions. That elegance is what I love about it.
Setting up the core architecture requires some technical choices to be made regarding the storage and catalog database types.
For the compute engine, I’d like to pull from the upcoming book DuckLake: The Definitive Guide.
The primary execution engine for DuckLake is of course DuckDB. Other options for execution engines include Apache Spark, Apache DataFusion, and Trino. However, DuckDB works particularly well with DuckLake and is the reference implementation, so that is the focus of this section.
So while there are other compute engine options for DuckLake, we will just assume DuckDB will be used in our example, without covering the other engines.
For storage, DuckLake is compatible with the big names like AWS S3, Azure Storage, Google Cloud Storage, or Cloudflare R2. The decision here will more than likely rest with what hyperscaler your company uses (AWS, GCP, Azure). Cloudflare is not a hyperscaler, but R2 is building momentum because it has no egress fees.
For the catalog database, there are a few different options DuckLake offers (DuckDB, SQLite, Postgres). SQLite and DuckDB are best for local DuckLake PoCs since they lack concurrency. Yes, you can try to bring the new Quack server into the picture, but that is still in beta. At the moment, the best option for a production DuckLake catalog is going to be Postgres. We will use that in our example.
For the sake of this article, let’s pretend you are a small data team at an SMB that uses AWS and your data needs are simple. We will assume a common baseline scenario with hourly batch jobs and a relatively small user base. DuckLake can also support high frequency ingestion and more demanding and complex workloads like multiple transactions per second, IoT level event streaming and change data capture.
That baseline scenario means you probably don’t need a very complex DuckLake setup. And since you’re a small data team, you might want to leverage some managed services that allow you to keep DuckLake humming 24/7.
For storage, you’ll be using S3 since your company is on AWS. That’s the easy part to figure out. There is some configuration needed, but S3 is straightforward.
For the catalog, it might depend on how well you get along with your software engineers if you don’t have a lot of experience working with Postgres. A lot of the time, data people don’t interact with transactional databases. That seems to be changing a little, with Postgres getting better extensions for analytical workloads. I don’t personally suggest Postgres for analytics, but that’s a topic for another article.
Realistically, you have a couple of options for the Postgres catalog:
A managed Postgres or serverless Postgres (Aurora) on AWS.
A third-party managed Postgres like Supabase or PlanetScale.
This article is not geared towards explaining the setup and configuration of a Postgres instance, so we will use Supabase for our catalog. They offer a free tier that allows us to quickly create a persistent Postgres database that we don’t have to worry about managing. DuckLake works with any Postgres database, so it's easy to change if we ever needed to.
A note about MotherDuck
There is another option for a production-grade DuckLake: creating a fully managed DuckLake on MotherDuck’s platform. MotherDuck will provide the catalog, object storage, and compute engine resources. A fully managed DuckLake has a few unique benefits, like automated file maintenance and additional caching for improved read performance. This takes care of all the “hard parts” of deploying a DuckLake into prod, but for this article, we want to explain a simple implementation so we can better understand DuckLake’s production requirements.
Like I noted above, if I’m on a small data team I’d like to leverage managed services as much as I can to handle both tech debt and DevOps overhead while still letting me handle technical details of the DuckLake, like flushing, compaction, and maintenance. That’s why I think starting with a SaaS product like Supabase is a good idea.
You can start a free account now and create a new Postgres database.
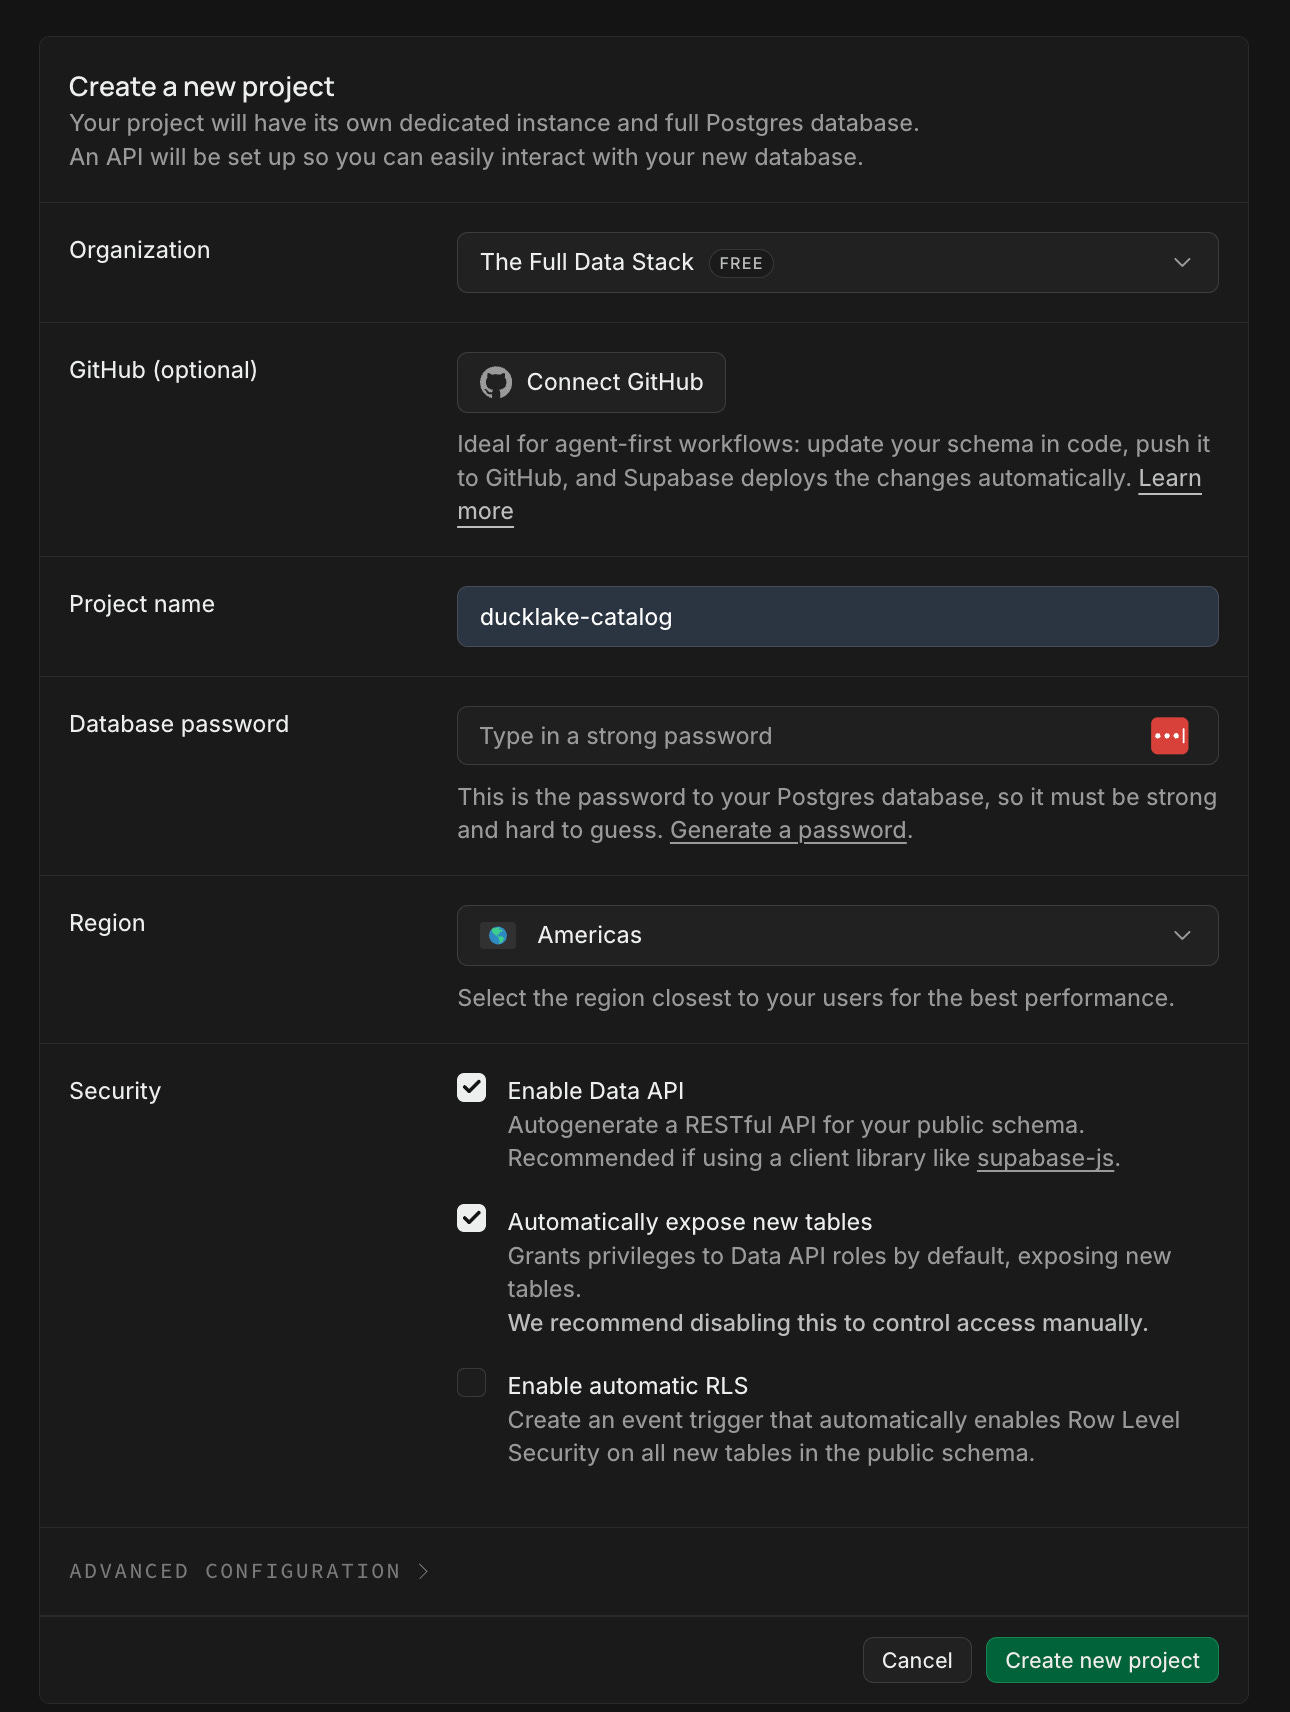
A quick screenshot of my Supabase Postgres:
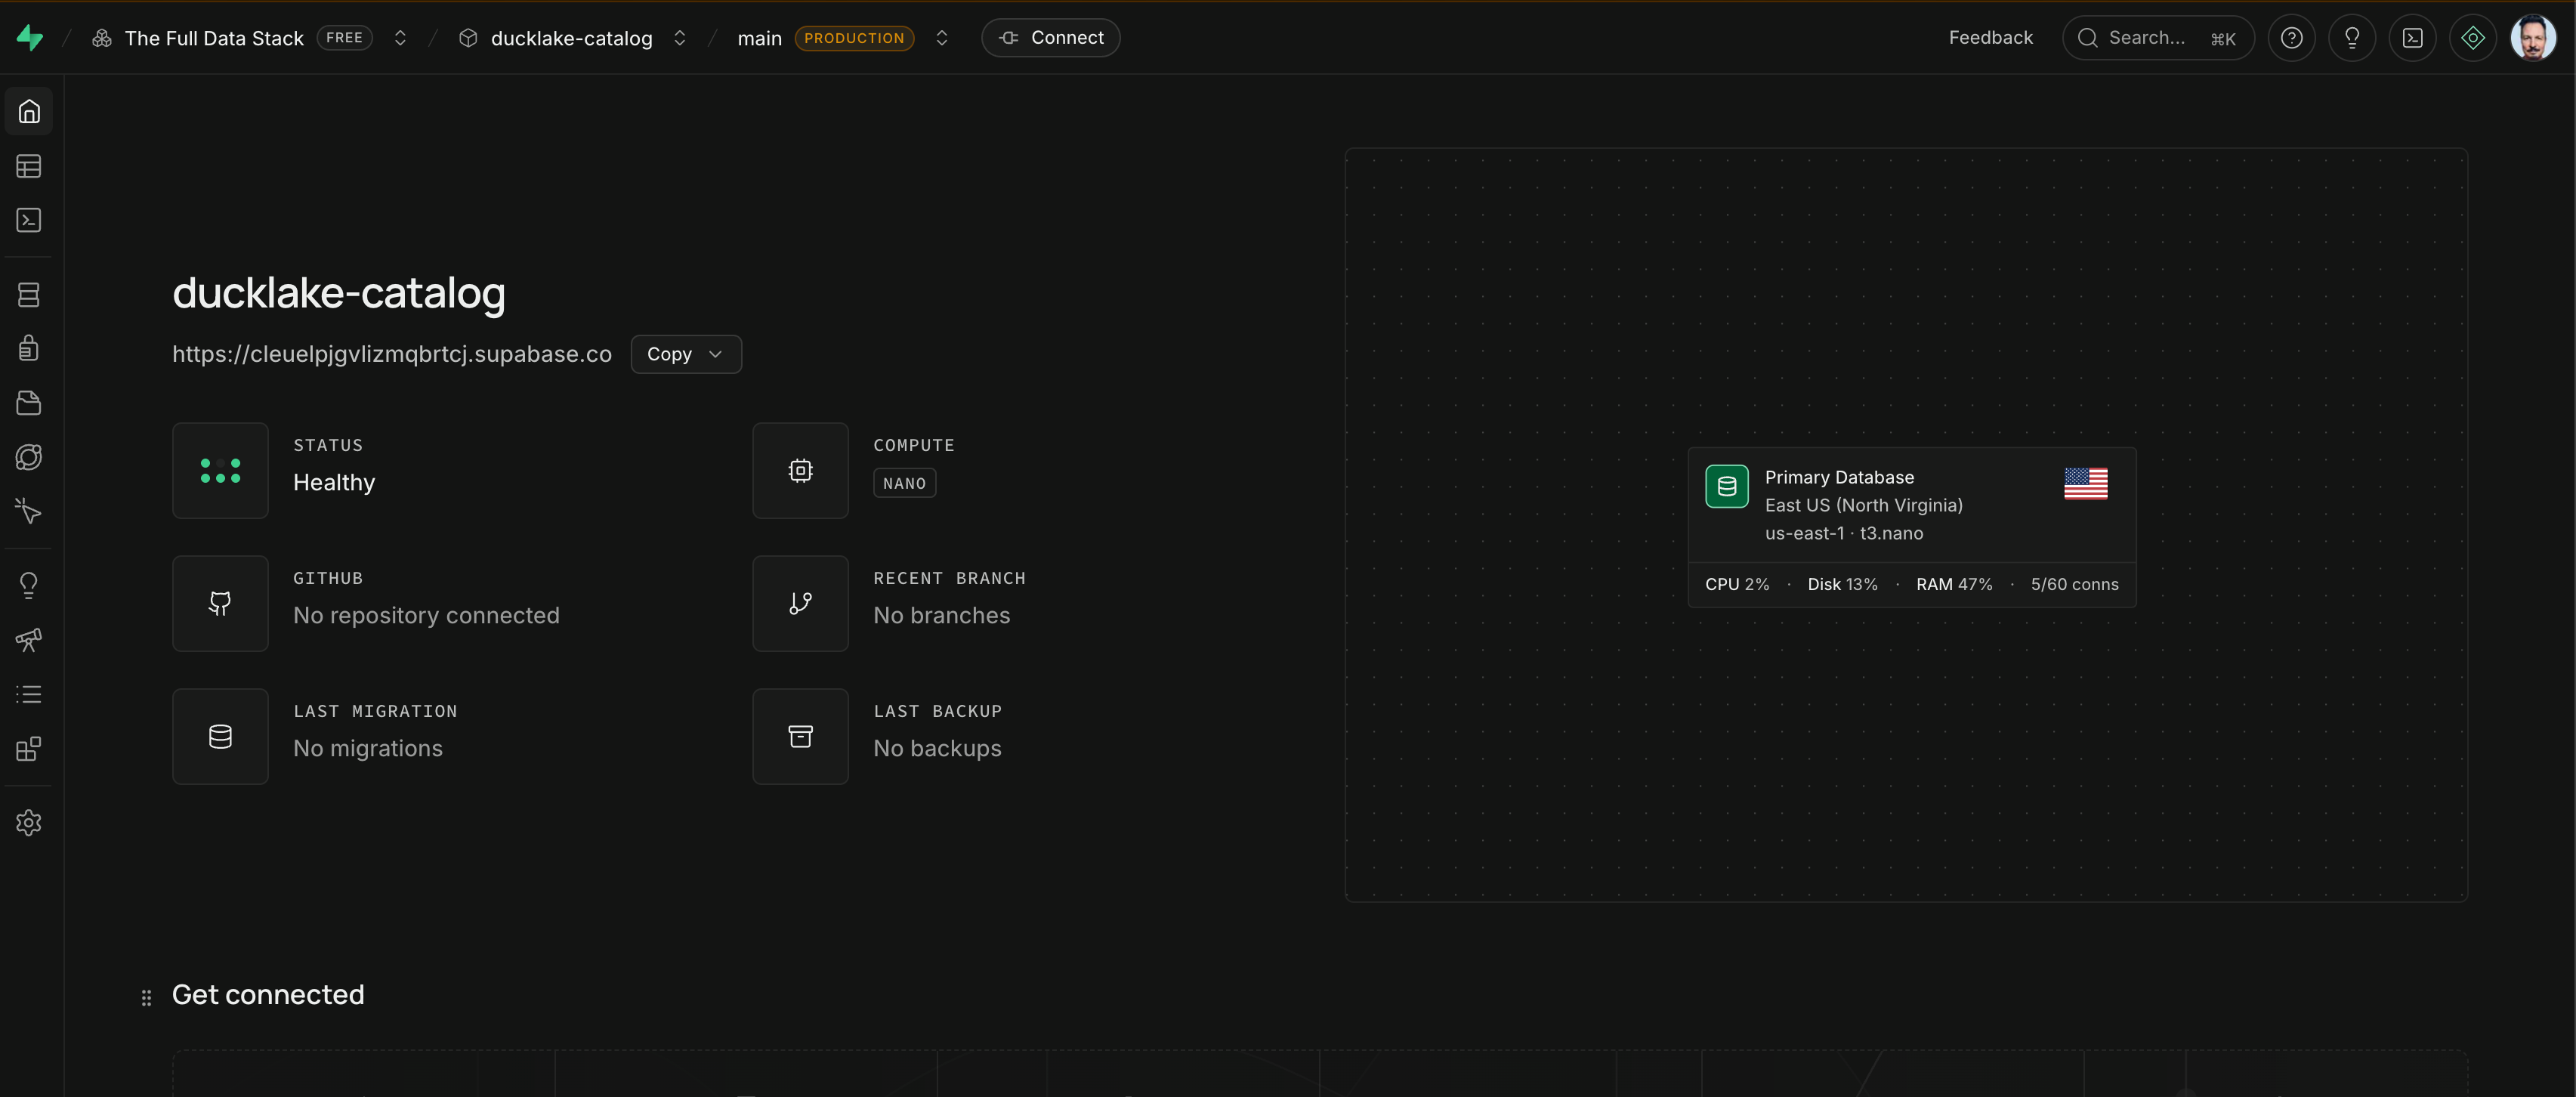
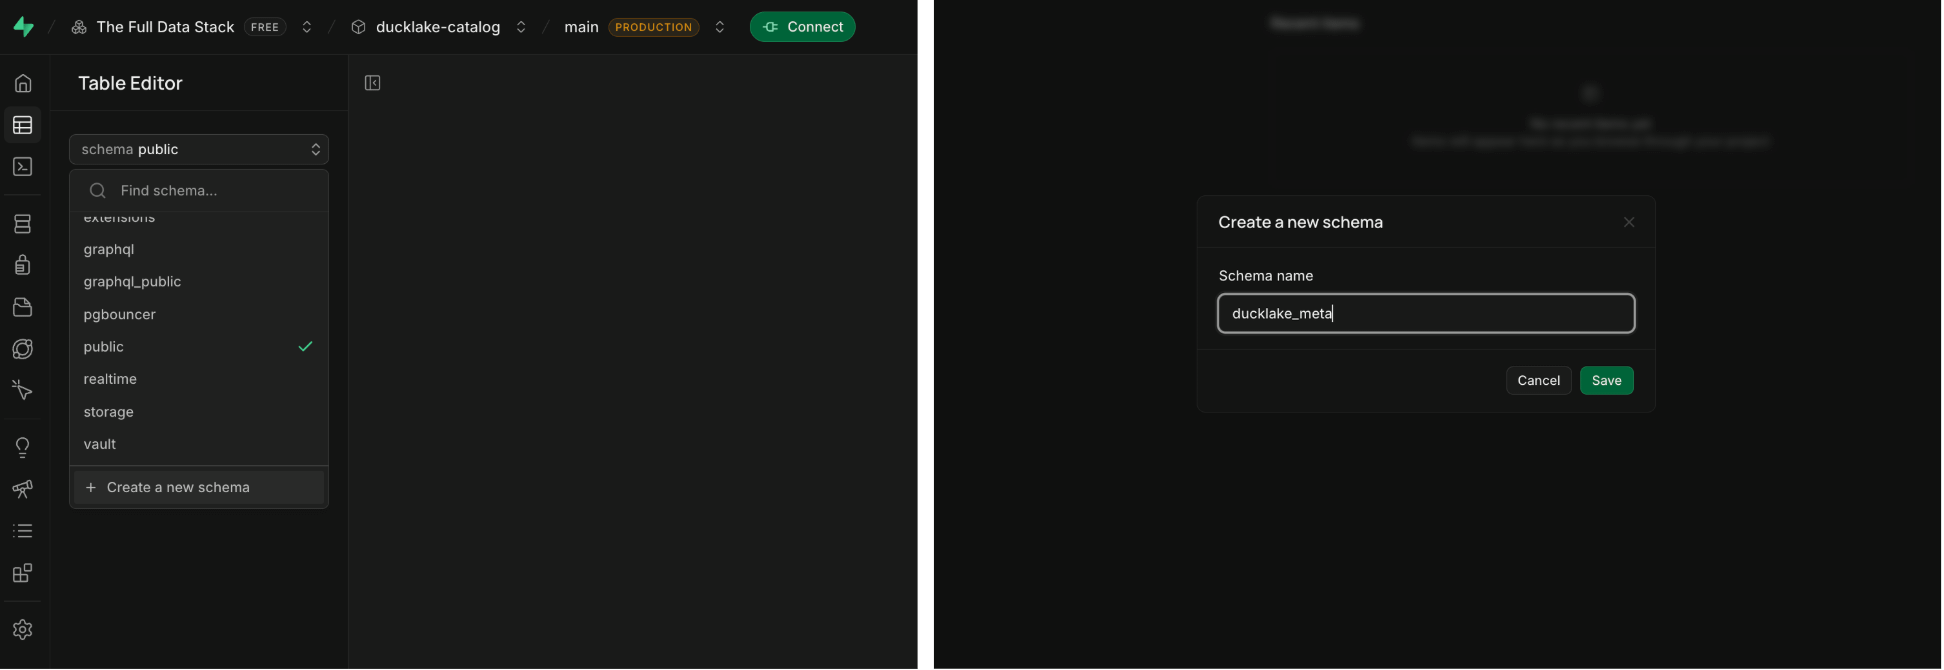
The default schema for the database is ‘public,’ which is very generic. We want to create a new schema to reflect a more useful one to denote DuckLake metadata tables. It’s the only additional step you need to take in Supabase.
Let’s make a new schema called ducklake_meta.
I won’t bring in a lot of screenshots here since creating an S3 bucket is pretty linear. Instead, here is a list of instructions:
Go to the AWS Management Console
Navigate to S3
Click Create bucket
Recommended settings
Bucket name: globally unique
Example: ducklake-prod-yourname
Region: pick the same region as your compute engine (important for latency + cost)
Block Public Access: Leave ON (all checked) → This ensures the bucket is fully private
Bucket Versioning: Optional (nice for safety, not required)
Encryption:
Default
This creates our bucket. Now we need to give it credentials that we can then save in a local DuckDB secrets table. That, along with our Postgres connection secret, will allow us to read the managed catalog and the S3 bucket and formally create our DuckLake.
Here’s a quick set of instructions for creating AWS user credentials:
Do not use your root AWS credentials.
Instead:
Go to IAM.
Click Users → Create user.
Under User setup:
Username:
ducklake-user
Select Programmatic access (or “Access key” in the new UI).
You’ll also need to add a policy to the user you created. This involves adding a JSON file through the IAM → Users UI.
After creating the user, you’ll get:
AWS_ACCESS_KEY_ID
AWS_SECRET_ACCESS_KEY
In case you didn’t know, you only see the secret once, so make sure you download it.
Open source lakehouse architectures do not lock you into a specific vendor, which means you have some options for how you want to interface with them. Given that our compute engine is DuckDB, the two top options are the DuckDB CLI and the DuckDB UI. As we start to build out the actual data pipelines that will write data to DuckLake, we will also bring in the DuckDB Python API.
I personally like to start out with the DuckDB CLI, then, as things are built up, the DuckDB UI is a great next step to get more visual context about what’s happening in the DuckLake. So, for this initial setup, we will use the DuckDB CLI.
Setting up the CLI is, as always, incredibly easy.
First, install DuckDB:
And start your duckdb instance up:
Once you have that up and running, we will take advantage of DuckDB’s wonderful secrets manager. DuckDB allows you to save credentials either in memory or persistently on an unencrypted local file. Since we are setting up a local interface that we want to keep coming back to, let’s save our credentials on a persistent local file.
We will save both our S3 bucket credentials and our Supabase Postgres connection credentials in two separate secrets. This way, we will not have to worry about setting these up again in future sessions. The best thing about the persistent secret is that it lives across any DuckDB session you run. DuckDB will always look for the local directory, no matter what folder you start DuckDB in. It’s a wonderful local solution to secret management.
We will first set up a persistent secret for our S3 and Postgres:
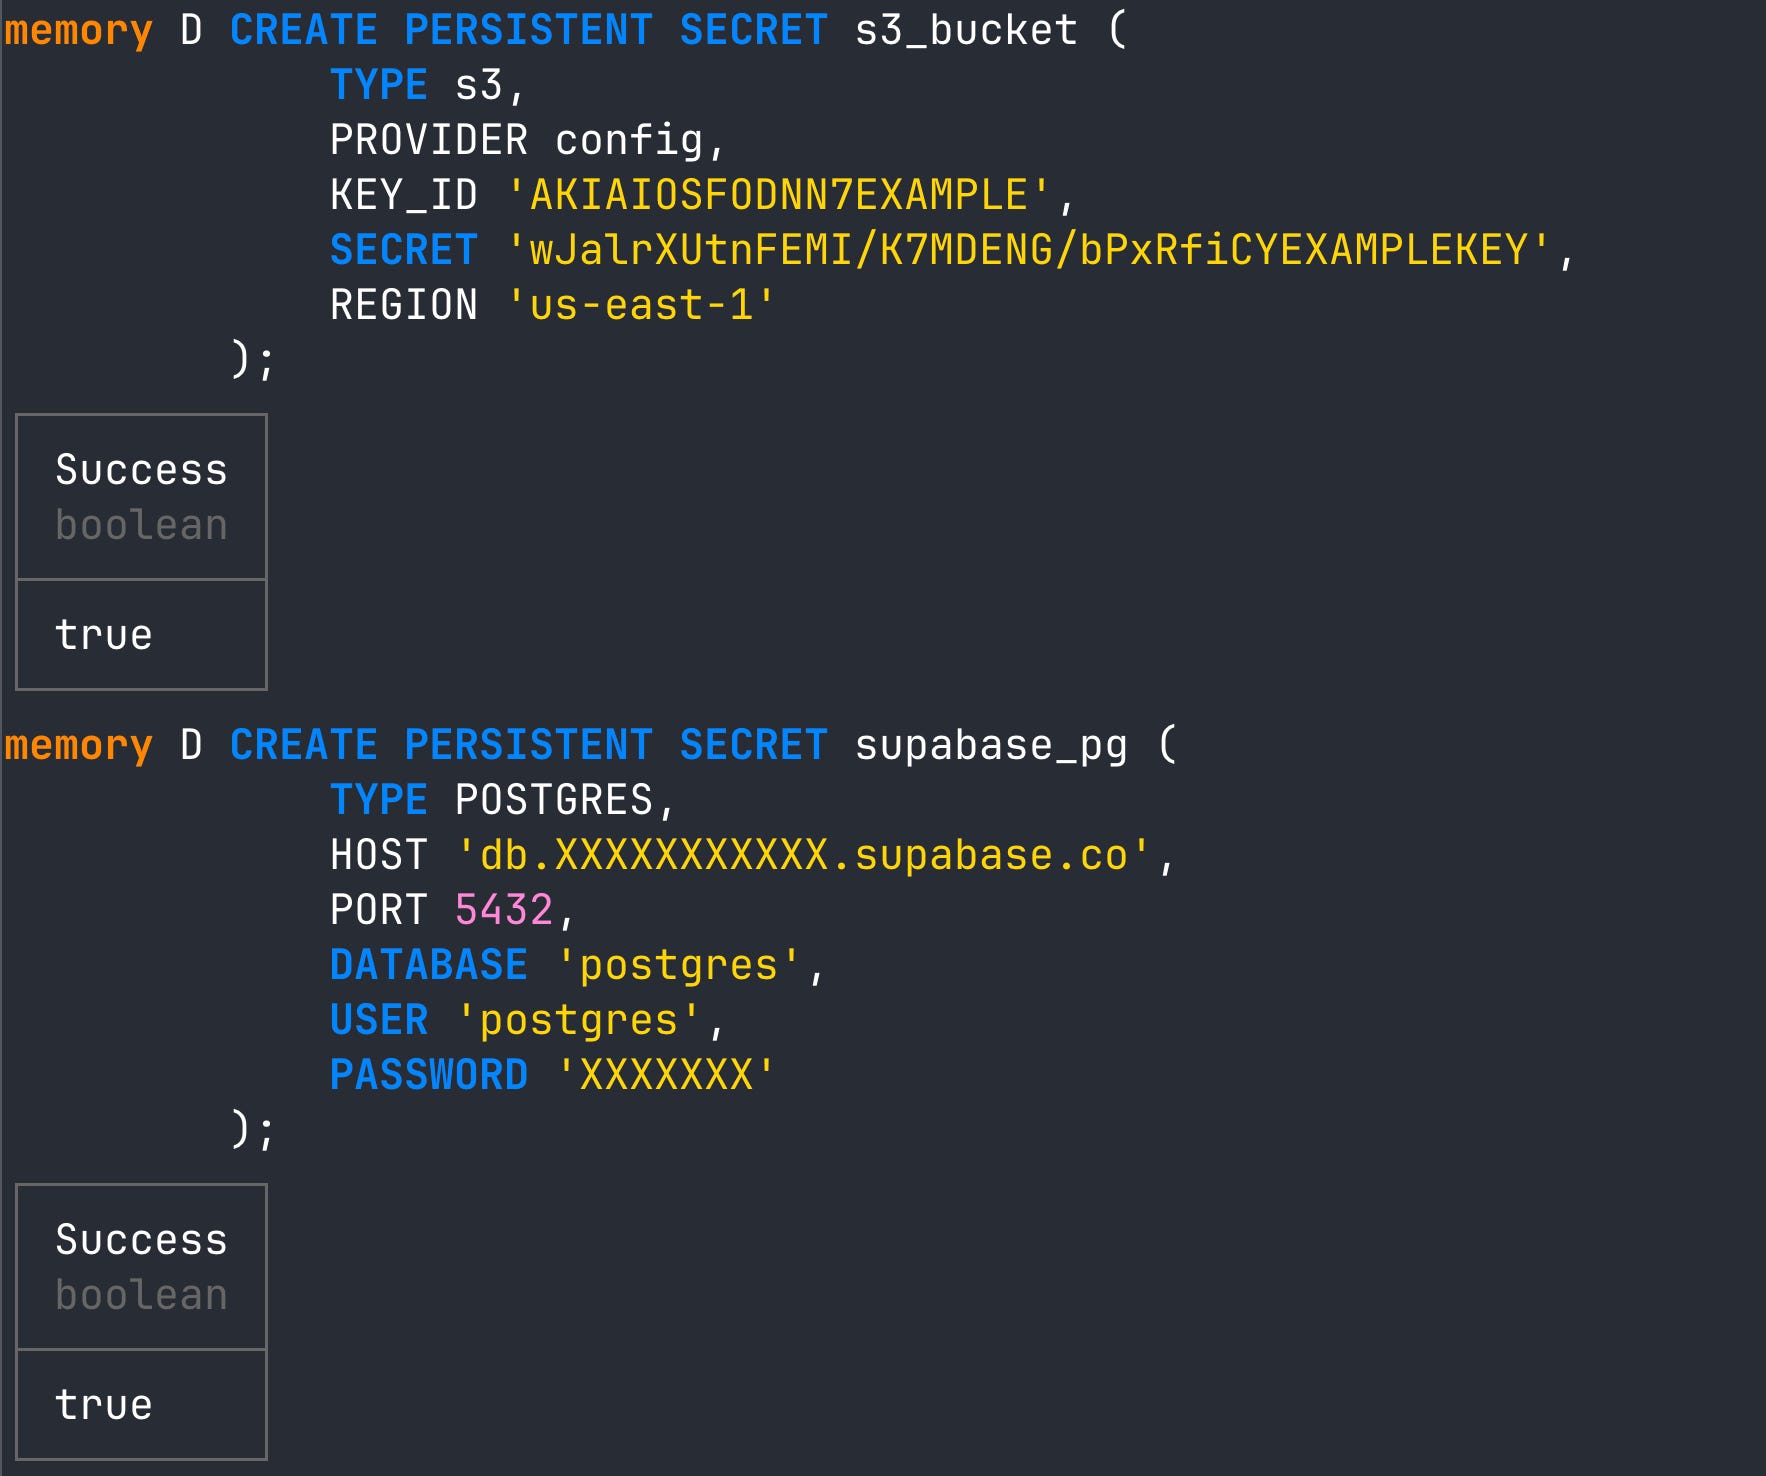
From here, we are going to dig deep into what DuckLake’s documentation says about best practices with our secrets. We can create a third secret that references both the S3 and Postgres secret, as well as stores additional arguments we want in our initial ATTACH statement (these are explained in the next section).
The third secret will look like this:
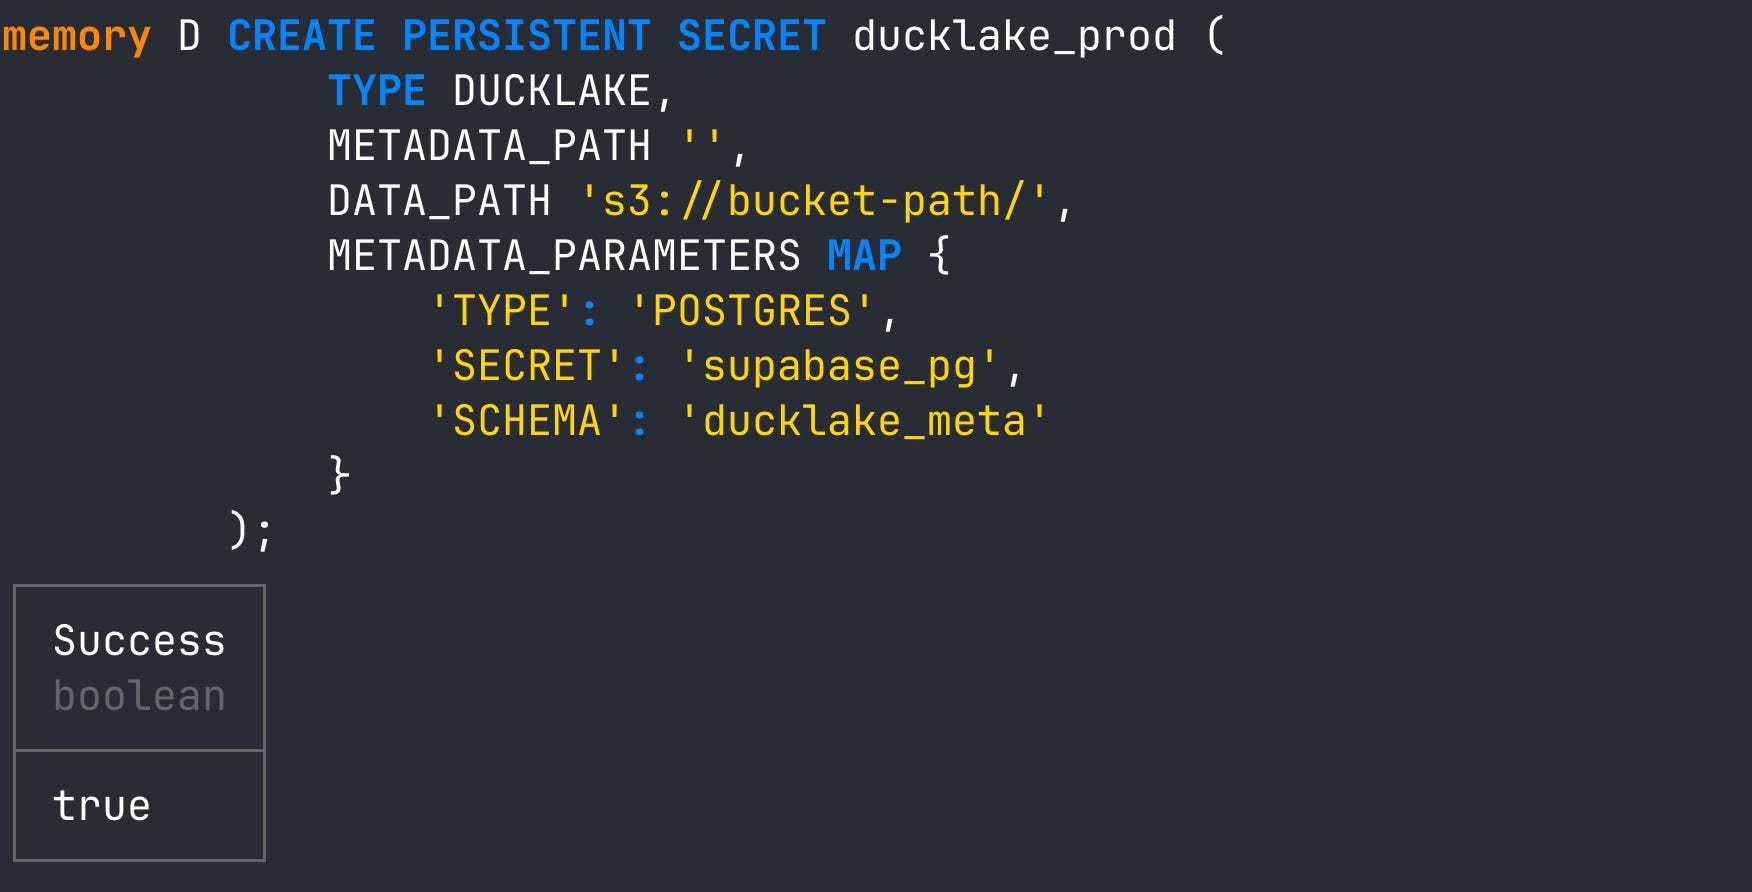
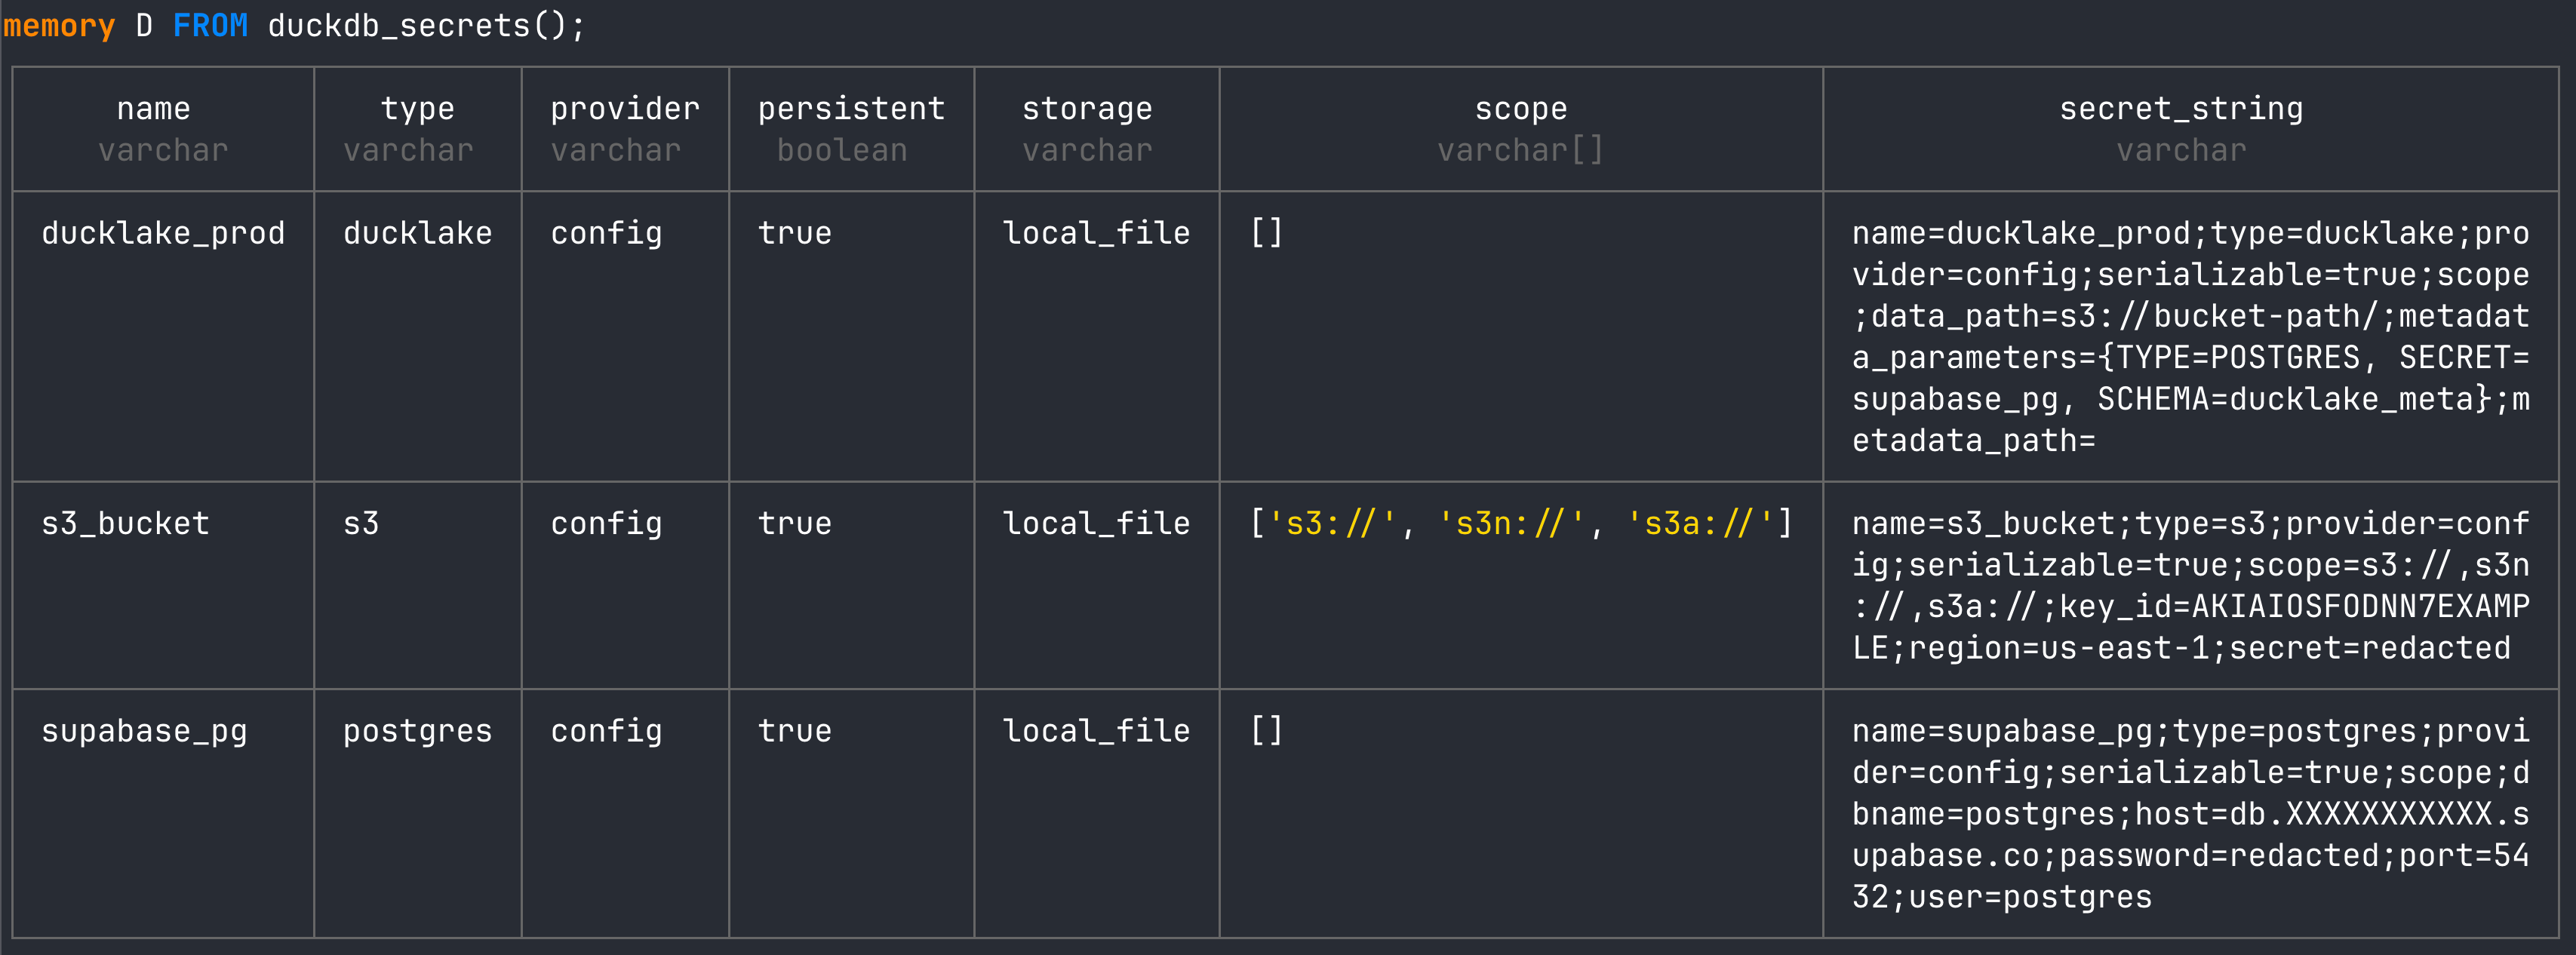
DuckDB also has a convenient function that will produce a table that shows the secrets you’ve created.
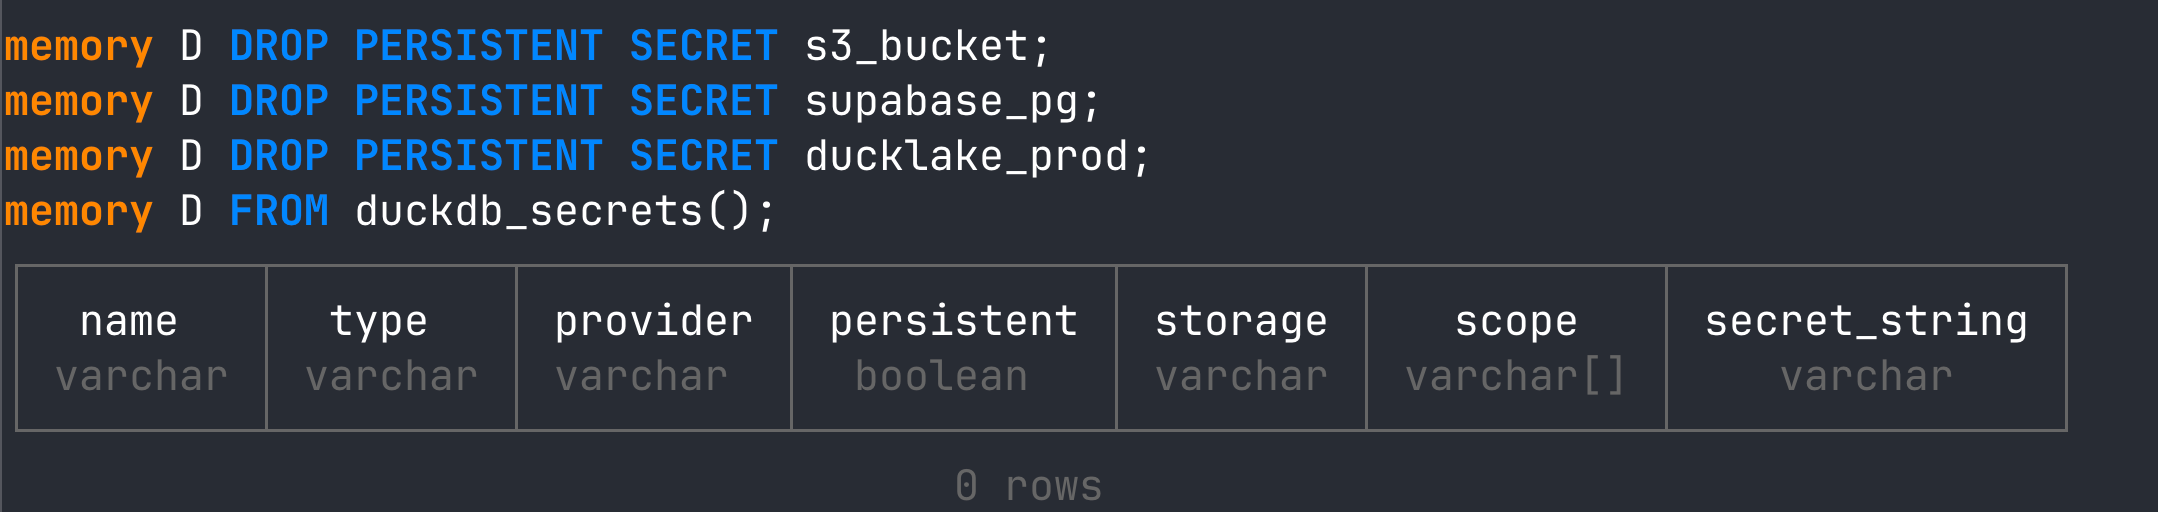
If you need to drop any of the secrets to clean things up you can DuckDB has you covered:
When you first create your Postgres database, there will be no tables in it. This will change when you first attach it to your DuckLake instance. Once you attach it, DuckLake will automatically create all the necessary metadata tables inside Postgres.
You saw that the third secret we created had a couple of extra arguments added to it: the data path argument and the schema argument in the metadata parameters. We do that up front so that these arguments are bulletproof. We want these arguments set for a couple of reasons.
First, we want to explicitly set the ‘DATA PATH’ in the initial ATTACH statement. If you leave this blank, DuckLake will use the current local working directory to set the path. This is a very important point because once you set this path, it will be stored in the metadata and cannot be permanently overwritten. You can override it for an instance with another command, but that becomes annoying over time. So setting it up as an argument in your initial secrets makes that detail more bulletproof.
Second, I like to set the SCHEMA argument in the METADATA_PARAMETERS. This is because when we connect to our Postgres database, it would import all schemas available in the database. That doesn’t necessarily have any negative effect on your DuckLake, but tables from other schemas would show up when you ran commands like SHOW ALL TABLES. Remember, we set up a new schema in Postgres called ducklake_meta. Setting this argument in the secret means that only the tables from that schema will be attached—just the metadata tables we need and no others. It allows for a much cleaner experience.
Before you ATTACH the catalog and storage, make sure you have the DuckLake extension installed and loaded.
Now, we finally attach our storage and catalog. Since we did all the work up front with the secrets, our ATTACH statement is incredibly simple. The ONLY extra thing I like to add to my ATTACH statement is the METADATA_SCHEMA argument. As of DuckDB 1.5, being able to view the metadata tables via DuckDB commands like .tables or SHOW ALL TABLES is turned off by default. However, if you set the METADATA_SCHEMA name, that will allow you to see the metadata tables via your interface. I prefer to have the ability to see the metadata tables because I like to create observability tables using them.
When it comes to this initial ATTACH statement, no news is good news.

We want to also USE my_ducklake so that we are in that alias as we start to create new tables and queries.

From here we will use the SHOW ALL TABLES command to see the metadata tables have been created in Postgres.
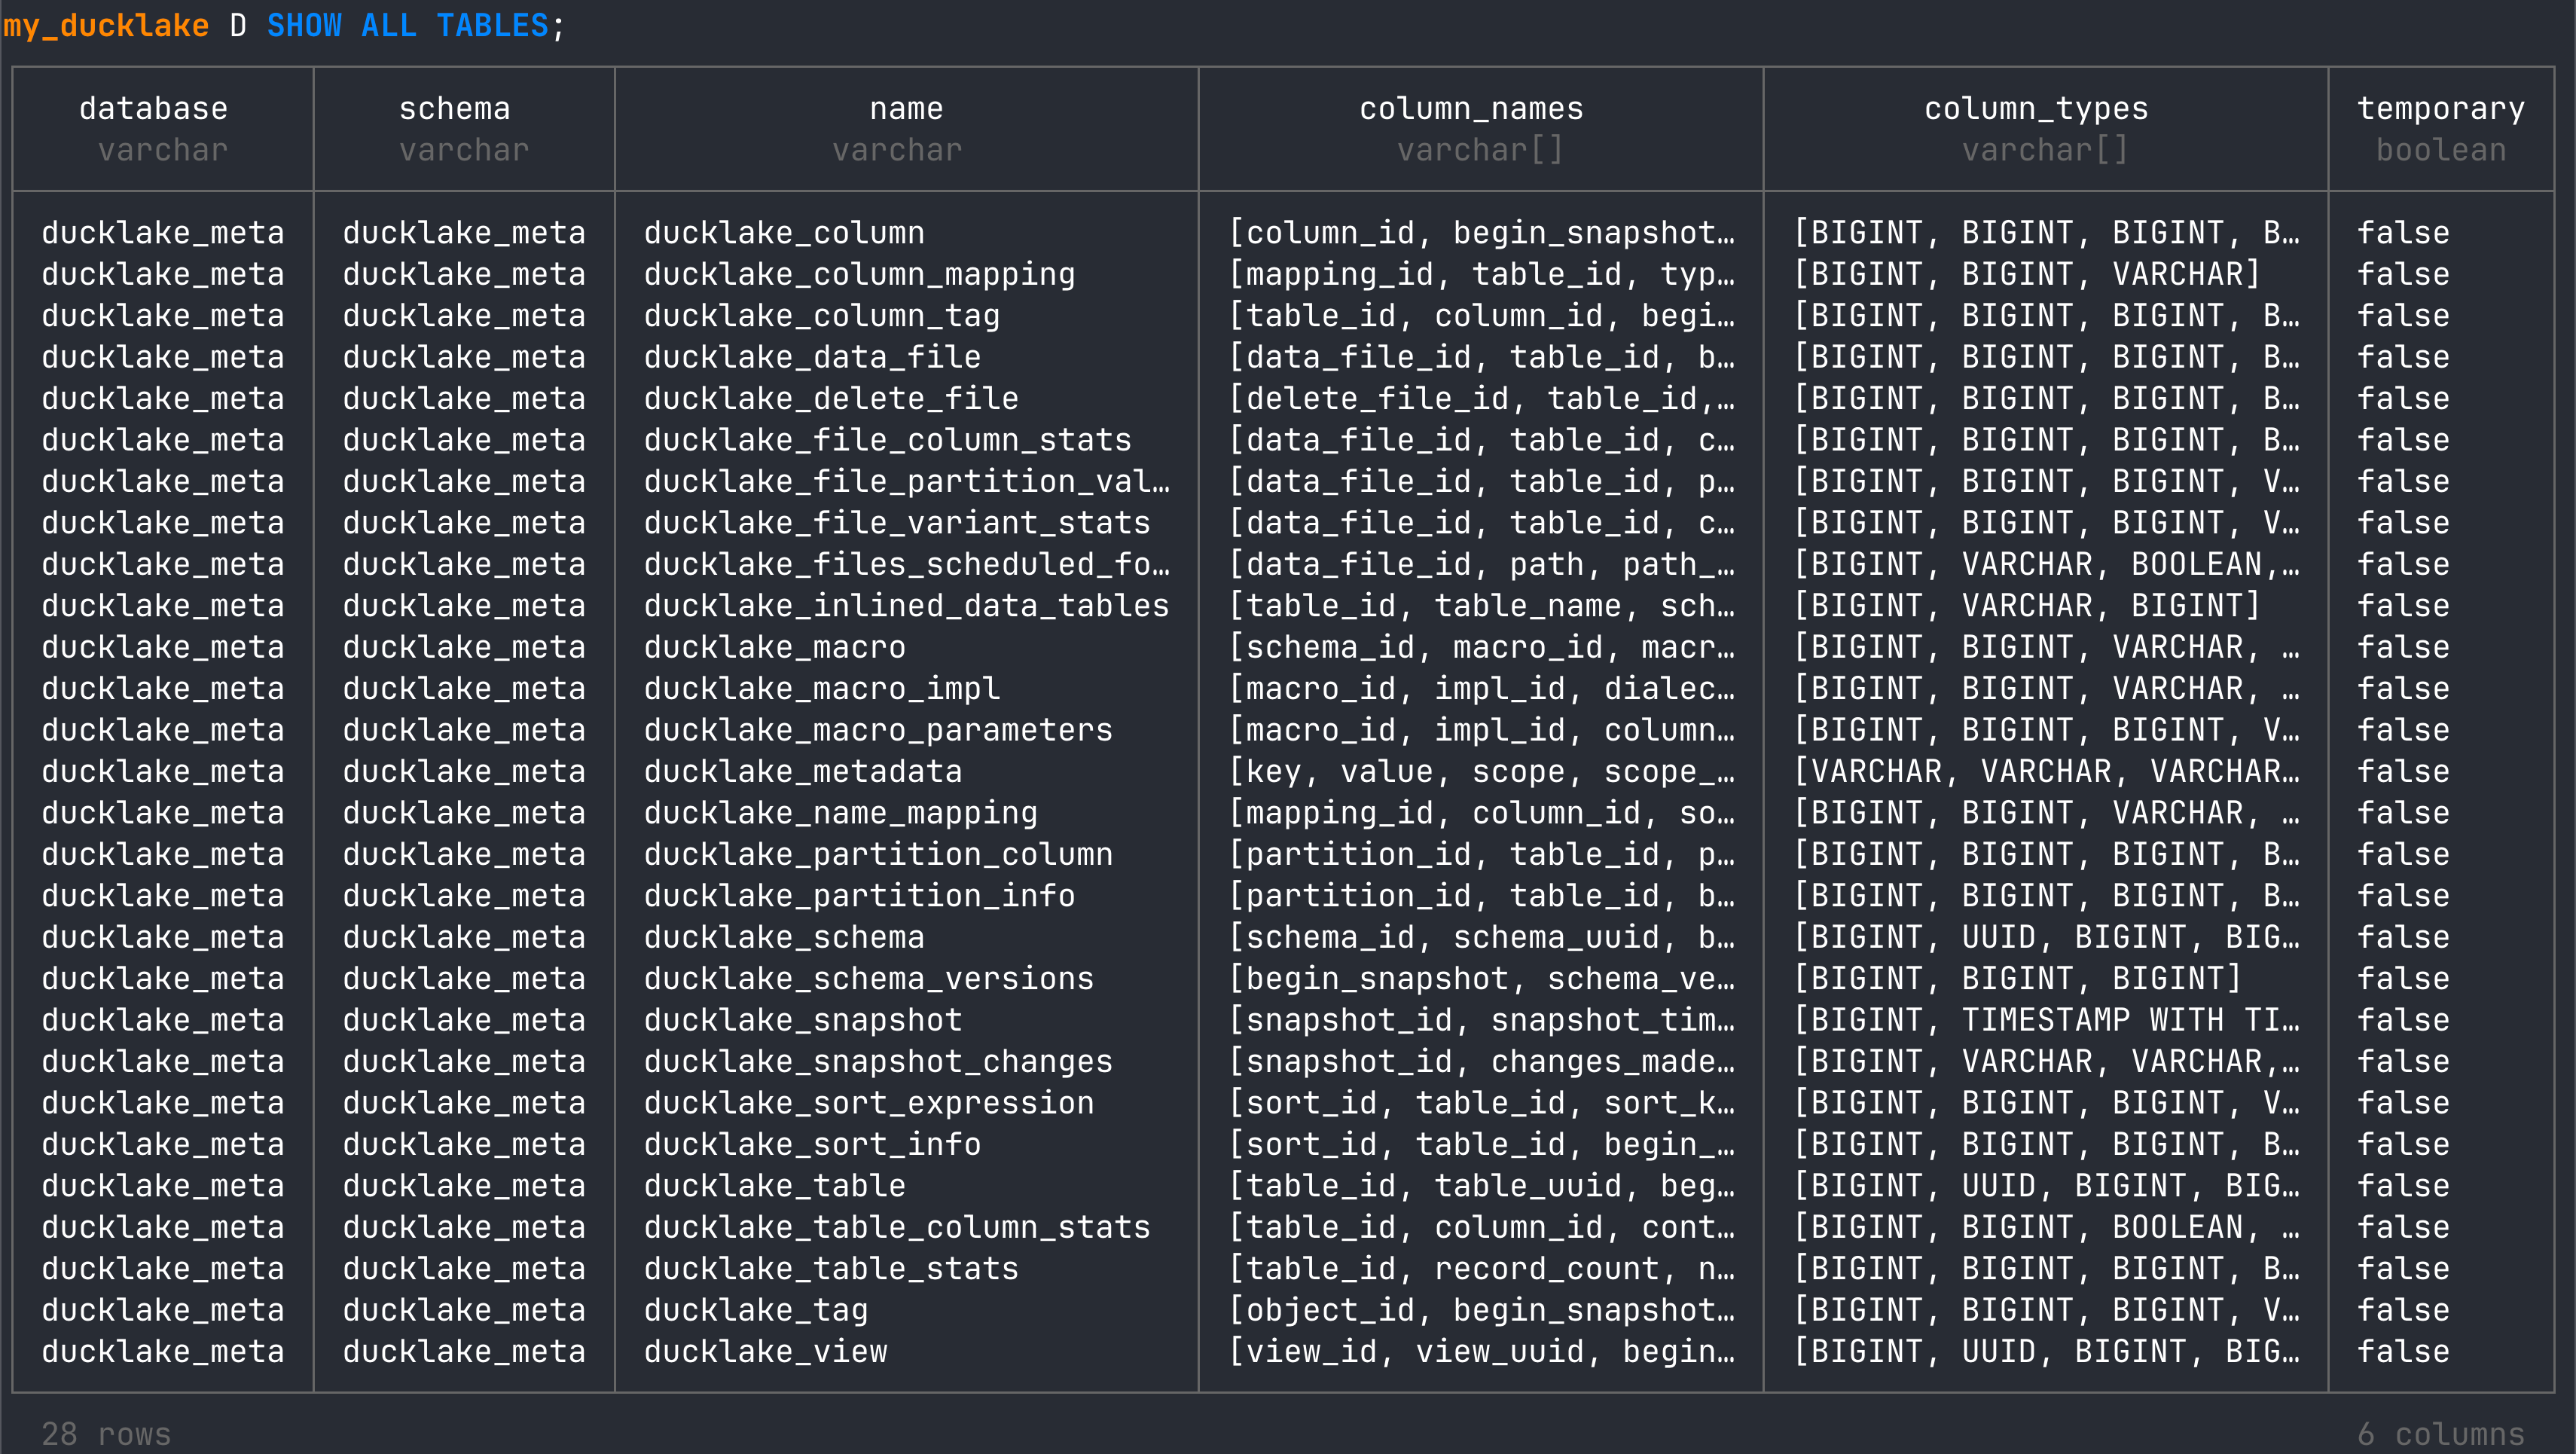
DuckLake’s metadata tables are very detailed and are mostly normalized. This means we can query and join them together to create new tables that let us know more about our DuckLake under the hood. Amazing!
If we look at the Supabase UI, we will also see that the tables are showing up under the schema we created.
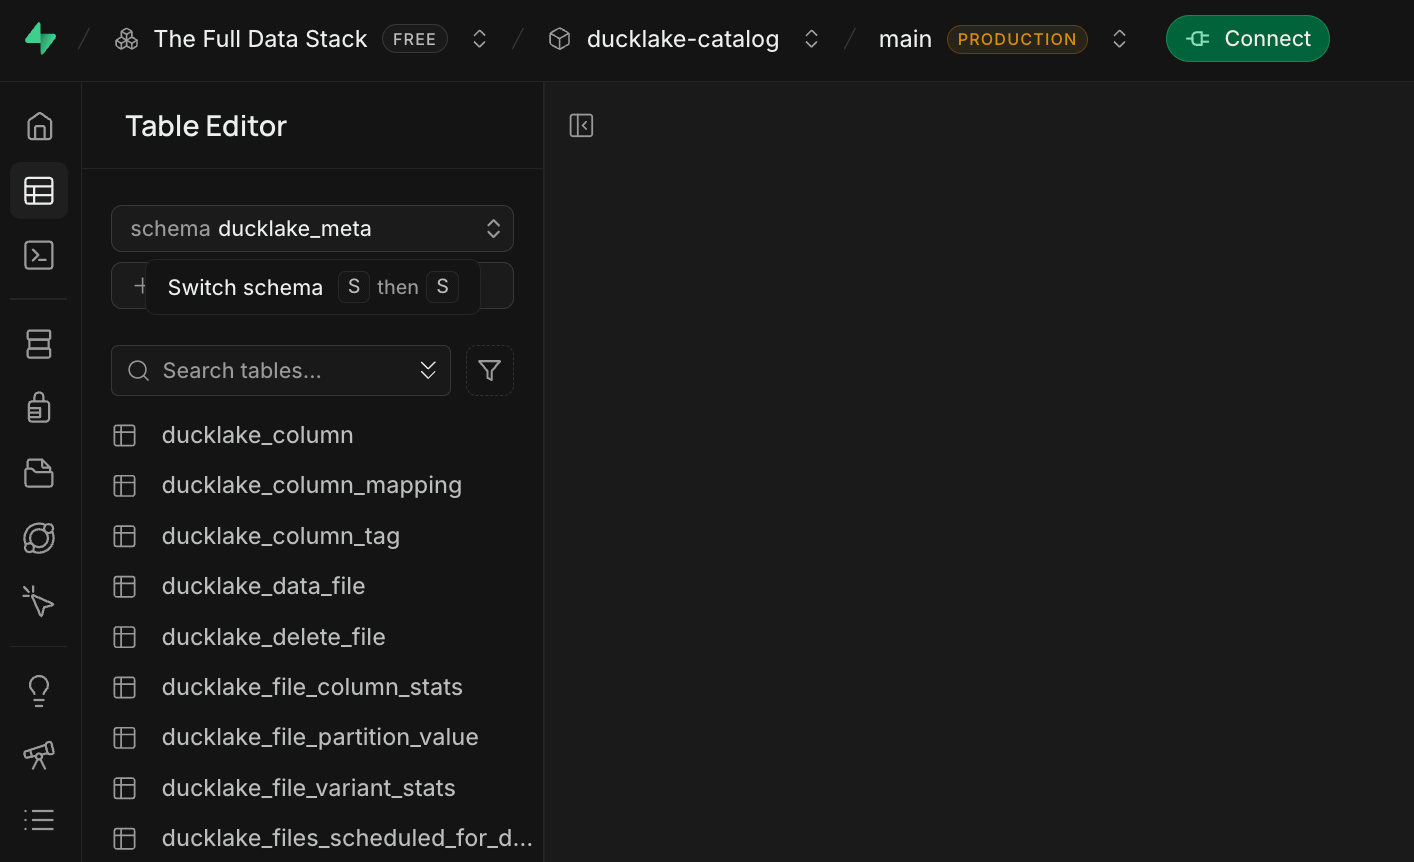
You can then exit out of the session whenever you’re finished.
We have now successfully created and attached our DuckLake foundation: the storage and the catalog. We can continue to work in the CLI, which I really enjoy. But I also wanted to close out this article by showing off the FREE DuckDB UI that comes packaged with DuckDB when you install it.
It truly is an embarrassment of riches.
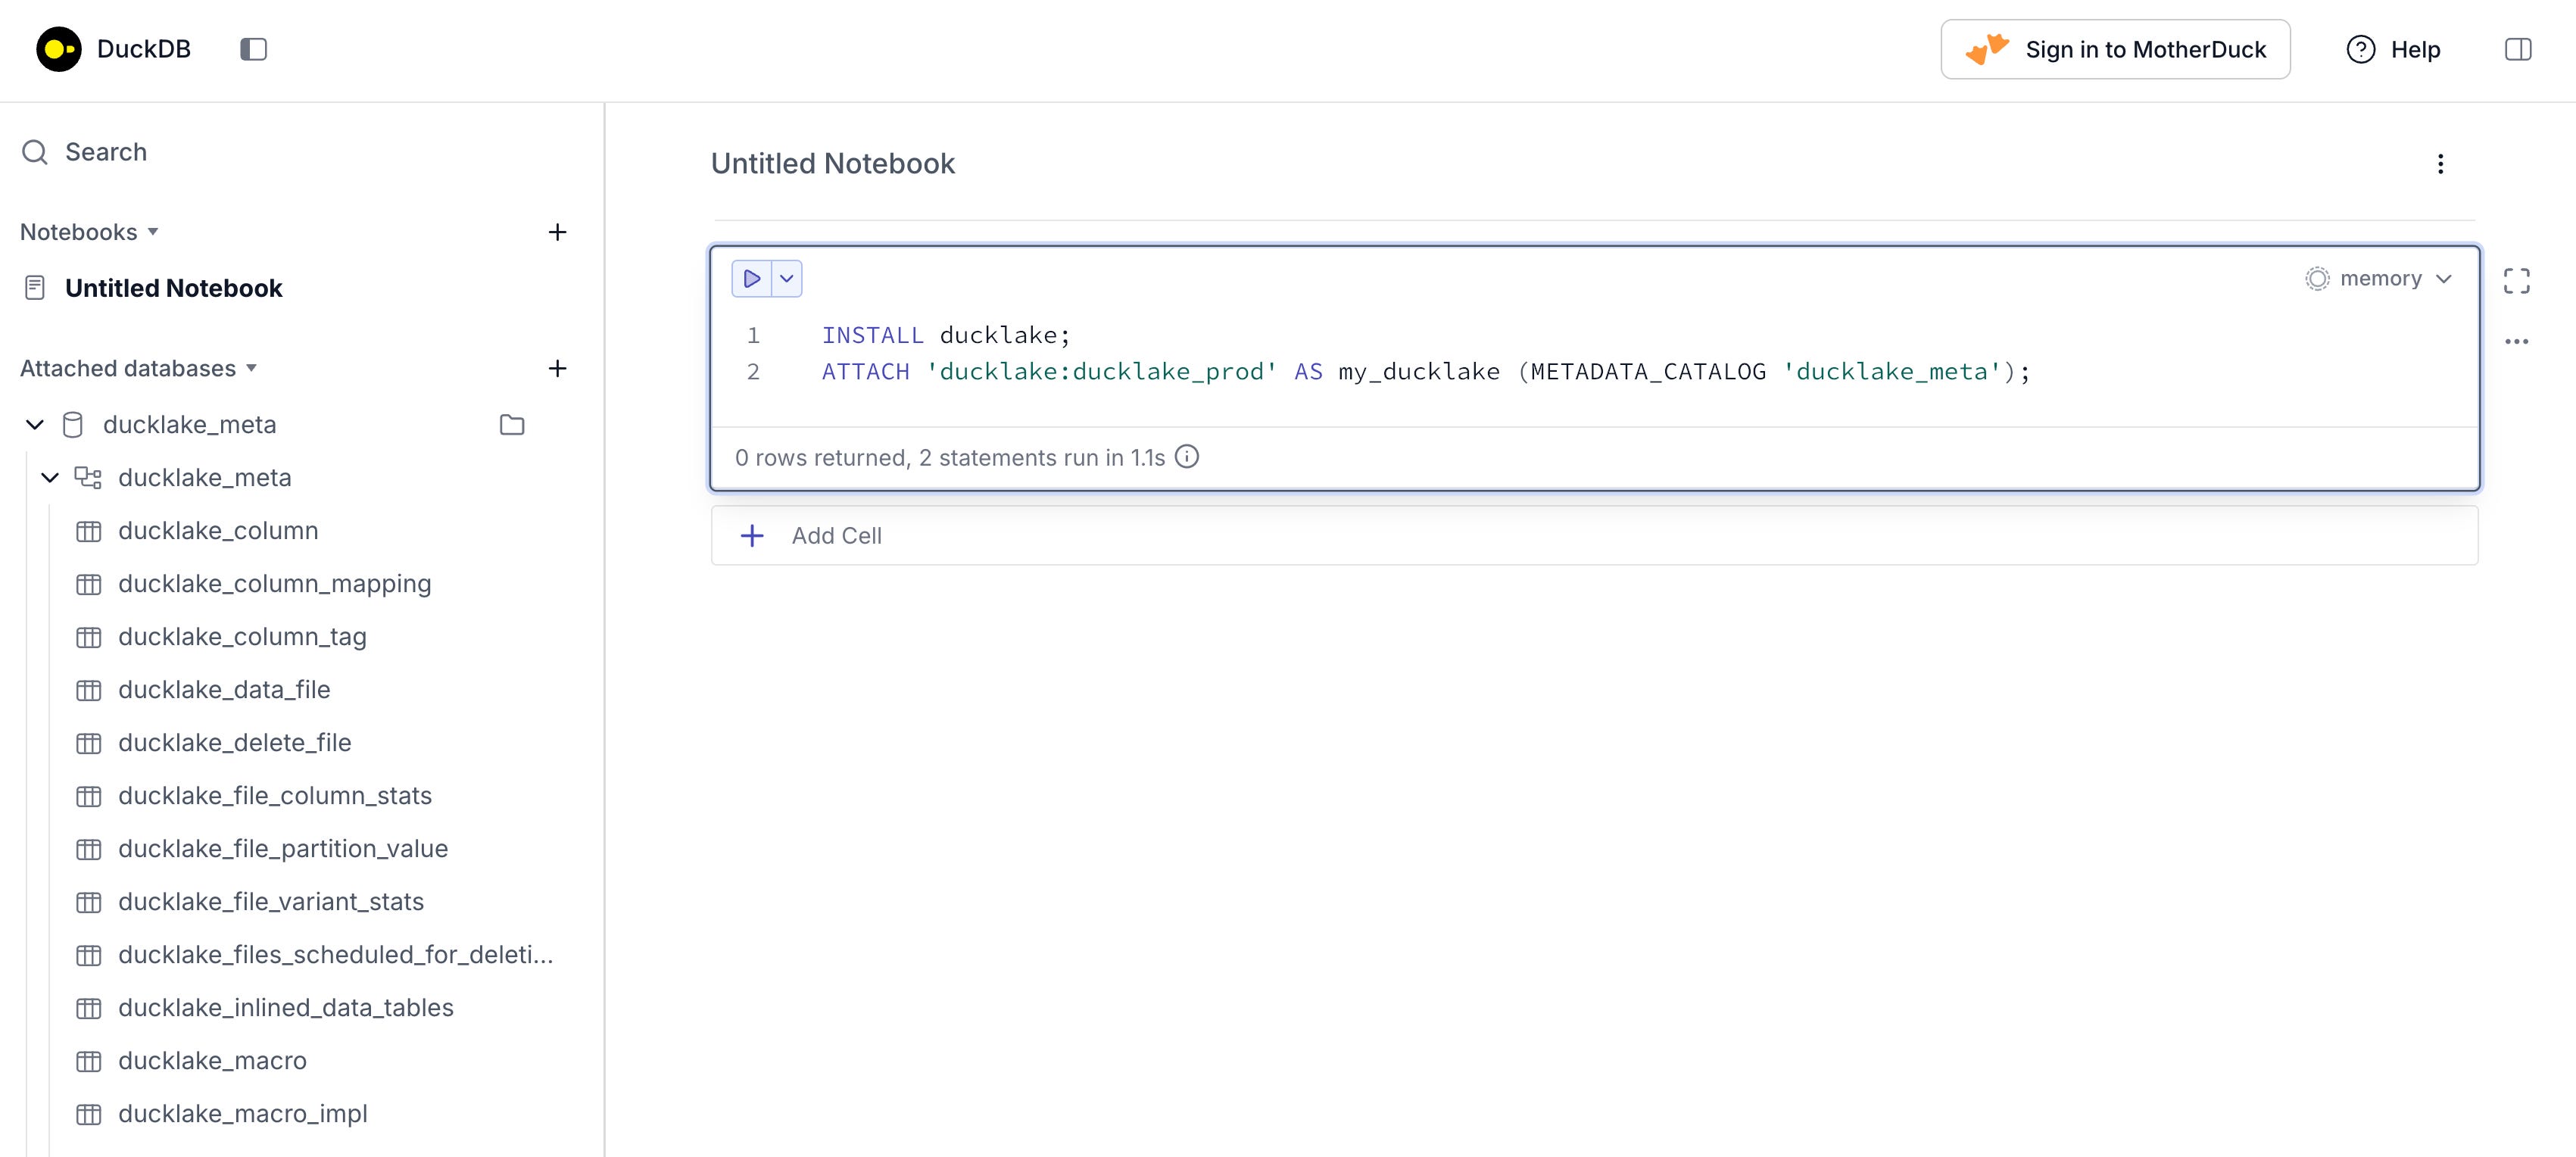
We can make sure we load DuckLake and then run the same ATTACH command right in the DuckDB UI. The big win with the UI is that we can leverage cells for different scripts, save the notebooks, and also see the metadata tables and any other tables we create in the left-side file tree. I’m at a loss for words with how awesome that is.
Getting DuckLake running is the easy part. Getting it right means making a few deliberate architecture choices up front. In this stage 1 foundation, you have picked (1) object storage for Parquet (S3), (2) a real catalog database that can handle concurrency (Postgres), and (3) a compute engine to drive it (DuckDB). You have also made two choices that pay dividends later. Store credentials cleanly with DuckDB secrets. Set immutable details like DATA_PATH and metadata schema scoping intentionally so you do not fight your own metadata later. A production grade DuckLake can be surprisingly simple. Leveraging managed services where it makes sense and implementing some design around your interface sets you up for success!
From here, we are ready for stage 2. Codify ingestion patterns, business logic, and how data lands in our lakehouse. That is where correctness, performance, and developer ergonomics come into paly. Then stage 3. Build the unglamorous but critical maintenance layer, including flush, compaction, and checkpoints, that keeps a production DuckLake fast and healthy over time. See you soon!

Hi, my name is Hoyt. I’ve spent different lives in Marketing, Data Science and Data Product Management. Other than this Substack, I am the founder of Early Signal. I help data tech startups build authentic connections with technical audiences through bespoke technical content and intentional distribution. Are you an early stage start up or solopreneur wanting to get creative with your technical content and distribution strategy? Let’s talk!
No posts
Comments
Nothing yet. Say the first thing.
Sign in to join the conversation.