
This is an adaptation of a talk I recently gave at Front End London. FEL host monthly events on all things relating to Product development — if you’re looking to meet some of your peers in the dev community, or maybe even interested in giving a talk, do drop them a line.
At an event I attended, I ran an informal show of hands, asking the audience who rigorously tests their front-end work. A handful of hands went up, but very much the minority of the guests. I lowered the bar to occasional testing and a few more hands joined the others, but still most members of the audience kept their hands down.
Automated and deep testing on the front-end then seems to be the exception, not the rule. Sure, the people who write blog posts, speak at conferences, and have Opinions About Coding are at it — but it seems that in the real world, there’s a definite barrier to adoption. If I think about my own experience, and that of the people I’ve worked with, this certainly bears out — and I believe this is down more to adoption difficulties rather than a lack of benefits. We’d all like the upsides of automated testing, but writing front-end tests seems to involve a bit of a difficulty jump.
Now, some of this is accounted for by un-ergonomic testing libraries, or immature technologies generally. But I found the real cause behind the difficulty of testing is designing applications that are testable.
It’s infinitely easier to write a test — at whatever level of testing — if the application has been designed with testing in mind.
In this post, I’m going to focus primarily on techniques that make unit testing of React components more straightforward. My experience has been that is something people find particularly difficult — and whilst “Jest is hard to use” might account for some of that difficulty — in reality it largely boils down to trying to write tests, having built component code that’s simply hard to test. I’ll share a few techniques you can apply when struggling to write a React test — techniques you can use to refactor your components — that’ll make your components more conducive to testing. These techniques are all small and simple to apply. And once you’re aware of them, you’ll probably find yourself writing components that are already test-friendly.
Before getting into specific techniques, it’s worth checking what a good test should look like. I like to use the Arrange, Act, Assert pattern. Here’s an example, for an imaginary library for calculation. All the examples in this post will be roughly Jest-like.
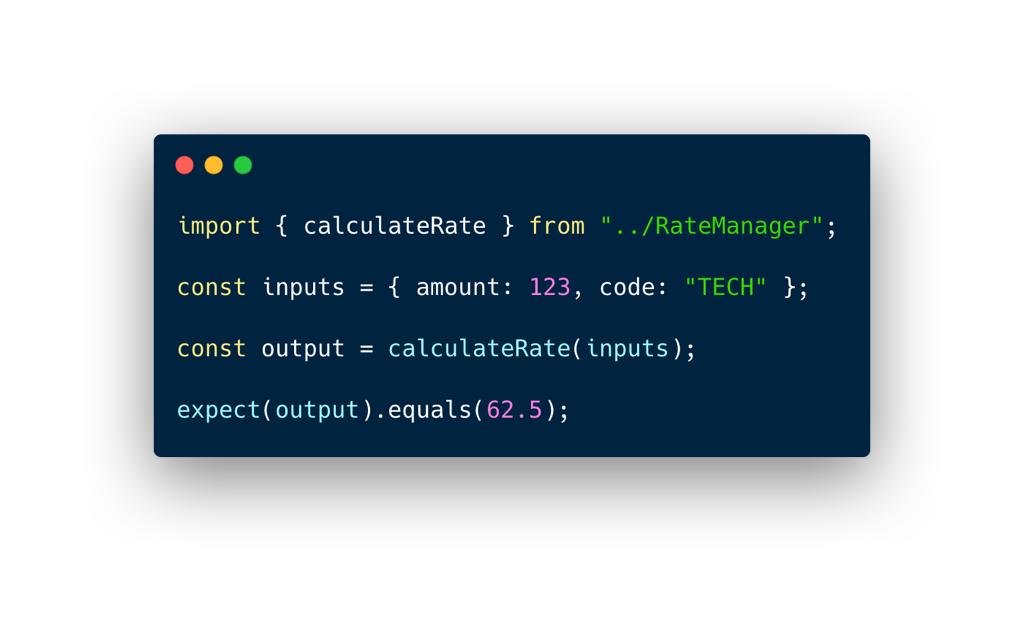
First of all, we Arrange things, gathering the inputs together. Then we Act and call the calculateRate function. Lastly we Assert that the calculate number matches what we expected. All pretty clear, and probably familiar from a thousand testing tutorials! Next, what would an ideal React test look like? (This example uses the excellent react-testing-library helpers).
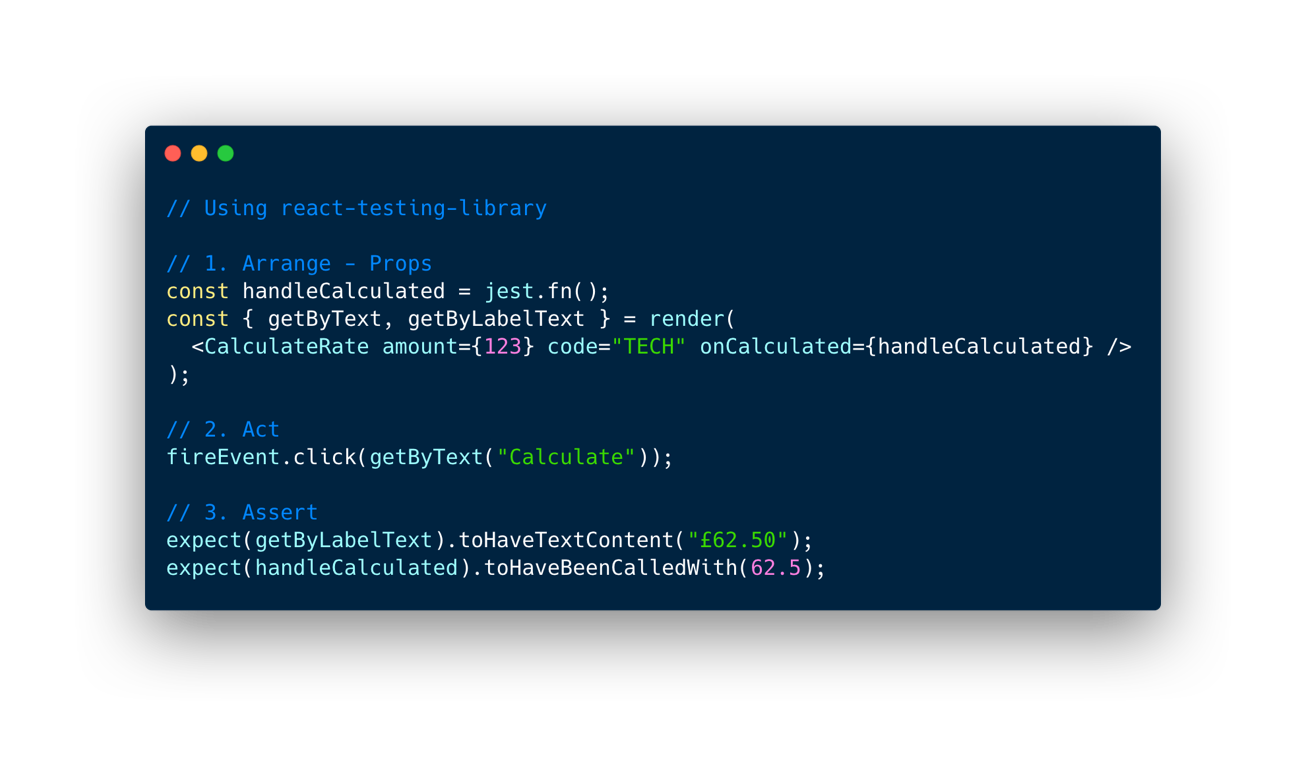
So again, we see Arrange, Act, Assert. For React components, formulating Props and rendering the component makes for a good Arrange phase. Then we Act, by doing something with the component. Finally, we can Assert the components behaviour.
As an aside, there’s a few supporting technologies that are worth mentioning. Jest and other testing libraries support snapshots which are a way of easily asserting complex data structures — and in React this is often used to test that the component tree produced by rendering a component matches what we expect. There’s also visual testing, e.g. through Cypress. These are cool, but I would generally recommend starting by writing simple unit tests as outlined in this post — end-to-end system testing is rewarding, but more complicated, once you go beyond tutorial-level.
Broadly then, our aim is to write tests that look like the ideal example. It’s really clean, and its very direct as to what’s happening. There’s no weird hoop-jumping, its obvious what’s being tested, and particularly important: the Arrange phase is straightforward.
It’s worth mentioning this quickly — there are signs you can look out for to help you spot that a component isn’t very testable. When you spot these signs, you can apply the techniques I outline — if you like! — and hopefully end up with something easier to test. Typically, you’ll feel the most pain when it comes to Arranging your test.
Good signals for a hard-to-test component are:
You find yourself writing very long single test cases, because setting up the component is such a pain. (i.e. your test follows Arrange-Act-Assert-Act-Assert-Act…)
To render a component, the correct sequence of
Provider-type components, or other parent components, is needed.You have to mock lots of libraries, otherwise the component won’t even render.
(If you use static typing in test files) You’re having to “fake” complex objects, or use a lot of
anytypes.You’re finding it hard to get to full test coverage for a single component, as you can’t get it to hit a particular “state”.
It feels like you have to “cheat” to assert things.
The less code you have in a module (i.e. a file), the less there is to possibly frustrate you.
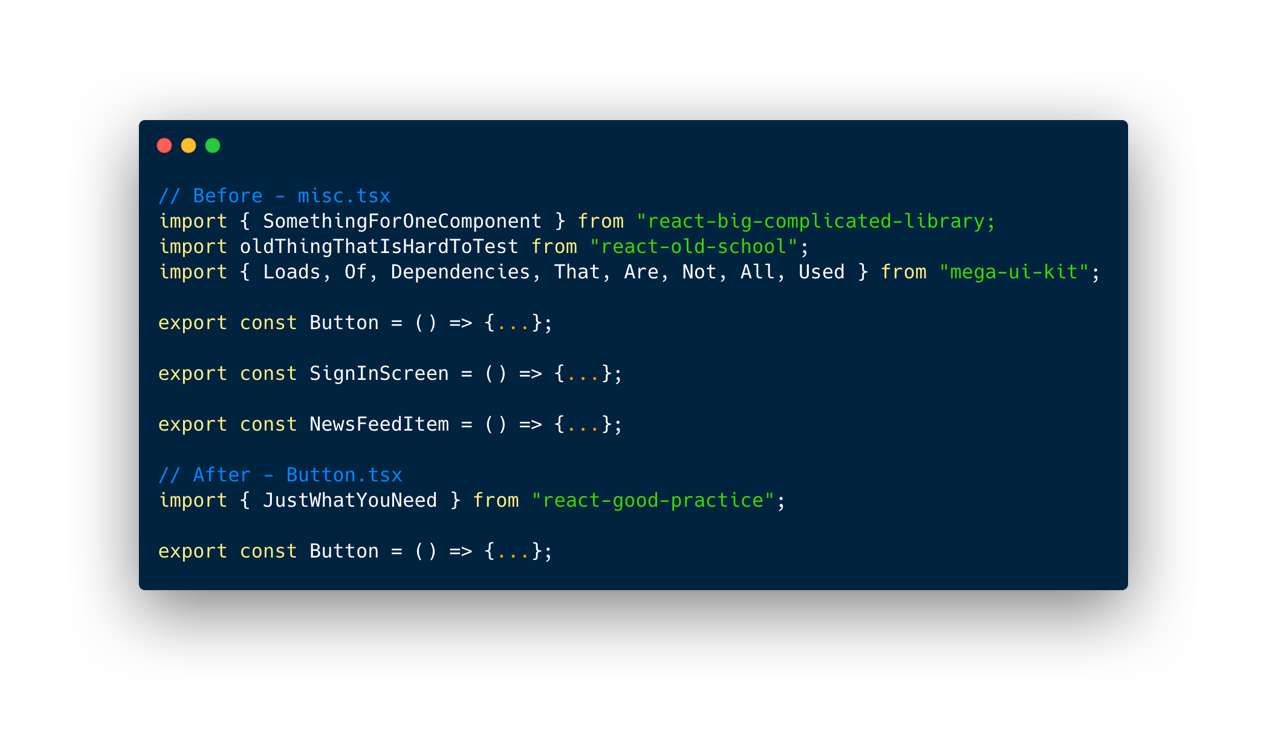
There are plenty of 3rd-party libraries that are hard to use in a testing environment. For instance in the React Native world, plenty of libraries naturally expect to be running on an actual device, but during unit testing they’re having to run in a faked environment. This can be dealt with! But it’s in your interests to minimise how much they “infect” your code.
You should limit your component modules either to a single component, or a single family of components that share a common purpose. A big “utilities” file, with a mix of components and imports, makes testing harder — if just importing a library makes a test difficult to write (maybe it needs to be mocked), then you’re best off only having to do this when writing tests for the component that actually uses the library, and not in a bunch of unrelated component tests too.
This is good practice anyway — the sort of thing any linter is going to be able to warn you about. Make sure that you remove anything unnecessary from your components and files. Don’t include things “just in case” — when it comes to testing your code, those unused elements may complicate things. Things to watch out for include:
Unused imports: as per the above tip, imports might not be “cost free”, and so it’s worth keeping things simple and removing any imports not used in a file.
Unused Props: these just add more clutter when Arranging your test — it’s more things to set-up. Or, if you ignore them in your test, then your test is not really resembling how the component is supposed to be used.
State you don’t use, functions you don’t use, lifecycle methods you don’t use…: Smaller units (i.e. less code) is easier to unit test.
One nice side-effect of cutting unused code: your test coverage % may go up! (As there’s less to test).
Here’s an example of a component with complex Props:
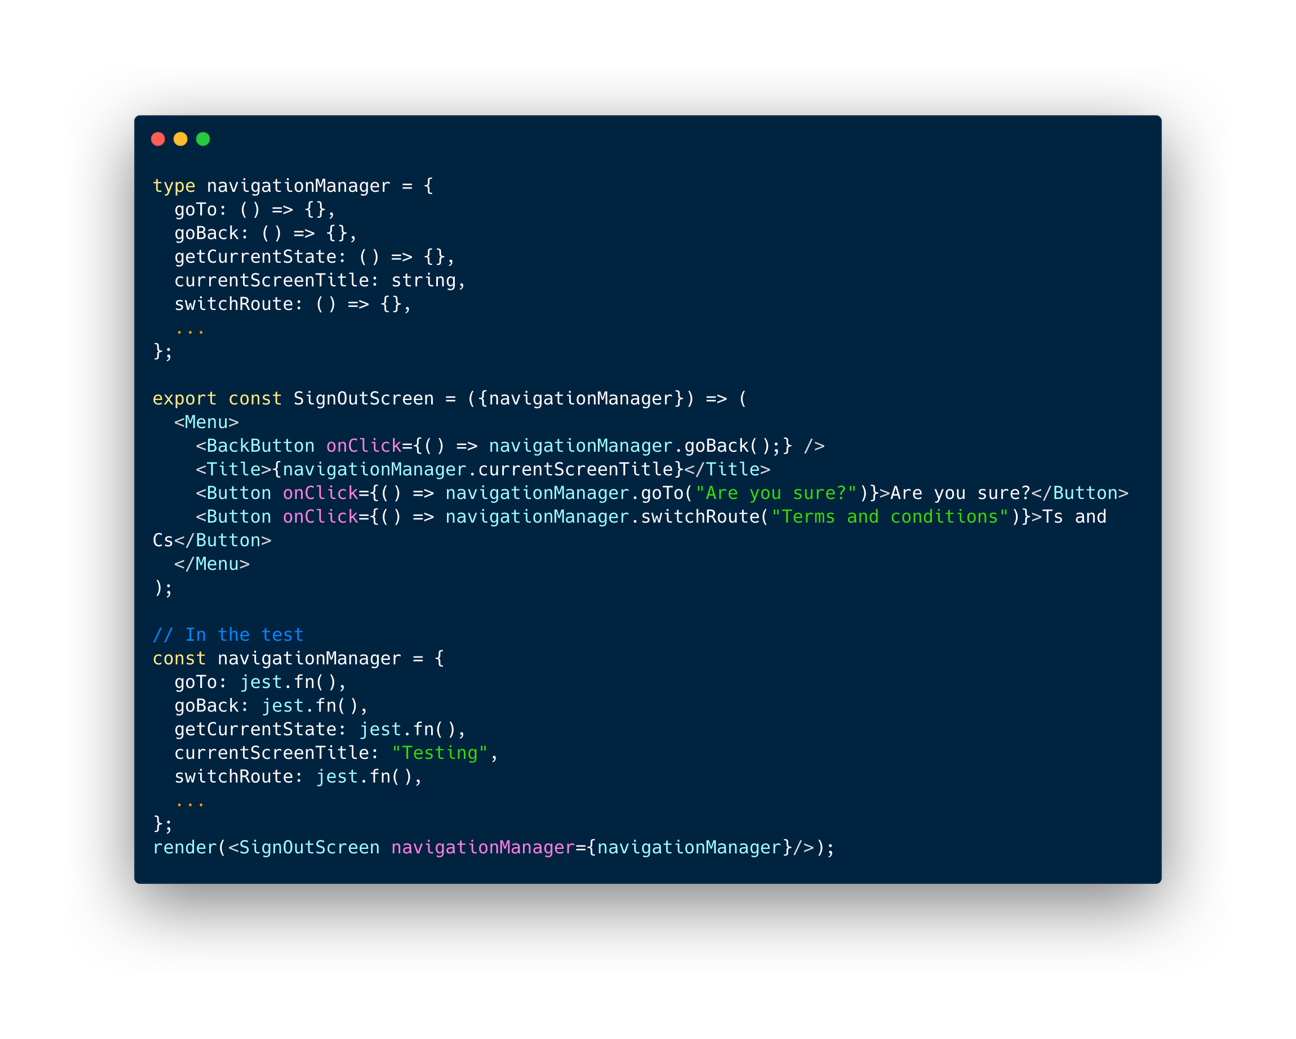
The navigationManager Prop has lots of methods associated with it, and only some of these are used by SignOutScreen. When we want to Arrange a test for this component, we need to make a navigationManager to pass in to it. But, because this is such a complex Prop, the amount of set-up required just gets longer and longer, and less connected to the test — you have to set-up things the component doesn’t even use. Or, you only set-up the parts of the Props that the component uses, and then its not a proper test as the Prop no longer matches how the component might be used.
You can work around this with helpers or fixtures, or as mentioned by just ignoring the problem. But if possible, it’s easier to test components where only simple Props are used. By simple, I mean plain strings, numbers, booleans, functions and so on, and avoiding objects or lists:
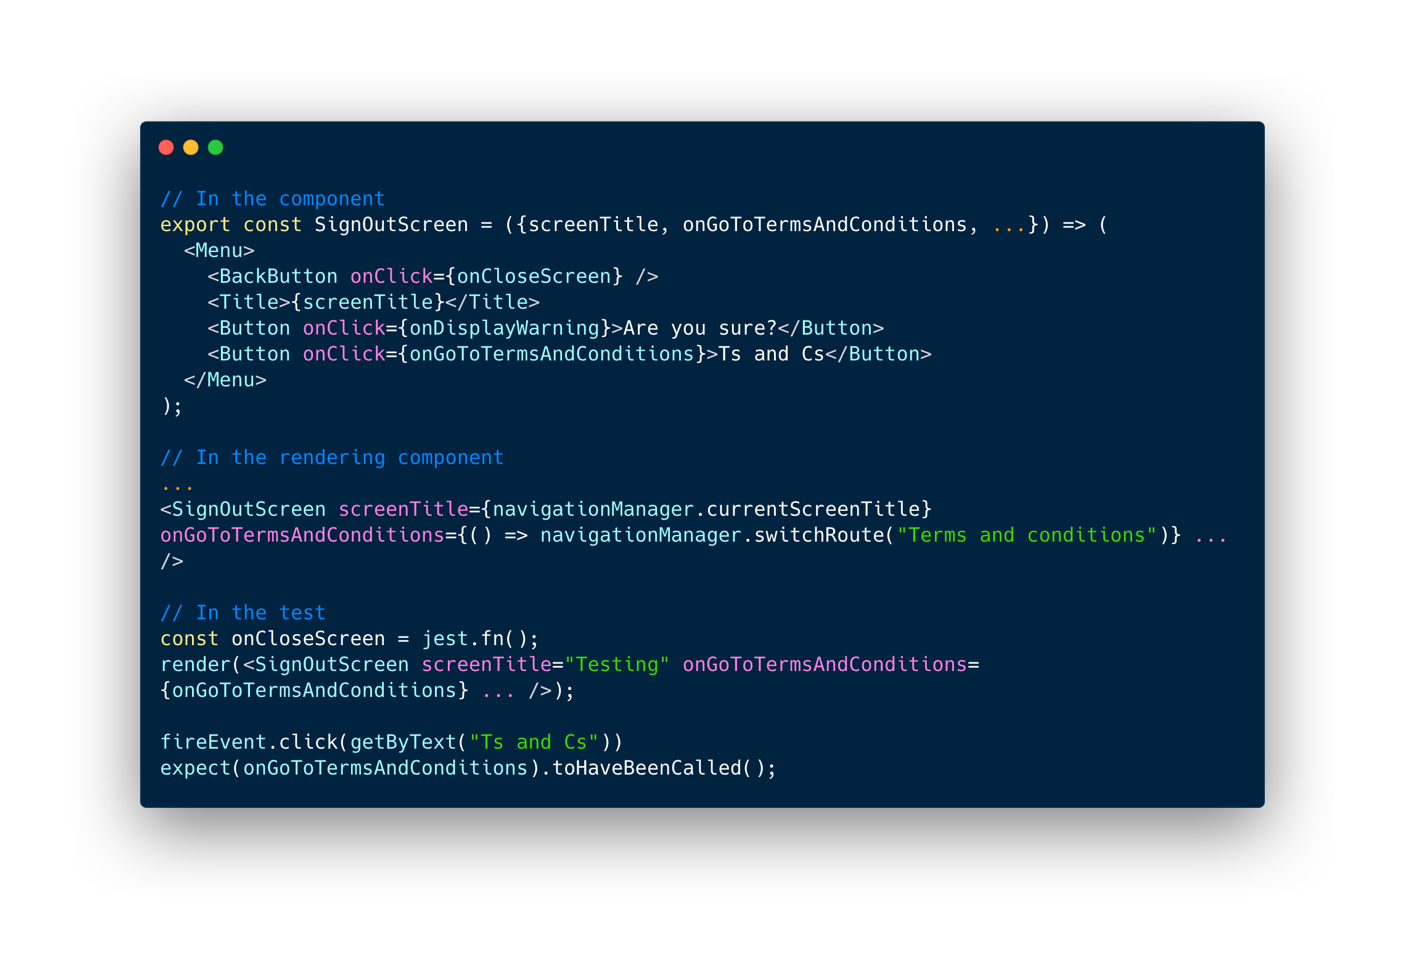
It’s not always possible and it’s not always a good fit (if a component uses most of a complex Prop, then you may as well keep it), but if you can refactor to using only simple Props, you end up with a more straightforward and easier to write test.
In the next post, we’ll get into simplifying components and applying Dependency Injection as the final techniques are outlined.
No posts
Comments
Nothing yet. Say the first thing.
Sign in to join the conversation.