
Welcome to Sewing With Numbers, a newsletter about sewing, math, design and how to draft your own sewing patterns. Through simple pattern drafting exercises, I’ll show you how fun, useful and empowering math can be. ✂️ Posts older than 3 months are archived for paid subscribers. But if subscriptions aren’t your thing, I also have PDF Booklets for older projects in my shop.
Hello my mathy sewing friends! Today’s post is the final post for Project 14—the Gathered Yoked Dress. I feel so behind in posting this dress. My apologies if you’ve been wondering where this post was! The pattern for this dress was fairly simple to draft and sew. But sewing all of the trim and details took forever. I finished two rolls of thread and had to go out and buy a third one (no small feat without Joanns these days). All that’s to say, June has rushed by in a flurry. Let’s dive in to this project.
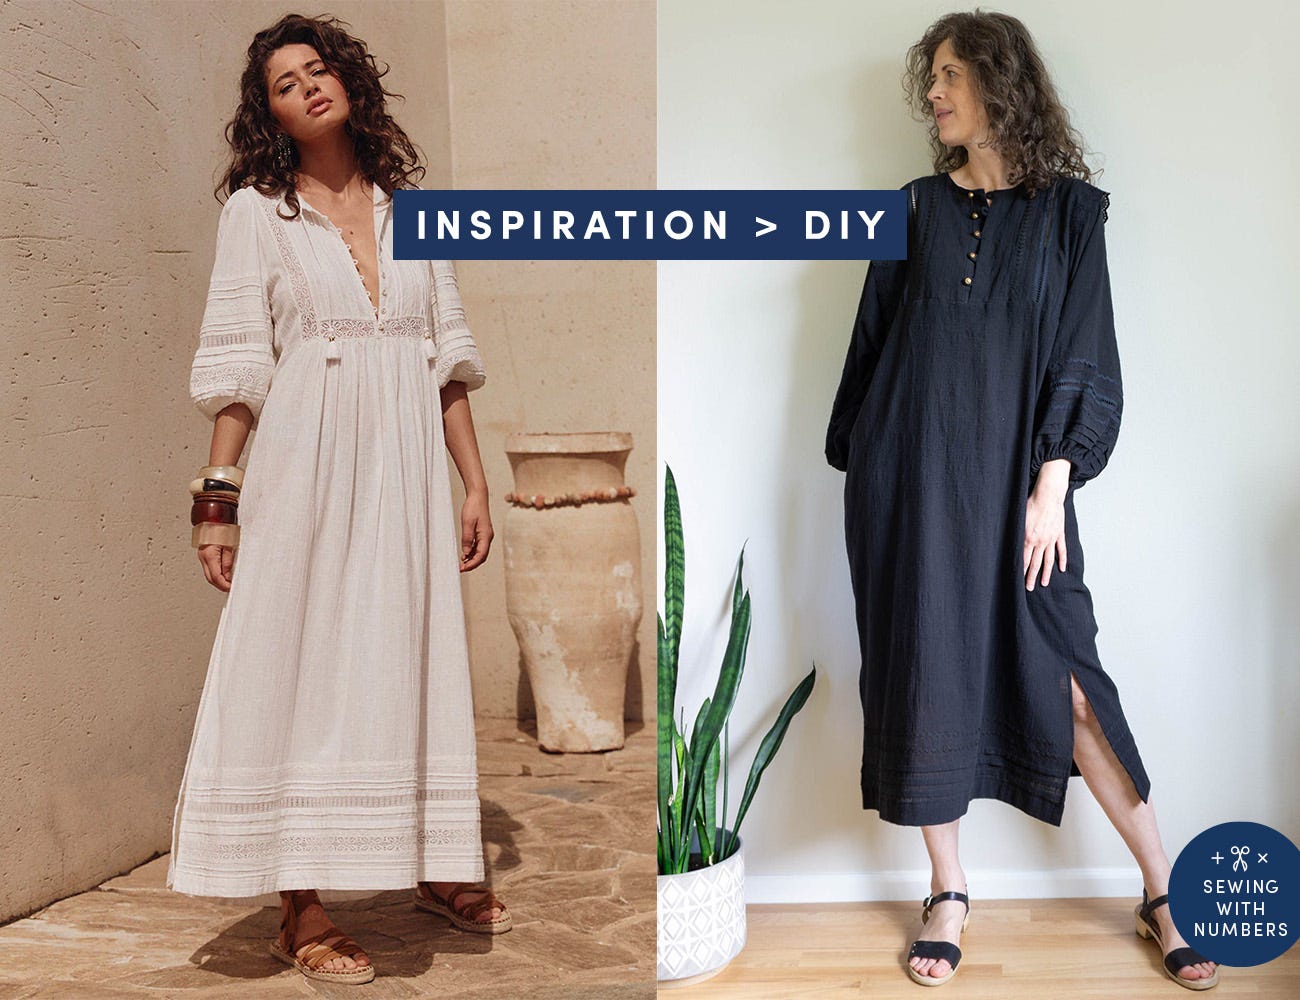
The design for this dress has been on my mind for a while. I first bought the fabric and trims in February 2025, on a trip to LA. I don’t remember if I found the black gauze first or the black trims but I found both in the fashion district. My favorite trims store is Trim Expo on Maple Ave. (And Trim 2000 next door has great zippers!) On that trip, I purchased 3 yards of black gauze and 4 yards each of a black ladder lace and black scalloped eyelet border. From my own stash, I added regular size and baby rick racks to the pile of trims.
At some point last year, I scoured the internet/Pinterest looking for inspiration for a boho style dress with lots of trim and found this one. I really liked the way the lace was used, the addition of pleats and the button front. I think my dupe is pretty good! For a closer match, I could have a longer yoke and skirt, and a tassel drawstring at the neck. My fit is also looser because I’m not using set in sleeves. And I have fewer gathers in the skirt because I didn’t have enough fabric for it.
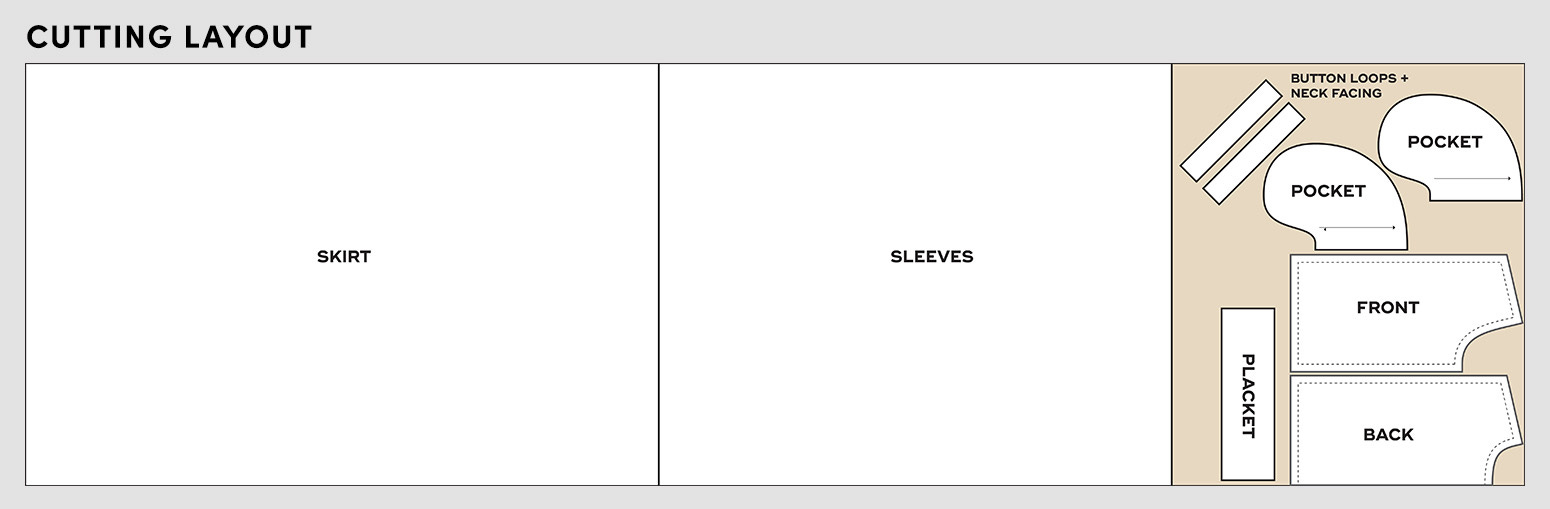
Speaking of fabric, above is my final cutting layout drawn to scale. I have just a little leftover which always feels like a win. I cut out the pieces as I went through the sewing process (not my recommended method) but the layout resembled the above. I cut the skirt and sleeves to the width of the fabric (54 inches). For those, I tore off the length I wanted and then tore the length in half for each skirt and sleeve piece. I cut bias strips to finish the neckline and make the button loops. The center front is finished with placket pieces. For the side seam pockets, I used my own pattern.
I started the dress by drafting the front and back yokes as I described in this post. I picked up my shoulder angle (13 degrees!) from another pattern. I made a quick muslin of just the yoke and then made a few changes to the neckline. After trying on the yoke, I realized I wanted the neckline deeper in both the front and the back. Tip: To see where the finished neckline will sit, cut away the seam allowance from your muslin.
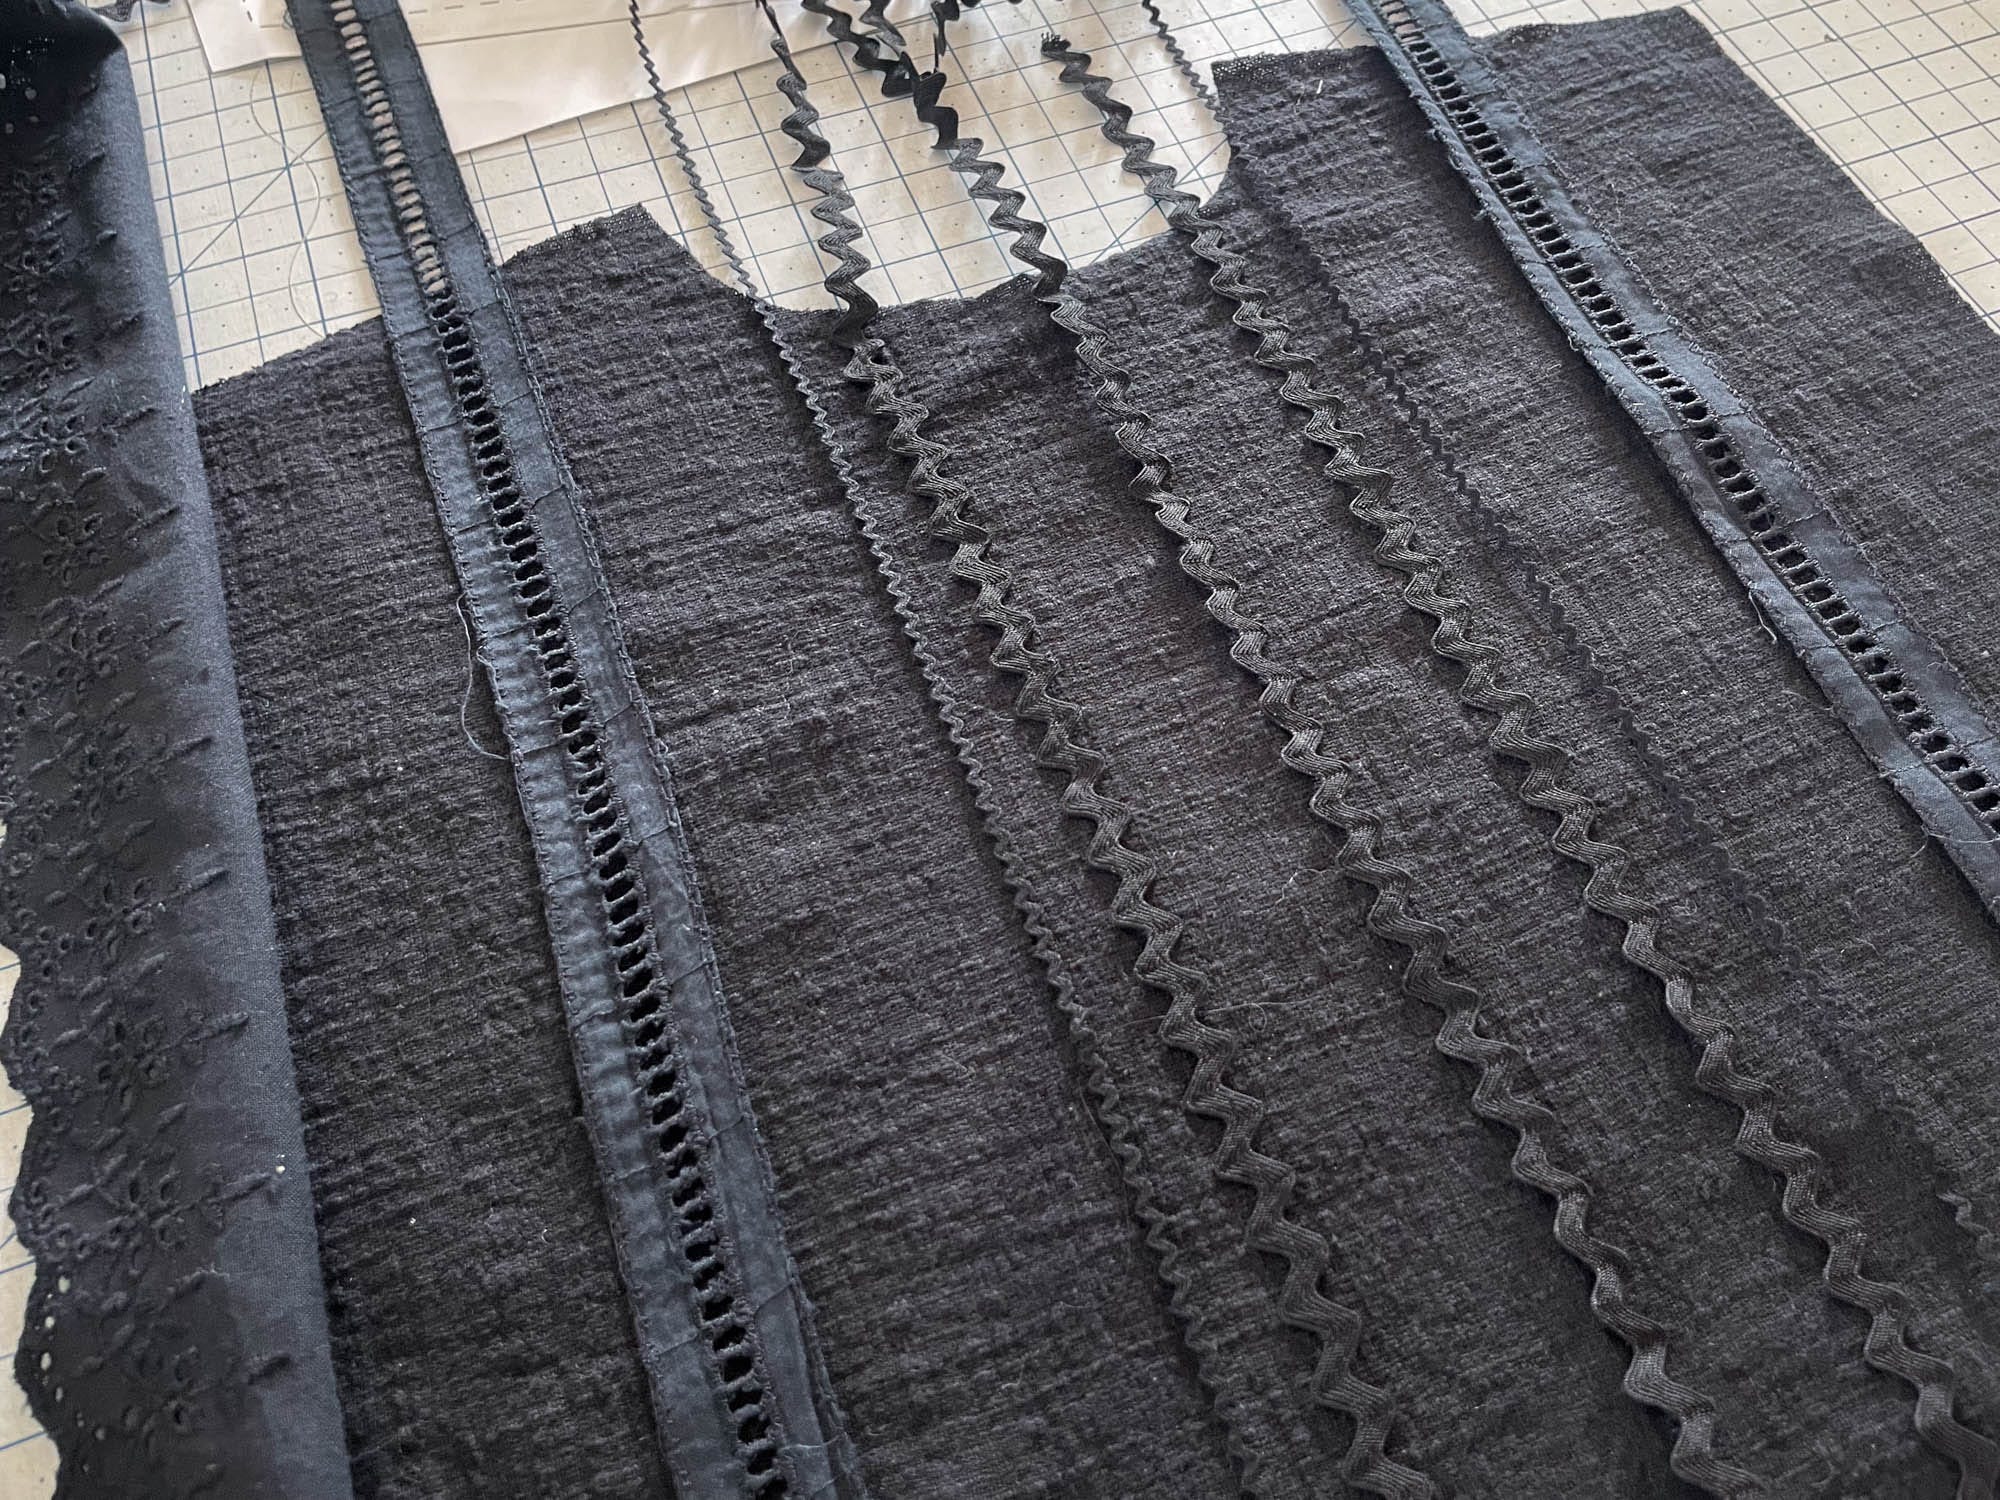
After cutting the front and back yoke, I started planning the trim application (see photo above). I decided to do columns of the ladder lace and rick rack.
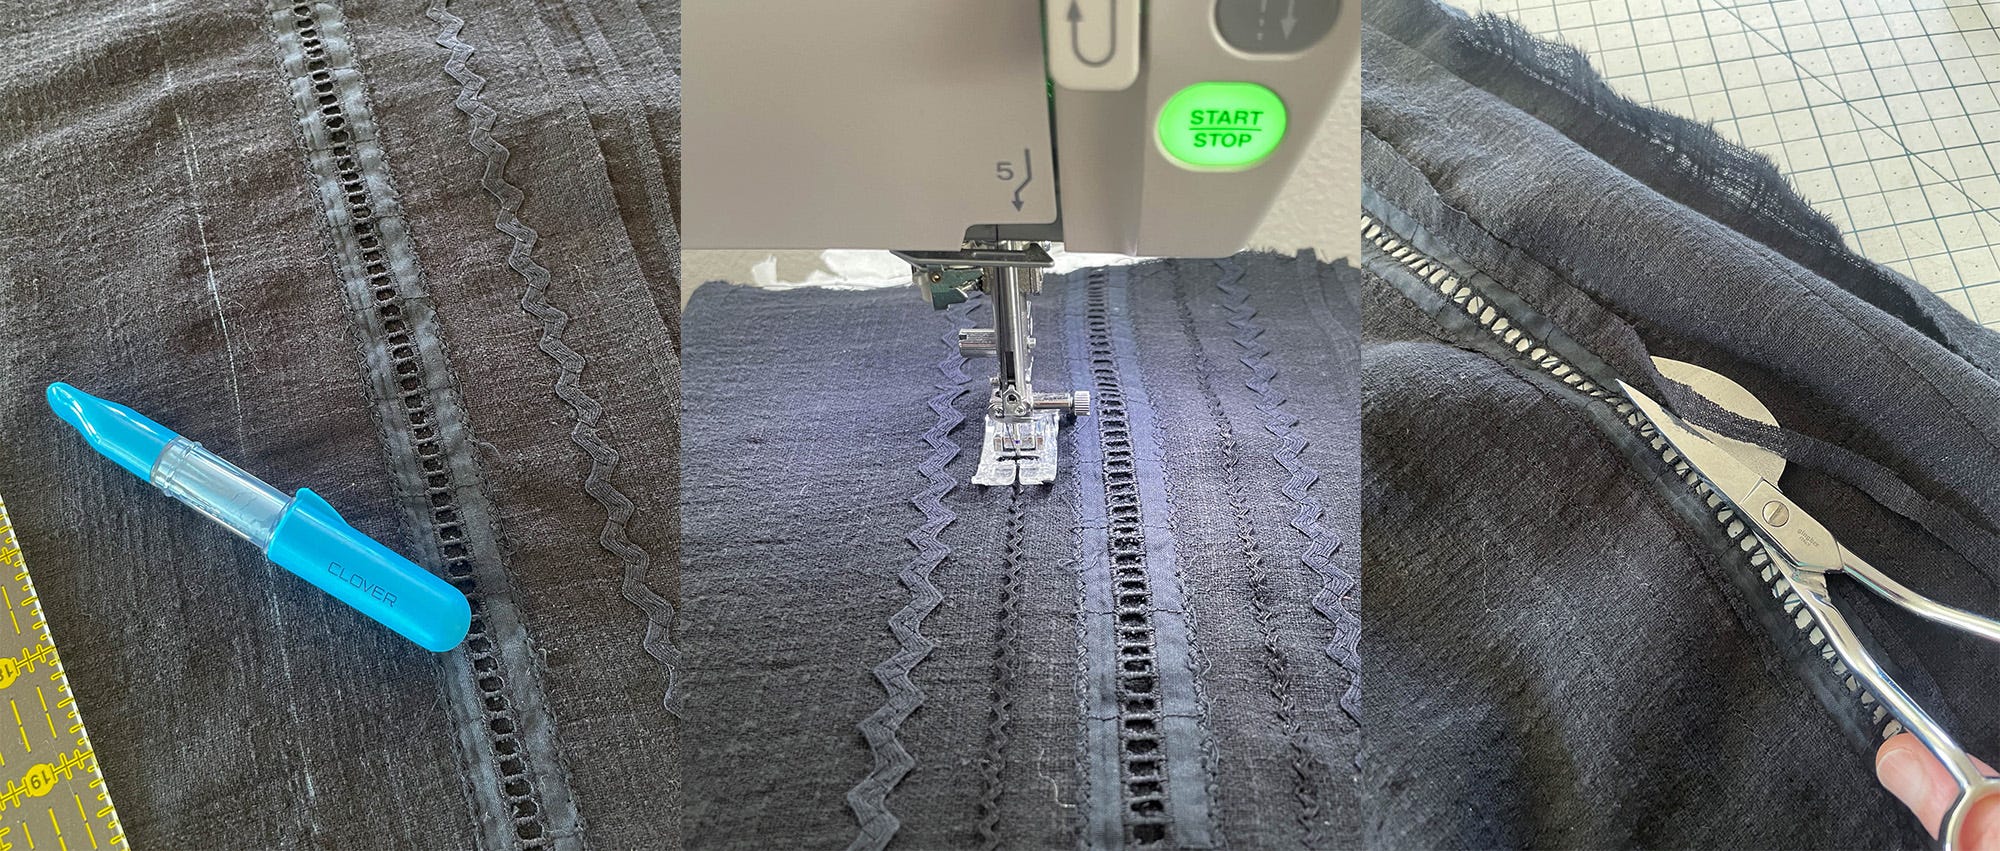
To attach the regular size rick rack, I top stitched using a zig zag stitch. For the baby rick rack I used a straight stitch. For the ladder lace, I used this method where you zig zag over each side, cut down the center, press, zig zag again and then trim the excess. To create guidelines for my trim, I used a ruler and my Clover chalk wheel to draw lines. I used my ruler a lot with this project. Often with sewing, I spend a lot more time pressing and cutting than actually stitching but this project definitely had a LOT of stitching.
The last time I worked with lace was for my Tiered Skirt project, where I just topstitched the lace to bottom of each tier, which was a very simple application. This was a lot more complicated but I love how it turned out.
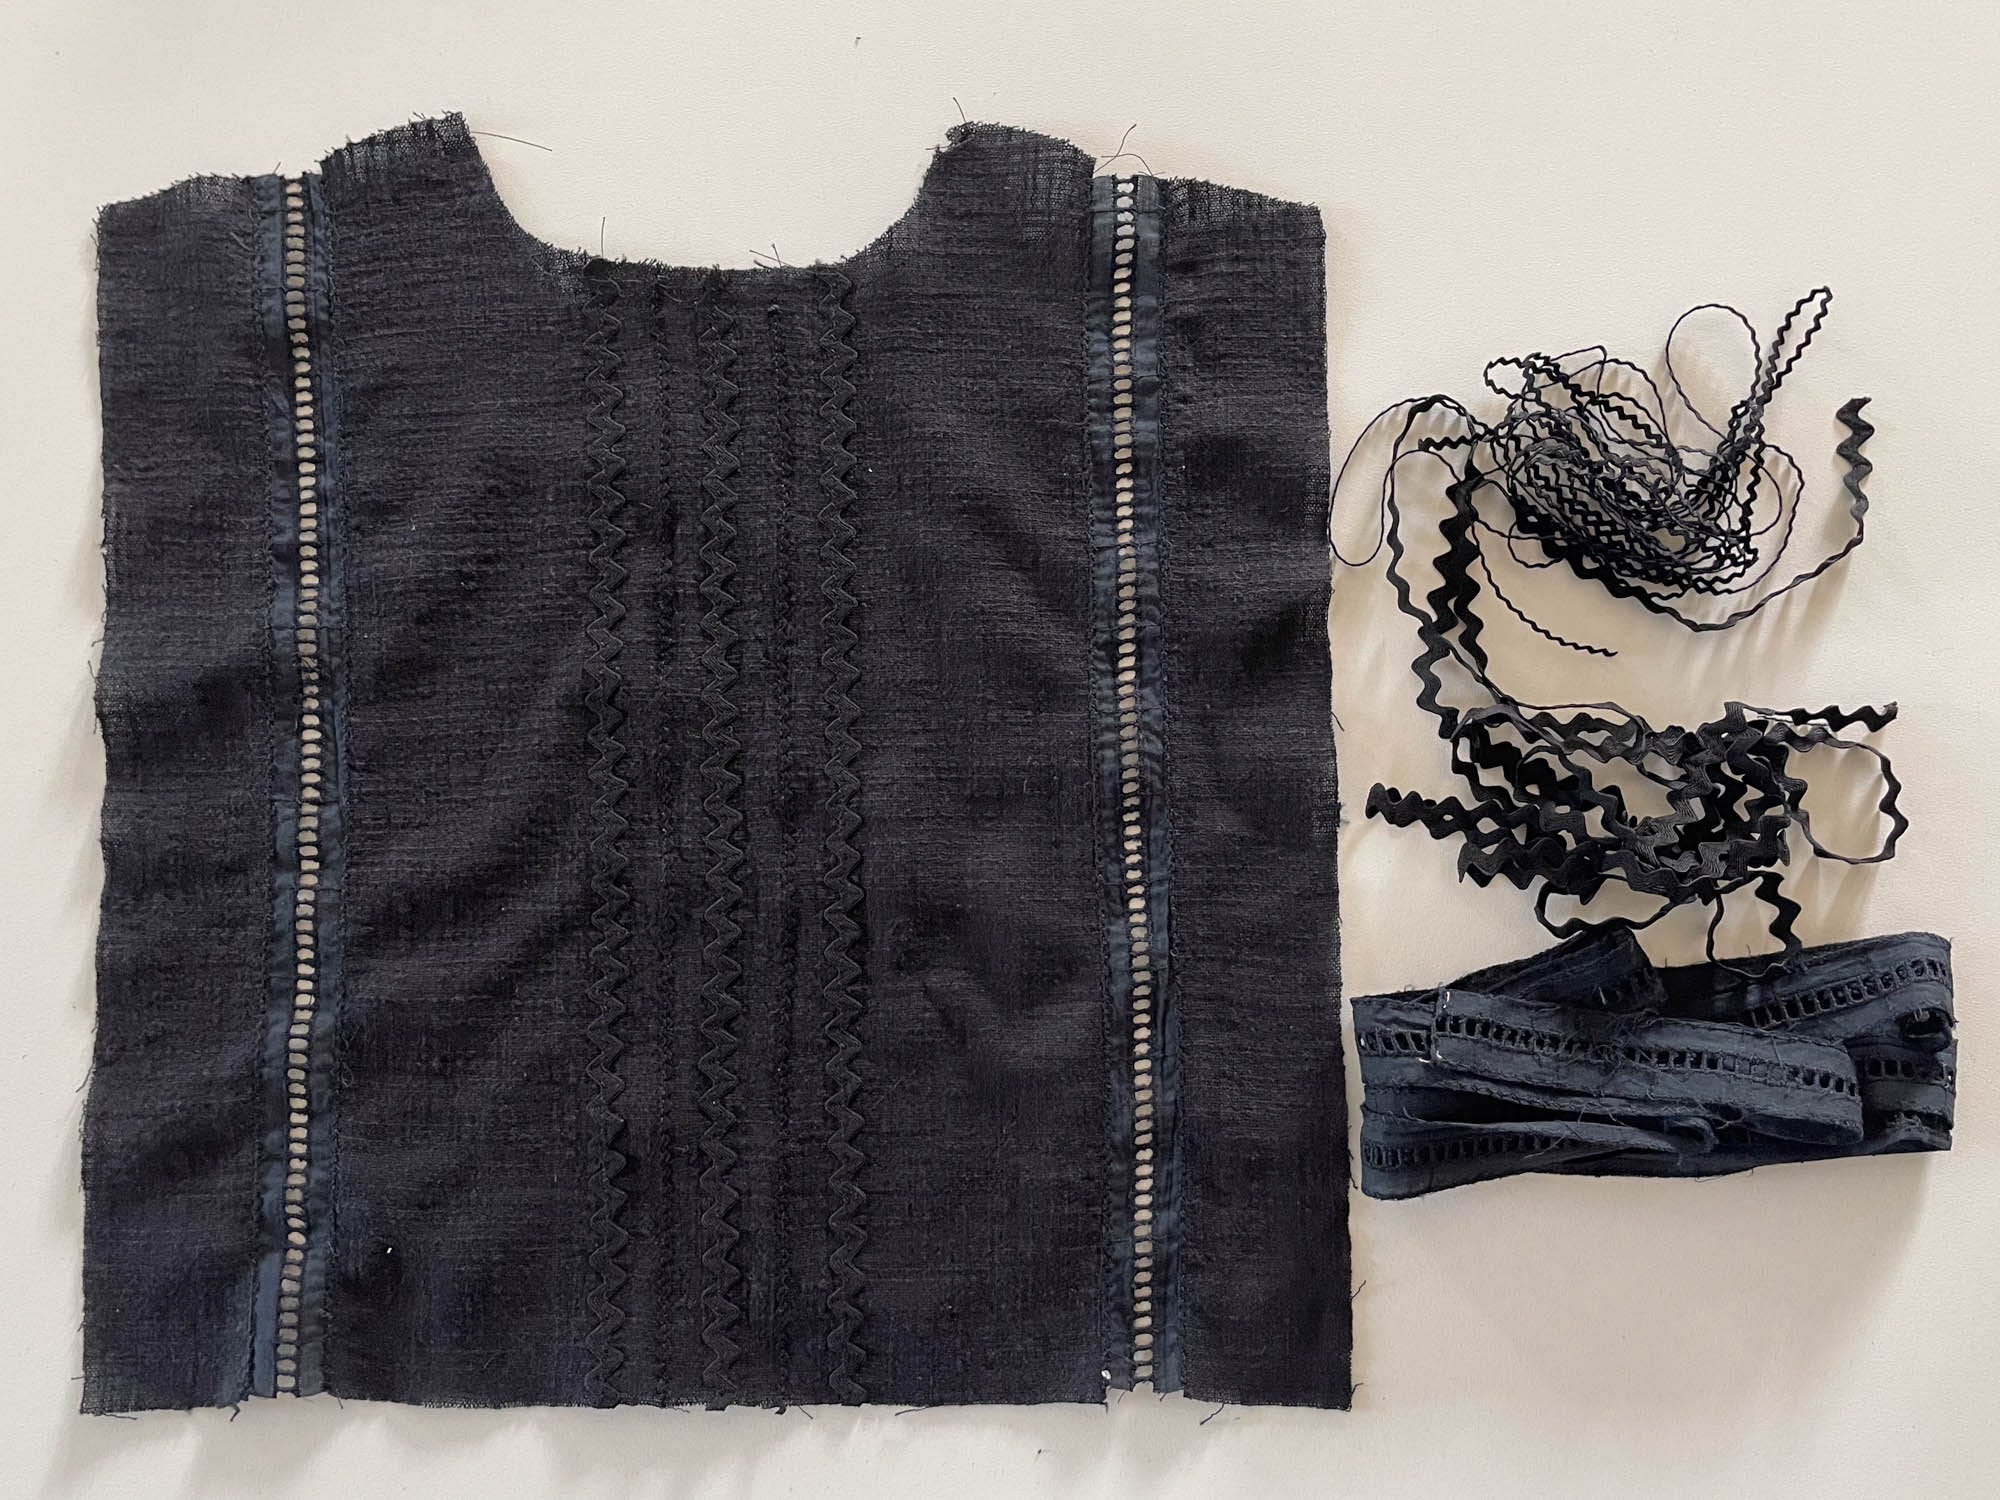
To assemble the dress, I pretty much followed the steps that I wrote up in this post. The exception being that I added a button placket and side seam pockets.
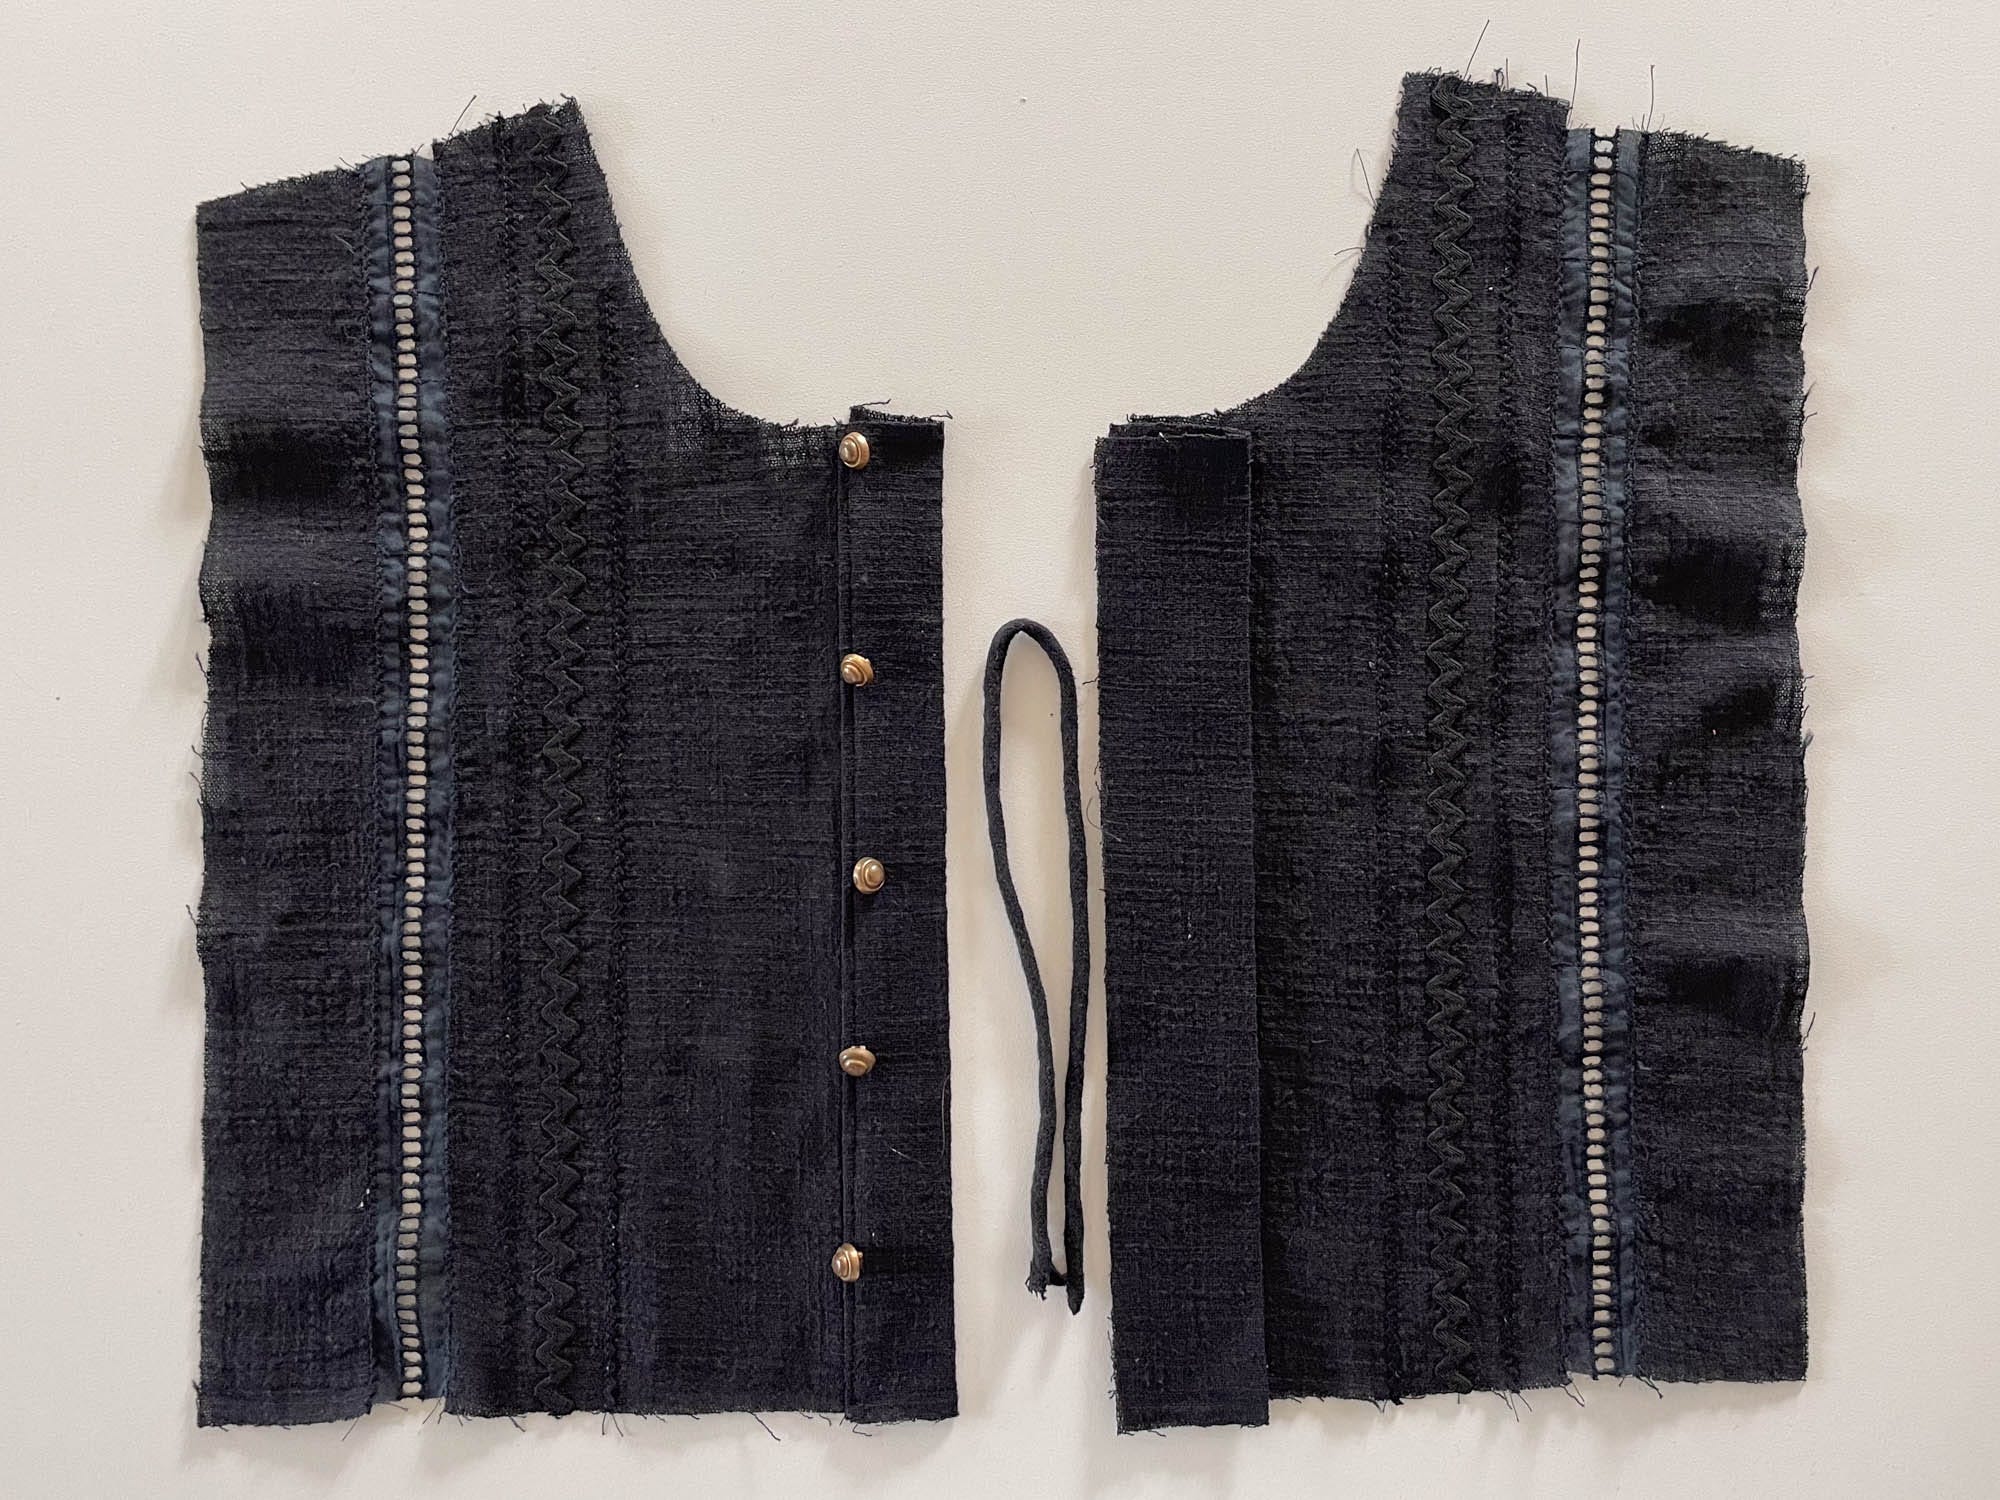
I found these gold buttons in my stash and had just enough for my bodice. They are a shank style so they will work with a loop rather than a button hole. I made a little extension placket that sits behind the buttons and sewed it to the center front.
I made rouleau loops using the same method that I use for the loops in my Eva Sundress pattern. (Click here to watch a video of my method.) I basted the loops to the center front then stitched on a facing to finish the edge. The loops are probably a little thicker than I’d like but I decided not to redo it and I think it’s ok because they really blend in to the fabric.
When it came time to draft the sleeves and skirt, I decided that I didn’t need a lot of gathers and could save on fabric. I also didn’t really have a lot of fabric left. So, for the sleeves, I cut a piece of fabric that was 26” long by the width of fabric (54”) and then cut that in half to make two sleeves. This width was just a little bit wider than the sleeve opening, so I added a few gathers at the center/top of the sleeve.
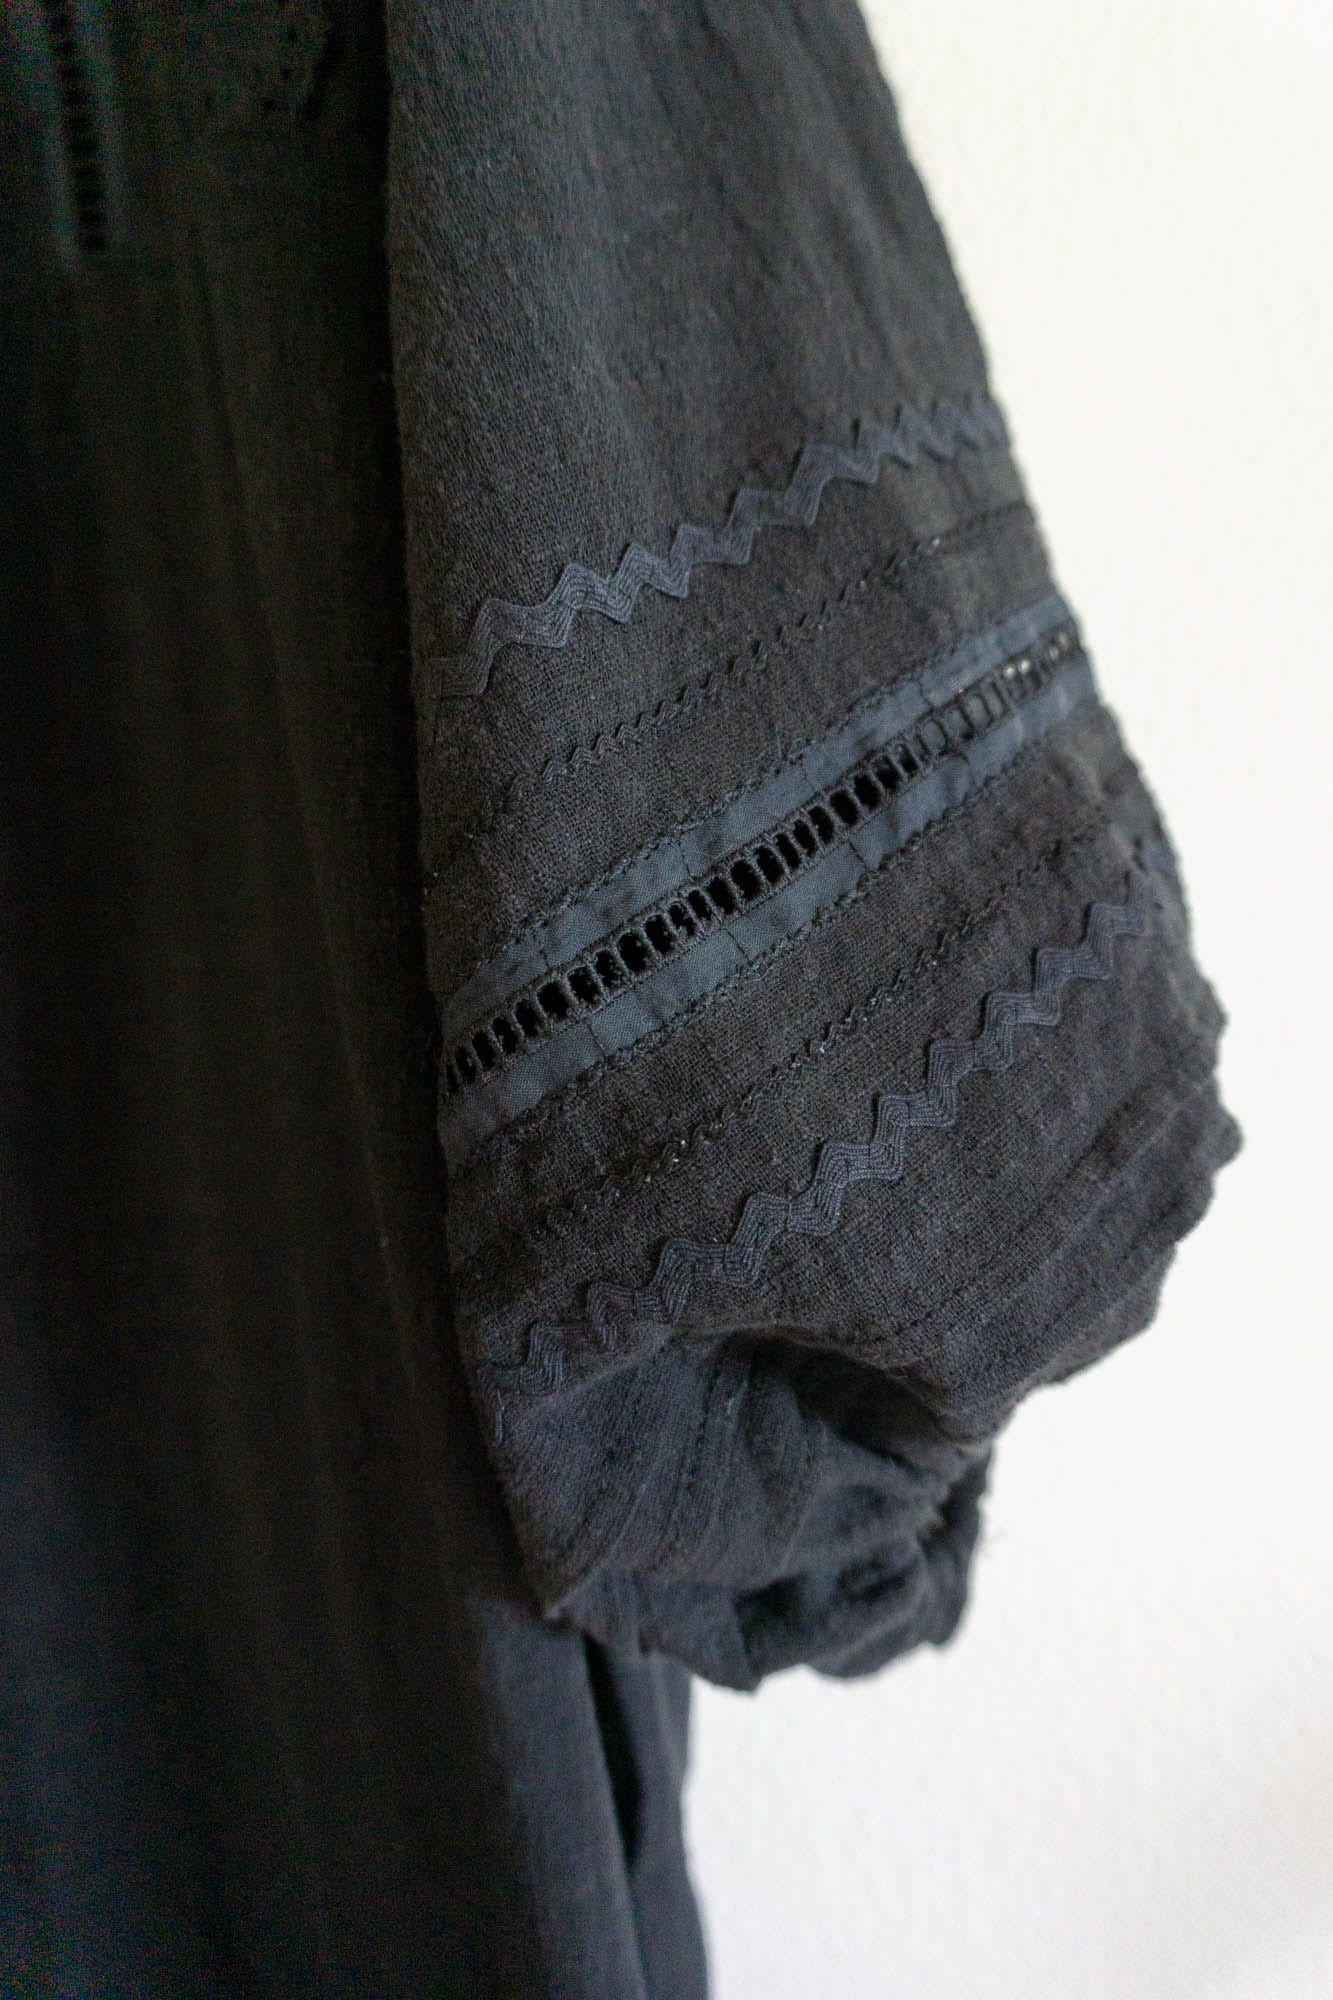
For the sleeve trim, I sewed three pin tucks, one row of ladder lace and four rows of rick rack. At the hem of the sleeve, I sewed a narrow casing and inserted 1/4” elastic. You may notice that the outer edge of the sleeve is higher than the inside edge. This is due to the rectangular shape of the sleeve. In Project 3, I showed how to add a curve to the bottom of the sleeve to make a more even length.
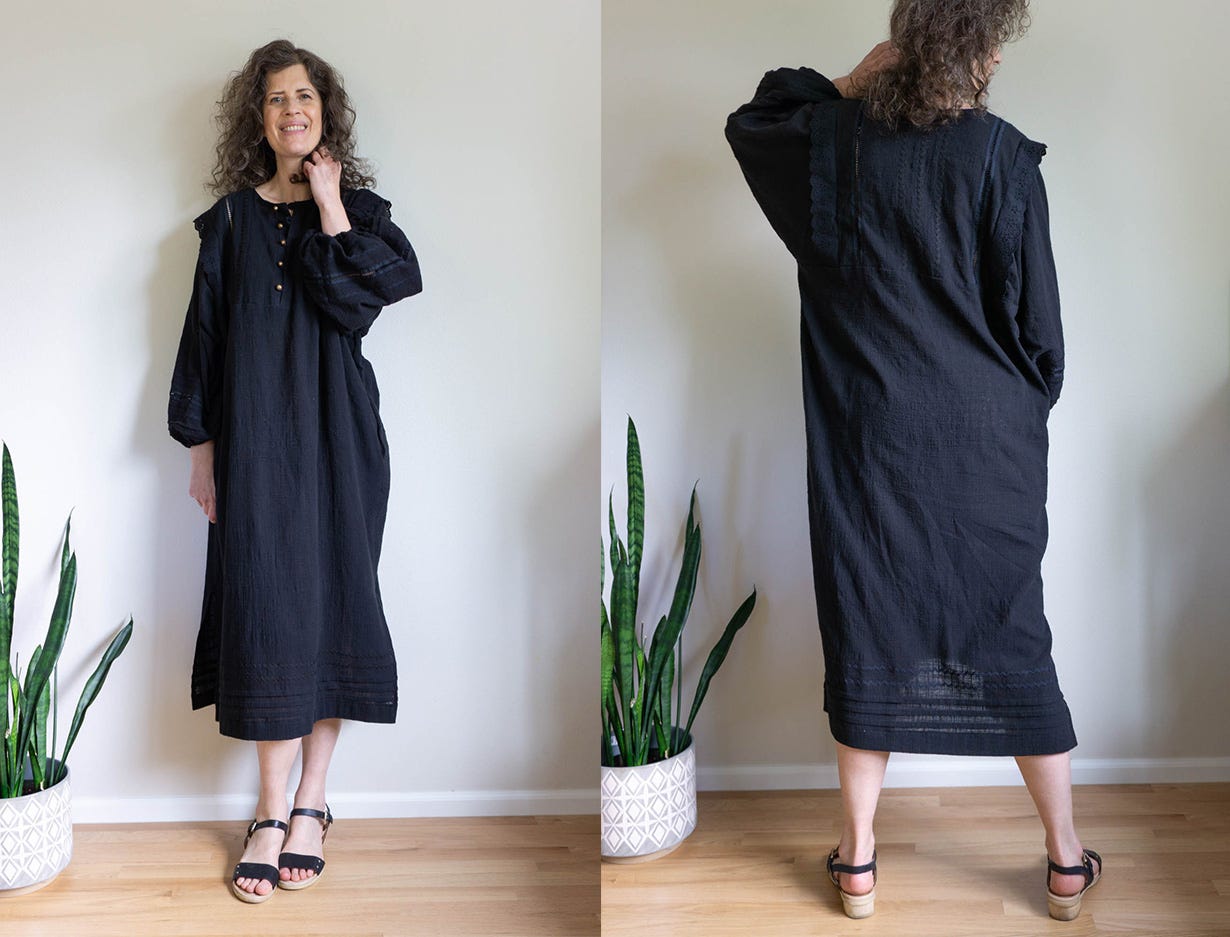
Finally, for the skirt, I used most of my remaining fabric and cut it into two pieces 28 x 42 inches. I could have gone a little longer but I didn’t want the dress to be too overwhelming. For the skirt trim, I made three rows of pleats and two rows of regular rick rack. I also made slits in the side of my skirt, just like the inspiration so that I’d have more freedom of movement.
I sewed on in-seam pockets using my standard method and my own pattern piece. I have a tutorial for my method on my other blog. And if you want a pdf copy of my pattern piece, you can get it for free when you sign up for my Sew DIY newsletter.
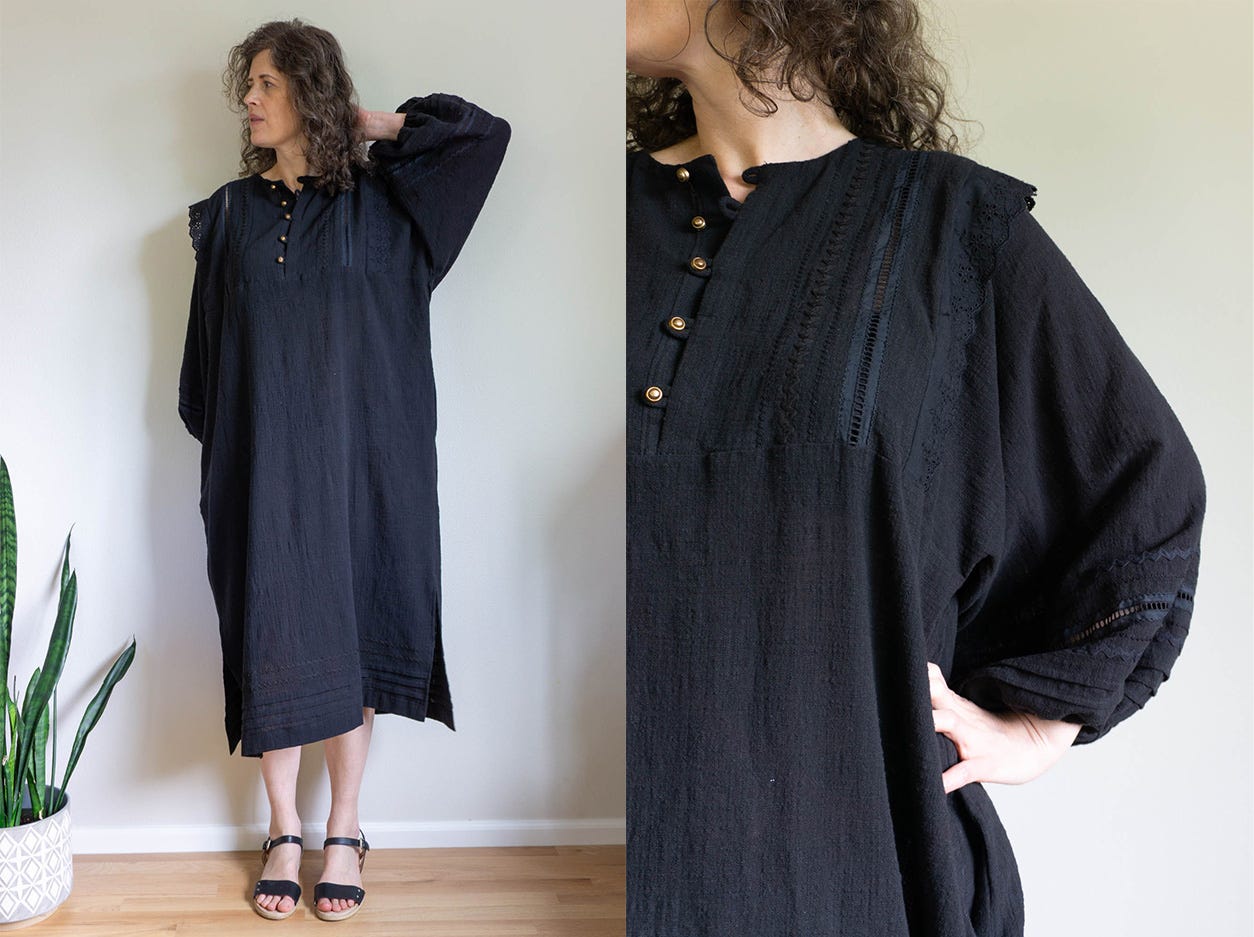
Overall, I like the dress and enjoyed sewing it even though it felt very slow at times. The fabric was a little challenging to work with. It easily stretches out of shape and did not like to have stitches unpicked. I accidentally made a hole in the top of the bodice that I darned by hand. Fortunately, it’s very hard to see things like that with the black fabric.
This was a fun project to sew and I think I’d like to try incorporating trim more often. I also love that I was able to use a bunch of rick rack that I had in my stash!
This is also an interesting shape to play with but not the most flattering shape. For better or worse it feels a lot like a nightgown or caftan. I’d prefer to have it be a little more fitted at the waist. I think ties on the side would look really cute as a way to create some shape. But, I’m not sure where they could be sewn in. At this point, they’d need to be topstitched somehow.
Please let me know if you have any questions on this project. There are probably things I forgot to mention. :)
There are lots of ways to support this free content. You can tap the “heart” at the top or bottom, share or “restack” the post to help other people find it. Become a paid subscriber or, visit one of the links below.
Sewing With Numbers Drafting Manuals are now available for purchase.
Pattern Shop | Improv Quilting E-Course | Ko-Fi | YouTube
Happy mathing!
Beth
Comments
Nothing yet. Say the first thing.
Sign in to join the conversation.