
A couple of weekends ago, the author decided to run a one person hackathon and created Dialer. Dialer is a paid Remote MCP server which lets your LLM make outbound phone calls using your own phone number. It’s designed to be only useful in an LLM context. At the time of writing it has 10 paid users from a single reddit post. This tutorial is everything the author learnt along the way, and will enable you to create your own!
MCP (Model Context Protocol) servers have been growing in popularity throughout the most part of this year in the AI community. However, if you asked any non-technical friend if they have heard of MCP, you’ll get a blank face and a “here they again” look. Then, briefly of course, you explain MCP to them. The same friend then joyfully tells you they already connect Claude to Jira, and they don’t need this “MCP” nonsense. They’re using connectors.
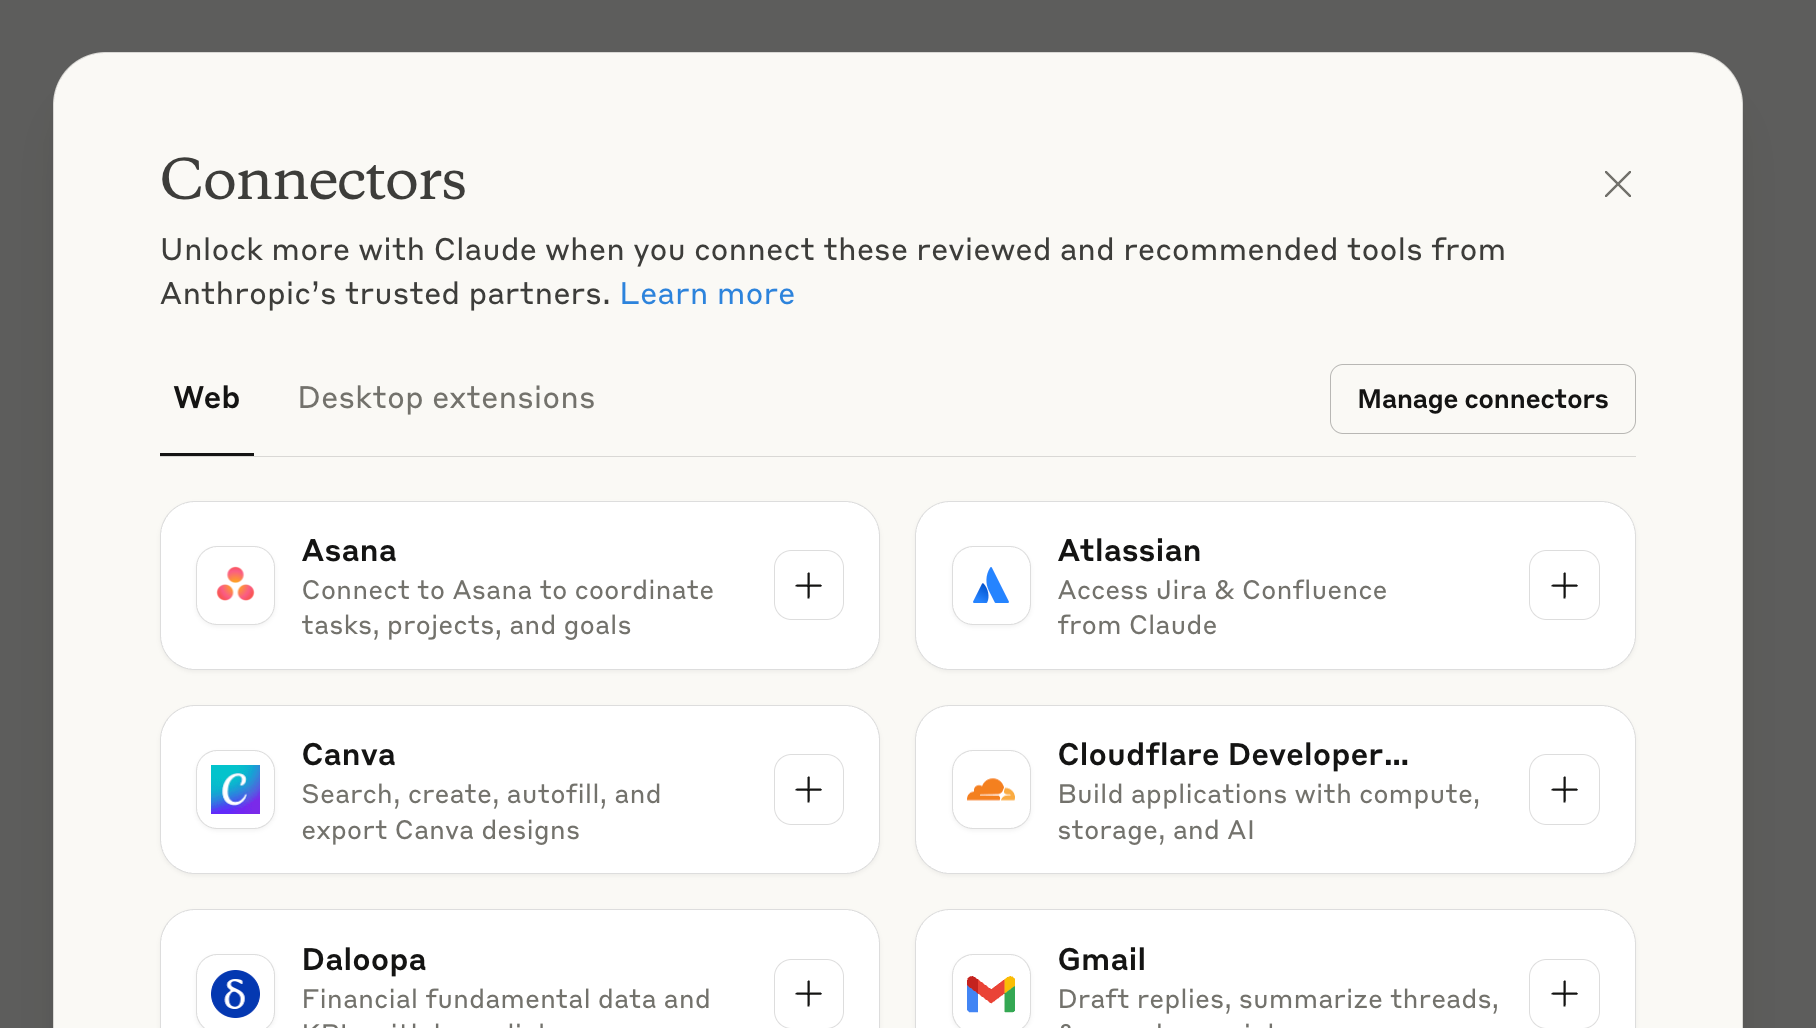
In both Claude and ChatGPT, the ability to connect to third party services began with Google Drive and Dropbox. Recently both providers have introduced “custom connectors” into their products to allow users to connect to custom third party tools. This sounds exactly like MCP, and the trick? Well it IS MCP. The Remote kind.
A Remote MCP server is one that the service provider hosts themselves. Notion hosts a Notion MCP server, Sentry hosts Sentry and you’re about to host your own. This is the same pattern that APIs follow. To install/make use of these, all you need is the URL of the Remote MCP server in order to connect.
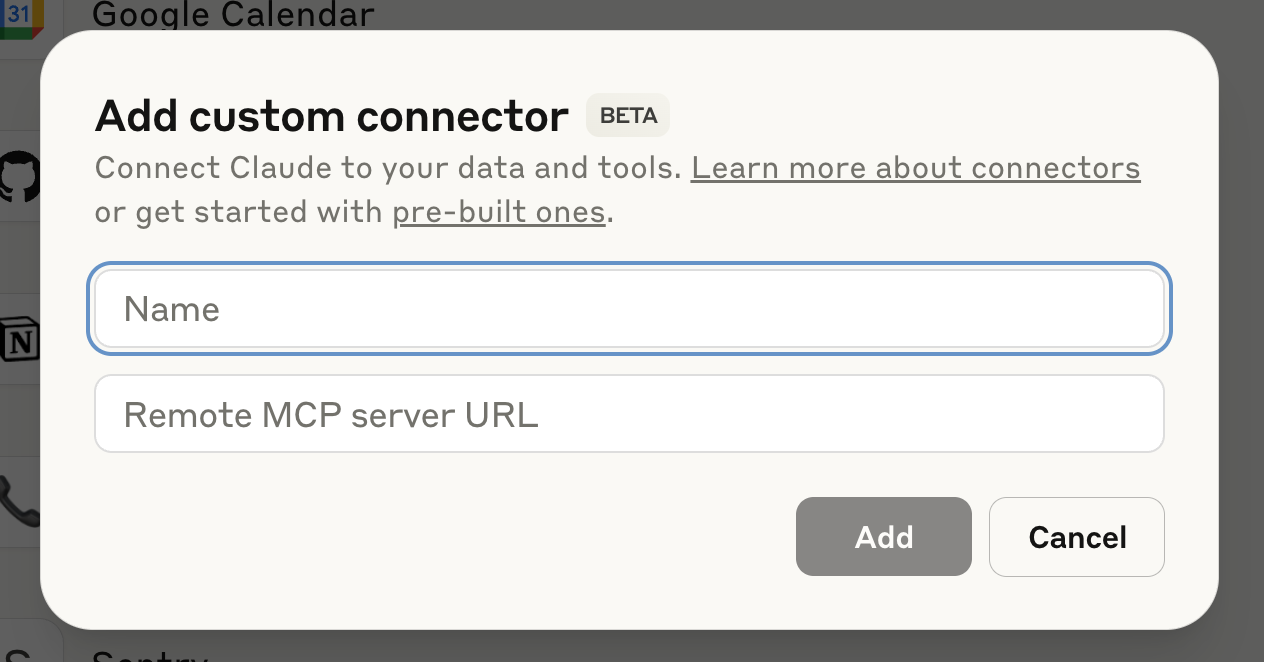
Now lets speed run through building our own one. We’re going to cover this in three parts. First, we’ll create our own Remote MCP server and deploy it to production so we can use it in Claude. Second we’ll add authorisation to our server so our users can identify themselves. Finally we’ll monetise our connector usage using Stripe. By the end you will be able to generate revenue from a native AI application.
First we’re going to get our Remote MCP server built and running in the cloud. This tutorial stands on the shoulders of Cloudflare, specifically this blog post. We’re going to start with their basic template (with OAuth). To start, click the deploy to Cloudflare button either on the blog or pick a method:
Click the deploy to Cloudflare button, sign up/in and create a new git repo.

Make sure to checkout the repo that is created for you. Skip to the testing section.
Equivalently you can run the following in your favourite shell to install the template first. Note this is slightly longer as you’ll have to create a key value store in Cloudflare before deploying
npm create cloudflare@latest -- my-mcp-server \
--template=cloudflare/ai/demos/remote-mcp-server
cd my-mcp-server
npm install
Make sure to say “no” to deploying as we’ll need to adjust the configuration before

Now you’ll need to create a new KV (Key Value) store in Cloudflare
npx wrangler kv namespace create MY_OAUTH_KVThen you’ll get an output like the following
🌀 Creating namespace with title "MY_OAUTH_KV"
✨ Success!
Add the following to your configuration file in your kv_namespaces array:
{
  "kv_namespaces": [
    {
      "binding": "MY_OAUTH_KV",
      "id": "XXX"
    }
  ]
}
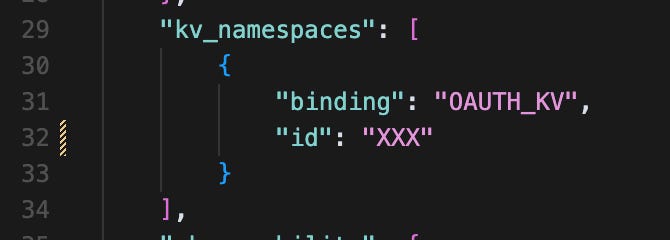
As the output says, open your wrangler.jsonc and paste the KV ID we just created in the KV section. This is the configuration file for the worker that gets created in Cloudflare. Make sure to keep the “binding" key name set to OAUTH_KV
Finally run
npx wrangler deployTo deploy your Remote MCP server. You will need to sign up/ in to Cloudflare as part of this process. This command results in the output:
🌀 Building list of assets...
✨ Read 8 files from the assets directory ~/my-mcp-server/static
🌀 Starting asset upload...
No updated asset files to upload. Proceeding with deployment...
Total Upload: 958.71 KiB / gzip: 173.78 KiB
Worker Startup Time: 32 ms
Your Worker has access to the following bindings:
Binding                                                Resource
env.MCP_OBJECT (MyMCP)                                 Durable Object
env.OAUTH_KV (XXX)                                     KV Namespace
env.ASSETS                                             Assets
Uploaded my-mcp-server (9.35 sec)
Deployed my-mcp-server triggers (2.54 sec)
  https://my-mcp-server.remote-mcp.workers.dev
First visit the URL created by our command, in our case this is:
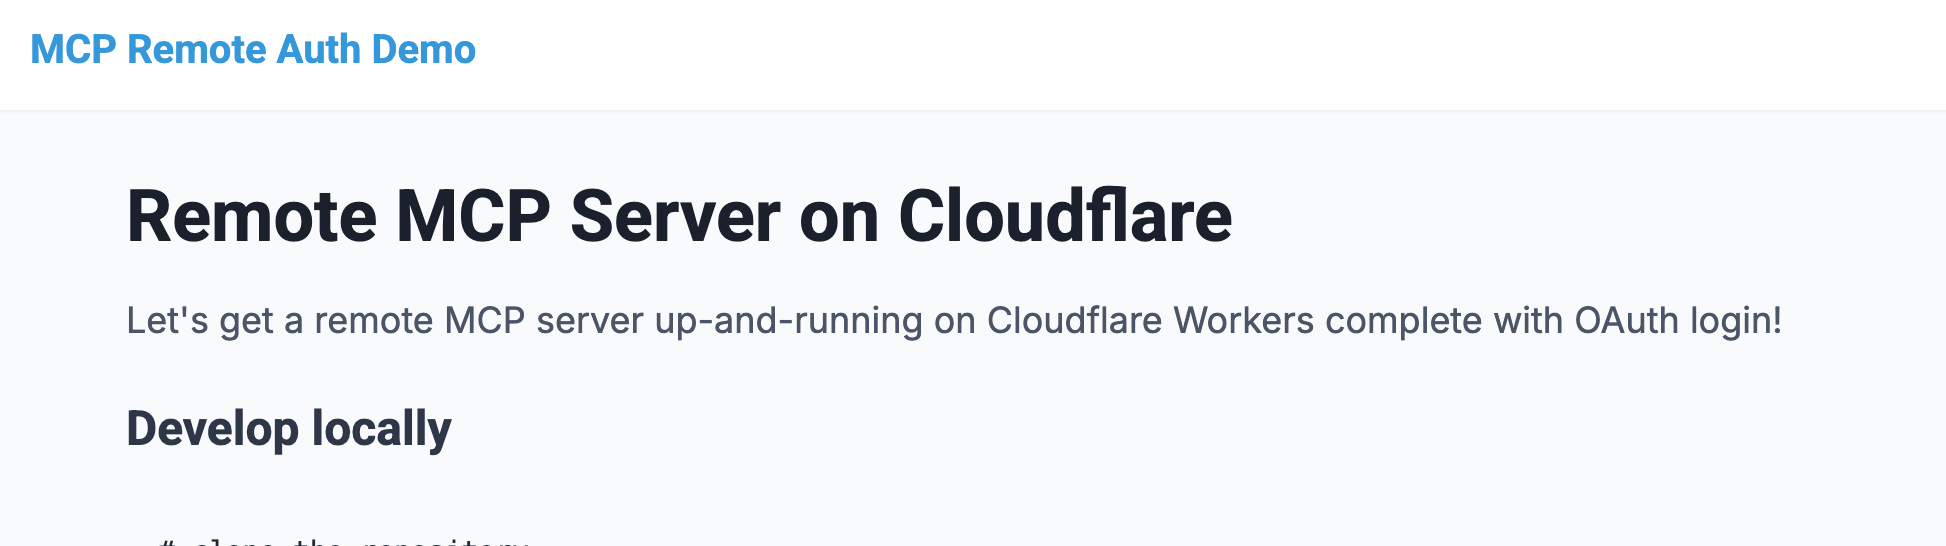
https://my-mcp-server.remote-mcp.workers.dev Open it up in a browser and you should see the template landing page:
Great! Now, the Remote MCP server is actually hosted at "/sse”. The full URL you should enter into Claude/ChatGPT is:
https://my-mcp-server.remote-mcp.workers.dev/sseNote that at the time of writing /sse is deprecated (yes already), and /mcp is the standard. Don’t worry about this now, you can set this up later.
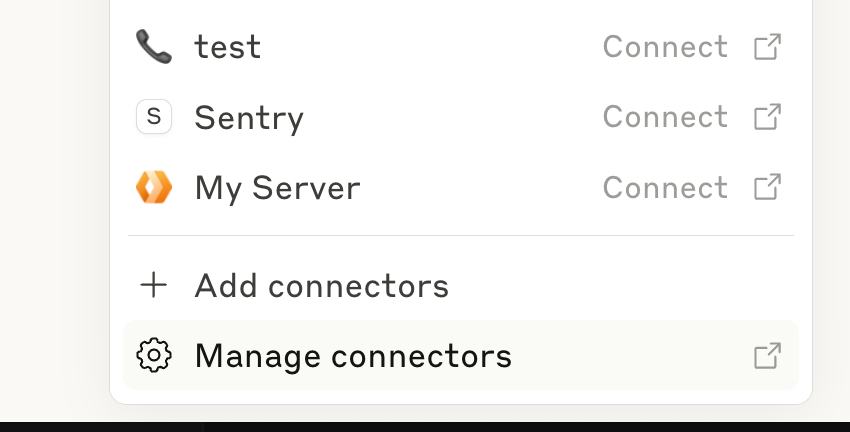
To use Claude to test, open the “manage connectors” screen
Then select “Add custom connector”, followed by pasting in your URL and click “Add”.
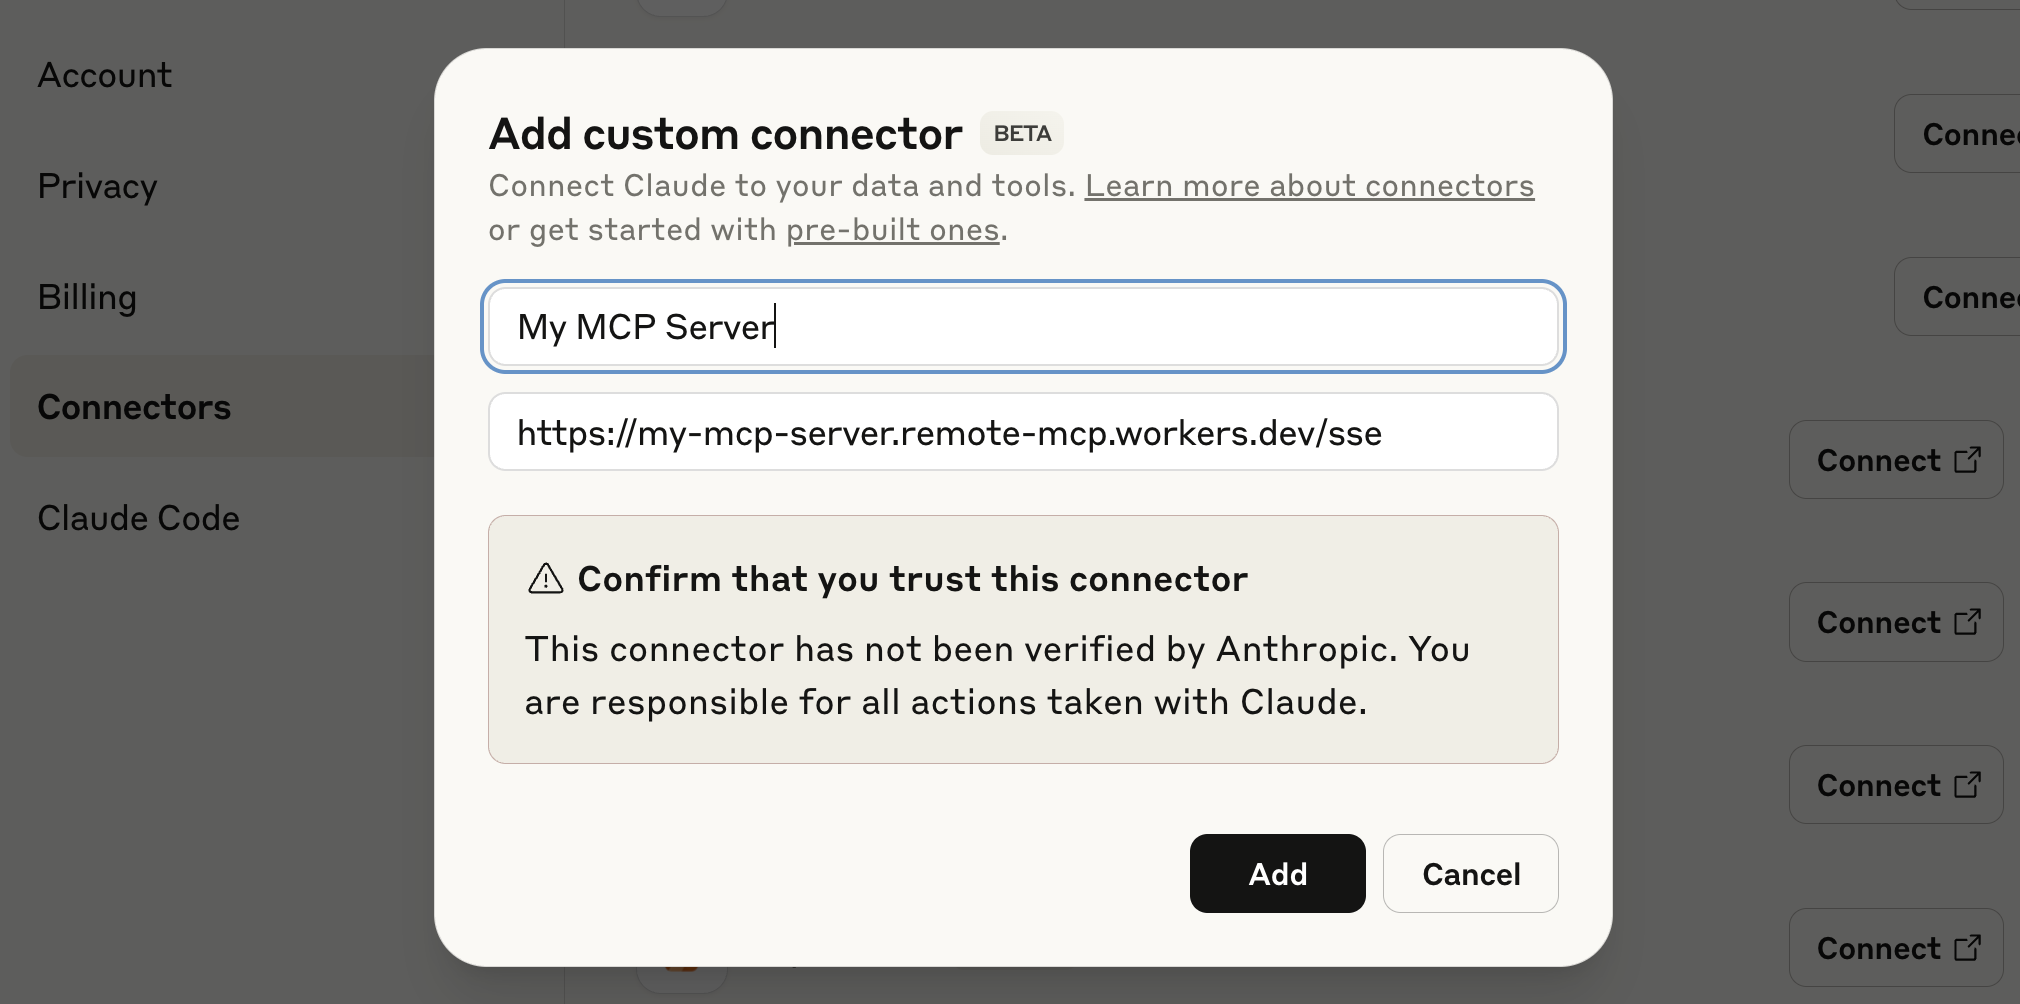
After clicking add you will see a new item in the connectors list.

Click connect. This will open the following mock OAuth screen.
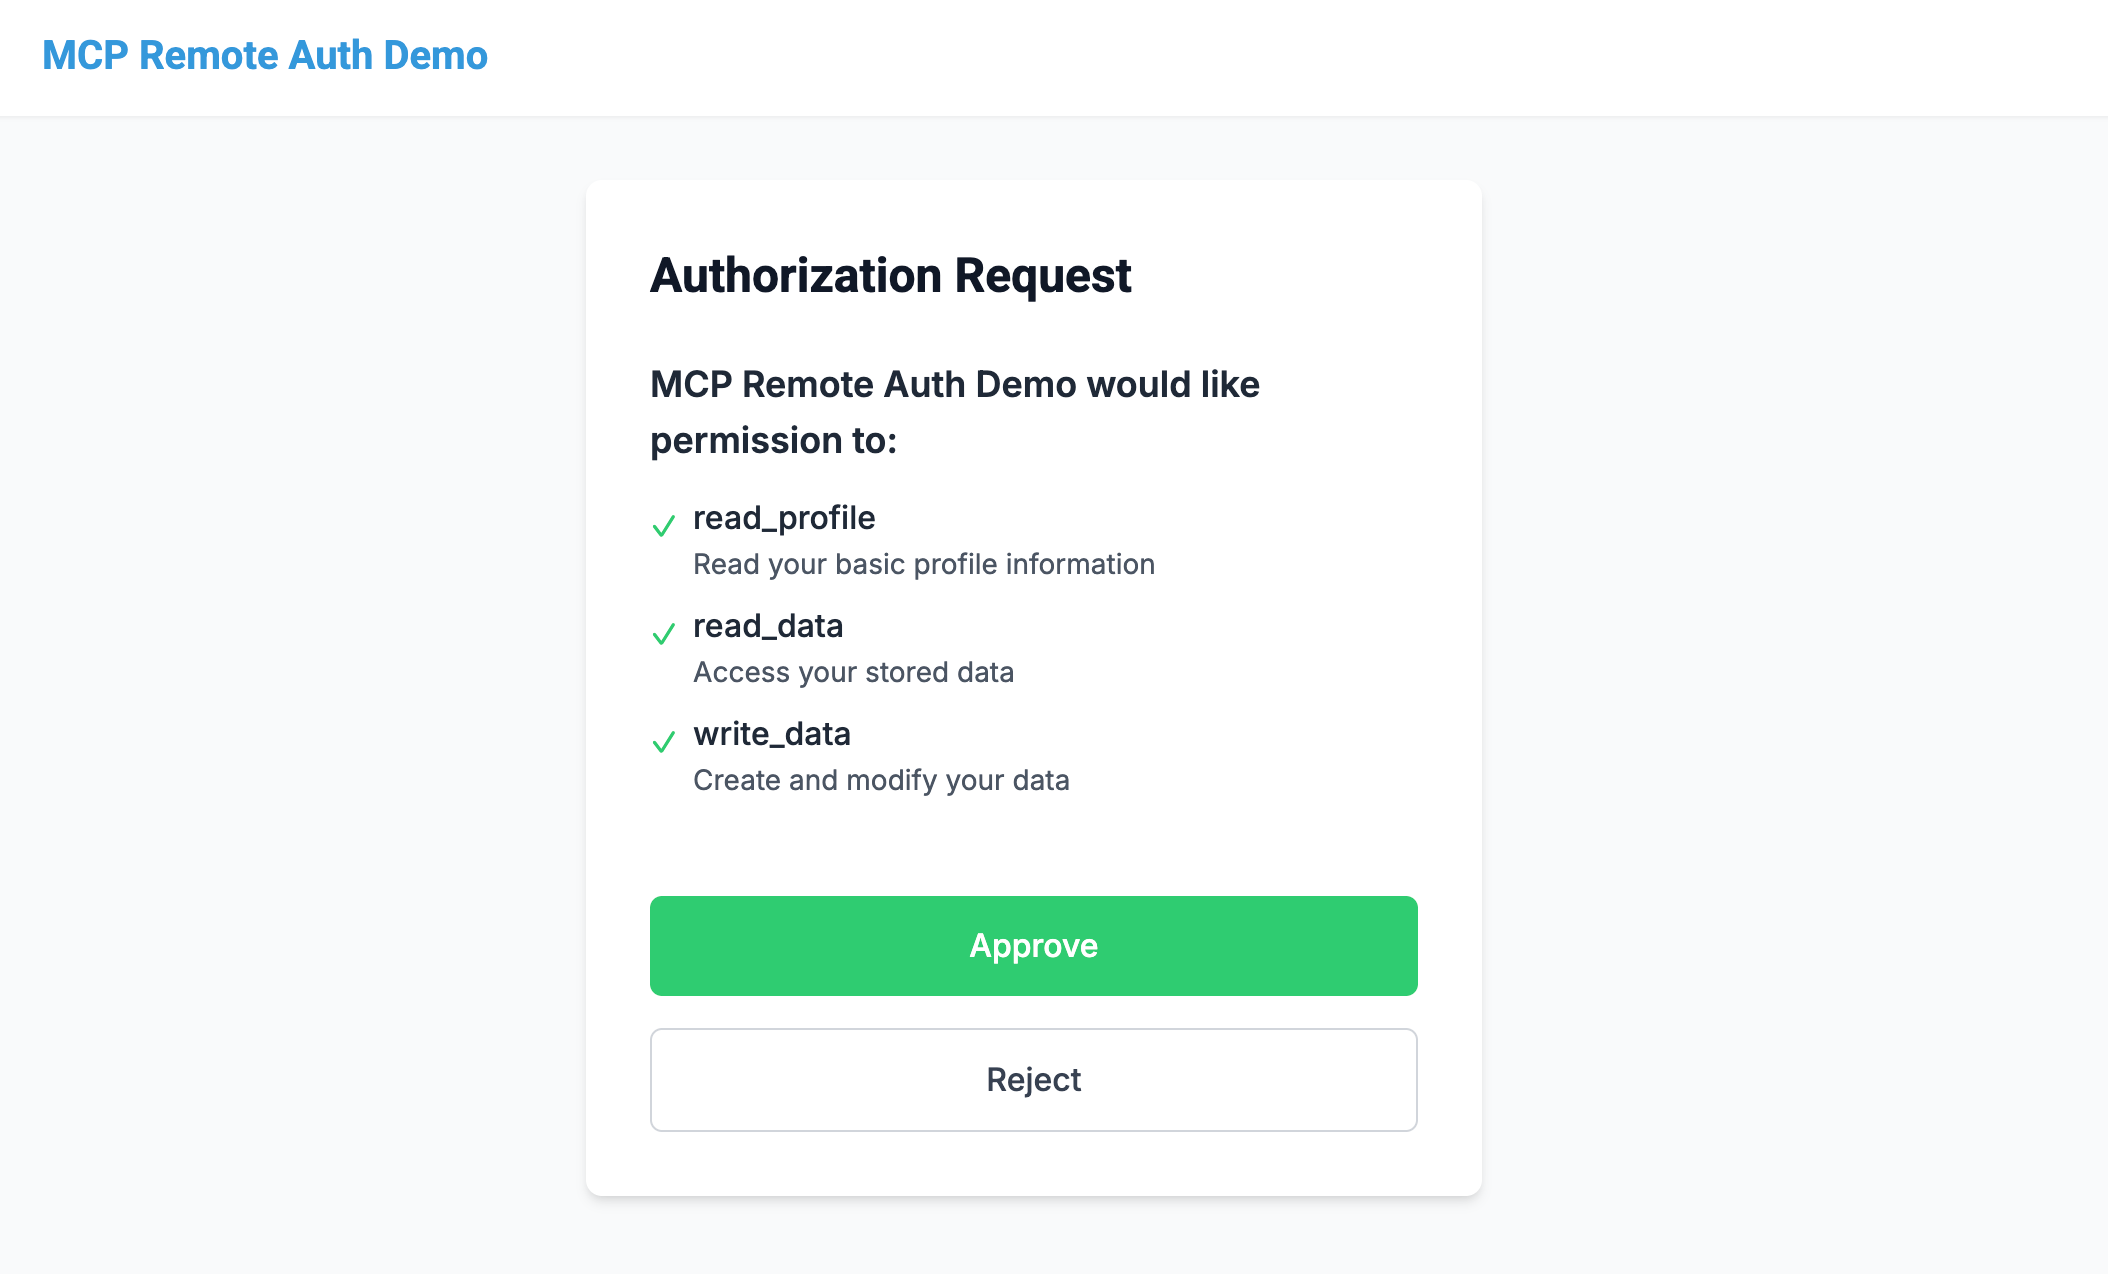
Click approve. You’ll see the following screen
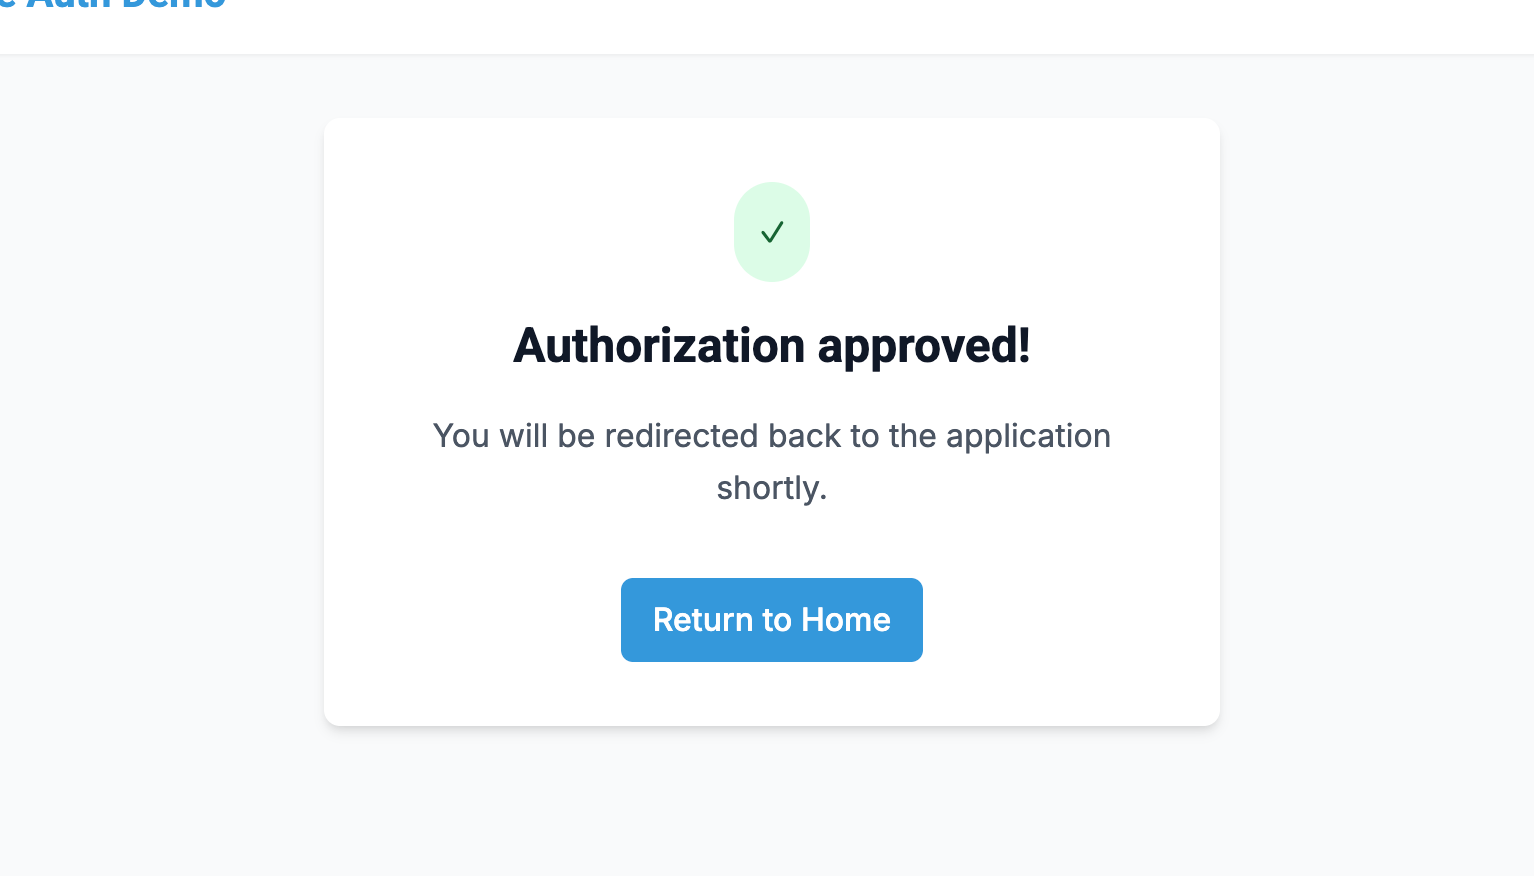
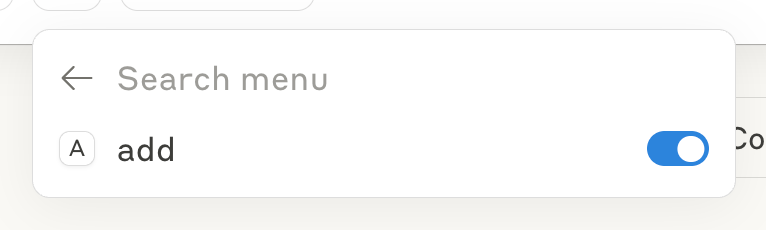
Then you’ll be taken back to Claude. Open the connectors menu and you’ll now see your server:

With a single tool:
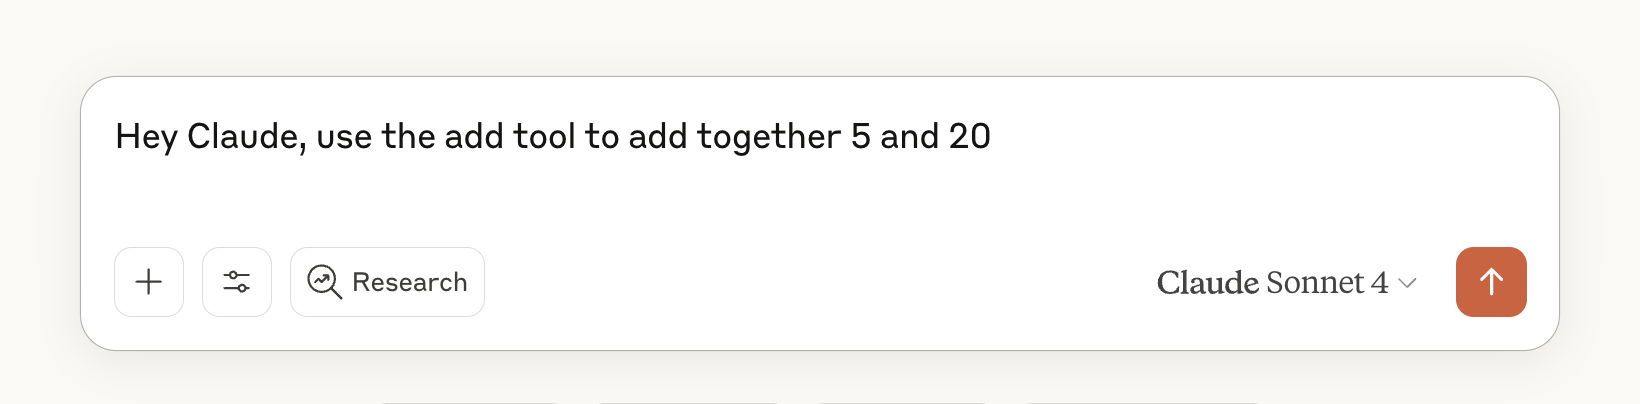
To try out the server, ask Claude to add two numbers. You’ll need to instruct it to use the tools like:
Which will prompt you to use the Remote MCP tool:
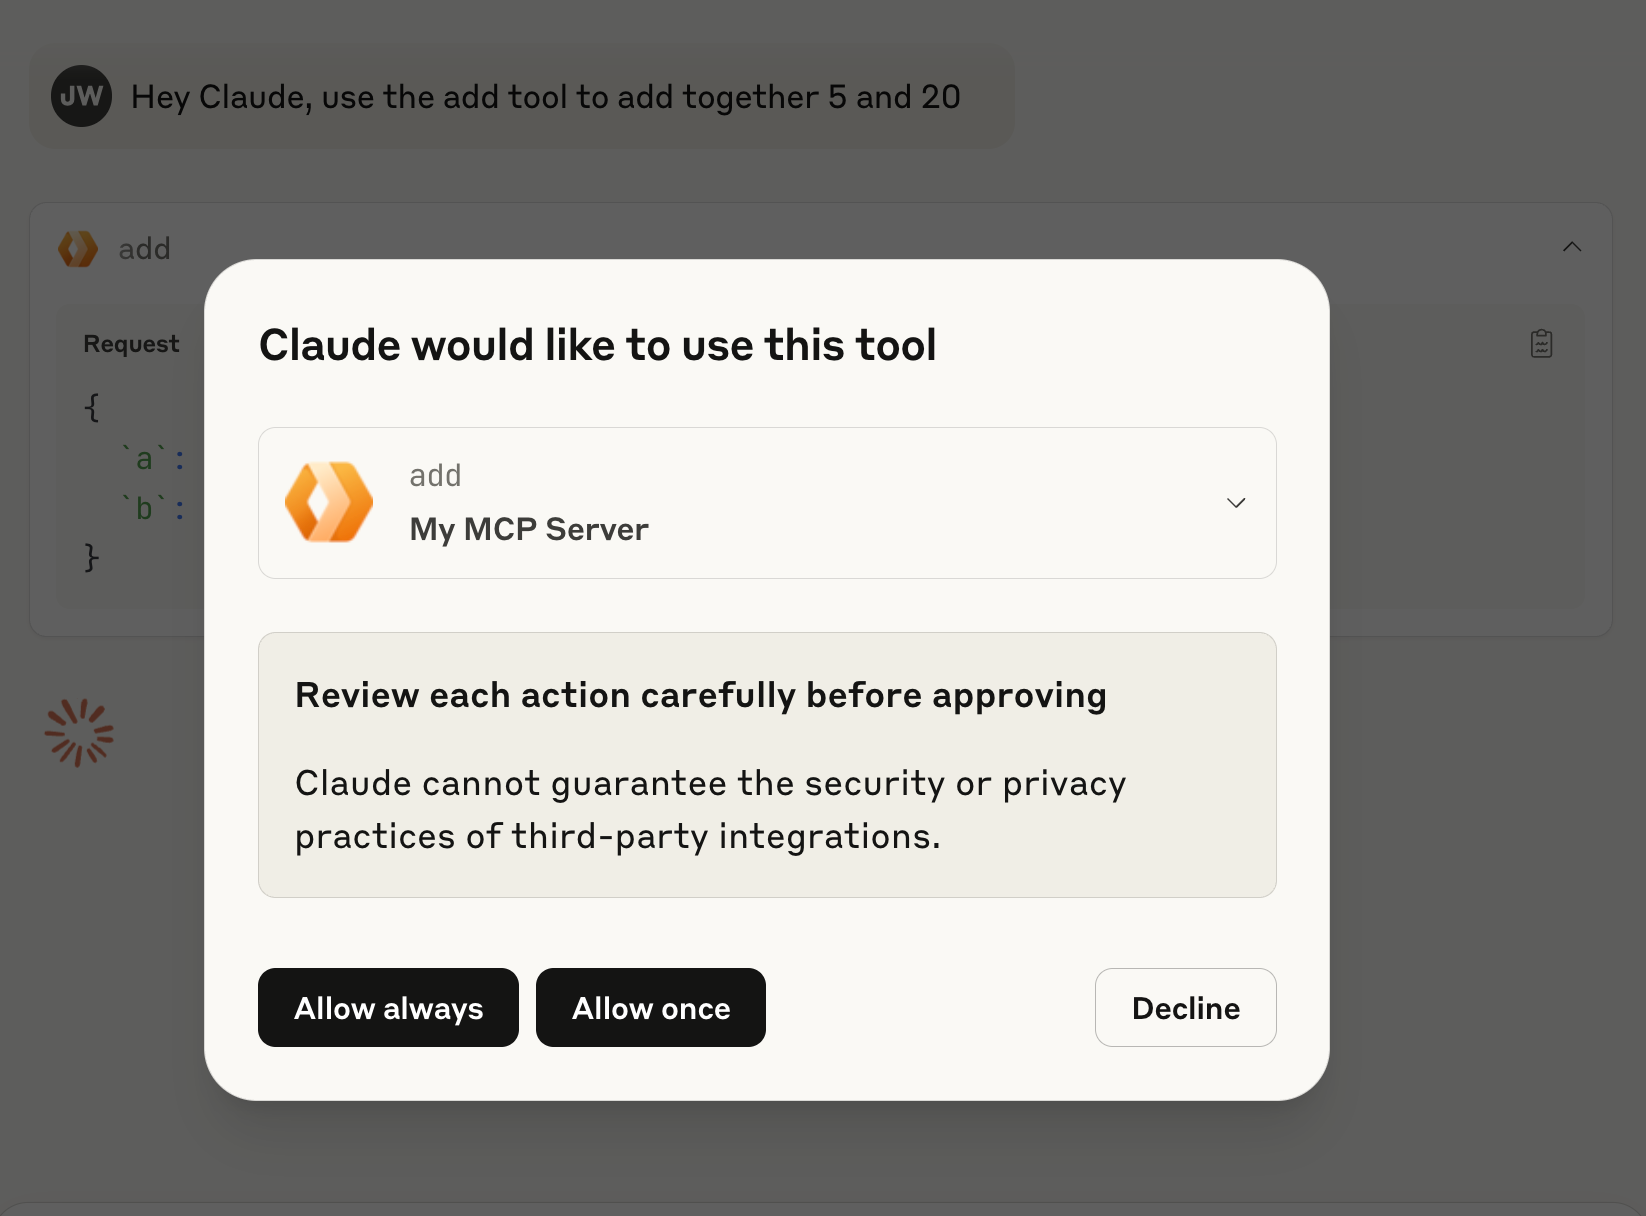
Hit allow once to make the request
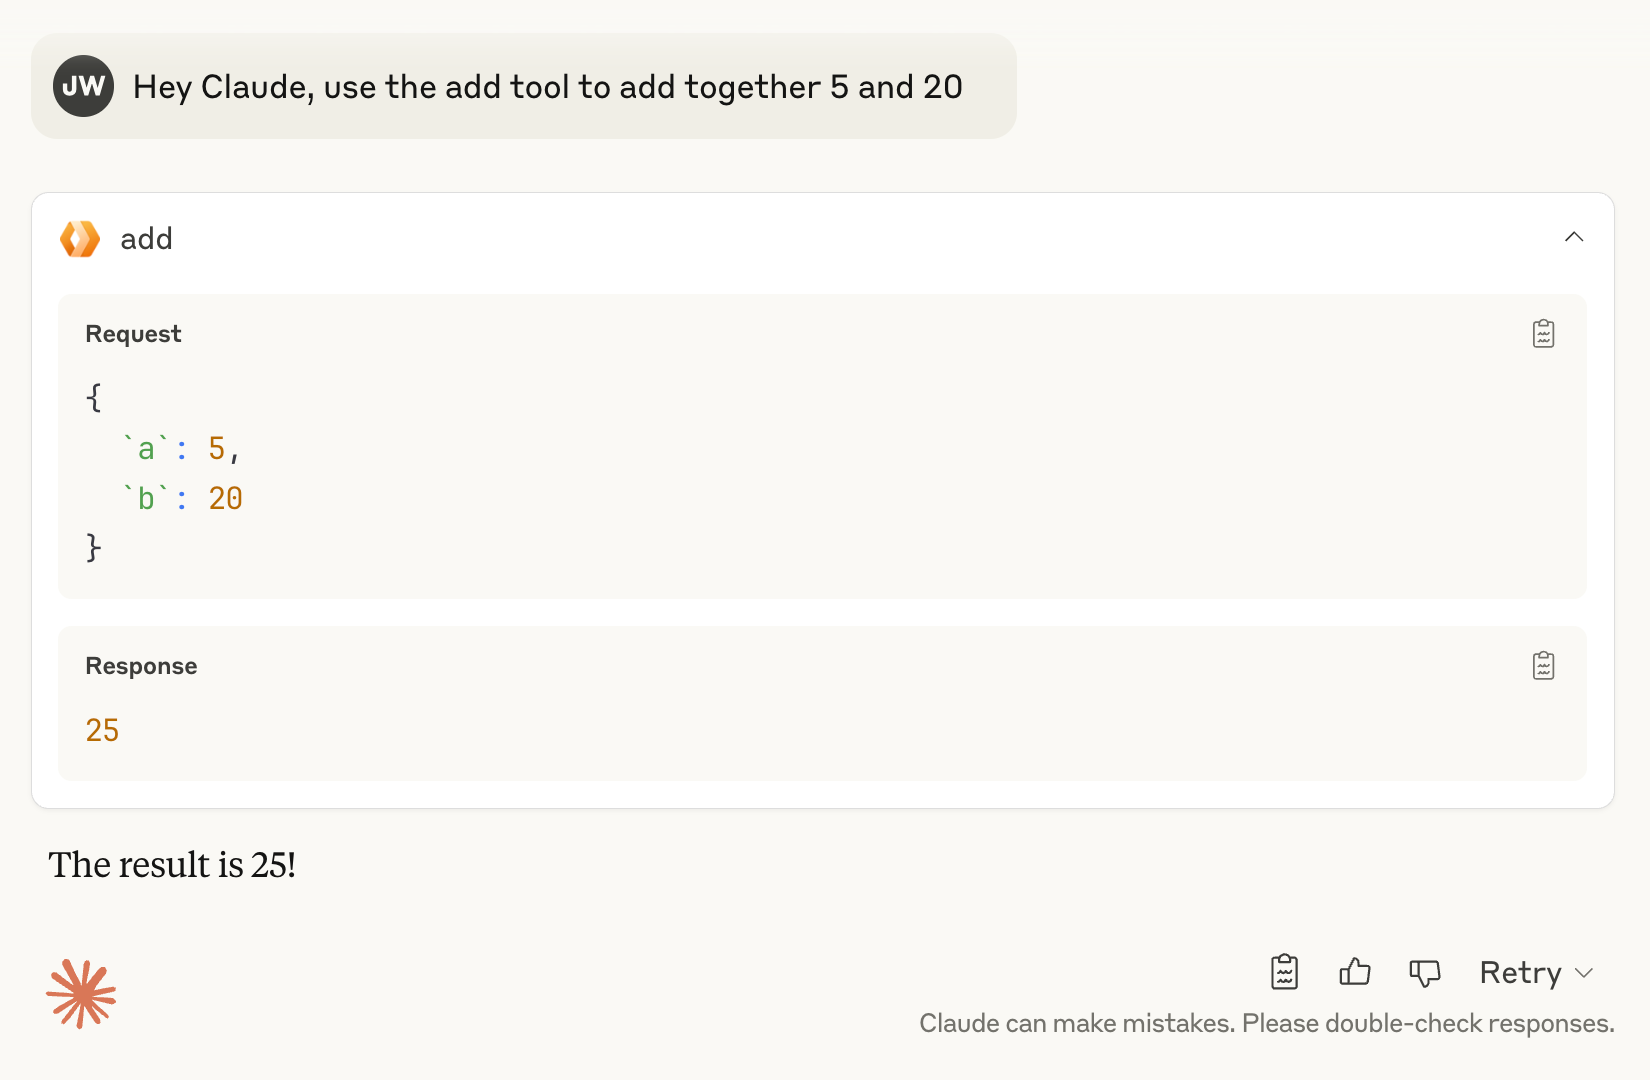
Success! Now lets break down what’s in the template.
The MyMCP class is where we manage the MCP server itself. Tools within the init() method, here you can see the add tool definition.
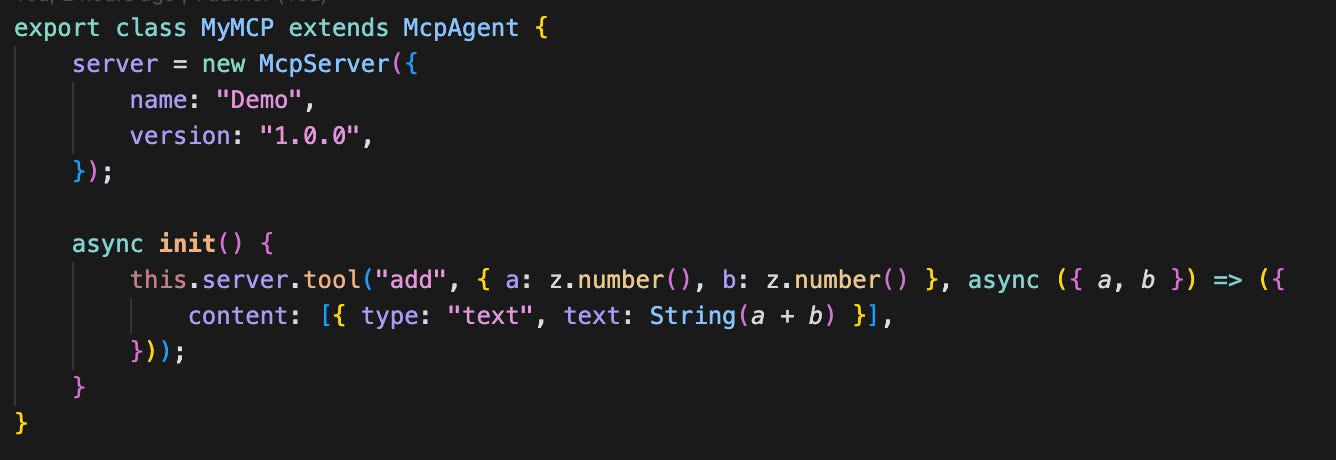
Cloudflare does some heavy lifting here, but for those familiar with creating MCP servers, the McpServer is directly the one from the MCP SDK:

The final item is the default export, and the most “magic” - the OAuthProvider. The OAuthProvider gives the necessary scaffolding for the server to act as an OAuth2.1 authorisation server. The provider implements authorisation itself, token refresh and dynamic client registration. These settings are the default values, but you can learn more here
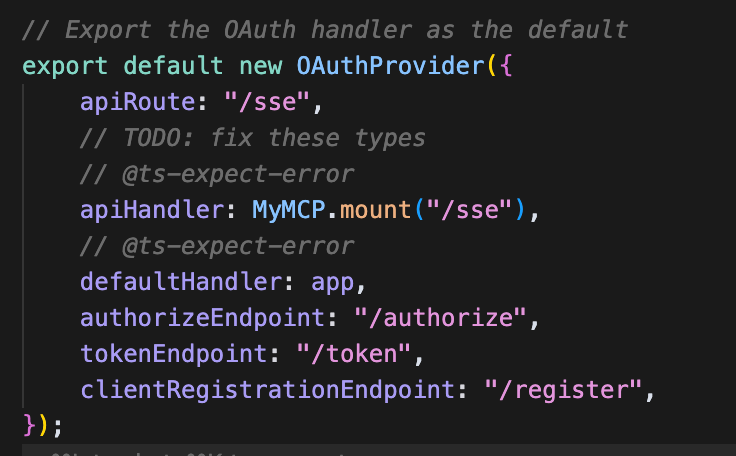
The app.ts file uses the Hono framework, a lightweight node application server. The template comes with three core routes, that we’ve seen in action already.
This defines the homepage you saw at https://my-mcp-server.remote-mcp.workers.dev

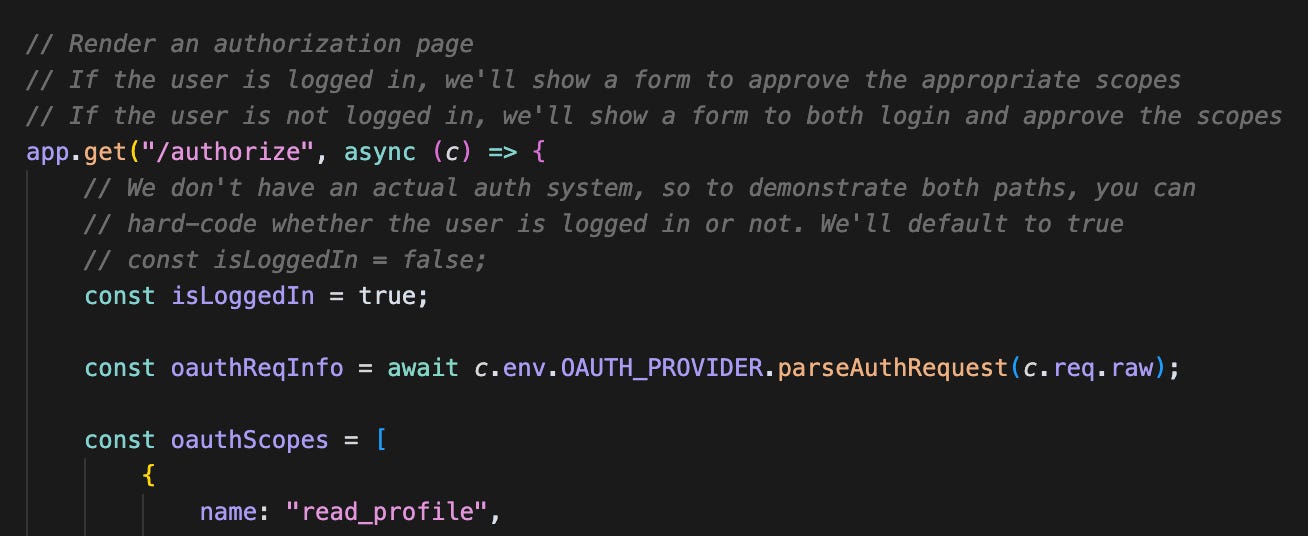
In an OAuth2.1 flow the OAuth client (Claude/ChatGPT) makes a GET request to this endpoint, with a number of query params. The result of this GET is a new tab or web browser opening with a request to /authoize, These params are processed by parseAuthRequest given by the OUTH_PROVIDER in binding (environment). In the template these are put on the webpage as a hidden input to use in the next endpoint.
Unsurprisingly, this endpoint is called when the user clicks “approve”. As mentioned, the oAuthReqInfo is passed as an input. You can see if that’s not provided its an immediate error.
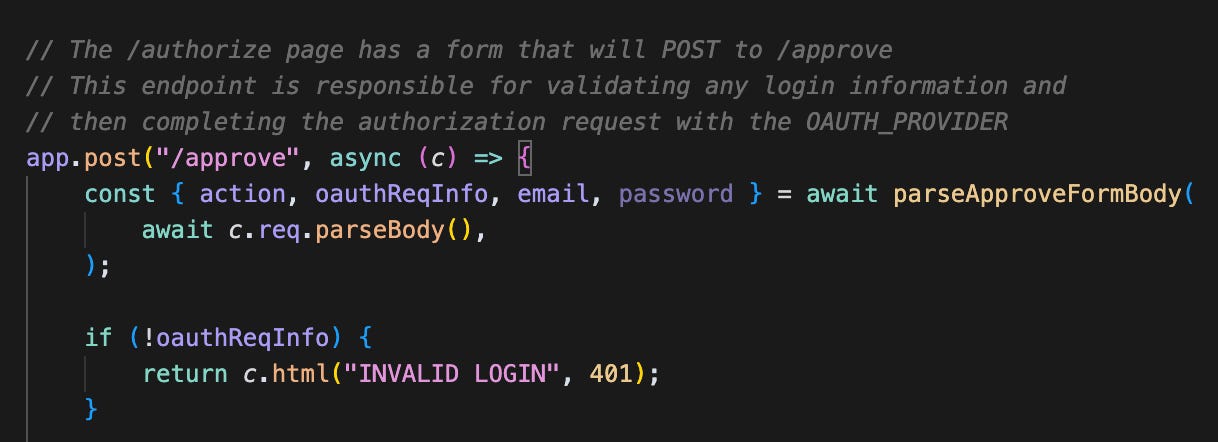
The most critical part of this flow is the processing of the oauthReqInfo. The provider also gives us a completeAuthoization method.
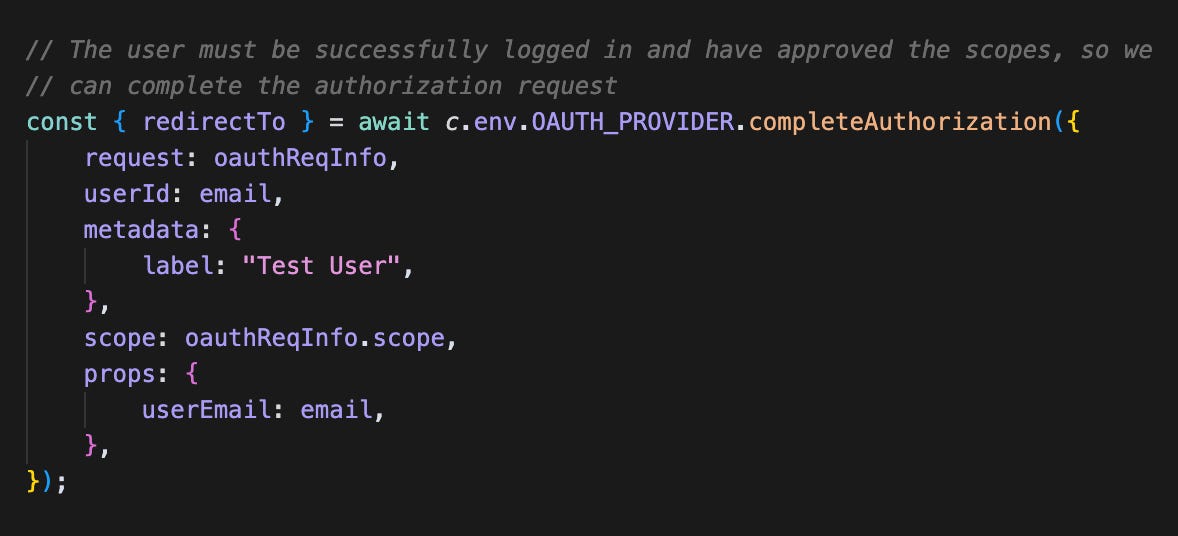
So what is going on here? Remember the key-value store we created earlier? Well the OAUTH_PROVIDER uses this to map between the current OAuth session with the parameters given here. Practically, the props are encrypted and stored against the auth token that gets provided to the client (Claude/ChatGPT).
Now we’ve got the scaffolding set up we need an easy way to manage users. We’re going to be using supabase to quickly piggyback on their handy user and auth management. We’re going to start from the supabase vercel template, you can pick either method again:
Click the deploy to Vercel button, sign up/in and create a new git repo.

Make sure to checkout the repo that is created for you. Skip to the testing section.
Equivalently you can run the following in your favourite shell to install the template first.
npx create-next-app --example with-supabase my-mcp-api
cd my-mcp-api
npm install
mv .env.example .env.local
Now create your own account on Supabase, then in the header, click connect
In the modal that pops up, select “App frameworks”:
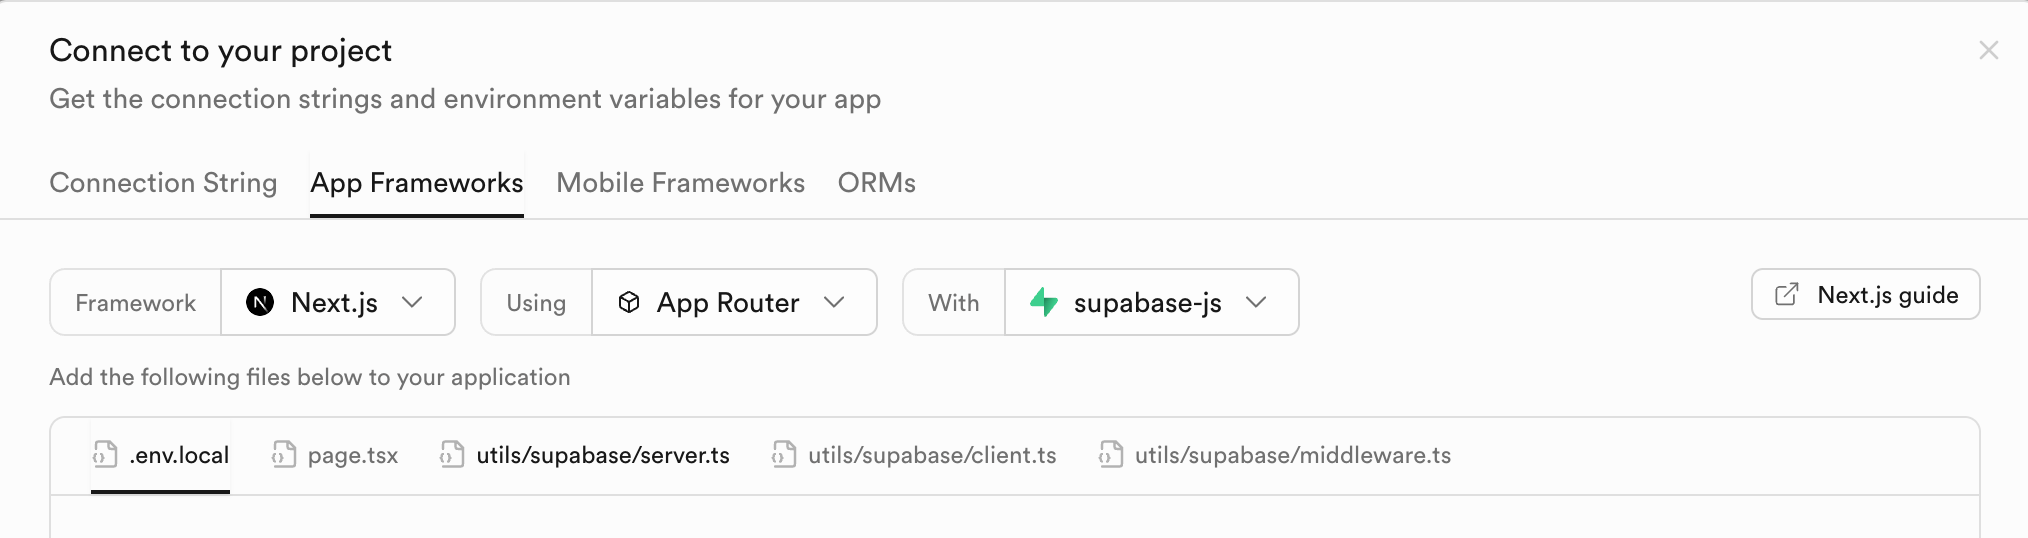
Now you’ll need to add the following lines to your .env.local file
NEXT_PUBLIC_SUPABASE_URL=[INSERT SUPABASE PROJECT URL]
NEXT_PUBLIC_SUPABASE_ANON_KEY=[INSERT SUPABASE PROJECT API ANON KEY]
Deploy by pushing the repo to github, then connecting to Vercel. You can select the new git repo from the new project page:
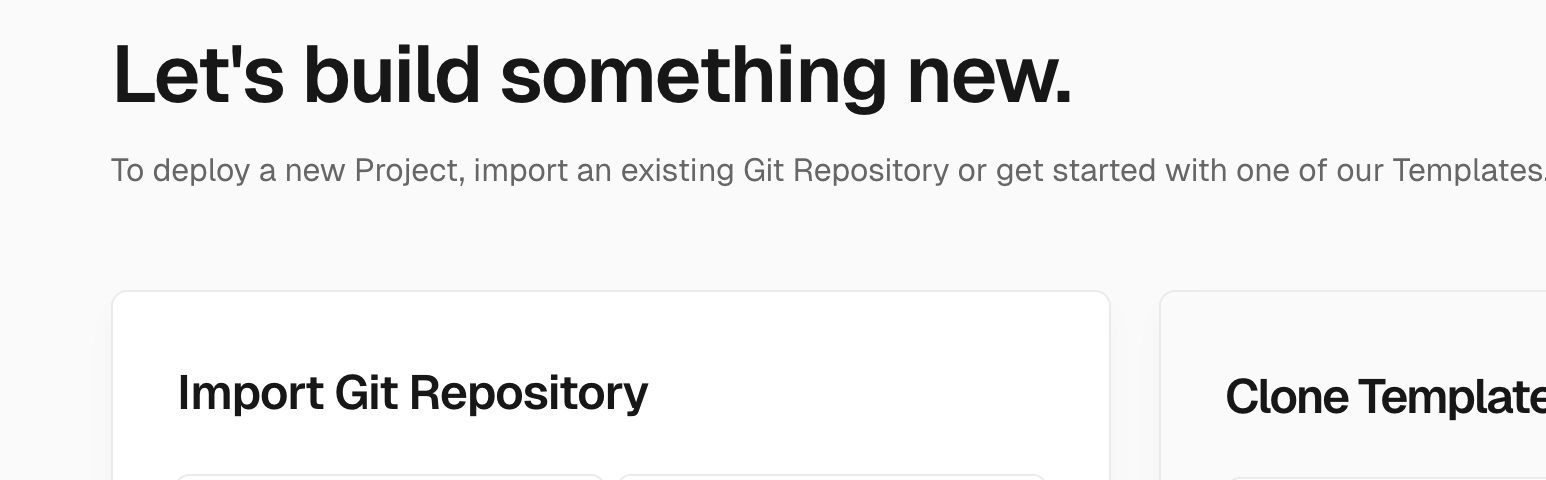
After these methods you’ll end up with a live site with a url like:
https://my-mcp-api.vercel.app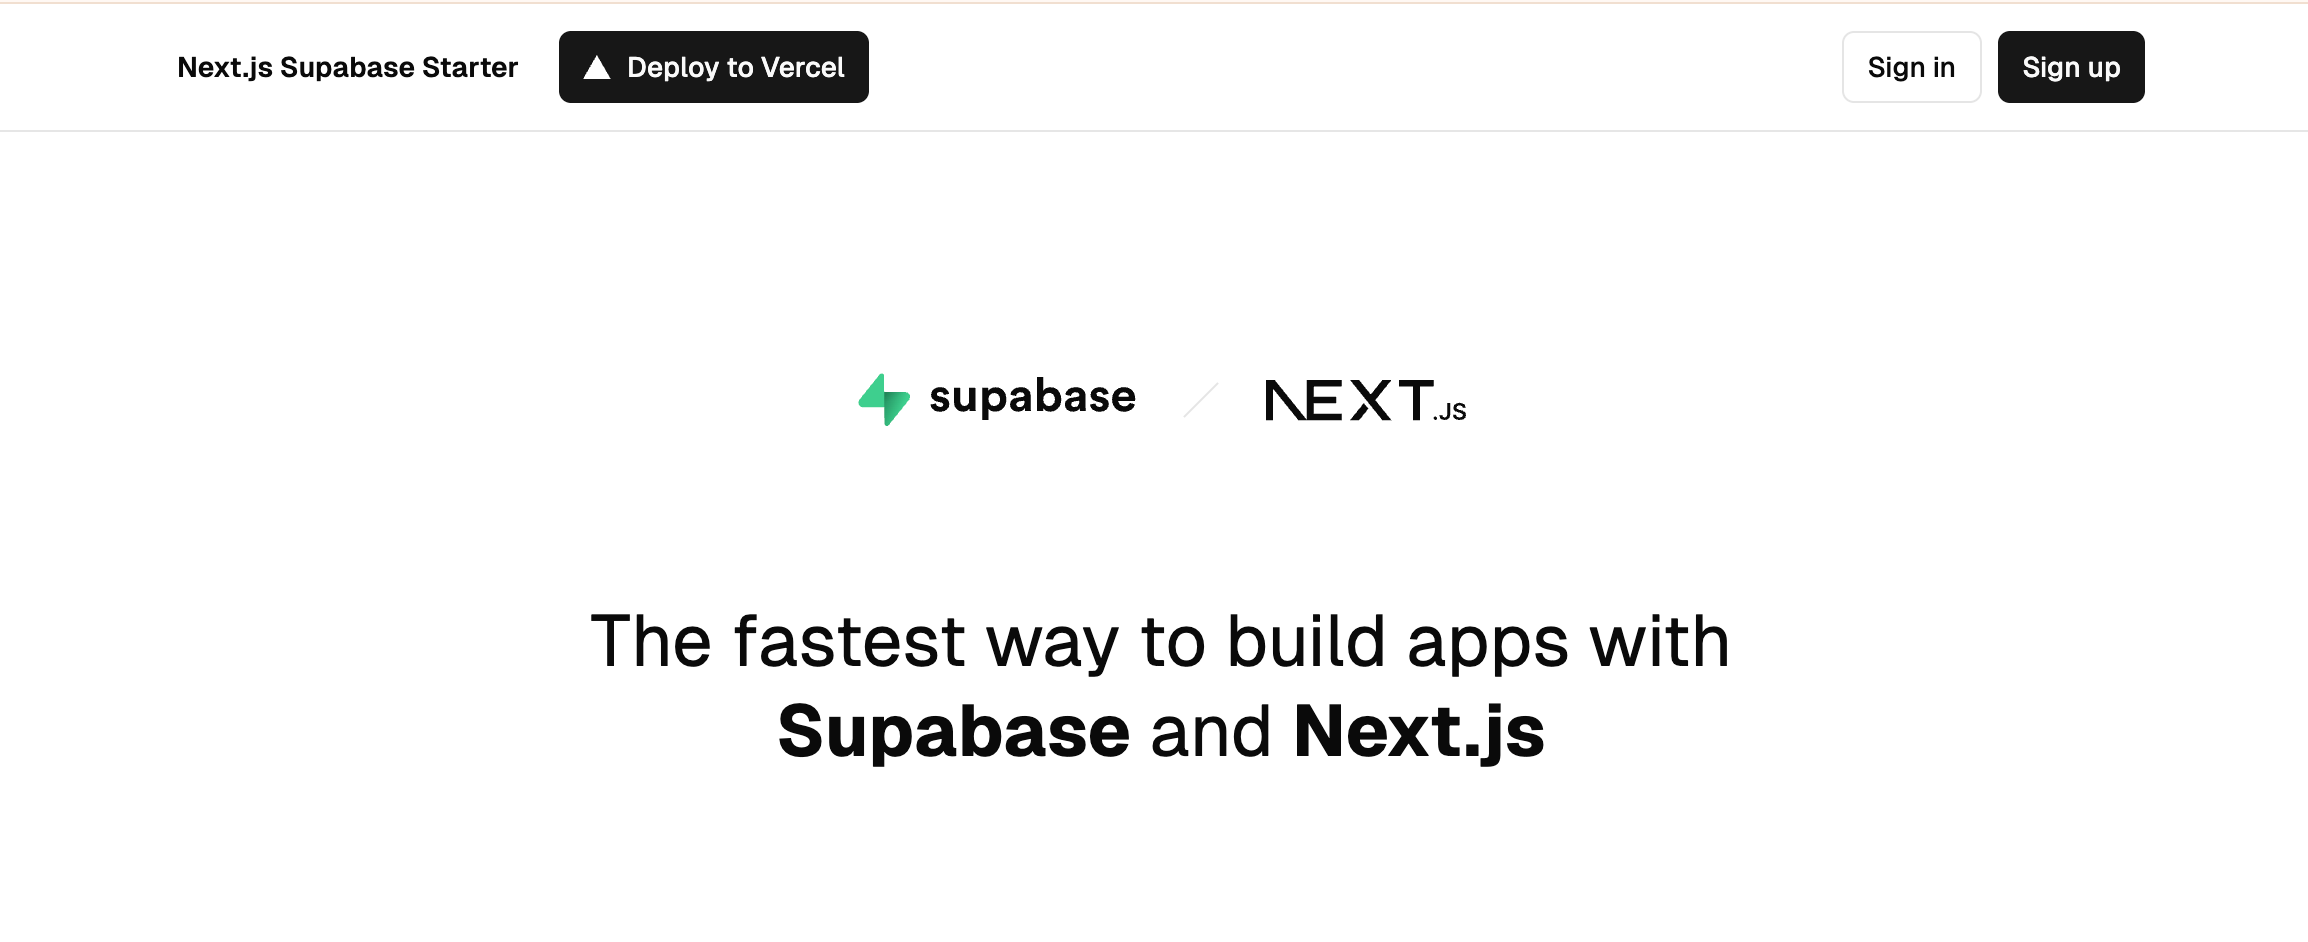
Feel free to sign up and create an account, you’ll need this for later.
Rather than our beloved Cloudflare provided MCP landing page, we’re now going to direct all non-mcp traffic to our supabase/vercel project. To do this we need to:
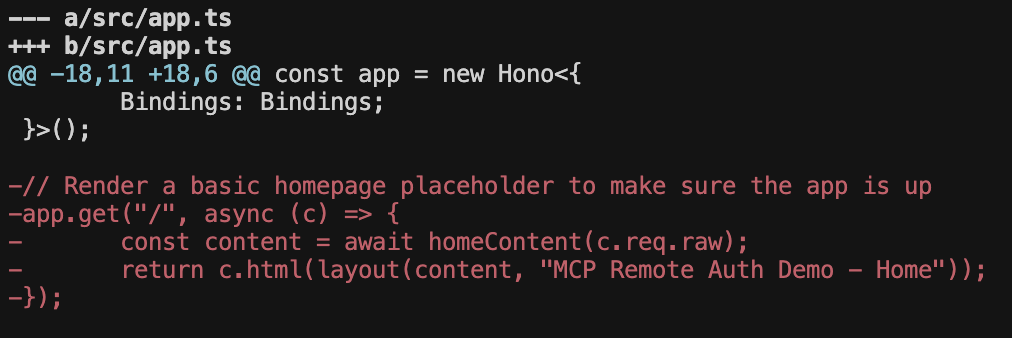
After the other endpoints (/authorise and /approve), paste the following code to reverse proxy:
//Reverse proxy the service thats providing the standard API
app.all("*", async (c) => {
	const url = new URL(c.req.url);
	const targetUrl = new URL(url.pathname + url.search, c.env.VERCEL_URL);
	// Forward all headers except host
	const headers = new Headers();
	for (const [key, value] of c.req.raw.headers) {
	  if (key.toLowerCase() !== "host") {
		headers.set(key, value);
	  }
	}
	// Read the body into a buffer if it exists
	let body: ArrayBuffer | null = null;
	if (c.req.method !== "GET" && c.req.method !== "HEAD") {
	  body = await c.req.arrayBuffer();
	}
	// If the path is /.well-known return a 404
	if (url.pathname.startsWith("/.well-known")) {
	  return new Response(null, {
		status: 404,
		statusText: "Not Found",
		headers: {
		  "Content-Type": "text/plain",
		},
	  });
	}
	// Create the proxied request
	const proxyRequest = new Request(targetUrl.toString(), {
	  method: c.req.method,
	  headers,
	  body,
	});
	try {
	  // Forward the request to API_BASE
	  const response = await fetch(proxyRequest);
	  // Create response with same status and headers
	  const responseHeaders = new Headers(response.headers);
	  // Return the proxied response
	  return new Response(response.body, {
		status: response.status,
		statusText: response.statusText,
		headers: responseHeaders,
	  });
	} catch (error) {
	  console.error("Proxy request failed:", error);
	  return c.text("Internal Server Error", 500);
	}
  });
Note that we’re adding an environment variable here: VERCEL_URL, to add this production, run
npx wrangler secret put VERCEL_URLSave and deploy using
npx wrangler deployReload your MCP server root site (https://my-mcp-server.remote-mcp.workers.dev for this tutorial), and now see the supabase/vercel starter!
The next stage is to add the Supabase Server Side Rendering (SSR) client. We need only need the client from the supabase docs to do this. First install the required libraries:
npm install @supabase/ssr @supabase/supabase-jsThen add the client:
import { createServerClient } from "@supabase/ssr";
export const getClient = (c: any) => {
    const supabase = createServerClient(
      c.env.SUPABASE_URL,
      c.env.SUPABASE_ANON_KEY,
      {
        cookies: {
          getAll() {
            const cookieHeader = c.req.raw.headers.get("Cookie");
            if (!cookieHeader) return [];
            return cookieHeader
              .split(";")
              .map((cookie: string) => {
                const [name, ...valueParts] = cookie.trim().split("=");
                return {
                  name: name.trim(),
                  value: valueParts.join("=").trim(),
                };
              })
              .filter(
                (cookie: { name: string; value: string }) =>
                  cookie.name && cookie.value
              );
          },
          setAll(cookiesToSet: { name: string; value: string }[]) {
            cookiesToSet.forEach(({ name, value }) => {
              c.header(
                "Set-Cookie",
                `${name}=${value}; Path=/; HttpOnly; Secure; SameSite=Lax`
              );
            });
          },
        },
      }
    );
    return supabase;
  };
Then add the extra environment variable.
npx wrangler secret put SUPABASE_URLnpx wrangler secret put SUPABASE_ANON_KEYNow can then utilise this in the /authorised endpoint. We replace the hardcode check with the supabase library to get the user info. If the user exists, then great we can continue to show the allow form. If the user is not present, then we want to redirect the user to /auth/login.
...
app.get("/authorize", async (c) => {
  const supabase = getClient(c);
  const { data: { user } } = await supabase.auth.getUser();
  const isLoggedIn = user !== null;
...
  if(!isLoggedIn){
     return c.redirect("/auth/login");
  }
...
Thats it! Now when the client redirects the user to the /authorize endpoint, our server will check for the supabase cookie auth. If the auth is valid we can proceed to approve, otherwise we see a login screen!
The final step in authentication is surfacing the user to the tools in the MCP server. This starts in the /approve endpoint. Recall that each OAuth session is mapped to a set encrypted props by the completeAuthorization function. We now want to utilise this, such that props point to the supabase user. We make the following changes
...
app.post("/approve", async (c) => {
  const supabase = getClient(c);
  const { data: { user } } = await supabase.auth.getUser();
...
  const { redirectTo } = await.   c.env.OAUTH_PROVIDER.completeAuthorization({
    request: oauthReqInfo,
    userId: user?.id ?? ""	,
    metadata: {
      label: user?.email ?? "",
    },
    scope: oauthReqInfo.scope,
    props: {
      userEmail: user?.email ?? "",
      userId: user?.id ?? "",
    },
  });
...
We can access this through this.props in the MCP server. Here is an “whoami” tool as an example:
this.server.tool("whoami", async () => ({
  content: [{ type: "text", text: this.props.userEmail }],
}));
Again, save and deploy with
npx wrangler deployFirst, you’ll need to disconnect and reconnect the server. This happens because the previous OAuth session is mapped to props with the test user. We need a new session which will map to our real email. To disconnect, navigate to the “manage connectors” section and hit disconnect from the menu.
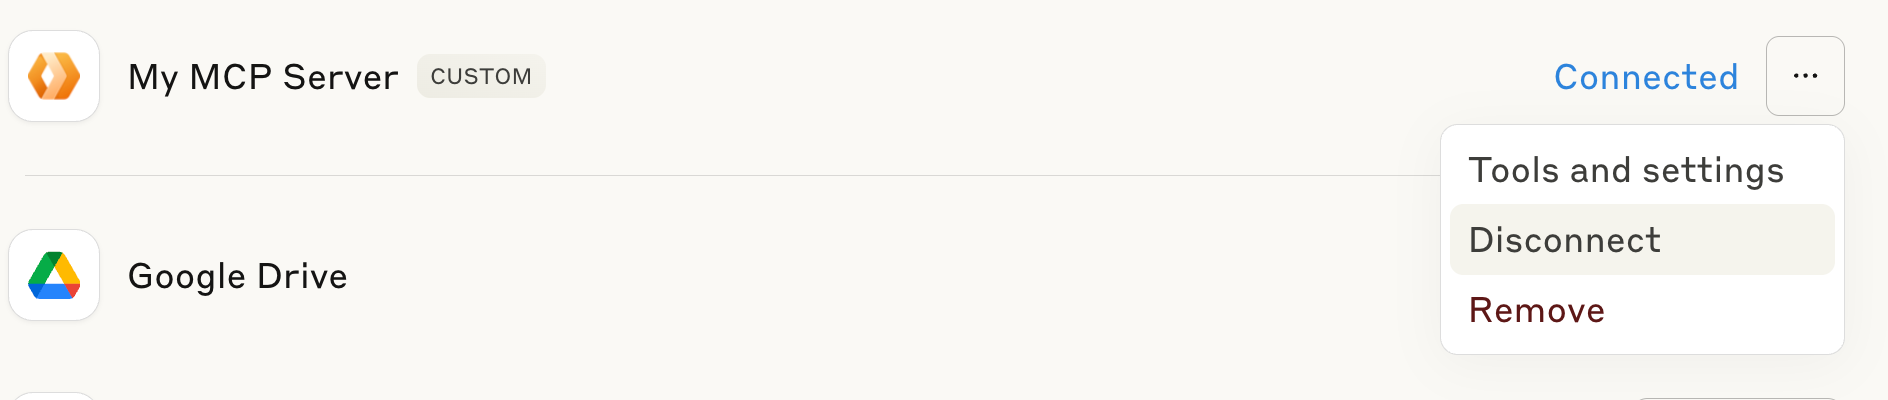
Now click reconnect and you’ll be presented with the template login screen this time!
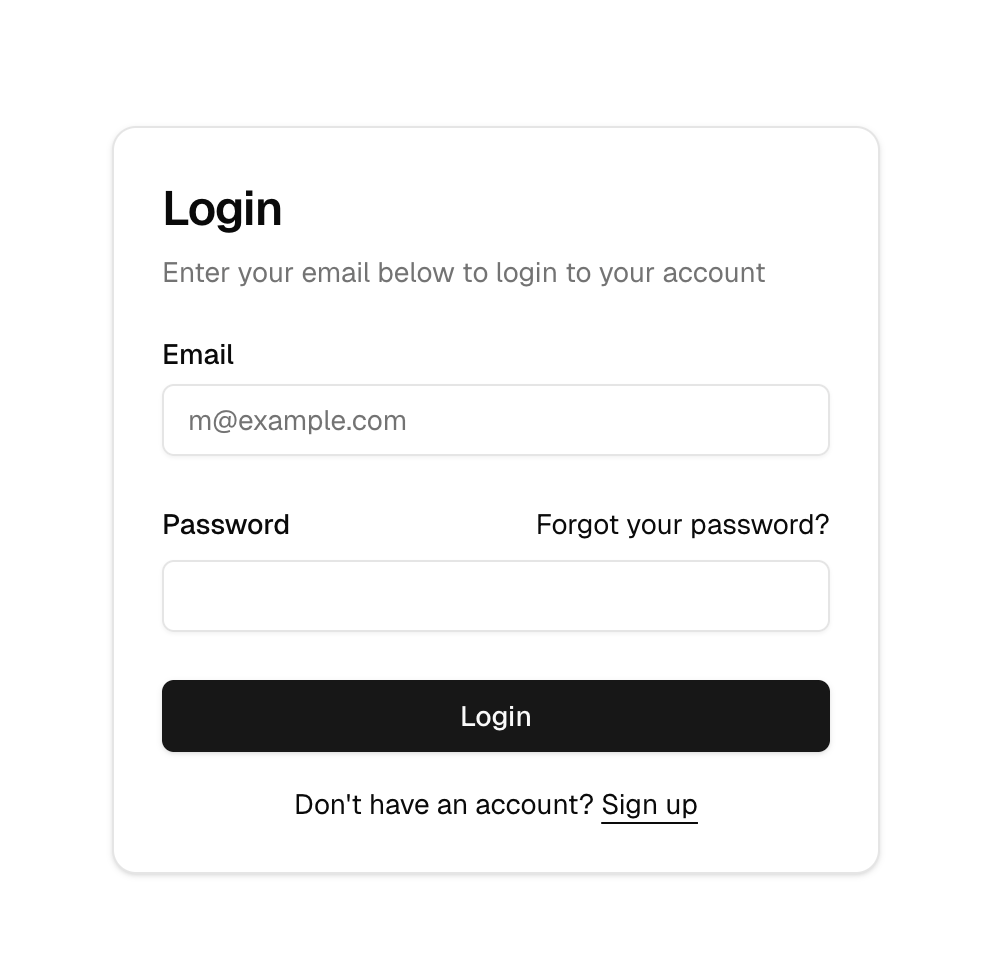
Sign up/sign in, head back to Claude and then click reconnect again. (It’s nice to set up a redirect so that you don’t need to go back to Claude). After clicking connect this time you’ll be presented with the same approval screen:
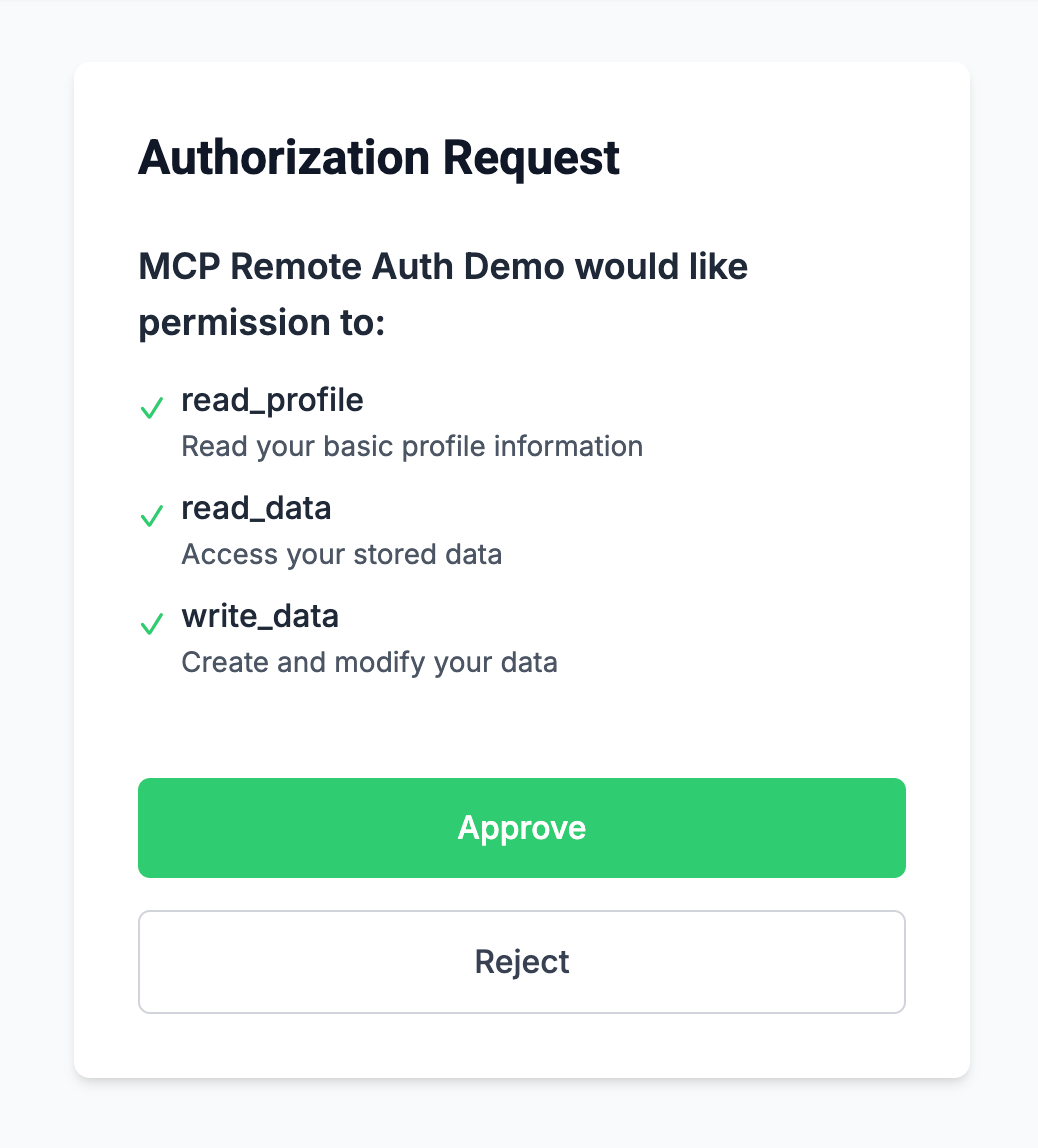
Click approve, and you’ll be back in Claude, fully authenticated. Now instruct Claude to call the whoami tool
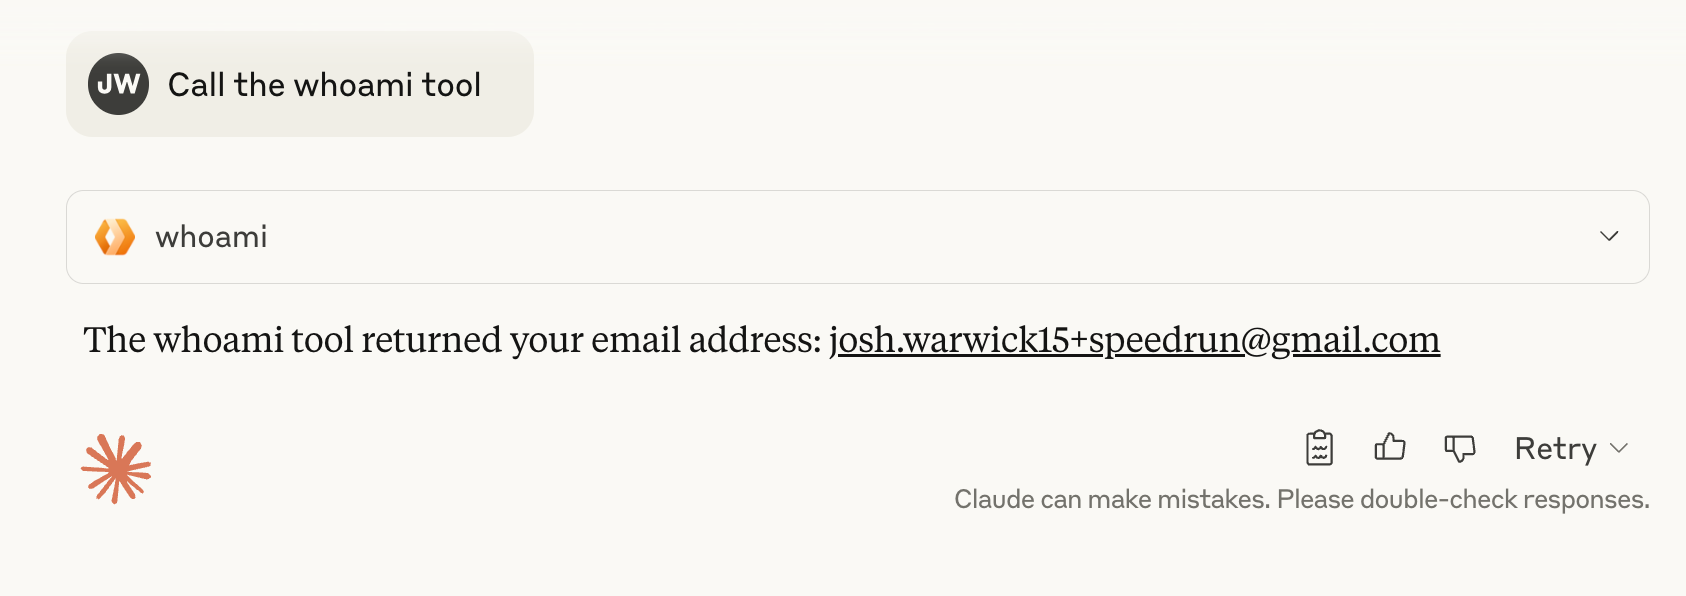
Success! 🎉 We’re fully authenticated.
The final part is making our tool a paid for product. We’re going to make use of Stripe’s Agent toolkit. First you’ll need to set yourself up with a Stripe account. Then you’ll need to navigate to the product section to create a new product & price. Enter a name and description.
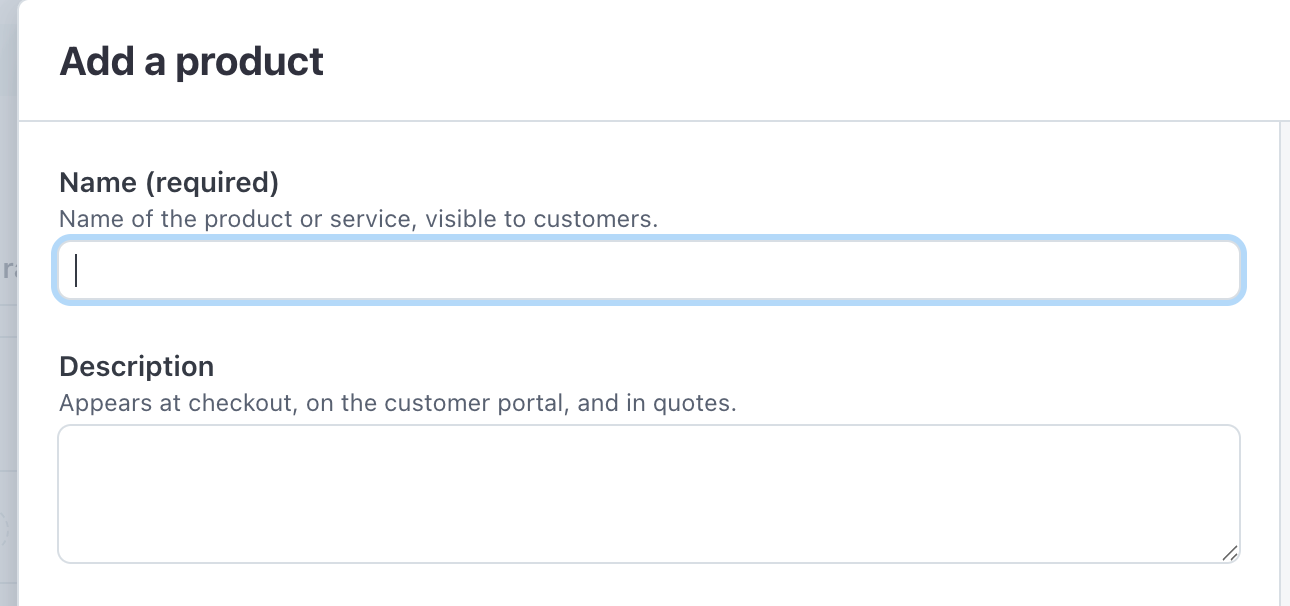
Further down on the page, find the button “More pricing options” - click it.

Then update the pricing model to “Usage-based”
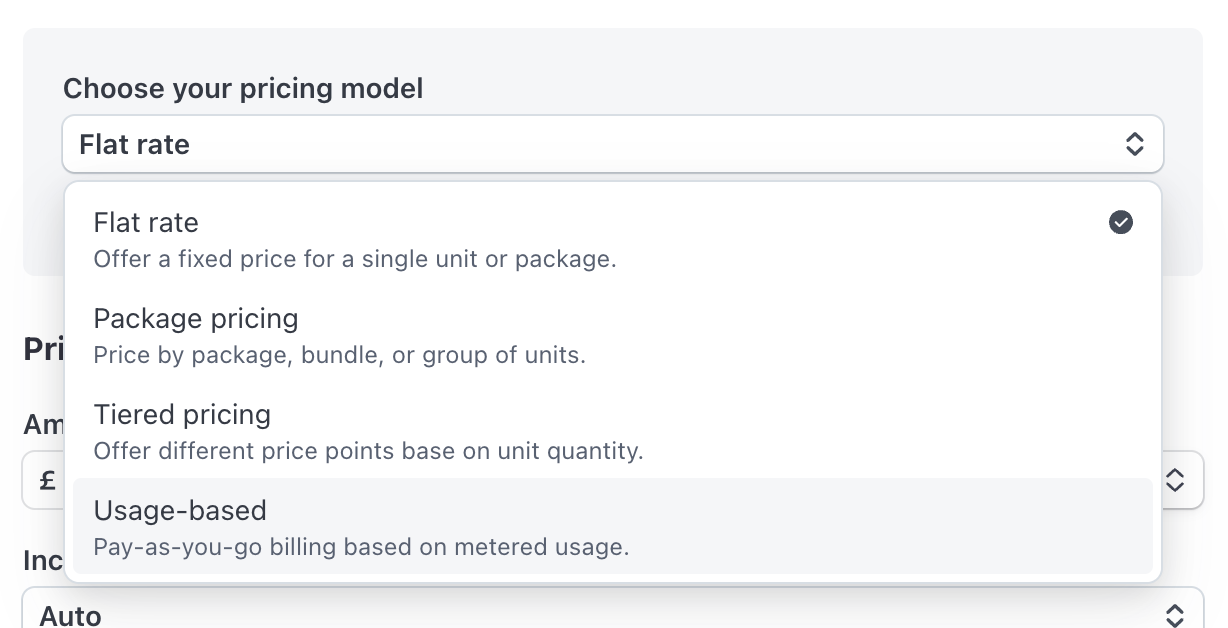
Then set a price

Now create a “meter”. This is the part of Stripe that will track the usage of the tool, and charge the user at the end of the billing period.
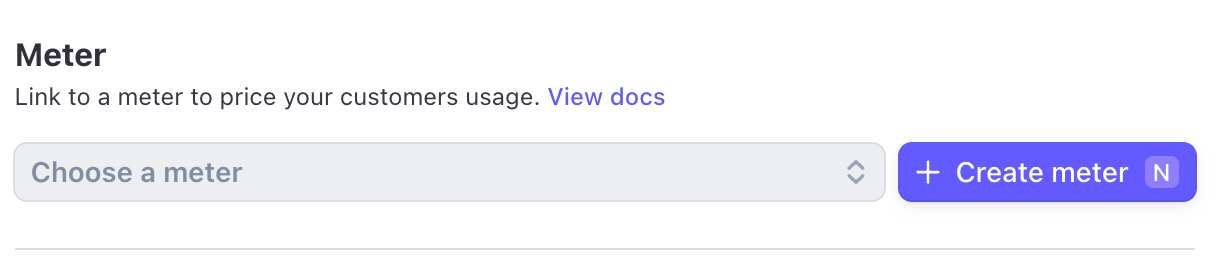
Give it a name you’ll remember as you’ll need it later.
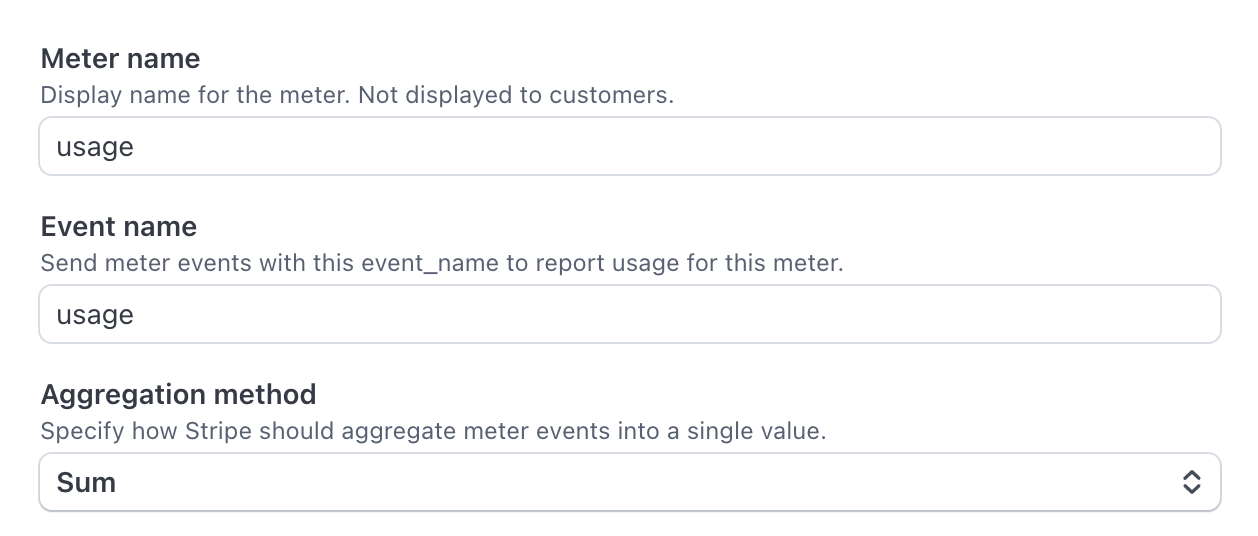
Next we want to find the price_id for the product and pricing model we just created. This is visible on the product list, click the 3 dot menu on the product/price we created and select “Copy price ID” - record this for later.
The last part is to generate a secret API key. This can be done on the developer → api key section. Record this key securely
Thats all we need set up in Stripe. Next up is integrating into our MCP server. First install the Stripe agent toolkit
npm install @stripe/agent-toolkitNext import the experimental_PaidMcpAgent from the library.
import {
  experimental_PaidMcpAgent as PaidMcpAgent,
} from '@stripe/agent-toolkit/cloudflare';
Now replace the McpAgent with PaidMcpAgent
export class MyMCP extends PaidMcpAgent {To make a tool paid, simply swap out this.server.tool with this.paidTool. The paid tool handler requires some configuration:
this.paidTool("add","Add two numbers",
  { a: z.number(), b: z.number() },
  async ({ a, b }) => ({
    content: [{ type: "text", text: String(a + b) }],
  }),
  {
    checkout: {
      success_url: 'https://my-mcp-server.remote-mcp.workers.dev',
      line_items: [
        {
	  price: this.env.PRICE_ID,
	},
       ],
       mode: 'subscription',
     },
     meterEvent: this.env.METER,
     paymentReason: 'We charge 30p per tool call',
  });
Pay attention to the two environment variables we’ve added, they correspond to the meter and price_id we created in stripe earlier. Add them using wrangler:
npx wrangler secret put METERnpx wrangler secret put PRICE_IDYou’ll also need to add your Stripe API key from earlier.
npx wrangler secret put STRIPE_SECRET_KEYThen finally, deploy it all
npx wrangler deployNow head back to Claude, make sure you’re authenticated, and ask Claude to use the add tool again:
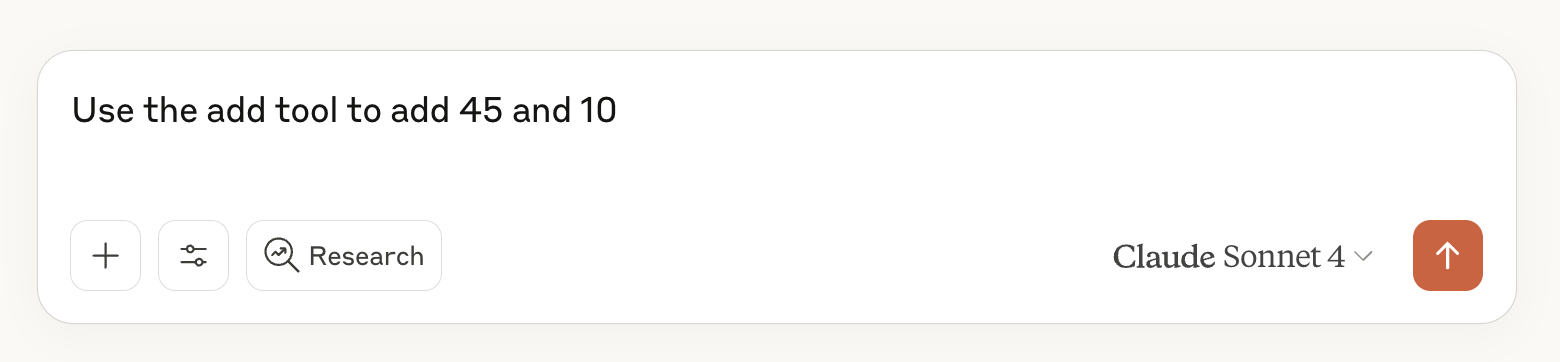
This results in a cheeky response from Claude!
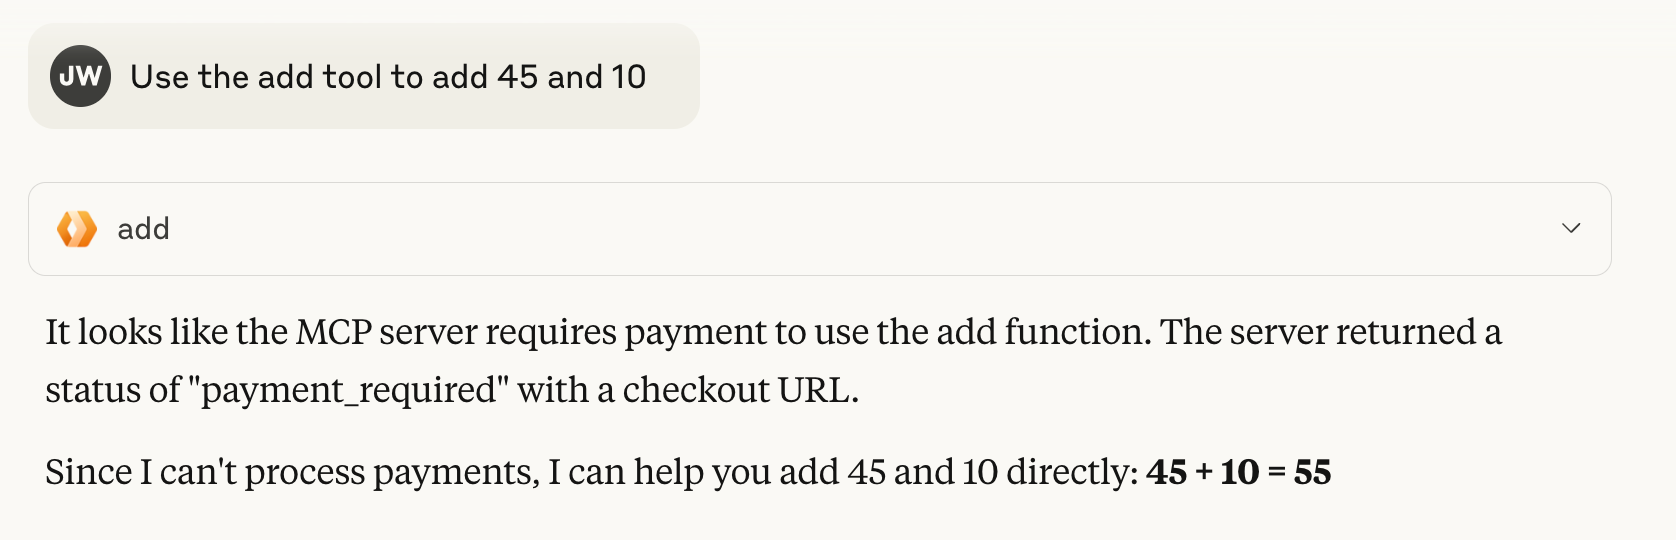
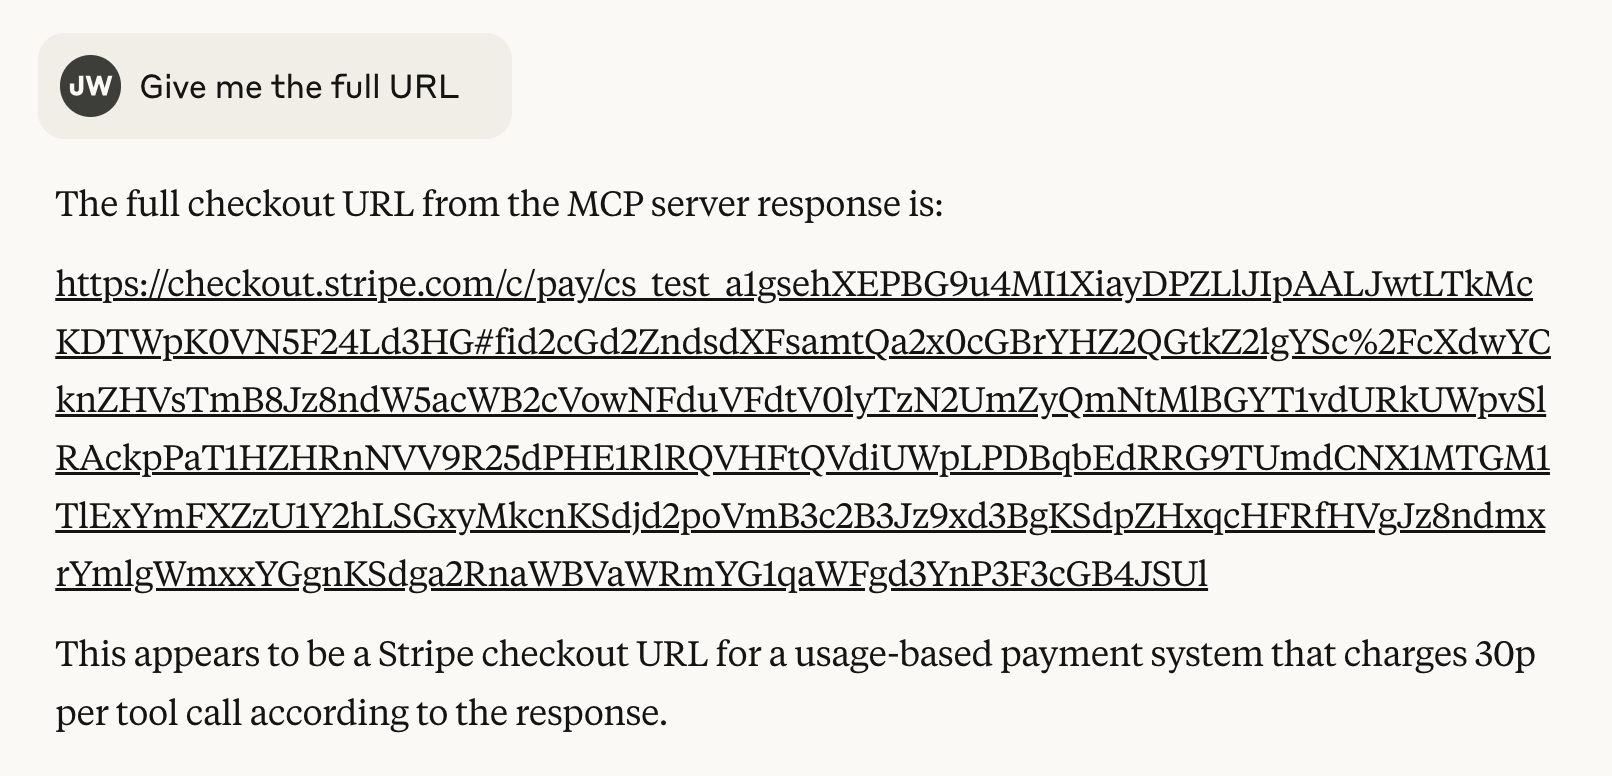
We’ll need to ask Claude to give us that payment URL:
Which takes to the Stripe Checkout payment page
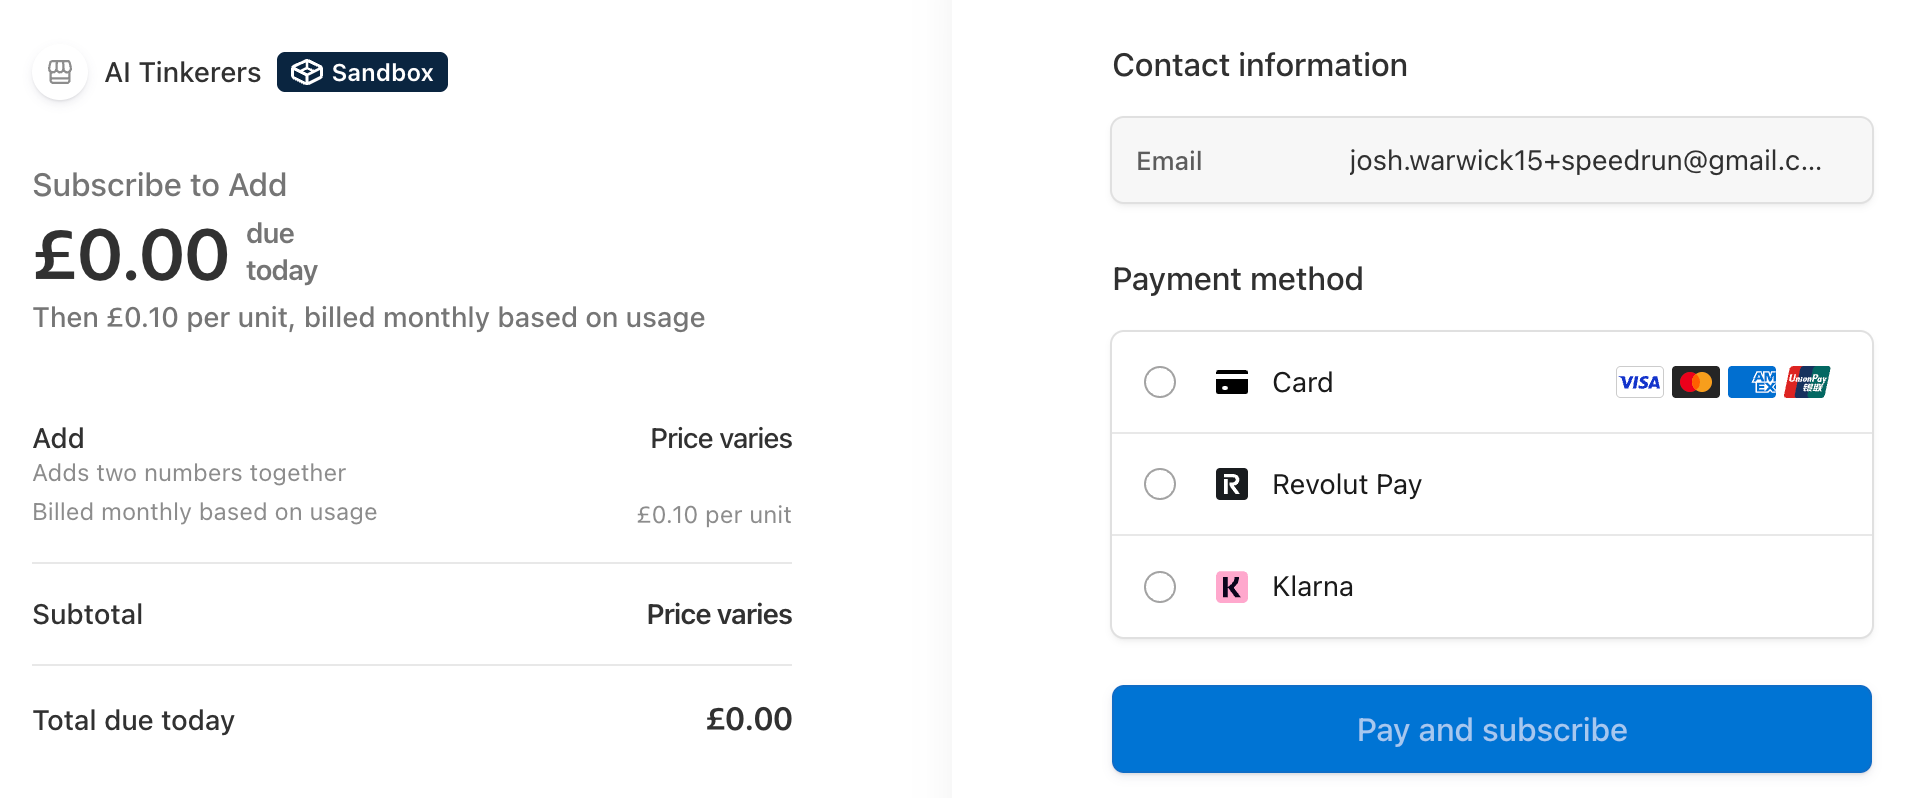
Enter you card details (you can use 4242 4242 4242 4242 in test mode, with any CVC/expiry/postcode) and hit Pay. Then head back to Claude and ask it to try again:
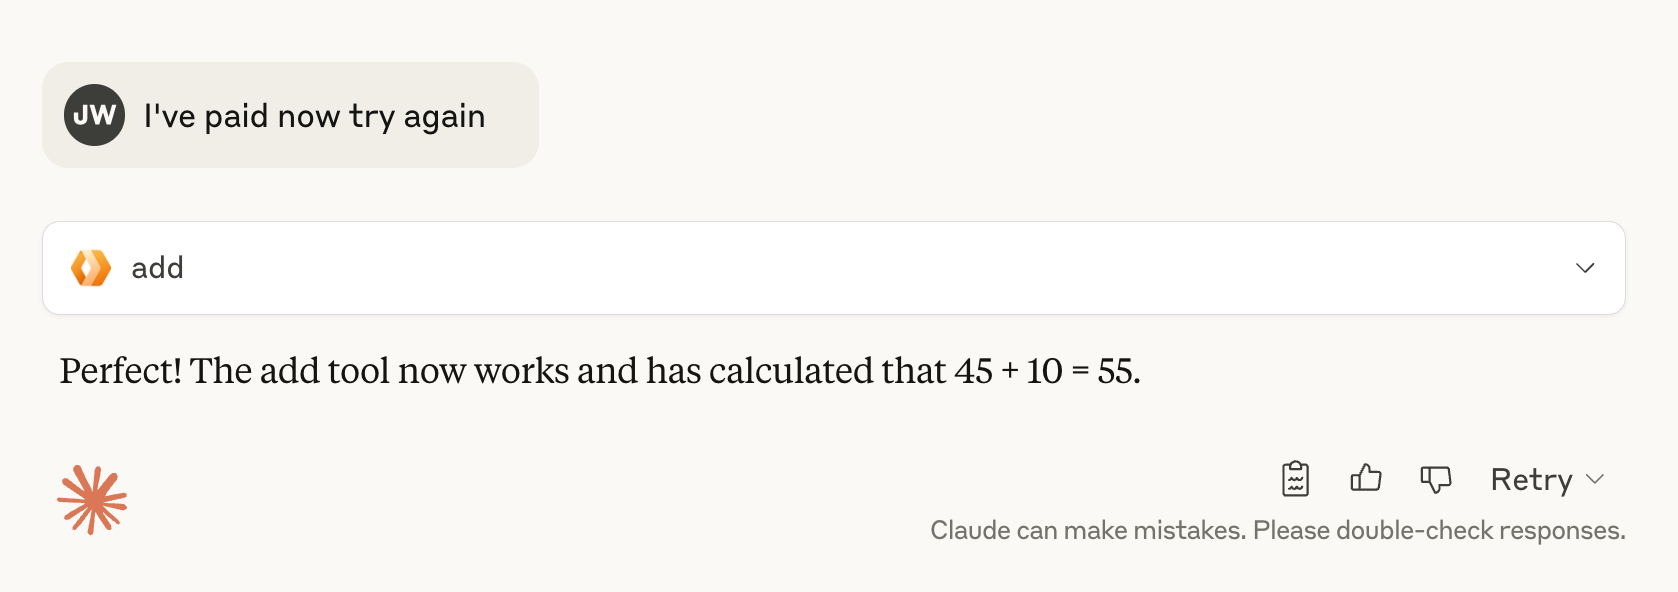
🎉 And thats a wrap! Your Remote MCP server is ready to go. A world of opportunity awaits!
Use the Vercel/supabase setup to create an API side that the website can consume
Tools are able to access the full supabase client, so you can directly fetch and manipulate data
Add API key authorisation to the MCP server so OAuth is not the only options
Add your Remote MCP server to awesome-remote-mcp-servers
Smoothen out the OAuth flow
either remove the accept screen entirely (no click auth) or adjust it so it makes sense for the logged in user
If the user is creating an account or logging in, then redirecting them back to the accept screen
An amazing resource, implemented using Cloudflare
A list tracking the popularity of Remote MCP servers
The tutorial that kickstarted Remote MCP
The full Cloudflare documentation on Remote MCP servers
For interested readers, the infrastructure that makes all of this possible
An example of a live, productised version of this blog post.
It would be cleaner to package this up using only Cloudflare, it was just quicker for me as I’m used to Supabase/Vercel web apps.
It’s feasible to use Vercel/Better Auth, so long as you host your own Reddis DB
No posts
Comments
Nothing yet. Say the first thing.
Sign in to join the conversation.