
I’m not totally against subscriptions. I get that for some things it makes more economic, time, and capability sense for me to pay someone else to handle. For example, I pay for music, TV streaming, internet, electricity, water, and a lawn service. But I am against subscriptions for things I can do myself and am fully capable of doing well. This is where technology, security, and automation fit into the picture for me. I just prefer ownership over recurring subscriptions and cloud services.
So, as all good security professionals do, I strive to live out what I preach. We all use strong passphrases, have unique ones for every account, patch all our systems, and follow the 3-2-1 backup strategy, right? RIGHT?

Ok, so in reality, security is a risk game, and some stuff just doesn’t make sense for individuals to do at home. So for this type of task, either you:
Enjoy it
Want to learn something
Want full control, privacy, and ownership
Are a psycho
However, physical security is on the CISSP and in NIST 800-53, so it counts (or at least it does to the risk folks). I believe it’s also generally fun to monitor your home, which in my case is also my office, so maybe I should 1099 myself haha. Ok, enough of me blabbing, let’s get into how I set up a fully self-hosted system that sends me real-time text-based alerts anytime a door or window opens and the arm or disarm status changes, push notifications for any movement detected by the doors, remote arm and disarm capability, and supports full 30-day camera playback.
One important item of note, there was an existing inactive home security system in place. It was from a well-known home security company and included a wall panel and Z-wave door/window sensors. After some research, I figured out I could repurpose the]ose devices to fit my needs. If starting from scratch, I would consider another method to accomplish the same things I did here.
Here’s the inventory of supplies I used, many of these items could be switched out with other similarly functioning devices/parts. Some of the items were repurposed (IQ Panel 2+, Z wave sensors) from a previously existing home security system, and not purchases I made. Some items, such as the IQ Panel, can be found on eBay for much cheaper than listed here. Some products also have newer generations available.
Raspberry Pi 4 B, 4 GB - $60 for the board only, but I’d go with a basic/starter kit that includes power and SD card with $95 - https://vilros.com/products/raspberry-pi-4-model-b-1?variant=40820184612958
SD Card - 64GB - anywhere $12
Ubiquiti Dream Machine (UDM) SE - $499 https://store.ui.com/us/en/products/udm-se
Ubiquiti Access Point U7 lite - $99 https://store.ui.com/us/en/products/u7-lite
Ubiquiti G4 Pro Doorbell Wifi - $299 https://store.ui.com/us/en/category/cameras-doorbells/collections/pro-store-doorbells-chimes/products/uvc-g4-doorbell-pro?variant=uvc-g4-doorbell-pro-us
Ubiquiti G4 Instant Camera (2x) - $99.00 https://store.ui.com/us/en/category/all-cameras-nvrs/products/uvc-g4-ins
HDD for cam storage (4TB) - $99 https://www.microcenter.com/product/690304/seagate-skyhawk-4tb-5400-rpm-sata-iii-6gb-s-35-internal-surveillance-cmr-hard-drive
2 Ethernet cables - anywhere ($5)
Qolsys IQ Panel 2+ - $499.50 https://www.lowvoltagesupply.com/Qolsys-IQ-Panel-2-Plus-PowerG-QS9201-5208-840-p/qs9201-5208-840.htm
Z-wave IQ mini door/window sensor (10x) - $20 each, https://suretyhome.com/product/iq-mini-sensor/
Discord Account - free
Total of roughly $2,000 for the products above, but price check around and definitely on eBay. I spent around $1,400 on the items I bought, which were mainly the Ubiquiti and Pi products.
Optional items:
Alarm.com basic account - 1 month $14 (if the IQ Panel Installer PIN is not known)
Pi POE Hat - $25.95 https://www.pishop.us/product/raspberry-pi-poe-plus-hat/?src=raspberrypi
There were a few issues I had to resolve, decisions to be made, and stuff to be learned before I really jumped into this project. The main issue was that I did not have the dealer or installer PIN for the existing IQ Panel in the home. This would restrict any ability to repurpose the panel for home automation. So I had to create an Alarm.com account, sign up for a month of access, and reset those PINs. There are a few different options you can go with to “self-monitor” those panels. You really just need this to reset the panel/PINs.
I also chose against using POE cameras and went with the Wi-Fi ones since drilling through brick is not fun, and my signal stretched far enough to reach all my exterior doors. I also went with the UDM SE over some cheaper options, as I wanted Unifi Protect and Network. For this project, you technically only need Protect, unless you want VPN functionality for remote system control. There are cheaper options that only provide Unifi Protect.
Here is a short list of the items I had to learn:
IQ Panel functionality
Home Assistant - OS install, integrations, services, automations
Unifi Protect functionality
Discord - create a channel
I could talk about the Unifi platform for months. I have loved using it and been amazed by the continual improvements and additions to functionality by their team. Think full Ring performance and features, but the camera footage is hosted locally and you have full control over what it does.
Really all I did within Unifi for this project was set up a camera at each door entrance of the house (set up instructions). I have it alert me of any movement within a certain Detection Zone (distance from my door). The Unifi Alarm Manager has a stupid amount of options, so you can go crazy with how and what you want to be notified of.
One place it would benefit to have Unifi Network is to set up a VPN, to allow for remote access to arm or disarm the security panel. This is an optional feature, but some people may definitely want/need this capability.
Now we need to create a Discord channel for your HA text alerts.You might find this doc https://discord.com/community/basic-channel-setup useful, and HA has pretty good instructions here for the service creation and HA set up.
Go to https://discord.com/developers/applications and create an app
Set up the bot with Send Messages permission within the server
Open Discord and go to User Settings > Advanced > Enable Developer Mode
The first step of Home Asssist is choosing what to run it on. I used a Pi since they’re cheap, run 24/7 very well, and are honestly just easy to make work. Once you pick you hardware, you need to install the Home Assistant operating system or container. Typically it is best to go the OS route as some items are not supported in the container. However, if you’re short on free devices, you could run it in a container on something you have existing.
Best way to install the HA OS is to use the Pi Imager to put the Home Assistant OS on your blank SD card and then follow the process outlined here. After initial set up, there are 5 steps to set everything else up.
Install HACS (Home Assistant Community Store)
Add Qolsys Panel integration
Configure connection with panel
Add Discord service
Add automation triggers
Best to just follow these instructions.
TLDR: Get add-on, install HACS, start add-on, restart HA, add HACS integration, authenticate and authorize HACS with Github
Open Home Assistant.
Navigate to: HACS → Integrations
Search for qolsys-panel
Click the 3 dots on the right and select Download
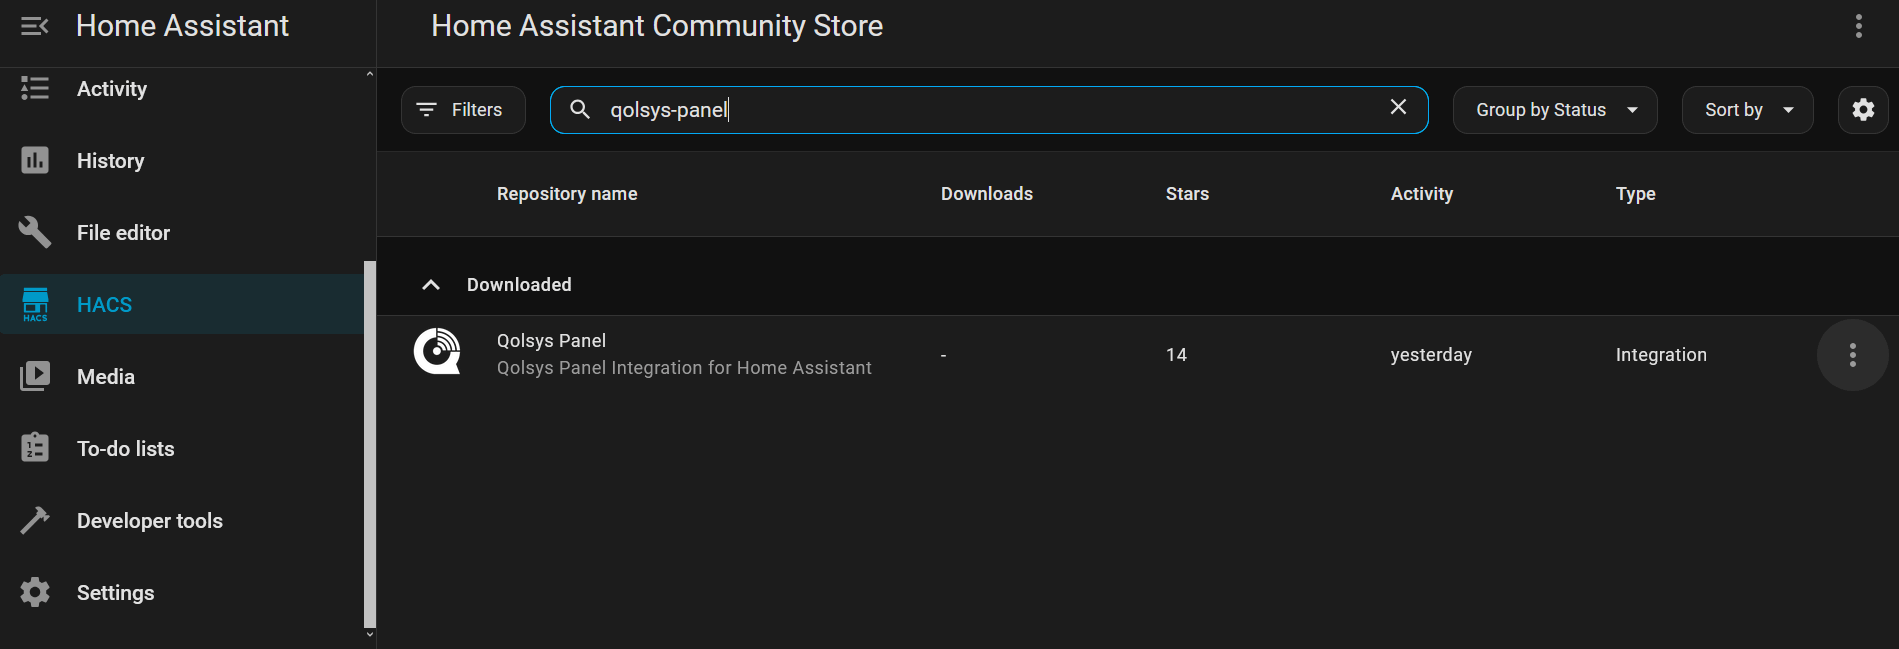
The panel and HA device must be connected to the same network.
On your Qolsys Panel, access the IQ Remote pairing page:
Settings → Advanced Settings → Installation → Devices → WI-FI Devices → IQ Remote DevicesIn Home Assistant, go to:
Settings → Devices & Services → Integrations → Add IntegrationSearch for Qolsys Panel.
When prompted for the pairing method, choose: Automatic Panel Discovery and Pairing
Next, we’ll add the Discord service to HA. You’ll need the bot api token for this.
Open Home Assistant.
Navigate to: Settings → Integrations
Search for Discord
Enter api token
Click Submit
Enter Discord Channel ID and Message field values
Lastly we will add an automation trigger to send alerts to your Discord channel of choice. I set ones for when the status ofa sensor changes from closed to open and when the panel is armed or disarmed.
For the doors/windows, I set a trigger when the sensors go from closed to open.
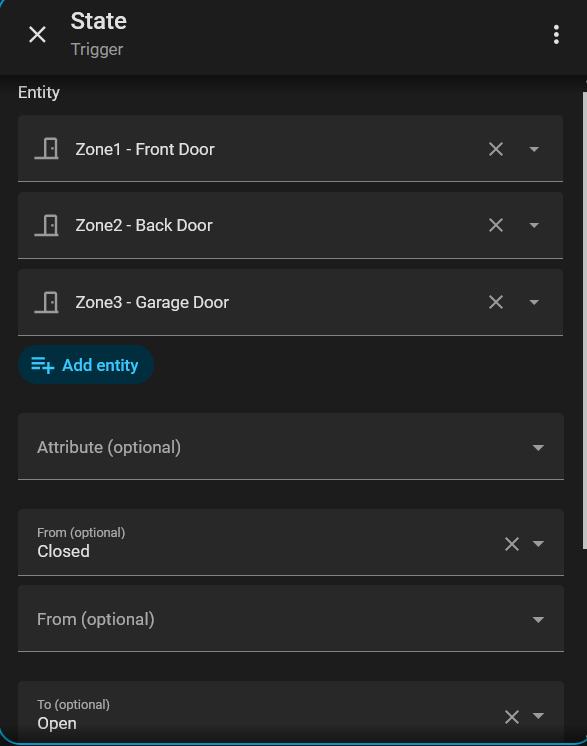
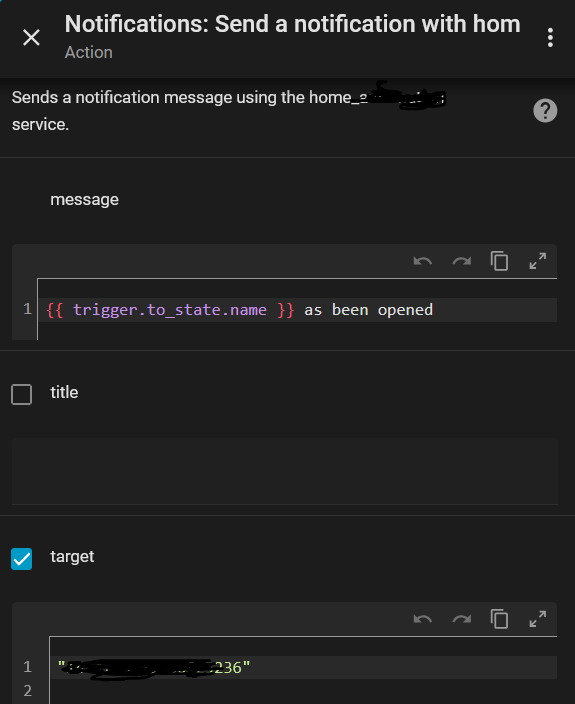
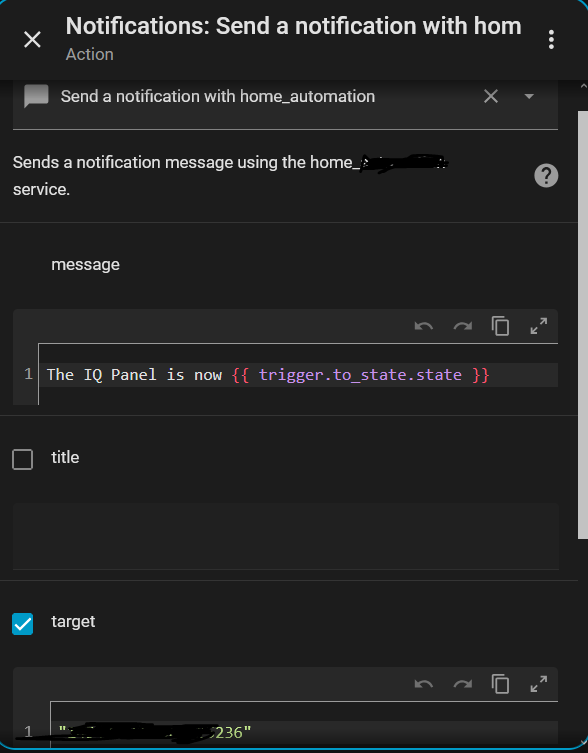
And I create an action where I have it send me a message, using the sensor name variable, so I know which door was opened in the text notification.
For arming and disarming alerts, I set this trigger
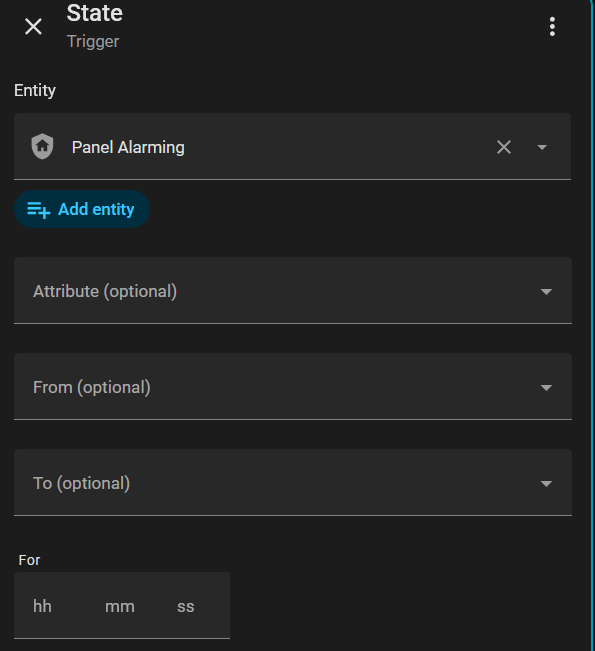
With the below action, and the panel arm status a variable, to know within the message if it was armed or disarmed.
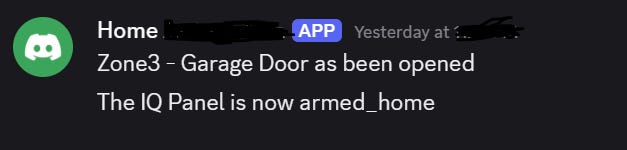
The real-time text alerts now look like this, any time a door or window sensor is opened, and the panel alarm is armed or disarmed.
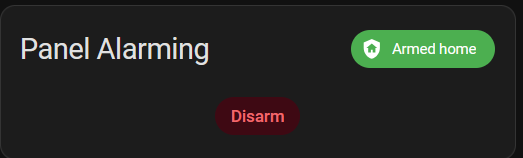
I also have the capability to arm or disarm the panel remotely via an HA panel. If you set up a VPN into your UDM, you could do this from anywhere in the world via the HA mobile app.
And of course with Unifi, I get notified of any movement around my doors, plus I can view full playback footage any time I desire.
So that is how I created a full home security monitoring system that I have full ownership, control, and privacy of. Hopefully this gives you some ideas! Feel free to share this blog if you found it useful, or leave a comment if you have further questions.
No posts
Comments
Nothing yet. Say the first thing.
Sign in to join the conversation.