
Dear reader,
I love nothing more than incorporating the format of my zines into the their story telling, so the physical object you interact with adds another layer to the work. I’ve been experimenting recently with some different square formats. So, I thought I’d share how to make 3 of my favourites.
As seen in my Rajah Quilt zine
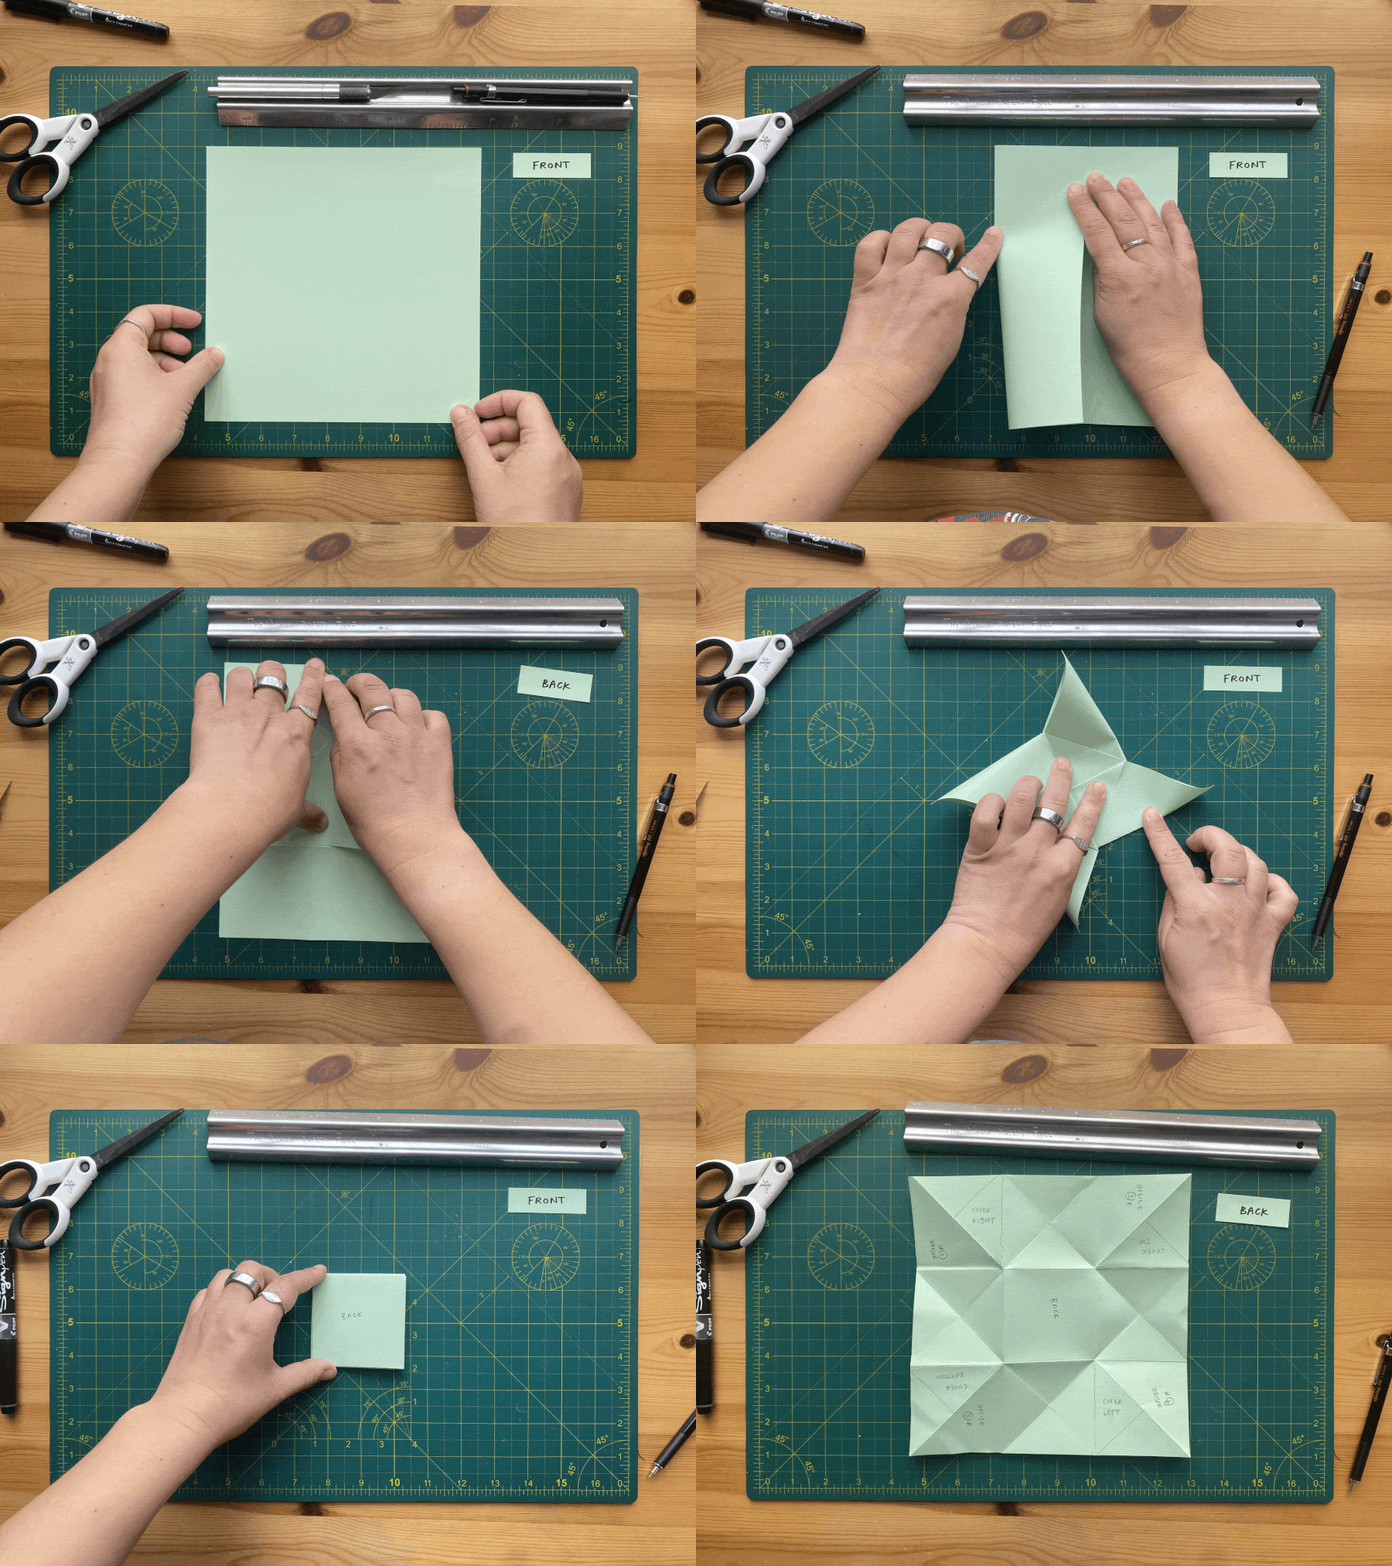
Start with a square piece of paper or card
Fold your paper inwards into thirds vertically and horizontally
Flip your paper over and fold each of the four corners inwards two thirds of the way across into the middle, the corner should line up with the opposite edges of the centre third square in your paper
Flip your page over and pinch in each of the corners of the centre third square inwards, you should start to feel the paper want to twist inwards (this might take a few tries)
Flatten out the star you’ve just made
Fold in each of the points of the star, tucking the fourth one in to hold the purse closed
Unfold and add your design
I really loved making a puzzle purse zine, it’s got theatre, interesting shapes and layers you can tell a story through. It’s worth being aware, if you’re printing rather than drawing directly onto your puzzle purse, that getting the final points on the cover all aligned can be a bit tricky. There’s also a fun twisting element you’ve got to be aware of, so I definitely recommend making a mock up first!
As seen in my easy peeling zine
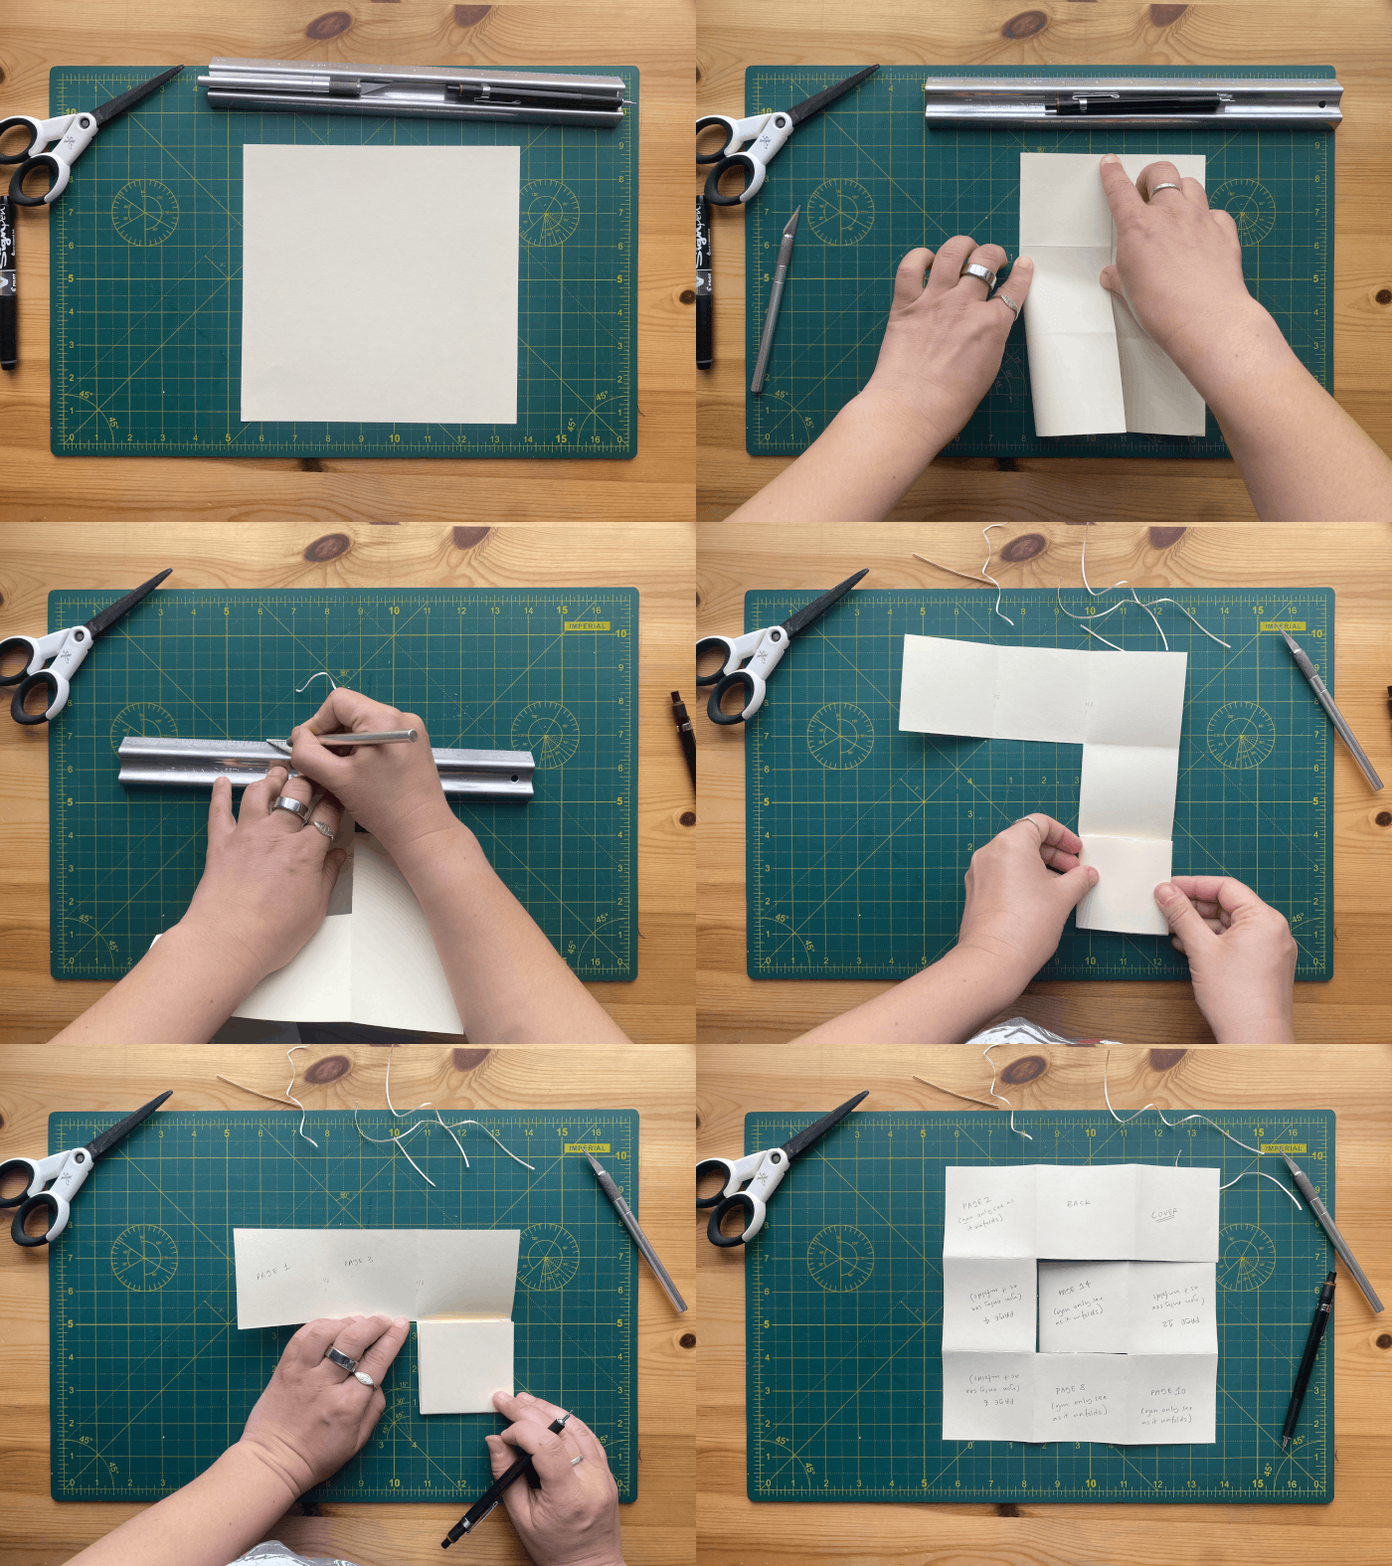
Start with a square piece of paper or card
Fold your paper inwards into thirds vertically and horizontally
Cut
Now you need to cut a bit of a margin across all of the cuts you’ve made so far as well as along the bottom left hand edge and the bottom edge of the page. This gives you space as you fold for your zine to get thicker and still fold up nicely.
Fold your zine up starting in the middle
This is a deceptively simple layout, which works great if you’ve got something you want to unravel and can make work with the final poster type layout. It’s got 16 pages in total, but most of the even pages you will only see as you unfold, rather than being part of the poster at the end, so think about if there are elements that perhaps add commentary or asides.
The big learning I had with this one was just how important cutting those extra little margins is when you get to folding, don’t skip this step!
As seen in my laundry zine
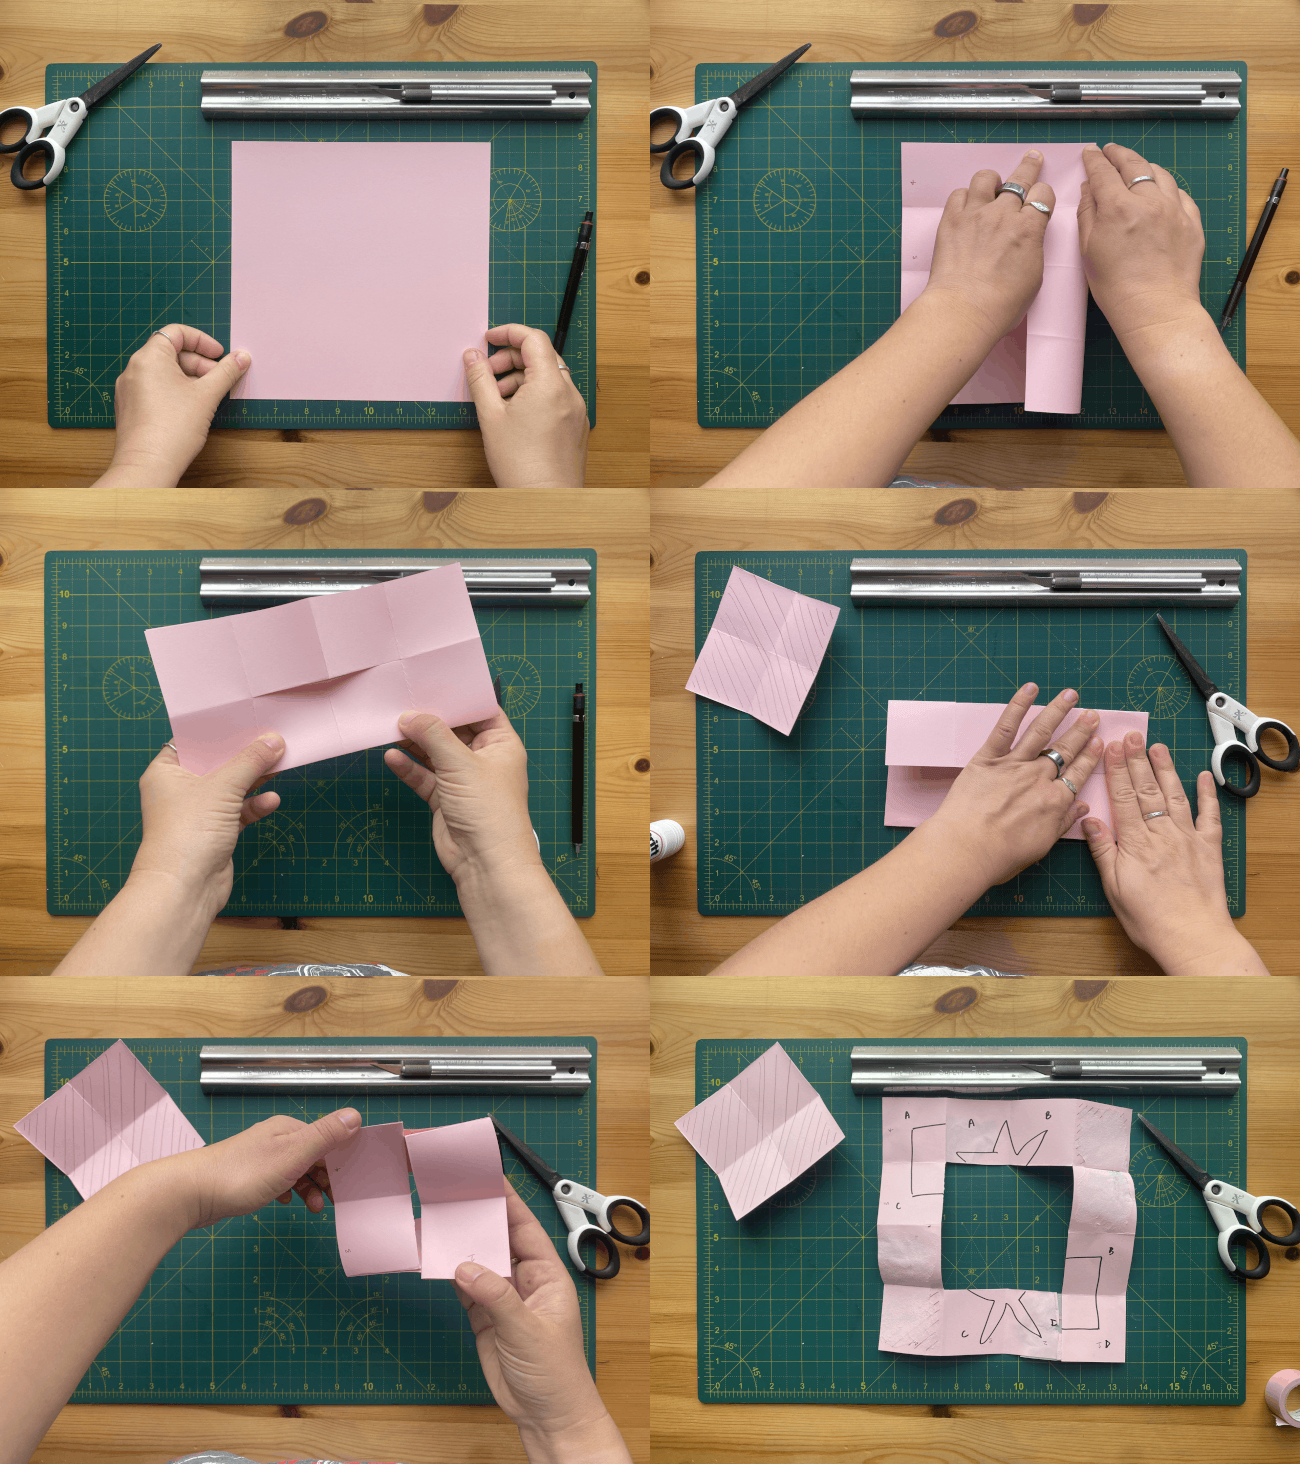
Start with a square piece of paper or card
Fold your paper inwards into quarters vertically and horizontally
Cut out the centre square, so you have a frame that’s a quarter thick all the way around
Add glue to the top right square and fold down to stick it
Add glue to the bottom left square and fold up to stick it
Now with your oblong piece of paper, add glue to the top left square and fold inwards to stick it
Add glue to the bottom right square and fold inwards to stick it
Add your design to your four pages once its folded (this isn’t one you can unfold once it’s stuck together so I’ve included one I’ve ripped open so you can see how to print if you’re that way inclined)
I had a card that had this mechanism as a kid and I loved it, it had pictures of Jar Jar Binks. If you’ve got a story that can loop or you just want a fun way to present 4 images this is a great option. Where with the other two I would recommend starting with an A3 piece of paper, this one you can make a decent size zine just with an A4 sheet so it’s pretty economical too.
Write / draw again soon,
Natalie
No posts
Comments
Nothing yet. Say the first thing.
Sign in to join the conversation.