
I recently set up a small home lab to get back into tinkering with electronics and 3D printing. For my first project, I decided to build something I’d been wanting for a while: a standalone device that alerts me when a meeting is about to start, without relying on a computer or phone.
The project is made up of four main components:
A logic board with Wi-Fi connectivity, capable of running code that sends HTTP requests
LEDs that act as meeting reminder indicators
A housing that holds the board, LEDs, and a USB-C connector for power
A small server application that connects to my Office 365 calendar and checks for upcoming meetings
For the logic board, I chose a Raspberry Pi Pico 2 W. It includes built-in Wi-Fi, is large enough to make soldering easier, and has broad community support.
The circuitry is very basic:
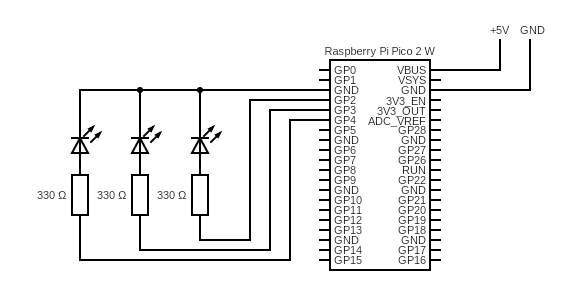
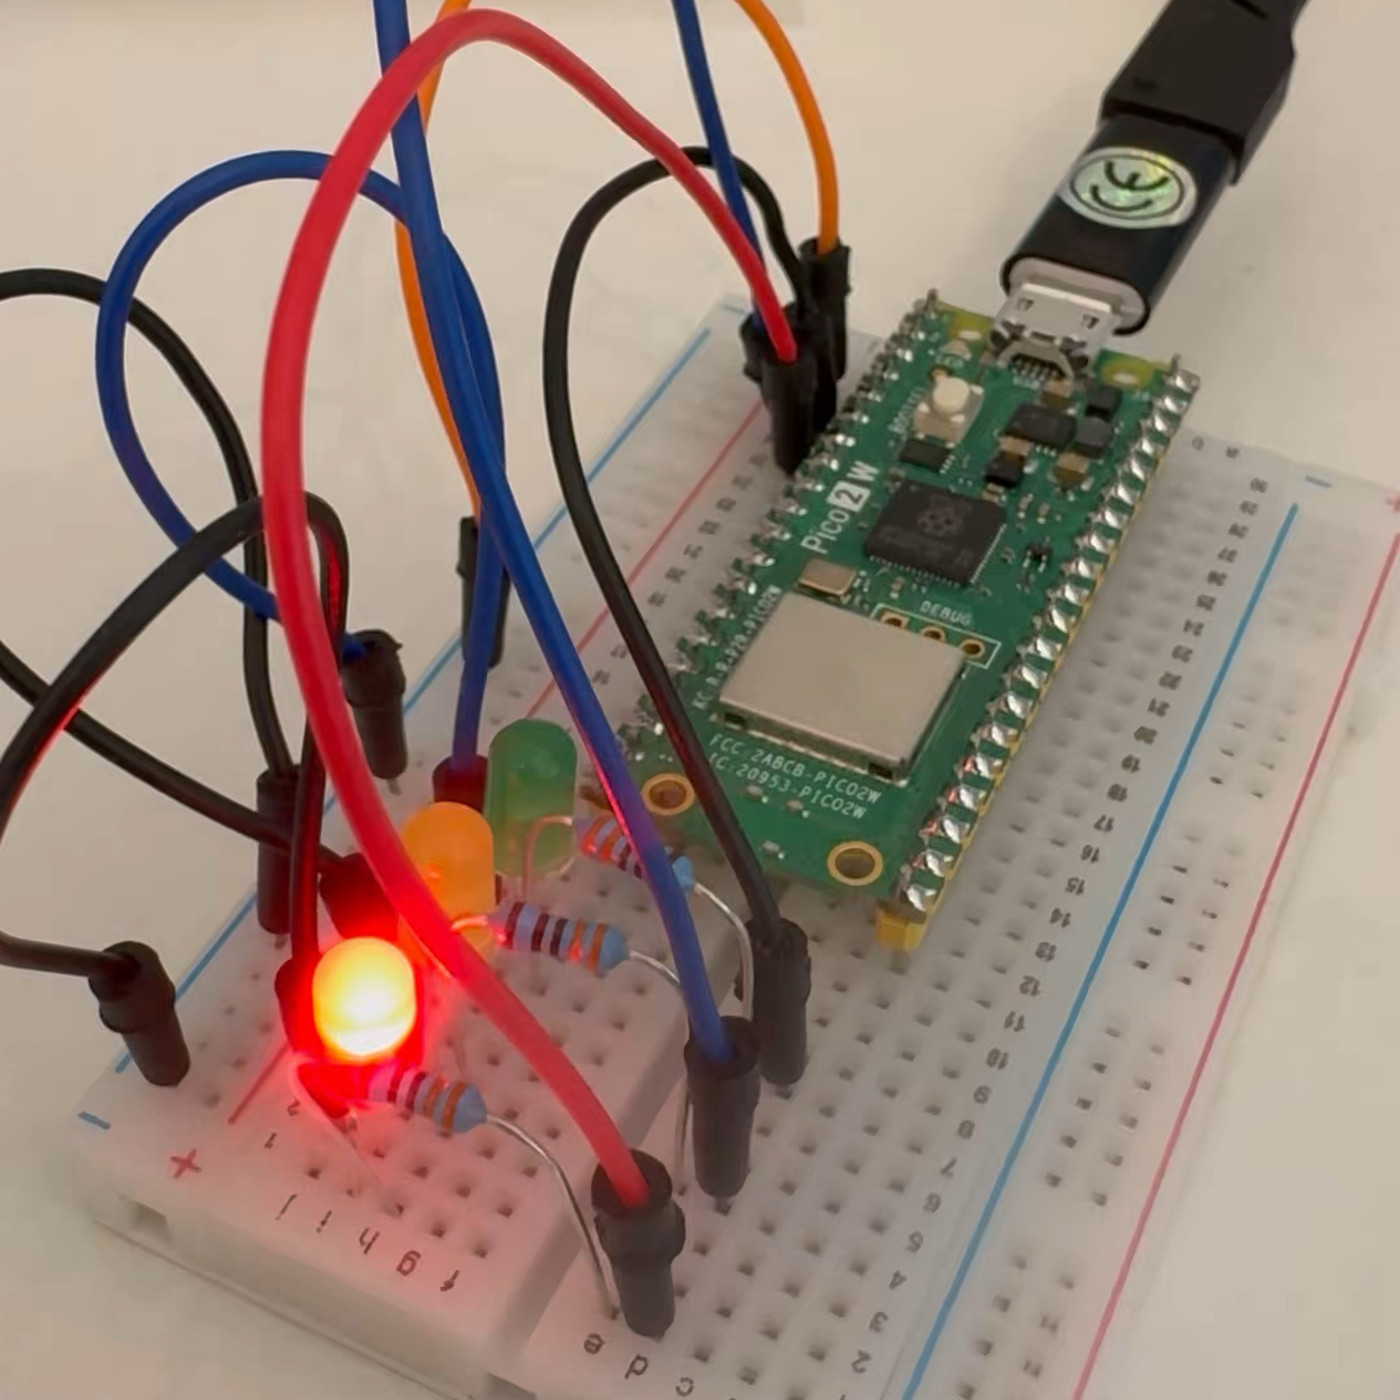
I laid out the circuitry on a breadboard first: LEDs, resistors, and the Raspberry Pi, connected using jumper wires. Then I wrote a small C++ program using the Arduino IDE to light up the LEDs. Sending the compiled app to the Pi worked successfully, after fighting a bit with connecting the Pi to my Mac via a USB cable.
Next, I wrote a small server-side script in Ruby on Rails that fetches the next upcoming meeting from my Office 365 calendar. The script returns one of the following states: “T-15,” “T-10,” “T-5,” “IN SESSION,” or “NO MEETING”.
The Rails code consist of just three small service classes:
class Azure::GraphAccessTokenService
  def self.call
    response = Typhoeus.post(
      "https://login.microsoftonline.com/#{ENV.fetch('AZURE_TENANT_ID')}/oauth2/v2.0/token",
      body: {
        'grant_type' => 'client_credentials',
        'client_id' => ENV.fetch('AZURE_CLIENT_ID'),
        'client_secret' => ENV.fetch('AZURE_CLIENT_SECRET'),
        'scope' => 'https://graph.microsoft.com/.default'
      }
    )
    json = JSON.parse(response.body)
    json['access_token'] || raise("Access token fetch failed: #{response.body}")
  end
end
class Azure::GraphCalendarService
GRAPH_BASE = 'https://graph.microsoft.com/v1.0'.freeze
USER_EMAIL = 'name@example.com'.freeze
def self.fetch_upcoming_events(token)
now = Time.now.utc
response = Typhoeus.get(
"#{GRAPH_BASE}/users/#{USER_EMAIL}/calendarView",
params: {
startDateTime: (now - 2.hours).iso8601,
endDateTime: (now + 8.hours).iso8601,
'$orderby' => 'start/dateTime',
'$select' => 'subject,start,end,attendees,isCancelled,isAllDay'
},
headers: {
'Authorization' => "Bearer #{token}",
'Content-Type' => 'application/json'
}
)
raise "Calendar fetch failed: #{response.body}" unless response.success?
JSON.parse(response.body)['value'] || []
end
endclass Calendar::NextEventStatusService
def self.call
token = Azure::GraphAccessTokenService.call
events = Azure::GraphCalendarService.fetch_upcoming_events(token)
new(events).status
end
def initialize(events)
@events = events
end
def status
now = Time.now.utc
# Check if any meeting is currently ongoing
ongoing = @events.find do |e|
start_at = Time.parse(e.dig('start', 'dateTime') + ' UTC') rescue nil
end_at = Time.parse(e.dig('end', 'dateTime') + ' UTC') rescue nil
is_ongoing = start_at && end_at && start_at <= now && end_at > now
has_attendees = e['attendees']&.any?
is_not_cancelled = !e['isCancelled']
is_not_all_day = !e['isAllDay']
is_ongoing && has_attendees && is_not_cancelled && is_not_all_day
end
return 'IN SESSION' if ongoing
# Check for upcoming meetings within 15 minutes
upcoming = @events.find do |e|
start_at = Time.parse(e.dig('start', 'dateTime') + ' UTC') rescue nil
has_attendees = e['attendees']&.any?
is_not_cancelled = !e['isCancelled']
is_not_all_day = !e['isAllDay']
start_at && start_at >= now && start_at <= now + 15.minutes && has_attendees && is_not_cancelled && is_not_all_day
end
return 'NO MEETING' unless upcoming
start_at = Time.parse(upcoming['start']['dateTime'] + ' UTC')
diff_seconds = (start_at - now).to_i
case
when diff_seconds <= 5*60 then 'T-5'
when diff_seconds <= 10*60 then 'T-10'
when diff_seconds <= 15*60 then 'T-15'
else "NO MEETING"
end
end
endNext, I started designing the base and lid of a small “coaster” using Plasticity, a wonderfully easy-to-use 3D modeling program available for Mac, Windows, and Linux:
The base and lid are held together using small 2×3 mm magnets. Four small standoffs hold the Raspberry Pi board in place. I glued the LEDs inside three slots, behind small holes that I filled with a small transparent round plug.
I used a Bambu Lab A1 3D printer using PLA Basic white filament for the base and gold-colored PLA Silk+ for the lid. The small round plugs were printed using PETG translucent filament:
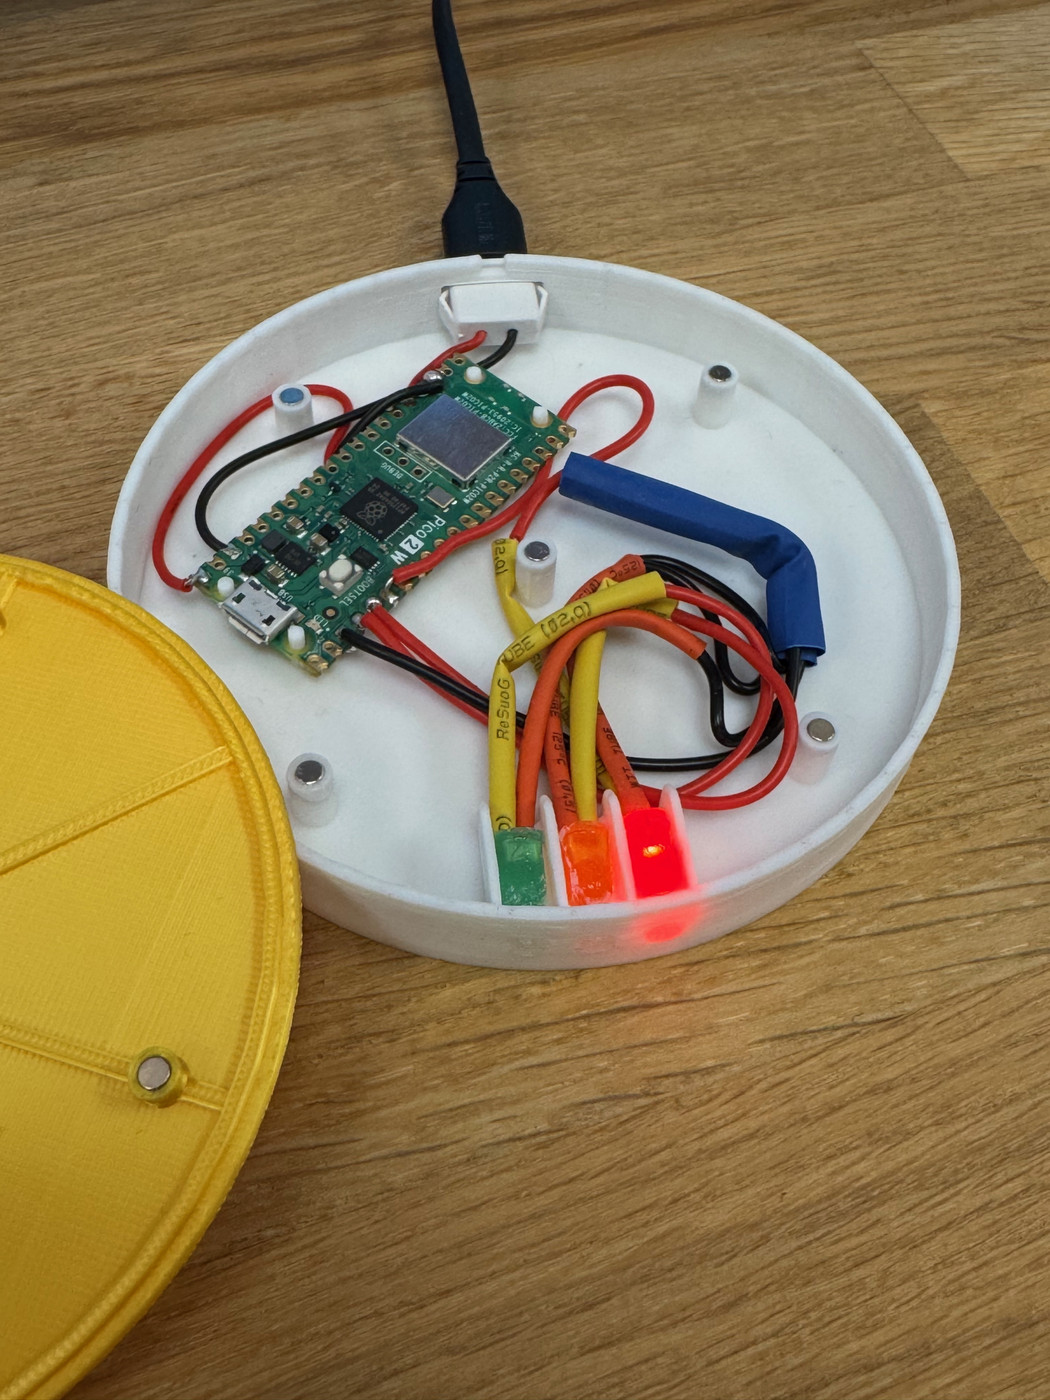
Fifteen minutes before a meeting starts the 🟢 LED lights up.
Ten minutes before a meeting starts the 🟠 LED slowly pulsates.
Five minutes before a meeting starts the 🔴 LED blinks rapidly.
There are a few things I might add to a version 2, such as a subtle beep or buzzer, black shielding to prevent light from bleeding through the base and lid, but that’s for another time.
It was a fun project and the end result is truly useful!
Comments
Nothing yet. Say the first thing.
Sign in to join the conversation.