
While the bones of our little hotel in upstate NY are wonderful, the property is far from pristine. Like many old buildings, it has survived decades of budget-conscious repairs, deferred maintenance, and many questionable style decisions. Somewhere along the way, damaged (original) floorboards had been patched with resin wood filler or vinyl board in a completely different color (sigh).
Buildings need to evolve to remain useful; we believe repairs and updates should hold reverence for the future users. Rather than trying to disguise the imperfections, we wanted a solution that acknowledged the building’s age while adding something thoughtful and new.
We were drawn to the idea of using copper patches to repair some of our damaged floorboards, similar to the Japanese philosophy of kintsugi, the repair becomes part of the story rather than something hidden from view


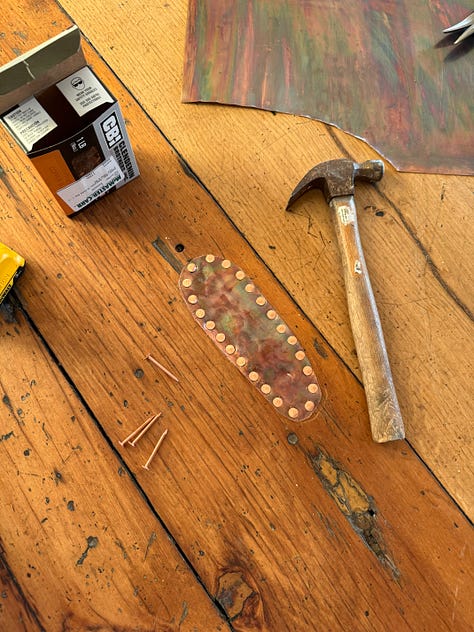
The result is delightful! The warm metal catches the light, complements the aged wood, and creates a repair that honors the integrity of the materials. It reminds me of the Shaker approach to design: their guiding philosophy was that "beauty rests on utility,” meaning that if an object was designed perfectly to serve its intended function and made with honest, high-quality craftsmanship, its appearance would naturally be beautiful. Bingo!
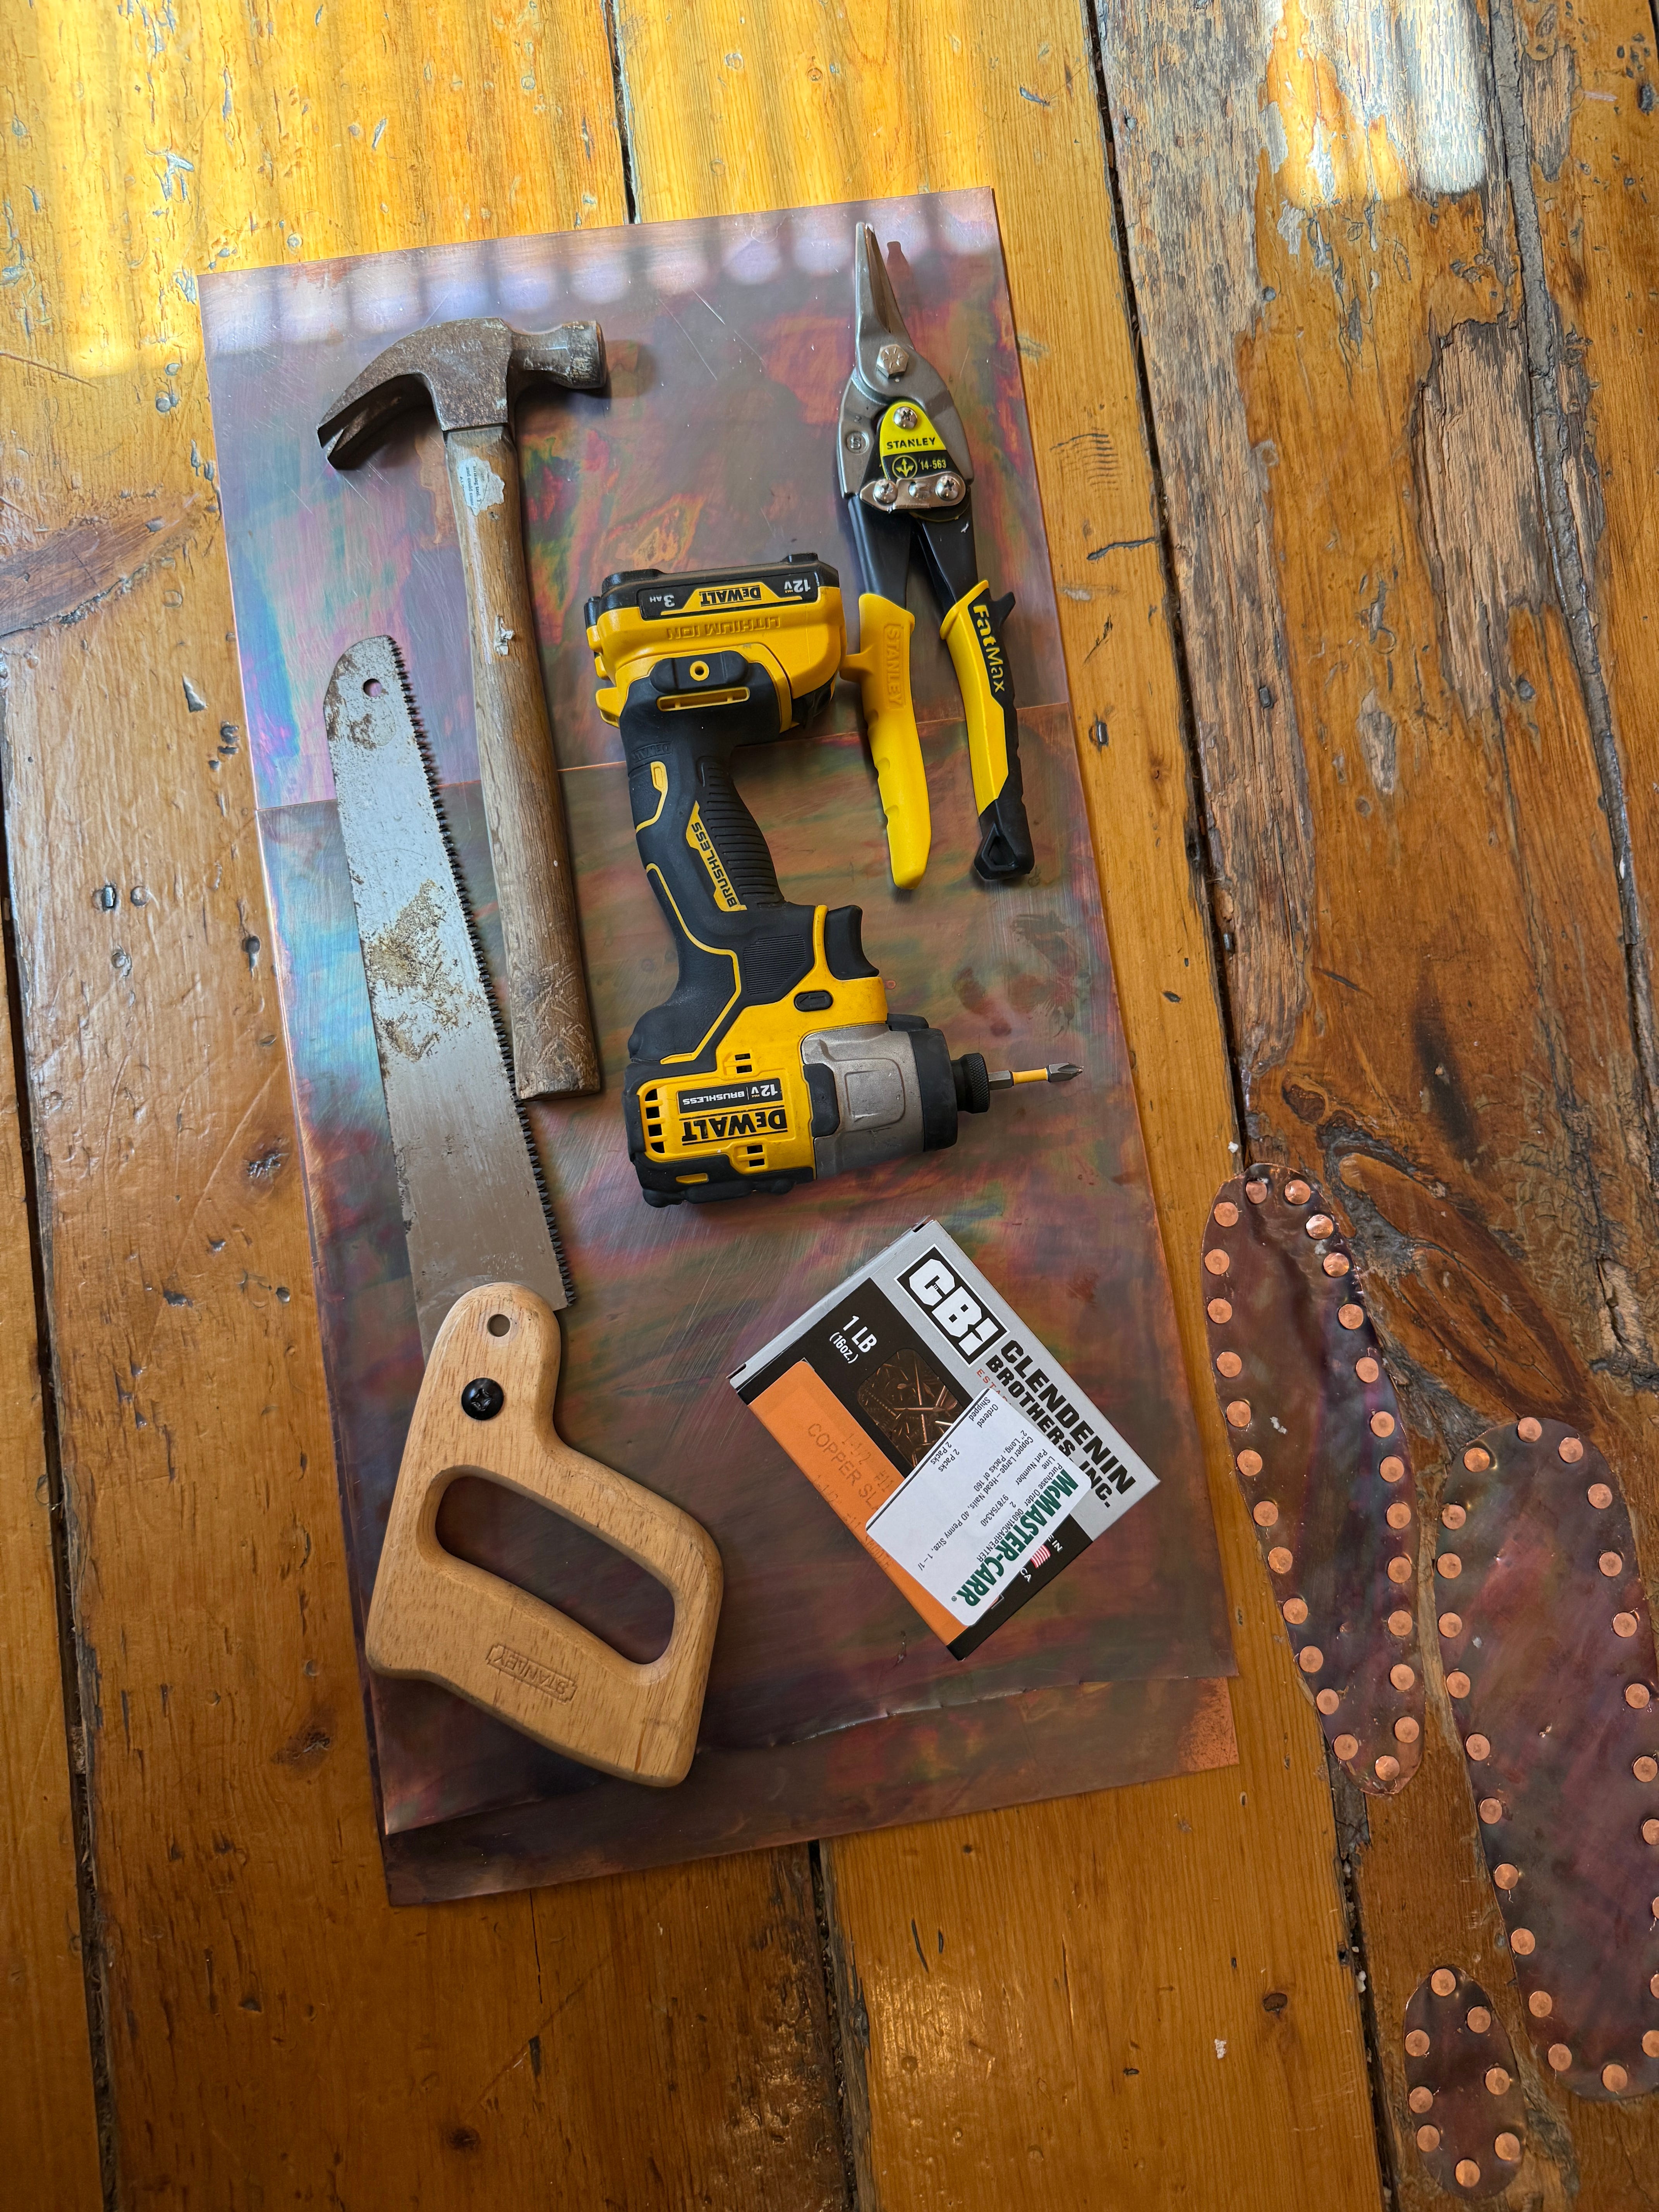
For our copper floor patches, we used relatively simple materials and hand tools to create a durable, honest repair that felt appropriate to a 170-year-old building.
Materials
Liver of sulver *optional for aging the copper:
Soft rag
Tools
Metal sheers
Drill and drill bits
Hammer
Work gloves
Hand saw or multi-tool
Fresh copper is beautiful, but it can feel a little too bright against worn floorboards. We wanted our patches to feel like they belonged in the building, or at least to give nature a head start. To accelerate the aging process, we treated the copper sheeting with liver of sulfur, a traditional metal patination solution that darkens copper and encourages the rich browns, charcoals, and subtle variations that would otherwise take years to develop naturally.

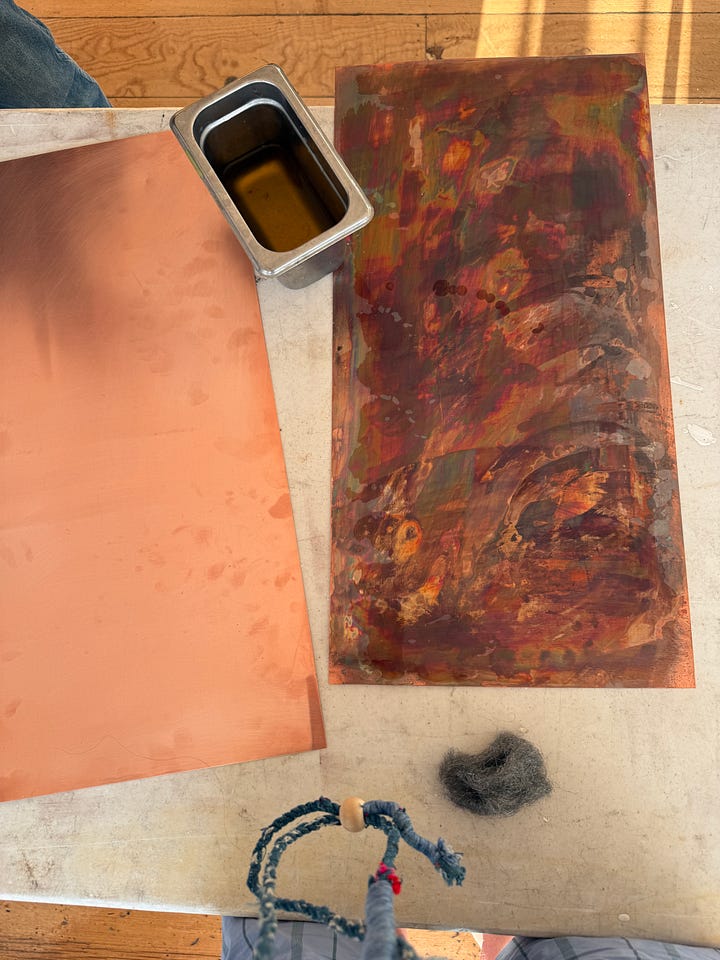
After cleaning the copper with water and drying it with a soft cloth, I lightly textured the surface using fine steel wool. This step isn’t strictly necessary, but I found it helped break the uniform sheen of the new copper and gave the liver of sulfur a bit more surface to grab onto, resulting in a richer, more varied patina.
Next, dilute the liver of sulfur in a cup of warm water. As it dissolves, the water will take on a yellow hue. Once fully mixed, dip a soft rag into the solution and wipe it directly onto the copper.
The reaction happens quickly. With each application, the copper will deepen in color, moving from bright orange to warm browns, charcoal tones, and subtle iridescent variations. If you’d like a darker finish, simply apply additional layers, allowing the patina to develop gradually until you reach the desired look.
Once you’re happy with the color, rinse the copper thoroughly with clean water to stop the reaction. Pat dry with a soft cloth and allow the sheet to dry completely before moving on to fabrication.
Remember: slight inconsistencies, fingerprints, streaks, and tonal shifts are part of what makes the finished patch feel authentic alongside centuries-old wood.
Before you can install the copper, you need something beneath it. The copper patch isn’t intended to span a void on its own. Instead, we’re creating a solid backing that provides counter-pressure and prevents the metal from flexing or sinking into the damaged area over time.
For narrow gaps and irregular voids, we used a large-gap expanding filler. If you’re repairing a larger hole, I would use a scrap wood plank or wood blocking to fill the majority of the cavity first (it doesn’t need to match the original flooring, no one will ever see it).
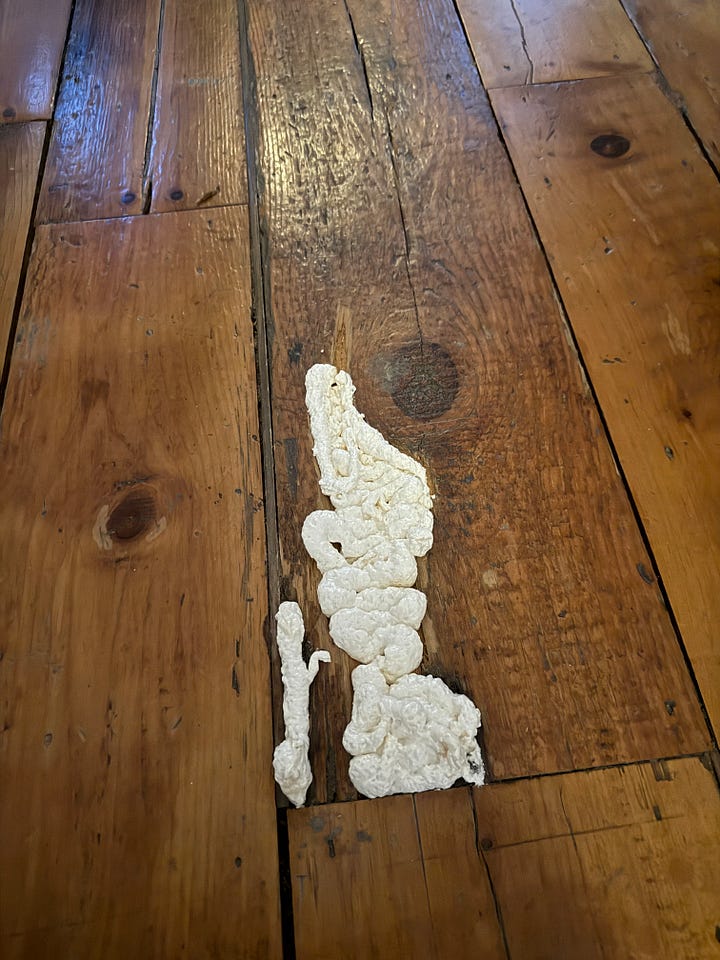

Apply the filler generously and allow it to fully cure overnight. Once cured, use a hand saw, oscillating multi-tool, or sharp utility knife to trim away the excess. One of the advantages of gap filler is how easy it is to shape and sculpt after it hardens. Work until the repair sits flush with the surrounding floorboards.
With the void filled and trimmed, it’s time to create your patch. Lay your copper sheet over the repair area and begin rough-cutting the shape using metal shears or tin snips. Leave at least one inch of coverage beyond the damaged area on all sides, ensuring the patch fully spans the circumference of the repair and extends onto solid wood.
One of the things we love about this approach is that the repairs aren’t hidden, they’re celebrated. Let the shape respond to the damage rather than forcing it into a perfect geometric form.
Once you’re happy with the fit of your copper patch, it’s time to fasten it permanently to the floor. Start by placing a single anchoring nail through the patch to hold it in position. I found it easiest to begin at one of the longer north-south ends of the patch, where the copper was most likely to lift or shift while working.
Because copper is such a soft metal, you’ll want to pre-drill every hole before driving in your nails. Using a drill bit slightly smaller than the nail shaft, drill through the copper and into the floor below, then gently sink the copper nail with a hammer.
When I first started, I would pre-drill and nail each hole one at a time. As I became more comfortable with the process, I found a faster rhythm: set the patch, install the anchoring nail, then pre-drill the remaining holes around the perimeter before returning to drive the nails. Work your way around the circumference of the patch, spacing nails evenly and allowing the copper to settle naturally against the floor.
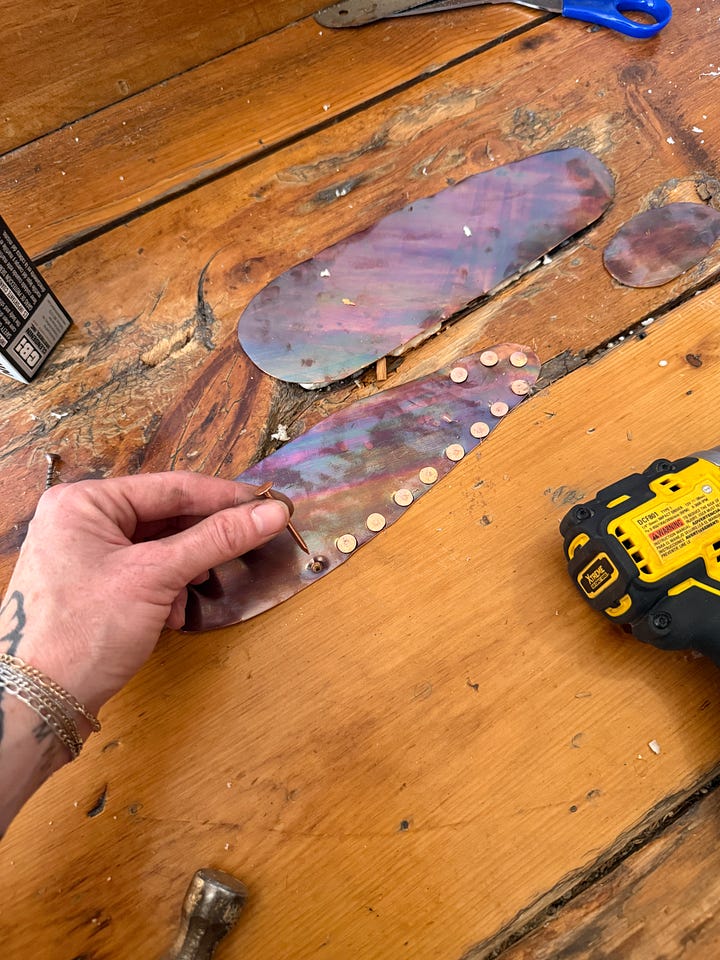

We chose 20 oz copper because it is substantial enough to withstand foot traffic while still being workable with hand tools. Its really important to hammer down the edging once all of your nails are in, to level the copper to the floor for a smooth transition.
One practical note: the hammering is surprisingly (or unsurprisingly) loud. Copper nails drive easily, but the sound resonates through old floors and framing. Unless you’re trying to make enemies of your family, guests, or neighbors, this is not a project to tackle in the middle of the night.
One of the things we’ve come to appreciate about stewarding a 170-year-old building is that every repair is a choice. You can erase the evidence of time, or you can work with it.
The Rhinecliff spent decades accumulating quick fixes, mismatched materials, and repairs that prioritized convenience over character. We don’t say that with judgment, every generation leaves its mark on a building. Ours just happens to be a chapter focused on thoughtful restoration and honest craftsmanship.
These copper patches won’t fool anyone into thinking the floor is original, but they acknowledge the damage, celebrate the repair, and add a new layer to the story of the building. A hundred years from now, someone else will walk across these floors and know exactly where another caretaker intervened and paused long enough to leave something beautiful behind.
If you’re restoring an old home, workshop, barn, or inn, we hope this inspires you to think differently about repair. And send us your copper patching photos if you tackle this simple and transformative repair technique!
Comments
Nothing yet. Say the first thing.
Sign in to join the conversation.