Hi,
Welcome to the new iteration of this blog. It’s been a while since I’ve touched this and this time I really want to do better. Instead of a boring “Hello World” initial blog post, I wanted to write about the process I went though to create this site.
This iteration is also powered by Hugo and hosted by Netlify.
0. Installing Homebrew
I am creating this website on an older Macbook Pro (Catalina). Before we begin, you need to ensure you have Homebrew installed. You can run
brew
to see if it’s installed. If it is not, you can install it by running the following command:
/bin/bash -c "$(curl -fsSL https://raw.githubusercontent.com/Homebrew/install/master/install.sh)"
1. Installing Hugo
Now we need to install Hugo. You can do this via running:
brew install hugo
and then check the install via running
hugo version
I’m running v0.69.0. Note: Later in these series, I will be using features from v0.67.0, so it is important to have a new version
2. Creating a new git repo
The next step is to create a git repo. Netlify (the hosting provider I’m going to use) supports Github, Gitlab & BitBucket. I’m going to use Github and use a private repository as shown below:
I’m now going to create a new folder on my macbook and clone the repository:
mkdir Sites
cd Sites
git clone https://github.com/<username>/<repo>.git
cd <repo>
e.g.
$ mkdir Sites
$ cd Sites
build@machine Sites % git clone git@github.com:michael-kehoe/michael-kehoe.io.git
Cloning into 'michael-kehoe.io'...
remote: Enumerating objects: 3, done.
remote: Counting objects: 100% (3/3), done.
remote: Total 3 (delta 0), reused 0 (delta 0), pack-reused 0
Receiving objects: 100% (3/3), done.
build@machine Sites % ls
michael-kehoe.io old_mk
build@machine Sites % cd michael-kehoe.io
build@silicon michael-kehoe.io %
3. Creating a new site
Now create the skeleton site. You do this via running
hugo new site . --force
For my site, I ran:
build@silicon michael-kehoe.io % hugo new site . --force
4. Picking a theme
See https://themes.gohugo.io for a list of themes to look through. There is nothing stopping you from creating your own, or modifying one (if the license permits). The feature set of a theme may vary (e.g. Social Media Button support).
For this site, I’m using hugo-refresh.
NOTE: The rest of this tutorial assumes that you are using the hugo-refresh theme
5. Installing the theme
Now we want to install the theme into our repository:
To do this you run
git submodule add <git repo of theme> themes/<theme-name>
e.g.
git submodule add https://github.com/PippoRJ/hugo-refresh.git themes/hugo-refresh
I’m going to make modifications to the theme, so I’m going to fork the repo (In Github) and modify it shortly.
git submodule add git@github.com:michael-kehoe/hugo-refresh.git themes/hugo-refresh
6. Create some basic configuration
We’re going to do two things here to allow the server to start:
- Delete the
config.tomlfile that was auto-generated - Copy the example configuration
cp themes/hugo-refresh/exampleSite/config.yaml .
At this time, I also want to make some small configuration changes:
- Change the
baseURLtohttps://michael-kehoe.io - Change the
titletoMichael Kehoe - Disable
disableKinds: ["sitemap","RSS"]
baseURL: https://michael-kehoe.io
title: Michael Kehoe
# disableKinds: ["sitemap","RSS"]
7. Running a local server
Hugo provides a simple server to build the content and serve it (very quickly). You can do this by running this in a new tab:
hugo server
It may be useful to render draft posts that you’re writing. In that case, you will want to run
hugo server -D
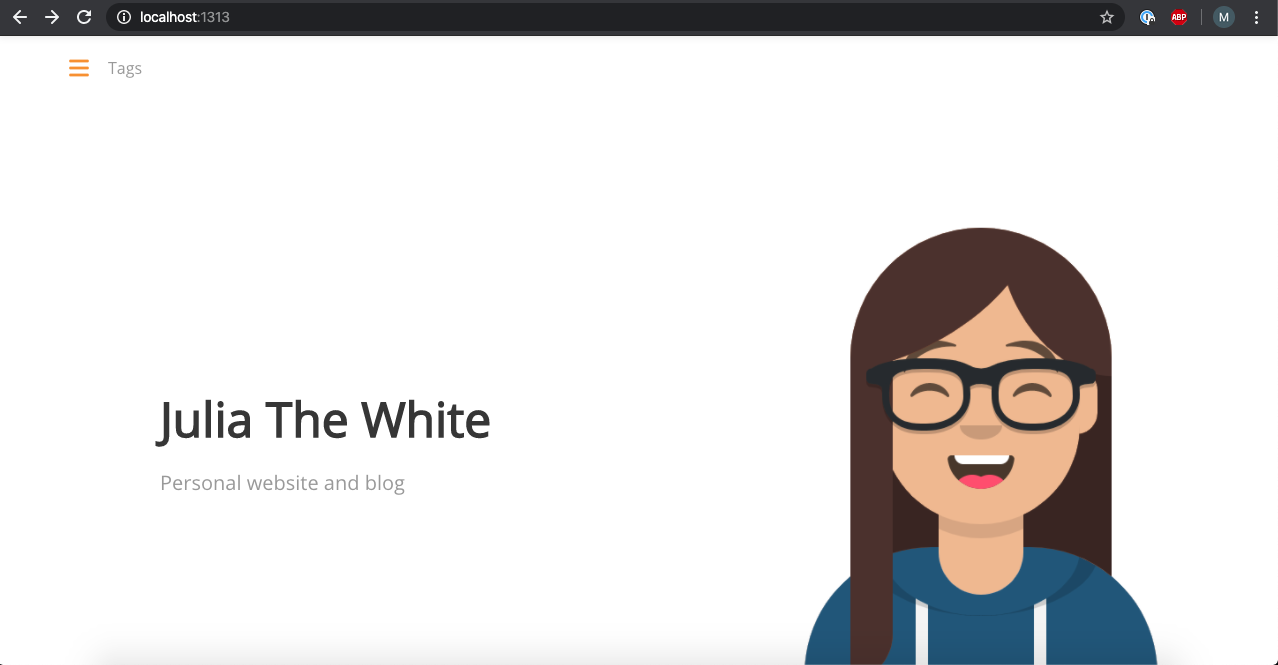
If you go to http://localhost:1313/ in a browser, you should see your website load. If it doesn’t, the tab that’s running hugo server -D should have some error information.
7. Tweaking the parameters
In config.yaml, we’re going to tweak some settings under the params section.
7.1 General Settings
- I want to set
articlesPerRow: 3toarticlesPerRow: 4. This is mostly personal preference. - I am also updating my favicon to be an avatar. I made it on https://avatarmaker.com/ and downloaded the SVG and placed it in
themes/hugo-refresh/assets/images/avataaars.svg. We will use this same avatar on the homepage later in this section - I’m setting
jsMinify: trueandcssMinify: true. This may lead to slightly slower build times, but it gives people viewing the page a slightly better experience in terms of load times. - I’m setting
mainColour: "#284ed8". This is the same color as the eyes in my avatar
7.2 Page not found
Under pagNotFound: (yes, there is a typo, but it’s in the theme), I’m modifying my avatar to show a frowny face. I’ve saved it in themes/hugo-refresh/assets/images/avataaars_404.svg and updated the image config to image: "/images/avataaars_404.svg". You can test this by going to http://localhost:1313/404.html
7.3 Homepage settings
In here, I make a few changes, firstly setting linkPosition: "menu+footer". This gives me a link to the homepage at both the top and bottom of the page. I set the title of the page to be Michael Kehoe and I’ve also updated my avatar.
  # homepage options
  homepage:
    # this options let you specify if you want a link to the homepage
    # it can be: "none", "menu", "footer" or "menu+footer"
    linkPosition: "menu+footer"
    # this options let you specify the text of the link to the homepage
    linkText: "Home"
    # option to specify the title in the homepage
    title: Michael Kehoe
    # option to specify the subtitle in the homepage
    subtitle: Leader of engineers who architect reliable, scalable infrastructure
    # option to specify image in the homepage
    image: "/images/avataaars.svg" # worker.svg
    # option to specify the width of the image in the homepage
    imageWidth: 500px
If you go back to your browser window, you should see the word Home in the top navbar, updated text in the center of the page and a new avatar.
Under footer:, we’re going to make some simple changes here and then some more complicated ones
- Disable the
emailoption as we do not want to allow our email address to be spammed.
    #email:
    #  link: name.surname@domain.com
    #  title: My Email
- Set my LinkedIn
    linkedin:
      link: michaelkkehoe
      title: LinkedIn
- Set my Github
    github:
      link: michael-kehoe
      title: Github
- Set my Twitter
    twitter:
       link: michaelkkehoe
       title: Twitter
- Set the copyright:
copyright: Michael Kehoe - 2020
- Adding Slideshare and Speakerdeck
This one is a little harder, so after the
instagramsection, I’m adding the following configuration
    slideshare:
        link: MichaelKehoe3
        title: slideshare
In themes/hugo-refresh/layouts/partials/footer.html, we’re going to add the following after the {{ if isset .Site.Params.footer.instagram "link" }} section
            {{ if isset .Site.Params.footer.slideshare "link" }}
            <li>
              <a href="https://slideshare.net/{{ .Site.Params.footer.slideshare.link }}" target="_blank">
                <span class="icon"><i class="fa fa-slideshare"></i></span>
                {{ if isset .Site.Params.footer.slideshare "title" }}
                  {{ .Site.Params.footer.slideshare.title }}
                {{ else }}
                  SlideShare
                {{ end }}
              </a>
            </li>
            {{ end }}
8. Organizing Content
Ok time to make some content!
8.1 Adding a credits page
Create a folder content/credits and inside the folder create index.md. When your server loads, you’ll see a credits link in the footer of the page.
Edit `content/credits/index.md:
---
title: "Credits"
date: 2020-04-24T00:00:00+00:00
draft: tfalse
hideLastModified: true
---
The images used in the site comes from https://avatarmaker.com/
To add your credits and then click on the credits link in the footer.
8.2 Adding an About page
Now I want to add a page about myself that has my biography.
Create a file content/about.md and add the following content:
---
title: "About"
date: 2020-04-24T00:00:00+00:00
draft: false
hideLastModified: false
keepImageRatio: true
tags: []
summary: "About Michael Kehoe"
showInMenu: true
---
<Biography content>
When the hugo server reloads, you’ll see in the navbar a link called About
This concludes this blog post, we’ll talk more in the next blog post about styling and content organization.
Last modified: 27 May 2020
Comments
Nothing yet. Say the first thing.
Sign in to join the conversation.