
I recently revisited my entire hosting setup for both client projects and my own websites. After years of bouncing between different solutions — some too complicated, others too limiting — I think I’ve finally found my sweet spot with a combination of Ploi and Hetzner Cloud. In this article I want to share it with you (and also document it for my future self).
FYI: I’ve included affiliate links. If you decide to try them out, I’ll receive a small commission.
Managing expectations
What I want from a hosting setup:
- Connect a (GitHub) repository
- Instant deployment on push, ideally with different actions for different branches
- Free, automatic SSL certificates
- Play nicely with file-based content management systems like Kirby ❶
- Simple (file) backups
- Modern UI (you wouldn’t believe what I’ve seen)
Managed servers or managing servers?
Managed servers
Among others, I’ve used managed servers by Strato, IONOS, All-inkl, DomainFactory, Hostinger and Host Europe. They always felt a bit limited when it comes to deployment and they charge (some, a lot of) money for things like SSL certificates or backups. Not to mention their ancient user interfaces ❷ .
Managing servers
On the other hand, I’ve experienced a lot of stress managing servers myself for some years, so I swore I’d never touch that topic ever again. Nothing like waking up on a nice Sunday morning to urgent emails about a server being down to make you question your career choice. It sure is nice to have full control, but not at the expense of this kind of stress.
Something in between?
I’ve searched for “something in between” for a long time — a solution that gives me control without requiring a degree in server administration.
Ploi: the perfect middle ground
As they tell you on their own website, they “(…) take all the difficult work out of your hands” and I have to say it’s true. It bridges that gap between fully managed and self-managed in a way that feels just right.
I’ll show you how it looks when I create a new site. Because I’m a very visual person myself, I took screenshots ❸ of each step.
1. Creating a server
Most sites don’t need a single server for themselves. But for completeness sake, let’s create our first server from scratch. This whole workflow is totally focused on my needs and because I’ve settled on Kirby a long time ago, we’re going to create a server for a Kirby site.
First, we press the “Create server” button and choose a provider:
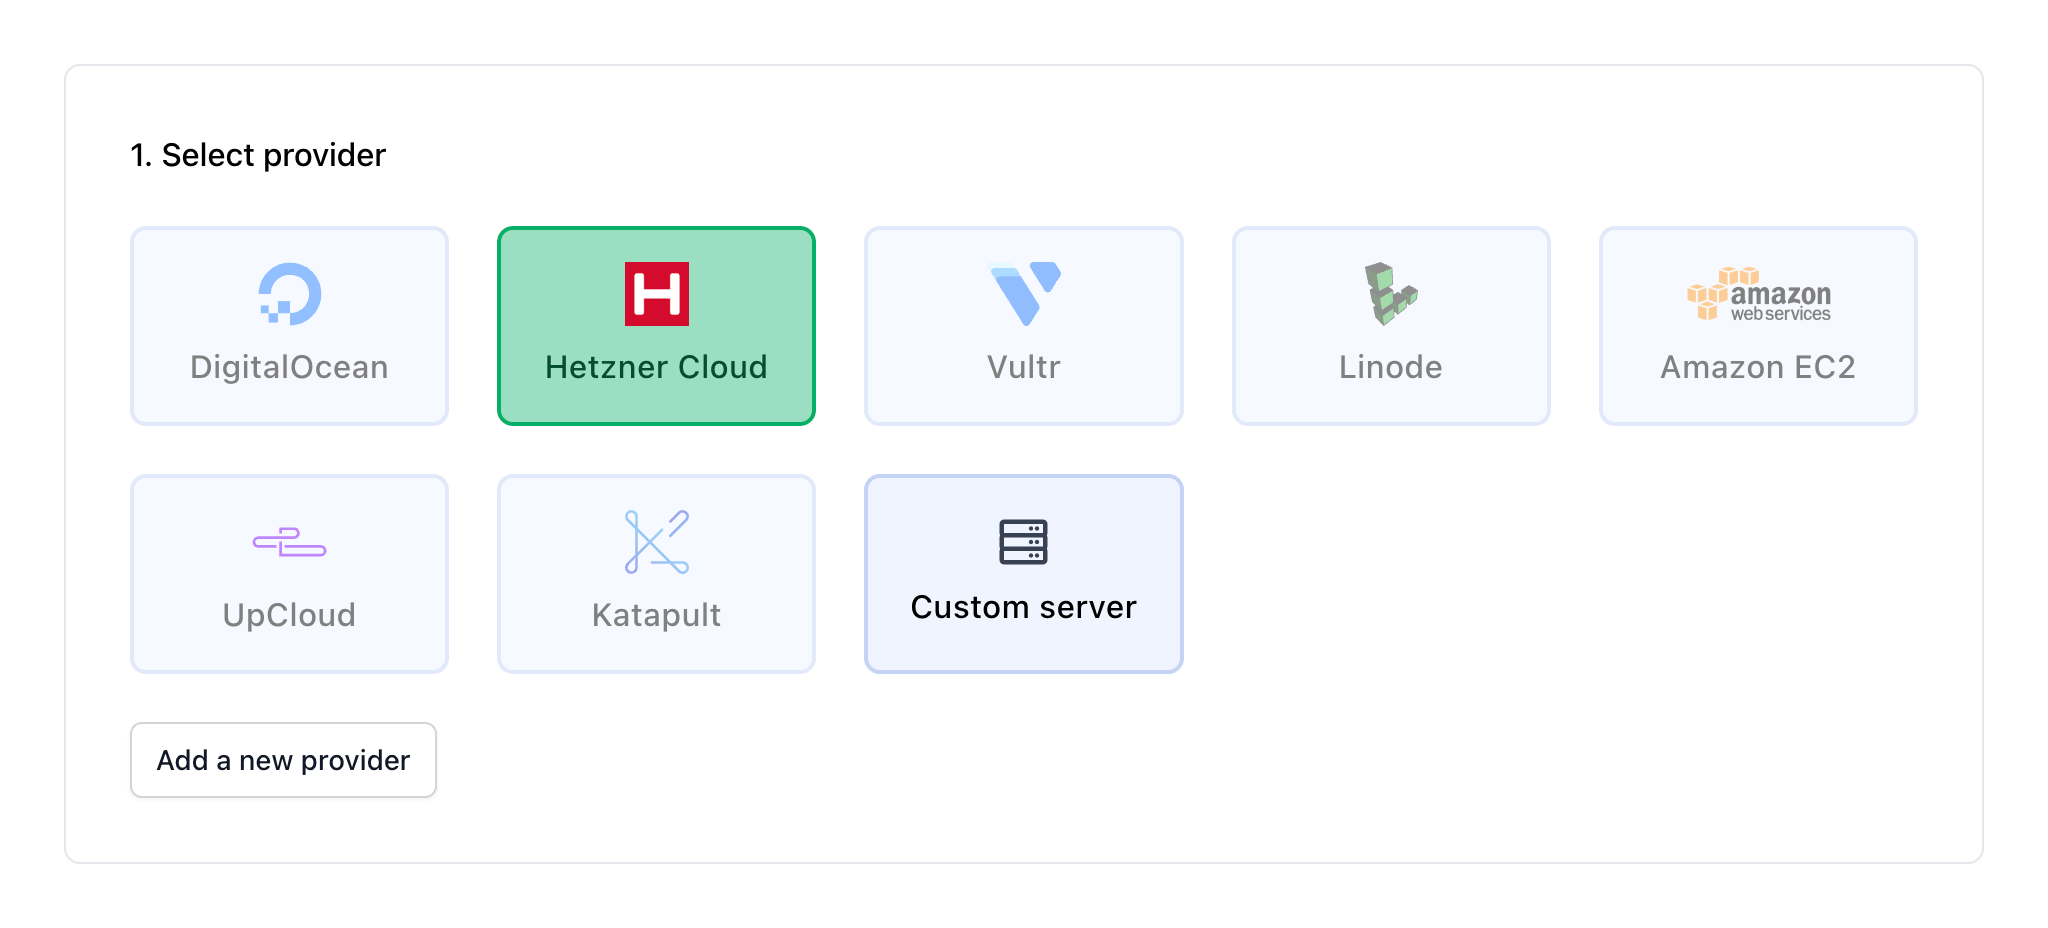
I’m using Hetzner here but there are other options, too. Even a “Custom server” one, but I’m not quite sure how that works.
Now we can configure some server details:
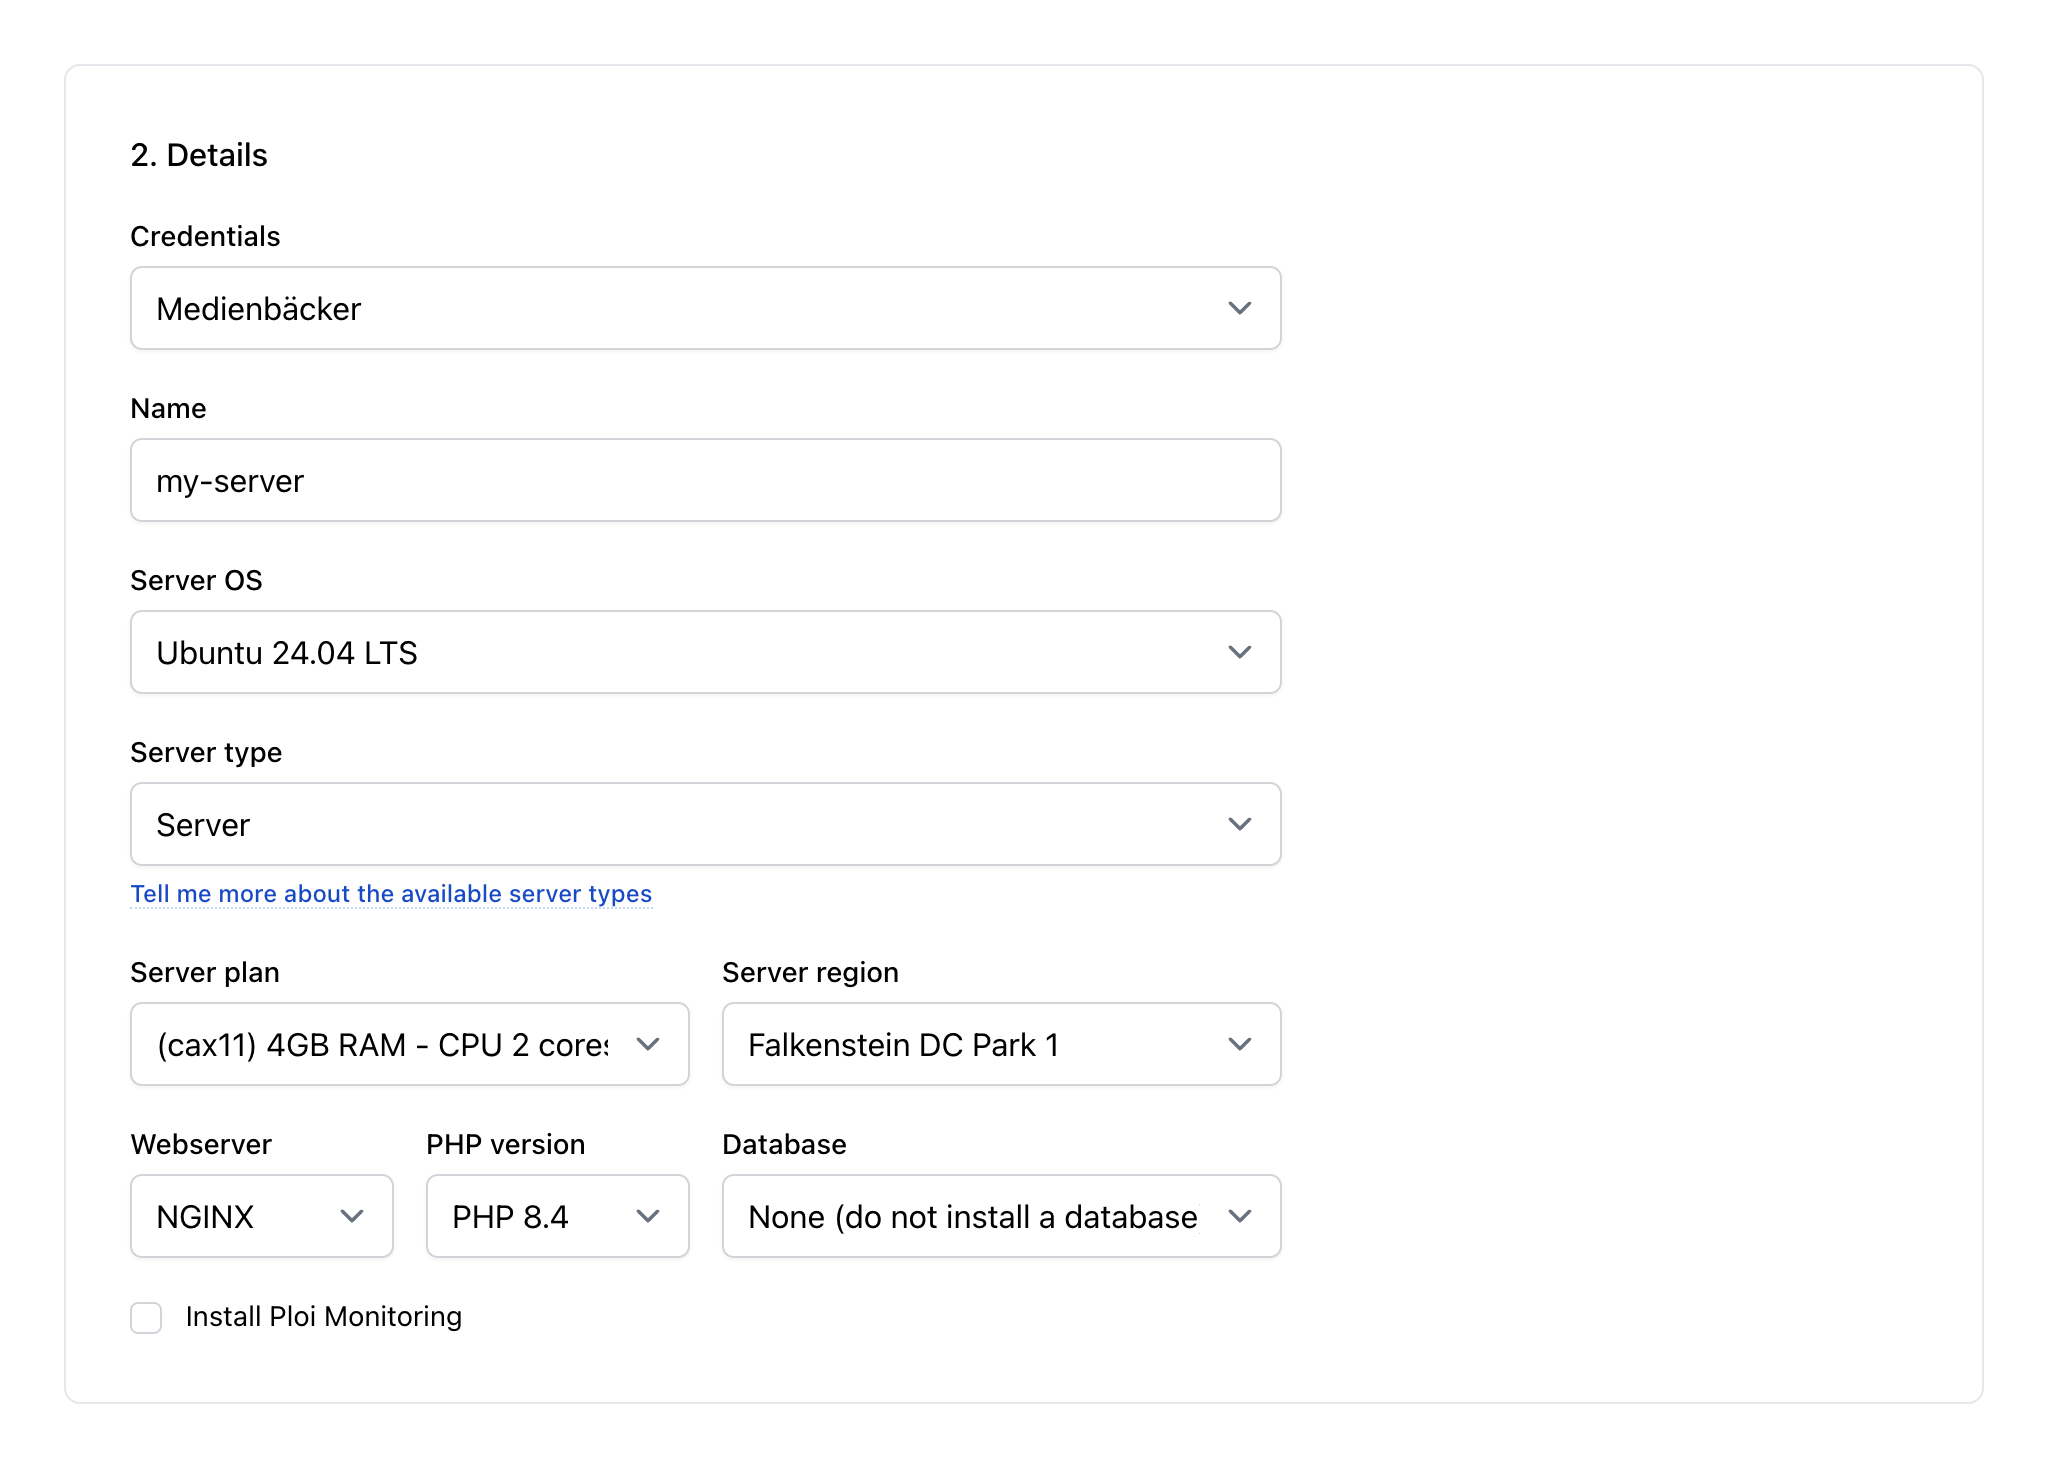
The first select input is “Credentials”, referring to the different API keys you can set up in Profile → Server providers. This way you can easily use different (client) accounts for the same server provider.
While I enjoy the automatically generated server names ❹ , you can also choose a custom name.
Server OS and server type I rarely touch, leaving it at the latest Ubuntu and “Server” respectively.
Depending on your project and server provider, you want to select a powerful enough server plan. Most of the time I use Hetzner’s smallest shared vCPU plan. I’ll go into detail about hosting with Hetzner Cloud further down.
Webserver, PHP version and database depends on your project but so far I always used NGINX, latest PHP and no database.
Now Ploi handles all the technical setup and we just have to wait a bit.
2. Creating a site
After Ploi installed our server we can add our first site. This is where things get interesting:
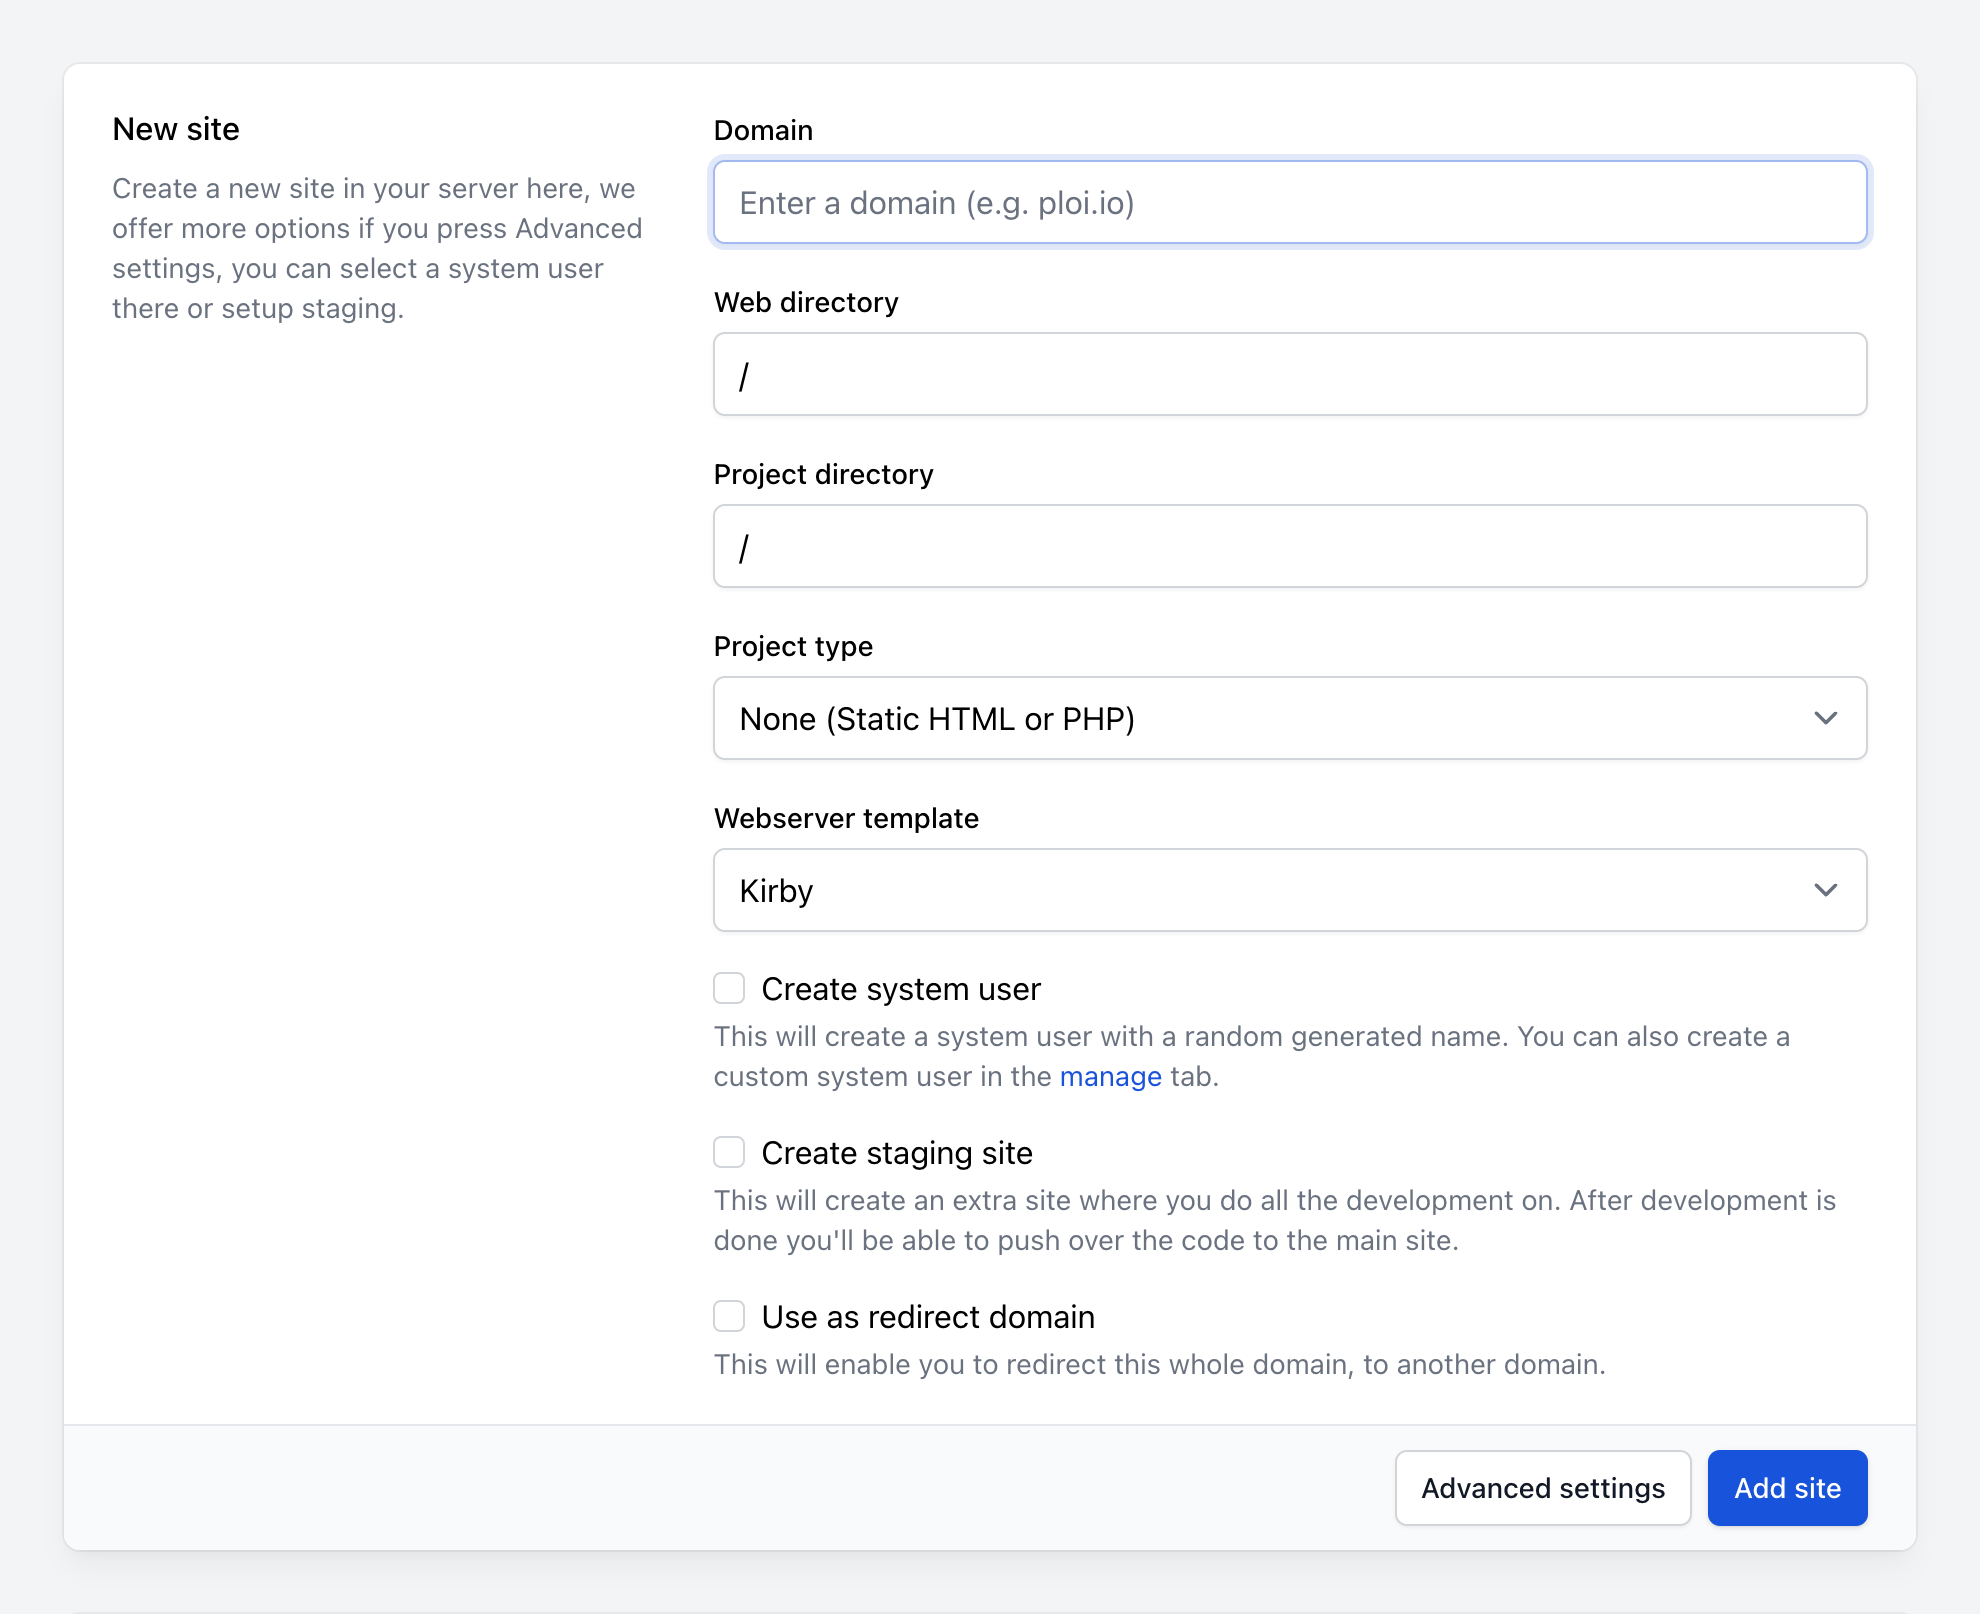
After entering your domain, you’ll have to decide whether to use Kirby’s public folder setup or set the web directory to /.
The only setting I touch here is the “Webserver template”. I’ve created a Kirby template with the Moritz Stückler’s NGINX boilerplate in Profile → Webserver templates. This way I can select “Kirby” here and have the same NGINX configuration for every new site.
3. Connecting a repository
Now our site is created and you’re presented with this screen:
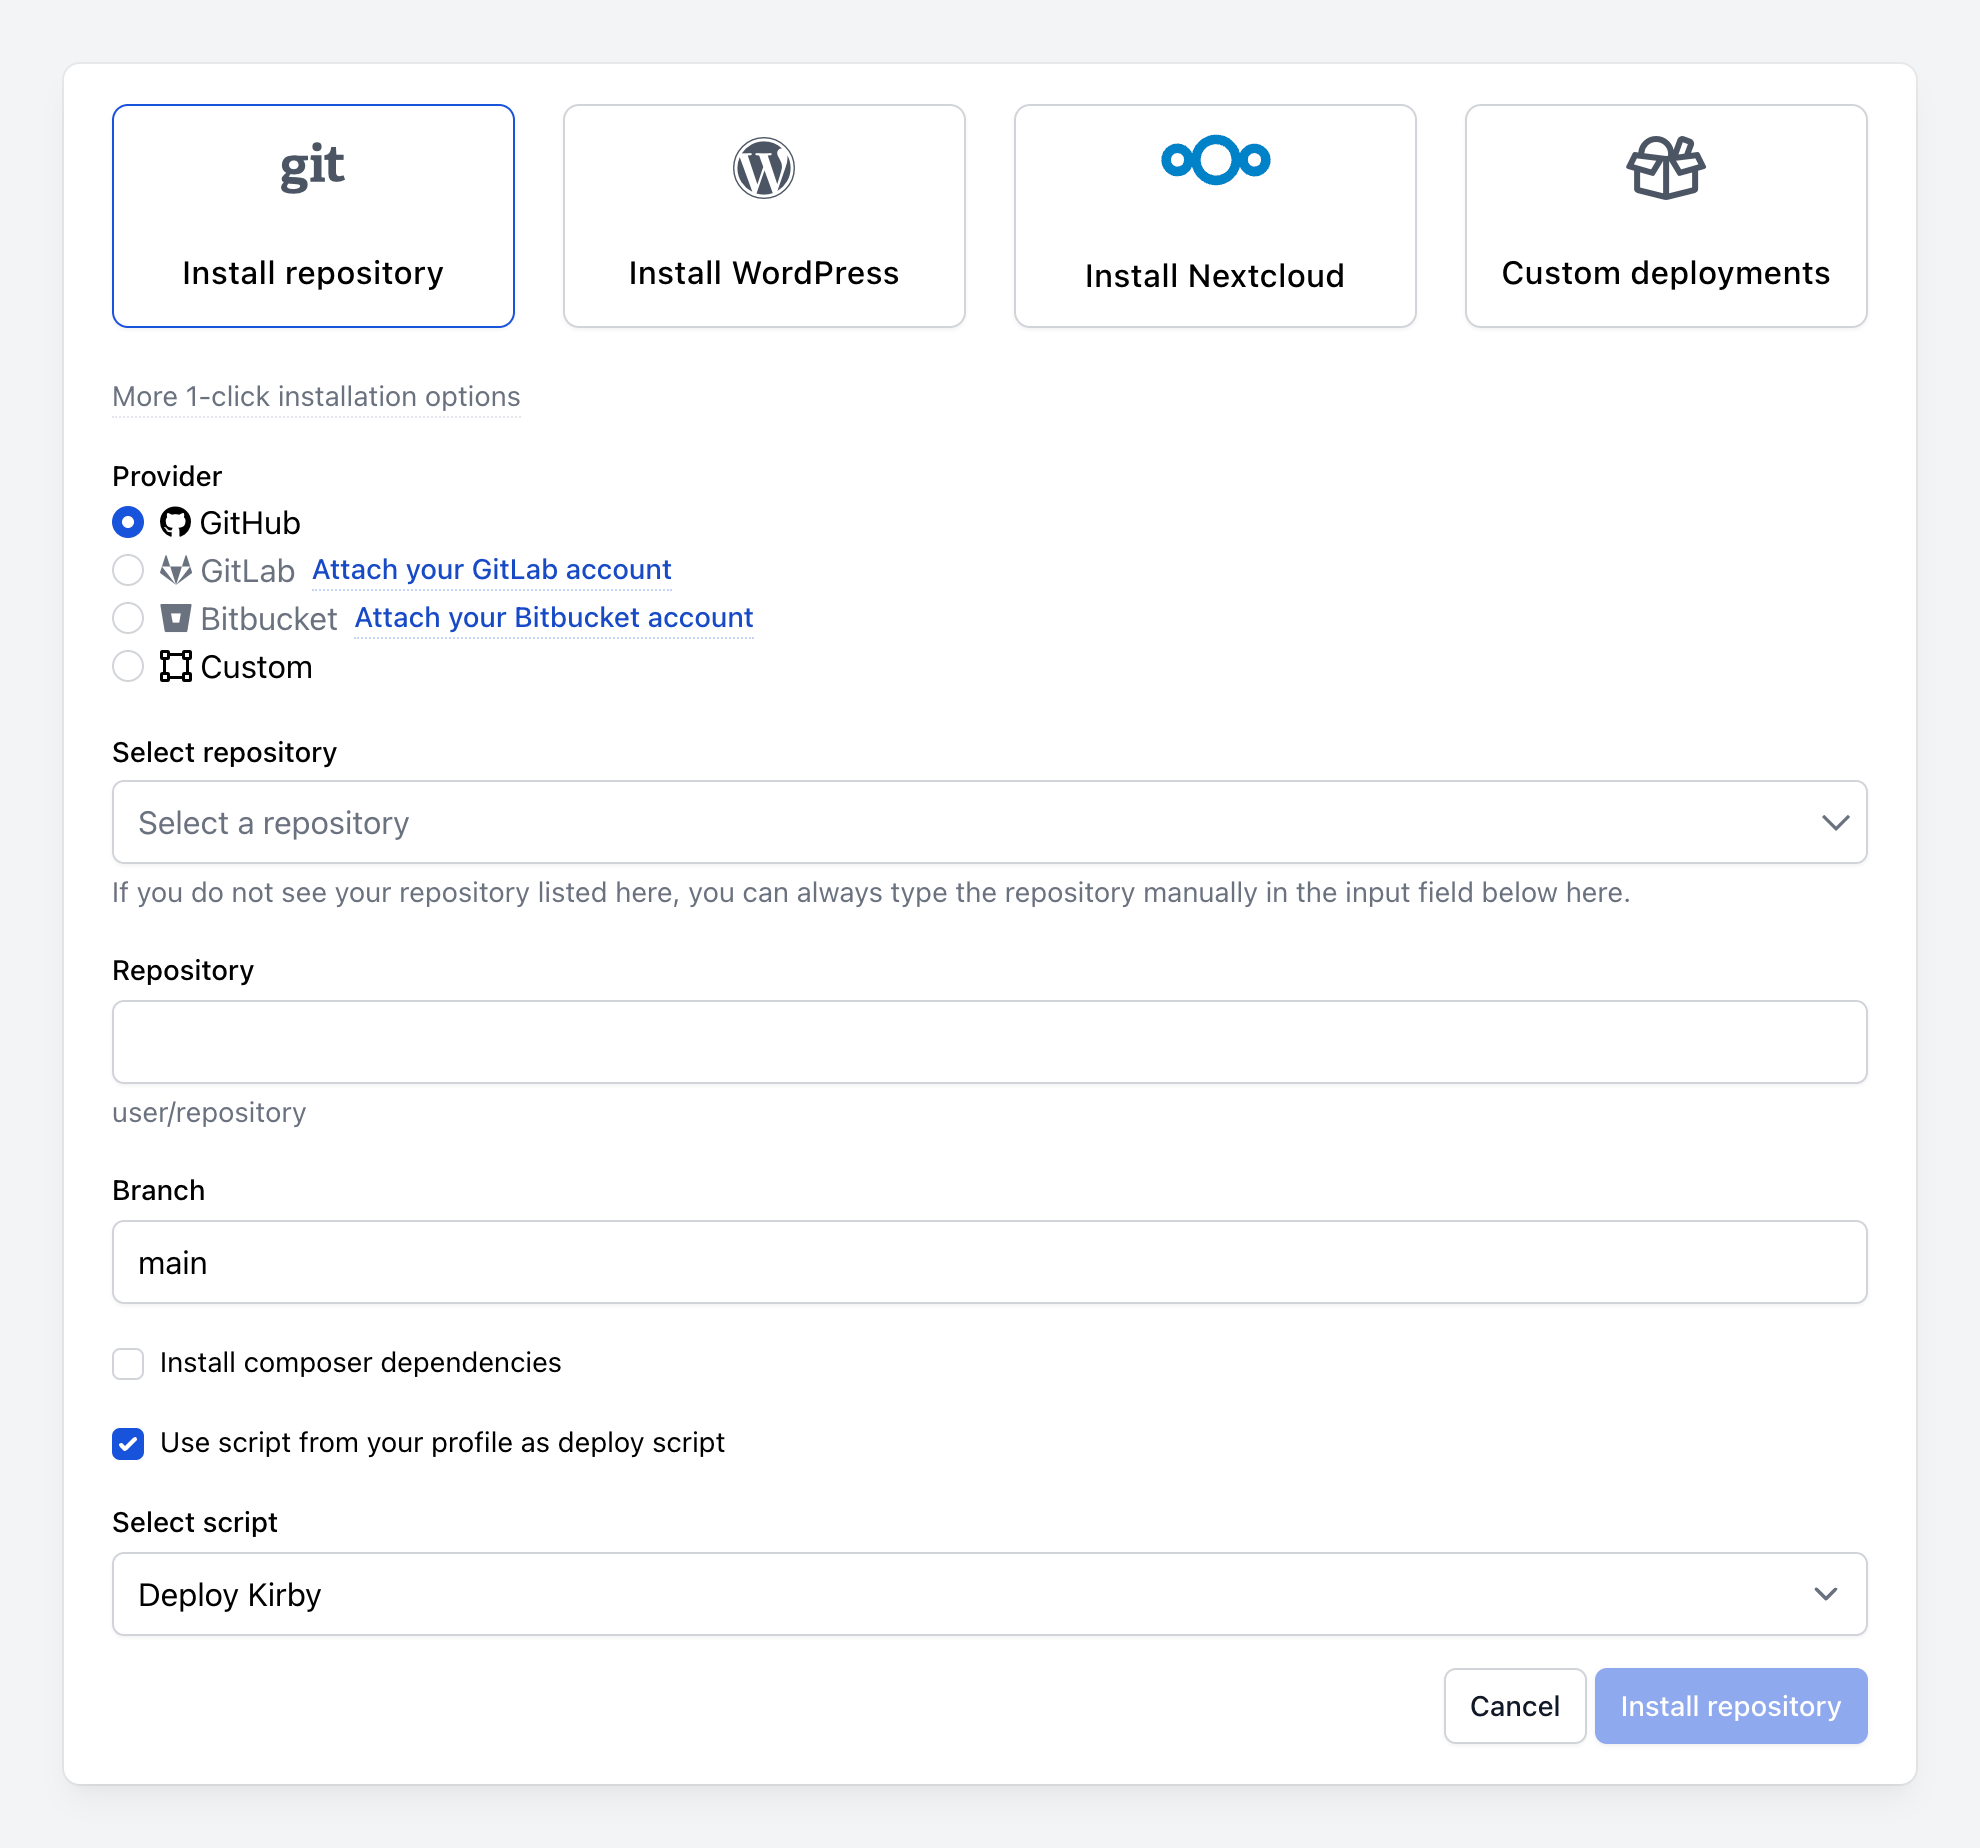
We want to install a GitHub repository so after selecting the first option, there are some additional fields showing up. I think this is all quite self-explanatory and they did a really good job with the UI.
Because I have a custom deploy script for Kirby set up in the Scripts view, I choose it in the last select field. The default deployment script works just fine, but for Kirby sites using the pages cache, I added a command that clears the cache for the site domain using a variable. I’ve also made use of some deployment variables that Ploi provides:
cd {SITE_DIRECTORY}
git pull origin {BRANCH}
echo "" | sudo -S service php8.3-fpm reload

# Optional: install Composer dependencies
composer install --no-interaction --prefer-dist --optimize-autoloader

# Optional: clear pages cache for site domain
rm -rf {SITE_DIRECTORY}/site/cache/{SITE_DOMAIN}/pages || true

echo "🚀 Application deployed!"
Now that we installed our repository we want the site to be deployed every time we push. This is surprisingly easy and we just have to enable “Quick deploy” in the “Repository” view:
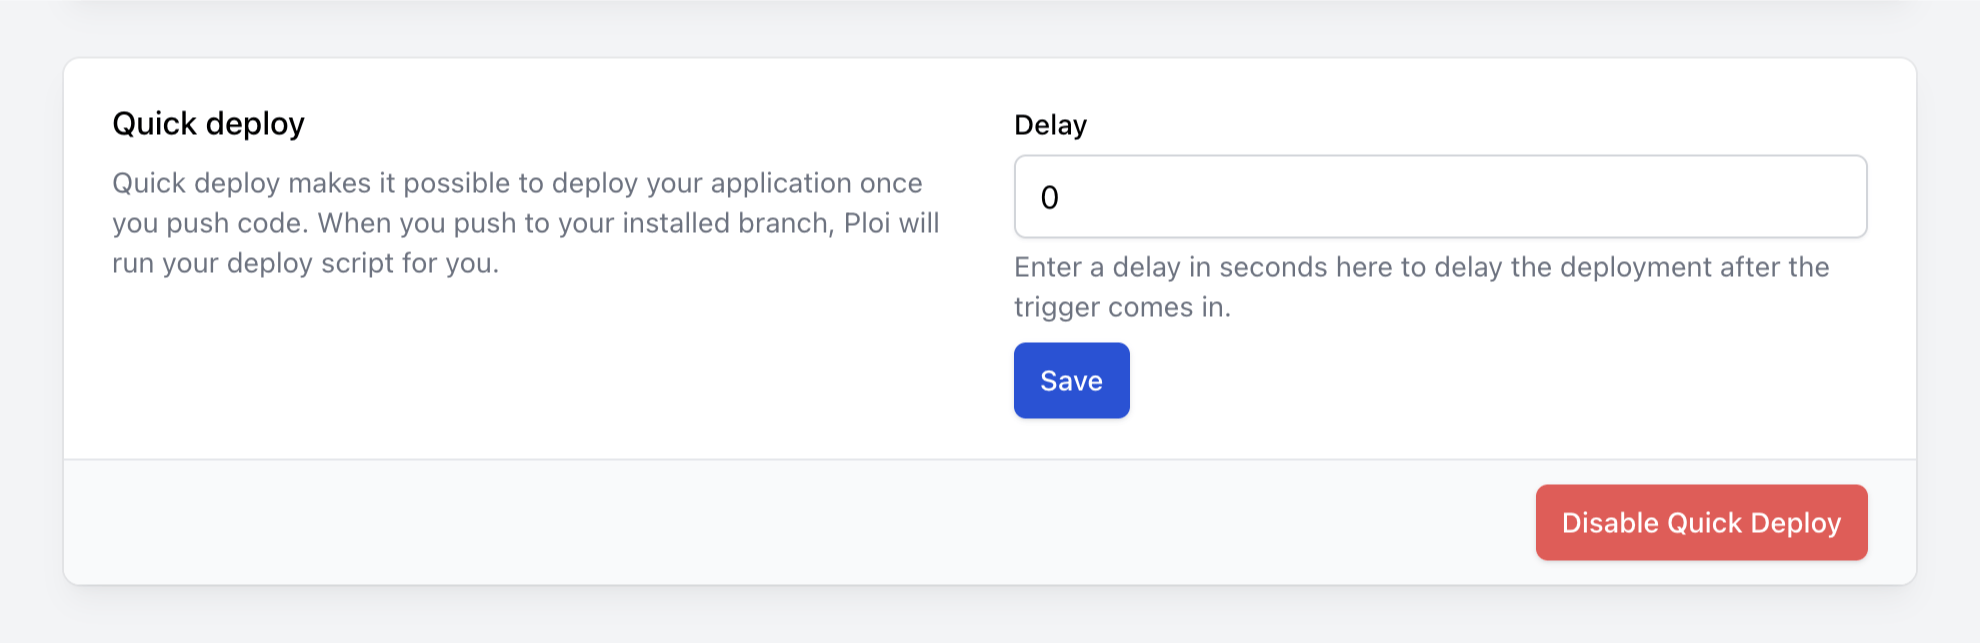
The branch you’ve installed will now listen for the push event and deploy the site immediately. As someone who likes to surprise clients and partners by how quickly some changes can be made, I really appreciate the speed.
4. Setting up a SSL certificate
Encrypting your site with a free Let’s Encrypt certificate is super simple. Just click on the SSL tab in your site and enter the domains you want to encrypt. It will then automatically renew:
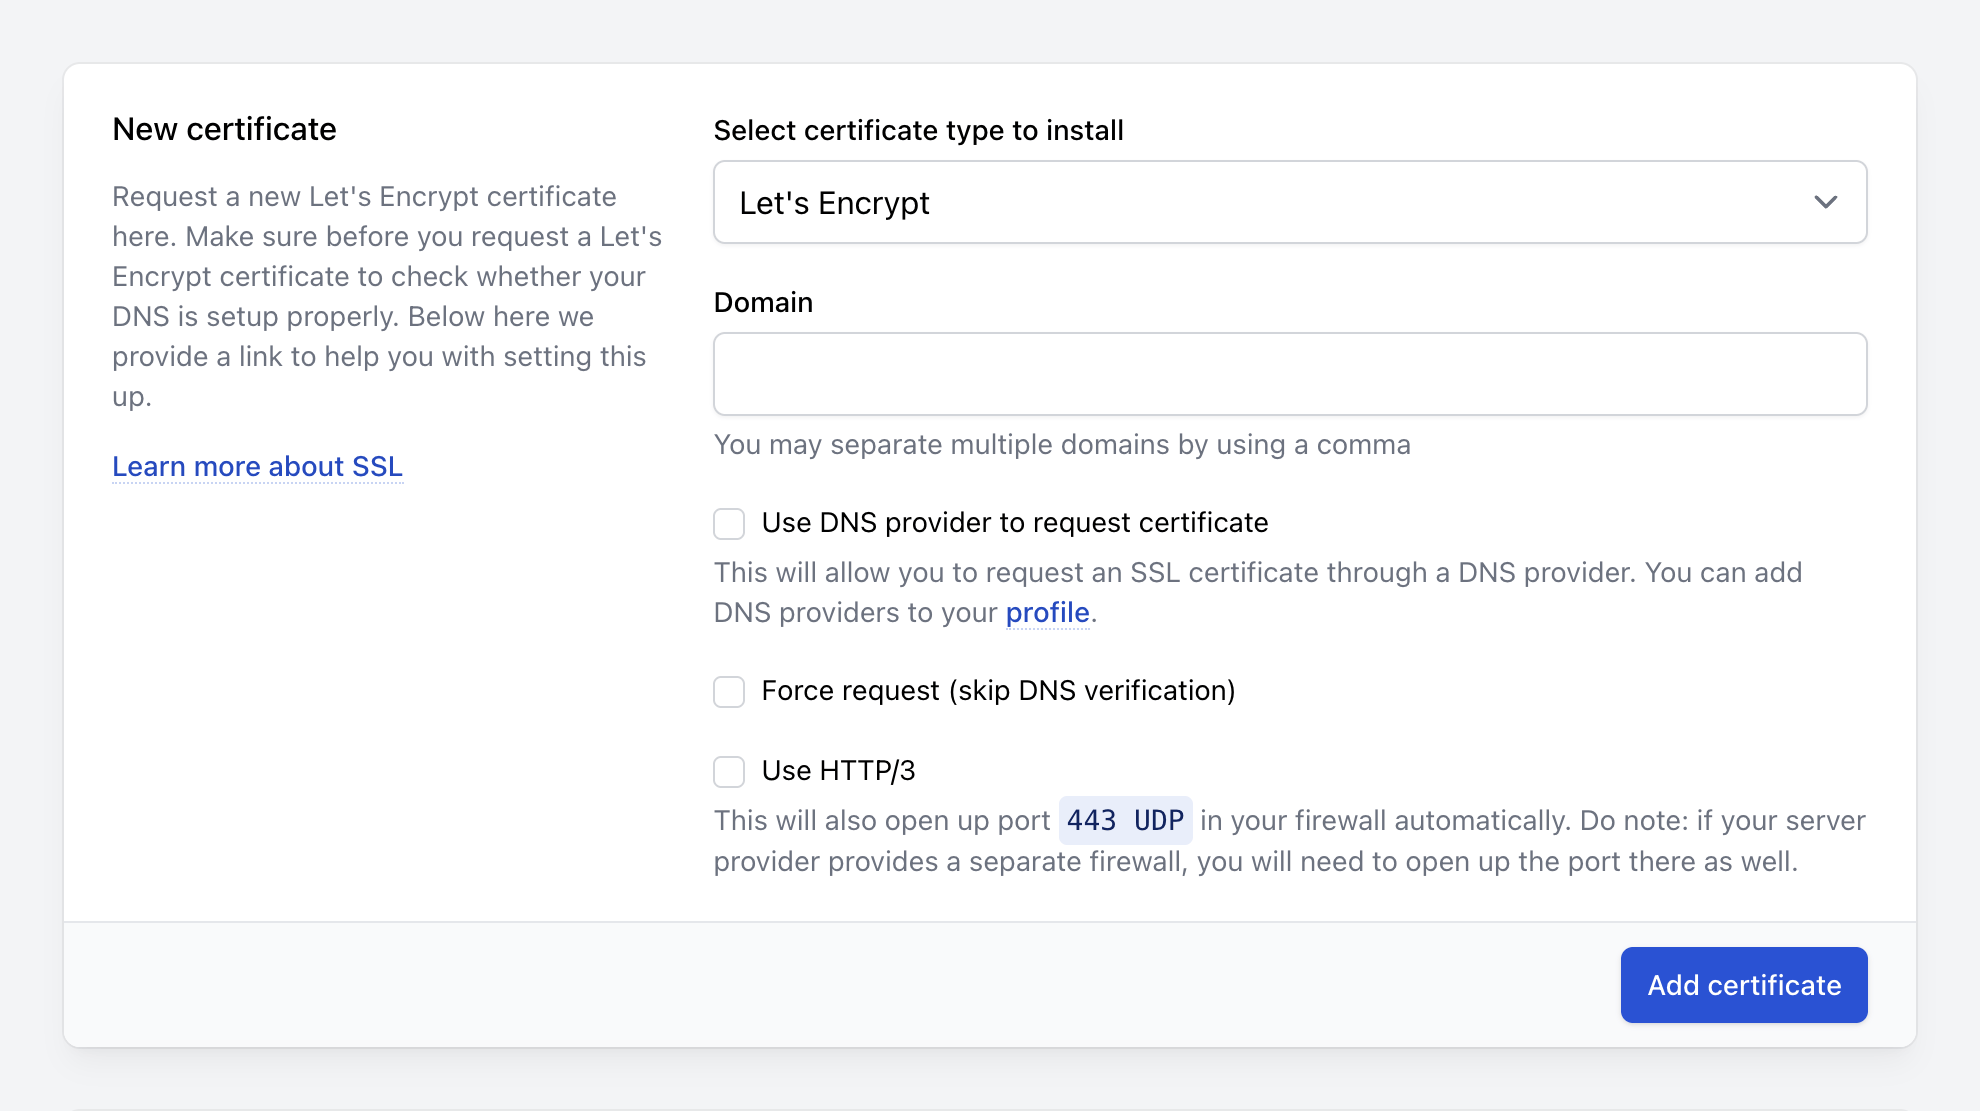
That’s it
Congrats, you’ve created a new server, a new site, connected a repository and installed an SSL certificate. Additional sites are super easy now.
Pricing
Ploi starts at 8,00 € per month with 5 servers included. I’m now at the “Unlimited” plan which has some advanced features I need ❺ and costs 30,00 € per month.
If you want, you can use my affiliate link for signing up.
Sending emails with MailerSend
While you can setup sendmail in Ploi, I wouldn’t recommend it. As they mention in their docs, your mails will probably just end up in spam folders. If you want to send emails, you need a service specialized in that. I’m currently using MailerSend by a recommendation of Tobi and it works great with my server setup.
Setting up domains
To use a service like MailerSend, you’ll need to verify your domain first. This involves adding some DNS records to prove you own the domain. I liked the “automatic” verification they offer, even allowing you to forward an email with instructions to your client or their service provider:
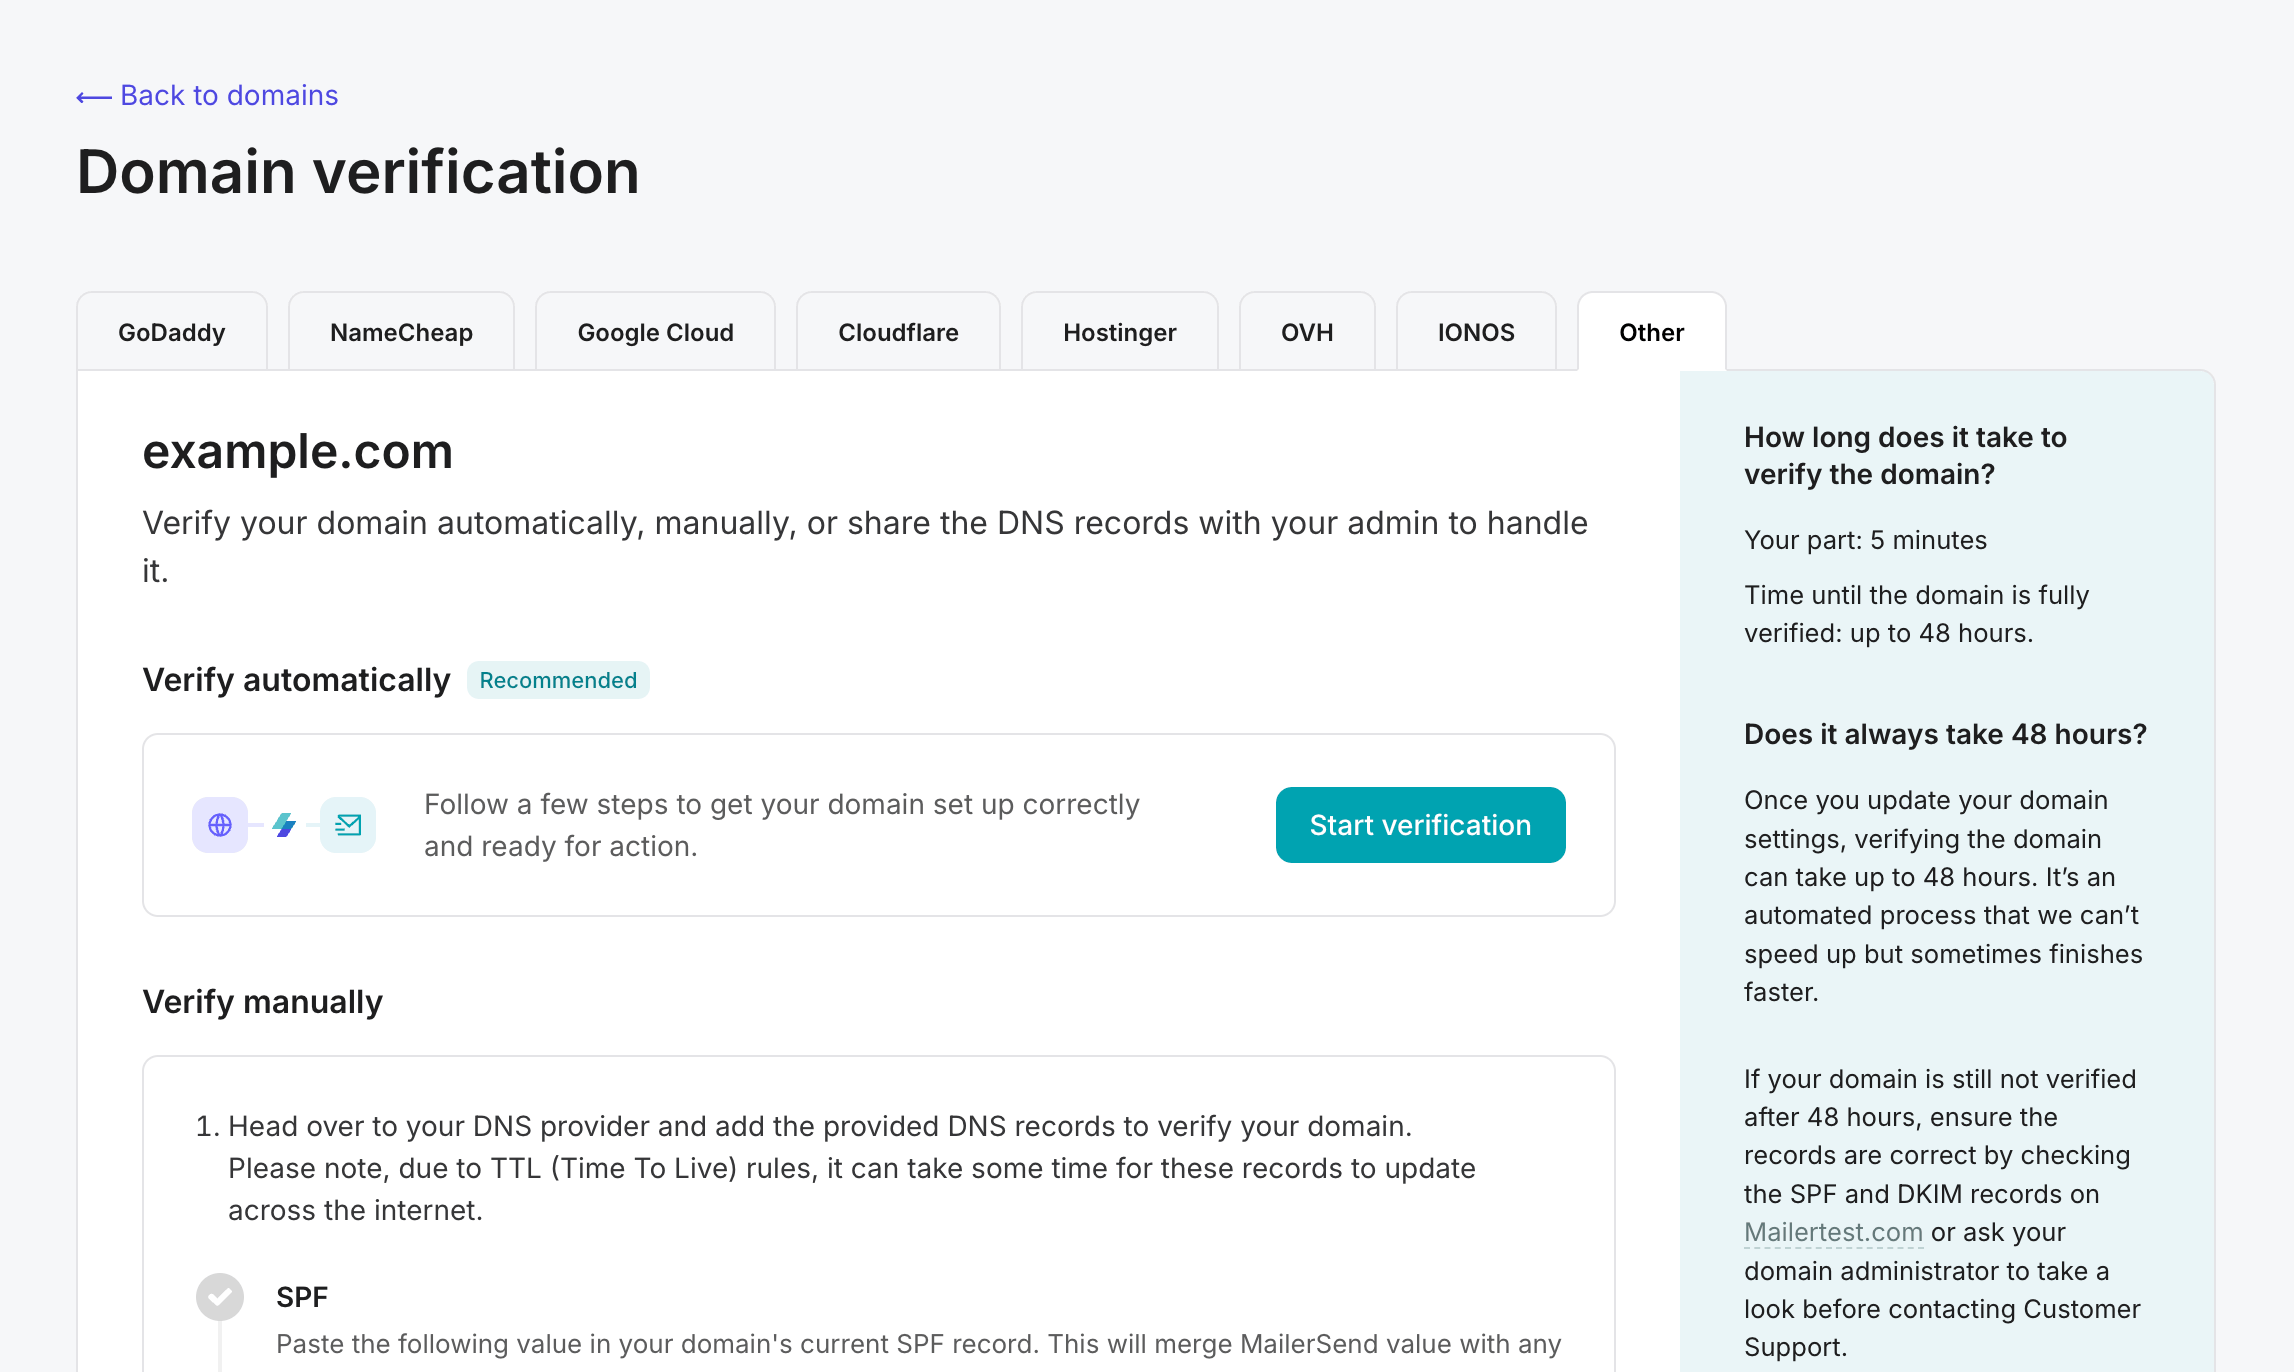
Using MailerSend in Kirby
After verifying a domain, you get SMTP credentials (username and password) that you can then use to send emails. In Kirby, it’s super easy to set up your transport configuration globally in the config:
'email' => [
  'transport' => [
    'type' => 'smtp',
    'host' => 'smtp.mailersend.net',
    'port' => 587,
    'security' => 'tls',
    'auth' => true,
    'username' => '…',
    'password' => '…'
  ]
],
Now every form you set up will use the MailerSend transport settings and you even get some nice statistics about how well your clients are doing (and how many emails get rejected):
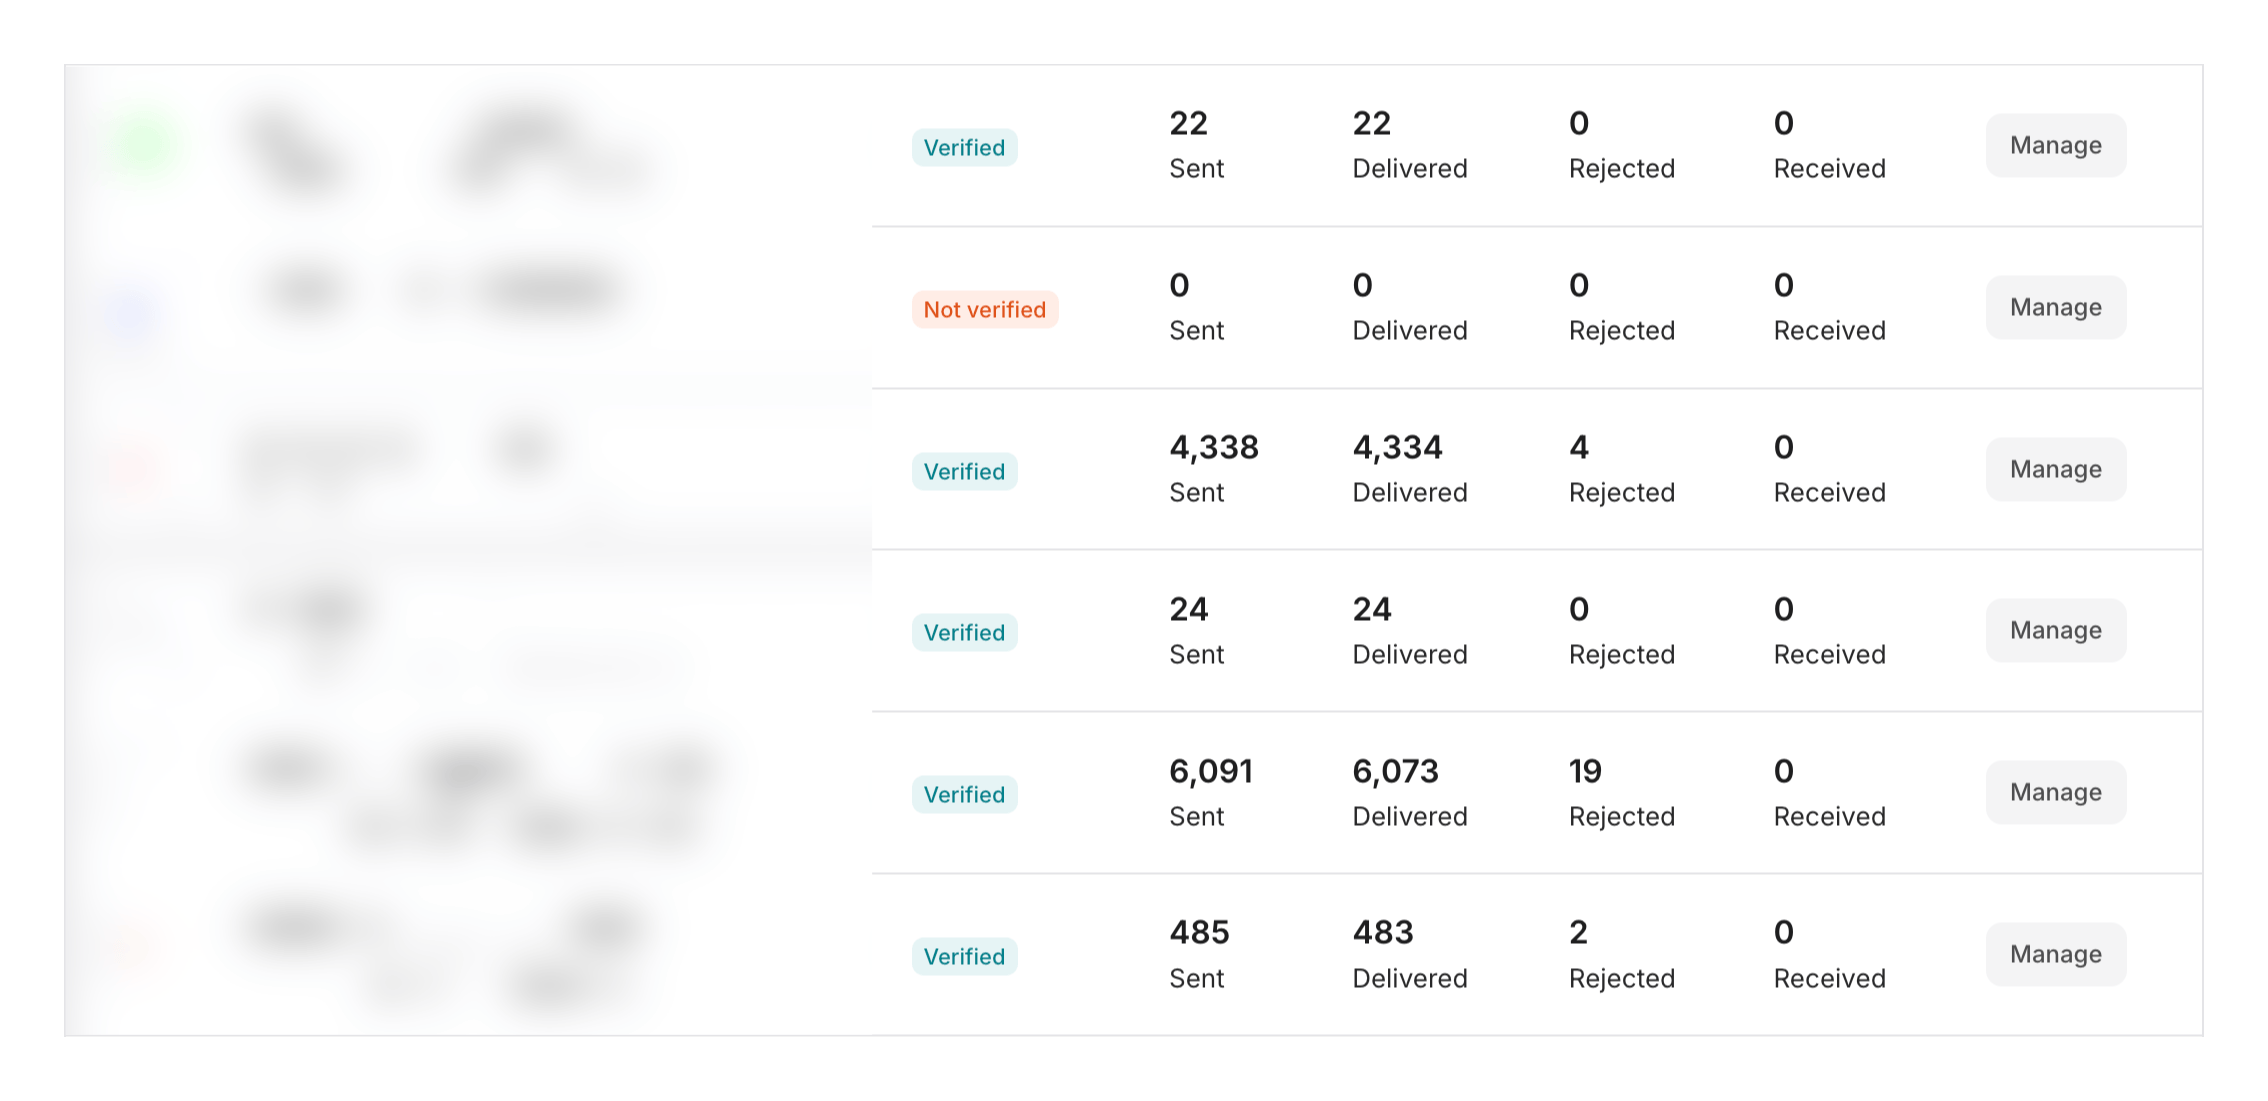
This feels like a very robust setup now. Relying on sendmail, I sometimes had breaking changes on servers that I didn’t even notice, breaking contact forms for my clients 😱.
Pricing
MailerSend is free for 3,000 emails per month, with additional emails costing $1.00 per thousand. For 50,000 emails you’re paying $28 per month in the “Starter” plan. That’s the one I’m currently using.
If you’re interested, you can use my affiliate link to sign up and try it out.
Hosting with Hetzner Cloud
Now, finally something about the actual servers. After trying various providers, I’ve settled on Hetzner Cloud for several reasons:
- Price-to-performance ratio
- European data centers
- Reliability
- Simple, pretty interface
- Easy team management for client servers
Connecting Hetzner to Ploi
If you want to use Hetzner Cloud with Ploi, you’ll just have to create an account there and generate an API token for your account:
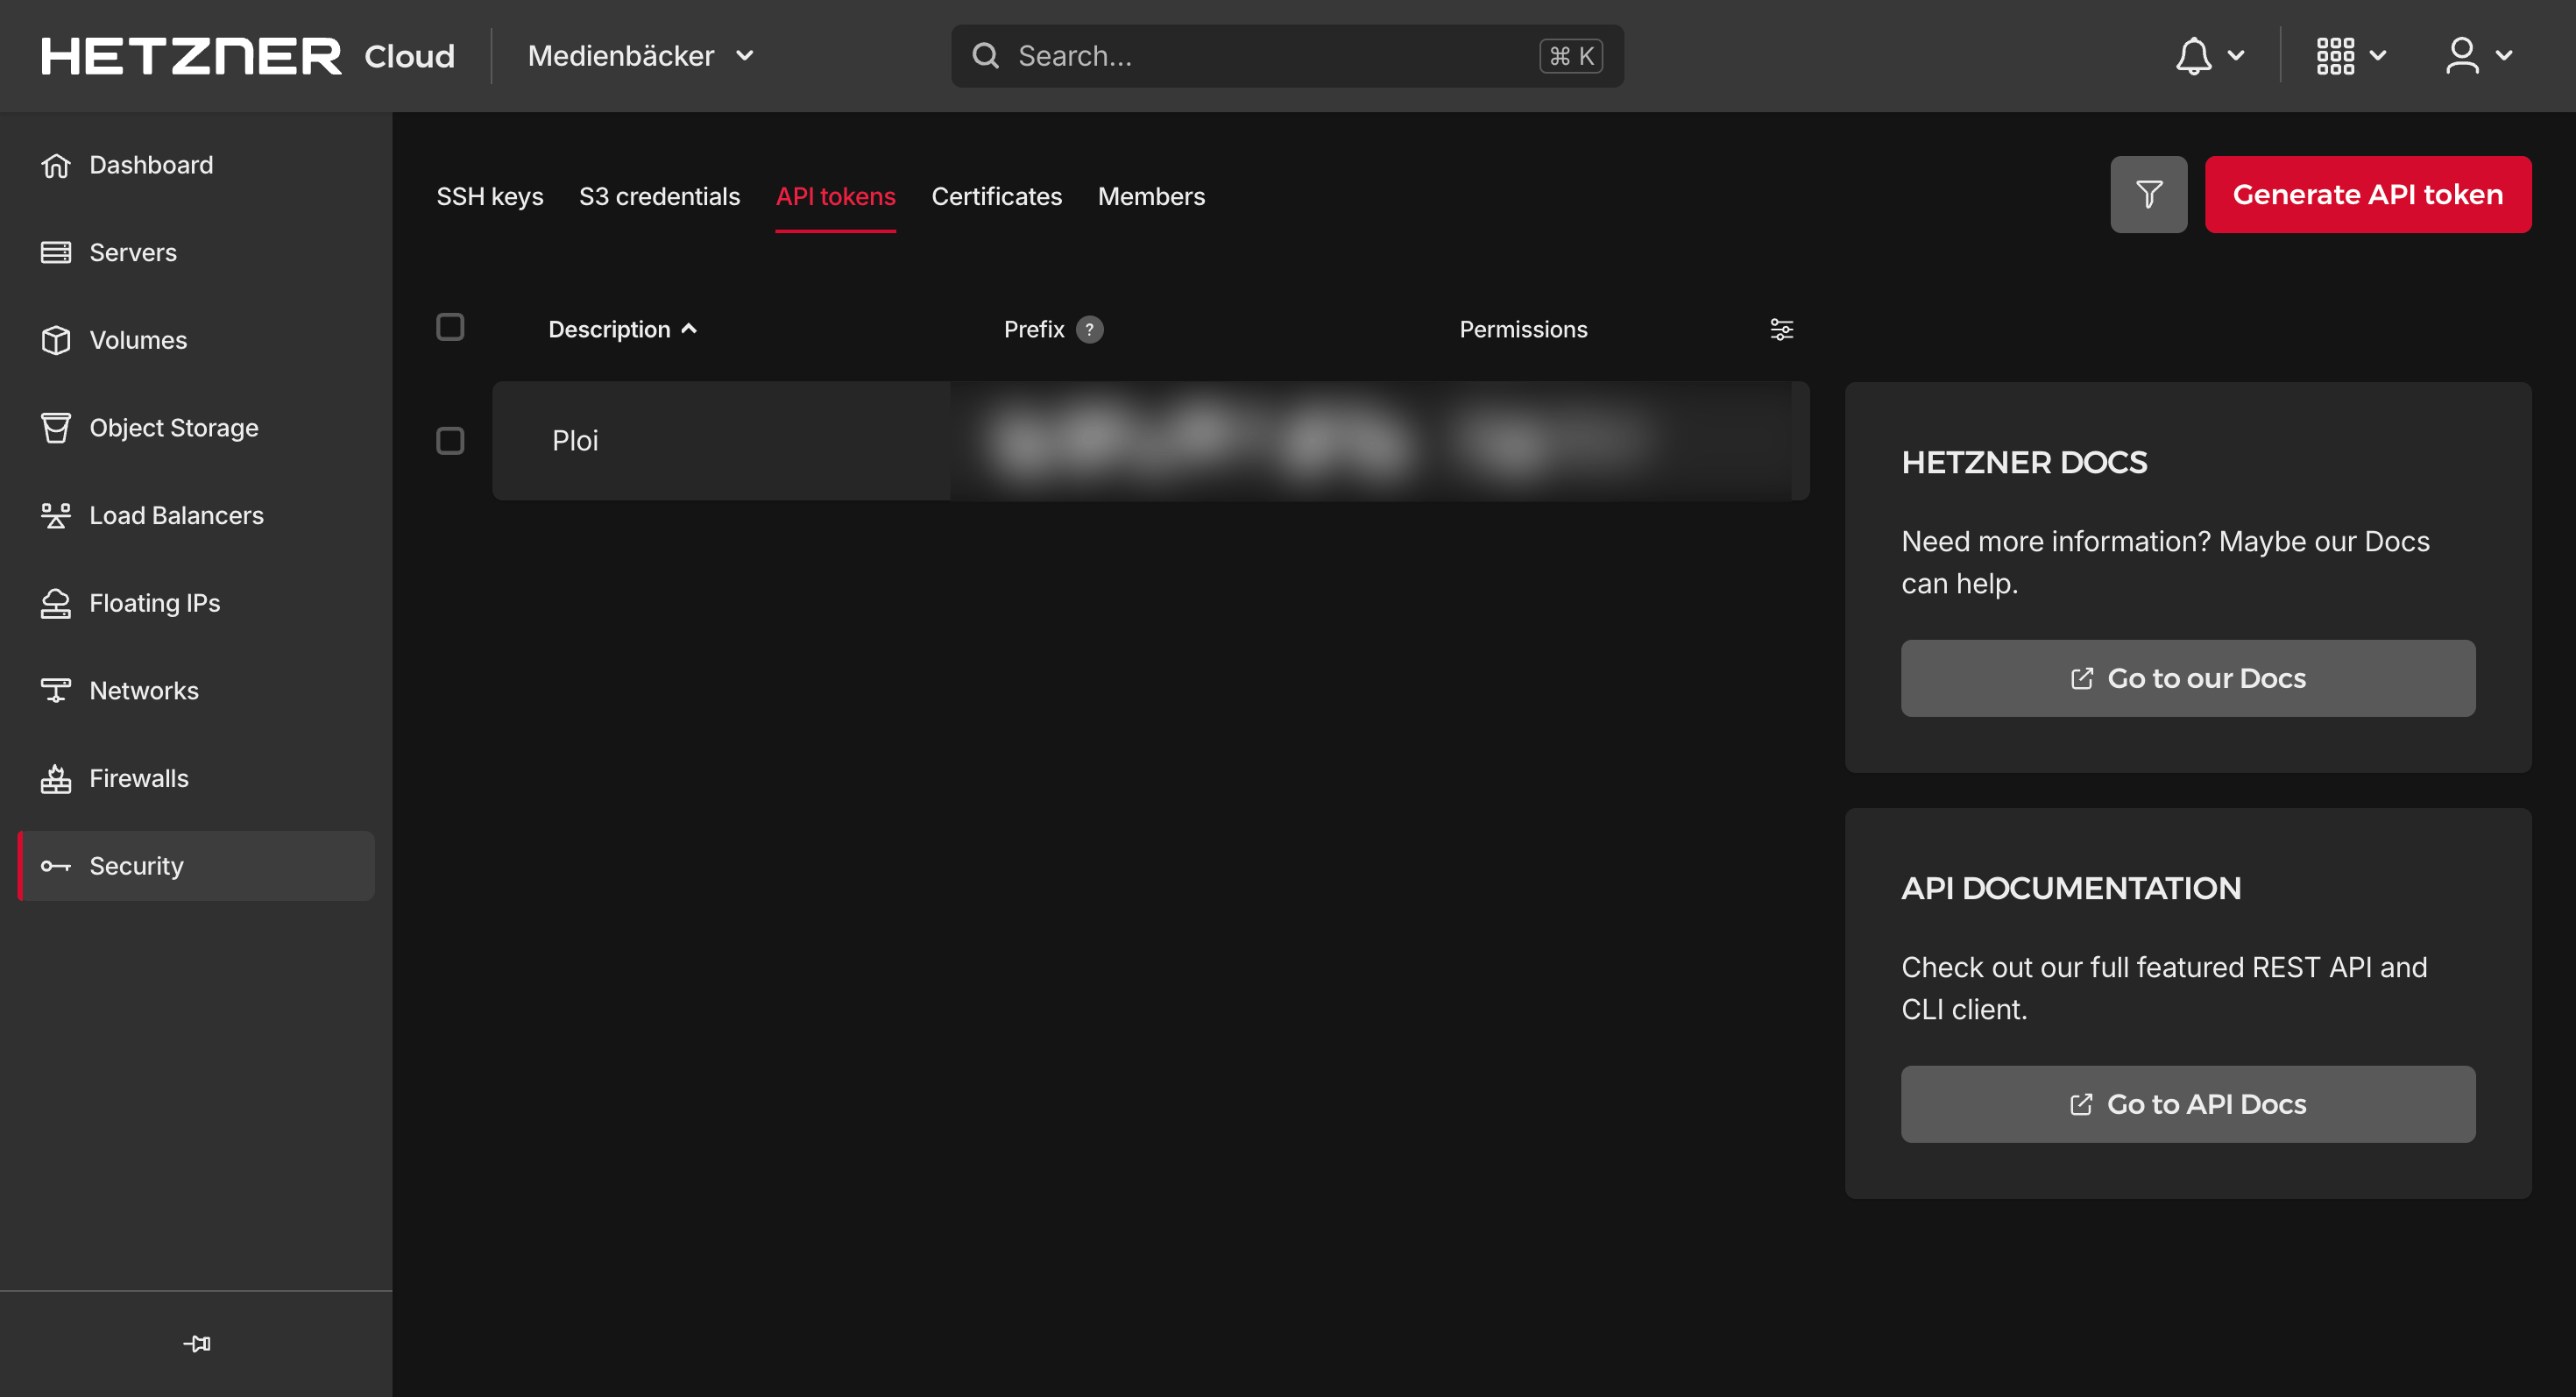
After entering these credentials in Ploi, it can now create servers and manage them in your name. You’ll almost never look at the Hetzner Cloud UI, which is a shame because I think it’s really pretty.
Choosing a plan
For most Kirby projects, I use their CAX11 plan with 2 vCPUs, 4GB RAM, and 40GB NVMe SSD storage. This is more than enough for most Kirby projects with very good performance. I’ve run sites with thousands of daily visitors without breaking a sweat.
Fun fact: I once migrated a client from an expensive 25,00 € per month managed hosting to this plan, and their site load time decreased significantly.
Pricing
Hetzner’s CAX11 plan costs just 4,59 € per month. They have various other plans if you need more power, but for most Kirby sites, this entry-level plan is more than sufficient.
Here’s an affiliate link with 20,00 € cloud credits if you want to try it out.
Final thoughts
This setup has transformed how I approach hosting for both client projects and my own sites. It’s a good balance between control and convenience — I can focus on building websites without worrying about server management headaches.
What’s your current hosting setup? Have you tried any of these services? I’d love to hear about your experiences or answer any questions over on Mastodon.
- There are hosting providers with incredibly slow hard disks, unsuitable for a file-based content management system like Kirby. I also encountered servers with weird caching issues that need special configuration for every single site. ↩
- I’m always getting laughed at by programmer friends about the fact I prioritize how software looks, but it’s quite important to me. Sure, most importantly it should “work”, but it doesn’t hurt if the UI doesn’t hurt my eyes. ↩
- If you’re stumbling over this article in the future and notice that some screenshots look outdated, please let me know. ↩
- Two of my favourites: “dreamy-squirrel” and “sassy-chipmunk”. ↩
- Among others: Unlimited servers, automatic file backups, team management and site monitoring. ↩
Comments
Nothing yet. Say the first thing.
Sign in to join the conversation.