
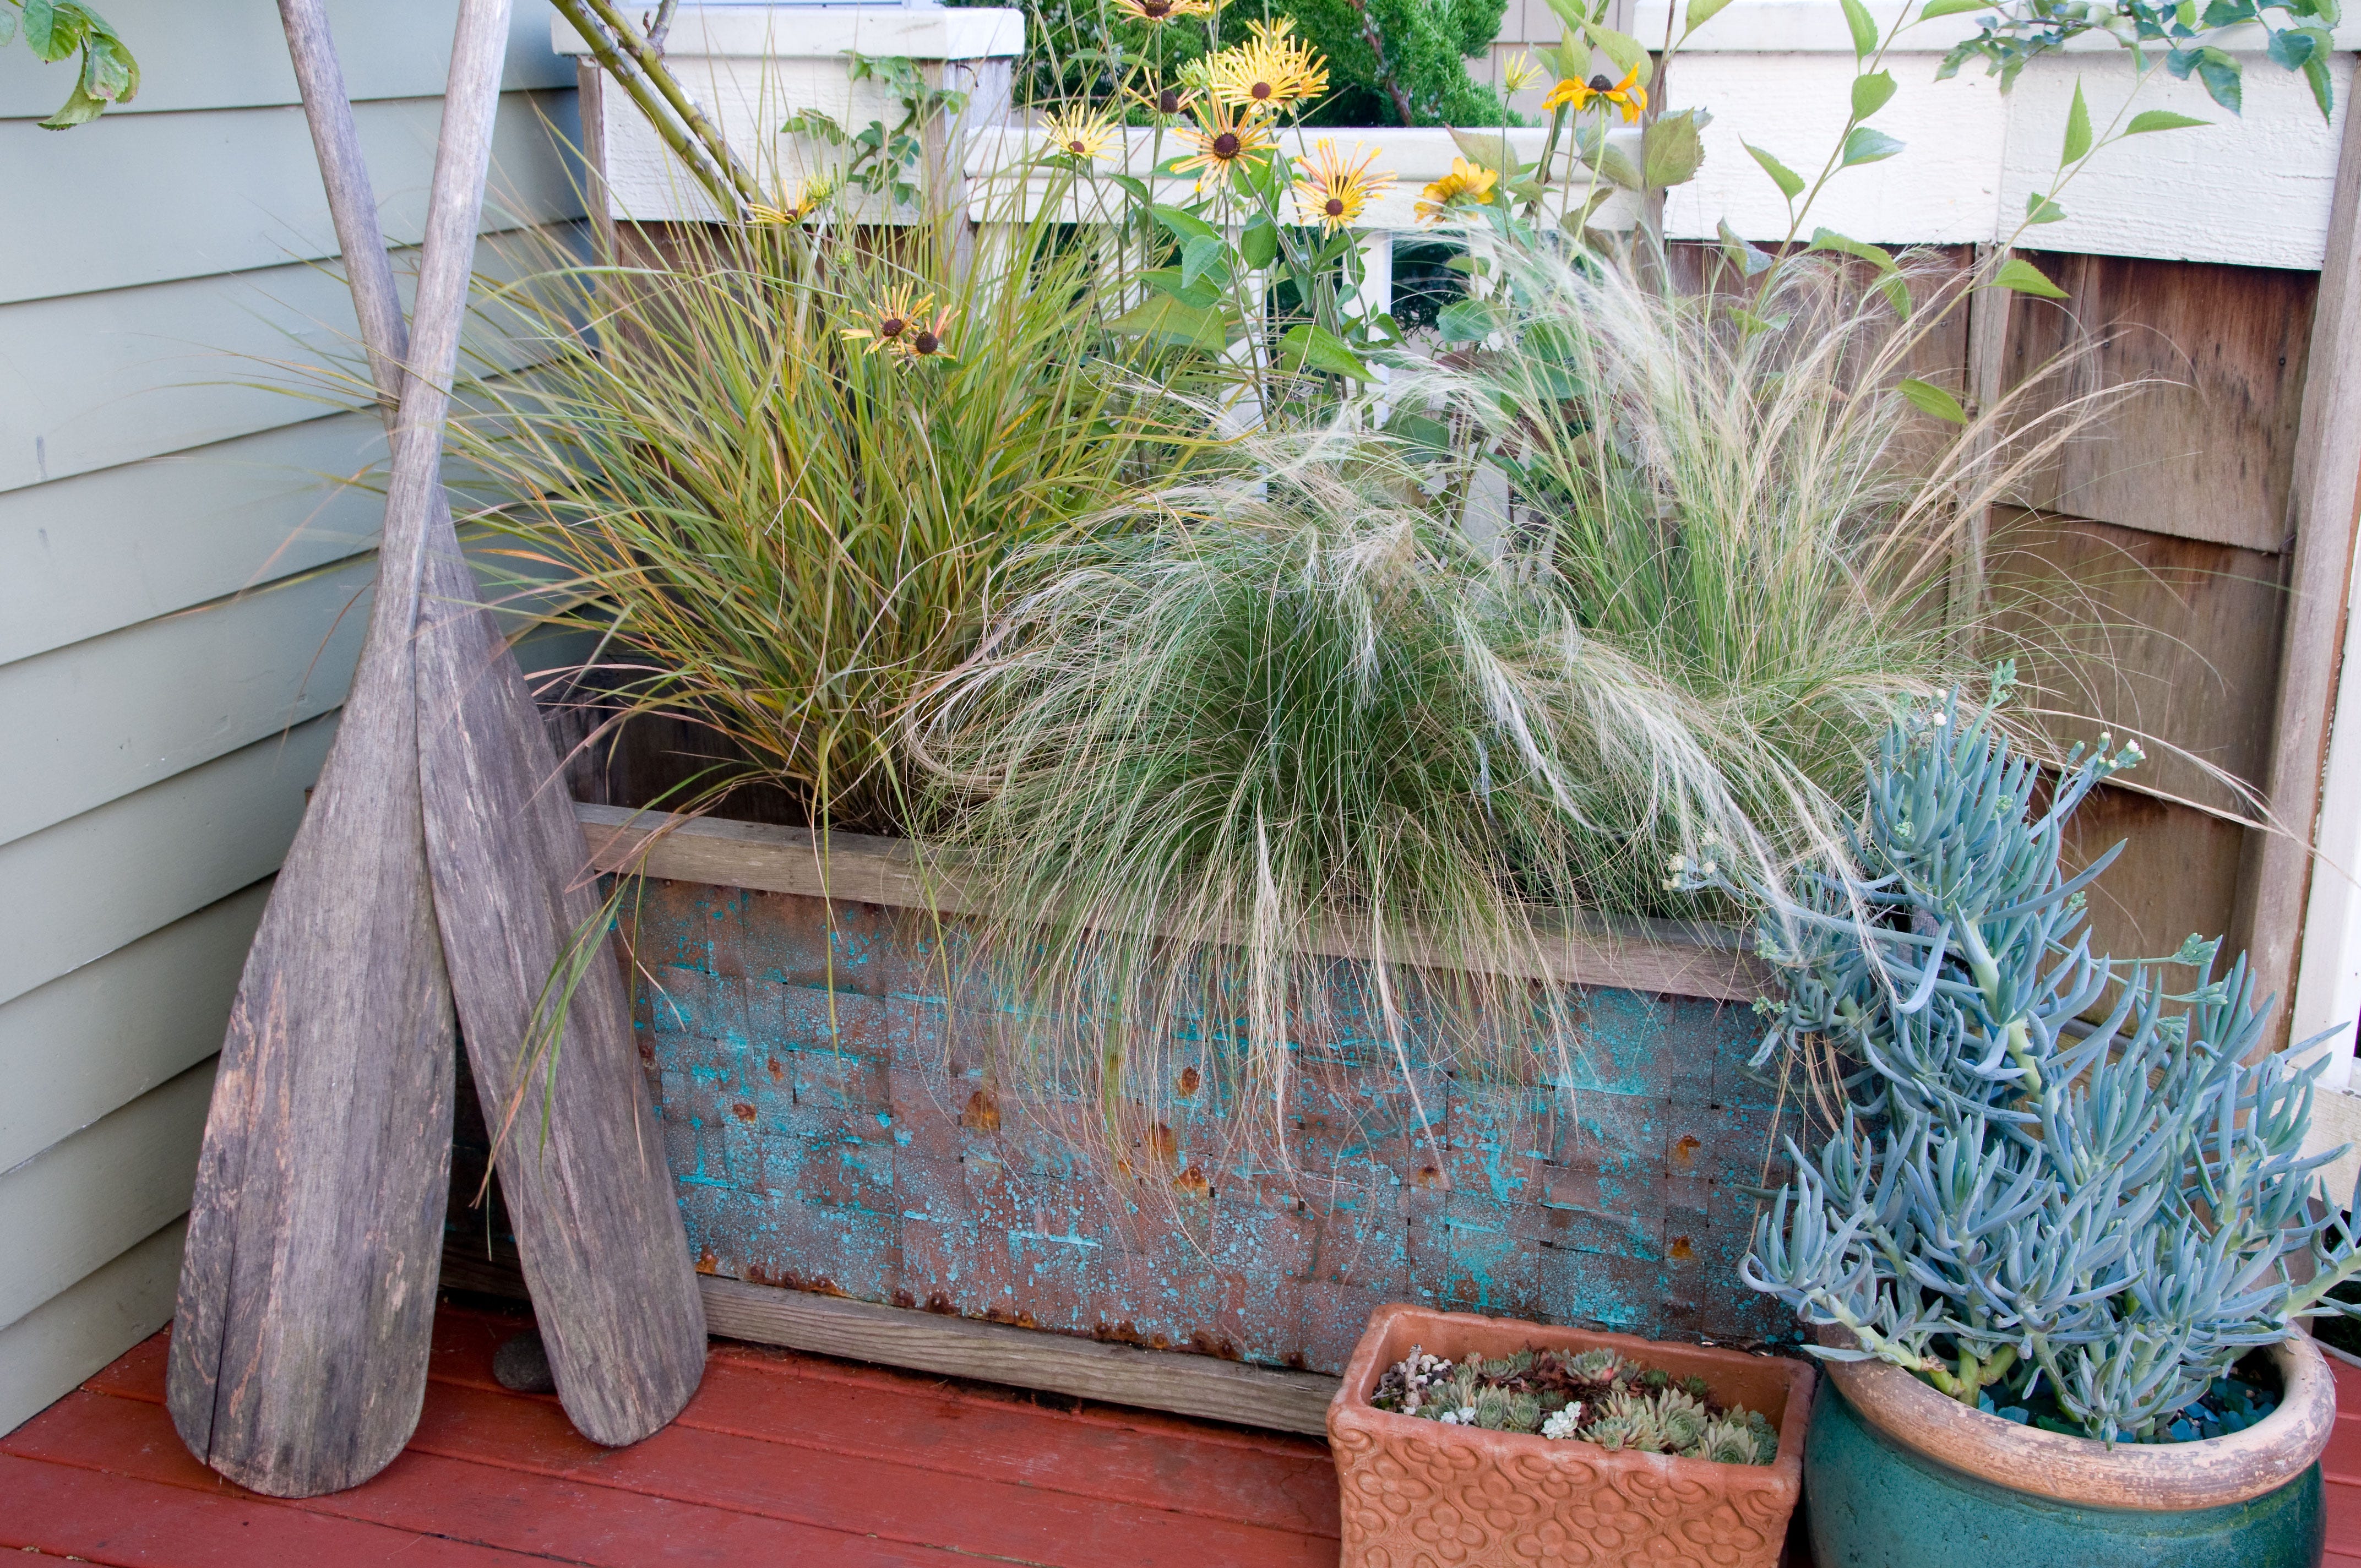
This striking copper-clad planter box carries the show with a supporting cast of textural, blond ornamental grasses and drought resistant perennials that shimmer in the slightest breeze. The simple angular lines of the box contrast with the loose planting style for a sophisticated, but casual effect and a breezy beach vibe so fresh you can almost smell the salt air. Its new copper surface adds panache while the patina finish complements the aged cedar for a look that more valued garden antique than cat-off garden giveaway. See “Instant Patina” below for an easy homemade solution that produces an authentic weathered look.
I used an old cedar planter that was showing its age — and not in a good way. If you don’t already have a planter ripe for a makeover, wooden boxes are stock items at most garden centers.
Soft, fine gauge copper is easy to work and can be cut with a pair of old scissors, just be careful around the resulting sharp edges. It’s available from a number of sources: hardware stores and lumber yards sell rolls of copper flashing as termite barrier, craft stores stock sheet copper and adhesive copper tape for art projects, while nurseries and garden centers sell rolls of copper barrier as an organic control of slug and snail control.
Wooden planter box; mine is 12 inches tall x 48 inches wide x 18 inches deep
1 roll copper flashing, 8 inches wide by 20 feet long
Thumbtacks
Upholstery tacks, brads, or small nails
Measuring stick
Ballpoint pen
Old scissors
Rubber mallet
Spray bottle
Plastic sheeting or garbage bag
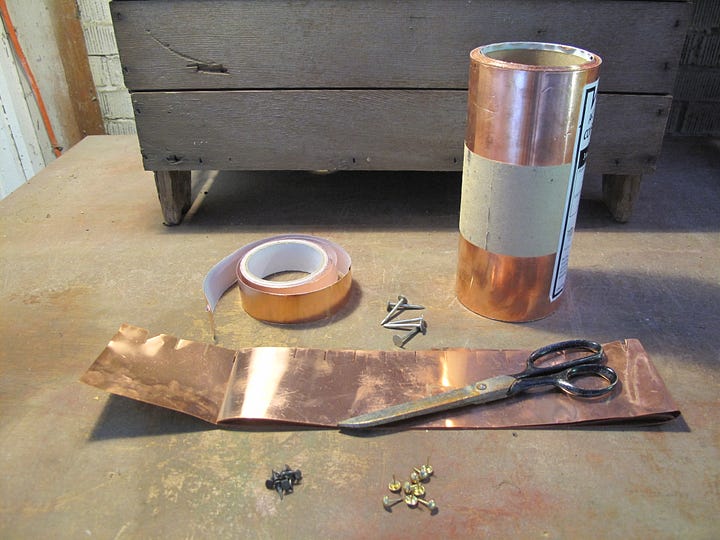
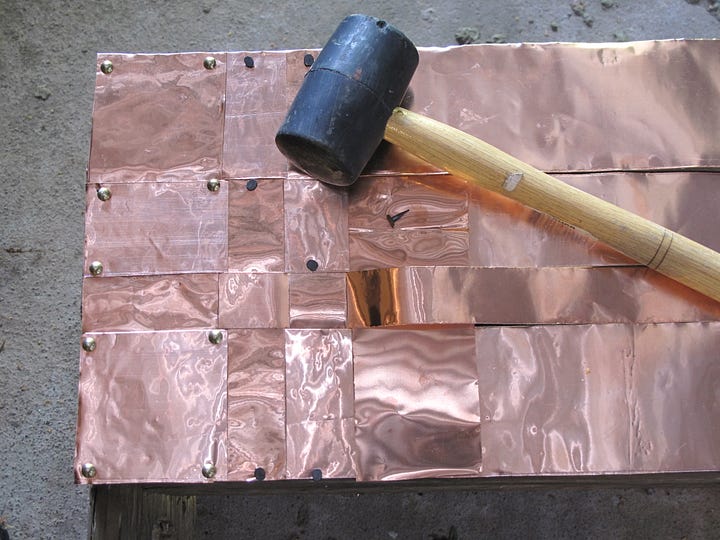
1. Measure coverage. Calculate the size and number of copper strips you’ll need to cut by figuring out the square footage of the surface of your planter. The side of my planter measures 12 x 48 inches, which comes to 4 square feet; (height x width = x + 12-inches = square footage). Because the finished copper surface is woven solid, I need double that amount, or roughly 8 square feet to cover the entire surface. My pattern is not uniform but composed of 1-, 2- and 3-inch-wide strips arranged randomly into an irregular finished weave.
2. Cut horizontal copper strips. Lay copper flashing out on a level work surface; measure and cut four 48-inch lengths. Using the measuring stick and a ballpoint pen, horizontally divide two 8-inch-wide flashing strips each into one 3-inch; two 2-inch; and one 1-inch strip. With old scissors, carefully cut along the incised pen lines with long, even slices for a smooth, non-ragged edge.
3. Pin horizontal strips in place. Position flashing strips, nestling one up against the other for complete coverage working from the top of the planter down, using thumbtacks to pin strips in position at both ends and the middle of each length. My strip placement pattern — 3-inch, 2-inch, 1-inch, 1-inch, 2-inch, 3-inch — produces strong edges top and bottom with a ribbon of more intricate detail running through the center. Note that you will end up with two extra 2-inch-wide strips which you’ll use in the course of weaving.
4. Cut remaining copper strips. As in step 2, using the measuring stick and a ballpoint pen, horizontally divide the two remaining 8-inch-wide flashing strips each into one 3-inch; three 1-inch; and one 2-inch strip. Cut finished strips to 12-inch lengths or long enough to span the height of your planter box.
5. Weave vertical strips through the foundation of horizontal strips. Utilize a simple alternating over and under pattern, staggering different widths for contrast and detail. Tack strips into place to hold their position and check your work often to maintain straight lines and a snug weave.
6. Fix woven strips permanently into place. Use a rubber mallet to pound upholstery tacks, brads, or small nails into place at each side and along the top and bottom of the planter. Supplementary fastening points across the face of the planter help hold the weaving in place and contribute an additional layer of surface decor.
7. Finish. Apply patina, if you’re going to add it, before filling planter with potting mix and plants.
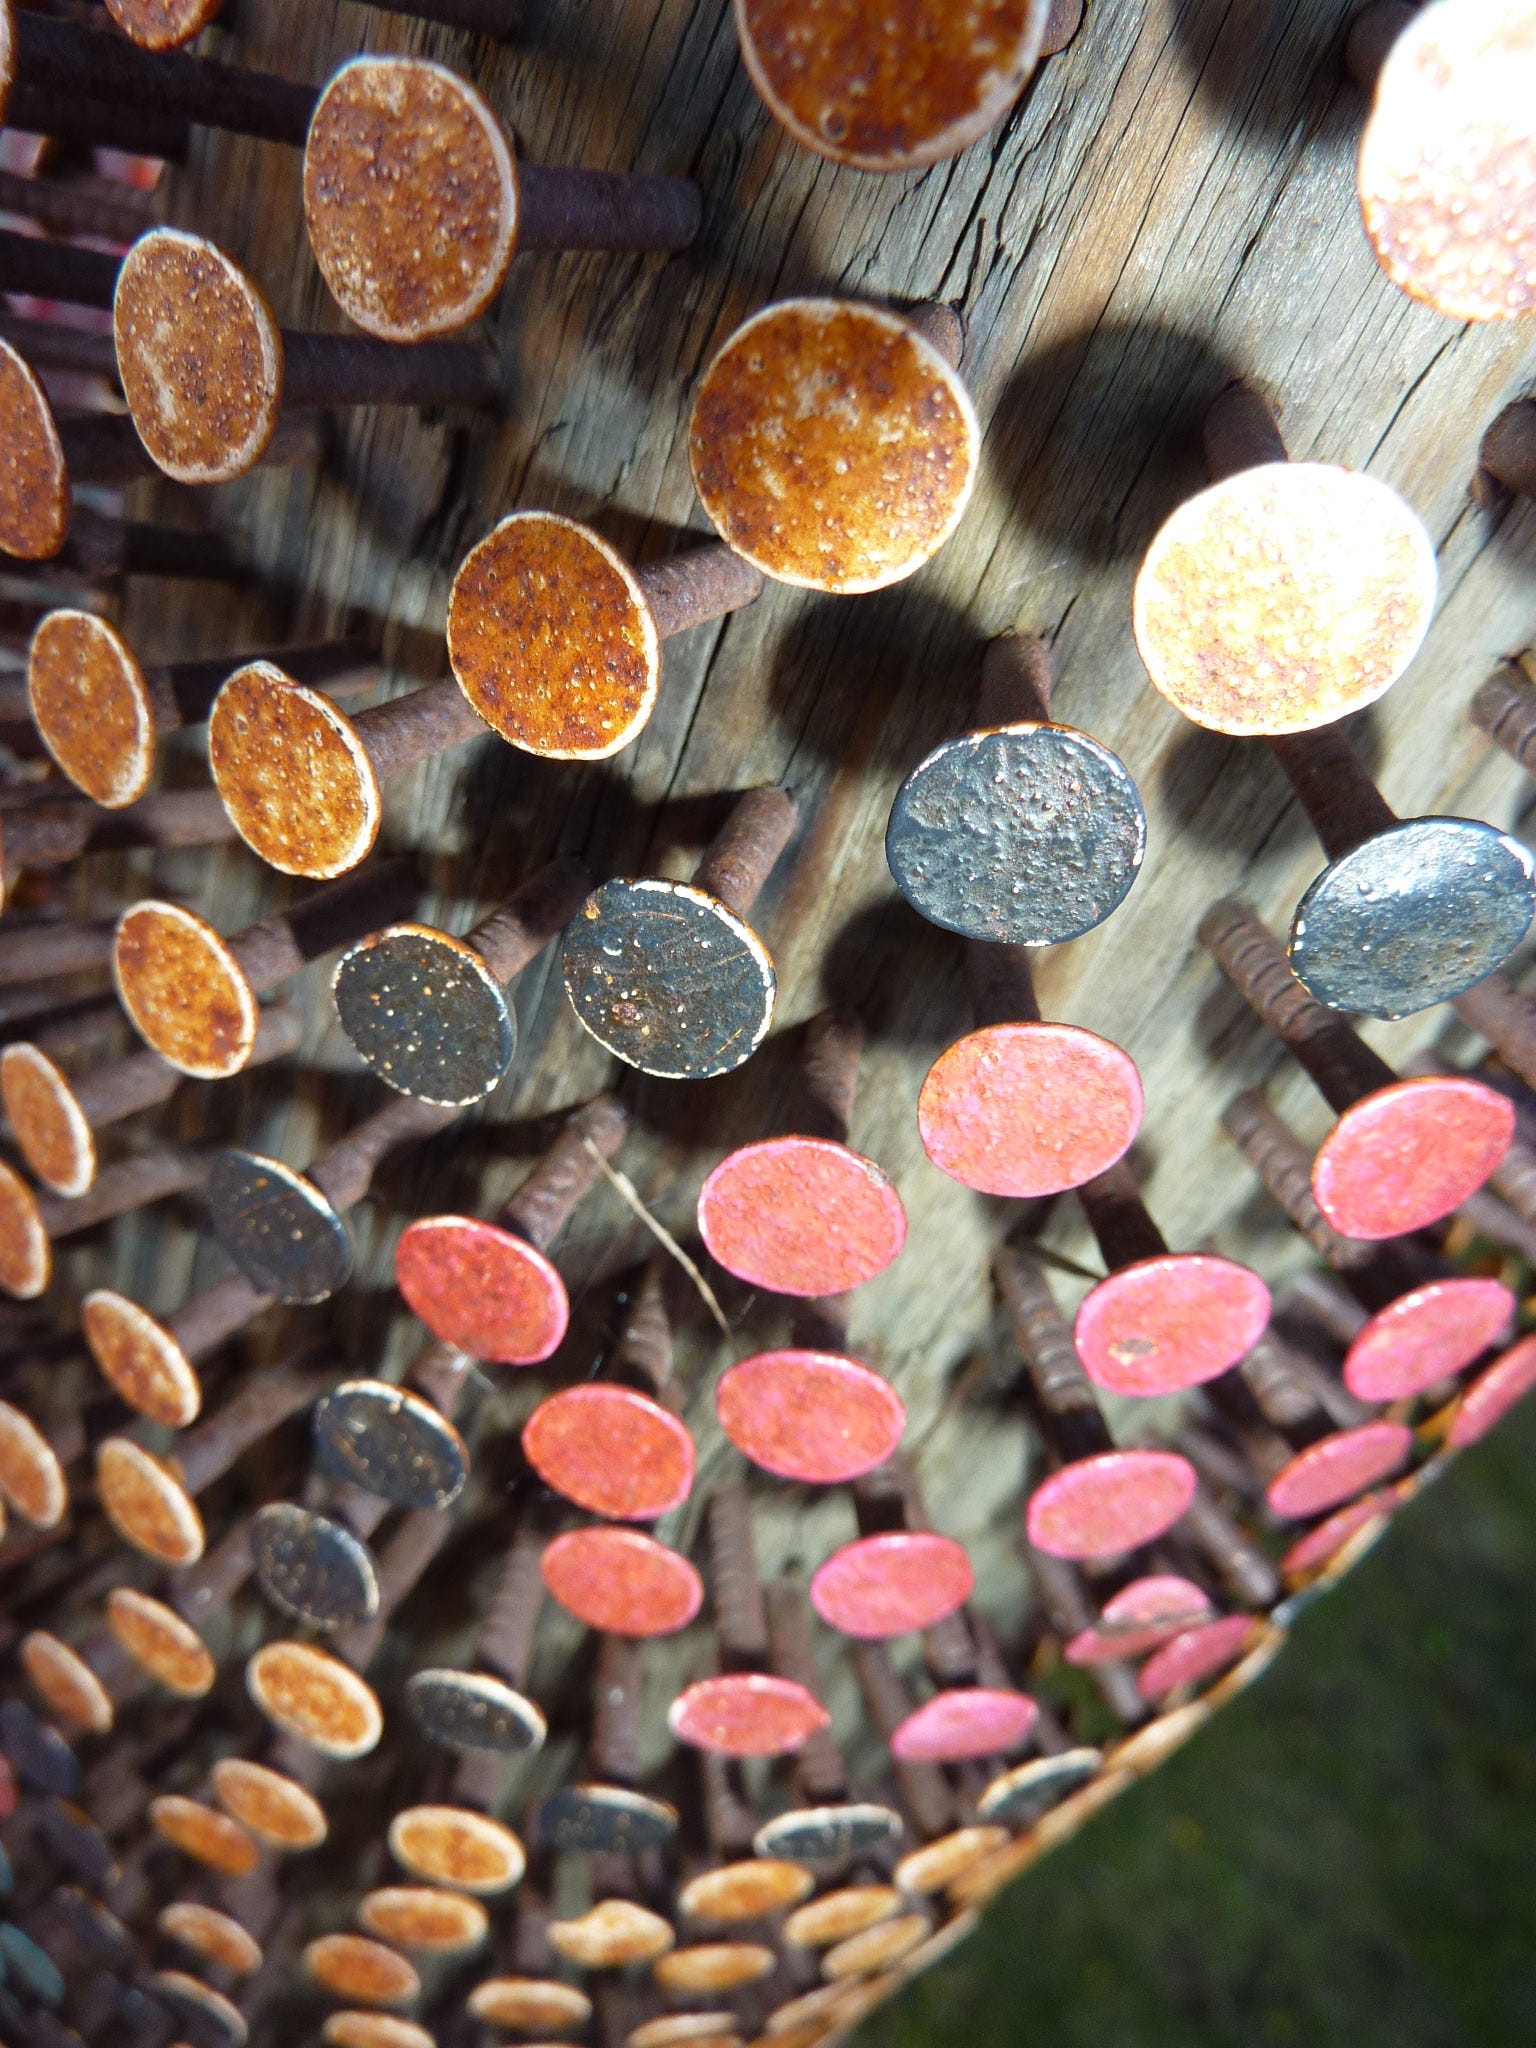
Alter your pattern by leaving open space within your weave allowing the surface of the wooden planter to show through.
Forgo weaving altogether and attach simple copper shapes cut from copper flashing to planters, fences or any other wooden surface in the garden like fence posts and plant structures.

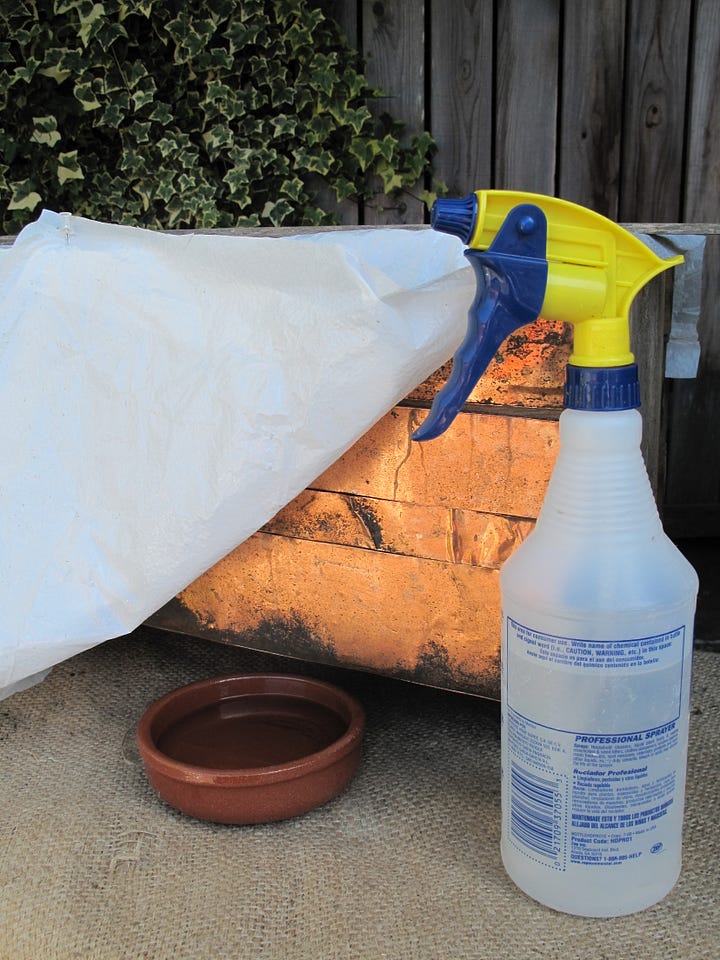

Over time and with exposure to weather, copper develops a beautiful blue-green patina or verdigris finish. This effect is especially pronounced in coastal areas where seawater and salty breezes accelerate the natural oxidation process. But if your garden lacks a maritime influence, or you just want to speed things along, you can easily create an almost-instant weathered patina to copper, brass, and bronze surfaces.
Take caution when working with ammonia, a noxious and potentially dangerous chemical. Minimize your exposure to toxic fumes by working outdoors in a well-ventilated area. Dilute leftover ammonia with water and pour down the drain — do not dispose of it in septic systems.
Grease-cutting household cleaner
4 tablespoons table salt
5 ounces cider or distilled vinegar
1 cup ammonia
Soft cloth or rag
Plastic spray bottle
Wide-mouth bowl
Plastic sheeting or garbage bag
1. Prepare copper surface. Thoroughly wipe down copper surface with a soft cloth and grease-cutting household cleaner to remove oils and dirt which resist the applied finish. Avoid touching the cleaned surface as even the oils on your fingers will leave marks in the finish.
2. Apply solution. In a plastic spray bottle, dissolve 4 tablespoons of table salt in 5 ounces of cider or distilled white vinegar. Lightly spritz copper with the vinegar and salt solution to initiate the oxidation process. For quicker results, place a wide-mouthed bowl of household ammonia next to the sprayed surface of your copper planter. Drape the planter with plastic sheeting or a garbage bag enclosing the bowl and trap the ammonia fumes.
3. Let patina develop. A brilliant verdigris finish will begin forming as the salt, vinegar, and ammonia interact with the copper. Do not disturb the fuming tent for at least two hours before checking on the progress of the developing finish. The process is not exact and may take up to twice as long to achieve the strength of color desired.
4. Finish. Remove the plastic bag being careful to avoid breathing the escaping nasty fumes. Allow the now “weathered” surface of your planter to fully dry.
Comments
Nothing yet. Say the first thing.
Sign in to join the conversation.