
One of the trickier parts of food photography is deciding where to place things within your frame. Instead of catching a moment like a street photographer, we have more of a blank canvas to build. If you’ve ever moved a fork a quarter of an inch back and forth for five minutes, you know this struggle.
So for the next few weeks I want to share some compositional tools that I’ve found helpful. Not rules you have to obey, just ways to make a more informed decision the next time you are standing there wondering where on earth to put that darn napkin.
Let’s start with one that I think is often overlooked.
No, this doesn’t require a protractor or advanced geometry skills.
I first ran into it in Richard Garvey-Williams’s book Mastering Composition, which is one of my favorites on the topic.
The premise is that a rectangle has two hidden squares in it. Take the short side of your frame and mentally fold it down onto the long side to the point at which it creates a square. Do the same thing from the other end and you get a second square, overlapping the first. The line that closes each of those squares is the rabatment.
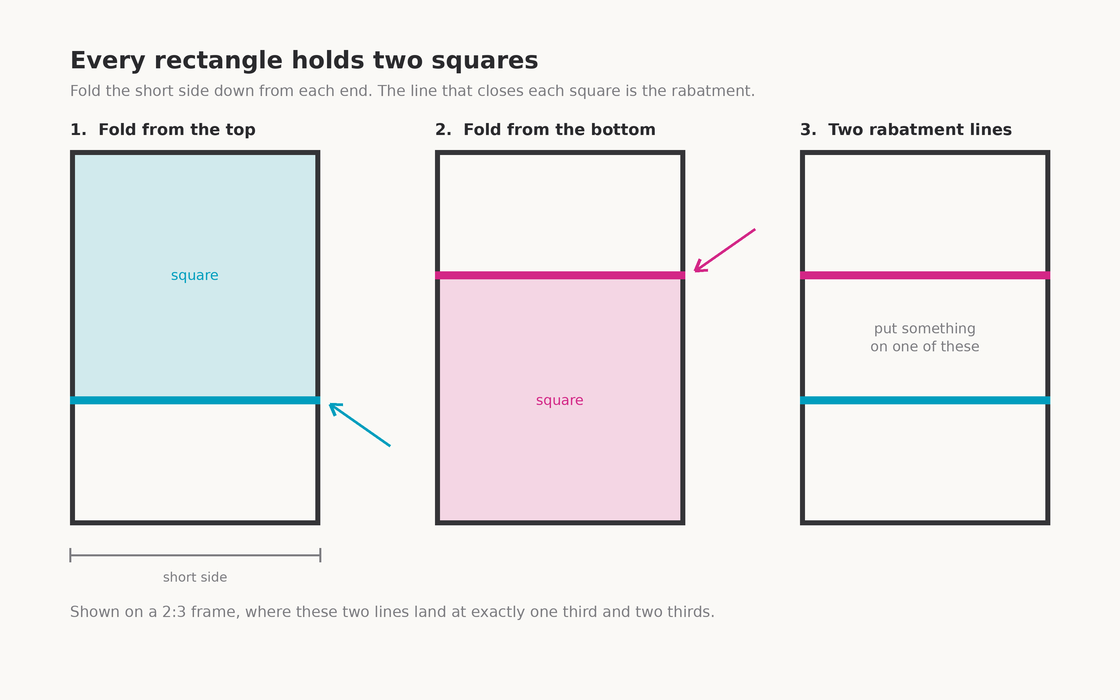
And the rabatment is a solid location for a focal point.
Garvey-Williams offers a possible explanation for why this works. A square is a simple shape that feels stable and balanced. When something in your picture lands on the line that would finish the square, the square reads as complete, and complete feels good.
He is careful to say that this isn’t a proven fact, but I do like his logic. Because when it comes to appealing images, balance is a big part of the equation. More on that in upcoming posts.
But let’s see this principle in action.
Here’s a milkshake I shot recently. Both squares are drawn on it, one from the top, one from the bottom. Notice where the lines intersect.
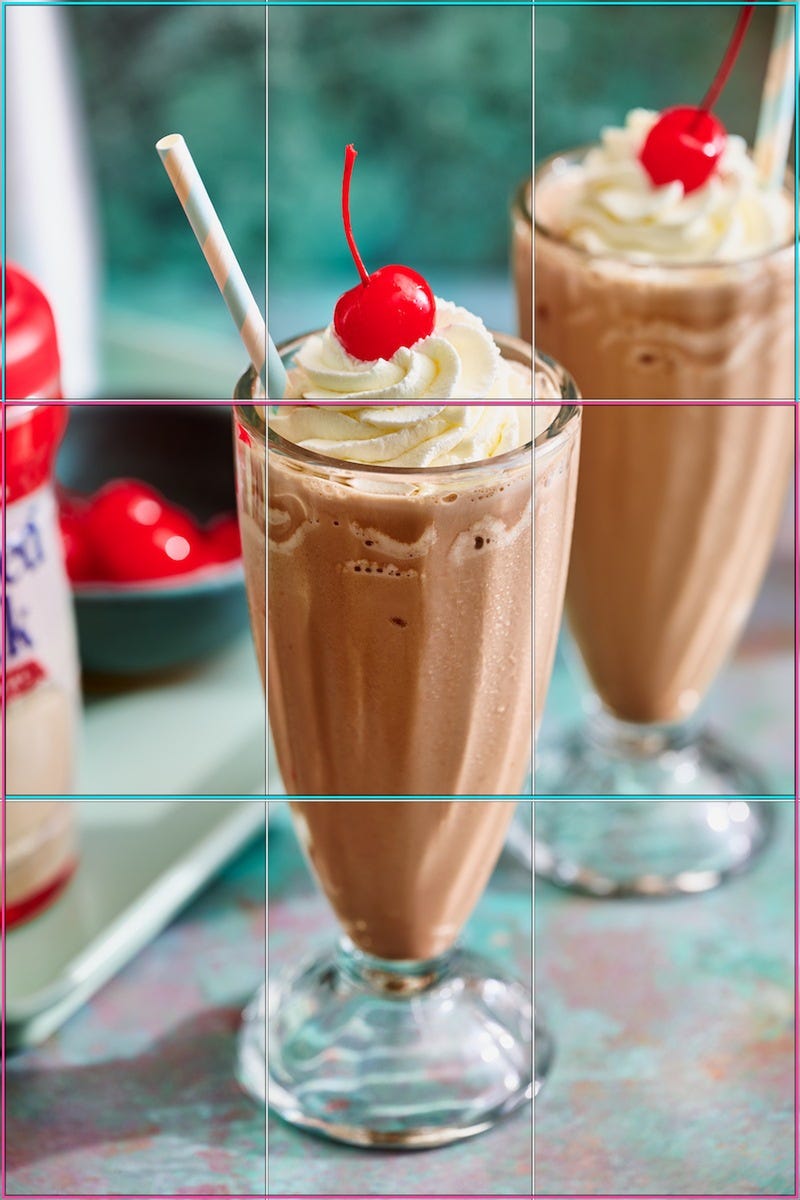
The top pink line in particular, it runs straight through the middle of the top of the glass, right where the most visual interest has been placed.
I wasn’t conciously thinking about squares when I captured (or cropped) this shot. I was more preoccupied with whether the whipped cream was going to slump. Thankfully it held!
But, keep in mind that this frame is 2:3 aspect ratio. A ratio of 2 along the top edge to 3 on the sides. Native to the aspect ratio of the camera. And on a 2:3 rectangle, the rabatment lines fall at exactly one third and two thirds.
Which means the rule of thirds, on the ratio most of us shoot in, is the rabatment of the rectangle. But, we’re not always delivering 2:3 images…so what happens then?
The thirds grid that a lot of us uses always stays the same no matter the aspect ratio. It’s always dividing the image into clear thirds.
BUT, the rabatment lines DO move. They depend on the short side, and the short side changes the moment you change your aspect ratio.
At 4:5, your Instagram feed, and most cookbooks I’ve shot, the squares get big relative to the frame and the two lines pull way out toward the edges, landing around 20 and 80 percent.
Here’s a bacon and caramelized onion quiche. The upper and lower rabatment lines intersect the crust edges. The thirds lines are also here (indicated in white) falling on negative space where slices were removed.
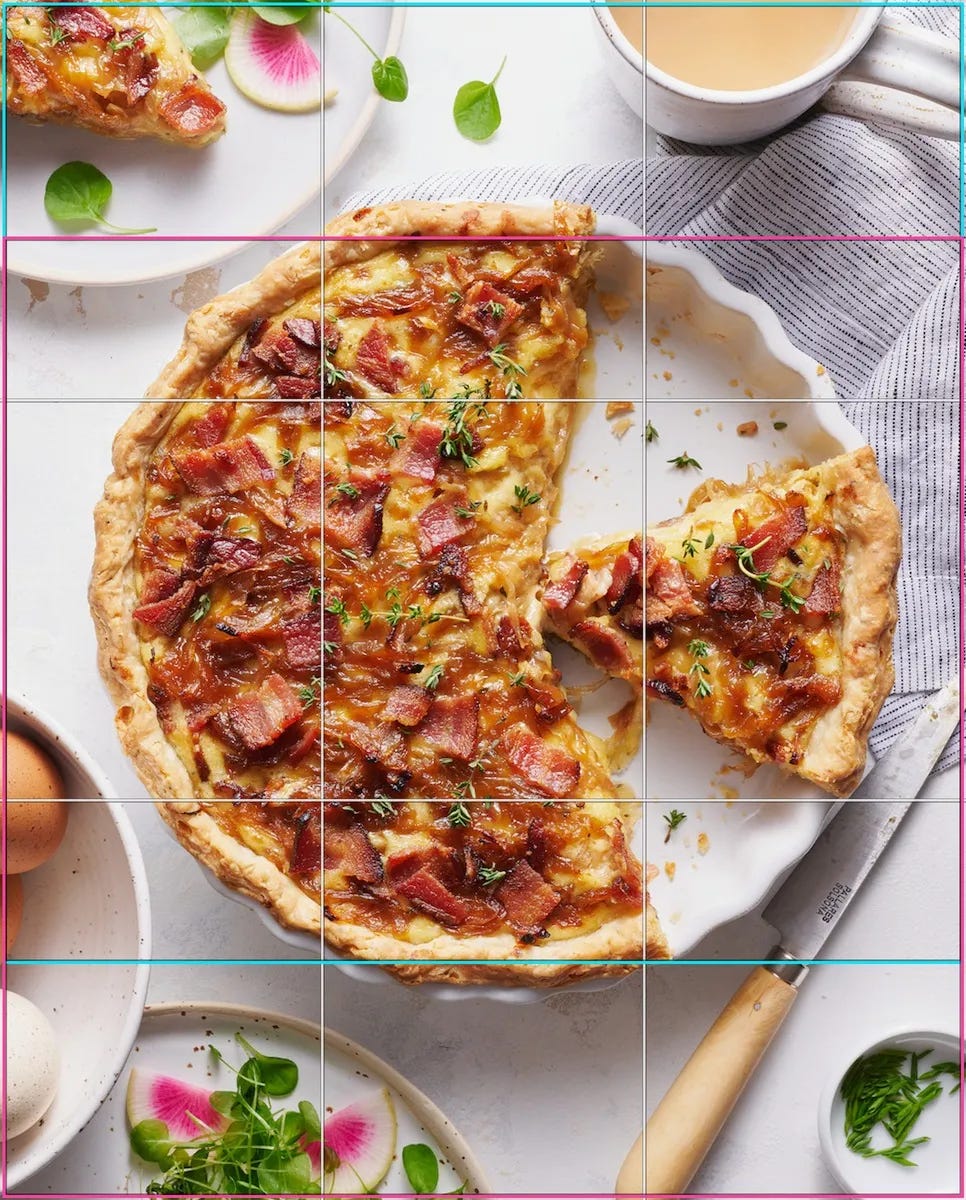
In a case like this, I find it interesting how the rule of thirds and rabatment diverge. And more importantly, why it probably feels different to compose images in different aspect ratios. Because not all things remain equal when the size of the frame changes.
In the 9:16, your story or your Reel cover, it swings the other way. The squares are nearly as tall as the whole frame. They don’t overlap. The two lines squeeze in tight around the middle.
Here in this parfait, the top line intersects the middle of the jar and the bottom line, the lower edge of the jar. The lower third line interestingly hits the jelly layer.
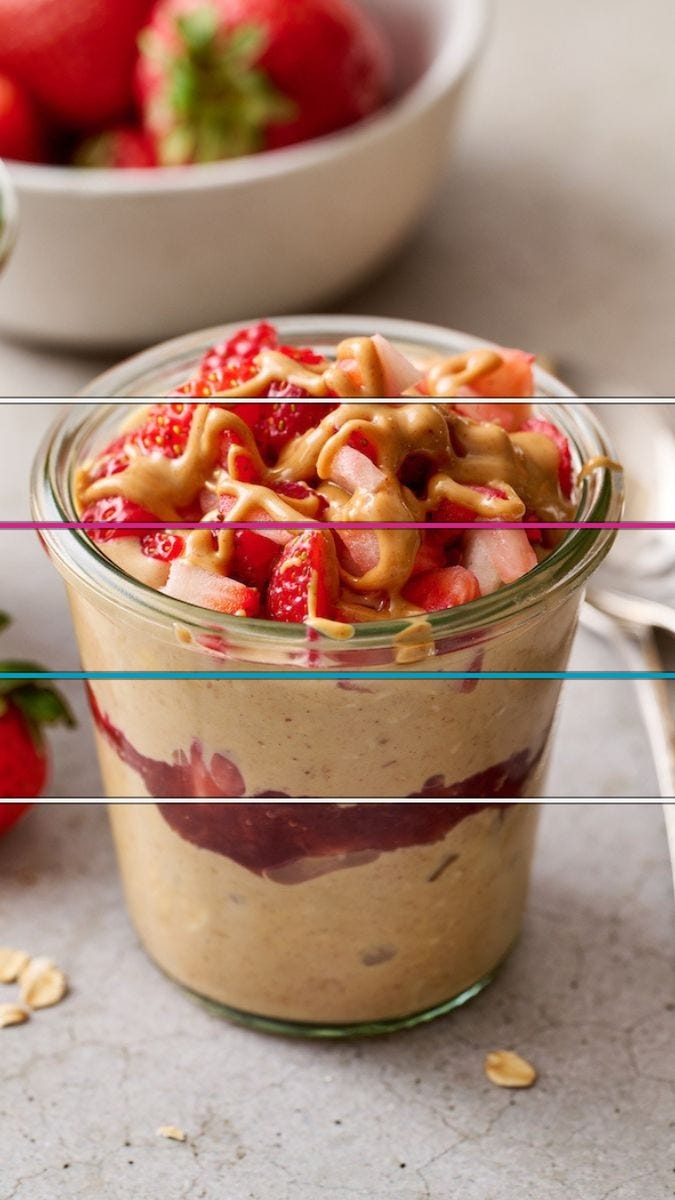
This helped me see why vertical video frames have felt harder to compose at times. The tall frame gives you less to work with, because everything structural is happening in a thin strip through the middle.
Pull up some of your own images, particularly ones you really like. For each one, find the short side, fold it onto the long side from both ends whether mentally or by using the grids you can download HERE, and see where the two lines land.
Then look at what’s intersecting. A rim. An edge. A stem. The spot where a spoon enters the bowl.
Either you have been composing to these lines all along without knowing they had a name. Or you haven’t and now you have something to pull out of your bag of tricks on your next shoot when you get stuck.
I would love to know what you find! Share in the comments below.
More next week…
No posts
Comments
Nothing yet. Say the first thing.
Sign in to join the conversation.