This page did not load. You can still read it on the original site — the toolbar below keeps your place in the directory.
This guide will walk you through React Native testing using **React Native Testing Library**. We will cover why we would want to use this library, the benefits, how to write tests, and all sorts of stuff while building an exciting game app. Let's start 🚀 ## Table of Content - [What is React Native Testing Library and Why We Love It](#what-is-react-native-testing-library-and-why-we-love-it) -…
This guide will walk you through React Native testing using **React Native Testing Library**. We will cover why we would want to use this library, the benefits, how to write tests, and all sorts of stuff while building an exciting game app. Let's start 🚀
## Table of Content
- [What is React Native Testing Library and Why We Love It](#what-is-react-native-testing-library-and-why-we-love-it)
- [Hello World: My First Test](#hello-world-my-first-test)
- [Let's Code: Create Word Warrior Game App](#lets-code-create-word-warrior-game-app)
- [Step 1: Add boilerplate](#step-1-add-boilerplate)
- [Step 2: Rendor UI](#step-2-rendor-ui)
- [Step 3: Add functionality](#step-3-add-functionality)
- [Install React Native Testing Library](#install-react-native-testing-library)
- [If you're using expo](#if-youre-using-expo)
- [Create Test Plan](#create-test-plan)
- [Write Tests](#write-tests)
- [Test Coverage](#test-coverage)
- [Takeaways](#takeaways)
## What is React Native Testing Library and Why We Love It
Tests are the best way to ensure the app's reliability. But let's be honest, testing is not easy to begin, and maintaining tests is even more troublesome.
The usual way of testing components is tightly coupled with the components' implementation details, making them harder to maintain in the long run. Querying elements using CSS class selectors or ids tends to fail as soon as you refactor or update the components.
Our tests should provide us confidence as well as they should be easy to maintain. That's where the React Native Testing Library (RNTL) shines. It provides a nice wrapper around `react-test-renderer,` exposing utility functions to query elements without bothering about the component's implementation details. It encourages the practice to write tests by keeping user interaction in mind.
**React Native Testing Library (RNTL)** exposes API to query elements by texts, labels, placeholder, role, etc., instead of querying by classes, ids. It mimics the user's interaction by firing events instead of us updating the state manually. This way of writing tests closely resembles how the user will interact and makes the whole testing process much more effortless.
Even if the internal implementation, like classes, id changes over time, you can be sure that your test will work just fine. Let's learn the basics first.
## Hello World: My First Test
Let's write a small test to get an idea of how this whole thing works. Writing tests consists of a block of `test()` functions that performs some assertions to predict the outcome.
```js
test('Should add 2 number', () => {
expect(2 + 2).toEqual(4)
})
```
We passed a description of test as the first argument and a callback with an assertion as second argument. We usually `expect` something to match or not match some value. Another example can be:
```js
test('Should add 2 number', () => {
expect(2 + 2).not.toEqual(5)
})
```
You can use this `test` keyword interchangeably with `it`. We usually start with adding `test.todo()` with a description as the initial list of tests we will cover. Then we go ahead and add the actual code as a callback in the second argument. We can also use `test.skip()` to skip specific tests in the test suite.
You might be wondering how does a test runner finds the files containing tests. We name test files with `.test.js` or `.spec.js` suffix for this reason. We can also choose to put them inside a `__tests__` folder, but it's usually a good practice to keep the test alongside the component file.
Now that we have some idea about testing. Let's move on to writing tests for a React Native app.
## Let's Code: Create Word Warrior Game App
We need a React Native app to add tests. You can use either `expo-cli` or `react-native-cli` to create the app. We will first create the app, then plan our tests using `test.todo()` and finally add all the examinations one by one.
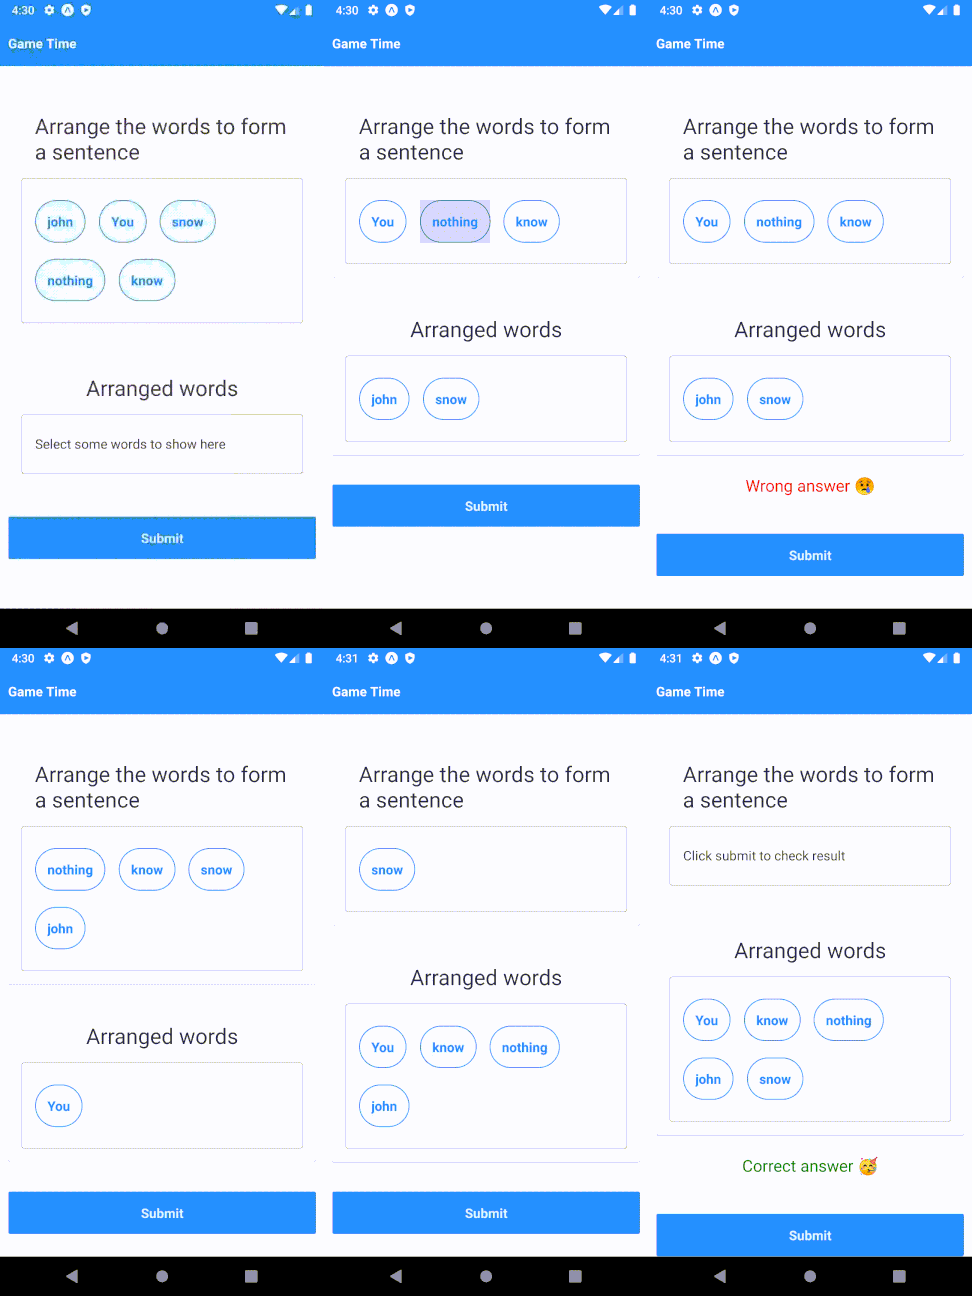
Let's build a **Word Warrior Game** which gives a bunch of words in random order. Users have to select each word from the given words in a specific order to make a sentence. You win if you're able to get the sentence right 🎉.
The final app looks like this:
> You can skip this part and [jump straight to testing.](#install-react-native-testing-library)
### Step 1: Add boilerplate
Start with creating a React Native project and add a `Main.js` file.
> I'm using [react-native-design-system](https://www.npmjs.com/package/react-native-design-system) for generic components like Button, etc.
```js
// Main.js
// imports
import React, { useState } from 'react'
import { ScrollView } from 'react-native'
import { Box, Button, Card, Header, Stack, Text } from 'react-native-design-system'
export default function Main({ text }) {
return (
// show random words as question
// show selected words as answer
// show result
{' '}
// check result
)
}
```
We will use the `text` prop to pass sentences and generate an array of random words. Then show those as questions and allow users to select/unselect them.
### Step 2: Rendor UI
We will randomize words from the `text` prop and render the `questions` array. We will also initialize the `result` and `answers` array.
```js
import React, { useState } from 'react'
import { ScrollView } from 'react-native'
import { Box, Button, Card, Header, Stack, Text } from 'react-native-design-system'
function generateRandomString(text) {
const array = text.split(' ')
for (let i = array.length - 1; i > 0; i--) {
const j = Math.floor(Math.random() * (i + 1));
[array[i], array[j]] = [array[j], array[i]]
}
return array
}
export default function Main({ text }) {
const [question, setQuestion] = useState(generateRandomString(text)) // randomize words
const [answer, setAnswer] = useState([]) // answer will be empty initially
const [result, setResult] = useState(null) // true/false for result, null to reset
return (
// render questions array
Arrange the words to form a sentence
{question.length > 0
? question.map((item, index) => (
))
: Click submit to check result }
// render answers array
Arranged words
{answer.length > 0
? answer.map((item, index) => (
))
: Select some words to show here }
// render results
{result !== null
? (
{result ? 'Correct answer 🥳' : 'Wrong answer 😢'}
)
: null}
)
}
```
We have a nice UI now. Let's add some button handlers.
### Step 3: Add functionality
```js
// ...imports
export default function Main({ text }) {
const [question, setQuestion] = useState(generateRandomString(text))
const [answer, setAnswer] = useState([])
const [result, setResult] = useState(null)
const selectWord = (word) => {
const newQuestionArray = question.filter(item => item !== word)
const newAnswerArray = [...answer, word]
setQuestion(newQuestionArray)
setAnswer(newAnswerArray)
resetResult()
}
const unselectWord = (word) => {
const newAnswerArray = answer.filter(item => item !== word)
const newQuestionArray = [...question, word]
setAnswer(newAnswerArray)
setQuestion(newQuestionArray)
resetResult()
}
const checkResult = () => {
if (answer.join(' ') === text) {
setResult(true)
}
else {
setResult(false)
}
}
const resetResult = () => {
setResult(null)
}
return (
// render ui
)
}
```
Also, import this `Main.js` file inside `App.js.`
```js
// App.js
import React from 'react'
import { theme, ThemeProvider } from 'react-native-design-system'
import Main from './src/Main'
export default function App() {
const text = 'You know nothing john snow'
return (
)
}
```
Perfect! Our app is ready now. Let's move on to part 2 and add some tests.
## Install React Native Testing Library
Open a Terminal and run this command:
```sh
npm install --save-dev @testing-library/react-native
```
This library has a `peerDependencies` listing for `react-test-renderer` and, of course, react. Make sure to install them too!
We will also use additional React Native-specific jest matchers from the `@testing-library/jest-native` package. Let's add them too:
```sh
npm install --save-dev @testing-library/jest-native
```
Then add it to your jest tests by using `setupFilesAfterEnv` option in your Jest configuration (it's usually located either in package.json under the "jest" key or in a jest.config.js file):
```js
{
"preset": "react-native",
"setupFilesAfterEnv": ["@testing-library/jest-native/extend-expect"]
}
```
### If you're using expo
Install `jest-expo` add this to your package.json
```json
"scripts": {
//... other scripts
"test": "node_modules/.bin/jest",
"test:debug": "node --inspect-brk node_modules/jest/bin/jest.js --runInBand"
},
"jest": {
"preset": "jest-expo",
"setupFilesAfterEnv": [
"@testing-library/jest-native/extend-expect"
]
},
```
> You can check the [official documentation](https://callstack.github.io/react-native-testing-library/docs/getting-started/#installation) for a more updated installation guide.
## Create Test Plan
Now we will write a list of areas we want to test. Think about how the user is going to interact with the app. Then test that functionality.
For our app, we want the random words to be visible initially. We want the user to be able to select and unselect words. We have to make sure words in questions pop into the answer section when we press them. We also have to check if the Submit button is working fine and showing the result correctly.
Based on these specs, our tests can look like:
```js
// src/__tests__/Main.test.js
test.todo('Should render passed text as words');
test.todo('Should be able to select the word');
test.todo('Should be able to unselect word';
test.todo('Should show an error when a wrong answer is submitted');
test.todo('Should clear error message when we click the button again');
test.todo('Should show win message when a correct answer is submitted');
```
We now have a plan on what tests to write. Let's go to the next section and write tests.
## Write Tests
Let's understand what happens when you write a unit test for React Native component. The steps which take place are:
- Render the component
- Query element from the rendered component
- Add assertions
Let's write our first unit test by keeping the above three points in mind.
```js
import { cleanup, fireEvent, render, within } from '@testing-library/react-native'
// imports
import React from 'react'
import { theme, ThemeProvider } from 'react-native-design-system'
import Main from '../Main'
// theme provider for components
function ThemeWrapper(children) {
return (
{children}
)
}
test('Should render passed text as words', () => {
// render the component
const { getByA11yLabel } = render(ThemeWrapper())
// query elements
const questions = getByA11yLabel('questions')
const oneButton = within(questions).getByText('One')
// add assertions
expect(oneButton).toBeDefined()
})
```
Let's see what's happening here:
- We imported a bunch of methods from `@testing-library/react-native.
- We changed `test.todo()` to `test()` and added a callback function.
- render function rendered the `Main.js` screen and returned a collection of utility functions to query elements.
- We got the question container using `getByA11yLabel()`
- We checked if the word **"One"** is defined inside questions using `within.`
We will follow similar steps with all the test cases. Let's add the second one. (Follow comments for better understanding)
```js
test('Should be able to select word', () => {
// render component
const { getByText, getByA11yLabel } = render(ThemeWrapper())
// query element
const button = getByText('One')
// fireEvent just like a user would do
fireEvent.press(button)
const answers = getByA11yLabel('answers')
// add assertions
const selectedButton = within(answers).getByText('One')
expect(selectedButton).toBeDefined()
})
```
`@testing-library/react-native` also gives us this `fireEvent` module which helps us mimic user's behaviour. We can use it to:
- click a button by `fireEvent.press(button);`.
- write some texts by `fireEvent.changeText(input, 'I typed something');`
- scroll to any position by `fireEvent.scroll(getByTestId('flat-list'), { nativeEvent: {
contentOffset: { y: 200 }}});`
Let's look at the third test:
```js
test('Should be able to unselect word', () => {
// render component
const { getByText, getByA11yLabel } = render(ThemeWrapper())
// query element
const button = getByText('One')
// select word
fireEvent.press(button)
const answers = getByA11yLabel('answers')
const selectedButton = within(answers).getByText('One')
// add assertion
expect(selectedButton).toBeDefined()
// unselect word
fireEvent.press(selectedButton)
const questions = getByA11yLabel('questions')
const unselectedButton = within(questions).getByText('One')
// add assertion
expect(unselectedButton).toBeDefined()
})
```
Sometimes, we can't simply test if the element is defined and visible on the screen. We have to be very specific about where the element is going to render.
Specifically, `within` comes very handy in these situations where we pop words from one container to another. It also encourages accessibility practices. For example, we added `accessibilityLabel` to each container, which we would have missed otherwise.
Let's move on to the next test.
```js
test('Should show error when wrong answer is submitted', () => {
const { getByText } = render(ThemeWrapper())
const button = getByText('One')
fireEvent.press(button)
const submitButton = getByText('Submit')
fireEvent.press(submitButton)
const failureMessage = getByText('Wrong answer 😢')
expect(failureMessage).toBeDefined()
})
```
Here, we got the text's failure message, which will work even when the styles or classes are changed. This practice of testing of getting elements by text and not some class makes the test much more maintainable over time.
```js
test('Should clear error message when button is clicked again', () => {
// check if error appears
const { getByText, queryByText } = render(ThemeWrapper())
const submitButton = getByText('Submit')
fireEvent.press(submitButton)
const failureMessage = getByText('Wrong answer 😢')
expect(failureMessage).toBeDefined()
// check if error message dissapears
const button = getByText('One')
fireEvent.press(button)
expect(queryByText('Wrong answer 😢')).toBeNull
})
```
We can use callback inside `expect` coupled with `toBeNull` assertion to check if the element doesn't exist on the screen. Let's add the last test.
```js
test('Should show win message when correct answer is submitted', () => {
const { getByText } = render(ThemeWrapper())
const buttonOne = getByText('One')
fireEvent.press(buttonOne)
const buttonTwo = getByText('Two')
fireEvent.press(buttonTwo)
const buttonThree = getByText('Three')
fireEvent.press(buttonThree)
const buttonFour = getByText('Four')
fireEvent.press(buttonFour)
const buttonFive = getByText('Five')
fireEvent.press(buttonFive)
// check result
const submitButton = getByText('Submit')
fireEvent.press(submitButton)
const successMessage = getByText('Correct answer 🥳')
expect(successMessage).toBeDefined()
})
```
Once done, run the tests using `yarn test` and see if the tests are passing.
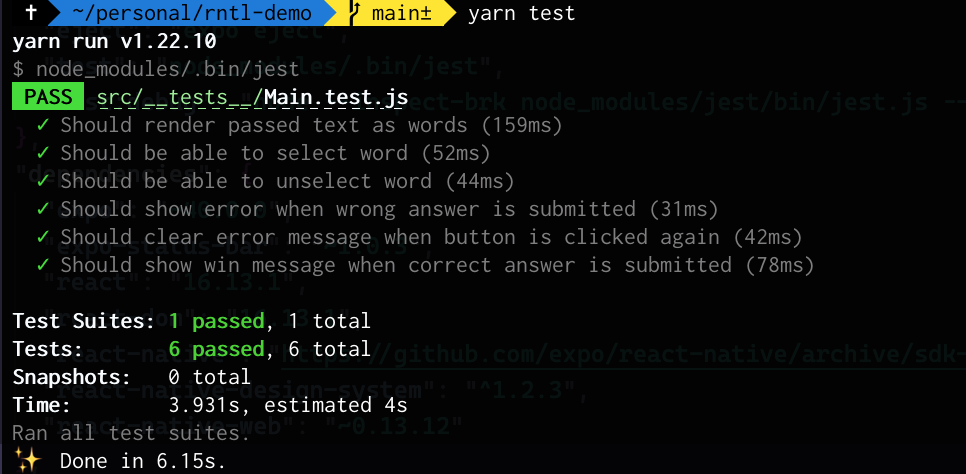
We can also perform some additional tasks by using `beforeEach()` and `afterEach()` hooks. These additional tasks usually involve preparing a test environment before each test and clean up after each test. Apart from these two, we have `beforeAll()` and `afterAll()` hooks that run before and after the test suite.
We successfully tested our mini-game app and looked at some ways to query data and assert values. You can follow [this guide](https://testing-library.com/docs/queries/about/) to get familiar with other querying methods.
> You can find project code on this [GitHub Repo](https://github.com/iamshadmirza/rntl-demo/tree/testing-basics)
These were some of the basic cases of unit testing in React Native. When following test-driven development, it's a good practice to start with failing tests. It makes sure we avoid false positives.
## Test Coverage
It's fairly easy to generate a report and see how much test coverage you have. To do so, just go to `package.json` and add this:
```json
"jest": {
"preset": "jest-expo",
"setupFilesAfterEnv": [
"@testing-library/jest-native/extend-expect"
],
"collectCoverage": true // add this property inside jest
},
```
And we are done 🎉. Now you'll see a coverage report in the terminal every time you run the test.
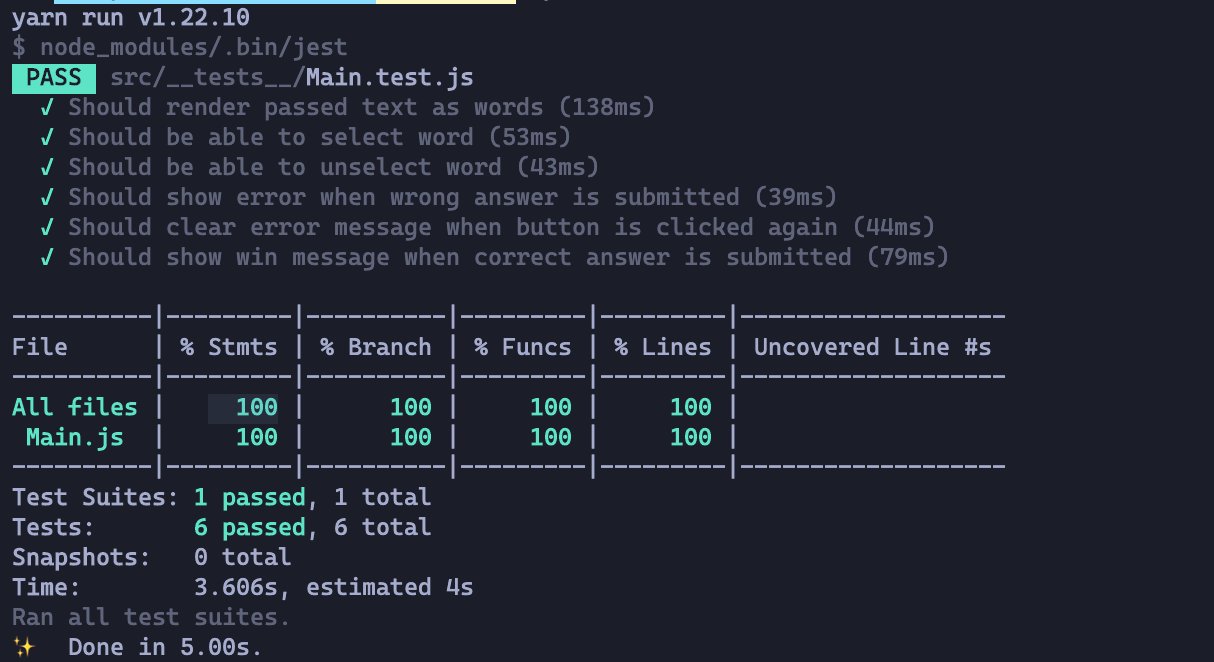
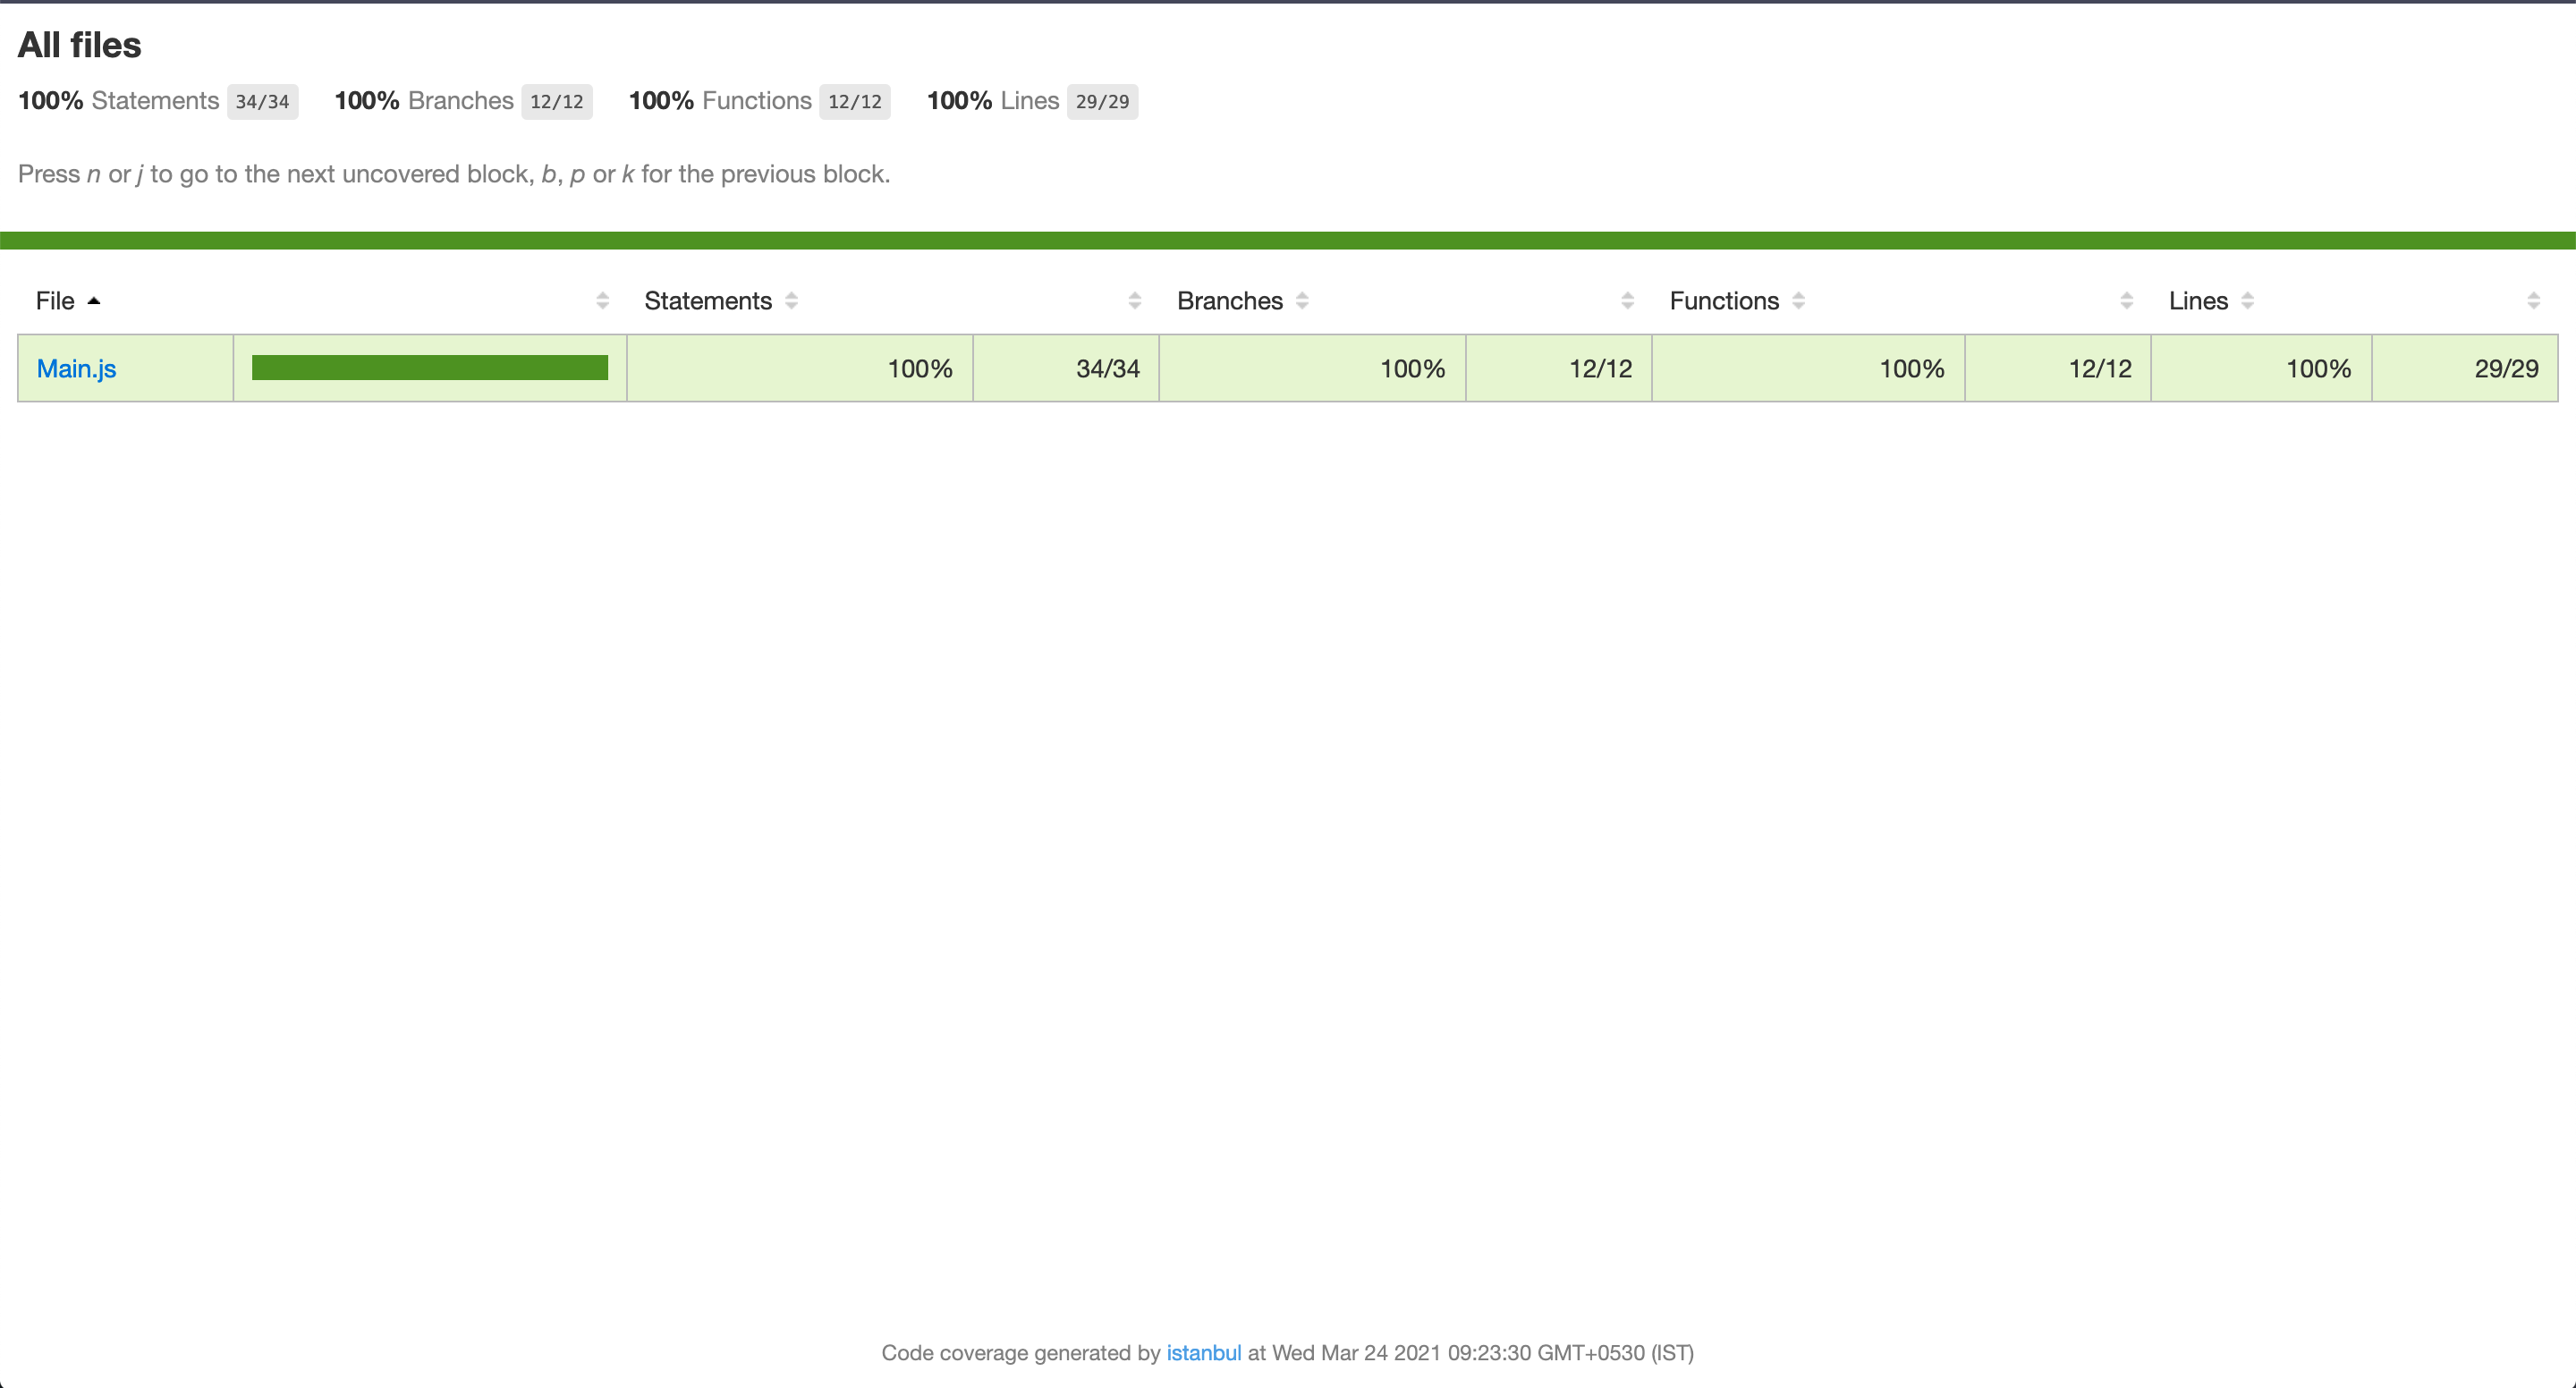
You will also notice a [`coverage`](https://github.com/iamshadmirza/rntl-demo/tree/main/coverage) folder created containing all the generated test reports. You can see these reports on the browser like this:
## Takeaways
- The usual way of testing is to render the component, find an element from the rendered screen, and add assertions.
- We can use `.test.js` or `.spec.js` as a suffix for test files. Adding files to the `__tests__` folder also does the same job.
- It's a good practice to keep the test file alongside the component file.
- Always test by keeping the user interaction in mind. Don't couple the test with implementation details whenever possible. Using `getByText` and `getByA11yLabel` is preferred over using testIDs since testID can also become a part of implementation detail.
- You can plan tests using `test.todo()` and skip specific test using `test.skip()`
- We can use code blocks like `beforeEach()`, `afterEach()`, `beforeAll()`, and `afterAll()` to run before/after each or all tests and do some specific tasks like preparing tests environment and cleanup.
- Use the `collectCoverage` flag in package.json to know more information about test coverage.
> Don't forget to share this if you liked the article. I keep sharing React Native stuff, you can follow me on [Twitter](https://twitter.com/iamshadmirza) to stay connected.Read on astro-theme-vitesse.netlify.app ↗
Comments
Nothing yet. Say the first thing.
Sign in to join the conversation.