

In the previous article of this series on vintage tool restoration, we covered the first step of restoration, focusing on the most effective, least toxic, and least destructive methods to clean tool parts and strip old plating, japanning, and other finishes. In this article, we provide a comprehensive and detailed guide to the next step: rust removal.
Many woodworkers inherit or purchase vintage woodworking tools covered in decades of rust. In my experience, electrolysis is the most effective method for removing rust from these tools without causing other damage to their surfaces. Unlike acids, wire wheels, sanding, or sandblasting, electrolysis avoids etching the metal or causing any loss of base material, and can even enhance the surface on many iron and steel parts. With electrolysis rust removal, tool dimensions, trademark stamps, markings, and fine details remain perfectly intact. While electrolysis effectively removes rust, it does not smooth pitting caused by corrosion, but we’ll cover that in the next tutorial.
In this tutorial, you’ll learn the chemistry behind electrolysis, exactly what materials and equipment you need, how to build a safe and effective electrolysis tank, how to process multiple parts at once with excellent results, and how to troubleshoot any problems that may occur. We’ll also cover the advantages and disadvantages of other rust removal methods so you can make the best decisions for your own collection preferences and projects.
After cleaning and stripping your tools, the active labor required for electrolysis rust removal is minimal. Simply hang your parts on a bracket, lower them into the tank, and turn on the power. The process then runs mostly hands-off, usually for between 4 and 48 hours per batch depending on the rust severity. Everything you need to set up and operate an electrolysis system for most woodworking tools can be purchased for between about $90–$200 in equipment and supplies.
Ready to get started? Let’s dive into the science, setup, and how to operate an electrolytic rust removal tank.
My first job after leaving the Army involved repairing and painting water towers across the Midwest. In that role, I learned how to use electrical current and zinc rods to prevent rust on massive steel water tanks that held between 50,000 and 1 million gallons of water. I became fascinated with this technology, and later learned it could also be adapted to remove rust from iron and steel tools and parts. Later, when I went to college, I took every chemistry course available to understand the science of electrolysis and electroplating more deeply. The following is a summary of what I learned.
Rust on iron and steel is primarily iron oxide, usually in the form of hydrated ferric oxide (Fe₂O₃), commonly known as orange rust. This rust forms naturally through an electrochemical process: iron loses electrons (oxidation) to oxygen and water, resulting in flaky corrosion that pits and etches the underlying metal.
Electrolytic rust removal reverses this process by using electricity to drive reduction reactions. To set up a simple electrolytic cell, the rusty tool is connected to the negative terminal (cathode), while a sacrificial piece of steel serves as the positive terminal (anode). Both the anode and cathode are submerged in an alkaline electrolyte solution, which is created by mixing electrolytes with water.
Electrolytes are substances that, when dissolved in water, dissociate into charged particles called ions. These ions enable the flow of electric current through the solution, facilitating electrolysis. Distilled water, which lacks nearly any ions, is a poor electrical conductor. Even tap water, enriched with minerals from municipal water supplies, doesn’t have enough free ions for efficient electrolysis. Therefore, electrolytes must be added to water for electricity to flow effectively from the anode to the cathode.
The sodium carbonate electrolyte is the best choice for home electrolysis systems. It fulfills two essential functions: it significantly enhances electrical conductivity to enable efficient current flow, and it maintains a mild alkaline pH of approximately 10–11. This alkaline pH acts as a protective barrier against acid-induced corrosion and prevents the formation of new rust during the electrolysis process.
At the cathode (the black/negative terminal connected to the rusty parts):
Electrons flow into the tool, driving reduction reactions. The primary reaction is the reduction of water: 2H₂O + 2e⁻ → H₂↑ + 2OH⁻. This produces hydrogen gas bubbles at the cathode that flow up visibly to the surface. The mechanical action of these bubbles agitates and exfoliates loose orange rust from the surface of the tool, while some of the remaining orange rust is converted to magnetite (Fe₃O₄), also known as black rust.
Black rust is much denser and more adherent than orange rust, and is also about the same volume as the original iron. Using electrolysis, some of the tightly adherent lower layers of black rust can even be partially reduced back to metallic iron, effectively “reclaiming” a bit of the lost metal and stabilizing the tool surface.
At the anode (the red/positive terminal connected to the sacrificial steel):
Water is oxidized to produce oxygen gas (2H₂O → O₂↑ + 4H⁺ + 4e⁻), and the anode slowly corrodes and dissolves. This sacrificial action protects your tool from damage, causing the anode to deplete and take the damage instead.
In short, electrolysis doesn’t just remove rust; it performs a controlled electrochemical reversal of oxidation through reduction. The net effect is cleaner metal with no loss of original surface detail. Although you may still choose to resurface certain parts of your tool due to corrosion pitting revealed by electrolysis, you’ll have a clearer understanding of the restoration process and will be better equipped to make informed decisions about your next steps.
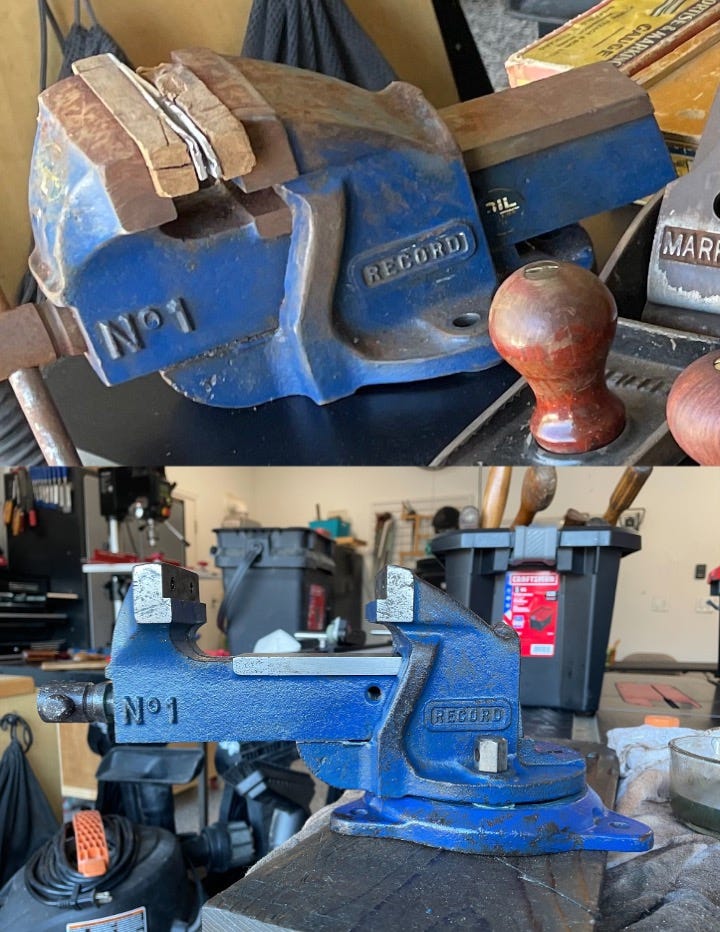
In addition to rust removal, electrolysis can be used to loosen frozen bolts, stuck screws, and seized threads on rusted tools. Normally you want to fully disassemble tools and then de-rust the parts individually. But when the parts are rusted together and can’t be disassembled, start by cleaning the entire tool as best as you can. Next, suspend the tool in your electrolysis tank and set your power supply at a low amperage, as further described below. Over time, water should seep between the locked screws and threads, and hydrogen bubbles from the water should gradually loosen the connection between the two surfaces. After allowing the tank to run with stuck parts overnight, try striking the top of the bolt using a metal hammer to break the bond between the threaded surfaces. If the screw still doesn’t move, try using a soft mallet to tap the vise handle sideways and coax the screw into moving. I’ve successfully used this method to unfreeze a wide range of frozen parts, including complete vises, multi-jointed swing-out bench stools, and automotive steering knuckles.
If you’ve already stripped nickel plating from your parts using the chemical process described in the previous article of this series, electrolysis provides a dual benefit: it will remove the depleted nickel residue from your tool while simultaneously de-rusting it.
The most frequently asked question about electrolysis is whether it will strip paint and japanning from tools. The answer is, it depends. If the finish is flaked or even a tiny pinhole with rust is present beneath the paint or japanning, electrolysis will cause the paint and japanning to blister and loosen. But if the paint or japanning is firmly adhered to the metal, the electrolyte solution cannot penetrate between the metal surface and the finish, and therefore won’t cause the finish to loosen or flake. This is especially true with baked enamel and traditionally applied multi-layer baked japanning. Therefore, if you want to preserve the original paint or japanning on tools, first carefully inspect them before electrolysis to avoid unwanted outcomes.
Electrolysis is generally safe when done properly, but it involves electricity, flammable gas, and a caustic solution. Follow these precautions to protect yourself and others:
Ventilation and Fire Safety: Peform electrolysis outdoors or in a well-ventilated area. The process generates hydrogen gas bubbles on the metal parts. Hydrogen is highly flammable. In the small-scale setup outlined in this tutorial, the amount of hydrogen produced is minimal and unlikely to accumulate to dangerous levels. Nevertheless, never cover the tank with a trash bag, plastic sheet, or any other enclosure that could trap or concentrate the gas. Ensure your setup is kept away from open flames, sparks, cigarettes, and other ignition sources.
Electrical Safety: Always plug your power supply into a ground-fault circuit interrupter (GFCI) outlet or use a portable GFCI adapter. Although the voltage is low (6–12 V DC) and generally safe, you can still receive a noticeable electric shock (comparable to touching a 9-volt battery to your tongue) if you touch the part, clips, or wires with wet hands.
Personal Protective Equipment (PPE): Wear safety glasses, rubber gloves, and old clothes or a shop apron. The electrolyte solution is alkaline and mildly caustic. Splashes can irritate or burn your skin and eyes.
Handling During Operation: Never touch the metal parts, wiring, or alligator clips while the power is on. Always turn off the power supply before adjusting, touching, or removing anything in the tank.
Medical Considerations: If you have a pacemaker, implanted medical device, or heart condition, consult your physician before attempting electrolysis or electroplating. Although low-voltage direct current is generally considered safe, please seek professional medical advice about your personal health situation before trying anything discussed in this tutorial.
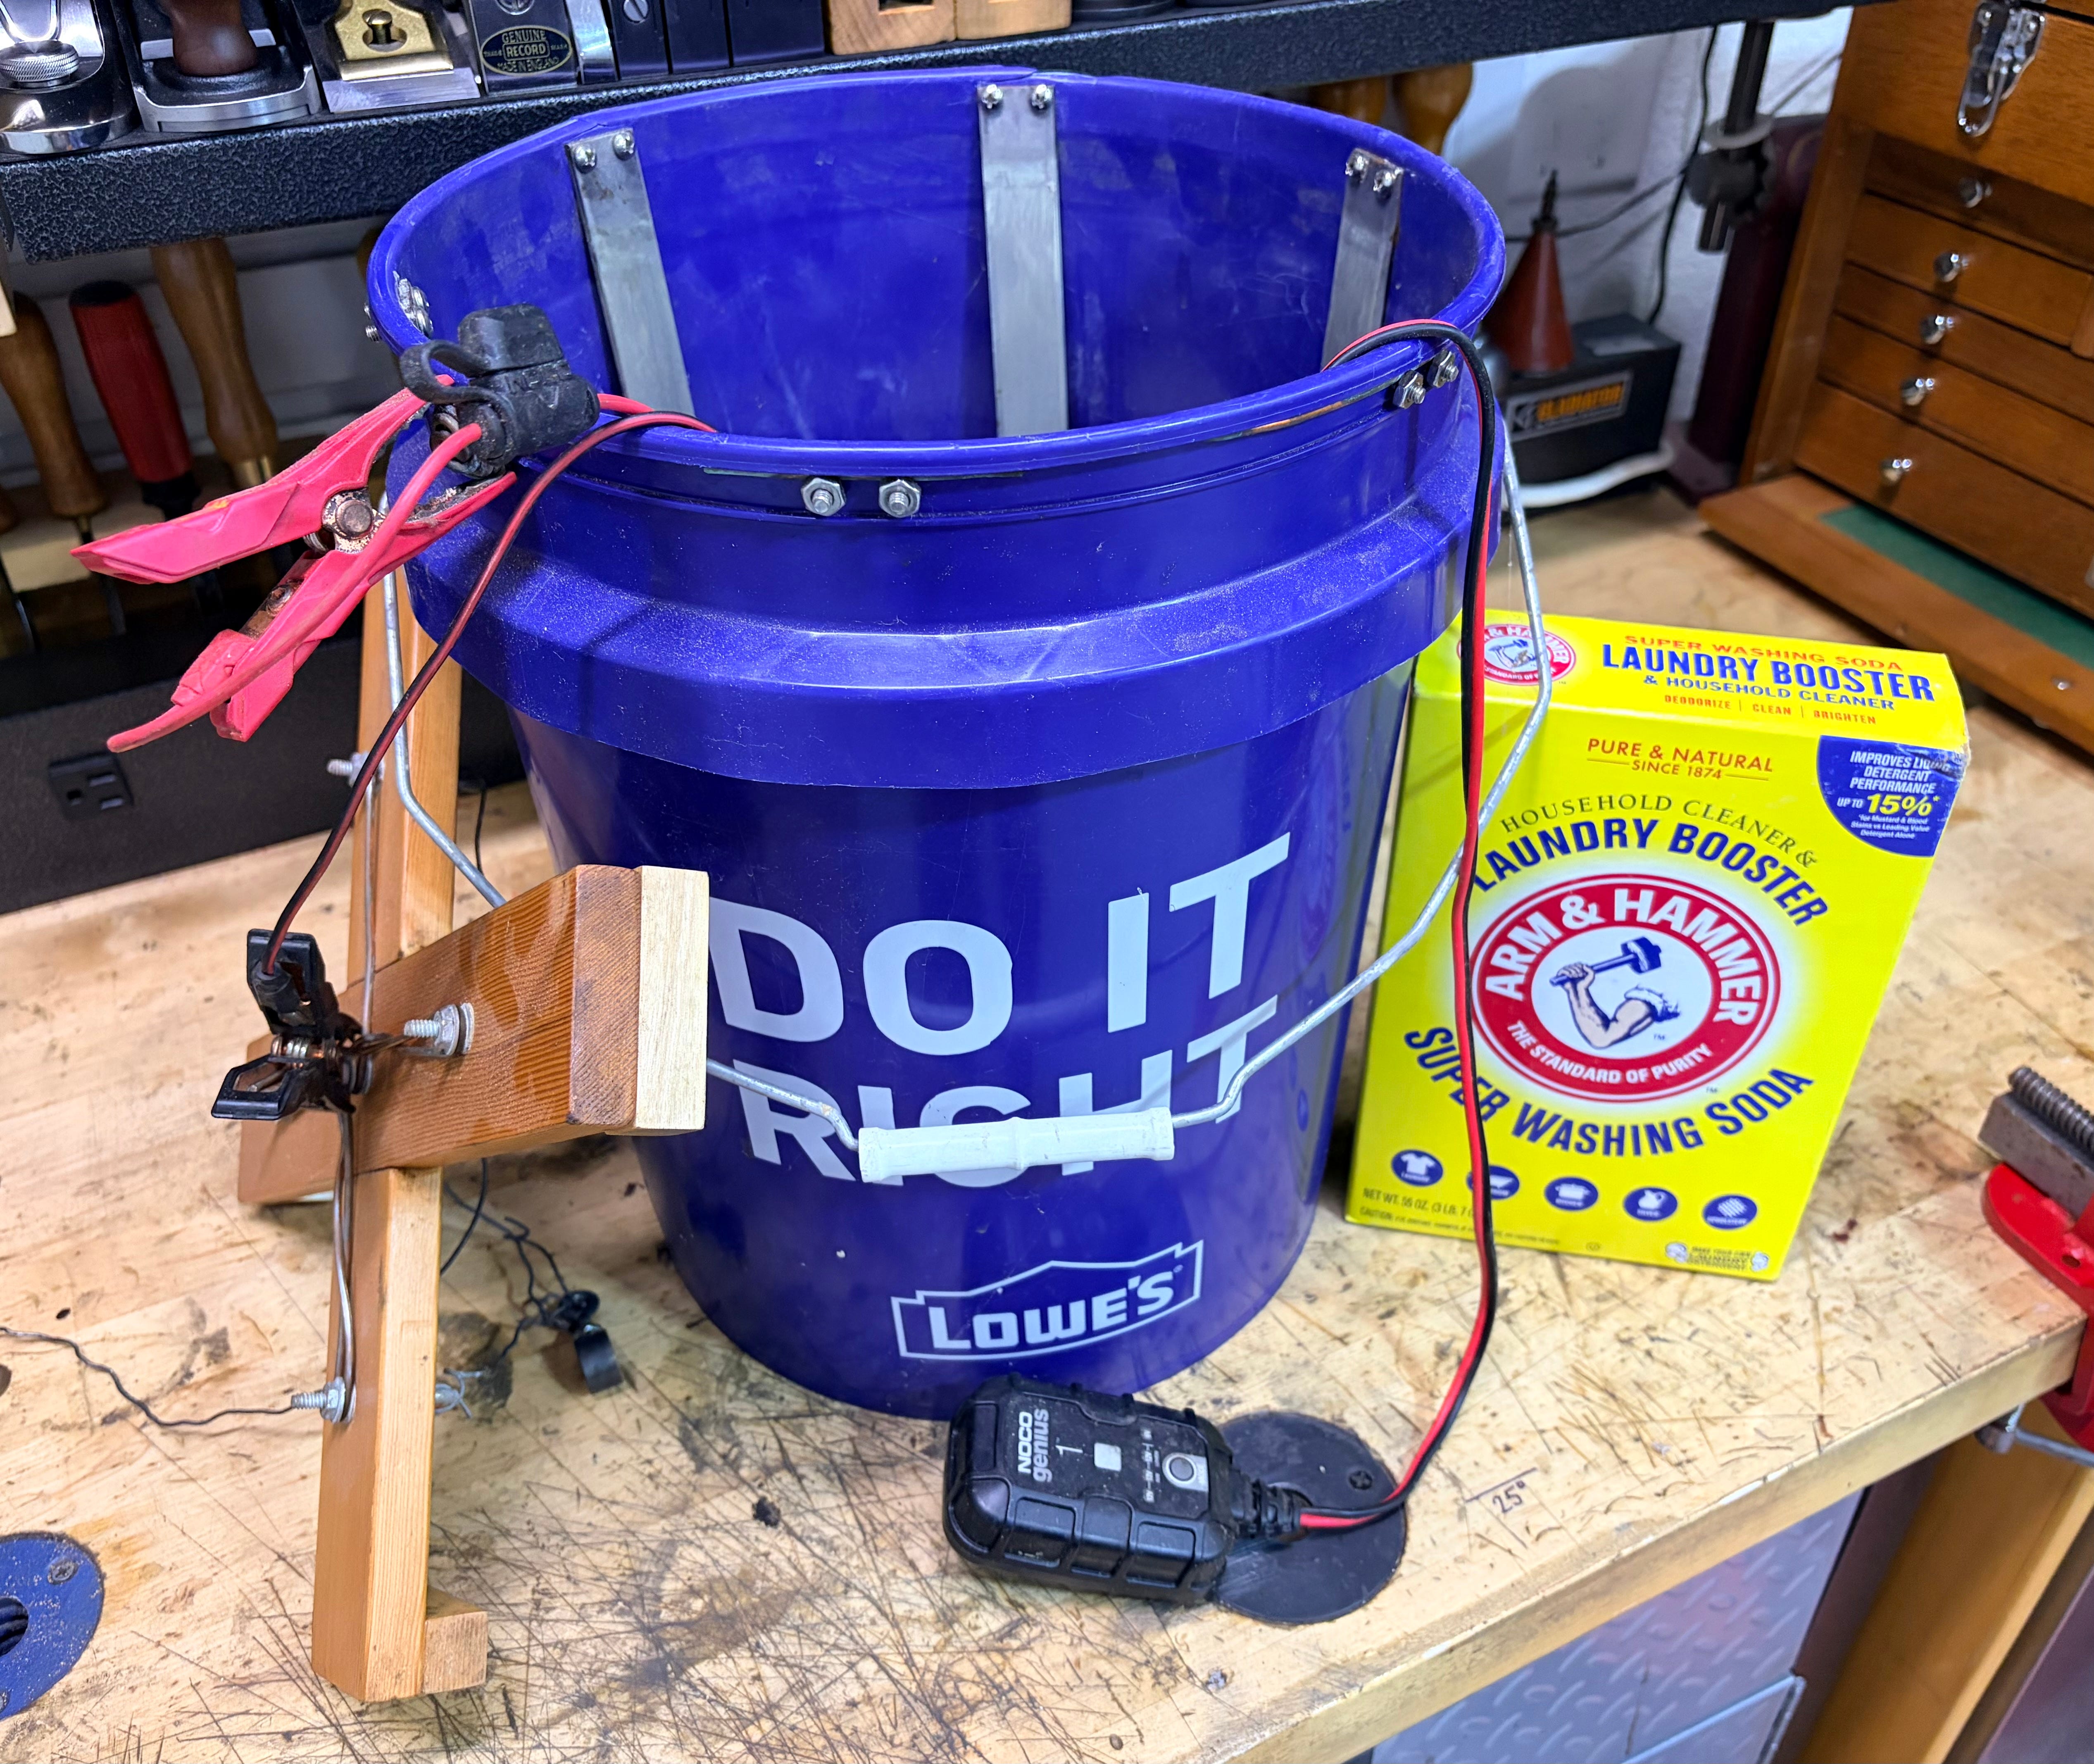
Budget Small Electrolysis System: About $90 total
Screws, nuts and washers to attach anodes to bucket
15”x1”x1/2” sticks for hanging bracket
14 gauge steel wire to suspend parts in tank from eyebolts on hanging bracket
Premium Small Electrolysis System: About $200 total
Heavy duty 5 gallon bucket
Screws nuts and washers to attach anodes to bucket
15”x1”x1/2” sticks for hanging bracket
Threaded eye bolts, nuts and washers to attach to hanging bracket
14 gauge steel wire to suspend parts in tank from eyebolts on hanging bracket
Containers:
I use a standard 5-gallon plastic bucket (like the ones sold by Lowe’s and Home Depot) as the primary container for most of my electrolysis rust removal projects. These buckets are affordable, widely available, and suitable for small to medium-sized parts up to about 12 inches in length. You can easily suspend parts into the tank from a wooden frame or stick resting across the top of the bucket.
I recommend starting with a 5-gallon bucket to learn and practice electrolysis. Once you’re comfortable, you can scale up to larger items and containers if needed. The container must be able to hold the electrolyte solution and your rusty parts while remaining completely non-conductive. Therefore, always use plastic and not metal containers, which will eventually degrade, corrode, leak, and potentially cause short circuits and unwanted reactions.
For larger items like No. 6 to 8 size hand plane bases, parts longer than 12”, or cast iron cookware, you can use large plastic containers, such as 10 to 20 gallon plastic barrels or tubs. You can also use shallow rectangular storage totes and operate your tank with parts hung horizontally rather than vertically. Shallow horizontal tanks may also be more convenient for flat or wide items and can provide better line-of-sight coverage between anodes and long parts.
For even larger tools and parts, consider using 20–32-gallon heavy-duty commercial trash containers or totes with thick walls that can handle the water weight, which is approximately 8 pounds per gallon. For the largest items, such as tool chests or large machinery parts, look for used 55-gallon plastic drums and cut the tops off if necessary. You can sometimes find large plastic drums for free or at low cost from farms, industrial suppliers, and online marketplaces.
Ensure that all containers you use are large enough to completely submerge your components in the electrolyte solution. The water level must remain below the top of the anodes to provide enough room to clamp the red power supply onto the anodes above the solution.
Anodes (Positive Electrodes):
Because the anodes are sacrificed during electrolysis, higher quality anodes will enhance your tank’s performance and minimize how often you need to replace your anodes and electrolyte solution.
I recommend using high-carbon 1095 steel plates as anodes for electrolysis rust removal. This steel is an excellent sacrificial anode for rust removal because it doesn’t contain heavy metals. It safely oxidizes and attracts rust, providing superior conductivity and durability.
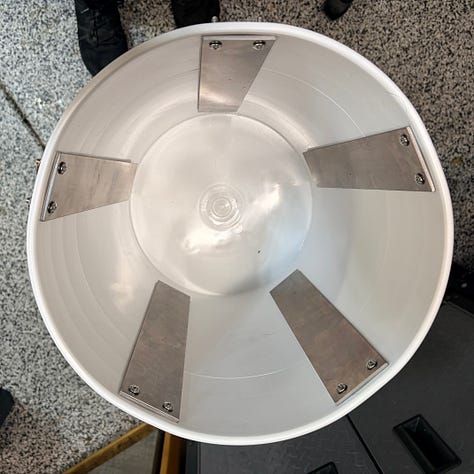
It’s less work to purchase anodes in the best size for a container versus cutting them to size. In a standard 5-gallon bucket, I attach five 12”x2”x0.12” strips evenly spaced around the inside of the bucket. In my experience, this will provide superior rust removal results and long-lasting solution and anode life.
If you’re in a hurry and want to set up your tank today or prefer to buy locally, you can find steel bar stock at most hardware stores. You can either buy pre-cut 12-inch lengths or cut longer lengths to size using a metal bandsaw or grinder cut-off wheel.
12-inch anodes work well in a standard 5-gallon bucket (~14” inside height), because they provide good vertical coverage while keeping the anodes above the tank floor. If cutting anodes from barstock, leave at least 1” clearance between the anode ends and the bottom of the tank. Contact with the bottom allows accumulated rust flakes and conductive sludge to create shorts or unintended current paths. This can reverse polarity on parts, which may cause pitting or new rust on your parts.
Some online sources suggest curling sheet metal around the inside of your tank (as a single anode) and clamping the red electrode from your power supply (above the waterline) directly to the sheet metal. While this method will work, from personal experience, you’ll achieve better results by taking the time to set up your tank with thicker individual plates. Most sheet metal is 18-22 gauge, and is often lower quality steel or galvanized. To prevent cuts during use, you’ll need to debur and round or fold the edges of the sheet metal. Additionally, thin sheet metal will degrade quickly in your tank. By contrast, the thicker plates I recommend should last several years of regular use. With the plates bolted to the inside of your tank, it’s also easy to dump, clean, and replenish the entire tank without disassembly.
Avoid using galvanized steel or any plated metal as an anode. The plating (usually zinc) can dissolve and plate onto your rusty part, creating unwanted deposits that you’ll need to abrade off later.
Graphite and titanium anode plates are also excellent for electrolysis rust removal. These materials are highly stable, don’t deplete significantly during use, and can last for years. The main drawbacks are their higher cost and limited availability in longer lengths. Most available graphite and titanium plates are shorter than the 12” lengths best for 5-gallon tanks. The ones linked are only about 4” tall, and you’ll need to leave about 1” above the electrolyte solution to connect to your power source, making them too short for most uses. However, if you can find appropriate lengths, they are worth considering.
Steel rebar is often suggested as an anode, probably because it is inexpensive and easy to get in pre-cut lengths at local hardware stores. I’ve had poor results with rebar, because it is made from low-quality steel that corrodes and disintegrates faster than high-carbon plate. Using rebar will lead to more frequent tank cleaning and anode replacement. Additionally, electrolysis is most effective when anodes are positioned in a “line of sight” to the parts being de-rusted. Rebar’s rounded, narrow surface area is less effective than flat steel strips because flat strips provide a much wider line of sight to the parts than narrow rebar. Therefore, wide high-carbon plates outperform rebar in every way.
Stainless steel anodes are the subject of heated debate in online electrolysis communities. The most common stainless steel alloy is 304, which contains 18% chromium (Cr). At the anode, some of this chromium oxidizes from Cr to harmless trivalent chromium (Cr³⁺). However, some of the Cr³⁺ further oxidizes to highly toxic hexavalent chromium (Cr⁶⁺), a known carcinogen and reproductive toxin regulated as hazardous waste under federal and state laws. Even trace amounts of Cr⁶⁺ make the spent electrolyte solution illegal to flush down drains, into sewers, or onto land. Accordingly, any waste electrolyte containing any amount of Cr⁶⁺ must be properly disposed of at a hazardous waste facility.
I’ve seen many claims that low-voltage home setups don’t produce Cr⁶⁺ in toxic amounts. That is incorrect. Cr⁶⁺ is formed as a byproduct of the electrolysis reaction at any amperage when stainless steel anodes are used. I’ve also read claims from people who use test strips and claim that their strips didn’t register Cr⁶⁺ so it isn’t being produced in their setups. While it may be true that their strips didn’t detect Cr⁶⁺, that doesn’t mean Cr⁶⁺ is absent in their waste solution.
EPA regulations set the maximum allowable level for Cr⁶⁺ in water at 100 parts per billion, while California sets it at 10 parts per billion. To put that in perspective, 5 drops of pure Cr⁶⁺ in an Olympic-size swimming pool equals about 100 parts per billion, and half a drop equals about 10 parts per billion. These tiny amounts are unlikely to register on standard test strips. The toxic risks of stainless steel anodes are simply too high for home workshop use, especially when inexpensive non-toxic alternatives exist. Therefore, please don’t use stainless steel anodes.
Electrolytes:
Table salt (sodium chloride, or NaCl) is recommended and used as an electrolyte for many purposes. However, it’s not ideal for electrolysis rust removal for two reasons: (1) it promotes rust formation, and (2) the electrolysis of sodium chloride produces chlorine gas, which is highly toxic when concentrated.
While you’re unlikely to produce harmful chlorine gas levels using salt as an electrolyte in a home electrolysis setup, it’s not worth using when a better, non-corrosive, non-toxic, and affordable alternative is available: Arm & Hammer Super Washing Soda (pure sodium carbonate, Na₂CO₃). Don’t confuse sodium carbonate with baking soda (sodium bicarbonate), which is a different product and much less effective as an electrolyte.
Washing soda is an ideal electrolyte for home electrolysis because it creates a mildly alkaline solution (typically pH below 11) that effectively reduces rust without promoting corrosion. It’s non-toxic in normal use, biodegradable, and produces no harmful byproducts during electrolysis. Additionally, it’s inexpensive and long-lasting. A 55 oz (approximately 3.4 lb) box currently costs between $5 and $6, and with regular use and replacement should last months. Washing soda solution also remains relatively clean compared to salt-based setups, and the resulting electrolyte is non-toxic and easy to neutralize. You can safely pour the waste solution down the drain after use.
Power Supplies:
My recommendation for a budget electrolysis power supply is this simple battery charger, which I’ve used with a 5 gallon tank for about the past six years. If you’re only interested in general-purpose rust removal and don’t plan to use it for low-amperage electrolysis or electroplating, this charger is all you need.
For a more versatile power supply that can handle a wider range of electrolysis applications, including low-amperage electrolysis and nickel electroplating, I recommend this premium model. I also suggest upgrading to these heavy-duty power supply clamps to replace the thin alligator clips that come with it.
Disregard online claims that “newer automatic” battery chargers won’t work for electrolysis, and that you must use only “older” battery chargers or must first connect chargers to car batteries before connecting them to your electrolysis tank. You can operate an electrolysis tank that way, but it isn’t necessary. I find that many people who repeat these claims do so based on Google and AI searches, which don’t always fact-check and sometimes repeat false information. I can tell you with certainty: I only use “newer” battery chargers connected directly to my electrolysis tanks, and they work perfectly for electrolysis rust removal. It’s possible to set these power sources so they won’t work properly, but if you follow my instructions below, they will work as explained.
I often use both of the power supplies linked above at the same time in different tanks. With both, you can remove rust and nickel plating residue in one tank while un-seizing rusted threaded parts or performing nickel electroplating in another tank. When I’m restoring tools in batches, I usually perform different operations on different parts simultaneously so I don’t have to wait for one task to complete before starting another.
Attaching the Anodes to Your Bucket
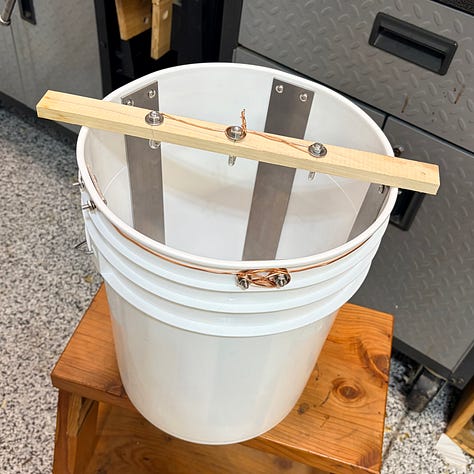
I recommend attaching the anode plates to your electrolysis container using #10-sized screws nuts and washers. Begin by marking the top of your anodes with two points, 3/8” from the top and 3/8” from each side. Then, center punch those points and drill them using a 7/32-inch bit. Carbide or cobalt bits are best (with a drop of cutting oil) for drilling the hard 1085 steel anode plates I recommend.
Next, space each anode evenly around the inside of your container. Hold an anode so that it is about 1/8 inch below the top of the container. Mark the center of the two holes onto your container using a Sharpie. Drill through the center of each mark using a 1/4-inch drill bit. Then using the screws I recommend or similar, push one screw through each hole (with the Phillips head side of the screw facing the inside of the tank). Next place 2 washers on the threaded side of the screw and thread a nut on the end to secure it. Leave the nut loose on the screw for now. Repeat this process for each anode and screw hole.
I mentioned earlier that you should not use stainless steel anodes, but it’s acceptable to use stainless steel screws to attach steel anodes to your electrolysis tank. The screws will always remain above the electrolyte solution and therefore cannot oxidize or produce a toxic byproduct into your electrolyte solution when used this way.
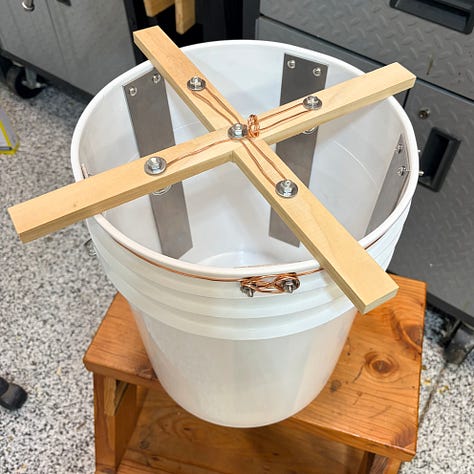
Next, using the above photo as an example, wrap a long length of bare 14-gauge soft copper wire around the top outside of your bucket. Loop the wire around each anode screw between each washer. Tighten the nuts on the screws to secure the wire. Form a loop at the end of the wire to attach to the positive (red) clamp from your power supply.
Create Hanging Brackets for Your Parts
A 15”x1”x1/2” wooden stick is all you need to suspend 1-3 parts at a time in your bucket. I recommend hanging parts from this bracket using double-sided hooks you can make from 14-gauge steel wire. You may remember that I said not to use galvanized steel for your anodes, but it’s ok to use galvanized wire on the cathode side, because the zinc on the galvanized wire won’t transfer to your parts.
Because I de-rust a wide range of tools and different sized parts, such as chisels, axe heads and hand plane bases, I use the X shaped bracket shown in the above photo to simultaneously suspend up to 5 different items in my tank. The X bracket is made from two pieces of 13.5” x 2” x 1/2” wood, which are joined with a half lap joint. To make the X bracket, I drill a hole in the center of the bracket, then mark and drill holes on all four arms of the bracket about 3” from the center. I attach threaded eye bolts through the bottom of these bracket holes and secure the eye bolts to the top of the brackets using nuts and washers. I loop copper wire around each screw post on the top of the bracket, and terminate the copper wire with a loop that will attach to the black (negative) clamp from my power supply. Finally, I tighten the nuts on the top of the eye bolts to secure the copper wire to the brackets.
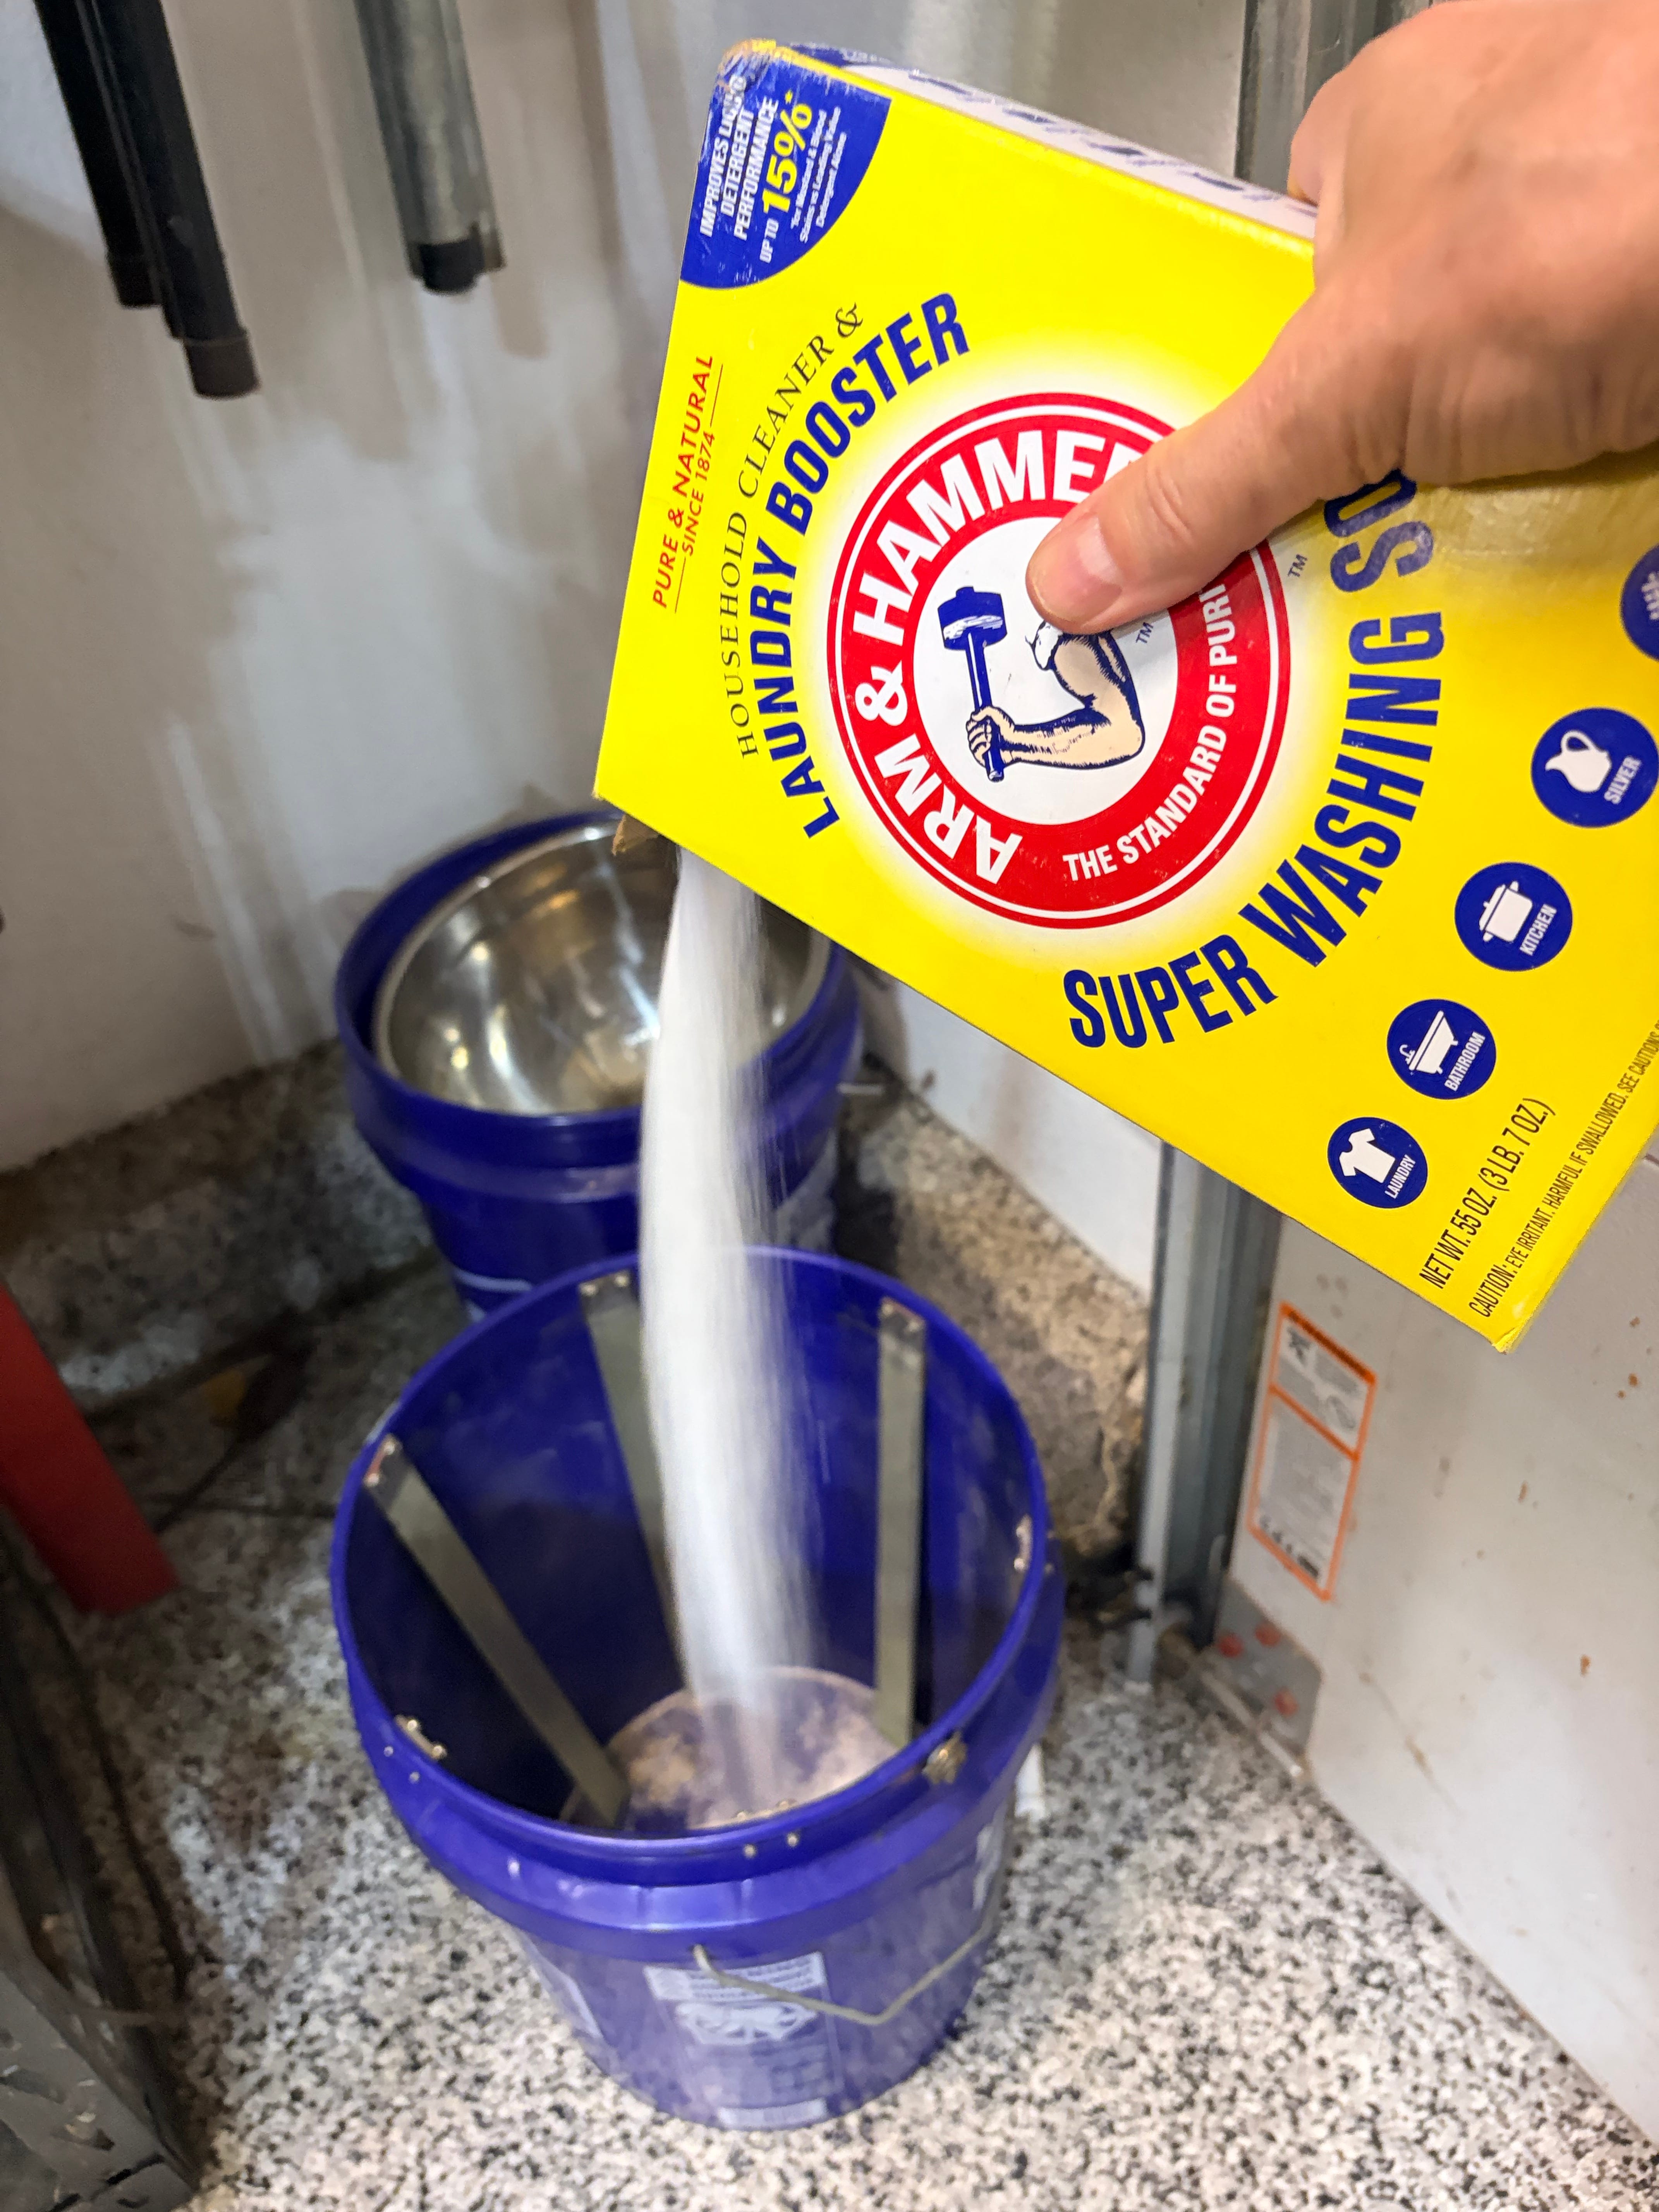
Always start by thoroughly cleaning all metal parts, as discussed in the previous article. Remove all oil, grease, wax, loose dirt, and unwanted old finishes. Brush or scrape off any excess surface rust to minimize the entry of contaminants into the electrolyte solution, which will extend its lifespan and effectiveness.
Mixing the Electrolyte Solution
Choose a level, stable surface for your tank. I set mine up on a concrete floor. Fill your tank with water to no more than 1” below the screws connecting your anodes to your tank. Add about 1 tablespoon of electrolytes per gallon of water, which is at least ½ cup of electrolyte per 5-gallon bucket. The exact concentration isn’t critical as long as you use the minimum amount necessary to conduct electricity in your tank. Thoroughly mix the electrolyte in the tank until all of the powder is dissolved.
Attaching Parts to the Hanging Bracket
Use steel wire to form double-sided S-hooks and hang them from the eye bolts on your bracket. Prepare a variety of hook sizes to accommodate parts of different lengths. Attach the S-hooks to the eye bolts. Most parts with a hole, notch, head, or obstruction can be attached to the S-hooks simply by hanging them or twisting the wire around the part.
For small parts with heads, holes, and protrusions, such as screws, bolts, depth stops, and lever caps, you can often group 3 to 4 pieces onto a single wire hanger. To prevent them from slipping out, twist the wire around each part. Once you’ve strung a group of these parts onto the wire, you can hang the bundle from a single eye bolt.
Rods, bars, and headless screws, such as those provided with metal plough and sash planes, are challenging to hang because they lack attachment points. If you twist wire around a smooth rod, it will usually slide out of the wire when you hang it. However, rods and bars can be securely clamped using shaft collars. Once the rod is clamped in a shaft collar, it can be attached to steel wire and hung from an eye bolt. I’ve found that shaft collars in these sizes—5/16”, 3/8”, 1/2”, and 5/8”—fit every rod I’ve ever needed to hang in my tank. If the set screw on a shaft collar is too short to clamp the rod firmly, just determine the thread size and pitch of the screw and replace it with a longer one.
Avoid overcrowding parts on the hanging bracket. Maintain at least 1-inch clearance between individual parts in your tank and from the tank walls. While you want to process as many parts as possible in each batch for efficiency, overcrowding may lead to reduced results and electrical shorts. The best results are achieved with well-spaced parts that allow for good electrolyte flow around each part.
Before submerging parts into your tank, hold the loaded bracket next to it to ensure all parts will hang freely inside without touching the bottom or sides. Once everything checks out, carefully lower the bracket into the tank so it rests on the top edges. Perform a final visual inspection to confirm that all parts are hanging freely and none are touching the anodes. Contact with the anodes will short the power supply and prevent the electrolytic process from functioning. Now, you can switch on your power supply.
Tips for Specific Woodworking Tools
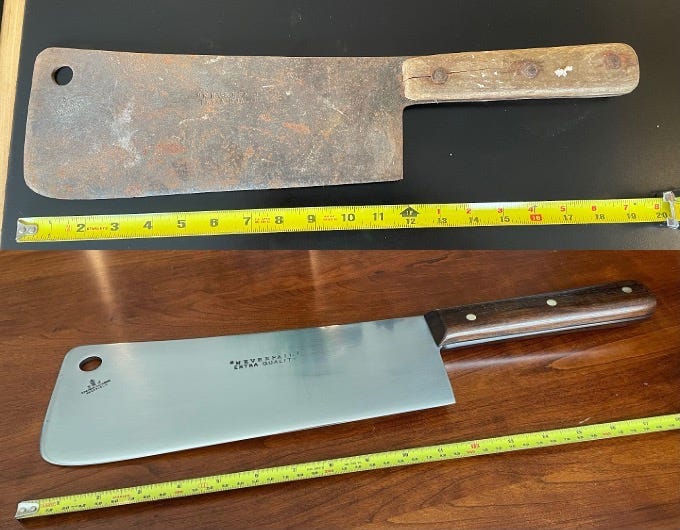
Hand planes: Fully disassemble by removing the iron (blade), cap iron, lever cap, frog, screws, and all other components. Set wooden handles aside for separate restoration, which will covered in a later article in this series. De-rust longer number 6, 7 and 8 hand plane bases in shallow horizontal tanks.
Chisels and gouges: When possible, remove wooden handles completely. Electrolysis involves an alkaline solution that produces iron residue, which can soften, damage, and stain wood. For peened or mortised handles that you don’t want to remove from the blade, insert the wooden portion into a disposable glove or tightly wrap it in plastic wrap (like Saran Wrap). Then, seal all edges thoroughly with waterproof tape.
Saws: When the tank depth permits, hang the blades vertically. For longer blades, hang them horizontally in a long, shallow plastic container, such as a storage tote. Whenever possible, remove wooden handles or seal them as described for chisels. Attach the blade to brackets using steel wire on both ends so that the anodes face the blade sides instead of the edges.
Spokeshaves and drawknives: Fully disassemble when possible and suspend each metal part separately in the tank. Remove wooden handles as described above when possible, or wrap and seal them as described above.
Metal plough planes and other multi-part tools: These are ideal for batch processing, since you can safely de-rust 10 or more small-to-medium parts at once in a 5 gallon tank, as long as the parts do not touch each other or the anodes.
Using the Simple Battery Charger for Electrolysis
After connecting the clamps to your system, plug in the simple battery charger and press the MODE button. Select the first 12V setting. The charger will start a safety check, and the center LED will flash between green and red. After approximately two minutes, the center light should change to a pulsating red light as shown in this video, indicating that the system is set up correctly and electrolysis is in progress.
Clamp the red (positive) clamp to the copper wire loop connected to the anodes on the side of the tank. Clamp the black (negative) clamp to the copper wire loop on top of the hanging bracket connected to the parts. Plug the charger into a GFCI-protected outlet and turn it on. When lights start flashing as the unit initializes, select the manual 12V setting (the first 12V option from the four options available). Avoid the other settings, as those are for battery charging and will not provide continuous current for electrolysis.
After selecting the first 12V setting, the main indicator light should fluctuate between red and green for up to two minutes as the unit performs a safety check. Afterward, the light should begin pulsing with just red light to indicate proper operation. Next you should see small bubbles rising from the surfaces of your parts. This confirms the circuit is complete and electrolysis is underway.
This basic 12V battery charger generates a safe and effective average current (usually in the range of a few amps) that can effectively remove rust from various parts in a five-gallon tank, assuming all contacts are good and the parts don’t short out against the anodes.
Using the Premium Power Supply
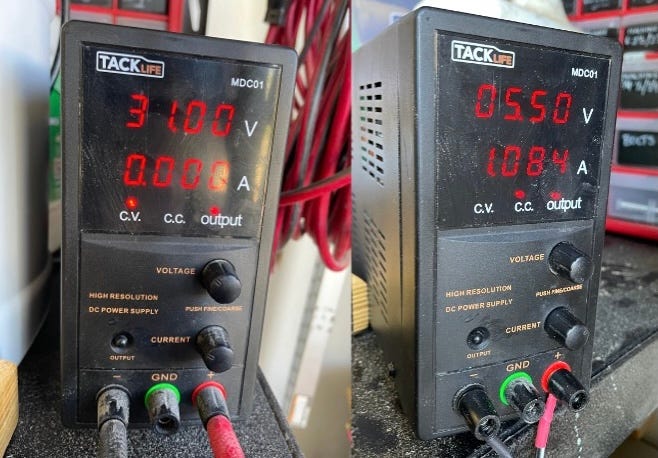
If you’re using the premium power supply I recommend, clamp the red clamp to the copper wire loop connected to the anodes, and the black clamp to the copper wire loop on top of the hanging bracket connected to the parts. Then, plug it into a GFCI outlet and press the power button. Turn on the charger and press the “output” button to switch the red indicator light to CC (continuous current) instead of CV (continuous voltage). For standard de-rusting, turn the course adjustment knob until you see tiny bubbles rising from the tool.
In my experience with five-gallon tanks, the optimal current setting is between 1 and 2 amps, but very large and dense items can require up to 5 amps. You can search Google for detailed advice and scientific resources about the optimal amperage for electrolysis rust removal. The general answer you’ll find is between 0.25 and 2 amps per square foot of cathode area, with calculations involving complex measurements, water displacement, and mathematical formulas to calculate the area of concave and irregular shapes found on tool parts.
Instead of relying on mathematical calculations and precise measurements, I visually estimate the optimal amperage for each set of parts I de-rust. If the bubbles rising from your tools are large, vigorous, and resemble boiling water, the amperage is set too high. To adjust the current, turn down the knob until the bubbles resemble those you might see rising from the bottom of a tall glass of freshly poured beer. There’s no universal “best” setting, and the amperage should be adjusted for each group of tools you de-rust. With practice, you’ll quickly get used to setting the amperage on your power supply by sight.
Setting the amps too low can make rust removal feel frustratingly slow. On the other hand, setting it too high accelerates hydrogen gas evolution on the parts, which can lead to greater absorption of atomic hydrogen into the steel. This may cause temporary hydrogen embrittlement, which is a loss of ductility that can make the metal more susceptible to cracking under stress.
For most iron and steel tools, this effect is minor and reversible. Over time, any absorbed hydrogen gradually diffuses out naturally, restoring the original properties of the iron and steel. Hydrogen embrittlement is rarely a concern except in extreme cases, such as high-strength or hardened edge tools exposed to very high amperage for extended periods and then immediately subjected to heavy impact or stress (e.g., chopping hardwoods). If desired, the effect can be quickly remediated by mild baking—typically an hour or so at around 300–400°F, which drives out the hydrogen without affecting the temper of most tool steels. But just don’t crank the amps high over a long time and you won’t need to worry about this.
Checking to Determine When Electrolysis is Finished
Required runtimes depends on several factors, including the thickness and density of the rust, the size and shape of the parts, their positioning relative to the anodes, and the current output of your charger. There’s no fixed “perfect” time, and the process is forgiving.
After initiating electrolysis, turn off the power and inspect the components every 2–4 hours, or after an initial overnight run for heavily rusted items. Once the parts appear uniformly dark/black and the visible orange rust is completely gone, remove and thoroughly rinse them. Then, test the surface. Use a brass or nylon brush to remove any surface residue. If brushing reveals mostly bright steel or bare metal with only minor black spots remaining, the electrolysis process is complete. However, if significant orange rust or heavy black scale persists, return the parts to the tank for additional electrolysis. Otherwise, proceed to the post-processing instructions below.
Average electrolysis run times for a standard 12V setup in a 5-gallon tank:
Light surface rust on hard steel tools such as chisels and blades: 3-4 hours is often enough.
Moderate to heavy rust on steel or machined surfaces: 6–12 hours or overnight.
Heavy rust on cast iron such as hand plane bodies and larger tools: 12–24 hours. For very heavily rusted items, you may need to split the electrolysis session, replace the solution, and clean the tank, anodes and parts for optimal results.
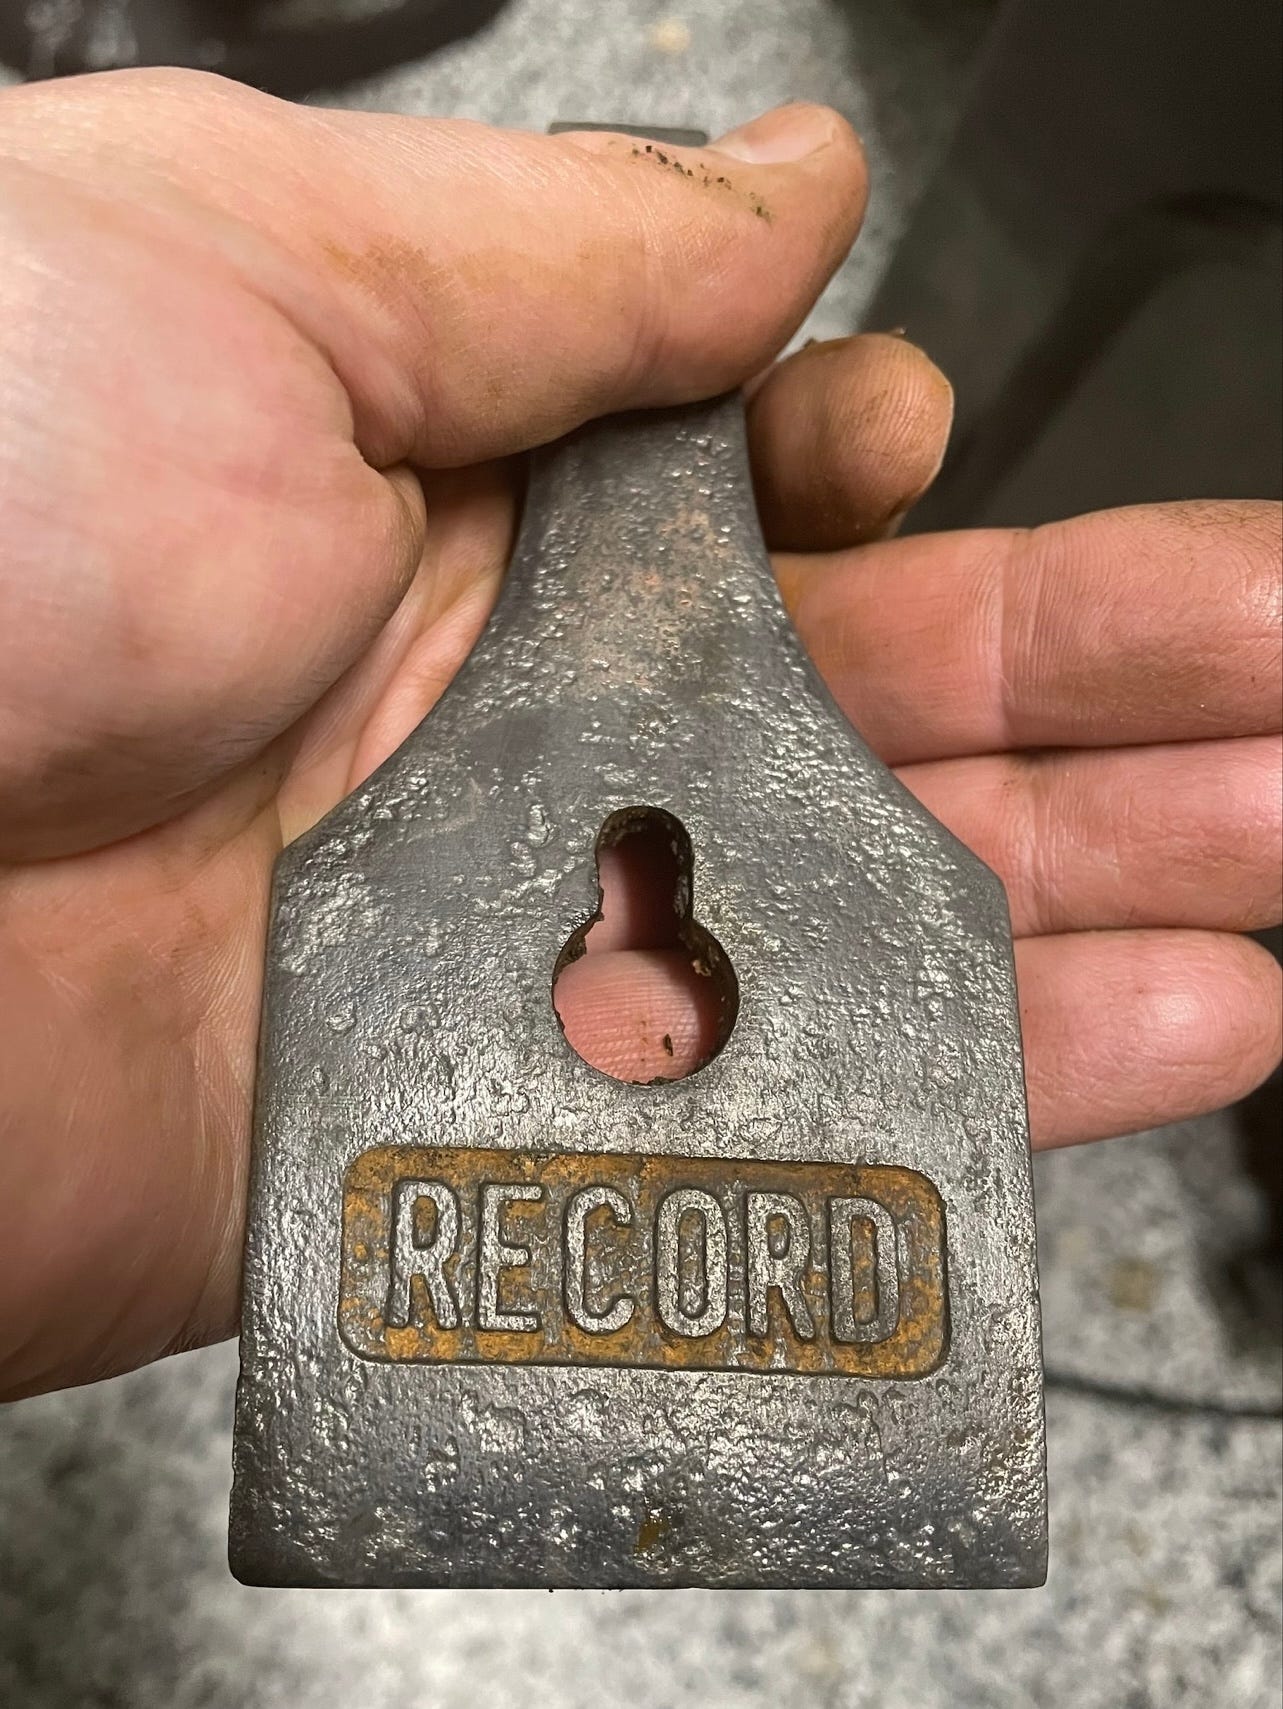
Power Source Shows Maximum Voltage but Zero or Very Low Amperage
This usually indicates the absence of an electrical circuit or insufficient conductivity. Check these common causes in order:
Poor or missing connections: Ensure the negative (black) clamp is securely attached to the copper wire or conductive hanger connected to your parts. A frequent oversight is forgetting to connect the power supply clamps to one or both electrodes. Check to make sure the positive (red) clamp has good contact with the copper wire loop connected to the anodes, and the negative (black) clamp has good contact with the copper wire loop connected to the parts. Jiggle the connections, clean the contact points if corroded or dirty, and re-check.
Short circuit: One or more workpieces may be touching an anode, the tank bottom, or each other in a way that bypasses the intended conductivity path. Remove all parts, inspect for contact, redistribute them evenly on the hanging bracket to ensure nothing touches the anodes or any sludge, and re-check.
Not in CC mode: The power supply is in CV (continuous voltage) mode and not in CC (continuous current) mode. Press the output button on the power supply to change the setting.
Inadequate electrolytes: Inadequate electrolytes can occur due to a weak electrolyte solution, forgetting to add electrolytes, or not mixing them until dissolved in the water. Weak solutions restrict ion flow, preventing potential conductivity and amperage. Since excess electrolytes are harmless, try adding more and stirring until a small amount remains undissolved at the bottom. Then, check the current again.
Parts are Etching, Pitting, or Developing New Rust During Electrolysis
This issue can arise from two potential causes:
Excessive current or inadequate anode surface area: If the current is excessively high for the anode’s surface area or geometric configuration, aggressive hydrogen evolution, localized heating, or uneven reduction can lead to pitting or etching of the base metal, especially in delicate or thin areas. To correct this, reduce the amperage or increase the anode’s surface area by adding more or wider steel plates. This will help distribute the current more evenly and reduce the density per square inch.
The electrolyte solution is polluted or depleted and needs to be replaced: During electrolysis, rust loosens from parts and settles at the bottom of the tank as black flakes, debris and sludge. A layer of surface scum or foam may also form on top of the solution. This is normal, but the solution needs to be changed and the anodes and tank should be cleaned from time to time to maintain efficiency. To maximize the life of your electrolyte solution, it’s always best to try and brush off as much rust as possible before the parts enter your tank. When the electrolysis solution becomes too dirty, several problems can occur:
Heavy contamination increases electrical resistance in the solution. This can cause the power supply to increase voltage to maintain current, or the current may drop overall, slowing the electrolysis.
The process relies on current flowing efficiently between the anodes and cathodes. Suspended particles or sludge can interfere with this, leading to uneven or incomplete rust conversion, meaning it can turn into a black magnetite layer on your parts.
In extreme cases, the electrolyte itself may become depleted as the base reacts with rust, grease, paint, or oils, forming insoluble compounds that contribute to the dirt, reducing or negating the effectiveness of the electrolytes.
If a thick conductive sludge layer builds up at the bottom of the tank, it can create unintended electrical paths. Current may arc or flow through the sludge instead of properly through the solution, leading to metallic deposits from the anodes onto the parts, especially if the anodes or parts are touching the bottom of the tank. Very dirty solution can also cause pitting or etching on your parts if the current becomes concentrated or erratic.
Always change the solution when it becomes thick, sludgy, or overly saturated with debris. For very rusty loads, you may need to refresh the electrolyte halfway through or use multiple sessions with fresh solution.
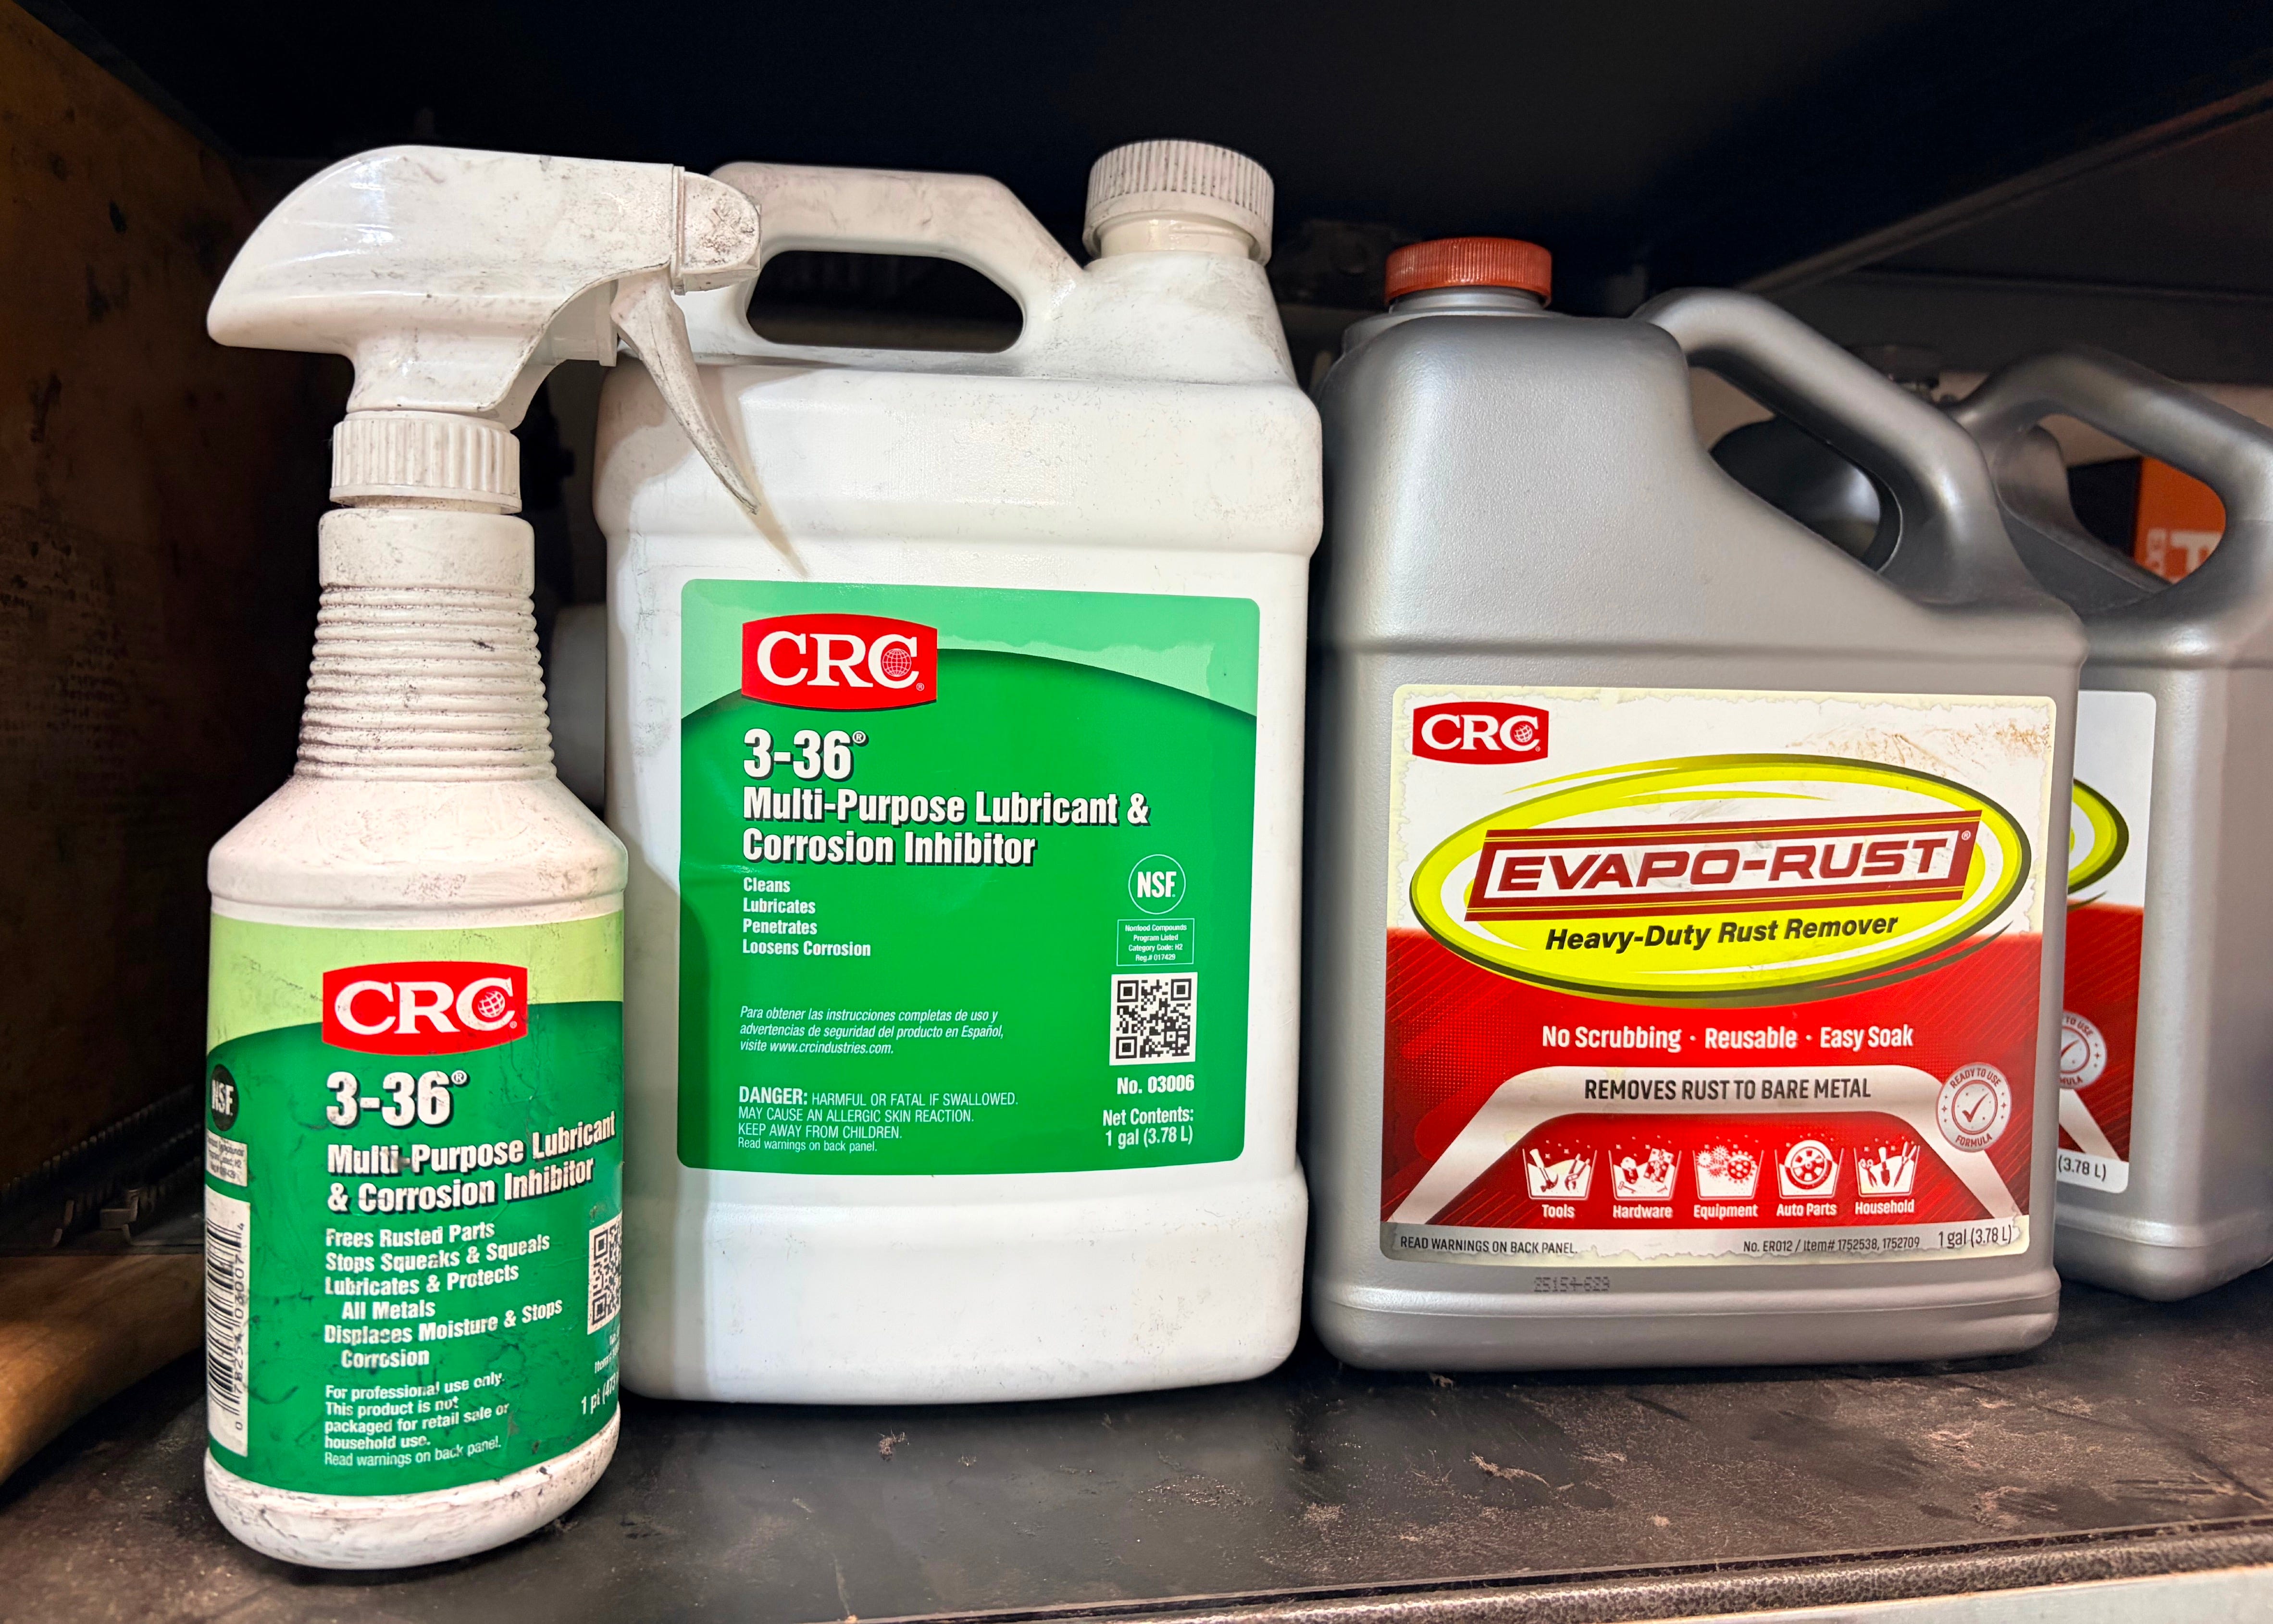
Freshly de-rusted bare metal is highly reactive and will develop flash rust within minutes after it is removed from electrolyte solution and exposed to oxygen and moisture. The following steps help neutralize the alkaline solution, remove loose debris, prevent flash rust, and prepare parts for additional finishing and long-term corrosion protection:
Rinse Immediately: Keep a 5-gallon bucket of clean tap water next to your electrolysis tank. As soon as you lift a hanging bracket with de-rusted parts out of the tank, submerge it into the rinse bucket. This neutralizes the alkaline electrolyte solution and washes away loose residue on the parts.
Dry the Parts Quickly: Remove the bracket from the rinse water and place it onto a terrycloth towel on a work table. Quickly detach the parts from the bracket, fold the towel over the parts, and pat them as dry as best as possible. Work quickly to prevent the damp parts from flash rusting after exposure to air.
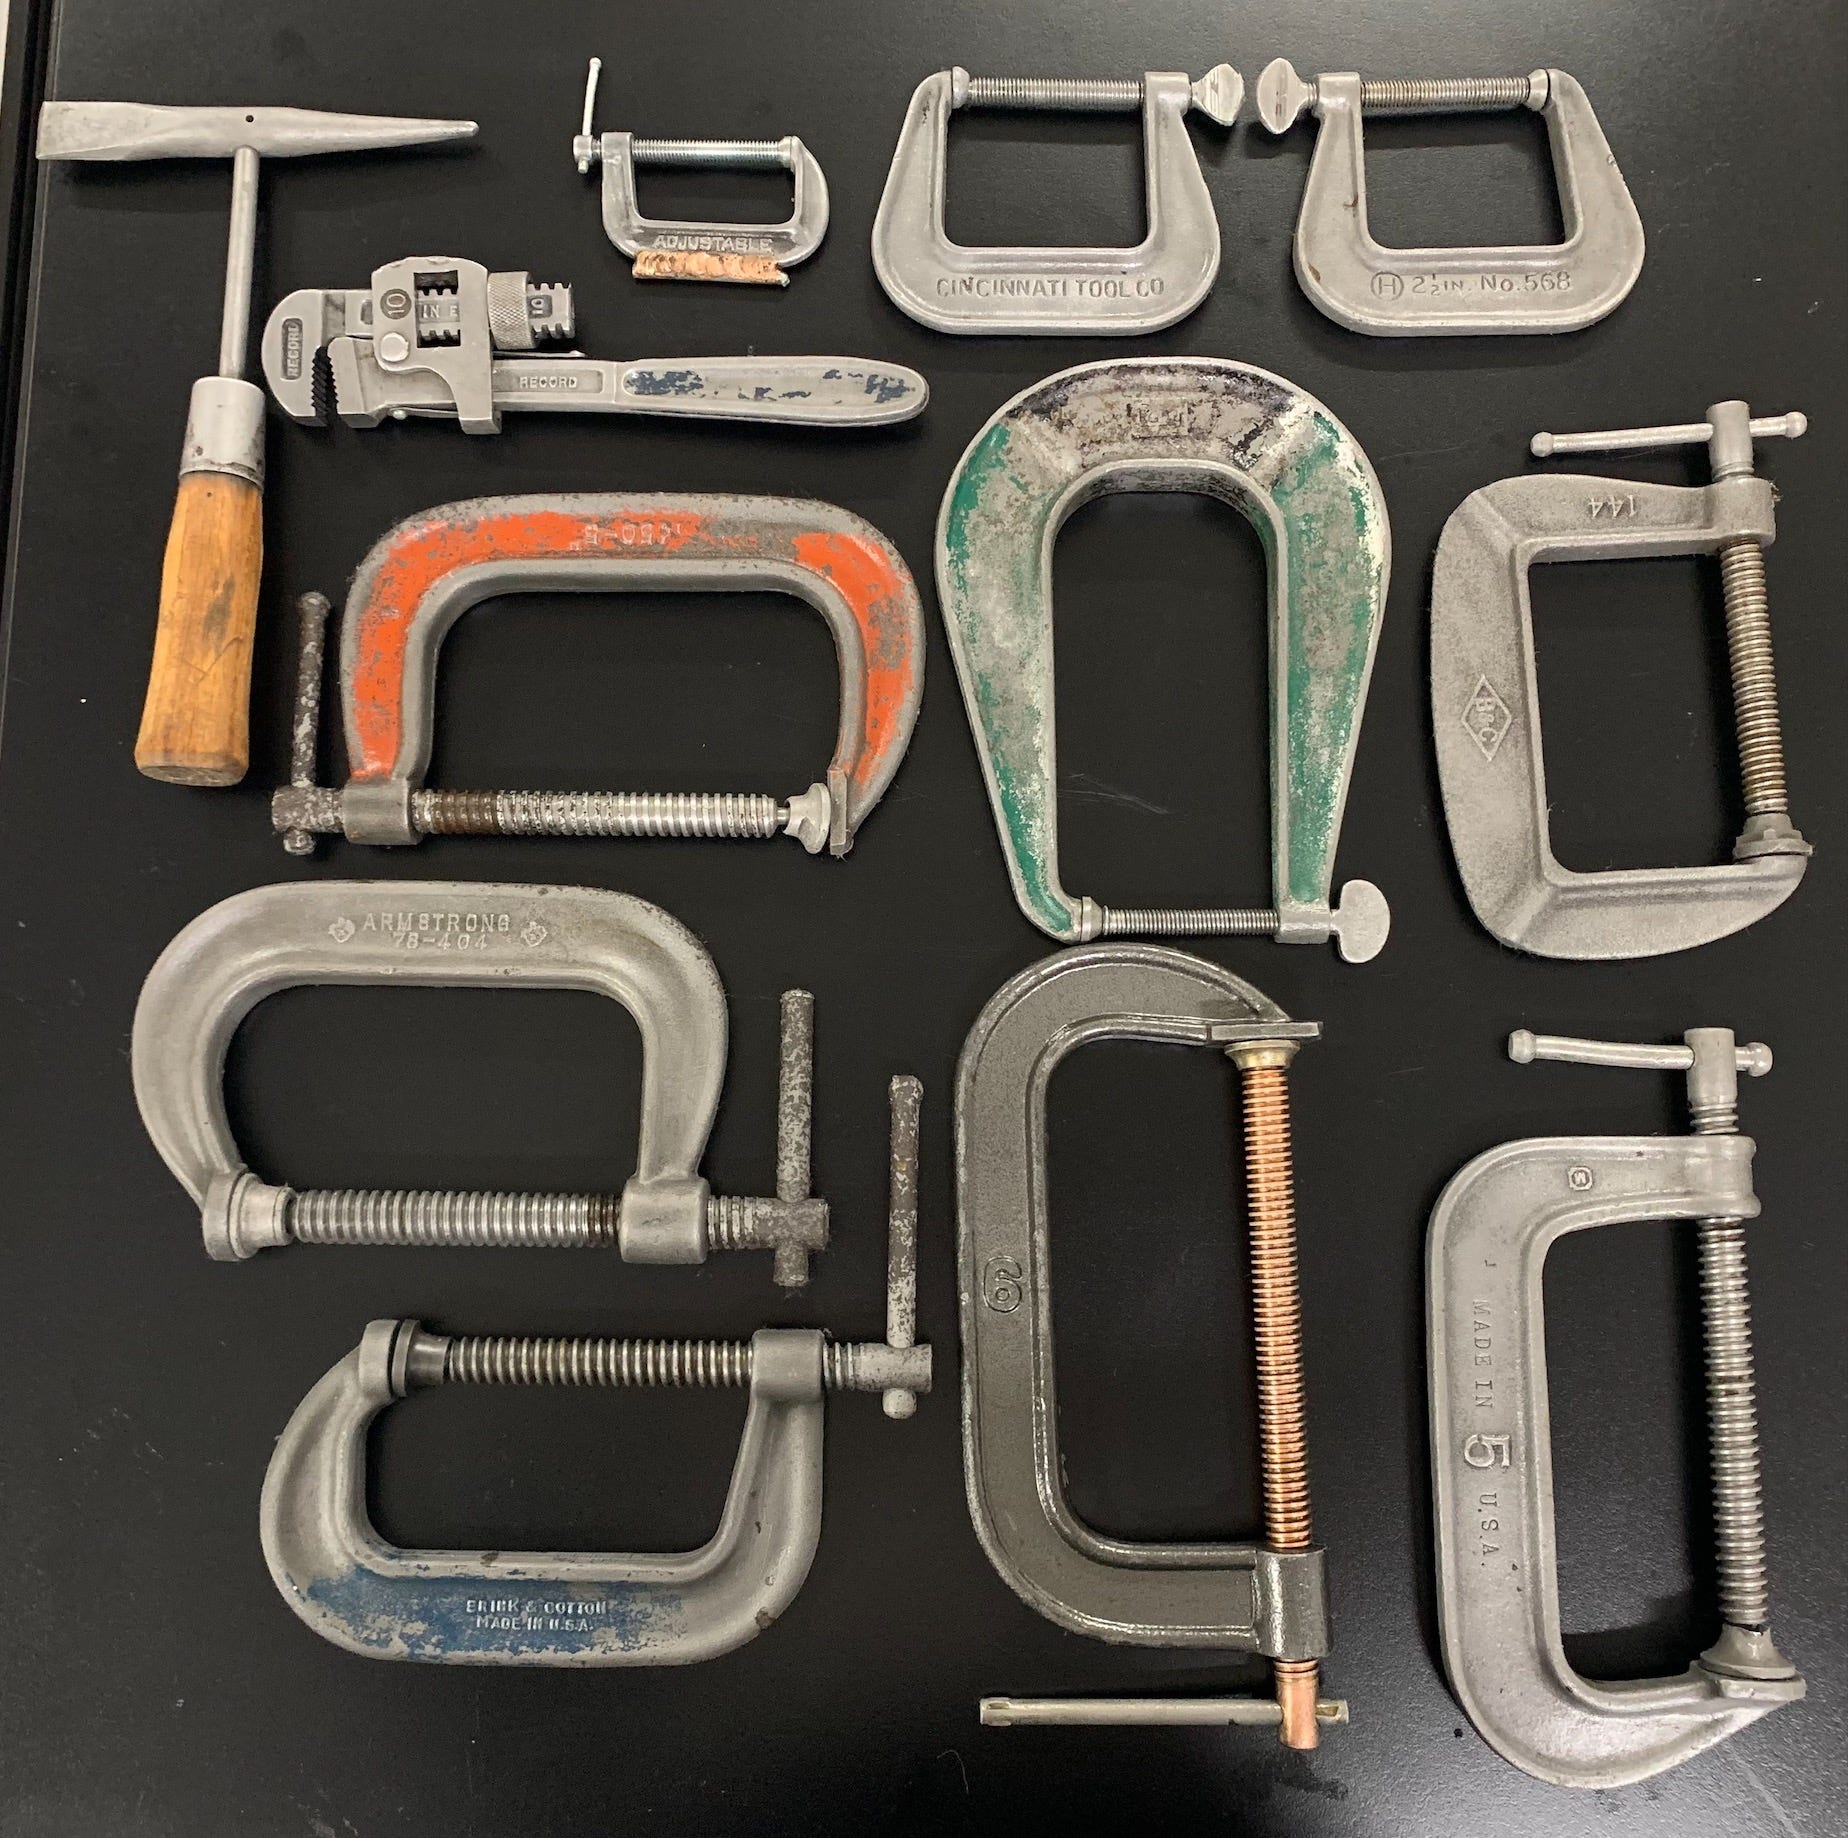
Apply CRC 3-36 for Protection: Immediately transfer the parts into a shallow plastic container and spray them with CRC 3-36 Multi-Purpose Lubricant & Corrosion Inhibitor. I use the pump spray bottle refilled from a gallon-sized container. CRC 3-36 is an excellent all-in-one product for tool restoration. It displaces water, cleans, lubricates, and eventually dries to form a thin, invisible protective film that provides long-term corrosion protection. In contrast, WD-40 is great at water displacement and short-term lubrication but is not a drying oil and doesn’t polymerize to leave a surface film for long-term corrosion prevention.
Tips for using CRC 3-36: Use the pump spray (trigger bottle) instead of aerosol spray cans. Aerosols are significantly more expensive per use and generate substantial airborne mist, so should always be applied wearing a PPE mask. I use about 5–6 gallons of CRC 3-36 per year as an active restorer. The product leaves a non-greasy film, and after being wiped, dries completely within a day or two as its solvents evaporate.
Scrub Remaining Residue: After applying CRC 3-36, scrub the parts with a handheld brass brush or nylon brush to remove residual black rust and surface residue. These brushes are safe for use on iron and steel and will not scratch the metal.
Deeper Cleaning if Needed: Hand scrubbing your parts with brass or nylon brushes may not remove all black marks and staining. You can stop now if the remaining patina is acceptable for your project, or remove the residual marks using abrasives and chemicals.
To remove stubborn residual black marks and other surface patina, start with the least damaging methods and products. Try Scotch-Brite Ultra Fine (gray) hand pads, which are equivalent to 600–800 grit. These pads are excellent for removing black marks and staining, but introduce shallow surface scratches. They leave a satin brushed finish that’s easy to buff to a shine. For more resistant stains, use the more aggressive Scotch-Brite Fine (maroon) hand pads, which are roughly 320–400 grit and leave more noticeable scratches. Always use abrasives in a consistent up-and-down pattern to create uniform scratch patterns that mimic the appearance of grain.
To remove the brushed appearance from these products and restore a polished surface, use 800-grit wet/dry silicon carbide sandpaper, followed by 1200 grit paper, and then a bench buffer and polishing compounds. If you don’t have a bench buffer, you can still get great results using the same paper up to 3000 grit with sanding blocks. Detailed resurfacing and polishing techniques and recommended products will be covered in the next tutorial in this series.
Handling Residual Black Marks in Pits or Hard-to-Reach Areas: If stubborn black residue persists in pits, crevices, or other challenging areas where resurfacing isn’t feasible, consider using Evapo-Rust as a targeted follow-up treatment, as discussed in the next section.
Chemical and Abrasive Methods of Rust Removal
So far, this tutorial has focused on methods for removing rust and surface stains from tools while preserving the original surface, gloss, and texture. In my experience, electrolysis is the most effective starting point for most restorations. However, heavily corroded tools often require chemicals to remove difficult-to-reach stains and abrasives to remove sub-surface corrosion marks. The products and techniques described below are additional options I recommend using or avoiding based on my experience and observed results.
Evapo-Rust, a popular rust remover, works through a chemical process called chelation. Its active molecules bond specifically with iron ions in iron oxide (rust), lifting them from the metal surface and suspending them in the solution without harming the base steel. Parts can be fully submerged and soaked until all orange and black rust is completely removed. Once the rust has been removed from a batch of parts, the solution can be reused multiple times until it becomes black and saturated with iron ions. At that point, it becomes depleted and must be replaced. As a general guideline, I typically get 5-6 uses out of a one-gallon container of Evapo-Rust. After using Evapo-Rust, follow the same post-processing steps outlined above for electrolysis.
Although Evapo-Rust is very convenient to use, it has significant drawbacks. First, it replaces rust marks with a dull, matte gray or darkened finish, sometimes referred to as a “carbon migration” effect. This unattractive finish can be restored to a shiny iron or steel surface by abrasion and polishing, but that largely defeats the purpose of using Evapo-Rust to avoid abrasion and other mechanical processing steps. Second, the part must be fully submerged in the solution. Any exposure of iron or steel at the waterline triggers a continuous loop of oxidation and chelation, resulting in a deep, often irreversible etched line in the metal.
I’ve seen online concerns about whether Evapo-Rust removes paint or japanning. Evapo-Rust’s chelation effect targets only iron ions and has no impact on non-iron-based paints or other coatings. However, rust spots that form through pinholes beneath coatings will be affected by Evapo-Rust, which can cause or accelerate bubbling and flaking of the coating above the rust. As a matter of chemistry, however, Evapo-Rust itself does not soften or remove coatings or affect anything other than iron oxide.
Despite these drawbacks, I still use Evapo-Rust for these purposes:
Removing stubborn black rust spots on iron and steel with textured, pitted, or intricate surface areas that cannot be resurfaced before nickel electroplating, since plating on magnetite is problematic.
Removing deep black rust spots when it is not feasible to uniformly smooth the surface and eliminate all pitting. By using electrolysis first to remove the bulk rust, Evapo-Rust then targets only the remaining black rust spots. This leaves the rest of the metal surface untouched, preventing a dull, matte gray finish across the entire tool and preserving the original sheen where no rust was present. The dead matte effect is limited to the rust spots, making it much less noticeable. Additionally, Evapo-Rust’s chelation action targets only the small rust spots, which minimizes product depletion and makes it highly cost-effective.
Creating an even base when planning to apply a uniform black finish afterward (for example, cold bluing or black oxide), as it eliminates dark spotty areas.
Treating small, low-value parts (such as screws, washers, and pins) that are difficult or inefficient to process with electrolysis, where surface appearance is unimportant or polishing will be required anyway.
Razor Scraping: This is a simple, low-damage mechanical method that’s popular for removing rust from flat or gently curved iron and steel surfaces, such as saw blades, plane soles, and tool bodies. To use it, hold a single-edge razor blade (or utility blade) at a low angle (around 30–45 degrees) and scrape lightly in one direction to lift off loose rust scale and flakes without gouging the metal. Start by rounding the blade corners with a file to prevent scratching. This method is surprisingly effective for removing bulk rust from large areas, preserves fine details, and can leave a much more attractive surface than sandpaper or other abrasives. Just be aware that this method will not remove rust from pores and crevices, but it will remove the appearance of rust and will usually make the tool look much better. Follow up with ultra-fine Scotch-Brite pads to lessen or neutralize fine orange rust spots after scraping and finish with CRC 3-36 to inhibit future corrosion.
I recommend razor scraping as the first step in restoring flat vintage tool surfaces when the primary objective is to preserve patina and intricate original trademark and brand etchings. While the scraping process can be labor-intensive, it is an effective “least harm” restoration method when the desired results can’t be achieved by other resurfacing techniques.
Soaking in Vinegar: Household white vinegar (5% acetic acid) dissolves rust using mild acid but is also corrosive to iron and steel. Vinegar etches and pits the surface of iron and steel (submerge a thin steel feeler gauge in vinegar for a week and watch it dissolve). Once removed and exposed to air, parts soaked in vinegar flash-rust quickly. Once etched by vinegar, iron and steel will re-rust much faster than the same metal with a non-etched smooth surface. Therefore, I strongly recommend against using vinegar for rust removal. Less harmful methods are always better to prevent unnecessary metal loss, surface damage, and premature re-rusting.
The one way I’d use vinegar on iron or steel is to intentionally make it rust quickly. In the antiques trade, vinegar is sometimes used to “age” replacement parts so they match the patina of older parts. To do this, wipe or soak the new piece with vinegar, let it develop orange rust overnight, then neutralize it in water and scrub it (with oil and fine steel wool or after light electrolysis) to leave a dark, aged appearance.
Wire Wheels: Wire wheels on a bench grinder are often used to remove rust by inexperienced restorers, people who don’t care about quality, and those who want to quickly enhance a tool’s appearance to sell it on eBay. The problem with wire wheels is that they beat the surface of the metal and make it rougher rather than smoother, adding striation or furrow marks. These marks are difficult to detect in the low-resolution cell phone photos commonly used to sell tools online. You can see these marks when the tool is in your hand, but not in low-resolution photos. Sellers rarely mention when they use a wire wheel to “church up” a tool for photos.
I would much rather pay more for a tool in “as found” condition than one damaged by a wire wheel. I would not knowingly purchase a tool that a wire wheel was used on. The only way to remove wire wheel marks is with sandpaper and further abrasion. I would most likely have been able to avoid that, or at least minimize it, using gentle restoration methods. When I receive a tool with undisclosed wire wheel marks, I always ask for a refund, then block the seller so I don’t risk buying from them again.
For a quick and less destructive alternative to wire wheels, consider using fine 8” 1/2” arbor Scotch-Brite wheels on a standard bench buffer. I stack two or three of these wheels on my 5/8” arbor buffer. These wheels will uniformly scratch the surface at around 400 grit, but leave a brushed satin finish without the linear ridges that wire wheels cause. If you plan to resurface a part anyway to remove corrosion pitting, these wheels are great for quickly removing black marks, especially on uneven areas. In the next article in this series, we will provide a comprehensive tutorial on resurfacing and polishing metal, including how to restore shine to metal after using these wheels.
Bead Blasting: Bead blasting is a surface cleaning technique that uses fine, rounded glass media pressurized by compressed air. It effectively removes rust, scale, paint, and japanning without causing pitting, unlike sand blasting. Similar to Evapo-Rust, bead blasting creates a uniform matte surface, and is best suited to quickly prep for painting and japanning. Unlike electrolysis and Evapo-Rust, it can’t reach into pinholes so doesn’t remediate rust in micro-pitting.
Bead blasting requires specialized equipment, including a blasting cabinet, hoses, nozzles, an air compressor, and glass beads, which will gradually wear down and must be replaced. Wearing a respirator is crucial to prevent silicosis. Additionally, practice is essential to avoid over-blasting and rounding edges. It’s also important to plug all threaded holes to prevent damaging the threading on tool parts. Bead blasting is not suitable for tools with delicate etchings and engravings, and I advise against using it on high-value tools.
Vibration Tanks and Tumblers: These machines use a vibrating bowl filled with abrasive or polishing media, typically ceramic triangles, plastic pellets, or plant-based materials, along with a liquid compound. They process batches of small parts. Generally, this technology shares the same advantages and disadvantages as bead blasting.
Large parts are unsuitable for tumbling because they must fit within the tank’s capacity. Vibratory tumbling is effective for unattended cleaning when subsequent polishing is intended, but it should be avoided when edges, threading, or fine markings risk being compromised or damaged. Monitoring run times is essential to prevent over-processing.
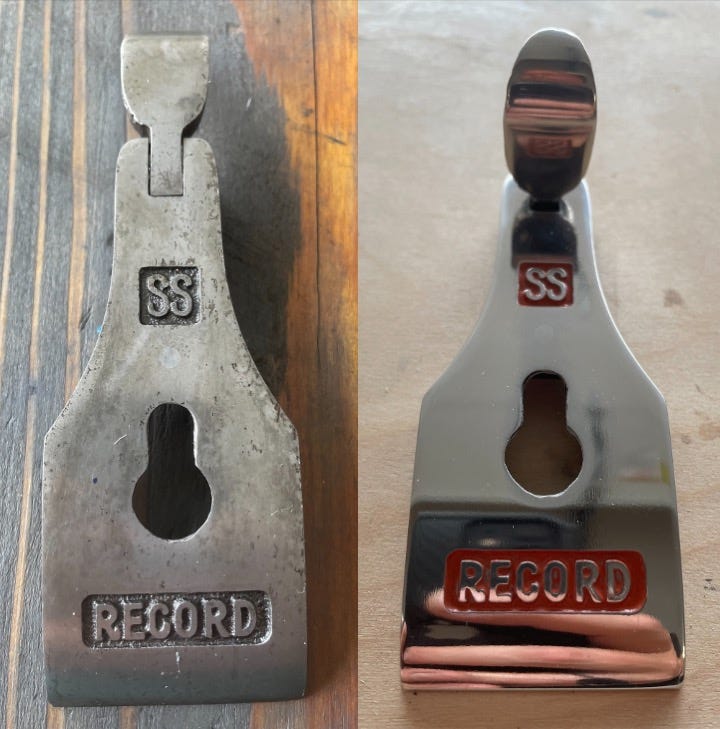
Begin with the least destructive rust removal method that is most likely to achieve your desired restoration outcome. Electrolysis is often the most effective choice for this purpose. Only resort to chemical and abrasive methods when absolutely necessary, and always be fully aware of their potential impact on the tool’s condition and value. After each restoration step, treat any bare iron or steel with a rust inhibitor like CRC 3-36 to prevent flash rusting.
Copyright © 2026 Eric O’Grey. All rights reserved. No part of this content may be reproduced, scraped, or used to train artificial intelligence models, machine learning systems, or large language models without express written permission.
No posts
Comments
Nothing yet. Say the first thing.
Sign in to join the conversation.