
Flare Tracker is a free, open-source link-tracking platform designed to run entirely on a free-tier Cloudflare account using Cloudflare Workers. It gives you full control over your link analytics without relying on third-party services.
Cloudflare Workers are serverless scripts. This is code that runs directly on Cloudflare’s global network without requiring you to set up a server.
This allows you to run your website and backend logic entirely in the cloud without ever having to rent, configure, or maintain a physical server.
Flare Tracker logs visitor details seamlessly behind the scenes:
Create a tracking link.
The tracking link records device information and the IP address of the user.
It instantly redirects them to the destination URL.
Log in to your web admin panel (which can be protected by a password and IP restricted for access) to view the results.
Link tracking tools like Grabify already exist, but they come with significant drawbacks that prompted the creation of Flare Tracker:
Domain Blocking: Grabify links are frequently flagged and blocked by social media platforms, email filters, and browsers.
Intrusive Ads: Free link trackers often display interstitial ads to your visitors, ruining the user experience and instantly tipping off anyone who clicks that they are being tracked.
Paywalled Features: Important features like custom domains, removal of ads, and extended data retention are locked behind subscription tiers.
Cloudflare is the ideal host because of these key features:
Generous Free Tier: You receive up to 100,000 requests per day for free, allowing you to track a high volume of link clicks without entering a credit card.
Anonymity: Setting up a free account requires minimal friction, needing only a basic email address to deploy tracking instances quickly.
Fast Delivery: Cloudflare operates a worldwide content delivery network, meaning your tracking scripts execute globally at the edge to ensure instantaneous redirections.
Custom Domains and Free SSL: The platform makes it easy to attach custom domain names and automatically provisions free SSL certificates to keep your tracking links secure and trusted by modern browsers.
Flare Tracker can be applied across several scenarios where lightweight link monitoring and telemetry are needed:
Security Awareness Training: When you need to test organizational resilience, Flare Tracker provides the tracking links needed to see who opens training materials and what devices they use.
General Tracking: When you need reliable telemetry without heavy infrastructure, Flare Tracker captures lightweight, behind-the-scenes data whenever a shared URL is opened.
Ethical Hacking: When you need to gather target intelligence during the initial reconnaissance phase, Flare Tracker allows you to safely capture a target’s IP address and device information upon link interaction.
Disclaimer: Flare Tracker collects device data and IP addresses, which are regulated personal data requiring proper consent.
Use this tool strictly for authorized testing and analytics. You are solely responsible for operating within legal boundaries.
Setup in minutes: Go from nothing to a working tracker quickly. One command provisions everything and hands you a link to share. When a campaign is over, one command tears it all down.
Nothing to sign up for, nothing to install. It runs from your terminal and deploys straight to your own Cloudflare account. There is no new analytics service to join and no software to install.
Your data lives in your account: Every click is stored in your own Cloudflare KV, never handed to a third-party analytics company and never sold. You own the data and you can wipe it whenever you want.
Fast anywhere, free at normal volumes: Your tracker runs on Cloudflare’s global edge network, so links resolve quickly from anywhere in the world and sit comfortably inside the free tier.
Transparent, consent-first tracking: Every link can show a clear consent page that tells visitors exactly what is recorded before anything is logged. Tracking people should not mean hiding it from them, and this makes disclosure the default rather than an afterthought. When consent was already collected upstream, a per-link setting lets trusted links skip the extra step.
Rich click intelligence: See far more than a raw count. Each visit captures IP address, approximate location down to the city, the visitor’s internet provider and network, their browser and device, and the exact time. Turn on Enhanced mode for screen size, platform, and time zone too.
Branded links on your own domain: Send people to links on your own domain instead of a generic address. Attach your root domain or any subdomain in a guided menu, and every campaign link can carry the domain that fits it.
Link previews that look the part: Set a custom title, description, and image for each link, so it shows a polished preview when shared on social media or in a message. Upload once and reuse across campaigns.
A dashboard built for finding things: A clean, password-protected dashboard lets you create and edit campaigns and dig through results without touching the terminal. Stack filters by date, IP or IP range, location, campaign, and device details, view timestamps in any time zone, and see at a glance how many clicks arrived since you last looked.
Rename freely, history keeps up: Change a campaign’s name whenever you like and every past result updates to match, so your reports stay readable as your naming evolves.
Locked down by default: Protect the dashboard with a password, restrict it to specific IP addresses, and switch it off entirely with one command. Sessions keep you signed in without leaving the door open.
One tracker, every campaign: Run as many campaigns as you need from a single deployment. Each link is tracked on its own, so you always know which campaign a click came from.
Flare Tracker is designed to be lightweight and easy to use.
A Cloudflare account.
curlandpythonCloudflare API Credentials:
Visit the ‘Account API tokens’ page in your Cloudflare account https://dash.cloudflare.com/your-cloudflare-url/api-tokens
Click ‘Create token’
In 'Permission policies’ section, choose ‘Write all resources’.
Click ‘Review token’
Click ‘Create token’ at the bottom of the page.
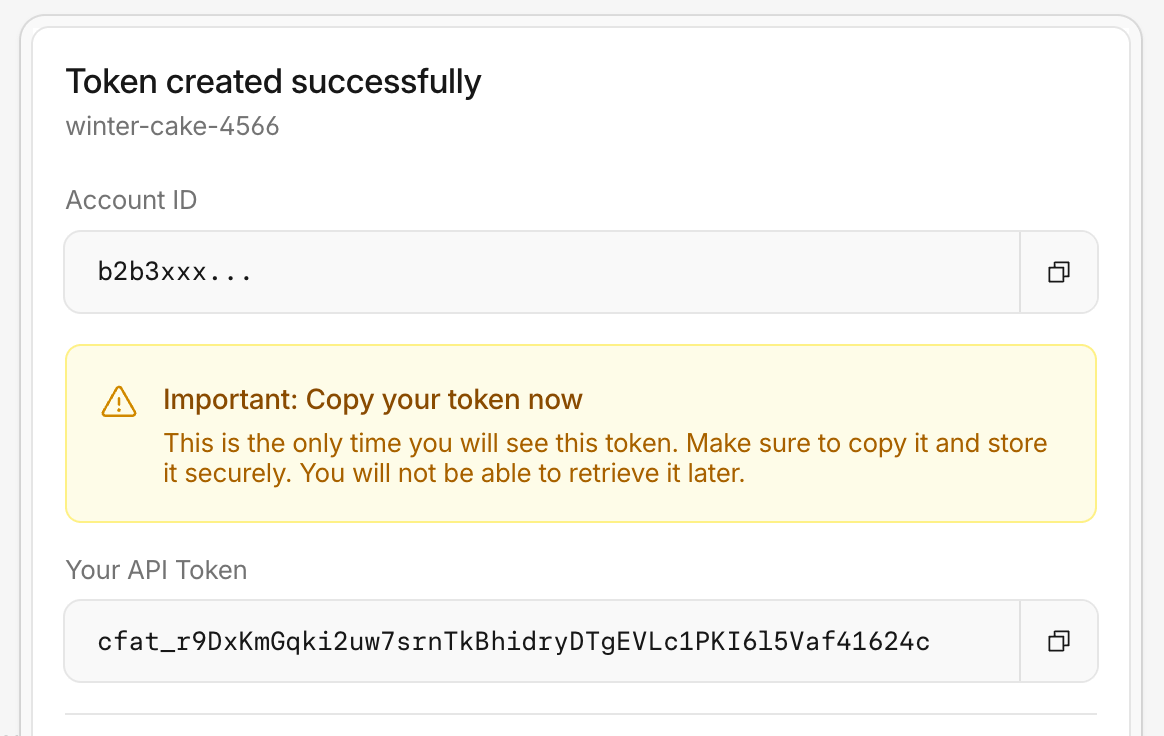
On the ‘Token created successfully’ pop-up, copy your API token.
The launcher is a single bash file.
Download it here: https://github.com/dark-marc/flare-tracker/blob/main/start.sh
Save start.sh to a folder you can open a terminal in.
chmod +x start.sh./start.shAt startup, you get a banner with the version number and a cf> prompt.
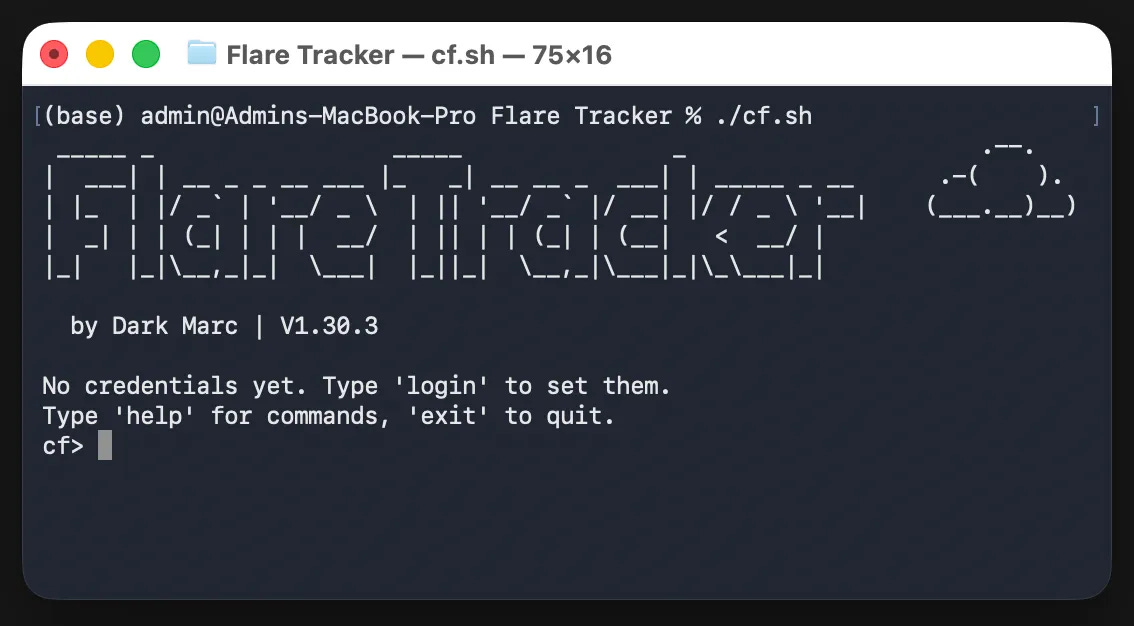
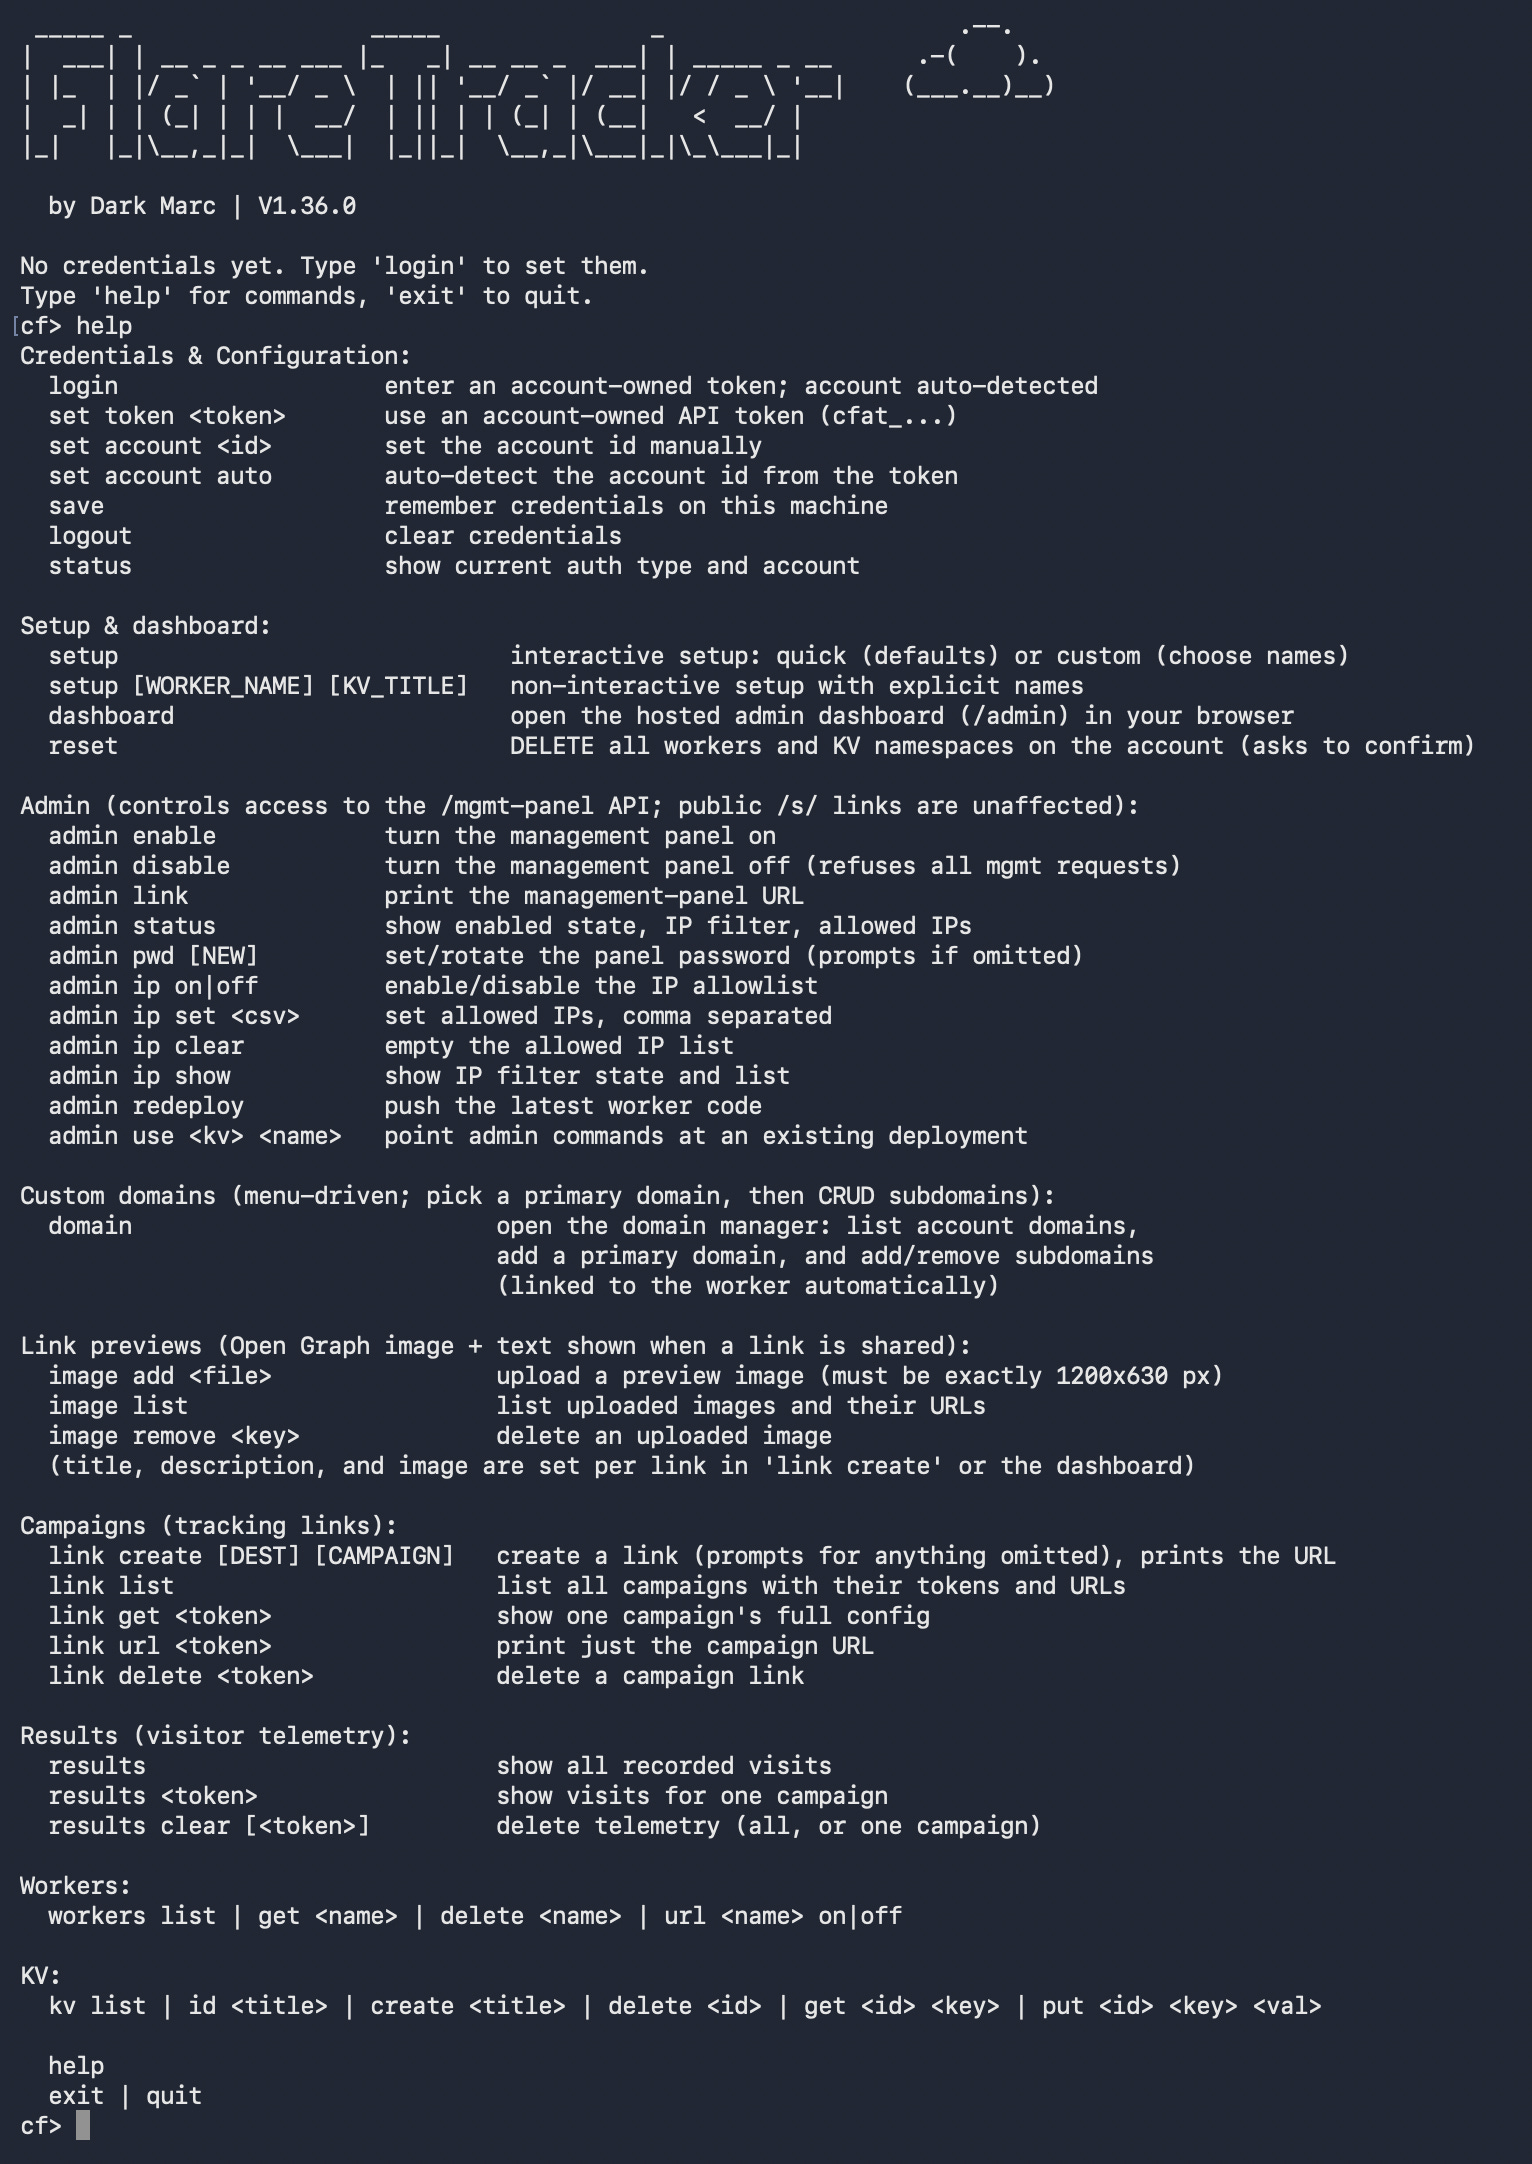
Type help at any time for the full command list, and exit (or quit) to leave.
Set up API key and answer the prompts; input is hidden as you type.
Your account id is detected automatically, and if you have more than one account you are asked to pick one.
cf> login
Account-owned API token (starts with cfat_).
API token: [input hidden]
Detecting your account...
Using account: you@example.com Account (abc...)
Credentials set. Type 'save' to remember them for next time.
The account ID is detected for you. If you have more than one account, you will be asked to pick one.
cf> saveThis writes your credentials to .cf_sh_creds next to the script, readable only by your user, and loads them automatically next time. Skip it if you prefer to sign in each session. logout clears them and deletes the file.
cf> setupThis provisions your storage (a KV namespace on Cloudflare) and deploys the Worker that runs the app. Setup offers two options:
Quick setup uses the defaults, a Worker named
ft-workerand a KV namespace titledFT_CACHE.Custom setup lets you choose the Worker name and KV title yourself (each prompt shows the default in brackets, so you only type what you want to change).
After you pick the names, setup prompts you to set an admin password (leave it blank to have a strong one generated and shown once), then deploys the Worker.
If your account has no workers.dev subdomain yet, you’re asked to register one, which becomes <name>.workers.dev and must be globally unique.
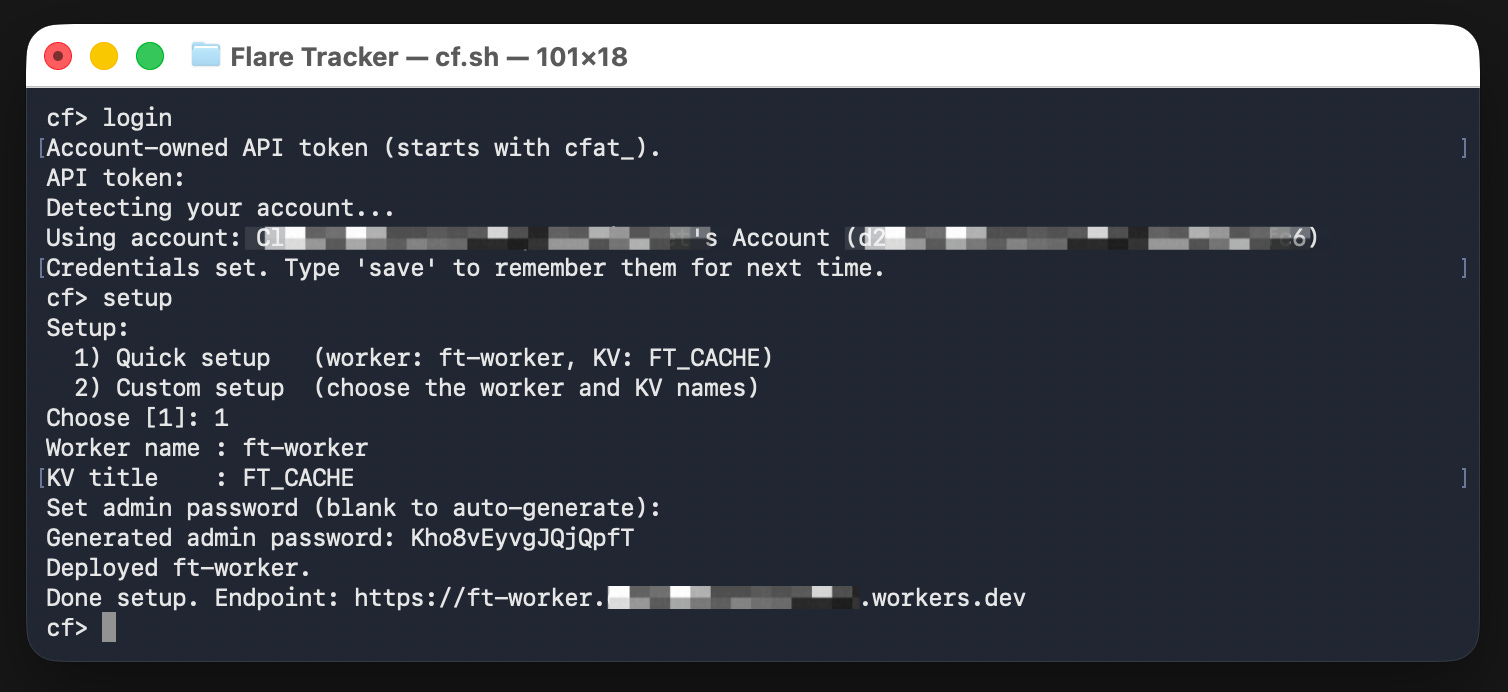
When it finishes it prints your endpoint:
Done setup. Endpoint: https://ft-worker.<yoursub>.workers.devcf> dashboardThis opens https://ft-worker.<yoursub>.workers.dev/admin in your browser. Enter the admin password to sign in. A session keeps you logged in across reloads until you log out.
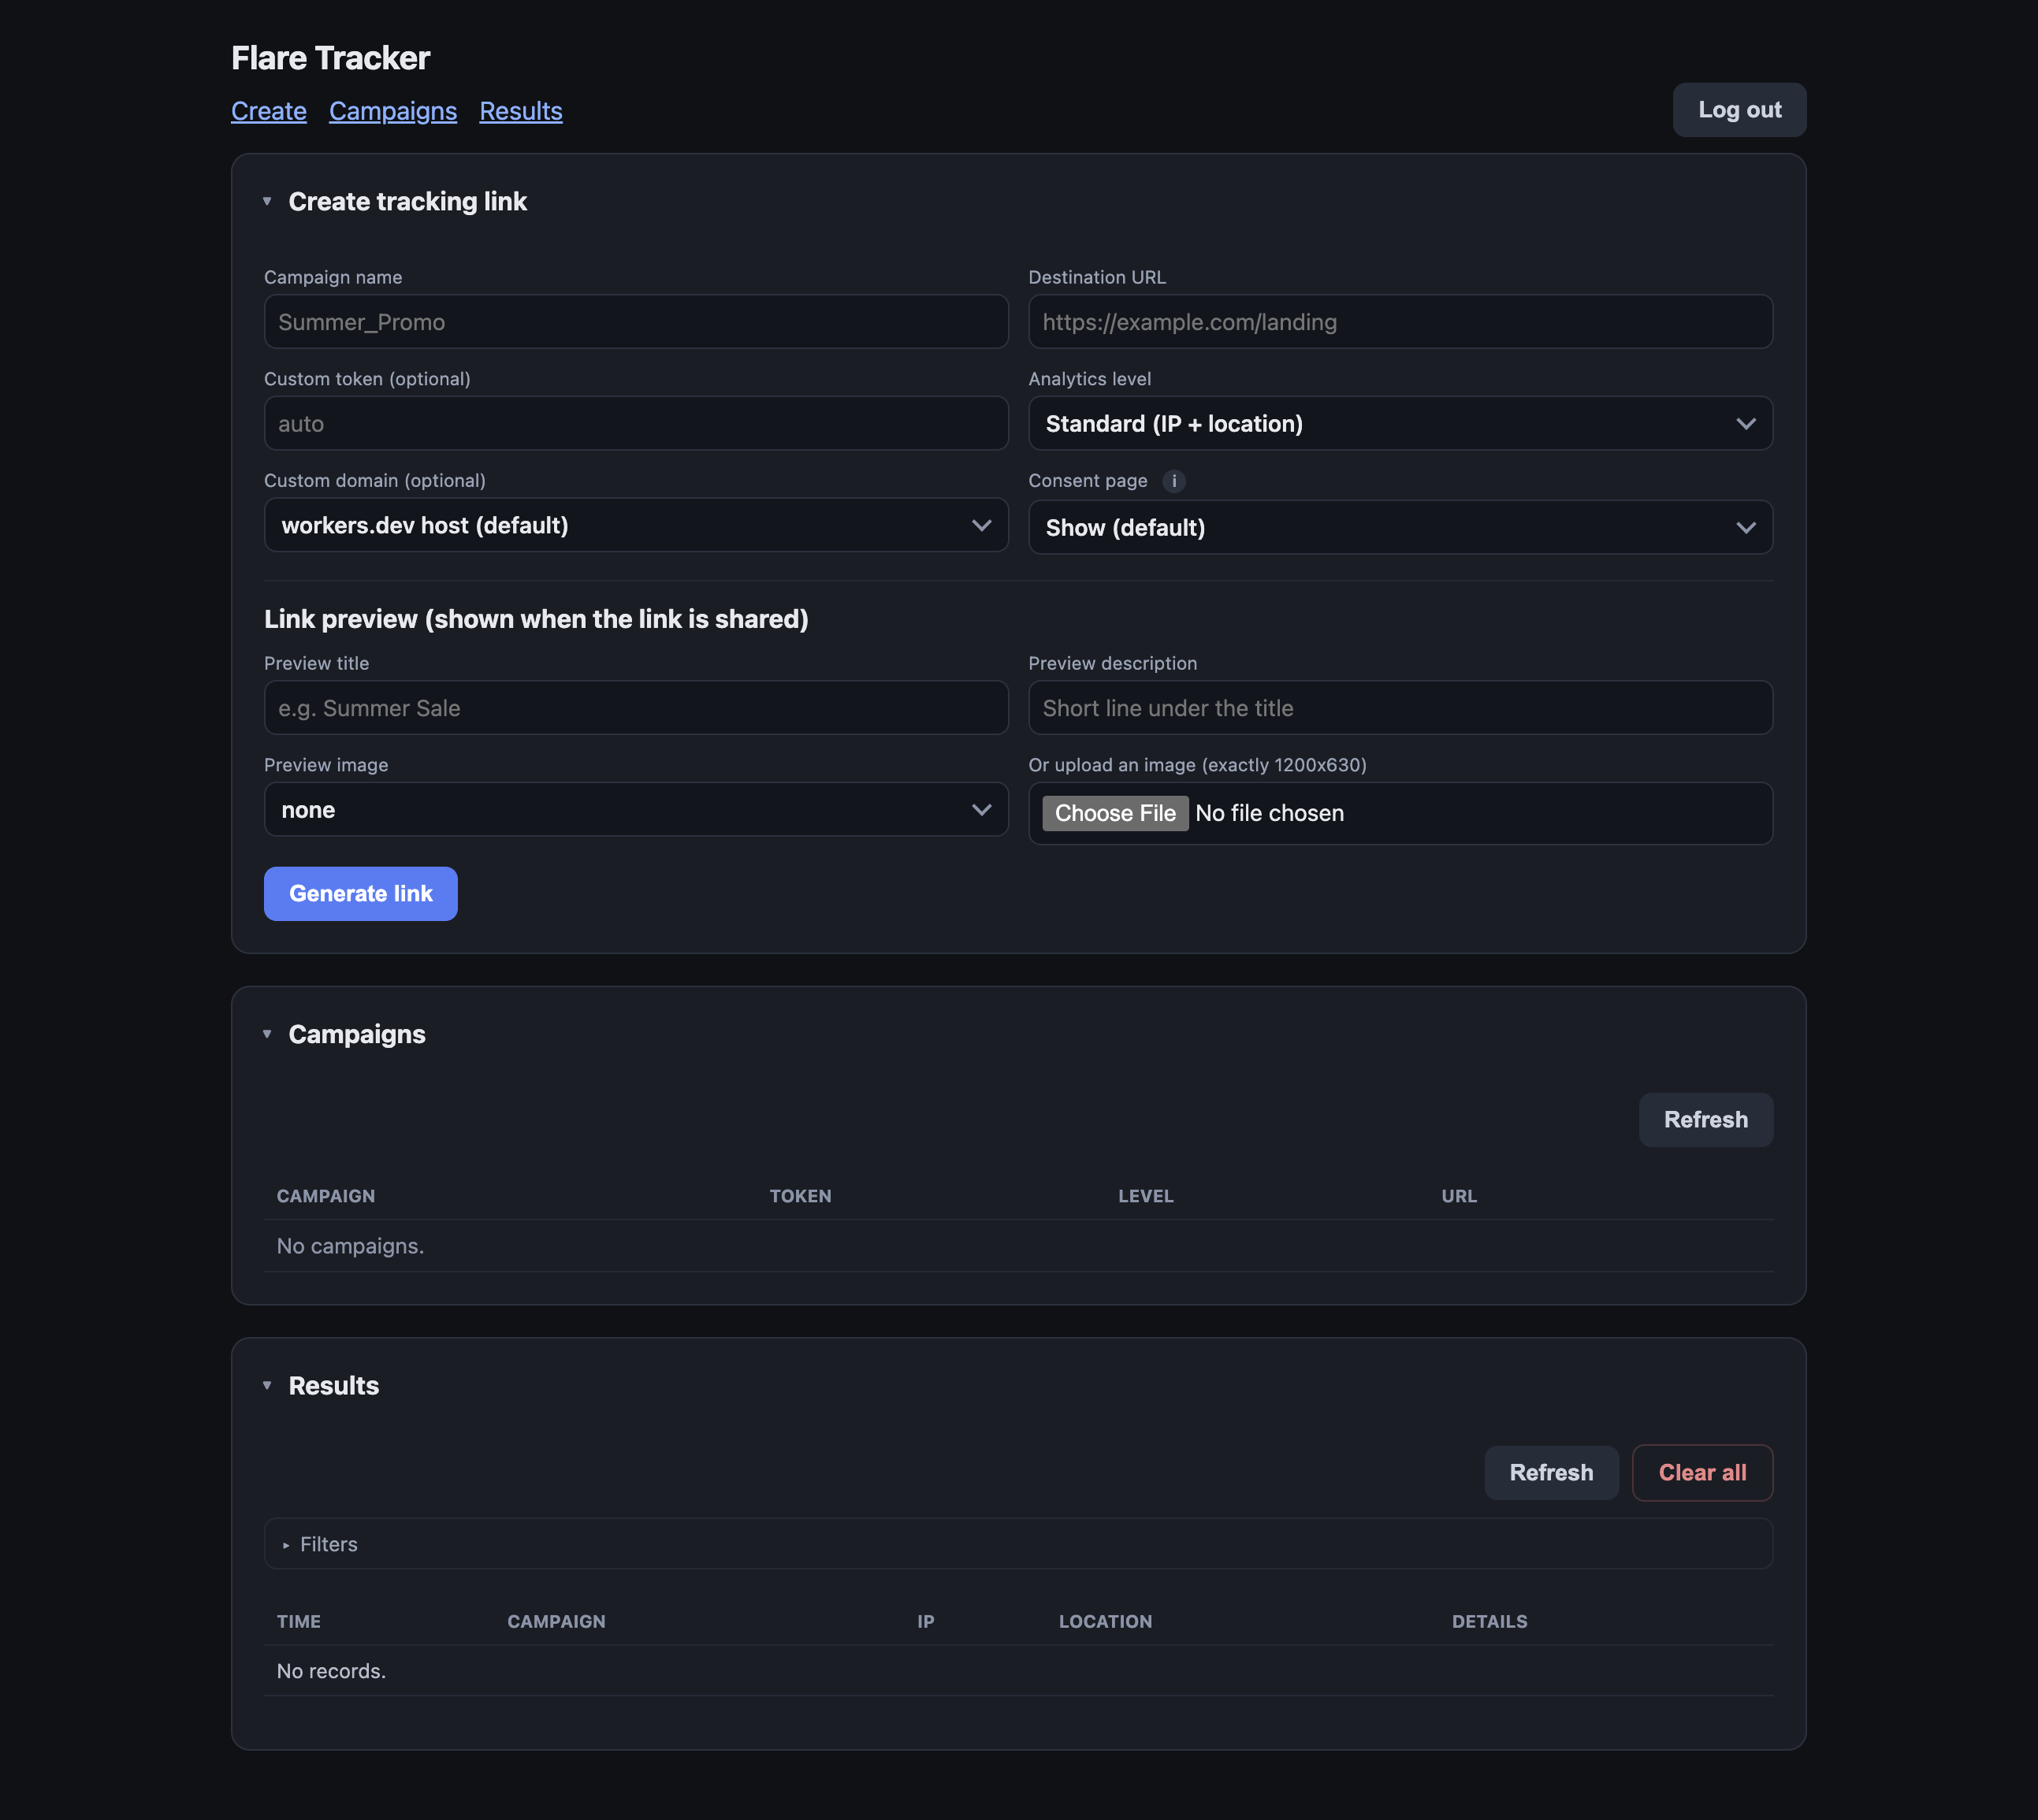
Use the dashboard’s Create tracking link section to create a link:
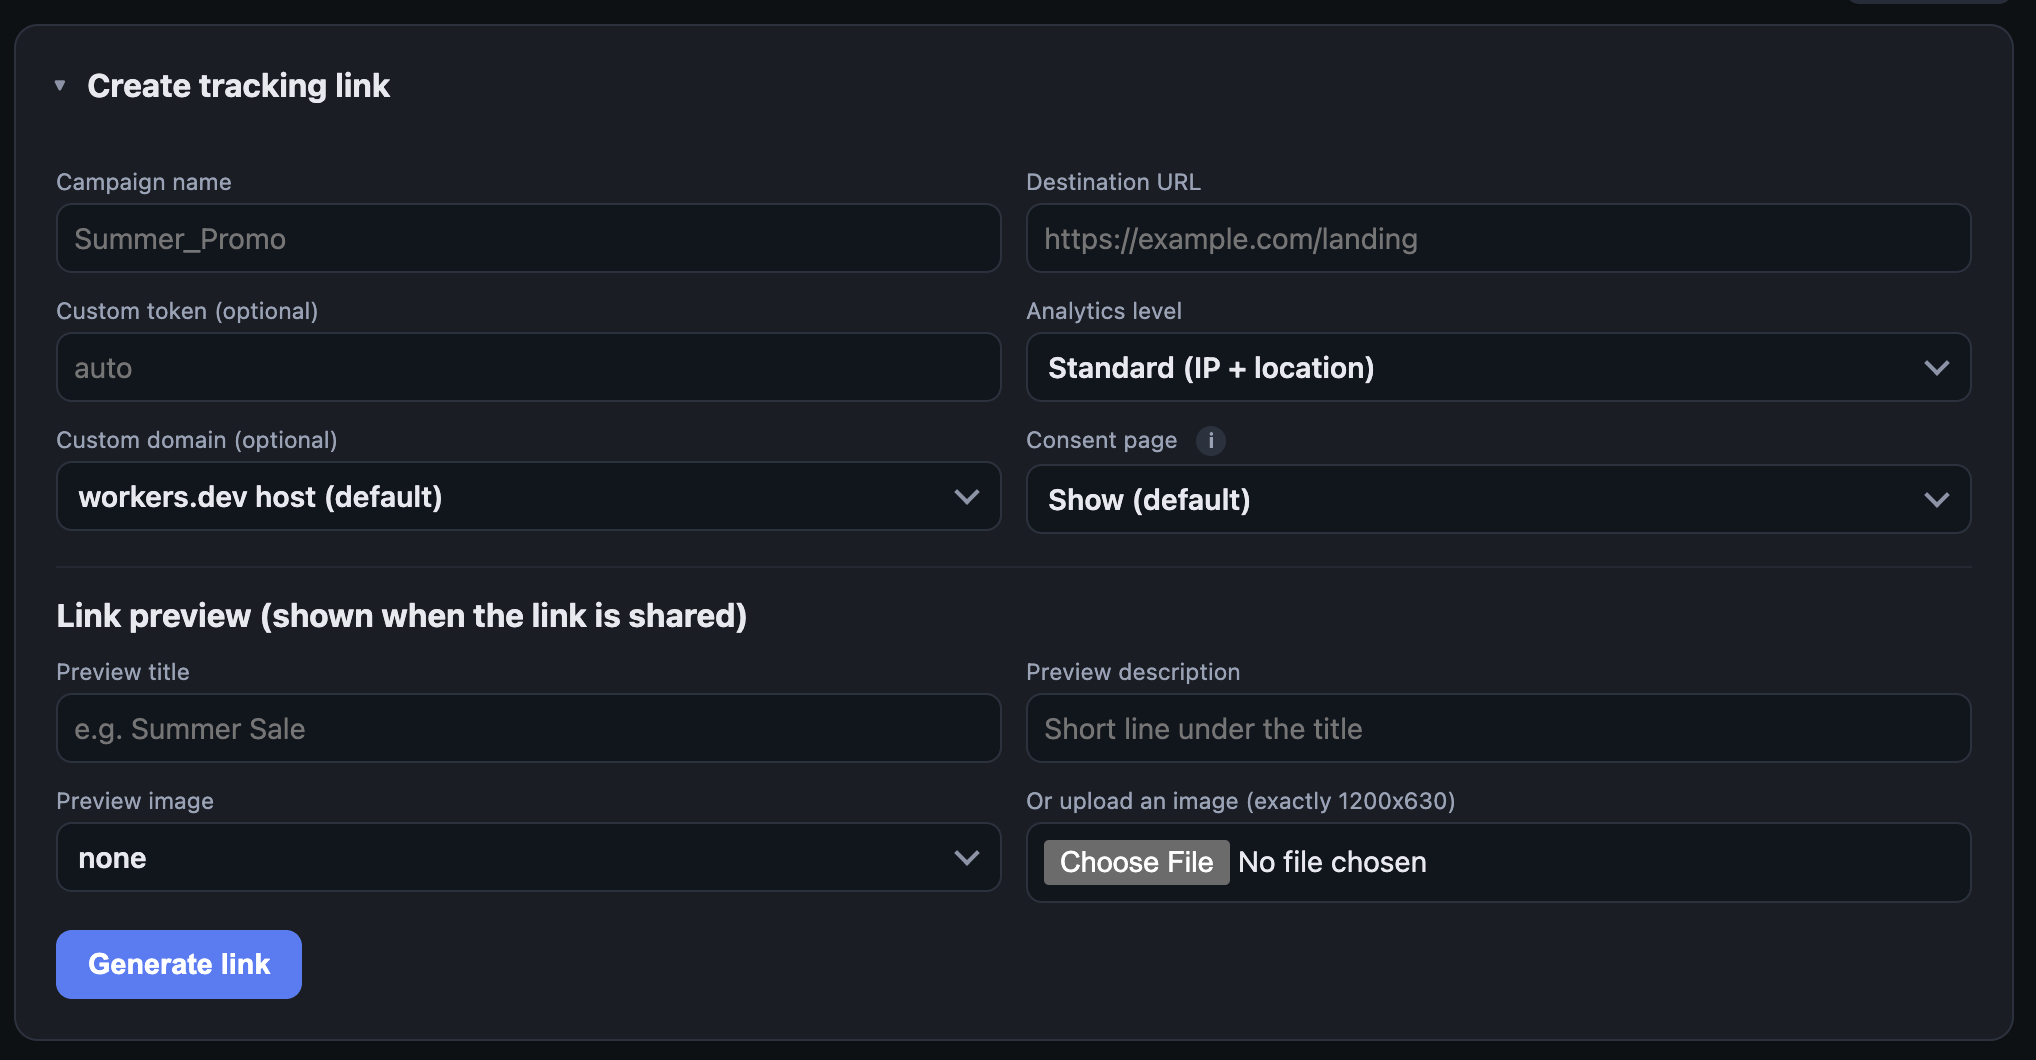
You can also create a link from the terminal:
cf> link createYou are prompted for the campaign name, destination URL, an optional custom token, the analytics level, an optional custom domain, and optional link-preview title, description, and image. The tool prints the finished tracking URL.
Share that URL to start tracking hits.
The dashboard reads results once when the page loads and again when you reload the page or press the ‘refresh’ button in the Results section.
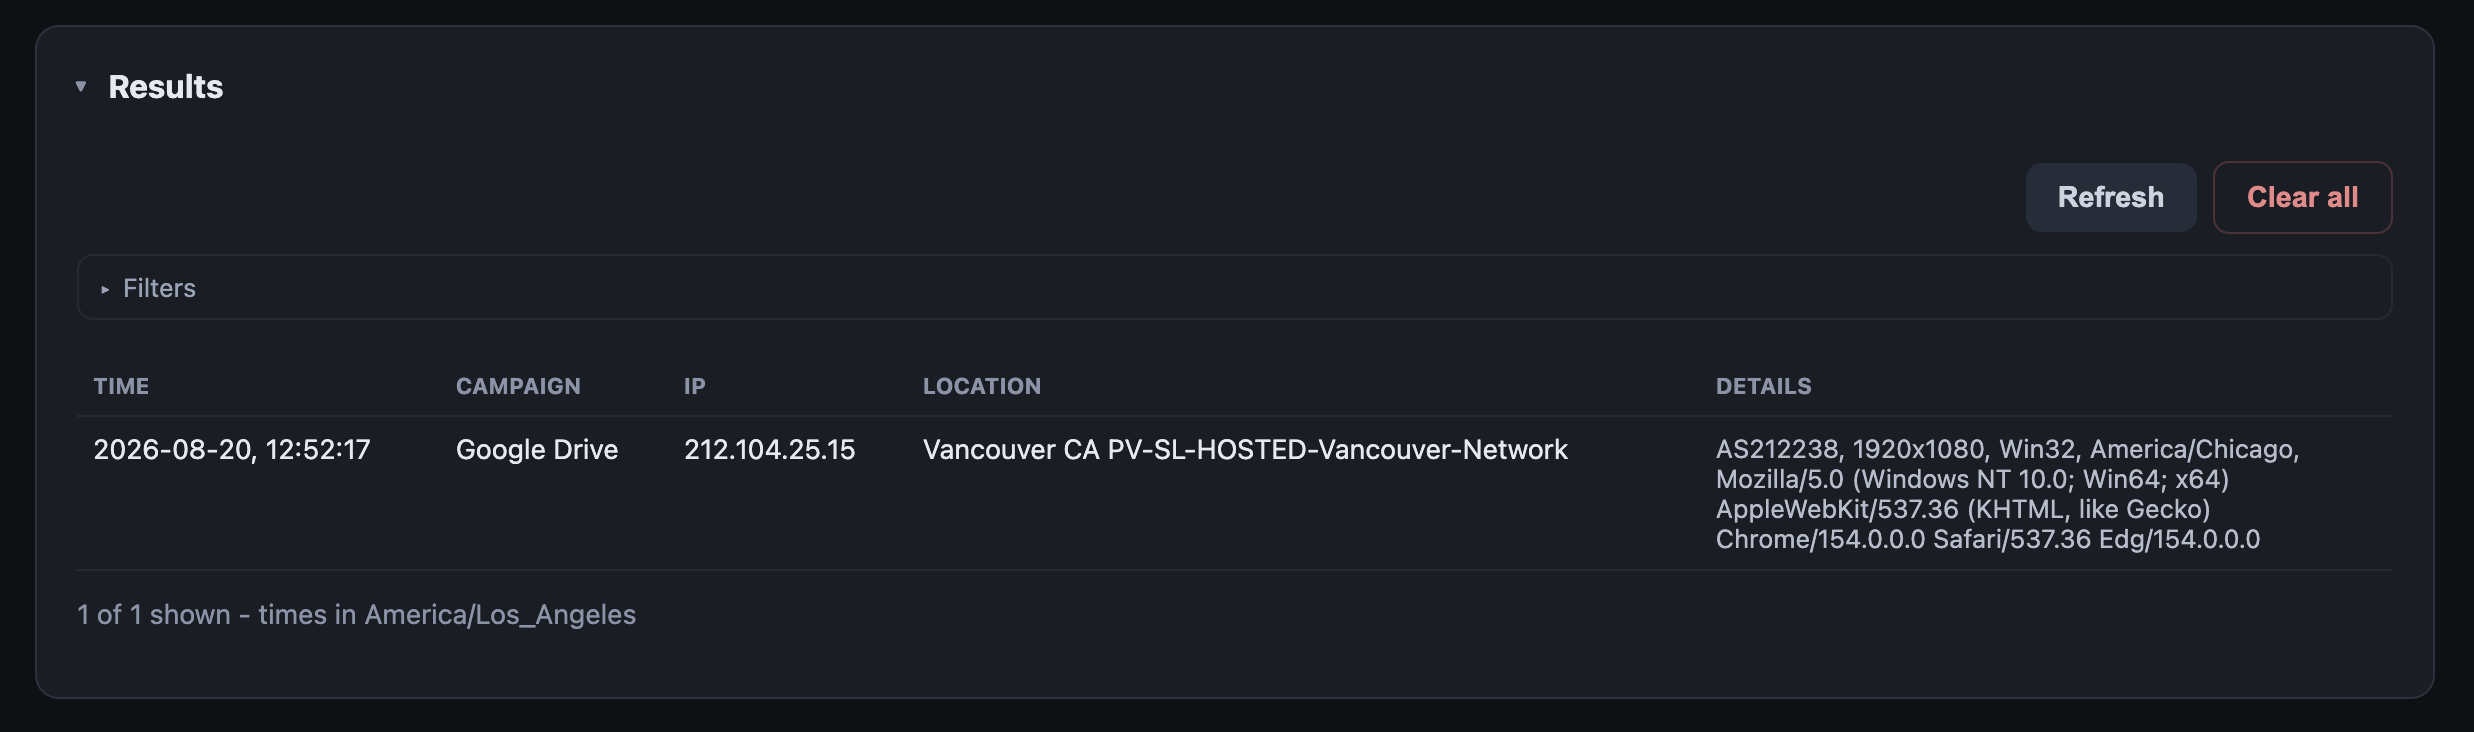
You can also check results from the terminal:
cf> resultsBeyond the quick setup, there are a few settings worth knowing about.
Links can live on your own domain instead of the workers.dev address.
Domain management is menu-driven:
cf> domainThis lists the domains already on your Cloudflare account with their status.
You pick one and manage the hostnames attached to the Worker under it: add a subdomain by typing only a label (for example go, which attaches go.brand.com), leave the label blank to attach the base domain itself, or remove an attached hostname.
Attaching wires the hostname to the Worker automatically. There is also an option to add a brand-new primary domain, which creates the zone and prints the nameservers to set at your registrar; once the domain is active you can attach hostnames under it.
After a hostname is attached it appears in the custom-domain dropdown when you create or edit a link, and links on it serve at https://<hostname>/s/<token>. Newly attached hostnames take a few minutes for their certificate to be issued before they serve over HTTPS.
When a tracking link is shared on social media or in a messenger, the preview image and text come from Open Graph tags.
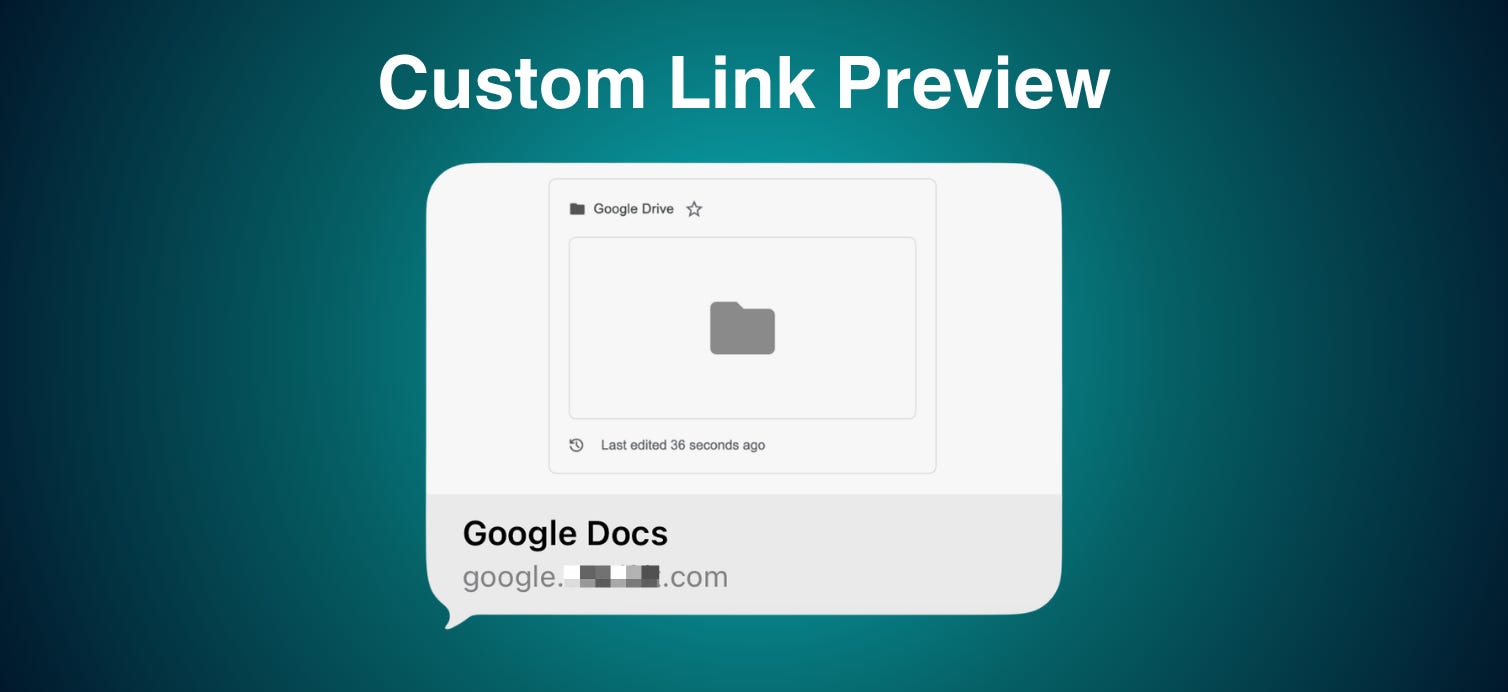
Each link can carry its own preview title, description, and image, set in the create form or the edit modal.
These render in the page’s <head> for everyone, separately from the consent notice, so scrapers get the preview while people still see the consent page.
Preview images are stored in your KV namespace and served from the Worker. They must be exactly 1200 x 630 pixels (the standard Open Graph size); anything else is rejected with a clear message. Manage them from the terminal:
# upload an image (must be exactly 1200x630)
image add <file>
# list uploaded images and their URLs
image list
# delete an uploaded image
image remove <key>
Or from the dashboard’s preview-image picker, which shows a thumbnail of each image, lets you search by name, upload a new one, and delete existing ones inline.
You can also point a link’s preview image at an external 1200x630 URL instead of an uploaded one.
By default every link shows the consent page before redirecting, and that page names everything the link records.
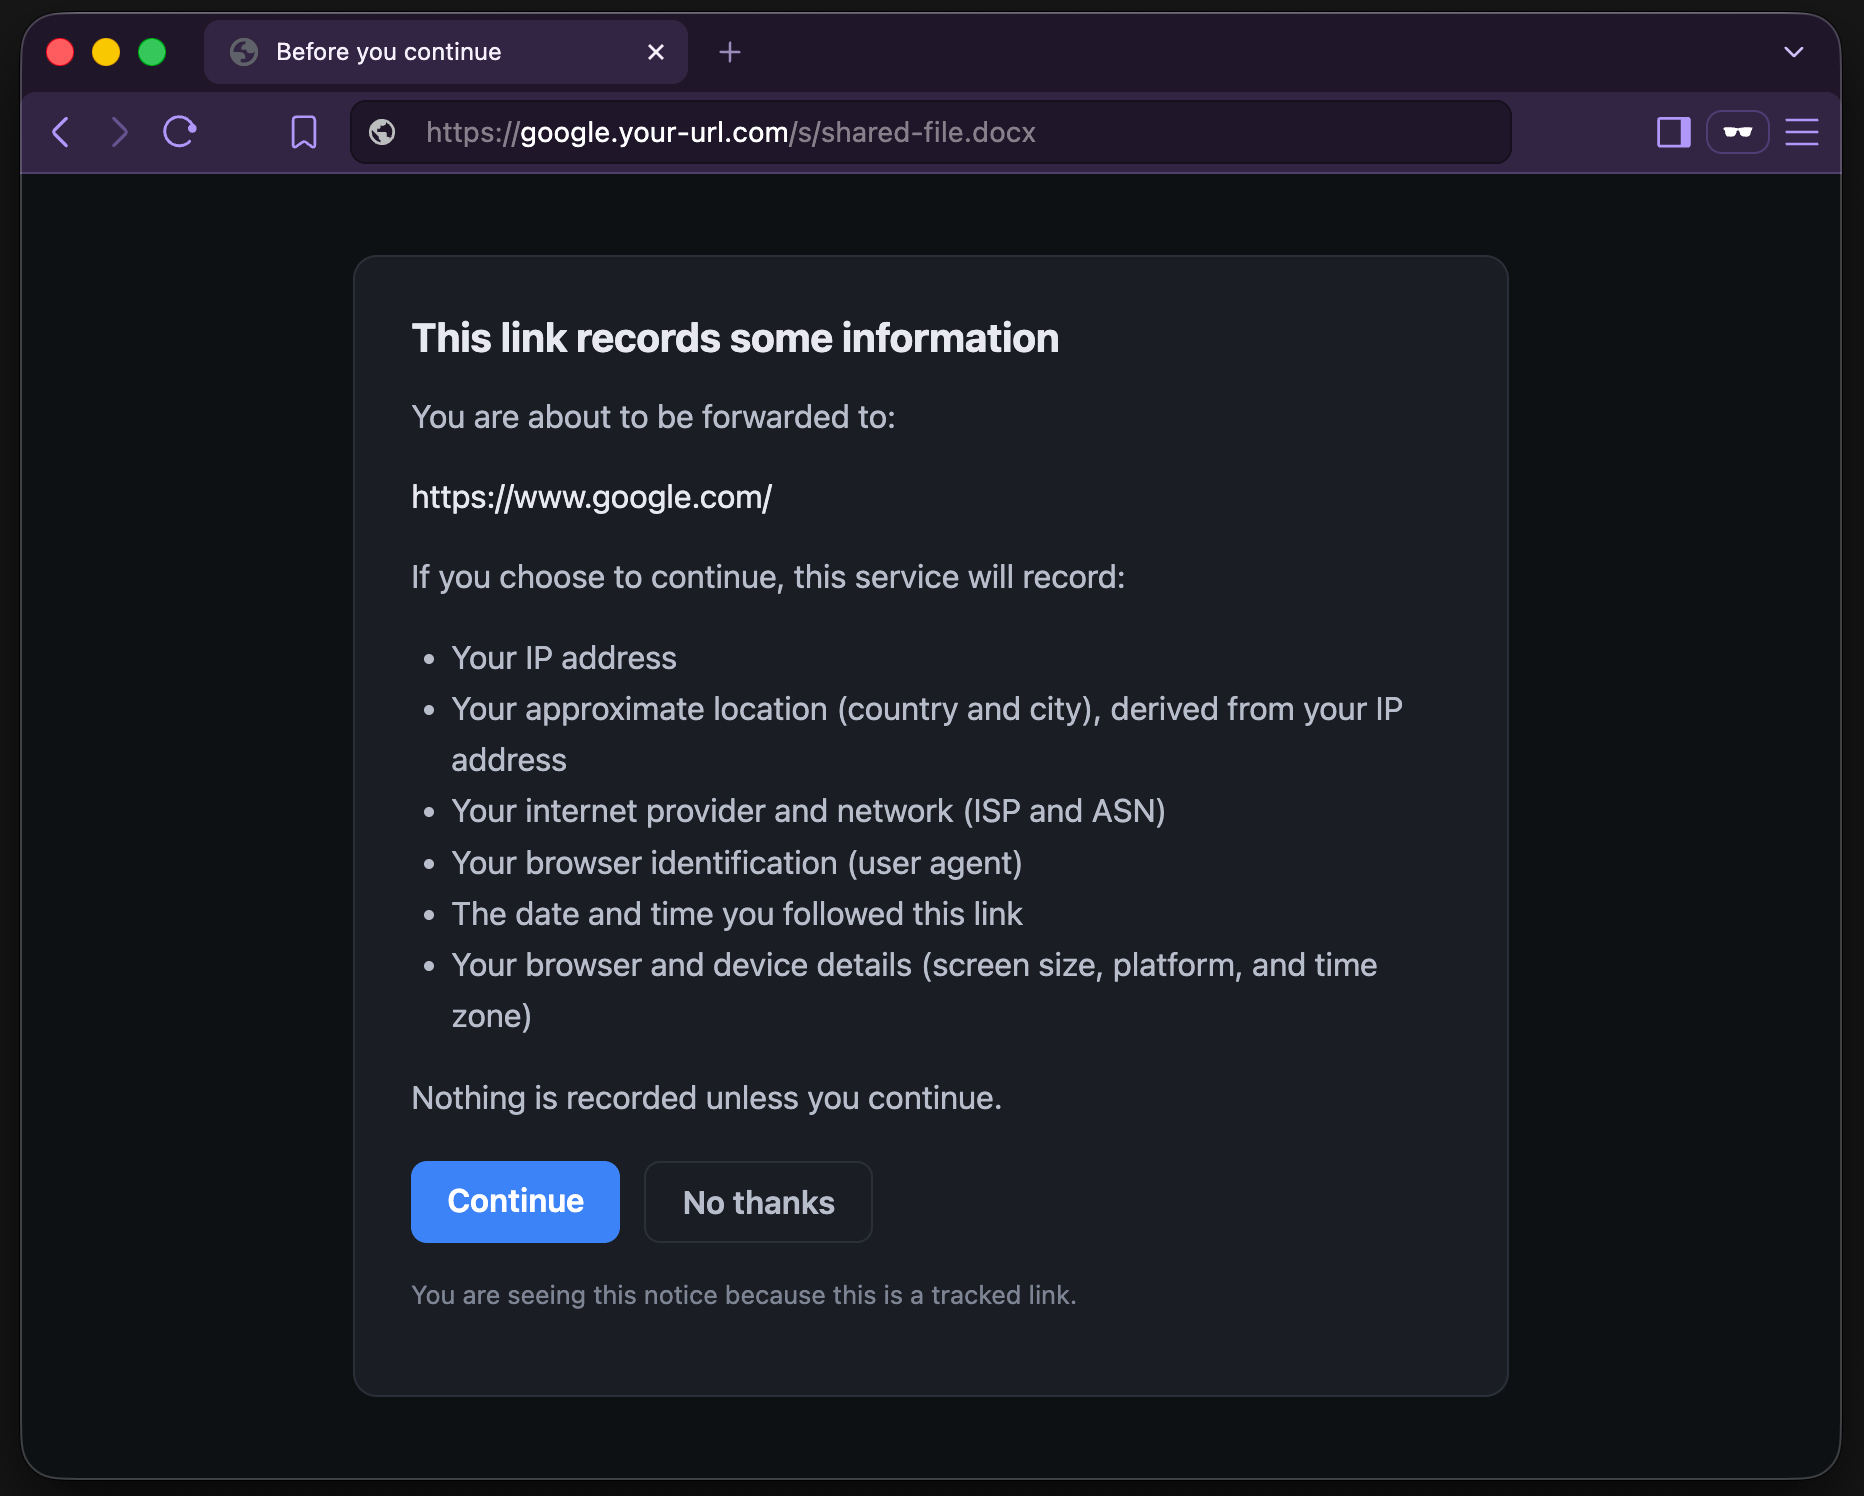
Each link has a Consent page setting with two options:
Show (default). The visitor sees the consent page and must continue before being redirected and recorded.
Skip - consent obtained upstream. The link redirects immediately and records server-side telemetry (IP, location, ISP, ASN, and user agent; the enhanced screen/platform/time-zone fields are not captured because no page renders to gather them).
Skip is only appropriate when the visitor genuinely saw and agreed to this tracking at an earlier step, such as in the ad page and its terms.
The tool trusts the setting and cannot verify that a real consent step happened, so the responsibility is yours. Used as intended it carries forward consent already given; pointed at people who never saw a disclosure, a skip-consent link is covert tracking.
The dashboard and its management API live under /admin and /mgmt-panel. Public tracking links under /s/ are never affected by these controls.
Password. Set during setup and stored in KV. Rotate it any time with
admin pwd, which takes effect immediately with no redeploy. Signing in mints a session cookie (HttpOnly, Secure, SameSite=Strict) that keeps you logged in for up to seven days or until you log out.IP allowlist. Optionally restrict the dashboard and API to specific addresses. When the allowlist is on, a request must come from an allowed address and present valid credentials; a session cookie does not bypass the IP check. Blocked requests get a plain 404 that reveals nothing.
On/off switch.
admin disablemakes the management API refuse every request;admin enablerestores it.
Admin commands:
# turn the management panel on
admin enable
# turn it off (refuses all mgmt requests)
admin disable
# print the management-panel URL
admin link
# show enabled state, IP filter, allowed IPs
admin status
# set or rotate the password (prompts if omitted)
admin pwd [NEW]
# enable the IP allowlist
admin ip on
# disable the IP allowlist
admin ip off
# set allowed IPs (comma separated)
admin ip set 1.2.3.4,5.6.7.8
# empty the allowed IP list
admin ip clear
# show IP filter state and the list
admin ip show
# push the latest Worker code
admin redeploy
# point admin commands at an existing deployment
admin use <kv> <name>
Run admin redeploy after replacing start.sh with a newer version so the deployed Worker and dashboard match.
All commands work at the cf> prompt or as arguments (for example ./start.sh results). Type help inside the tool for this list, and exit or quit to leave.
Authentication uses account-owned API tokens only (the cfat_ kind you create under Manage Account > Account API Tokens). The account id is detected automatically from the token.
# Enter an account-owned token interactively (hidden input); account auto-detected
login
# Use an account-owned API token (cfat_...)
set token <token>
# Set the account id manually (rarely needed; normally auto-detected)
set account <id>
# Auto-detect the account id from the token
set account auto
# Remember the current credentials in a private file next to the script
save
# Clear credentials and delete the saved file
logout
# Show the current auth type and account (whoami is the same)
status
# Interactive setup: choose Quick (defaults) or Custom (pick the names).
# Provisions KV, sets the admin password, and deploys the Worker. Safe to re-run.
setup
# Non-interactive setup with explicit names.
# Defaults: Worker "ft-worker", KV title "FT_CACHE" (KV title optional).
setup [WORKER_NAME] [KV_TITLE]
# Open the hosted /admin dashboard in your browser
dashboard
# Delete all Workers and KV namespaces on the account (asks for confirmation)
resetControls access to the /mgmt-panel API and the hosted dashboard; public /s/ links are unaffected.
# Turn the management panel on or off
admin enable
admin disable
# Print the management-panel URL
admin link
# Show enabled state, IP filter, and allowed IPs
admin status
# Set or rotate the password (prompts if omitted)
admin pwd [NEW]
# Enable or disable the IP allowlist
admin ip on
admin ip off
# Set allowed IPs, comma separated
admin ip set <csv>
# Empty the allowed IP list
admin ip clear
# Show IP filter state and list
admin ip show
# Push the latest Worker code
admin redeploy
# Point admin commands at an existing deployment (if the local project file is missing)
admin use <kv> <name>
# Open the menu-driven domain manager: list account domains, add a primary
# domain, and add or remove subdomains linked to the Worker
domain# Upload a preview image (must be exactly 1200x630 px)
image add <file>
# List uploaded images and their URLs
image list
# Delete an uploaded image
image remove <key># Create a link, prompting for anything omitted, and print the URL
link create [DEST] [CAMPAIGN]
# List all campaigns with their tokens and URLs
link list
# Show one campaign's full configuration
link get <token>
# Print just the campaign URL
link url <token>
# Delete a campaign link
link delete <token># Show all recorded visits
results
# Show visits for one campaign
results <token>
# Delete telemetry (all, or for one campaign)
results clear [<token>]# List all Workers in the account
workers list
# Show a Worker's deployed code and details
workers get <name>
# Delete a Worker
workers delete <name>
# Turn a Worker's public workers.dev URL on or off
workers url <name> on
workers url <name> off# List all KV namespaces
kv list
# Print the id of the namespace with that title
kv id <title>
# Create a namespace
kv create <title>
# Delete a namespace
kv delete <id>
# Read a value
kv get <id> <key>
# Write a value
kv put <id> <key> <value># Show the full command list
help
# Leave the interactive shell (quit is the same)
exitEverything lives in one KV namespace in your account (titled FT_CACHE by default, bound to the Worker as FT_CACHE):
link:<token>holds each campaign’s configuration (destination, campaign name, analytics level, consent setting, custom domain, and preview fields).result:<token>:<timestamp>-<random>holds each recorded visit. The random suffix keeps records distinct even for clicks in the same millisecond.img:<key>holds each uploaded preview image.pwd,admin_enabled,admin_ip_on,admin_ipshold the admin password and access settings, which the Worker reads live so changes apply without a redeploy.session:<token>holds active dashboard sessions.config:domainsmirrors the custom domains attached to the Worker, so the dashboard’s domain dropdown can read them.
To remove everything the tool created, use reset, which lists all Workers and KV namespaces and deletes them after you confirm.
No posts
Comments
Nothing yet. Say the first thing.
Sign in to join the conversation.