
Hey there, everyone!
This quick video will guide you through getting started with R.
Instead of futzing around with installing R and then RStudio on your first day, we’re going to start by using Posit.Cloud. All you need to do is create a free account and you’re all set!
First, go to: https://posit.cloud and create a new free account for yourself if you don’t already have one.
You should now see ‘Your Workspace.’
Press the ‘New Project’ button.

Then select ‘New RStudio Project’ from the dropdown menu.
Wait a few seconds for the setup to complete and then your screen should look something like this:
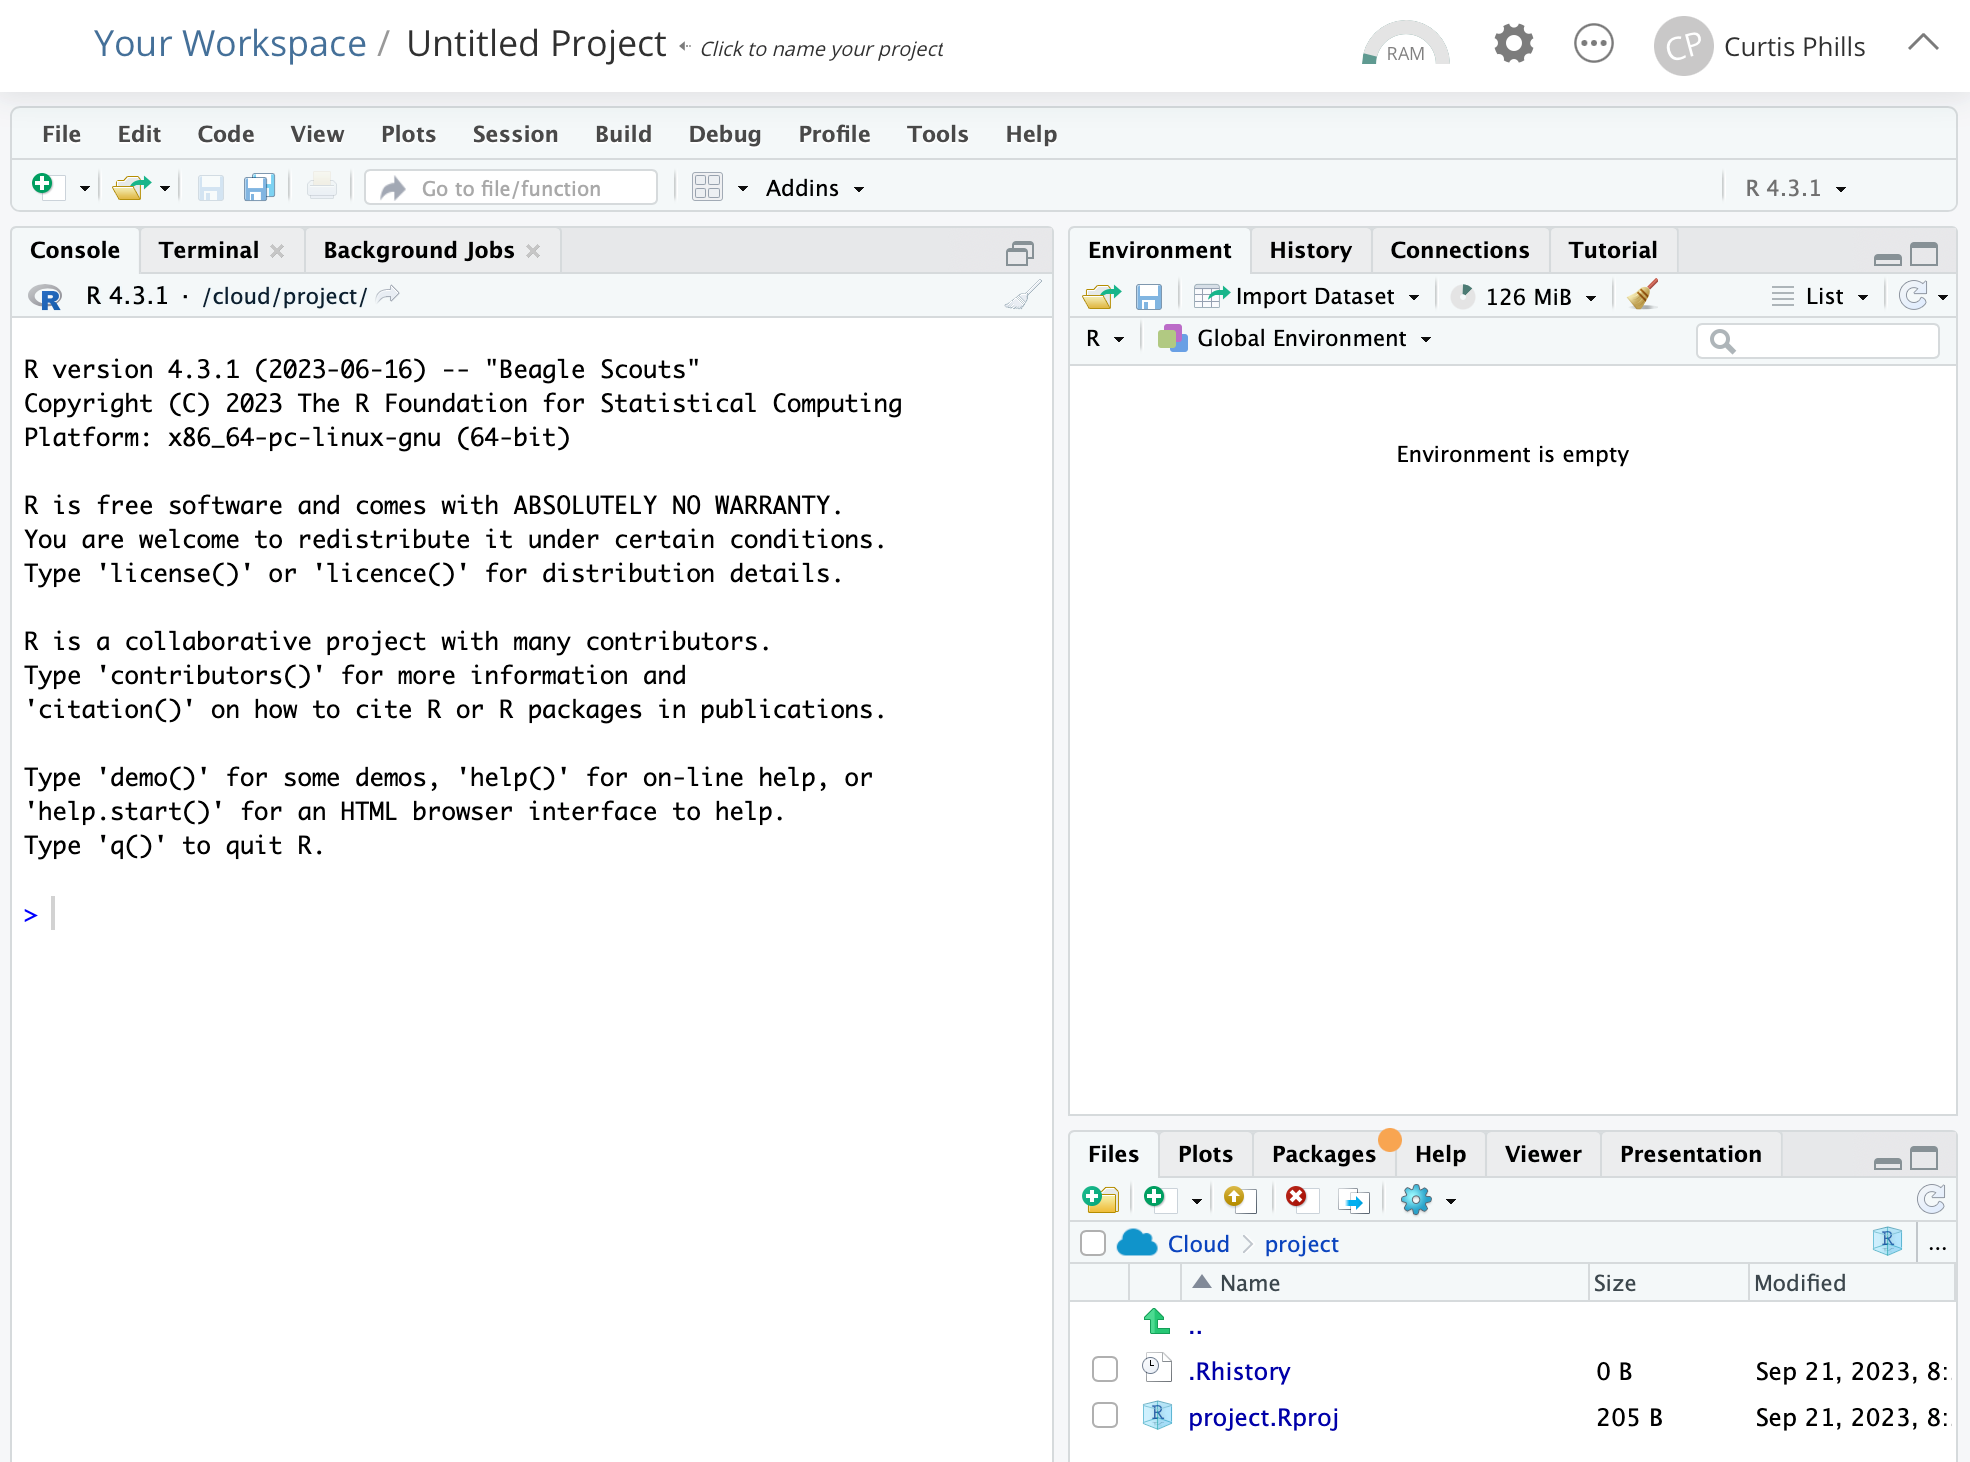
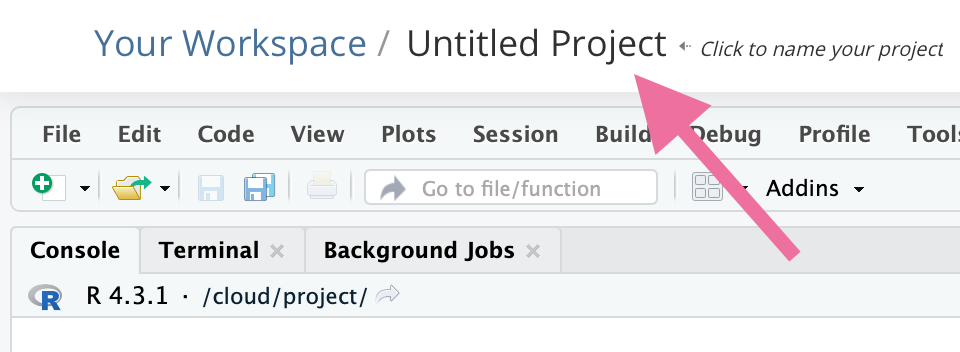
Let's start by renaming our project to “First day in R." Click on ‘Untitled Project’ and type in the new name.
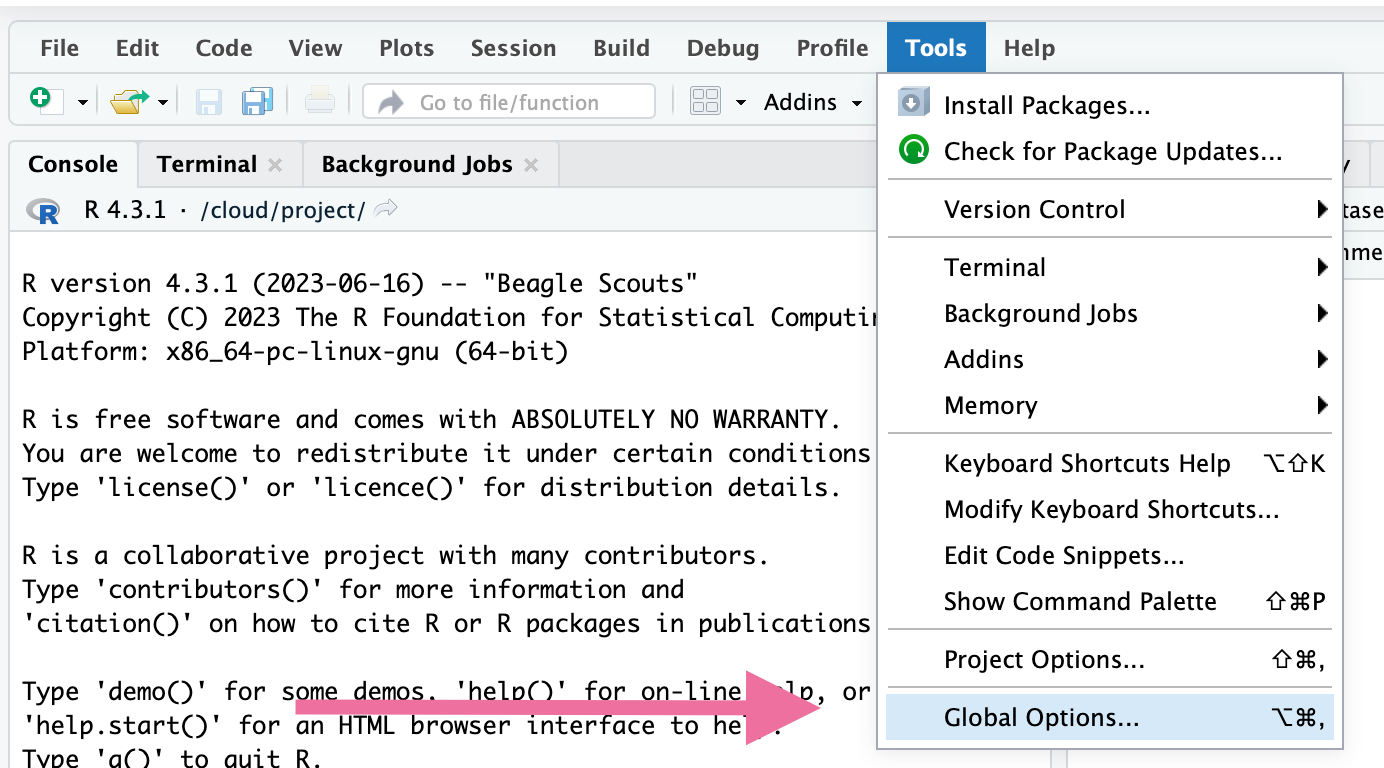
One of the first things I recommend is customizing the look and feel of Posit Cloud. If you like the default appearance, that's fine, but if you want to experiment, head to Tools, then Global Options.
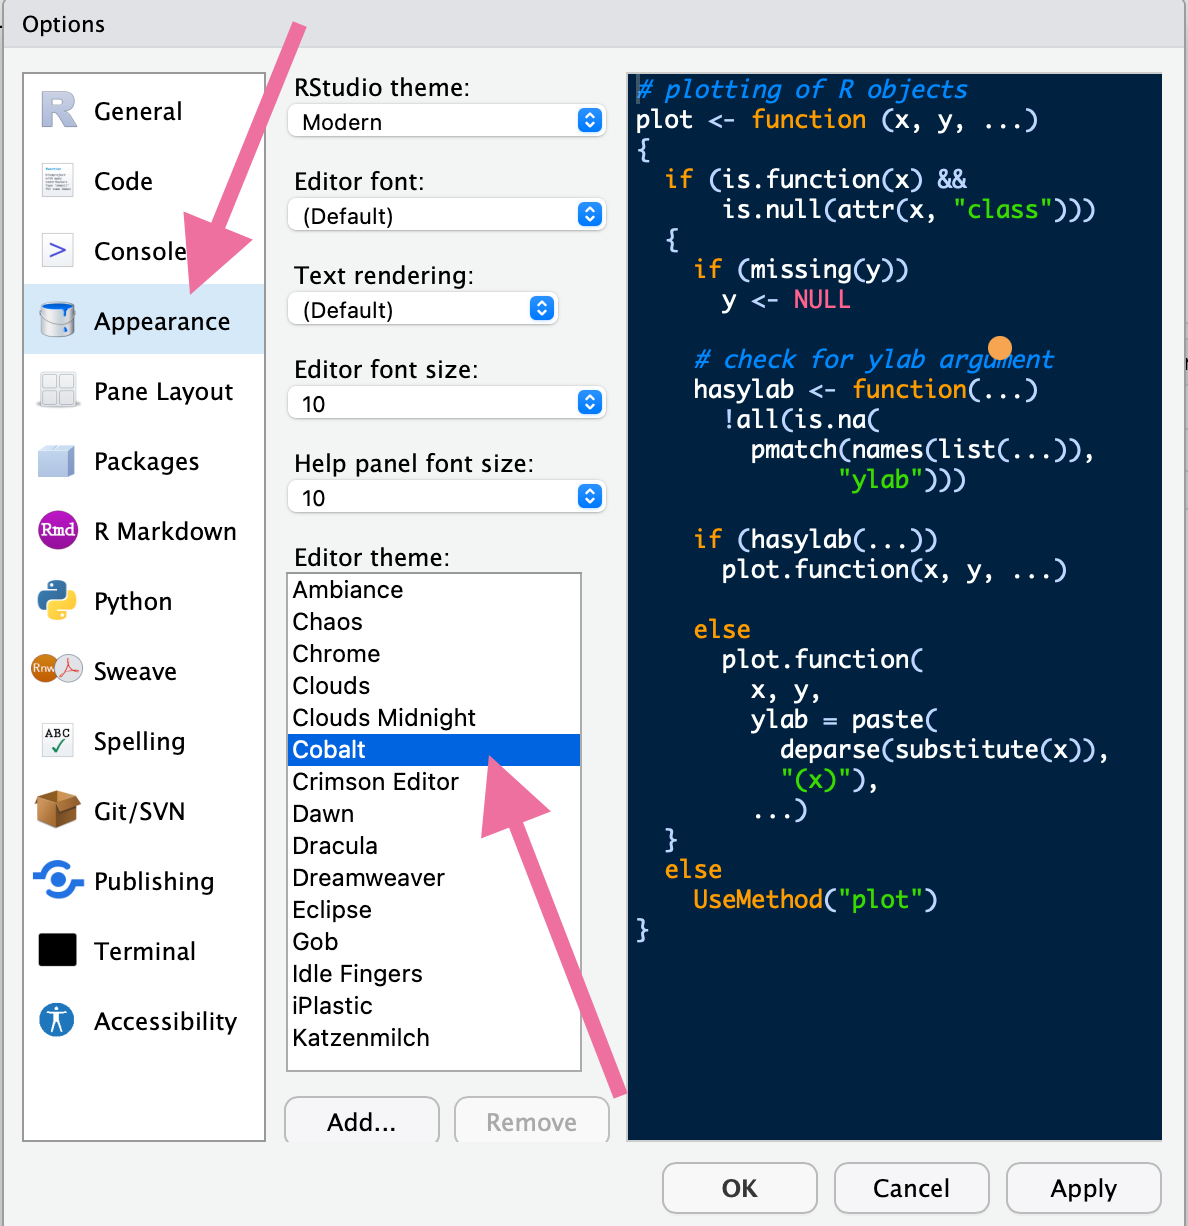
A new window will pop up, and on the left, select "Appearance." You can choose different themes or even download custom themes from the internet to make it your own. Let's go with the "Cobalt" theme for today.
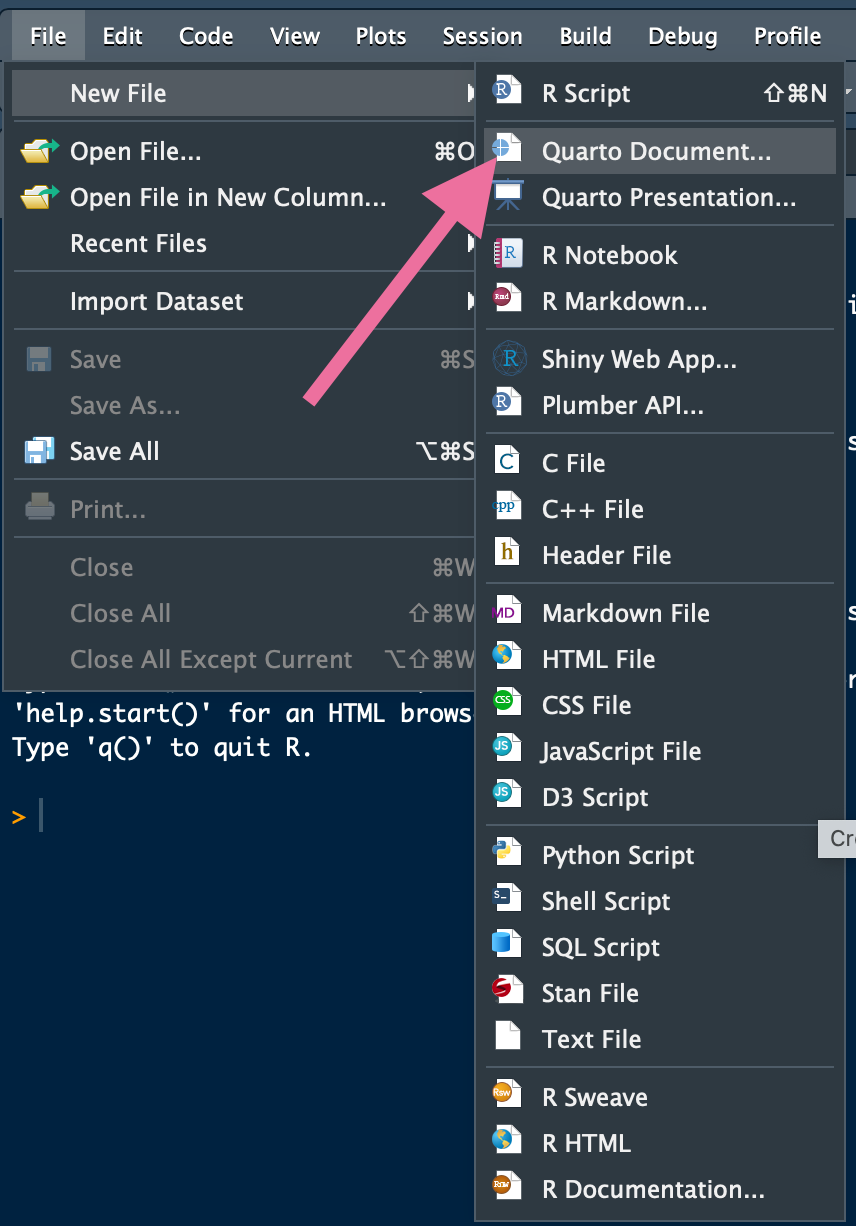
Now, let's create a new quarto document. Go to File, New File, then Quarto Document.
Title this one "Introduce Yourself," and add your name as the author. We'll output a web page or HTML. Also, uncheck "Use the Visual Editor" for more control.
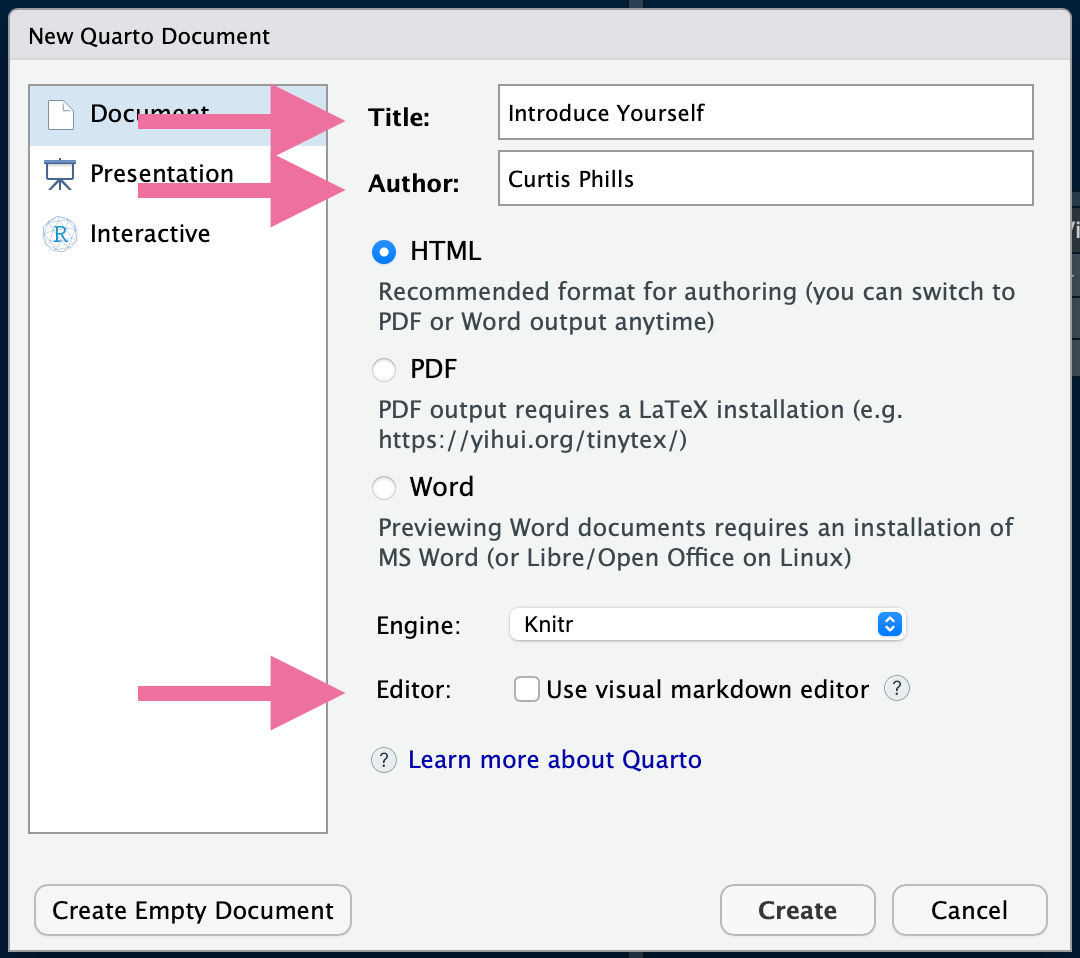
Once your dialogue window looks like this, hit Create.
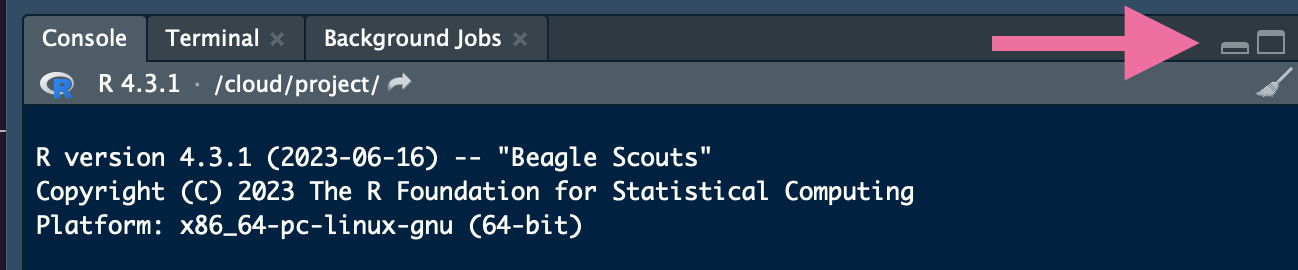
Now, we can minimize the Console by clicking the Minimize button. This way, you have more room to edit your documents.
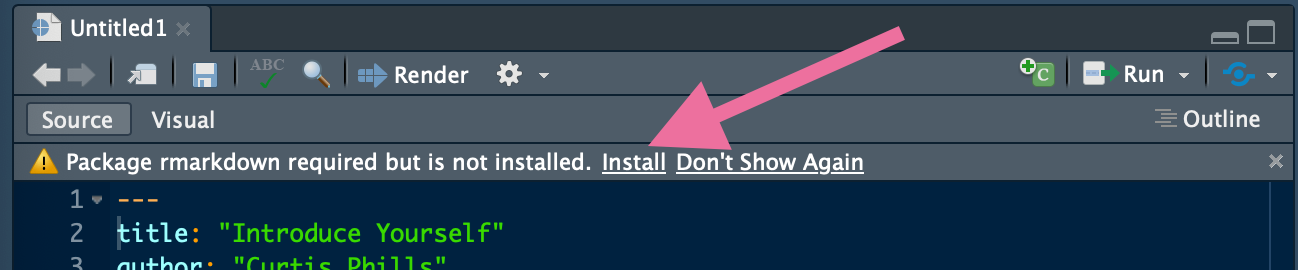
Notice that this project asks you to install the R Markdown package. Click "Install" to proceed.
While that's happening, let's take a look at the document we're editing.
Minimize the Console again. In this document, pay attention to three parts. First, between lines one and five, you have metadata about the document, including the title, author, and output format.
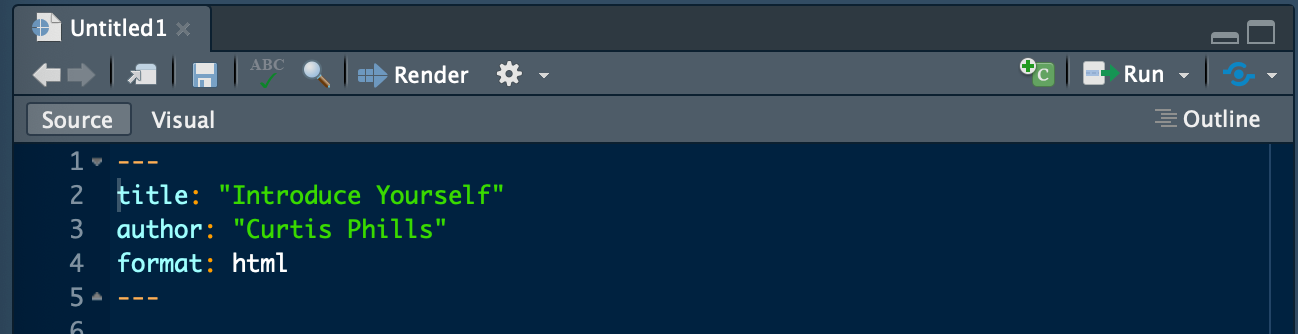
From line six to 26, this is where we'll do most of our editing.
Line seven to 14 is plain text in Markdown format, while line 15 to 17 is where you add R code. Lines 21 to 24 are also examples of R Code. Notice the background is slightly lighter.
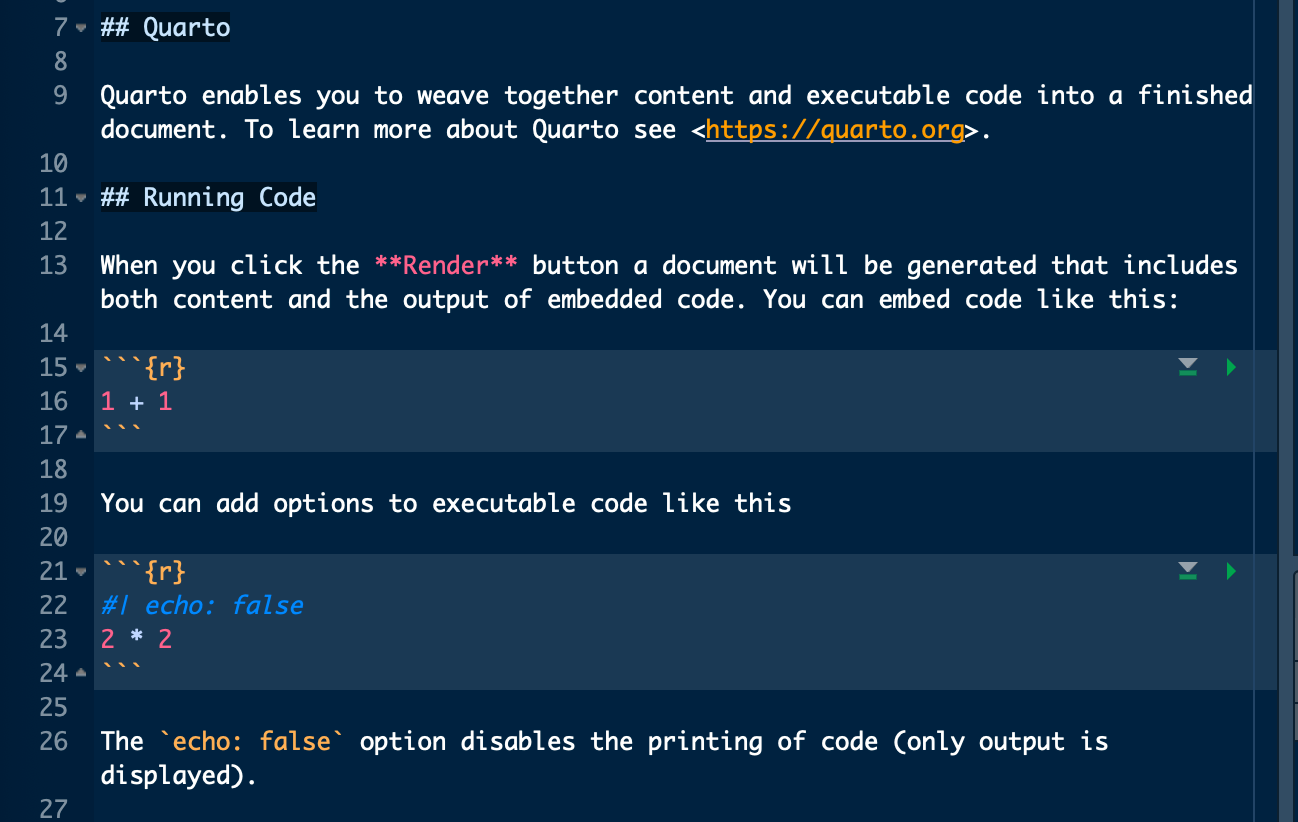
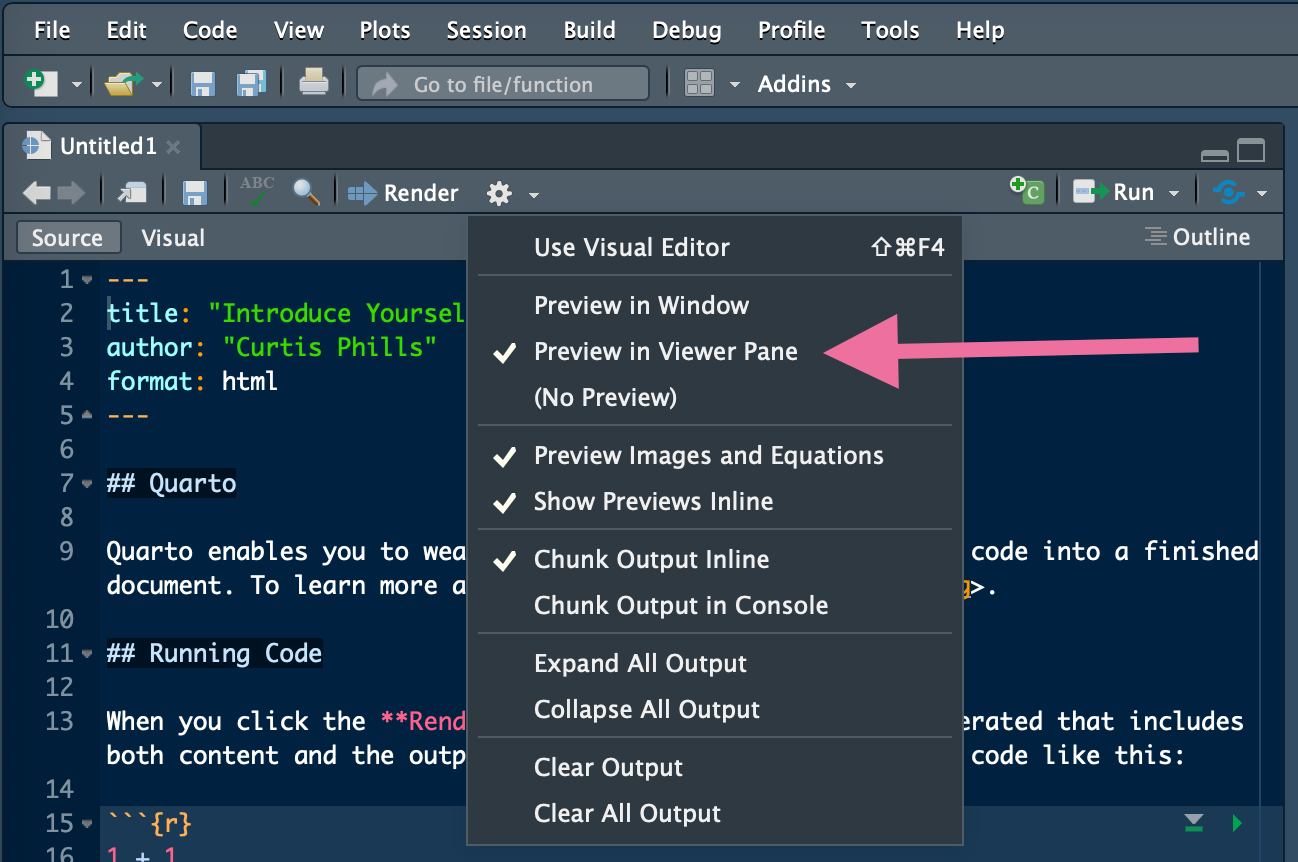
Now, before we proceed, click the ‘settings’ gear and select ‘Preview in Viewer Pane’. This allows you to see your output alongside the code. You’ll see how changes in the code affect the output on the right.
Now, click the "Render" button.

It'll ask you to save. After saving, it'll create a webpage on the right side of the screen that looks something like this:
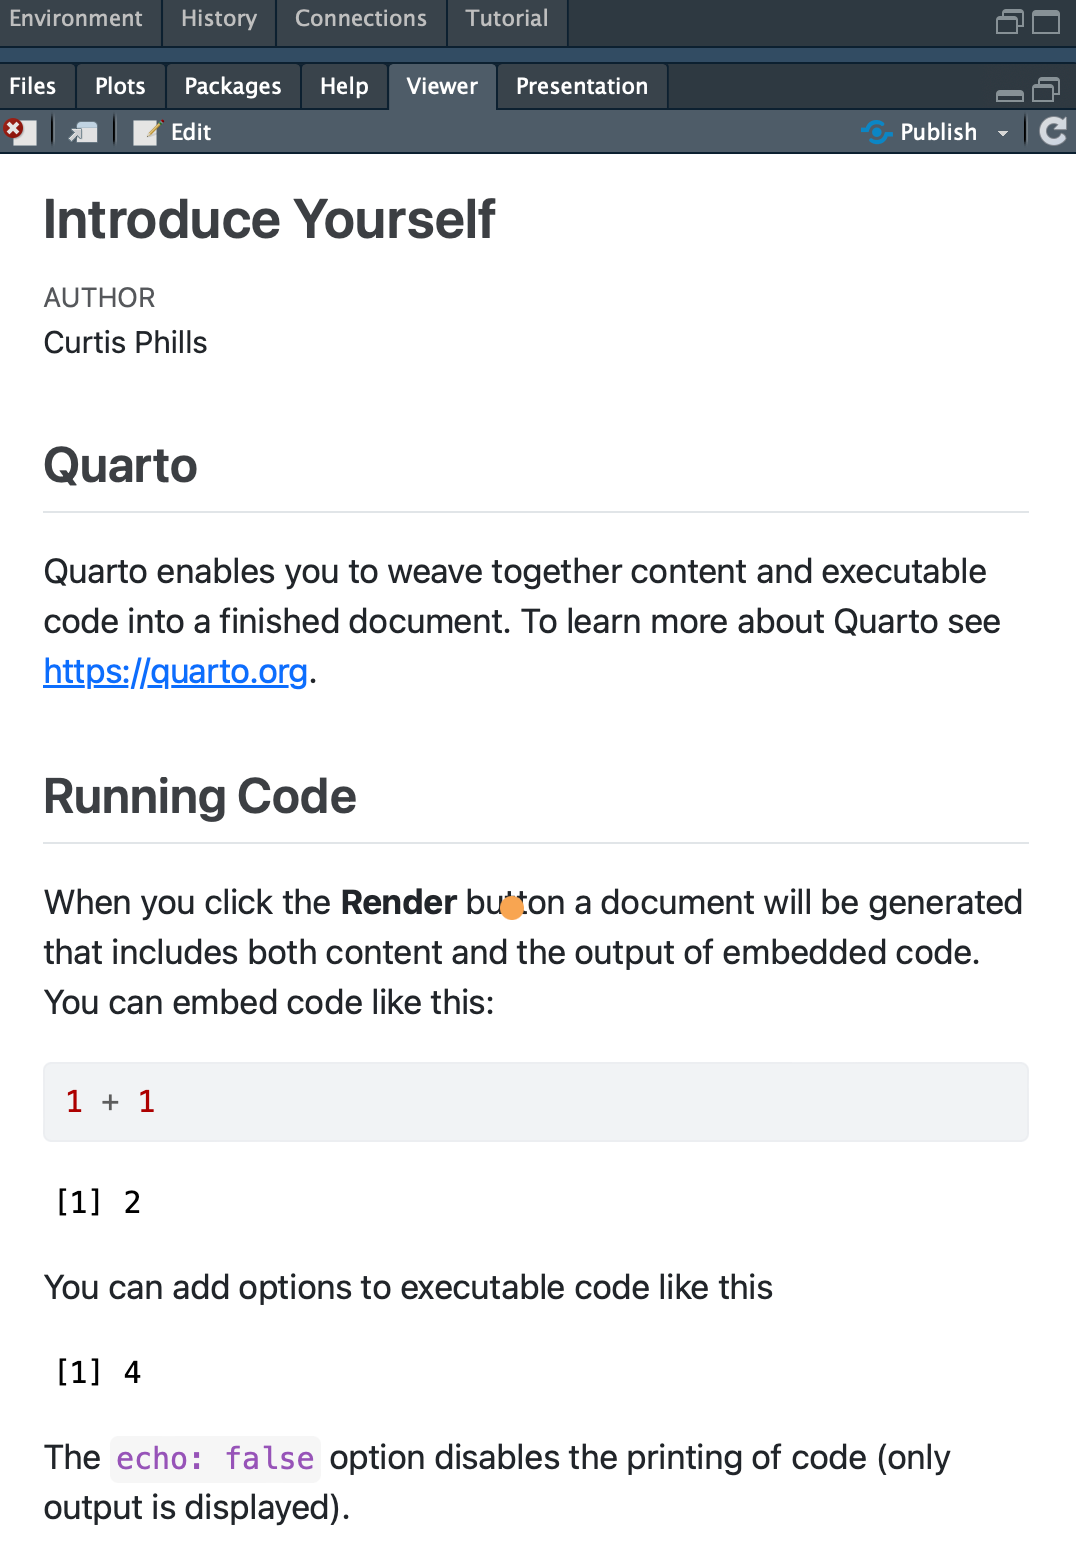
You can change text sizes using hashtags (#). For example, two hashtags for level two headings. Try different sizes and see how they look when you press "Render."
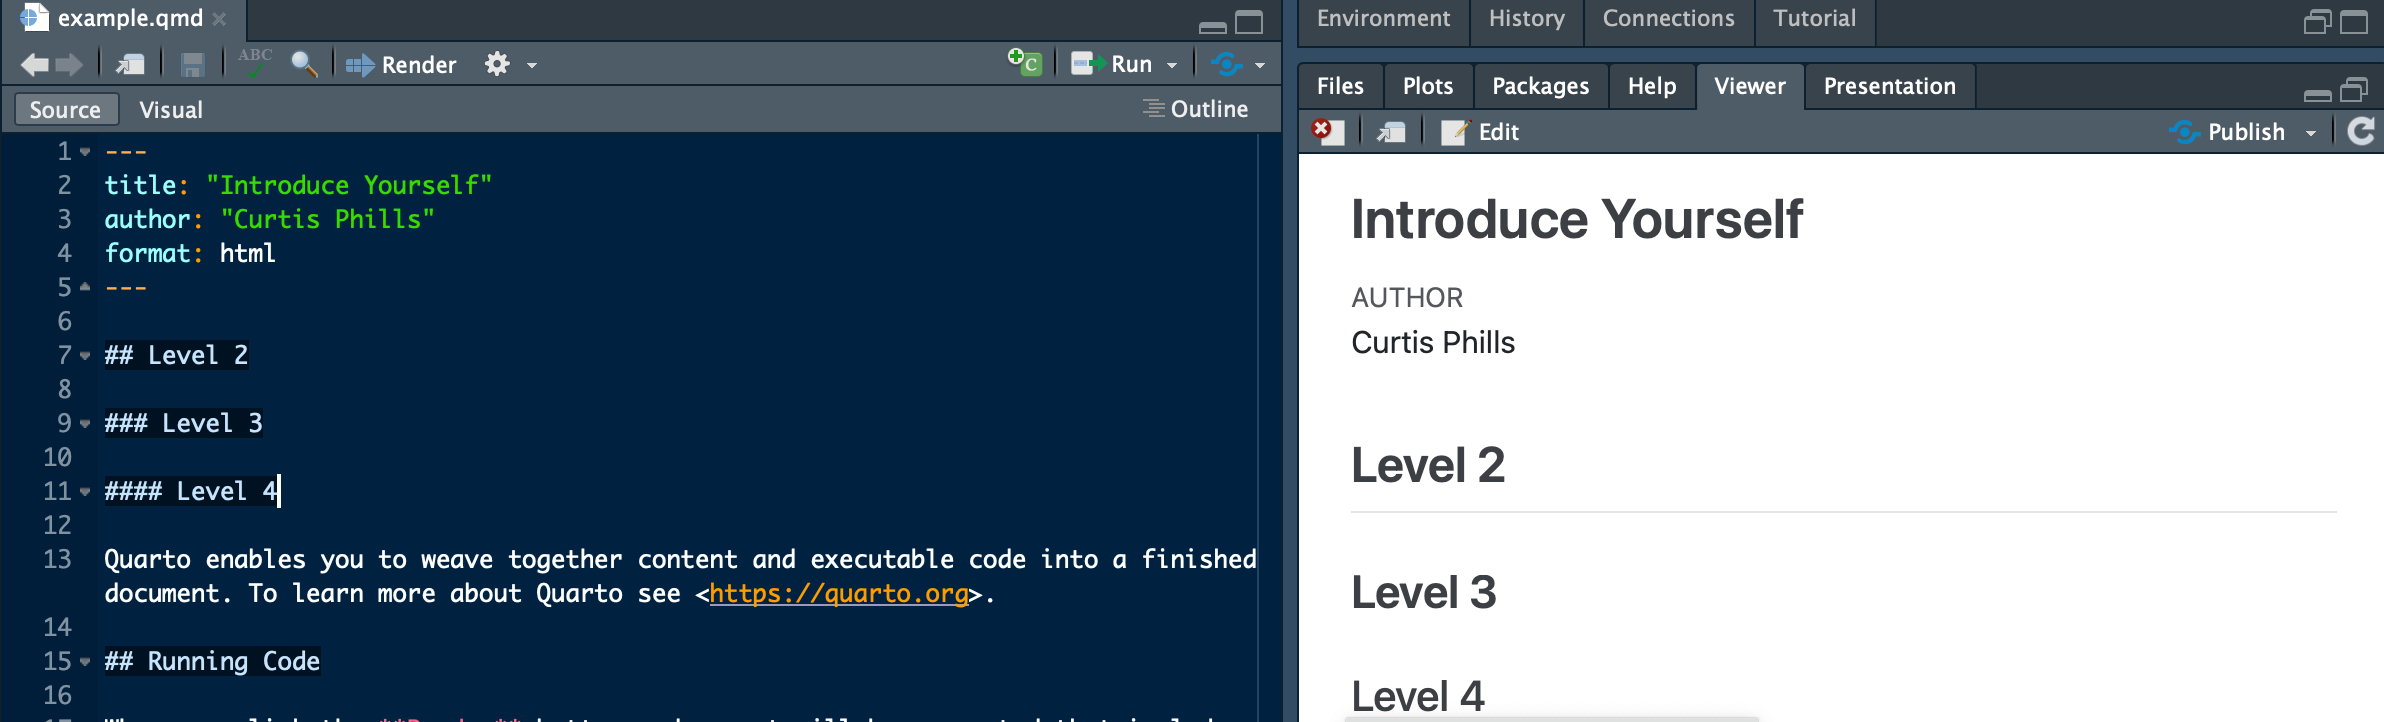
Now, let's delete everything from line seven to 35. Your first task is to tell the class your name, and you should make it bold using double asterisks (**).
For instance on line 7, write “**My name is myname.** ” To ensure it's on a separate line, use two spaces after the final asterisk.
Press render and marvel at your creation!
Next, tell us your major. You can put it in italics using single asterisks (*).
For example on line 9, write:
*My major was psychology.*
Remember the double spaces after the final asterisk to get proper line breaks. Press render again and look at what you’ve made!
Now, share your three favorite books, movies, TV shows, or video games. I'll go with TV shows.
My three favorite tv shows:
Killing EveArcaneBetter Call Saul
Also, very important, there is an empty line between “My three favorite tv shows” and “1. Killing Eve”.
BUUUUUT there are no empty lines between “1. Killing Eve,” “2. Arcane,” and “3. Better Call Saul.” I know it’s hard to tell on substack.
Press Render and be amazed!
Lastly, tell us one interesting thing about yourself in plain text.
I am training to run a marathon.
Finally, let’s learn to use the Files tab.
NOT the File menu. The Files tab.
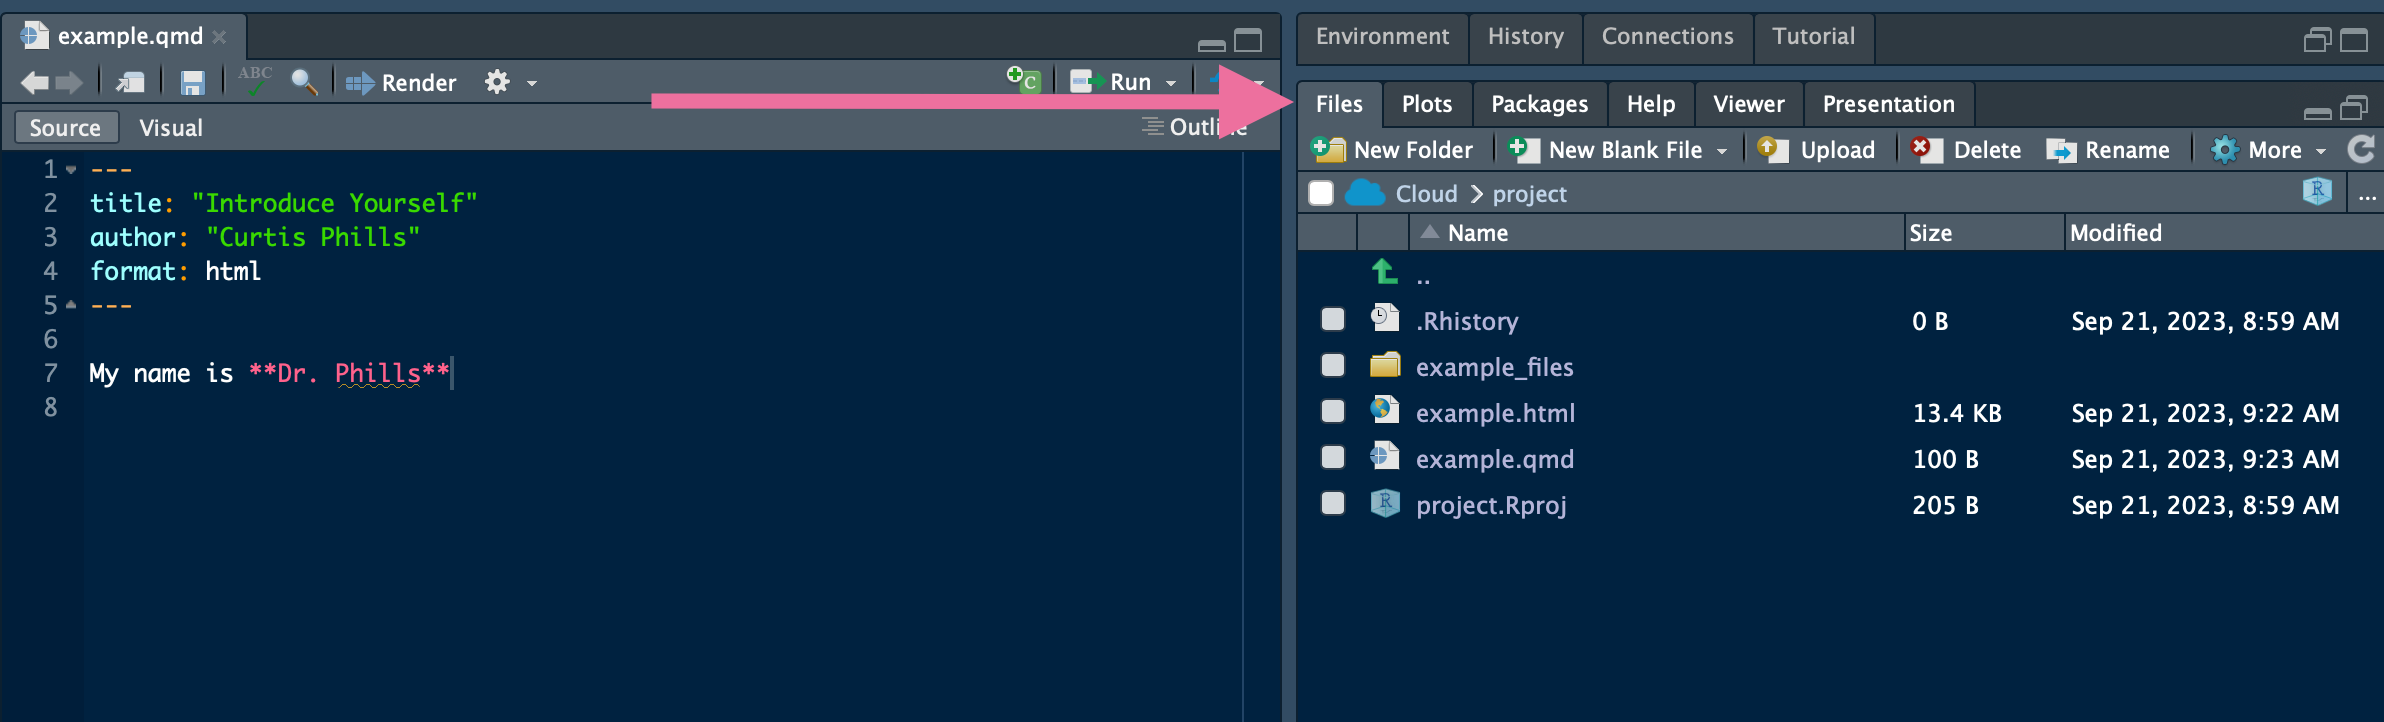
We are going to add a photo of ourselves by first uploading the photo to the files tab and then writing a tiny bit of code in the editor.
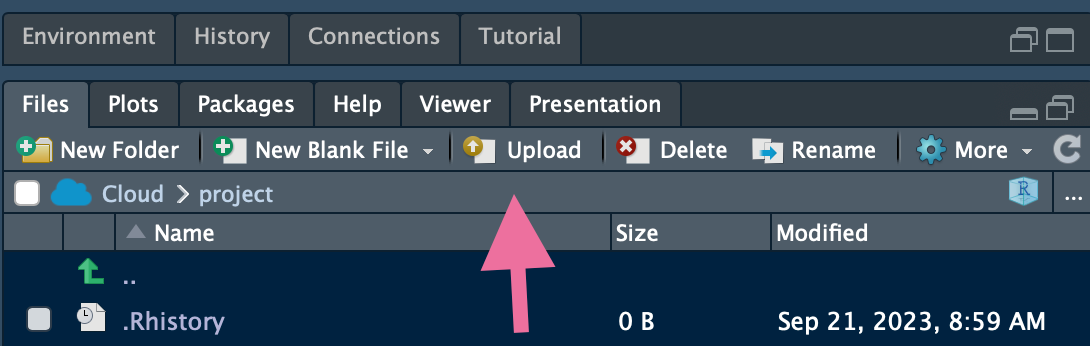
First, select the upload button and find your photo. Supported formats are PNG, GIF, and JPEG.
To insert a photo into the webpage, use this Markdown syntax:
.
For example in your document, write:

Replace ‘filename’ with the exact spelling of your photo as it appears in the files tab.
Also, this is very important, the ‘!’ must be flush against the left margin. Don’t have any spaces between the left margin and the ‘!’
RAnd now you’ve "Introduced Yourself" to R! If you encounter any issues reach out with questions or watch this video above. 🚀
Comments
Nothing yet. Say the first thing.
Sign in to join the conversation.