
After discussing games that I can’t enjoy anymore in my last post, I figured I should talk about a true evergreen next to balance things out. As a result, today’s topic is Heroes of Might and Magic III (HoMM3 for the rest of the article). HoMM3 is one of the games I keep returning to, and even after more than 25 years, it’s still a lot of fun.
Unsurprisingly, HoMM3 is the third installment of the Heroes of Might and Magic series. It was released in 1999 and was developed by New World Computing. The Heroes series is a spin-off of the venerable RPG series Might and Magic that stretches all the way back to 1986. It inherits the lore of the original series and loosely follows the story. However, HoMM3 is perfectly enjoyable even if we don’t know anything about Might and Magic.
Before I explain in detail what makes HoMM3 so exceptional, I first have to explain the core gameplay. HoMM3 is a turn-based strategy game with a lot of role-playing game (RPG) elements. The game involves capturing and developing towns, gathering resources, raising armies, and sending them into combat.
At its core, the game consists of three distinct parts: exploration, combat, and city building. Let’s discuss each of those in detail.
HoMM3 is a map-based game. The majority of our time is spent on the adventure map. We move our heroes over it to achieve our goals. This includes capturing mines to gather resources, picking up treasures, fighting neutral creatures, and starting combat with enemy heroes and cities. Each hero has a level, attributes, an inventory, and commands at least a single creature stack. The heroes are the linchpin of the game, which is rather unsurprising given its title.
On each map, we have to reach a certain objective to win the game. That might be something simple like defeating all opponents or something more elaborate like finding a certain artifact before a timer runs out. The map layout has a huge influence on the way the game plays. This is especially true for the campaign where the game likes to use scripts to surprise us.
At the beginning of each game, the map is almost completely shrouded in black. We need to explore to find the resources we need, locate the enemy, and level up our heroes.
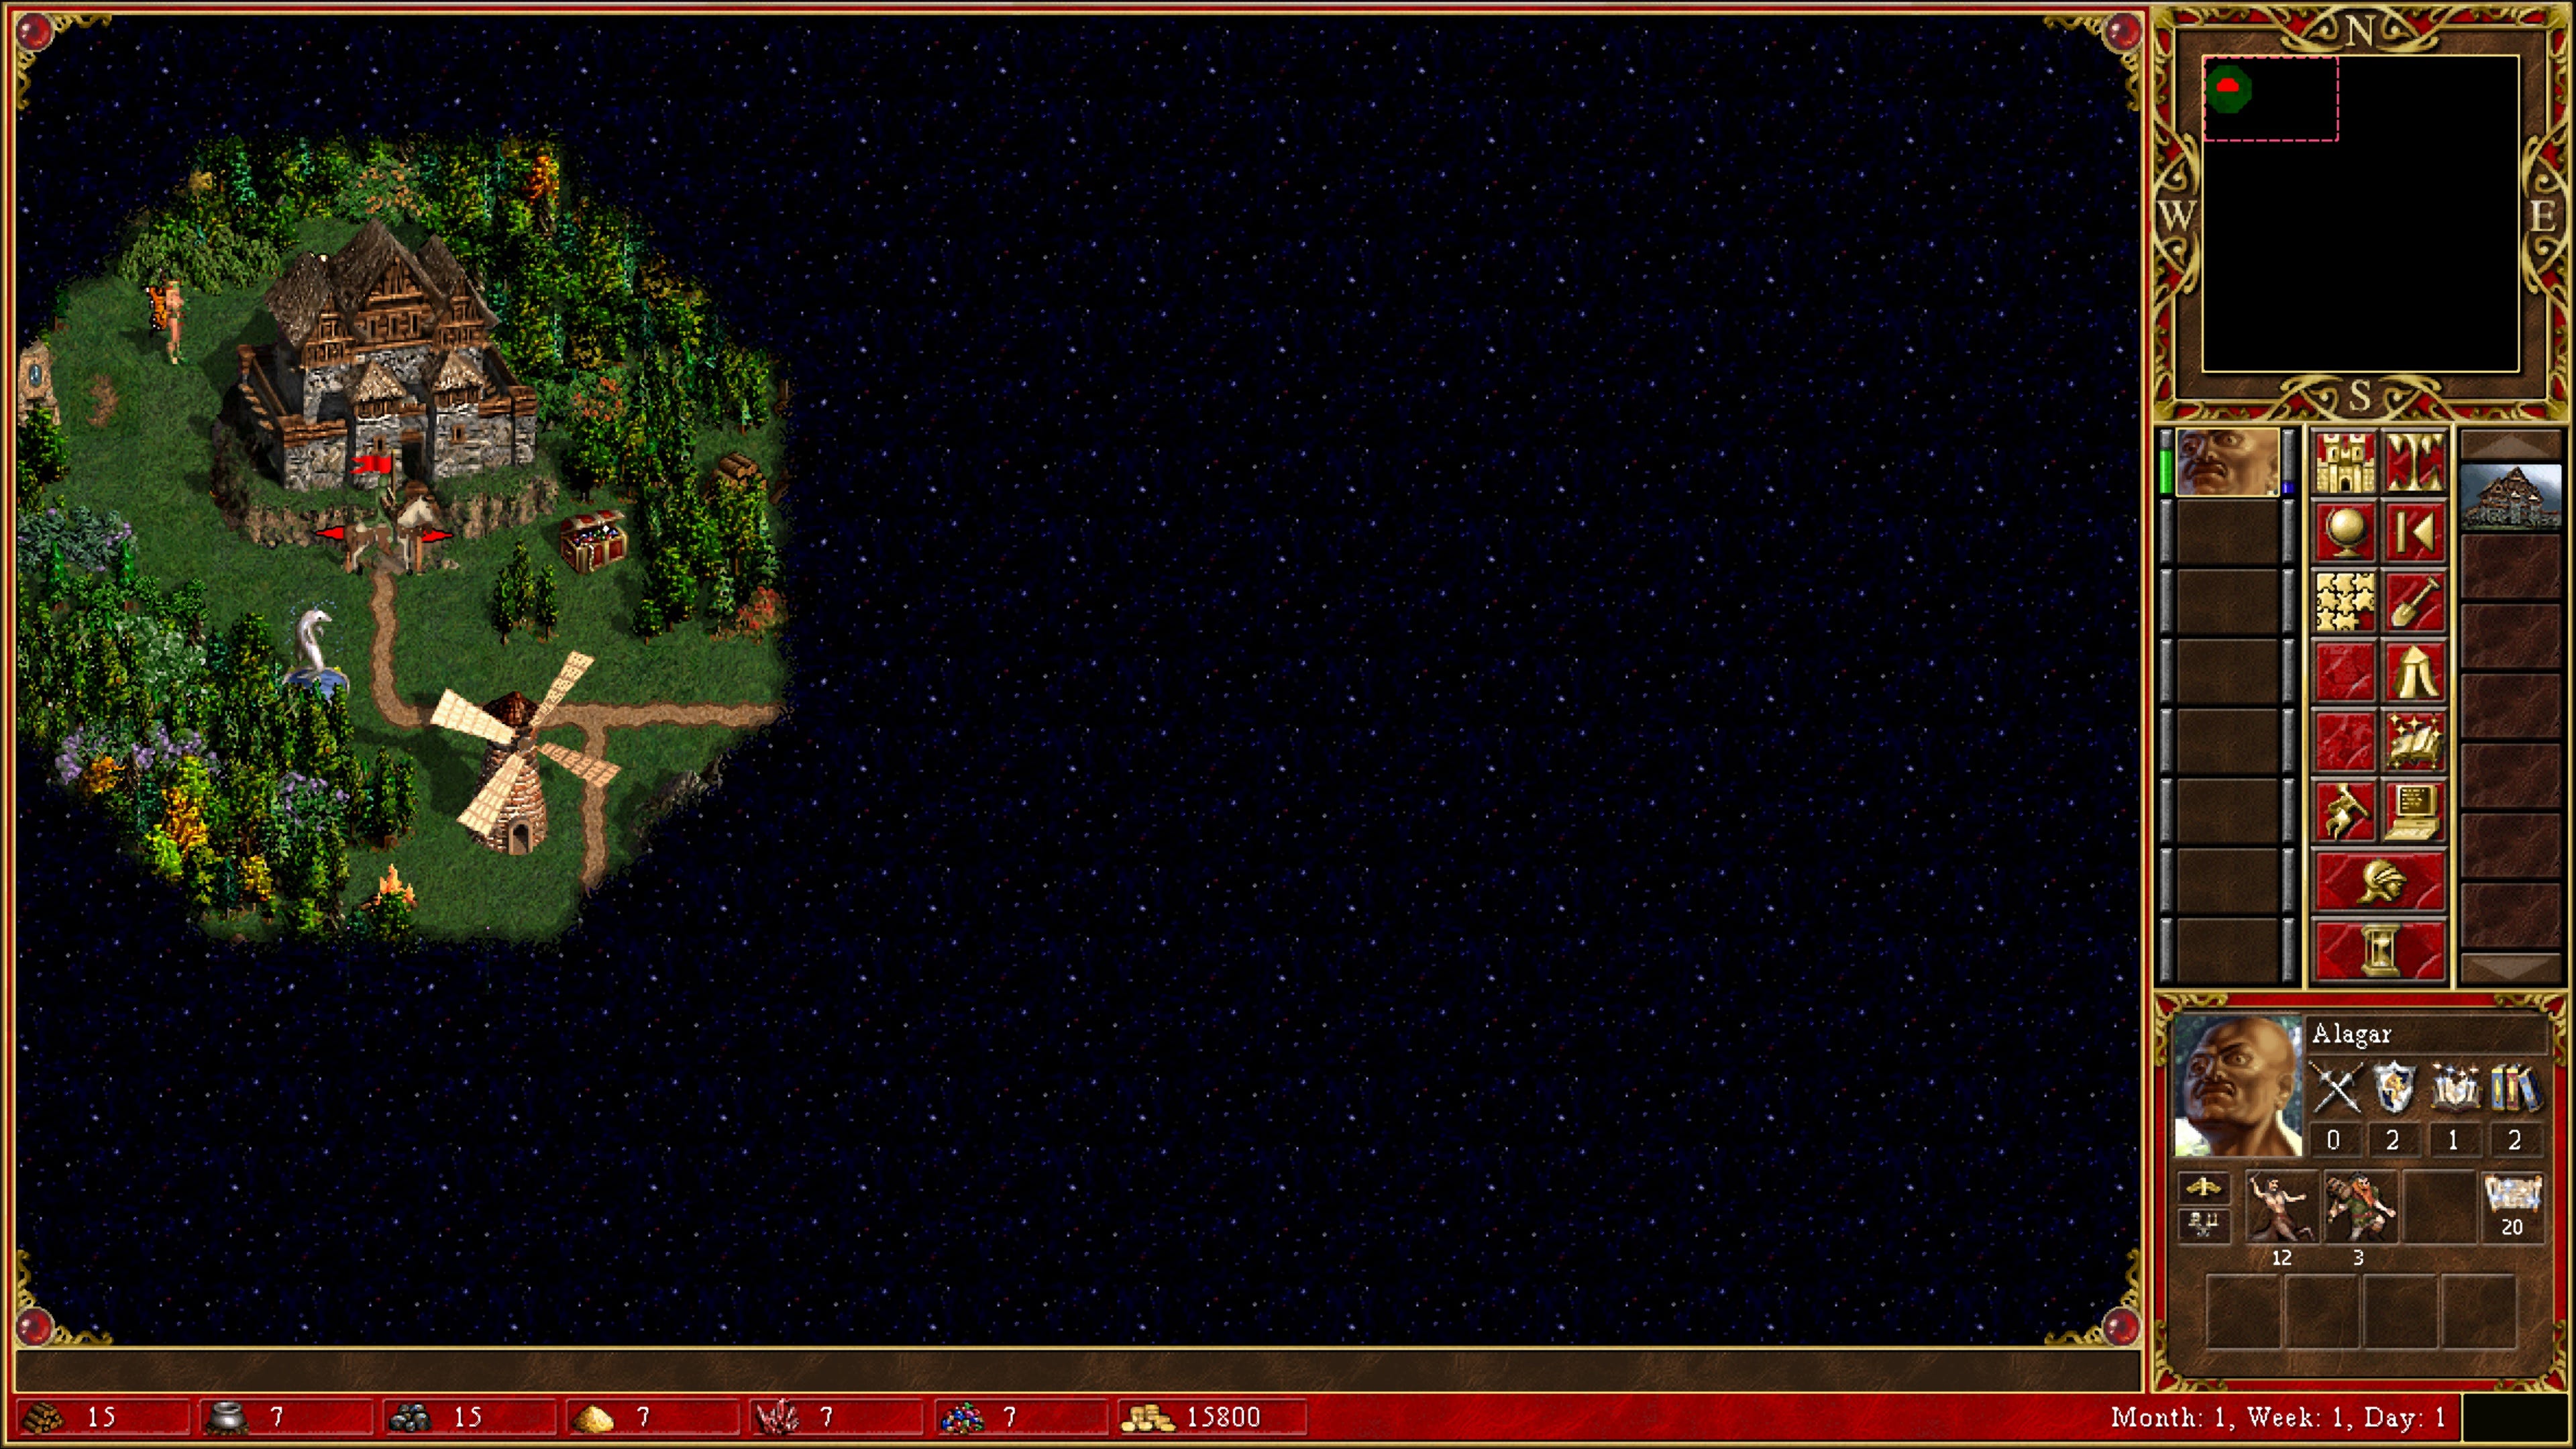
Even if we already know the map layout from a previous game, the maps can still surprise us, as they have a certain degree of randomization built in. This applies chiefly to the neutral enemies placed on the map, the resources, as well as to artifacts. The map only defines the level of each of those and then picks a random one out of the pool of possibilities.
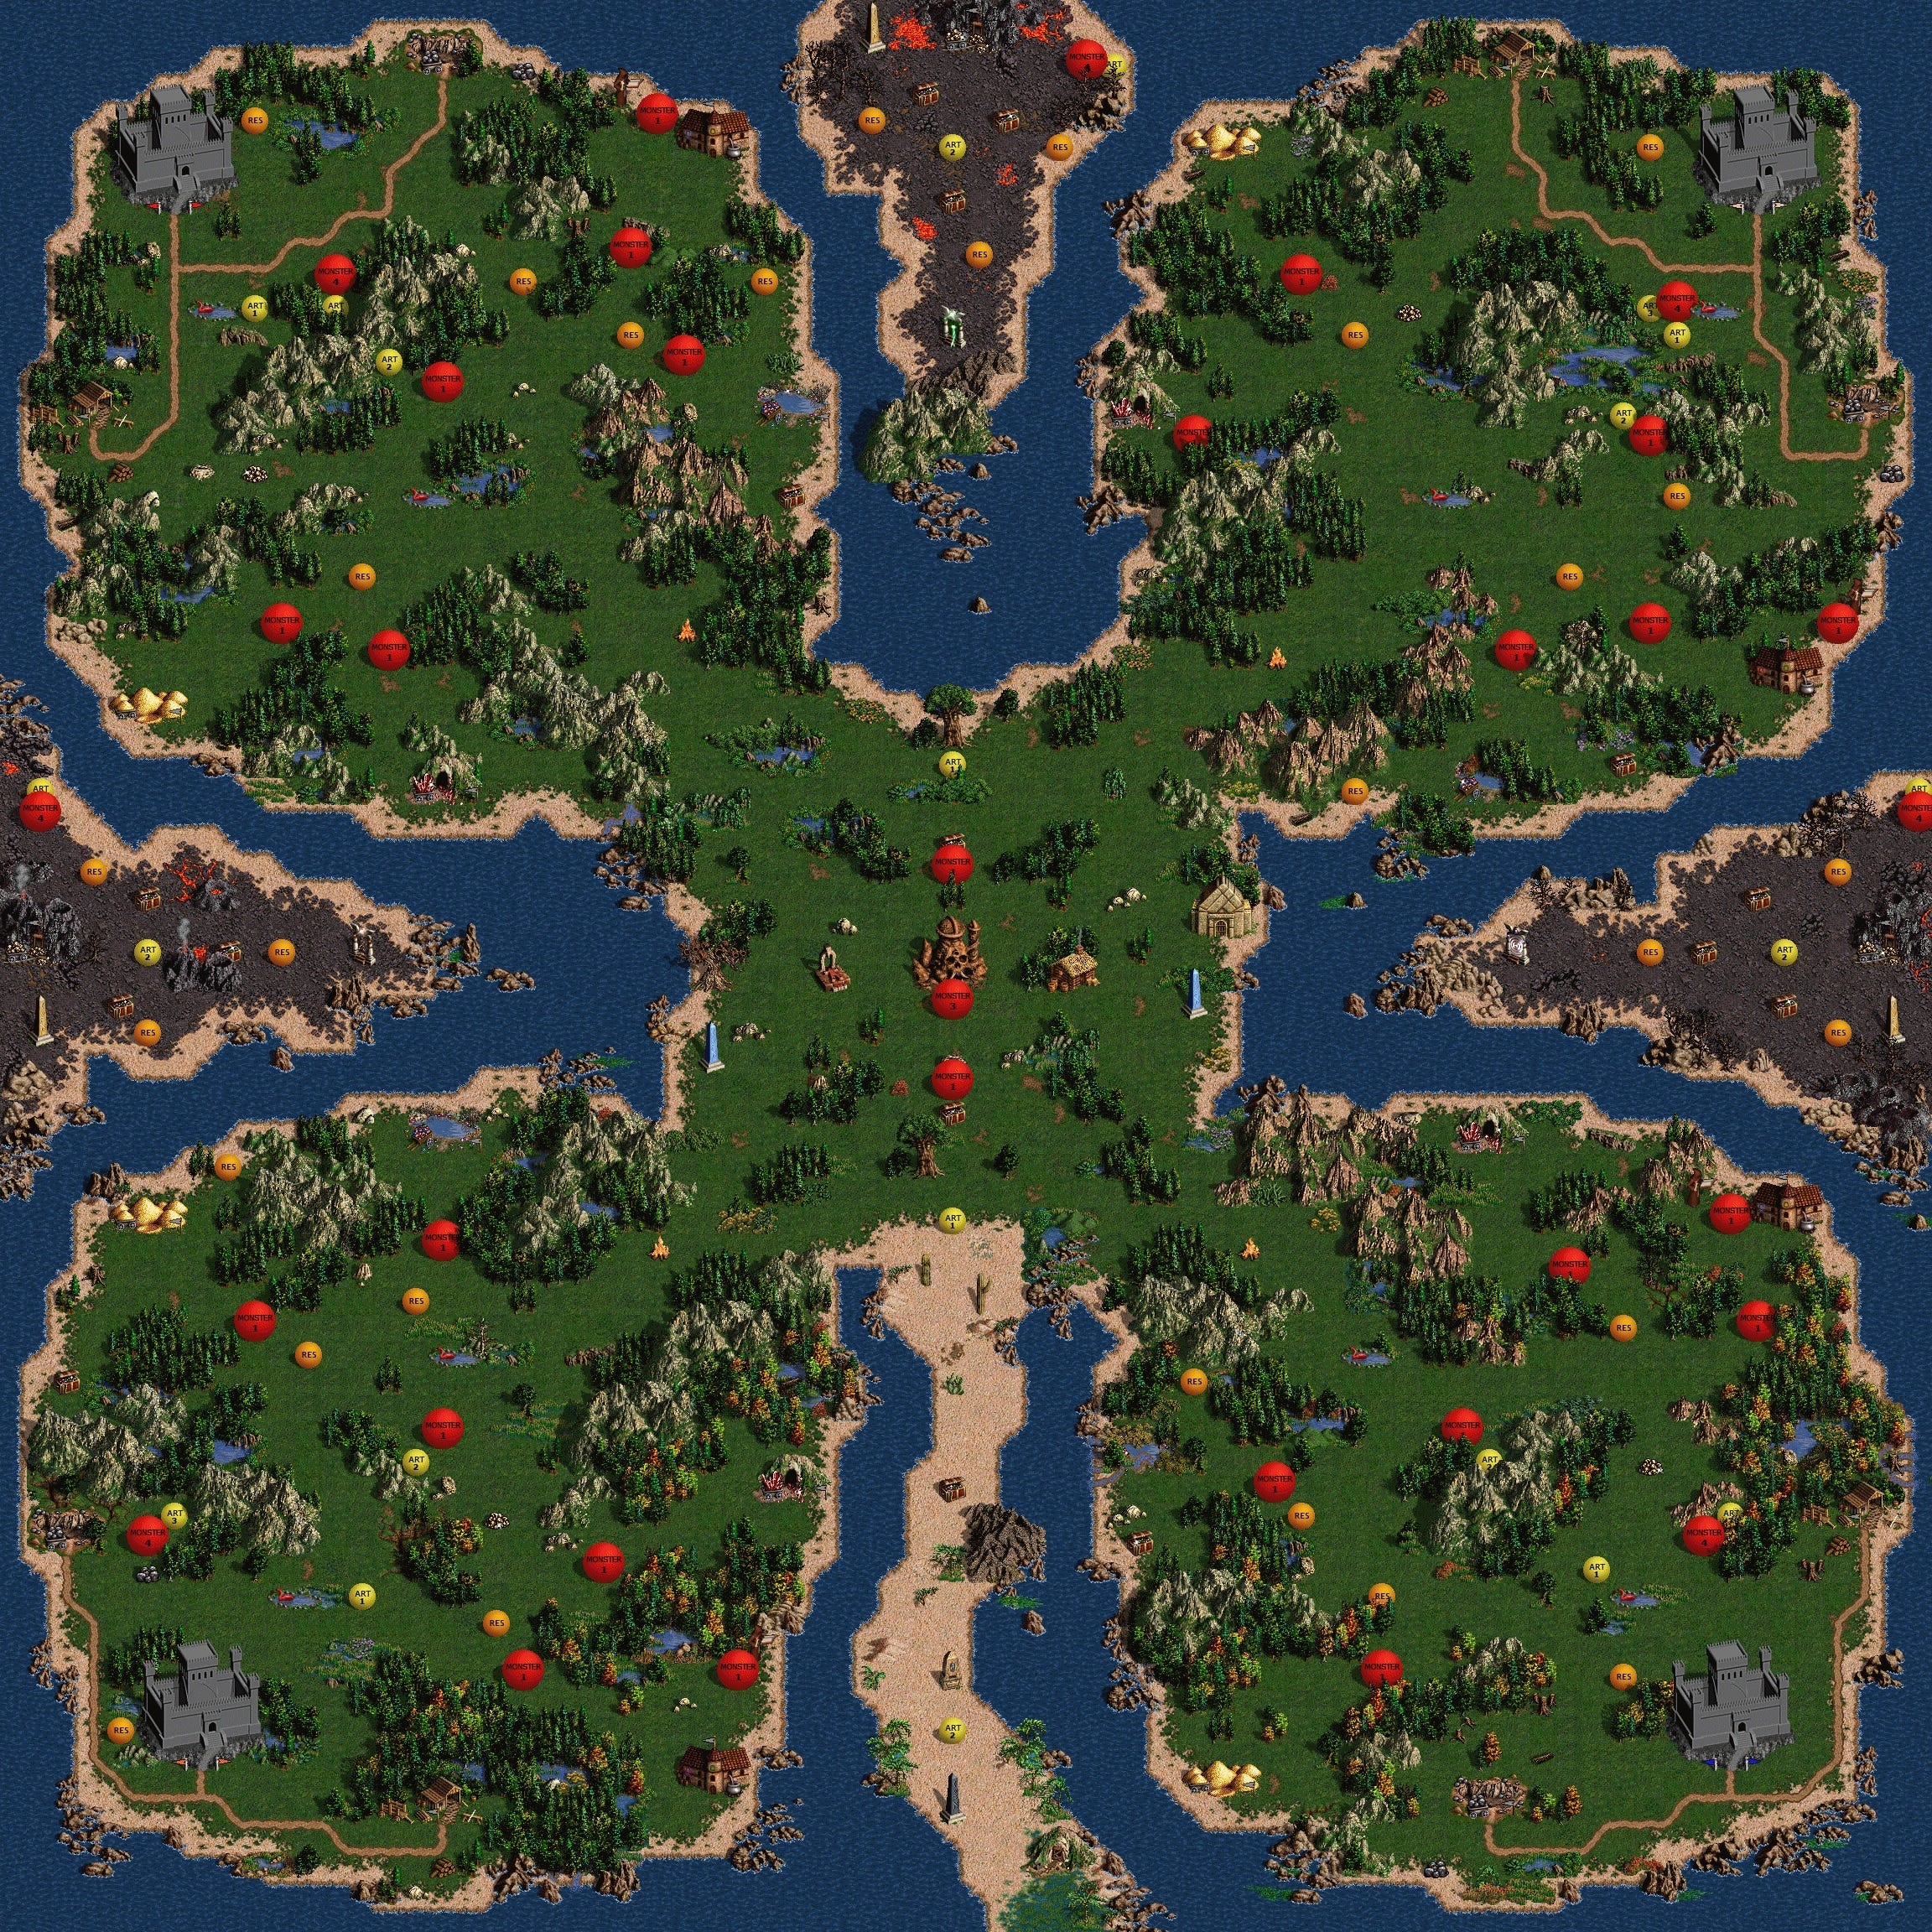
To make this more clear, take a look at the layout of the map “Crimson and Clover”. Here, we can see little circles that identify the different placeholders. For example, the circle “Monster 4” at the bottom left of the map serves as a placeholder for a random level 4 monster. This monster guards a major artifact as denoted by the number 3 (artifact classes are indicated by a number between 1 and 4). We don’t know what monster and artifact are actually placed here until we explore this part of the map. This makes a big difference as artifacts within the same class differ greatly in power.
What makes map exploration so enjoyable are the rewards for doing it. The maps are filled to the brim with interesting things to find. The game rewards us for understanding the map and searching every nook and cranny for powerful artifacts or useful map objects.
The map objects play a big part in making the exploration more fun. Some, like the mines, are fairly boring. Others are much more interesting. For example, the seer’s hut gives us a random side quest with a random reward. For example, we might get the task to retrieve a certain artifact and receive a group of powerful creatures for our army as a reward. As both task and reward are random, these quests vary quite a bit and aren’t always worth doing. Still, they are a great addition to the game.
Other map elements allow us to explore more efficiently. For example, the redwood observatory reveals a large area around it. This is incredibly helpful to quickly reveal the map.
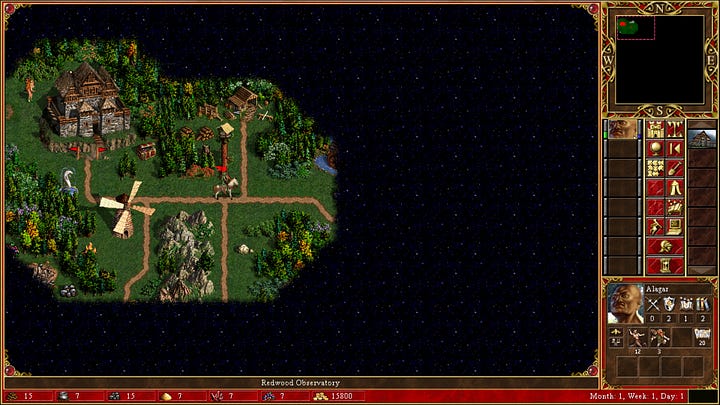
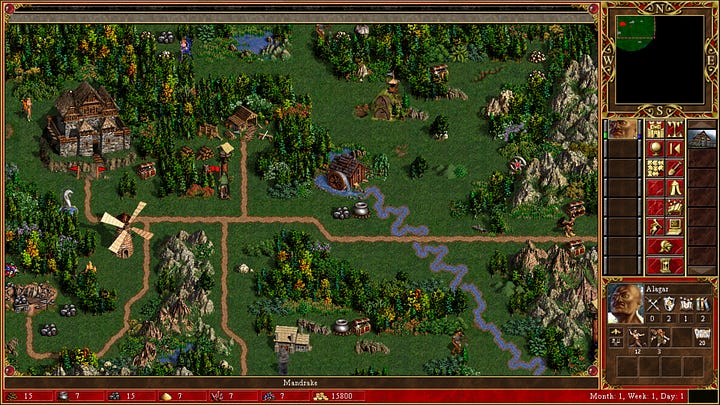
The map is also filled with elements that improve our hero. We can increase his attack or defense skill in the arena, gain some easy experience via the learning stone, or learn some new secondary skills at the university. We can also fight creatures for rewards in the many different types of creature banks. These rank from the lowly imp cache to the mighty dragon utopia.
The highest exploration reward we can get is the grail. To find it, we need to visit all obelisks on the map. This reveals the grail’s location on a special treasure map.
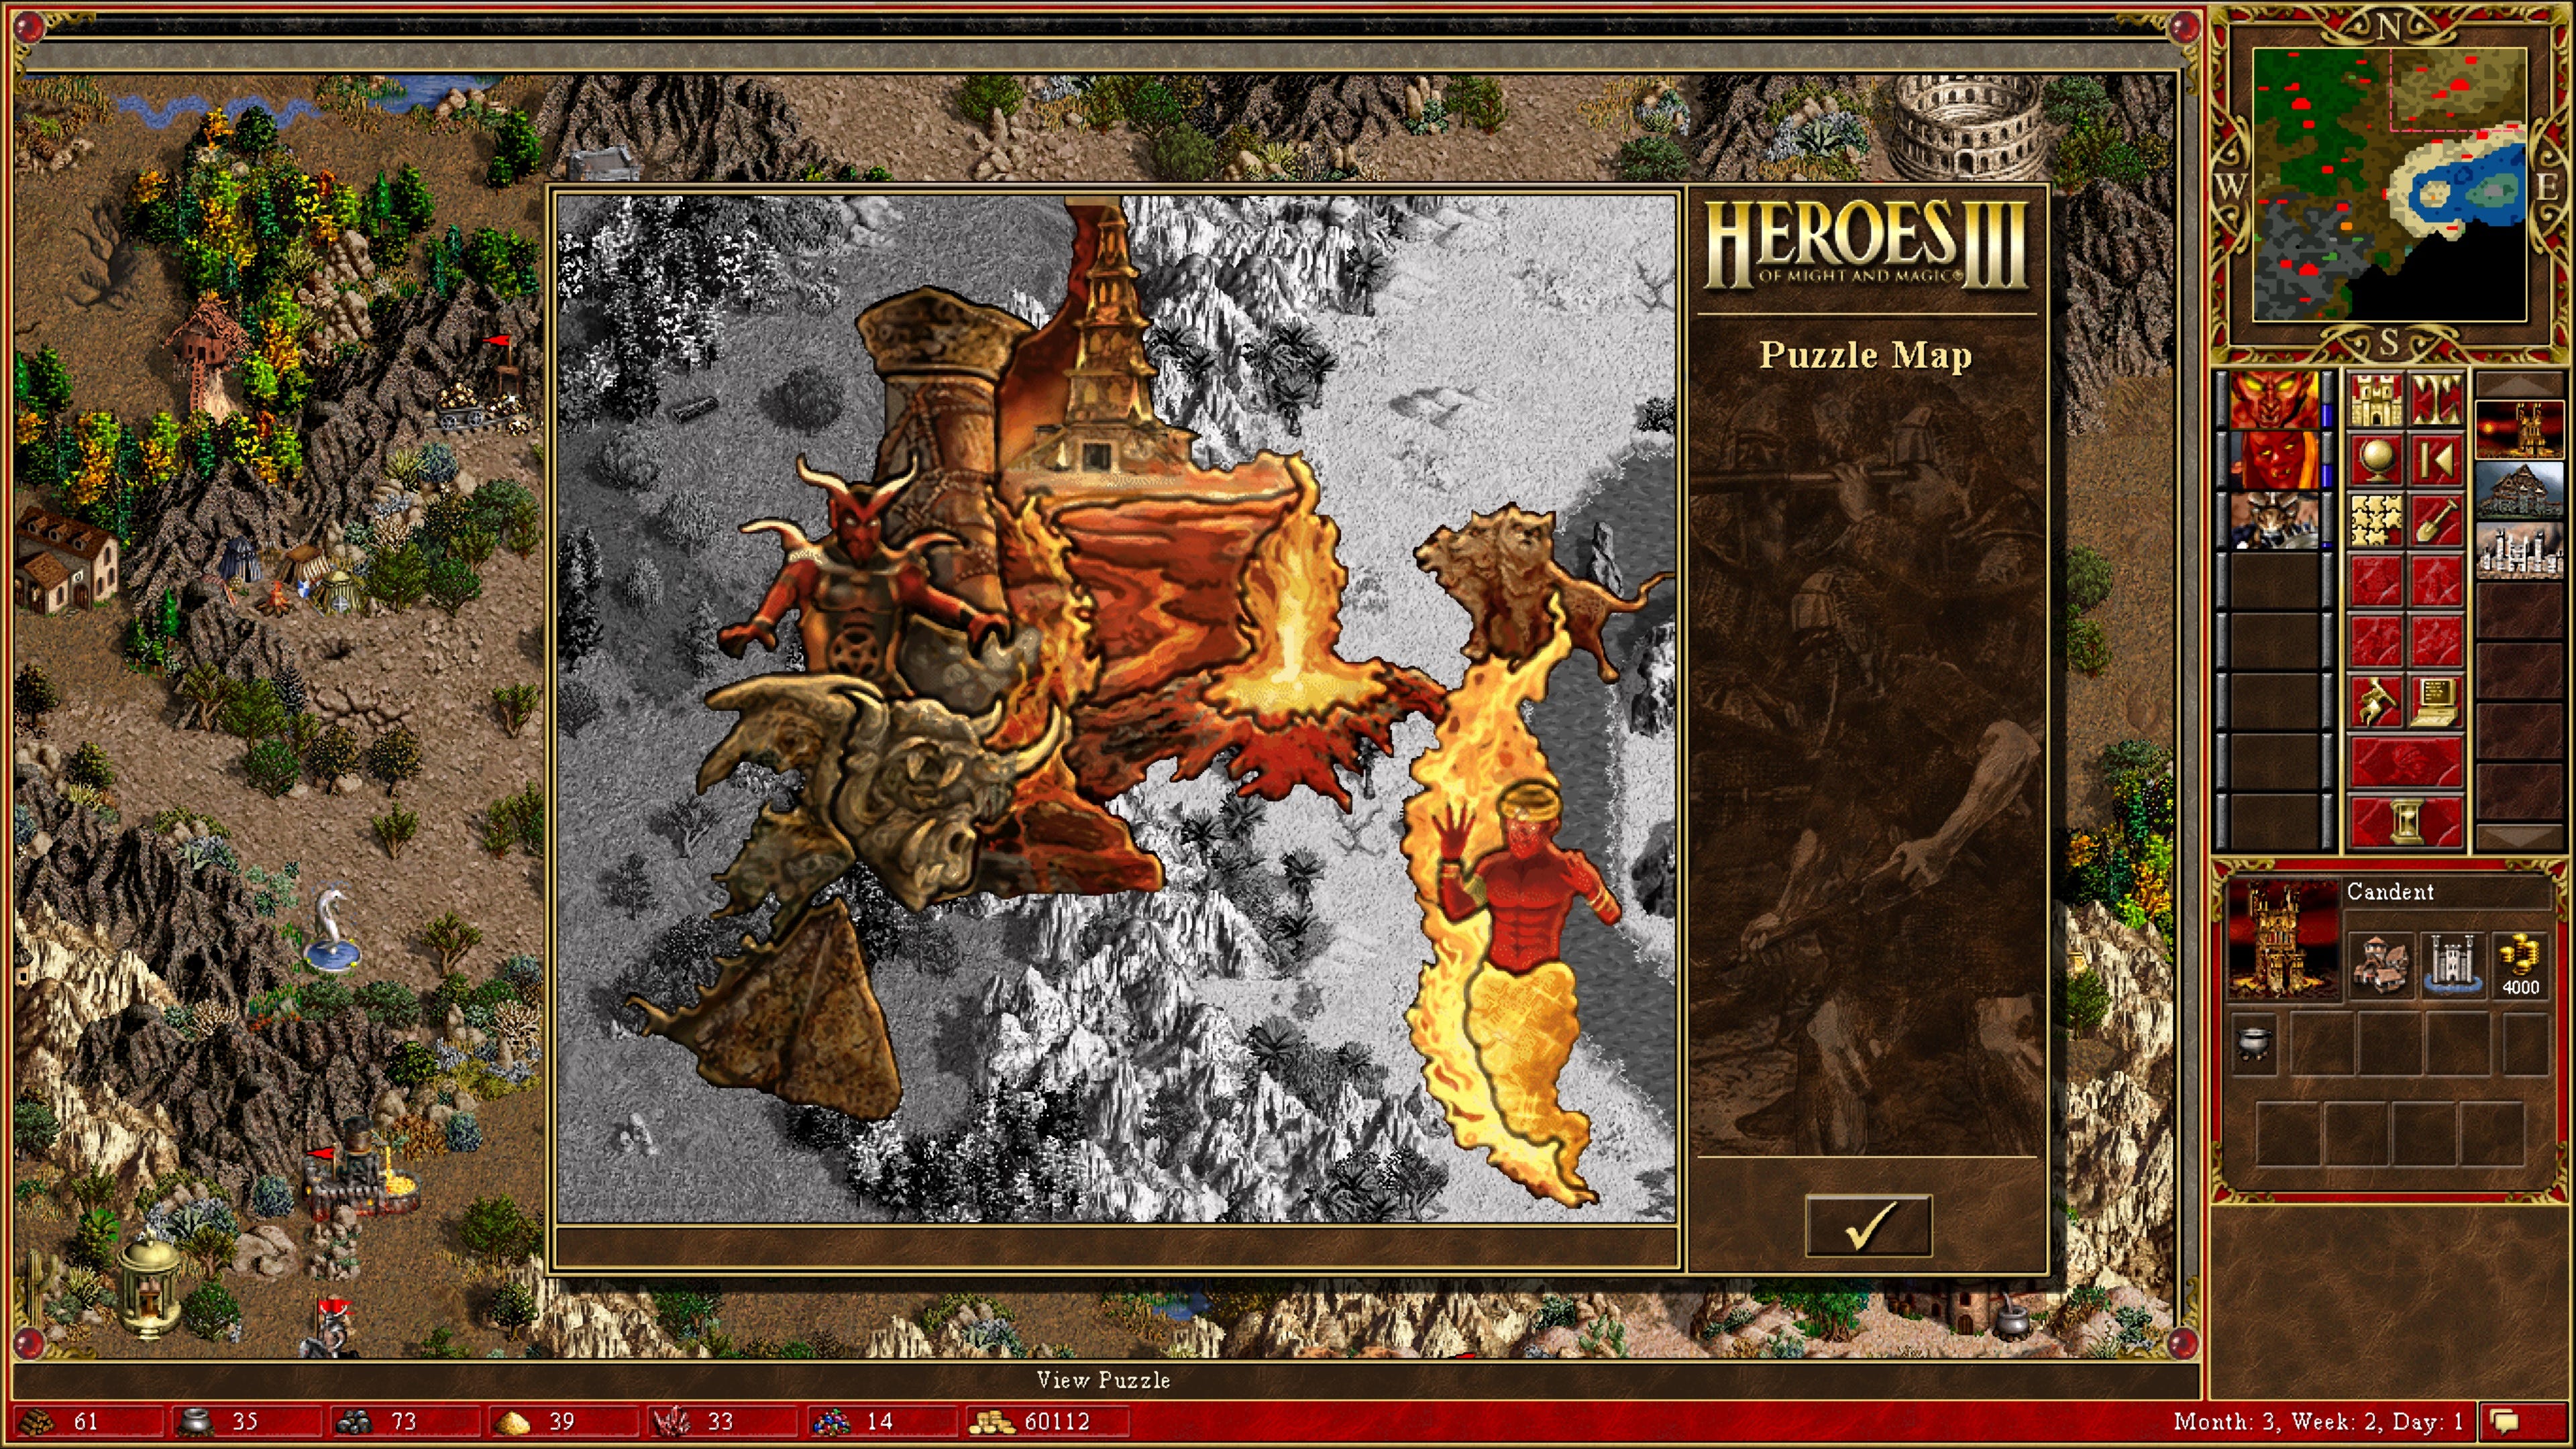
Once we have retrieved the grail and moved it into a city, we have the option to create a special building that grants us great benefits. This is a bit of a “win more” scenario, as we’re usually already winning the game in this situation, but it’s still a great reward.
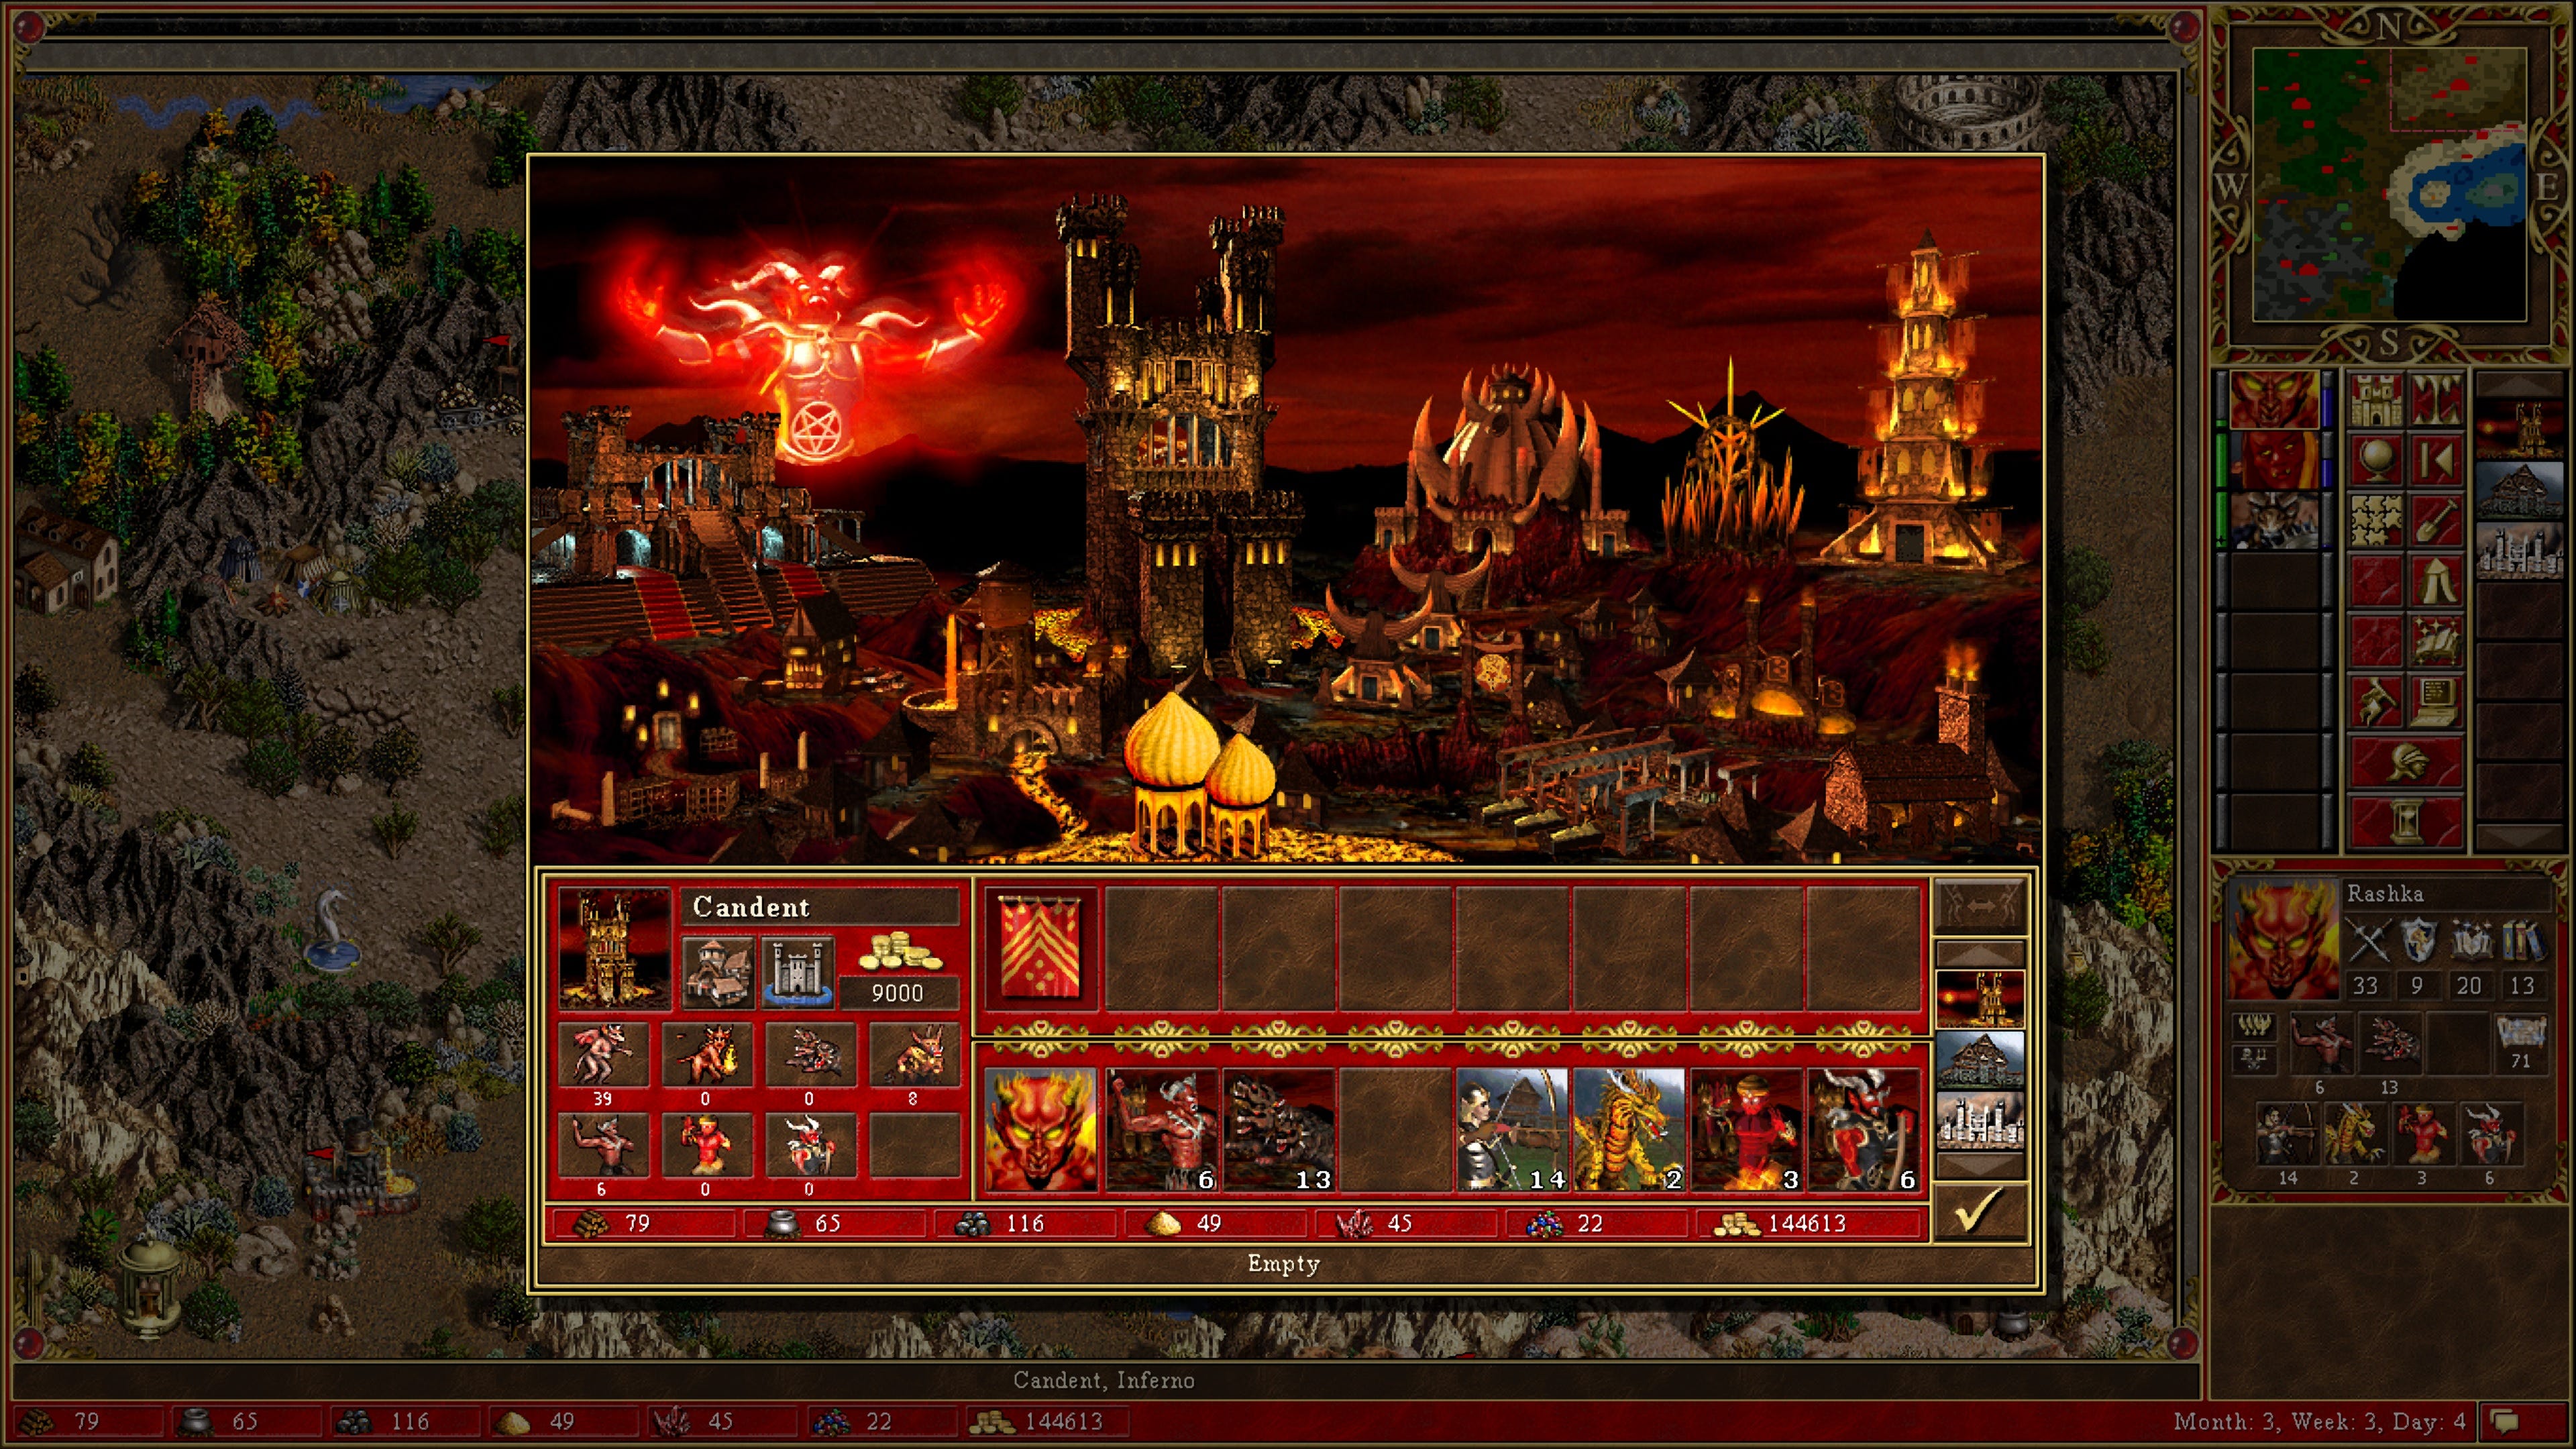
To make exploring the map even more interesting, the game also features an underground that we can only enter in certain places. The underground can contain the same things as the regular map, including towns. As a result, it strongly increases the effective map size.
The game is also fond of enabling alternative routes. These can be realized with portals (both one- and two-way) and border guard map elements that we can only pass after finding the matching key master tent. Thanks to these elements, new paths open up over time. This can lead to unpleasant surprises if our enemies find the new paths first.
Some maps also feature large bodies of water that we need to cross via boats. Naturally, the water also contains map elements to make crossing it more interesting. We can also fight enemy heroes in naval combat. While this only changes the displayed background during the fights, it’s a nice feature nevertheless.
Speaking of combat, it’s about time that we discuss this in more detail.
As soon as we enter combat, the game switches to a dedicated combat screen. Our own army takes position on the left while the enemy army takes the right. Each army consists of at most seven creatures, each representing a stack of creatures of the same type.
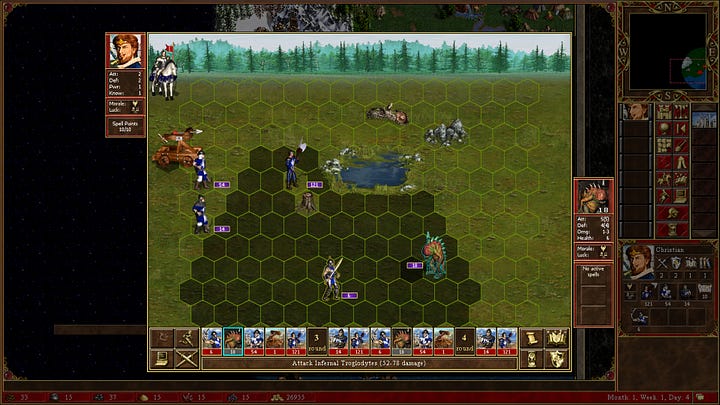
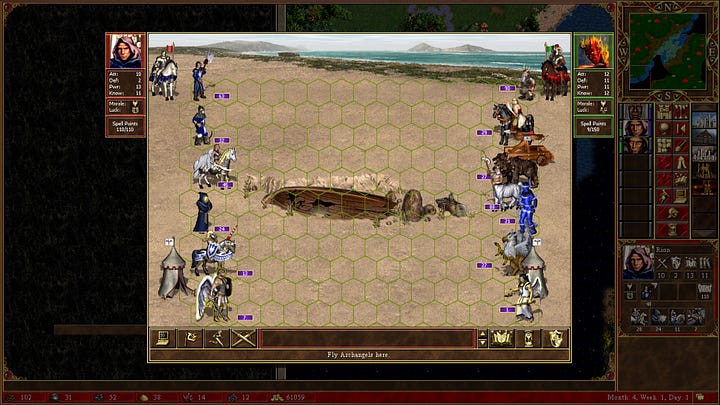
The combat itself is turn-based. In each turn, all creatures move in order determined by their speed, with the fastest creature going first. For each creature, we can either move somewhere, (move and) attack something, defend, or wait. Some creatures also have special abilities that we can trigger manually.
Each creature has a limited movement range. Melee attackers need to reach the enemy before they can do any damage. Ranged attackers can always attack but do more damage to close enemies. However, they lose the ability to attack at range if an enemy creature manages to move next to them. In that case, they have to use their melee attack, which is usually much less effective.
As a result, positioning is very important in combat. We also need to keep the creature turn order in mind. For example, our Pit Lord might not be able to reach the enemy during his turn. However, once the enemy creature has moved, the gap might be sufficiently small to attack. To help with this problem, we can order a creature to wait. Waiting creatures move to the end of the creature queue and only take their move after all non-waiting creatures have acted. As an alternative, the Pit Lord can also skip his turn entirely in exchange for a slight defense boost.
While our heroes are present on the battlefield, they don’t fight. Their only role is to cast spells and to apply passive buffs to the creatures. Both spells and passive buffs can make a big difference, especially on high-level heroes. There are a couple of spells in the game that can easily win a battle on their own if our hero is skilled enough. To balance things out, spell use is restricted to once per turn, and each spell consumes a certain amount of spell points that we only regenerate outside of combat.
In addition to positioning and using our spells correctly, we also have to time our attacks correctly to get the best battle results. Attacking first is almost always desirable in HoMM3, as creatures counterattack after getting hit. However, the attack is processed first, so hopefully fewer creatures remain to counterattack us. Creatures can counterattack only once each turn, so it might make sense to first attack them with a more expendable creature before moving in with a more powerful one.
Naturally, there are exceptions to this rule. Some creatures can attack without triggering counterattacks. Others have more than one counterattack per round. We need to be aware of each creature’s special abilities to make the optimal decisions. Fortunately, the game allows us to look up each creature’s stats and special abilities at any time during combat.
There are a couple of special combat scenarios. For example, when fighting the inhabitants of a creature bank, our troops are placed in the middle of the screen surrounded by the enemies. Without a doubt, the most important special case are town sieges.
A fortified town has a wall we first need to destroy before we can attack the enemy creatures hiding behind it. To do that, we have a catapult that fires one stone per turn. It takes two direct hits to create a gap in a fully fortified wall. Sadly, we can’t control the catapult directly unless our hero has the Ballistics skill. Thanks to this lack of control, the catapult’s erratic decision-making, and its lack of accuracy, creating a gap in the wall can take quite a while.
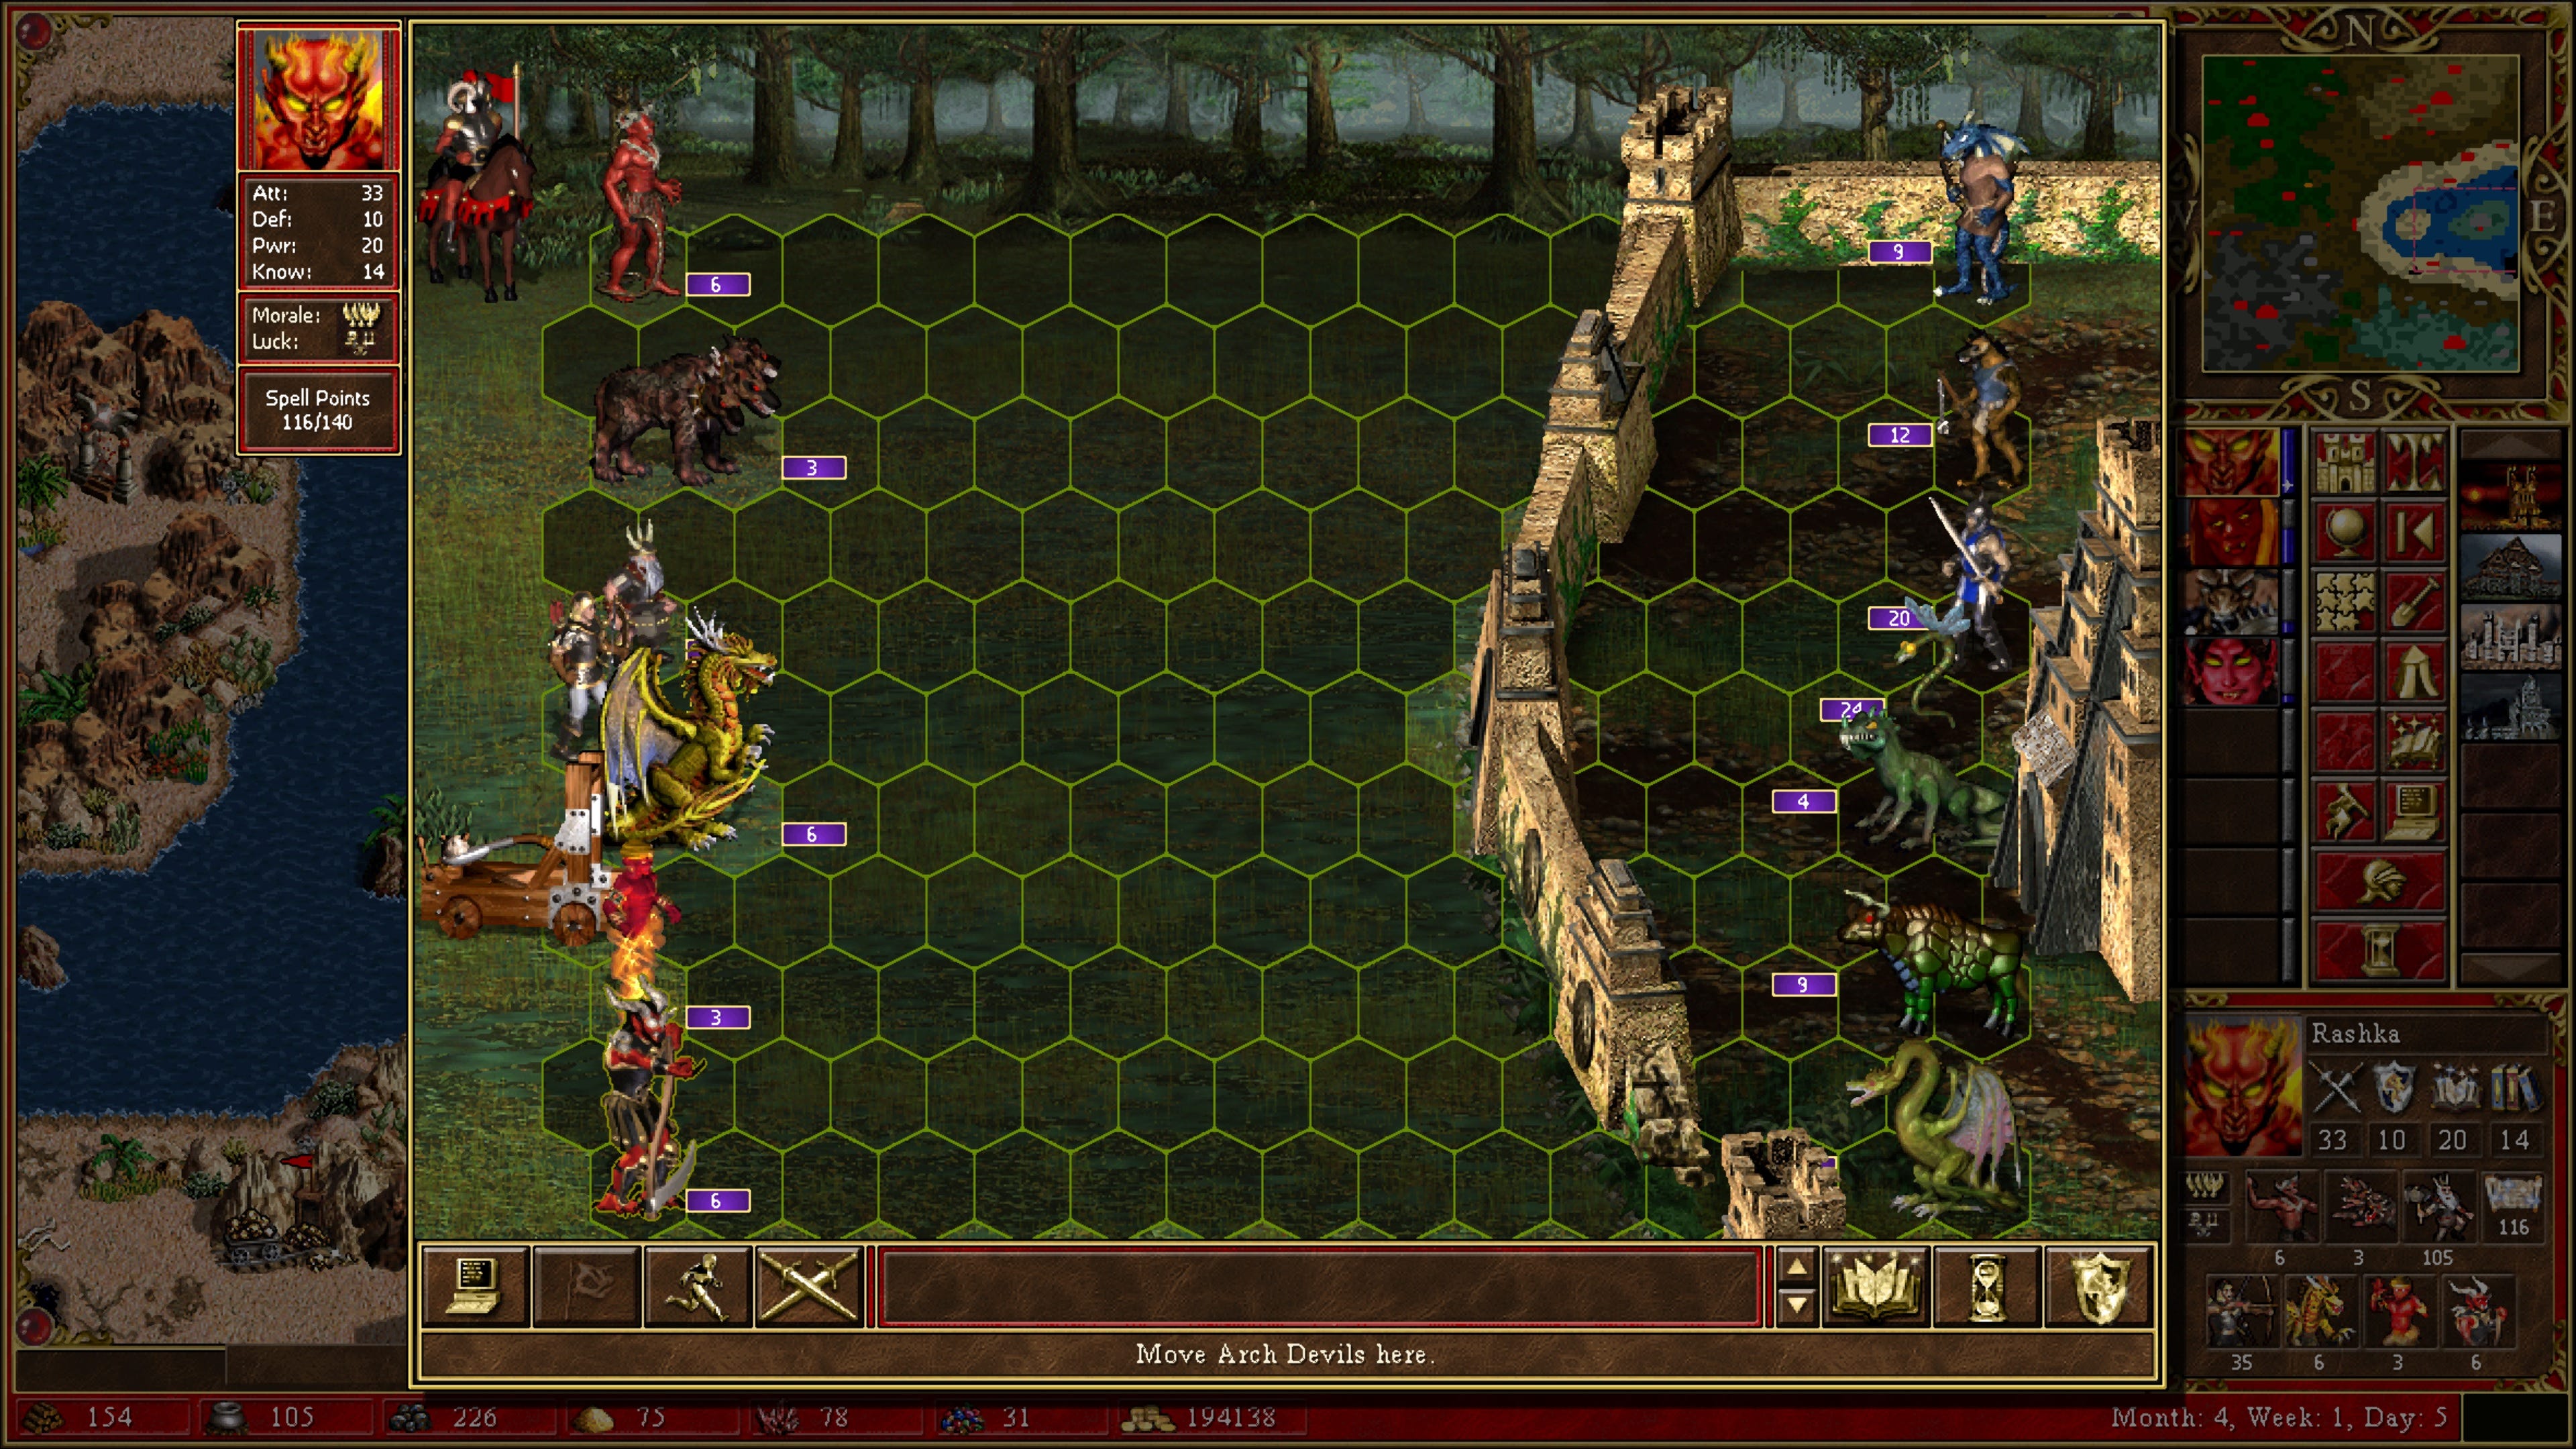
Fortunately, flying creatures can cross the walls with ease. However, flying in might not be that great of an idea. After all, our flyer will then be surrounded by the enemy without any meaningful backup. We should only use this strategy if we have very powerful fliers.
The defenders can always exit the wall via a special gate if they are so inclined. However, it’s usually better to remain hidden behind the walls and let our ranged attackers weaken the enemy as much as possible before a gap appears in the walls.
In general, the attacker is at a big disadvantage during a siege, so we should only attack fortified towns when we have a strong army, including fliers, or have such powerful magic spells that we can destroy the defenders with spells alone.
To sum up, the combat in HoMM3 is easy to grasp but nevertheless has a lot of depth. Making the right decisions takes quite a bit of experience, especially as the AI is quite capable. Now, it’s time to move on to the third pillar: city building.
Cities are our primary source of income, spells, and creatures. As a result, they are immensely important. In fact, we lose the game if we don’t control any town for seven days. Usually, we start the game with only one town, but this number varies depending on the map. On some maps, we start without any town at all and need to quickly capture one.
Towns consist of buildings. Buildings have various functions, including allowing us to recruit heroes and troops, providing us with more income, and making the town easier to defend. The majority of the town’s buildings are creature dwellings that allow us to recruit a certain creature type.
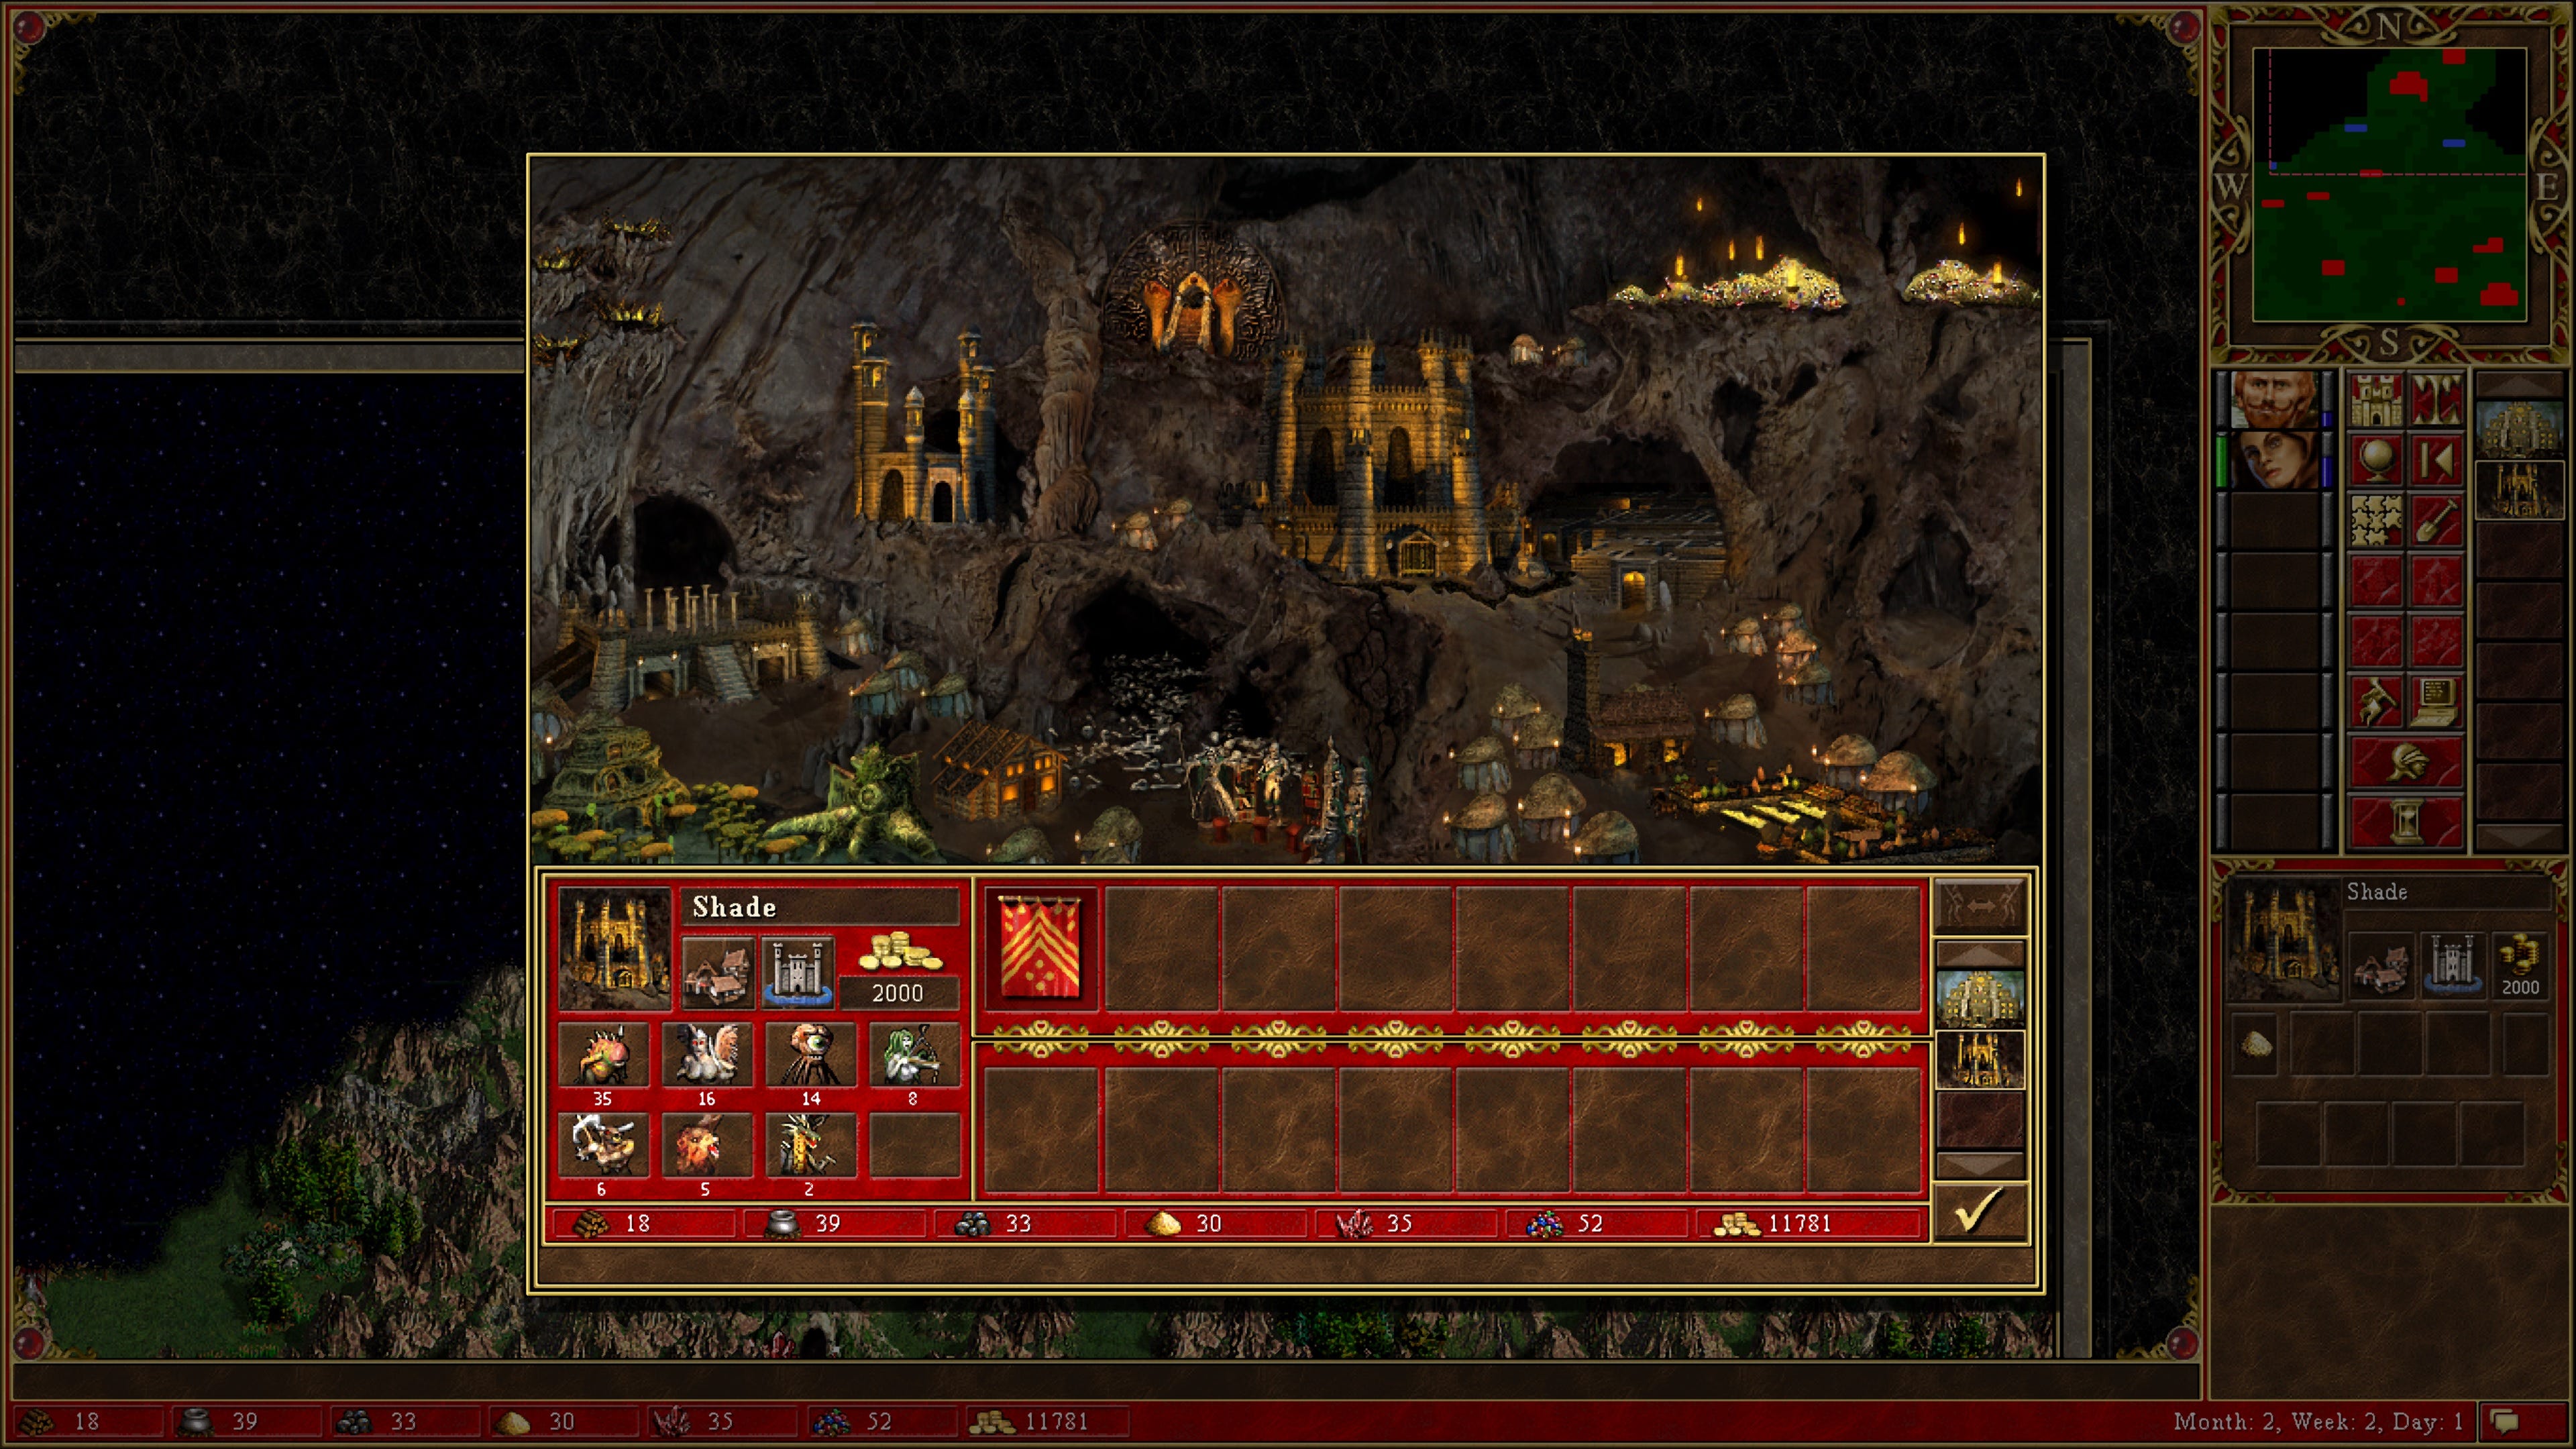
Each dwelling may be upgraded once to unlock access to a stronger version of the creature. Creature dwellings produce a certain number of creatures at the start of each week. If we don’t recruit the creatures, then the number will grow over time. In general, more powerful creatures have lower growth rates, and their dwellings are more expensive to construct.
Because creatures are only produced once a week, the order in which we construct buildings matters. Ideally, we want to have as many creature dwellings constructed at the end of the first week as possible to maximize creature growth. However, we also need gold and other resources to build these dwellings and to recruit the creatures.
As we can only construct one building per day, we need to find a balance between buildings that increase our resources, creature dwellings, defensive buildings, and others. There is no one-size-fits-all build order, as the optimal choice strongly depends on the map. If there are a lot of resources scattered around the adventure map, we can prioritize creature dwellings and vice versa.
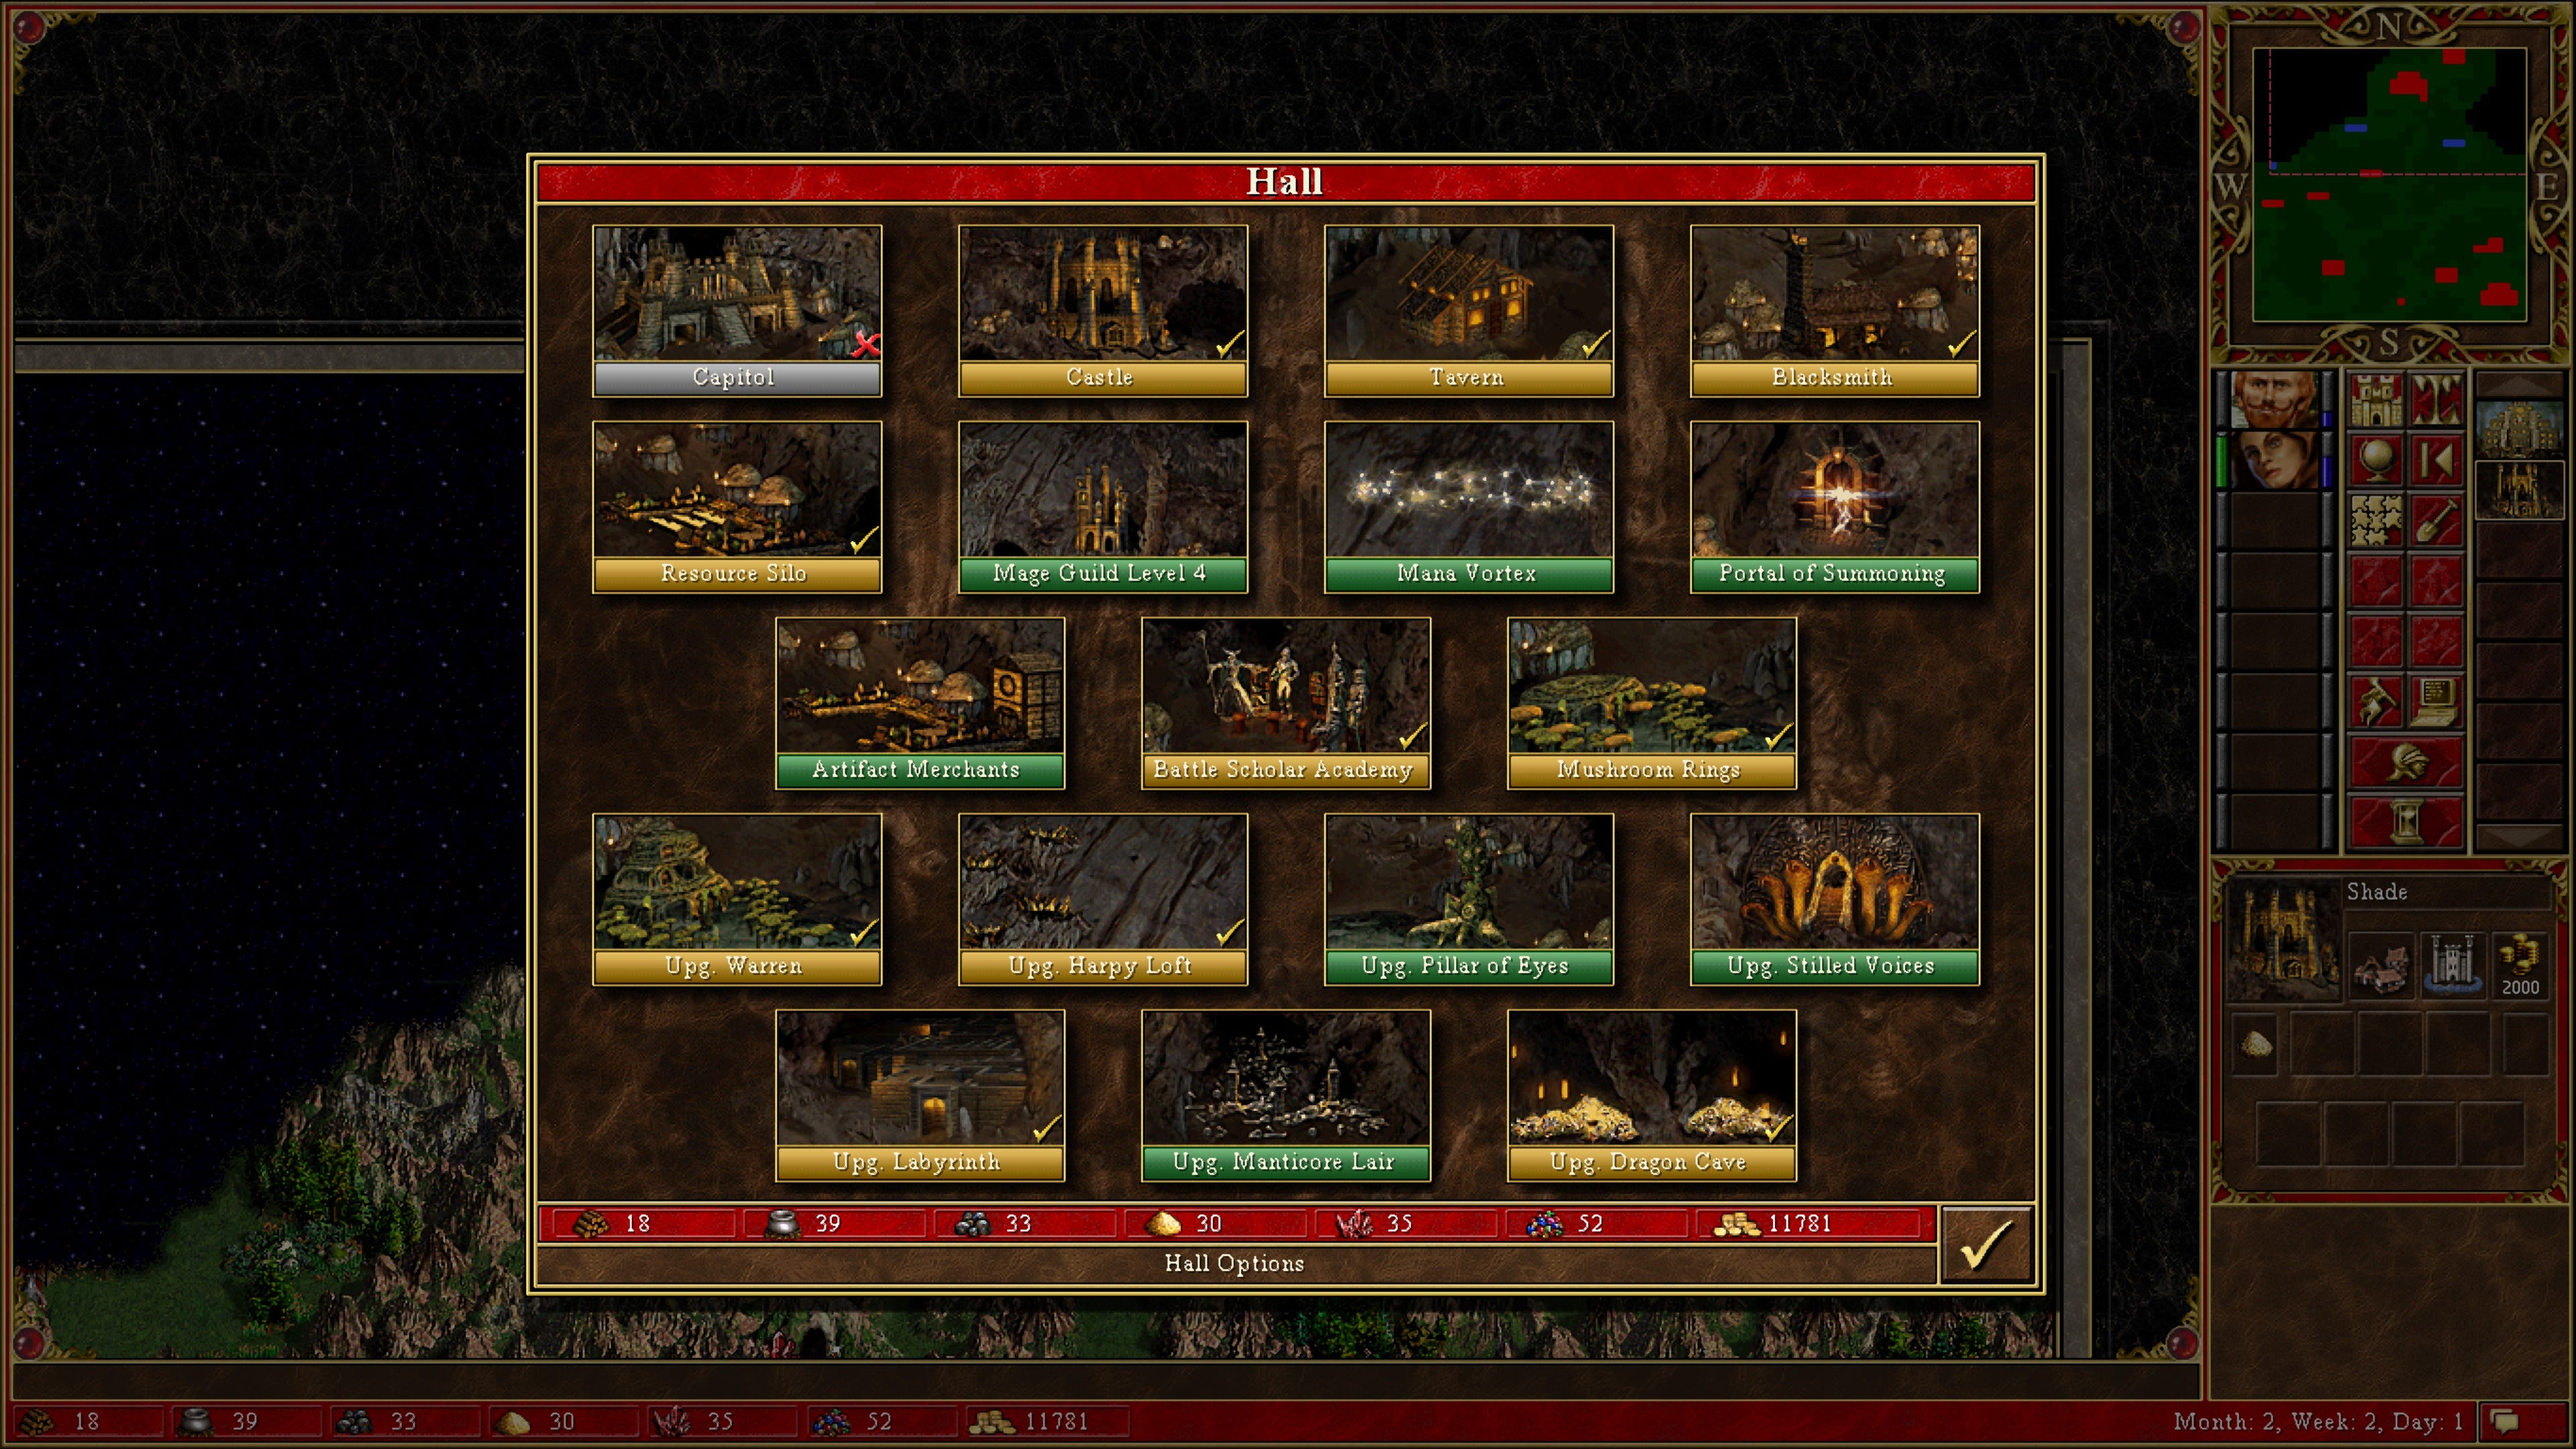
There are nine different types of towns in the game. These towns differ in the types of heroes and creatures they can recruit. Each town type also has a couple of unique buildings. For example, the Inferno town can construct the castle gate, which allows any visiting hero to teleport to another friendly Inferno town with a matching castle gate.
The various town types play quite differently. Some towns have powerful creatures that are costly to recruit, while others have weaker but cheaper creatures. On small maps with limited resources, a cheap town type like Fortress might be a better choice than a more expensive one like Tower. While the latter is much stronger than the former in the late game, it might simply take too long to get there.
Now that I’ve explained the exploration, combat, and the city building, it’s time to discuss the RPG elements. These turn the game from a pure strategy game into a strategy/RPG hybrid.
Unsurprisingly, the RPG elements of the game focus on the heroes. As mentioned in the combat section, heroes apply passive bonuses to the creatures under their command. For example, the attack value of the hero is added to the attack value of a creature. This means that the same creature will be more powerful under the command of a high-level hero compared to a low-level one.
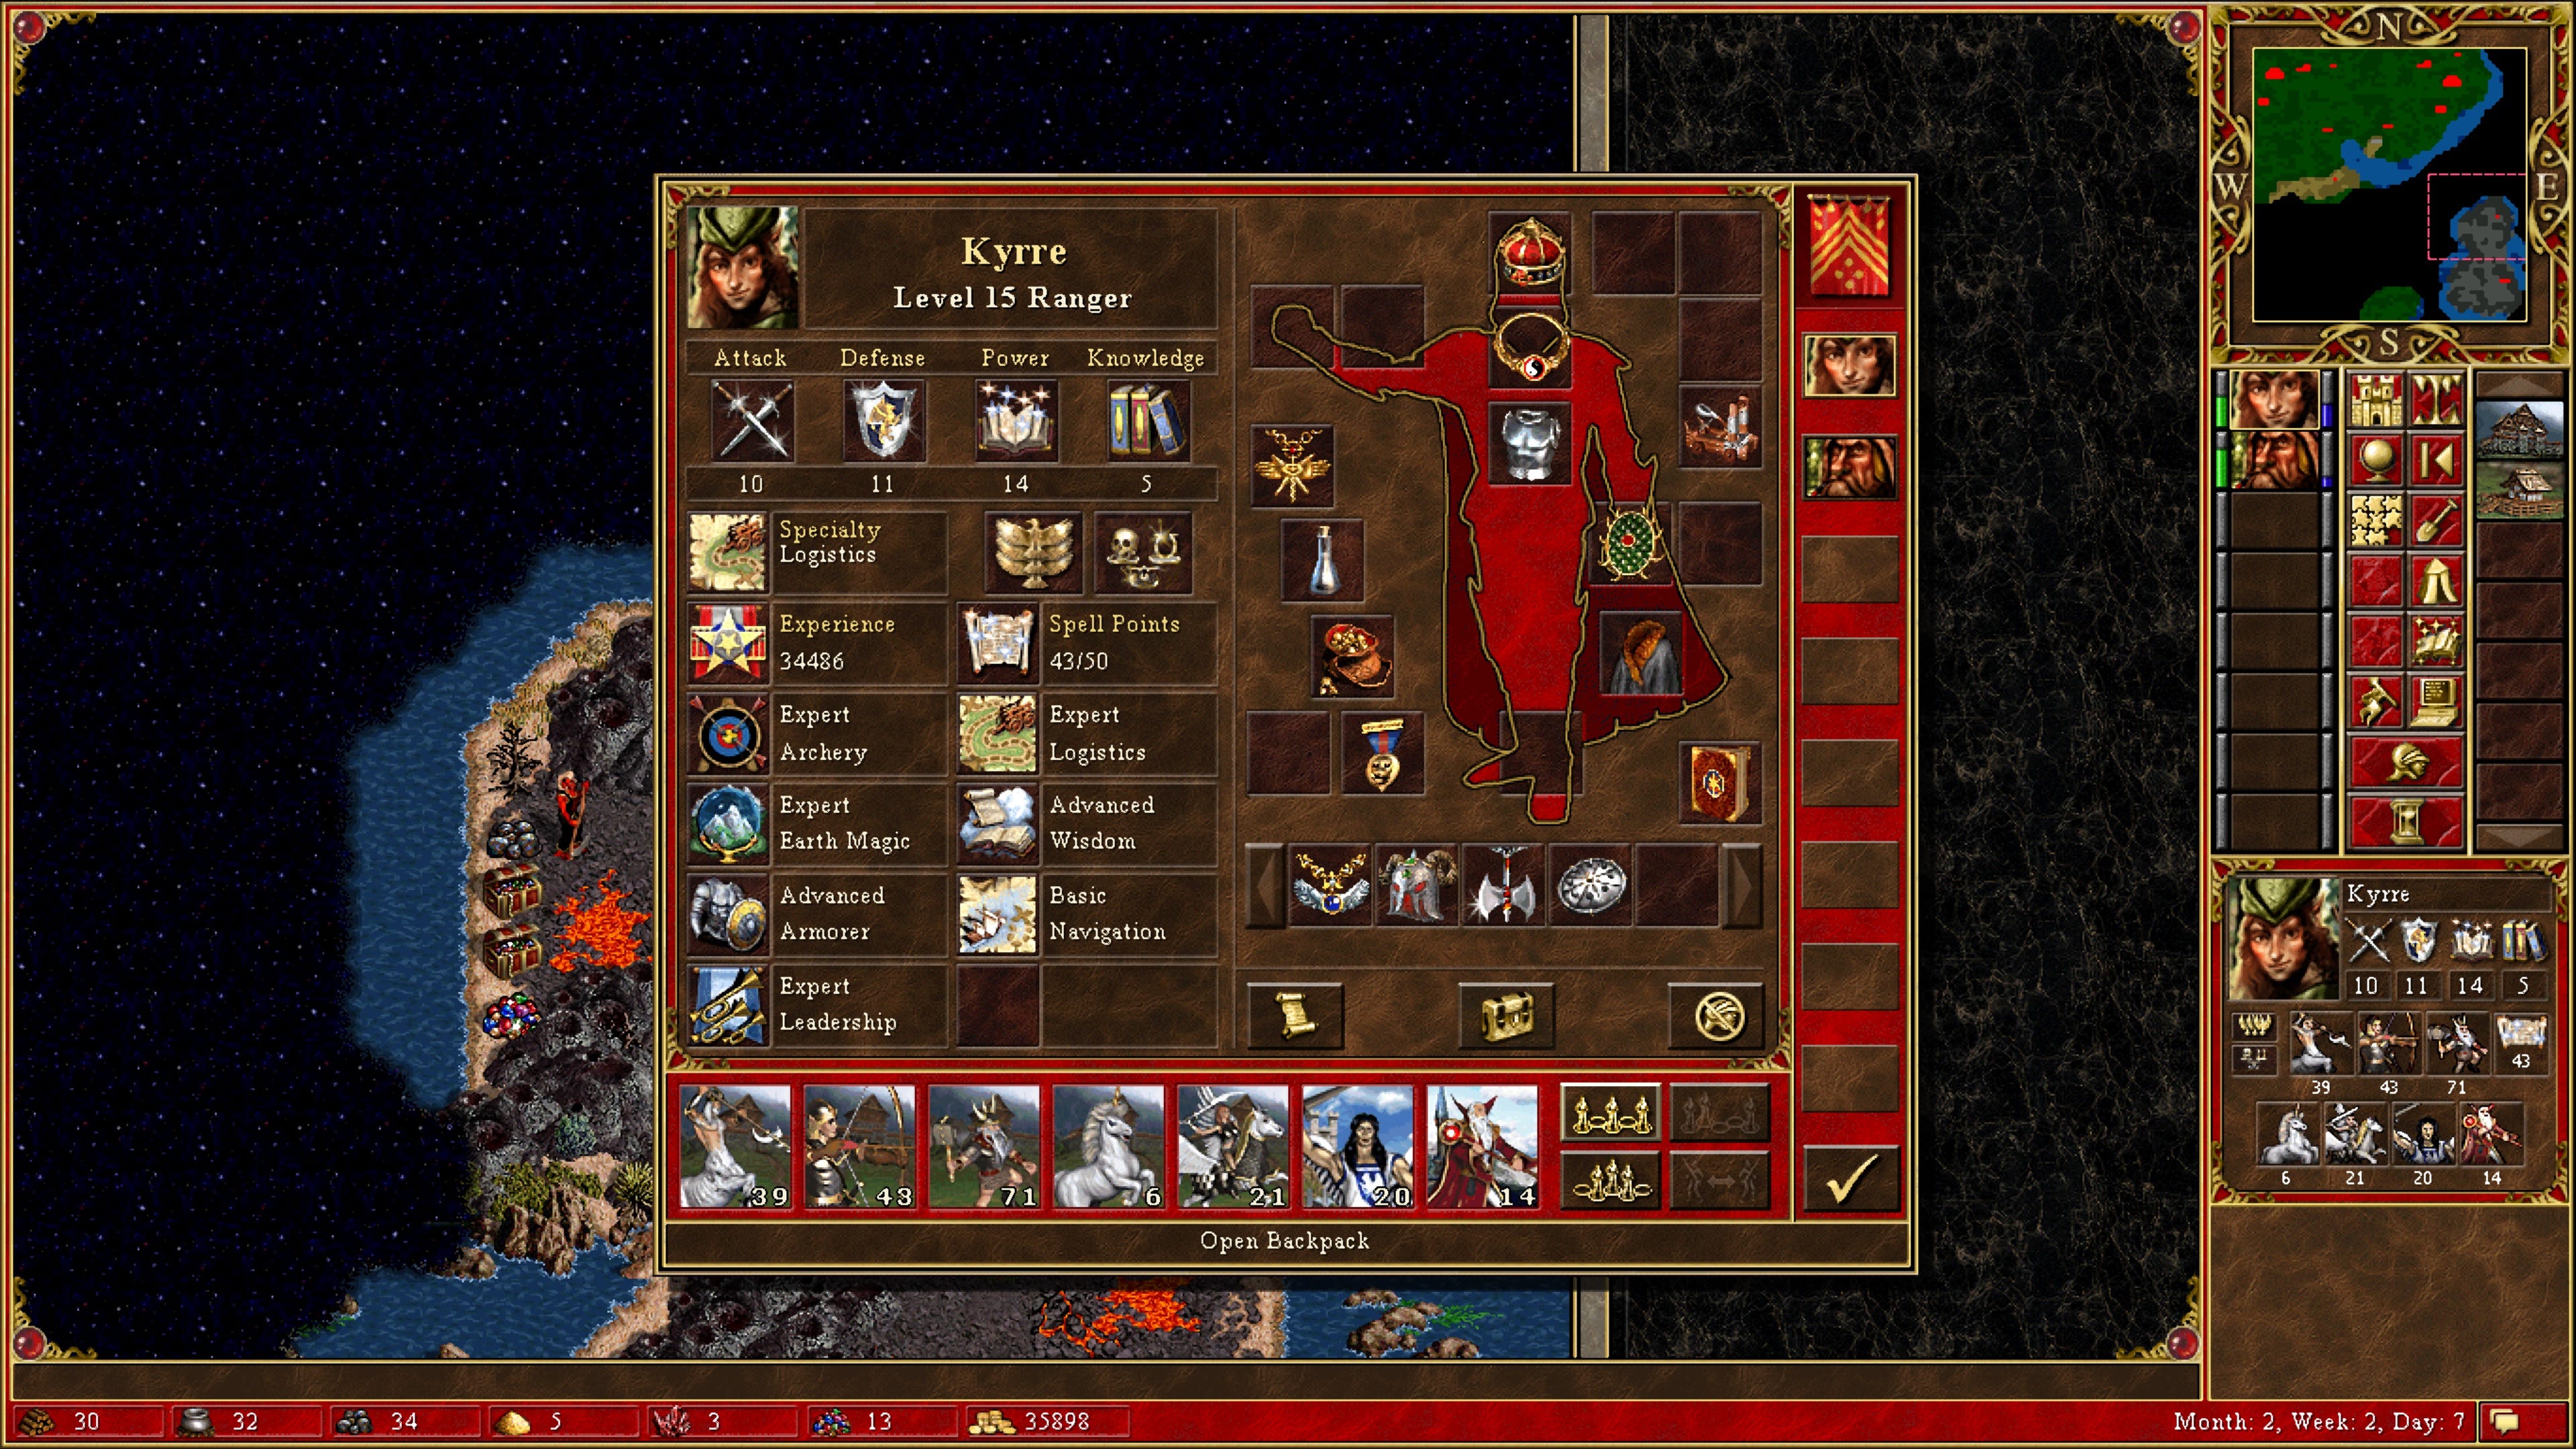
Heroes gain experience by fighting and by interacting with certain map elements. On level up, one of the hero’s primary skills will increase by one. While we cannot choose which one, we can somewhat influence the outcome based on our hero choice. Each town has a hero type focused on magic and one focused on combat. Naturally, the former has a higher chance of increasing magic-related primary skills like spell power and vice versa.
In addition to the improved primary skill, we also get to choose between two options for a secondary skill. This can be a completely new skill or an improved version of an already known one. There’s a wide variety of secondary skills grouped into three categories: combat skills, magic skills, and adventure skills.
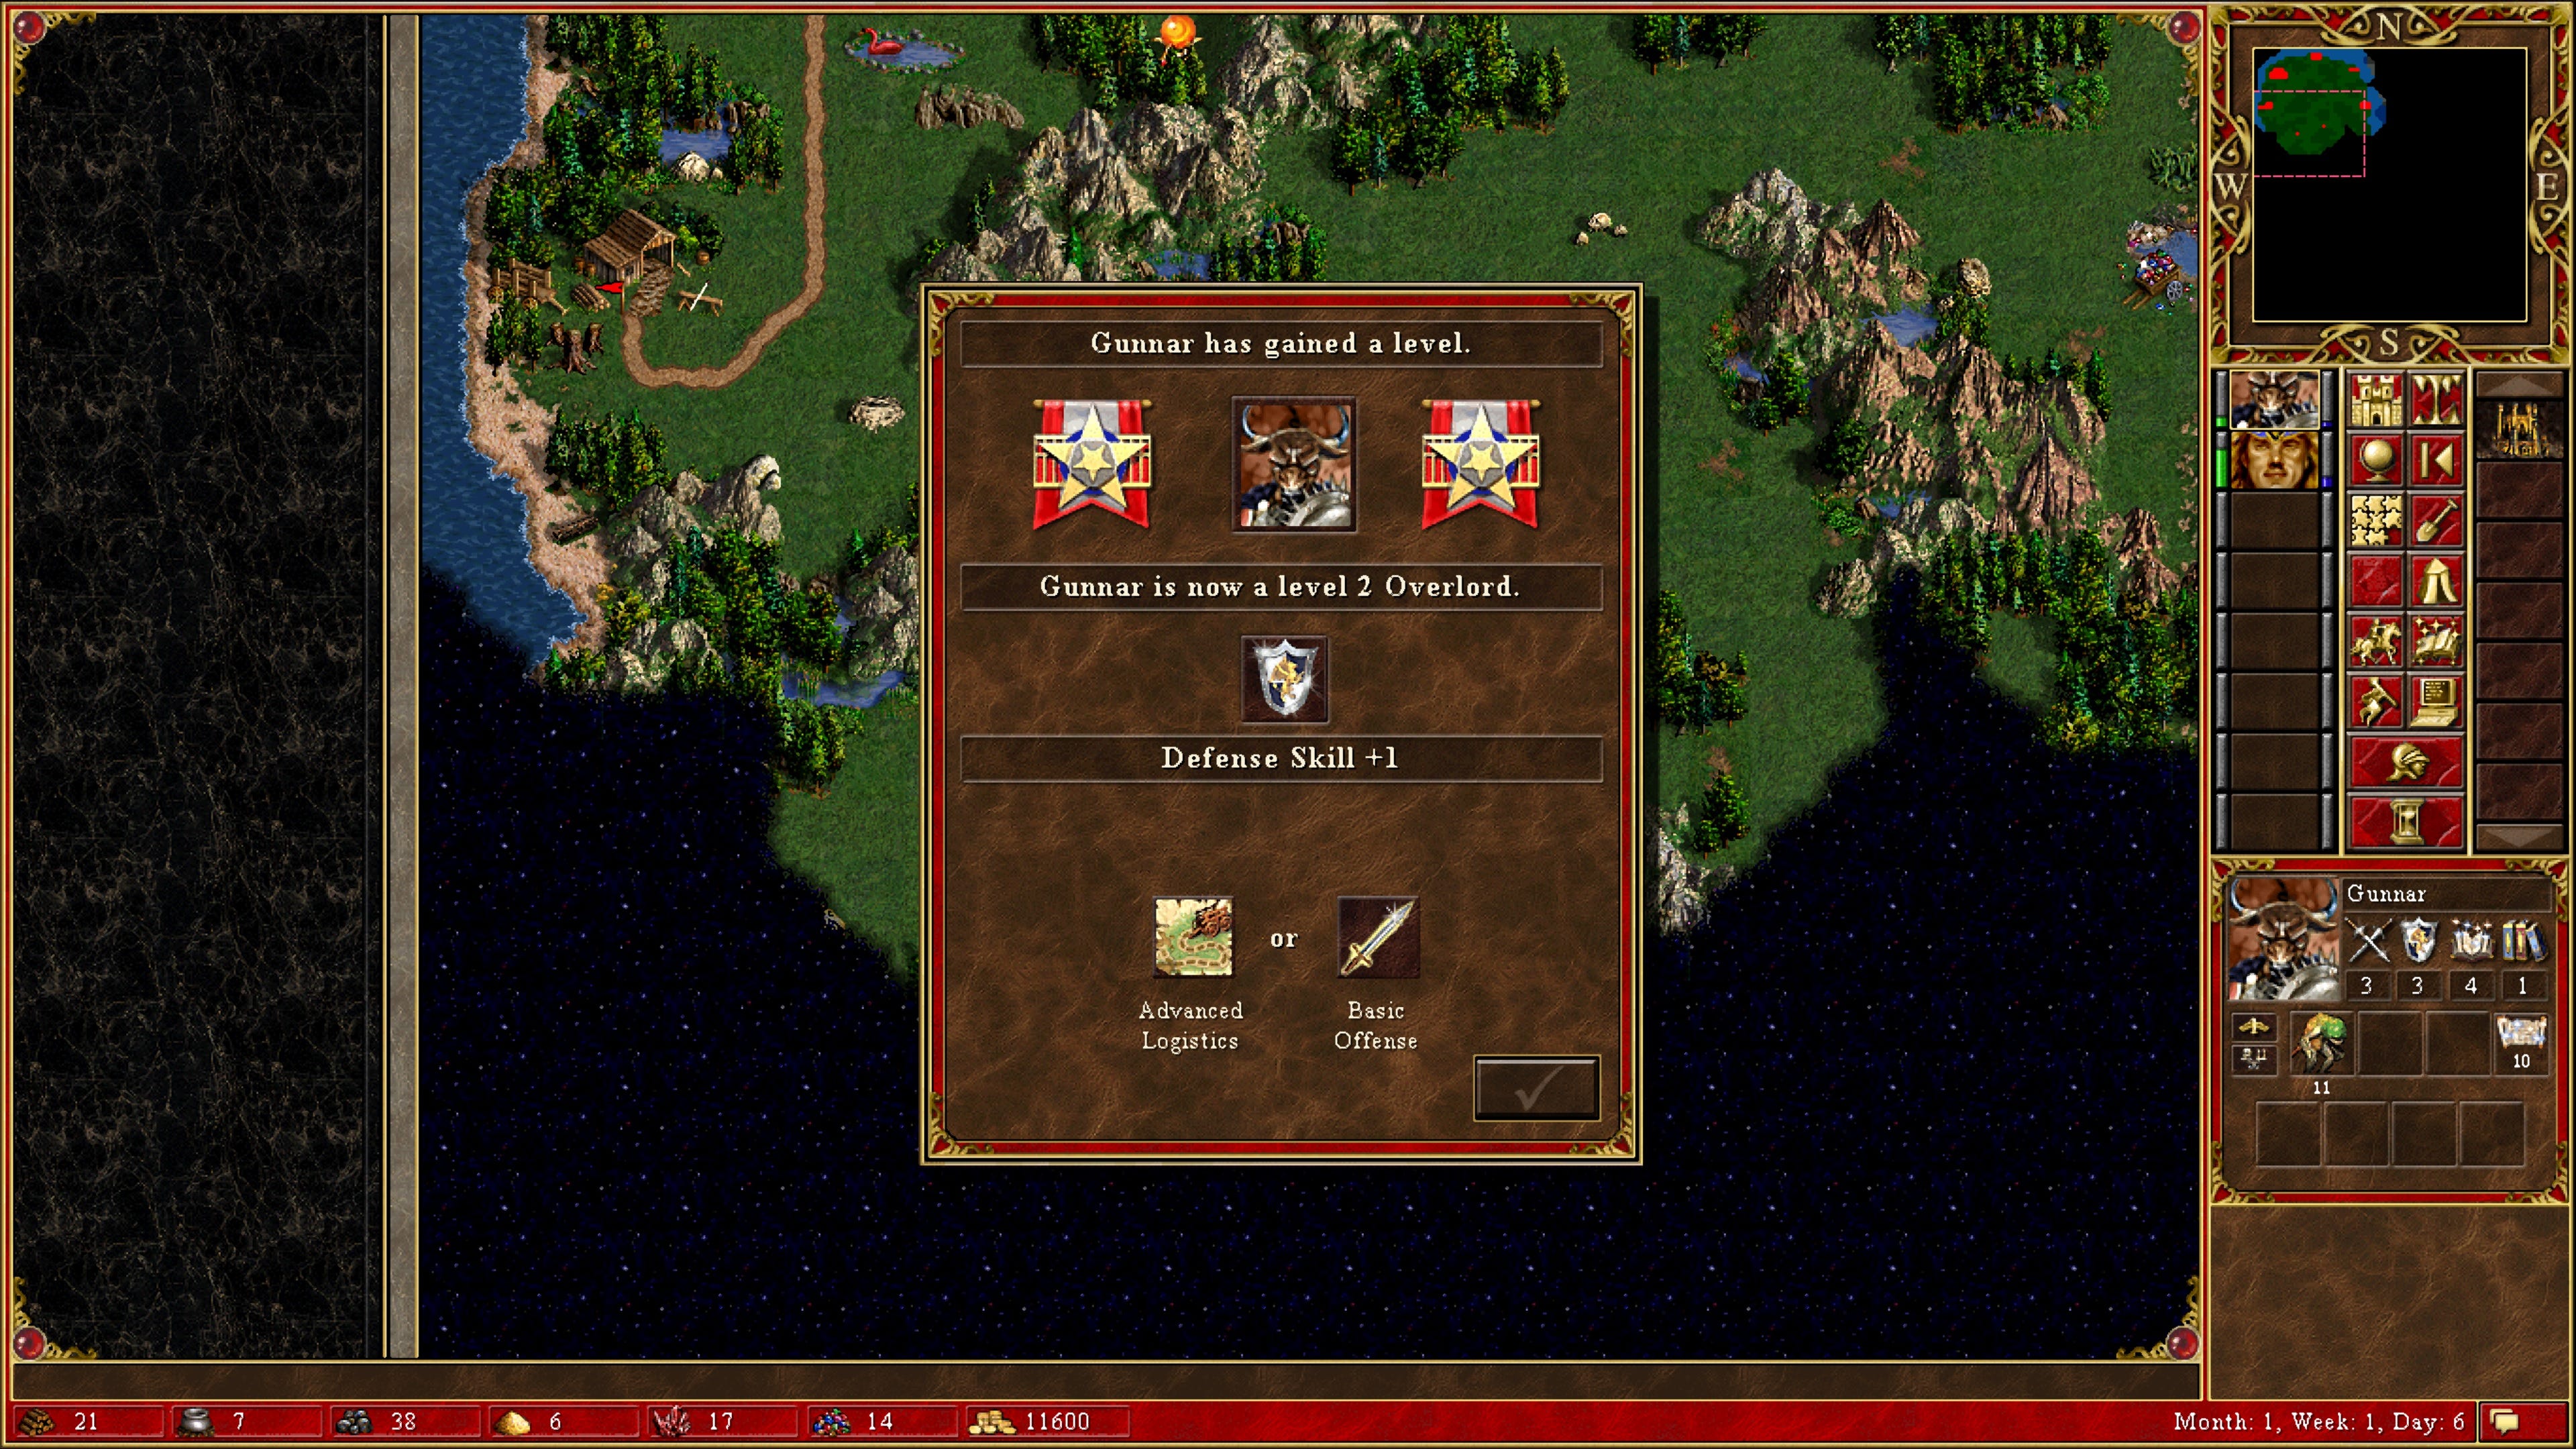
Combat skills affect combat directly, for example, by increasing our creatures’ ranged damage. Magic skills improve the hero’s ability to cast spells, for example, by allowing him to learn higher-level spells. Last, adventure skills provide the hero with advantages on the adventure map, for example, by allowing him to move further each turn.
Each hero can learn at most eight secondary skills. A skill cannot be unlearned, and each has three levels. The skills we pick have a high impact on our hero. To make the correct choice, we need to think about our hero’s role first. It’s normal to recruit multiple heroes over the course of a game. However, as the game strongly rewards high-level heroes and the amount of experience we can gain on a map is limited, we mustn’t spread the experience points over too many heroes.
Hence, some of our heroes will remain low-level over the course of the game. These will mostly keep busy by shuttling troops over the map, collecting replenishing resources on the adventure map, and defending our towns. Naturally, we want to pick different skills for these heroes than for our main hero.
For example, a skill like Ballistics that helps us break enemy walls is completely pointless for a defensive hero. On such a hero, we’d rather pick something like Estates to earn a bit of extra gold. Similarly, most magic skills only pay off on higher levels, so learning something like Earth Magic is probably pointless for a purely defensive hero.
In addition to our picked skills, our hero’s equipment is also important. We can find a lot of different magic artifacts in the game. Some of them only offer a minor boost, while others are completely game-breaking. For example, we might find spellbooks that contain all spells of a certain element. Naturally, these are a great find for a powerful mage. Another example of a game-breaking artifact are the angel wings that allow our hero to fly. This means that we can ignore mountains and water on the adventure map completely.
The impact of the secondary skills and the artifacts illustrates how important the RPG elements are to the game: they tie everything together. We have an incentive to explore the map because we can find resources, artifacts, and experience sources that make us more powerful. However, we need an army to do this effectively, as most map elements are guarded by neutral elements. So, we need to develop our town to get a better army, using the resources we found on the map.
Getting stronger makes us more proficient in combat, which in turn allows us to explore new parts of the map. We encounter a powerful self-reinforcing loop that makes the game very addictive. The desire to just do one more turn is very strong. This is a good segue, as I want to discuss the game’s strength in a dedicated section.
HoMM3 has a number of strengths that, combined, make the game truly exceptional. First of all, I have to praise the game’s exploration once more. The maps are interesting, often very pretty, and very rewarding to explore. As mentioned, the RPG elements contribute a lot to this, which leads to the second strength: the game has a very rewarding character progression. As I previously explained, this is the most important thing an RPG has to get right. High-level heroes are incredibly strong, so every level up feels meaningful and rewarding.
Third, I have to praise the combat system. It’s easy to grasp, reasonably deep, fast-paced despite being turn-based, and greatly rewards good play. Even though we spend a lot of time fighting in the game, the combat doesn’t get dull.
The game’s fourth strength is its presentation. The game’s sprites were made using prerendered 3D models and animations. This approach was common for the time, as most PCs weren’t powerful enough to handle a lot of detailed 3D models. It produced a highly detailed 2D look that resulted in a timeless beauty. The game is also very easy to read.
The game’s approach to balance is another key strength. While the developers wanted a balanced game, they primarily focused on creature balance. I think they mostly succeeded in that regard, even though some town types are clearly stronger than others. For spells and artifacts, they relied on their gut feeling.
As a result, quite a few skills and artifacts are game-breakingly strong, and I like that. This kind of balance is fun as it powers a rewarding character progression. If we overbalance a game, everything feels weak. This is not at all the case here.
Last, I want to stress that the game is very easy to get into. It has a very detailed manual, as was common at the time. However, we don’t have to read the manual to get what’s going on, as the game contains a lot of very helpful tool tips. There are few strategy games that present their information as clearly as HoMM3.
If we combine all these strengths, we end up with a game that - at least for me - is unsurpassed to this day. No other strategy game has been this much of an evergreen for me.
In terms of sales, the game did well, but it wasn’t an overwhelming hit. By the end of 1999, it sold 1.5 million units worldwide. New World Computing further milked the game by producing two add-ons as well as a couple of standalone level packs. Interestingly, HoMM3 was very popular in Eastern Europe, as the game was localized into Russian and Polish. This popularity continues until today. For example, the popular community mod Horn of the Abyss was developed by a Russian team.
HoMM3 is considered the pinnacle of the Heroes series. Even though the series counts eight main games plus a sizable number of expansions, the quality of the third installment was never reached again. It didn’t help that New World Computing had to file for bankruptcy in 2003. Afterwards, the series changed hands a lot but never reached its peak quality. Granted, not even New World Computing could replicate the quality of HoMM3, as HoMM4 was a disaster.
The latest attempt to revive the series is Heroes of Might and Magic: Olden Era. It’s currently in early access. I haven’t played it yet, but I doubt that it’ll reach HoMM3’s brilliance.
HoMM3 is an incredibly well-designed game and a true evergreen. It’s a must-play for everybody with even the slightest interest in the genre. It’s a shame that we never got a similarly great entry to the Heroes series. Perhaps some games aren’t meant to be surpassed.
If you want to play the game today, I recommend buying the complete edition on GOG and installing the HoMM3 HD mod. For an authentic experience, make sure to turn off the “HD+” feature in the mod. You can activate it later once you’re familiar with the base game.
Thanks for reading. Please consider subscribing to the Substack. Also, please share it with a friend. You can do both with these handy buttons below.
Comments
Nothing yet. Say the first thing.
Sign in to join the conversation.