
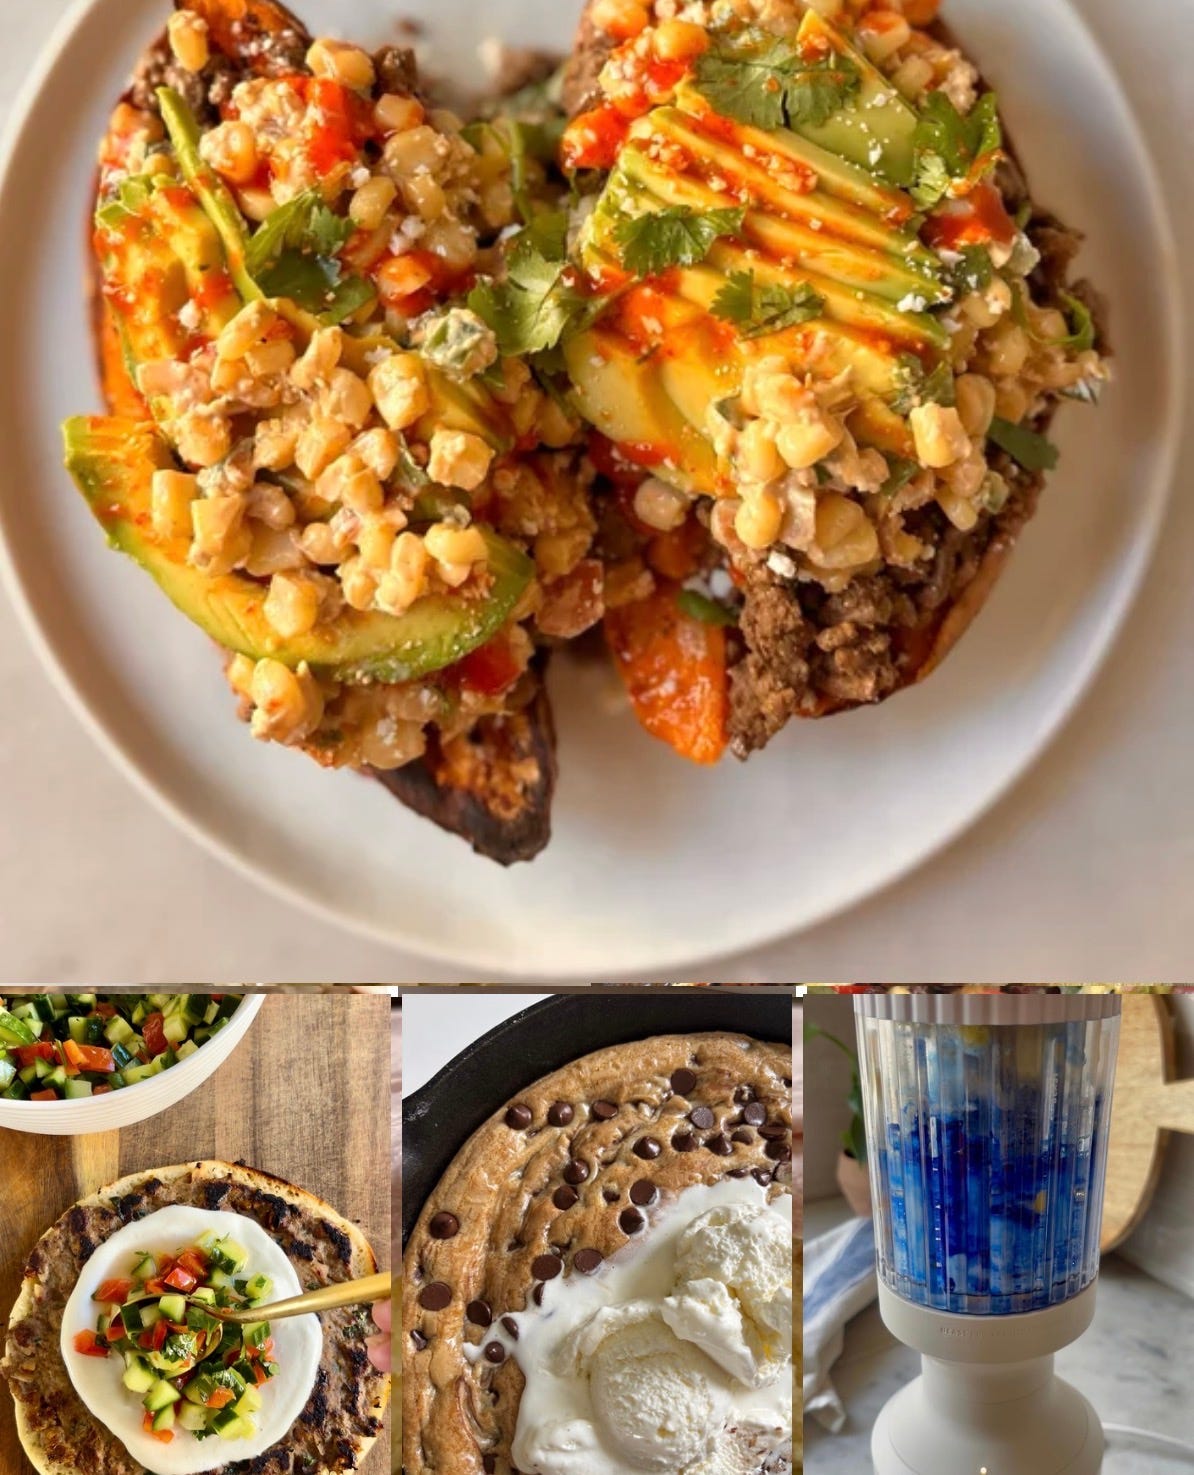
Happy Sunday! Here are all of this week's recipes in one place — I hope you find something (or many things!) to make and add to your cooking rotation.
P.S. Looking for a specific ingredient, one of my favorite kitchen tools, or the printable recipe PDFs? I’ve linked everything at the bottom of this post.
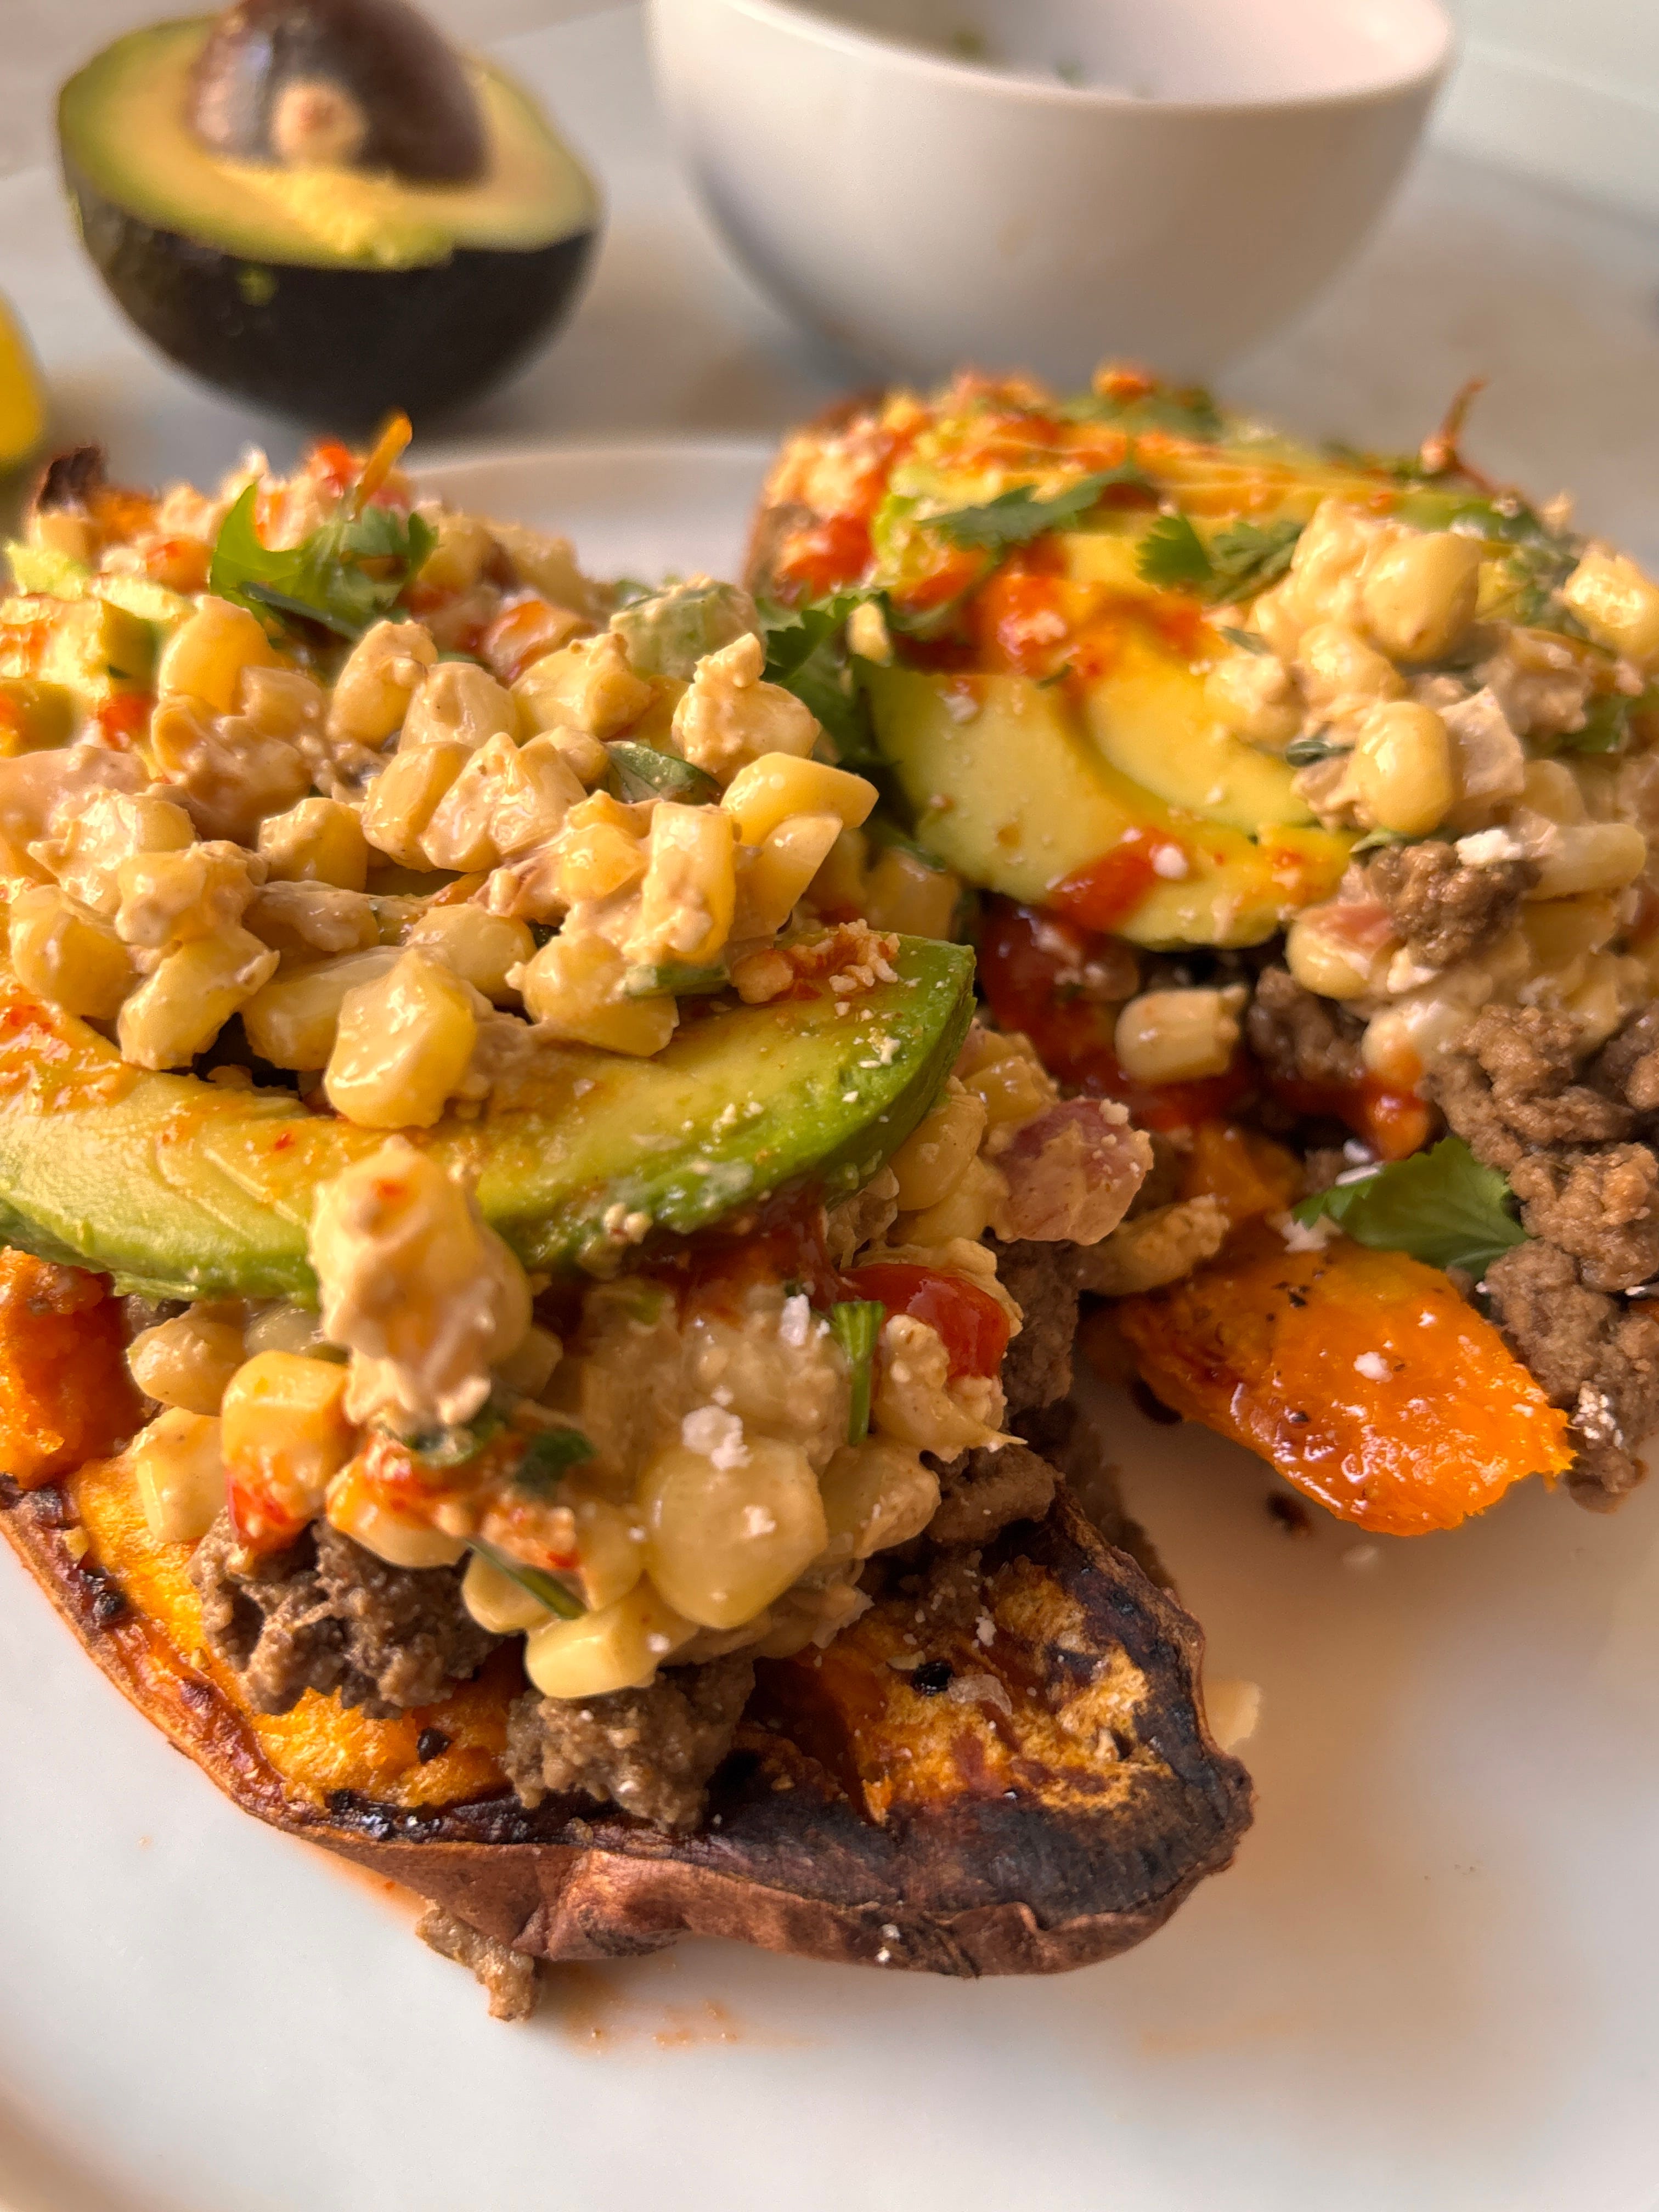
Roasted sweet potatoes stuffed with taco-seasoned ground beef and warm street corn — creamy, smoky, and finished with cilantro, Cotija, and lime. And you’d never guess its healthy.
I know, I know — it looks like a few steps when you read the recipe. But I promise, each step is simple, and the payoff is completely worth it. To keep cleanup minimal, I roast the sweet potatoes on parchment and cook the beef and corn in the same cast iron skillet — just a quick wipe in between.
It’s roasted, caramelized sweet potatoes, smoky taco beef, and then the real star of the show: street corn made with Greek yogurt, a little mayo, jalapeño, lime, chili powder, and cotija. Sweet, smoky, cool, creamy, all in one bite — I could eat this every single week and not get sick of it. Maybe I will.
My kids LOVE this one. I make extra just so there are leftovers for me — I’m so happy to have this waiting in the fridge for lunch the next day.
Serves: 4-6 | Prep Time: 20 minutes Cook | Time: 50-60 minutes
Ingredients
Sweet Potatoes
4-6 medium sweet potatoes
Olive or avocado oil, for drizzling
Kosher salt
Taco Beef
1½ pounds 93/7 lean ground beef
One packet of taco seasoning, OR:
2 teaspoons chili powder
2 teaspoons garlic powder
1 teaspoon ground cumin
1 teaspoon paprika
½ dried oregano
1½ teaspoons kosher salt
½ teaspoon black pepper
Warm Street Corn
¼ cup finely diced red onion
1-2 tablespoons butter (or avocado oil. but butter and corn are so good together)
4 ears fresh corn, kernels cut from the cob
½ cup plain Greek yogurt
¼ cup mayonnaise (I used Chosen Foods avocado oil)
½ cup crumbled Cotija cheese
1 large jalapeño, finely diced (I removed the seeds and membrane but leave it in if you like it spicy)
Juice of 2 limes
¼ cup chopped fresh cilantro
½ teaspoon chili powder
Tajín and kosher salt, to taste
Toppings
Sliced avocado
Extra Cotija cheese
Chopped cilantro
Lime wedges
Extra Tajín
Hot sauce
Instructions
Preheat the oven to 425°F and line a baking sheet with parchment paper. Wash the sweet potatoes and slice them in half lengthwise. Lightly drizzle the cut sides with oil and sprinkle with salt, then place them flesh-side down on the parchment. Bake for 45–60 minutes, or until very tender.
While the potatoes bake, brown the ground beef in a large skillet over medium-high heat. Drain any excess grease if needed, then stir in the chili powder, garlic powder, cumin, paprika, salt, and pepper. Cook for another 2–3 minutes, until the spices are fragrant. Transfer the beef to a bowl, then carefully wipe out the skillet so you can use it for the corn.
Return the skillet to medium heat and add the butter or oil. Add the red onion and cook for 2–3 minutes, until softened. Stir in the corn and cook for 5–7 minutes, stirring occasionally, until the corn is tender and lightly caramelized.
Remove the skillet from the heat and let the corn cool for about 5 minutes. Stir in the Greek yogurt, mayonnaise, Cotija, jalapeño, lime juice, cilantro, chili powder, Tajín, and salt to taste.
Split each sweet potato open and fluff with a fork. Top with the seasoned taco beef and a generous scoop of the warm street corn mixture.
Finish with sliced avocado, extra Cotija, cilantro, a squeeze of fresh lime, and another sprinkle of Tajín, if desired.
Fresh corn makes all the difference here. It caramelizes slightly and adds a sweetness you just won’t get from canned corn. BUT canned corn will still be good
Let the corn mixture cool for a few minutes before stirring in the yogurt and mayonnaise so it stays smooth and creamy.
These reheat well, making them great for meal prep - I love having it in my fridge! Just store the street corn, taco meat, and sweet potatoes separately, then assemble when you’re ready to eat.
XL Sheet Pan - for roasting the sweet potatoes. I love this bigger sheet becuase i can fit so much more on it.
Parchment Paper - makes clean up super easy AND helps caramelize the sweet potatoes. I always have this on hand.
My favorite XL Cast Iron Skillet - the extra space ensures you get caramelized meat and veggies instead of steamed.
My go-to chef’s knife. Affordable, sharp, and one of the most-used tools in my kitchen.
My Favorite Tongs - these have an open/close feature that precent them from getting jammed in your utensil drawer. That is the worst.
Maldon Sea Salt - I use this for seasoning along the way + finishing. I promise it makes your food taste better.
Oil Sprayer - I have one for avocado oil and on for olive - I use them every day.
This is one of those dinners that feels a little different, but is actually so simple to make. Crispy pita, warm spiced turkey with a hint of sweetness, and a cool, creamy yogurt sauce. So, so good.
Serves: 4 | Time: ~30 minutes
Ingredients
Turkey Filling
1¼ lbs ground turkey (93% lean)
2 tbsp baharat spice blend
OR
Use this spice mix:
1½ tsp za’atar (most grocery stores carry this blend)
1 tsp cumin
1 tsp ground coriander
½ tsp ground cardamom
½ tsp allspice
½ tsp paprika
1 ½ tsp garlic powder
1 tbsp onion powder
1½ tsp kosher salt
⅓ cup chopped almonds
¼ cup chopped dried figs
½ cup chopped fresh parsley, divided
Garlic Lemon Yogurt Sauce
½ cup Greek yogurt (I used full fat)
Juice of ½ lemon
1 tbsp olive oil
½ teaspoon garlic powder
Salt + pepper
Cucumber Herb Salsa
1 english cucumber, finely diced
1 red bell pepper, finely diced
remaining ¼ cup chopped parsley
1 tbsp chopped mint
1/2 tbsp tbsp chopped dill
Juice of ½ lemon
drizzle of red wine vinegar
drizzle of olive oil
1/2 tsp salt
For Assembly
4 pita breads, sliced in half horizontally
Instructions
Make the sauces - Stir together yogurt sauce ingredients until smooth. In a separate bowl, mix the cucumber salsa and let it marinate while you make the pitas. Taste and adjust seasoning.
Make the filling - In a bowl, combine turkey, spices, onion powder, garlic powder, salt, almonds, figs, and parsley. Mix gently.
Prepare the pita - Slice pita in half and press about 1/2 cup the turkey mixture on top of each pita half, creating a thin, even layer.
4. Cook (smash style)
Heat a skillet over medium heat with a little oil (not high—this allows the meat to cook through while still developing a good crust).
Make sure your turkey mixture is at room temperature before cooking—cold meat will prevent the pita from crisping and from getting that caramelized crust.
Place the pita meat side down first and press lightly so it makes full contact with the pan. Cook for 3–4 minutes, until the meat is browned and caramelized.
While it cooks, lightly brush or spray the pita side with oil—this helps it get extra golden and crispy.
Flip and cook another 2–3 minutes, until the pita is crisp and the turkey is fully cooked through.
Flip and cook another 2–3 minutes until the pita is golden and crispy and the filling is cooked through.
Top warm pita with yogurt sauce and spoon over the fresh cucumber herb salsa. Soo good! Enjoy 🫶🏻.
The figs + almonds are what make these SO good. Sweet/savory/crunchy perfection.
Don’t skip the fresh herbs — they make everything taste bright and fresh.
Medium heat is key here for a crispy pita + fully cooked filling.
Full-fat Greek yogurt gives the sauce the best creamy texture.
Best eaten hot off the skillet while the pita is extra crispy.
Leftover cucumber salsa is amazing on bowls, eggs, or grilled chicken.
Olive Oil Sprayer - I use this everyday for all the things.
Stainless Slotted Fish Turner - thin, flexible, and perfect for crispy pita.
12 inch Cast Iron Skillet - my favorite size for everyday cooking.
15 inch Cast Iron Skillet - gives the pita the best golden crispy crust.
My go-to Knife - sharp, lightweight, and affordable.
This is the cookie you make when twelve dough balls sound like way too much effort. No mixing bowl, one pan, one timer, and a gooey center. Get the ice and spoons ready.
Serves 6–8 (12-inch) or 10–12 (15-inch) | Prep: 15 min | Bake: 22–32 min | Total: about 45 min
A simple cookie dough baked in a hot cast-iron skillet turns into something way better than the sum of its parts. The butter melts right in the pan, the sugars caramelize a little before the dough even goes in, and the edges go deeply golden while the center stays soft — almost custardy. No portioning dough balls, no watching a tray of twelve at once. Just one pan, one timer, and everyone digging in with spoons straight out of the skillet.
Serve it warm with vanilla ice cream (Tillamook Old-Fashioned is my go-to) melting into the top. That’s really it — you don’t need much else.
Recipe includes both a 12-inch skillet (serves 6–8) and a 15-inch skillet (serves 10–12), so scale to whatever you’ve got.
For a 12-Inch Cast-Iron Skillet
(serves 6-8)
Ingredients
• 1 cup (2 sticks) unsalted butter
• 1 cup packed brown sugar
• ½ cup granulated sugar
• 2 large eggs
• 2 teaspoons vanilla extract
• 2½ cups all-purpose flour
• 1 teaspoon baking soda
• 1 teaspoon kosher salt
• 2 cups chocolate chips
For Serving
Vanilla Ice Cream (Tillamook Old-Fashioned Vanilla is my favorite)
Preheat oven to 350°F. Place the butter directly into the 12-inch cast-iron skillet and put it in the oven to melt.
Once melted (about 3–5 minutes), carefully remove the skillet. Add the brown sugar and granulated sugar directly to the hot butter and stir to combine. Let sit 2–3 minutes so the sugar begins to dissolve and slightly caramelize.
Allow the mixture to cool for about 10 minutes so it’s warm but not hot. (You don’t want to scramble the eggs.)
Whisk in the eggs and vanilla until smooth.
Sprinkle the flour, baking soda, and salt directly over the mixture. Stir just until combined — do not overmix. Fold in the chocolate chips.
Smooth the dough evenly in the skillet. Sprinkle with some more chocolate chips on top.
Bake for 22–28 minutes. The edges should be golden and set, and the center slightly soft. It may look just a little underdone in the middle — that’s perfect.
Let rest at least 10 minutes before serving.
Place a generous mound of vanilla ice cream directly into the center of the warm skillet cookie and share. Yum.
For a 15 Inch Cast-Iron Skillet
(serves 10-12)
Ingredients
• 1½ cups (3 sticks) unsalted butter
• 1½ cups packed brown sugar
• ¾ cup granulated sugar
• 3 large eggs
• 1 tablespoon vanilla extract
• 3¾ cups all-purpose flour
• 1½ teaspoons baking soda
• 1½ teaspoons kosher salt
• 3 cups chocolate chips, plus extra for the top
Instructions
Follow the same method as the 12-inch version above, melting the butter directly in the skillet first and letting the sugar mixture cool before adding eggs.
Bake at 350°F for 25–32 minutes, checking at 25. Edges should be deeply golden, center still soft — same jiggle test applies. Let rest 10–15 minutes before serving.
Share this with your people and enjoy!
Make it ahead: you can mix the dough up to a day ahead and keep it in the skillet, covered, in the fridge — just let it sit out 20–30 minutes before baking so it’s not going into the oven ice cold.
Chocolate swap: chocolate chunks instead of chips give you those glossy melted pools instead of a more uniform chip. Either works.
Storage: covered at room temp, it’s good for about 2 days — though it rarely lasts that long.
Doneness cue: trust the jiggle test over the clock. Ovens vary more than you’d think, especially with cast iron holding heat differently pan to pan.
12-inch cast-iron skillet — the one I reach for constantly, not just for this.
15-inch cast-iron skillet — worth it if you’re feeding a crowd.
This one has been on repeat in our house lately. My kids are obsessed — partly because it tastes like a tropical vacation, and partly because it looks like something out of a fantasy movie.
Serves 1-2 | Time: under 5 minutes
That color is completely natural, all from blue spirulina, which happens to be one of the most antioxidant-rich ingredients you can add to your diet. You’d never know it by how good this tastes.
Ingredients
1 cup coconut milk
1 scoop vanilla protein powder (I like whey, use plant-based to keep it dairy free)
1 cup frozen pineapple
½ cup frozen mango
½ cup raw unsalted cashews
1 teaspoon blue spirulina
dash of salt
~ ½ cup ice
Instructions
Add all ingredients to your blender and blend until completely smooth.
Pour and enjoy.
The cashews are the secret. They make this smoothie incredibly creamy without any dairy — don’t skip them.
Blue spirulina has almost no flavor on its own, so don’t let it intimidate you. It just makes everything beautiful with a major antioxidant boost.
Start with half a teaspoon of spirulina if you’re new to it, then work your way up. A little goes a long way for color.
Frozen fruit is key here — it keeps things thick and cold without watering it down with too much ice.
The Beast Mini Blender - This is the one I reach for every single day. Same great features as the Mega but compact, which makes it perfect for single servings and super easy to clean. Get 15% off with my link!
The Beast Mega Blender — A powerhouse blender that’s fully contained (no splatter!) and comes with a straw lid for easy on-the-go drinking. I have both sizes and this one’s great if you’re making larger batches. Get 15% off with my link!
Blue Spirulina Powder - This is the one I use. USDA organic, neutral taste. A little goes a long way for color. I start with half a teaspoon and work my way up.
My favorite Vintage Hobnail Glasses - these are beautiful but perhaps my favorite thing about them is they are hard to break!
Thank you so much for being here. I hope you love these recipes like we do.
xo,
Chelsea
If printable recipes make cooking easier for you, you can find them below.
Paid subscribers get early access to new recipes, plus my full printable PDF recipe library — a new PDF with every recipe I share.
Comments
Nothing yet. Say the first thing.
Sign in to join the conversation.