
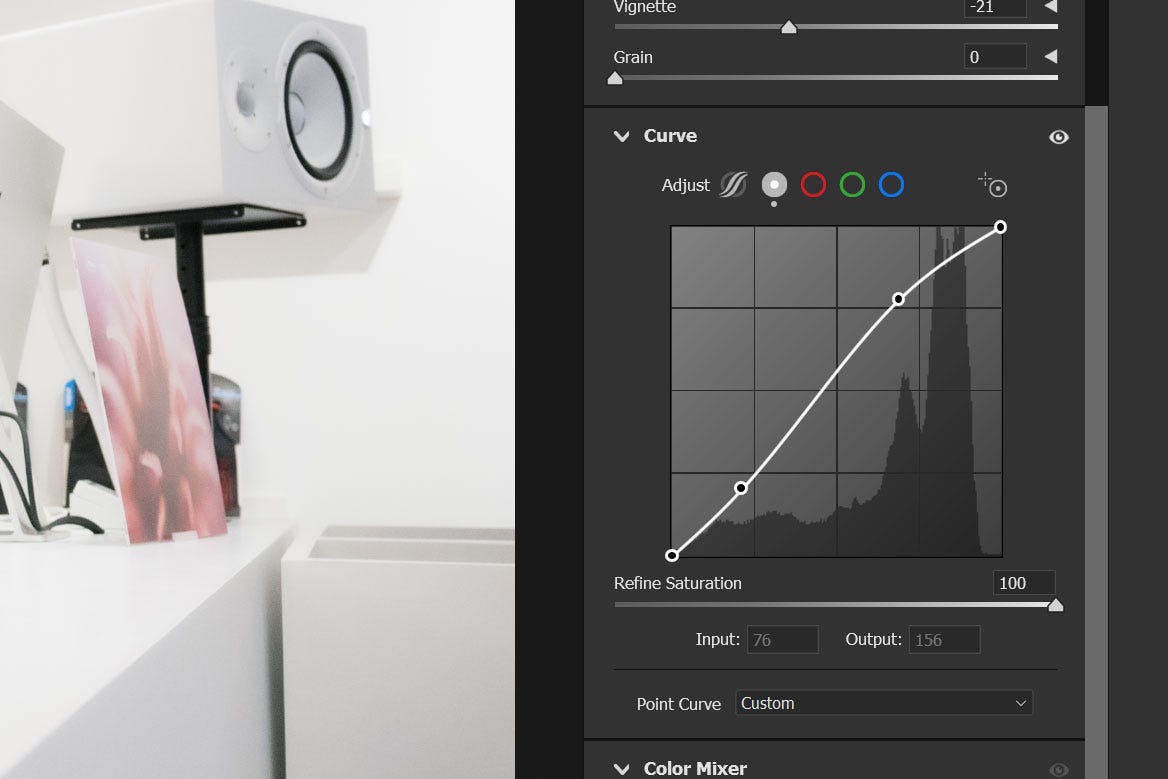
The Curves adjustment in Adobe Photoshop and other imaging editing applications is one of the most powerful tools for adjusting contrast and color. It offers such a wide scope of control that I wrote a guide to using curves for Petapixel.com a few years ago. In that article I didn’t mention the Curves adjustment available in Lightroom and/or Adobe Camera Raw as I felt it was missing an important option. As it turns out, Adobe addressed this omission back in 2023 and for me, it has made all the difference.
TL;DR
Making tonal adjustments in Adobe Camera Raw and Lightroom are performed using RGB values. This can create unwanted changes in color saturation when these adjustments are performed. A few years ago, Adobe introduced the Refine Saturation slider to the Curves tool in Camera Raw/ Lightroom allowing the saturation effect to be reduced or even completely eliminated as desired.
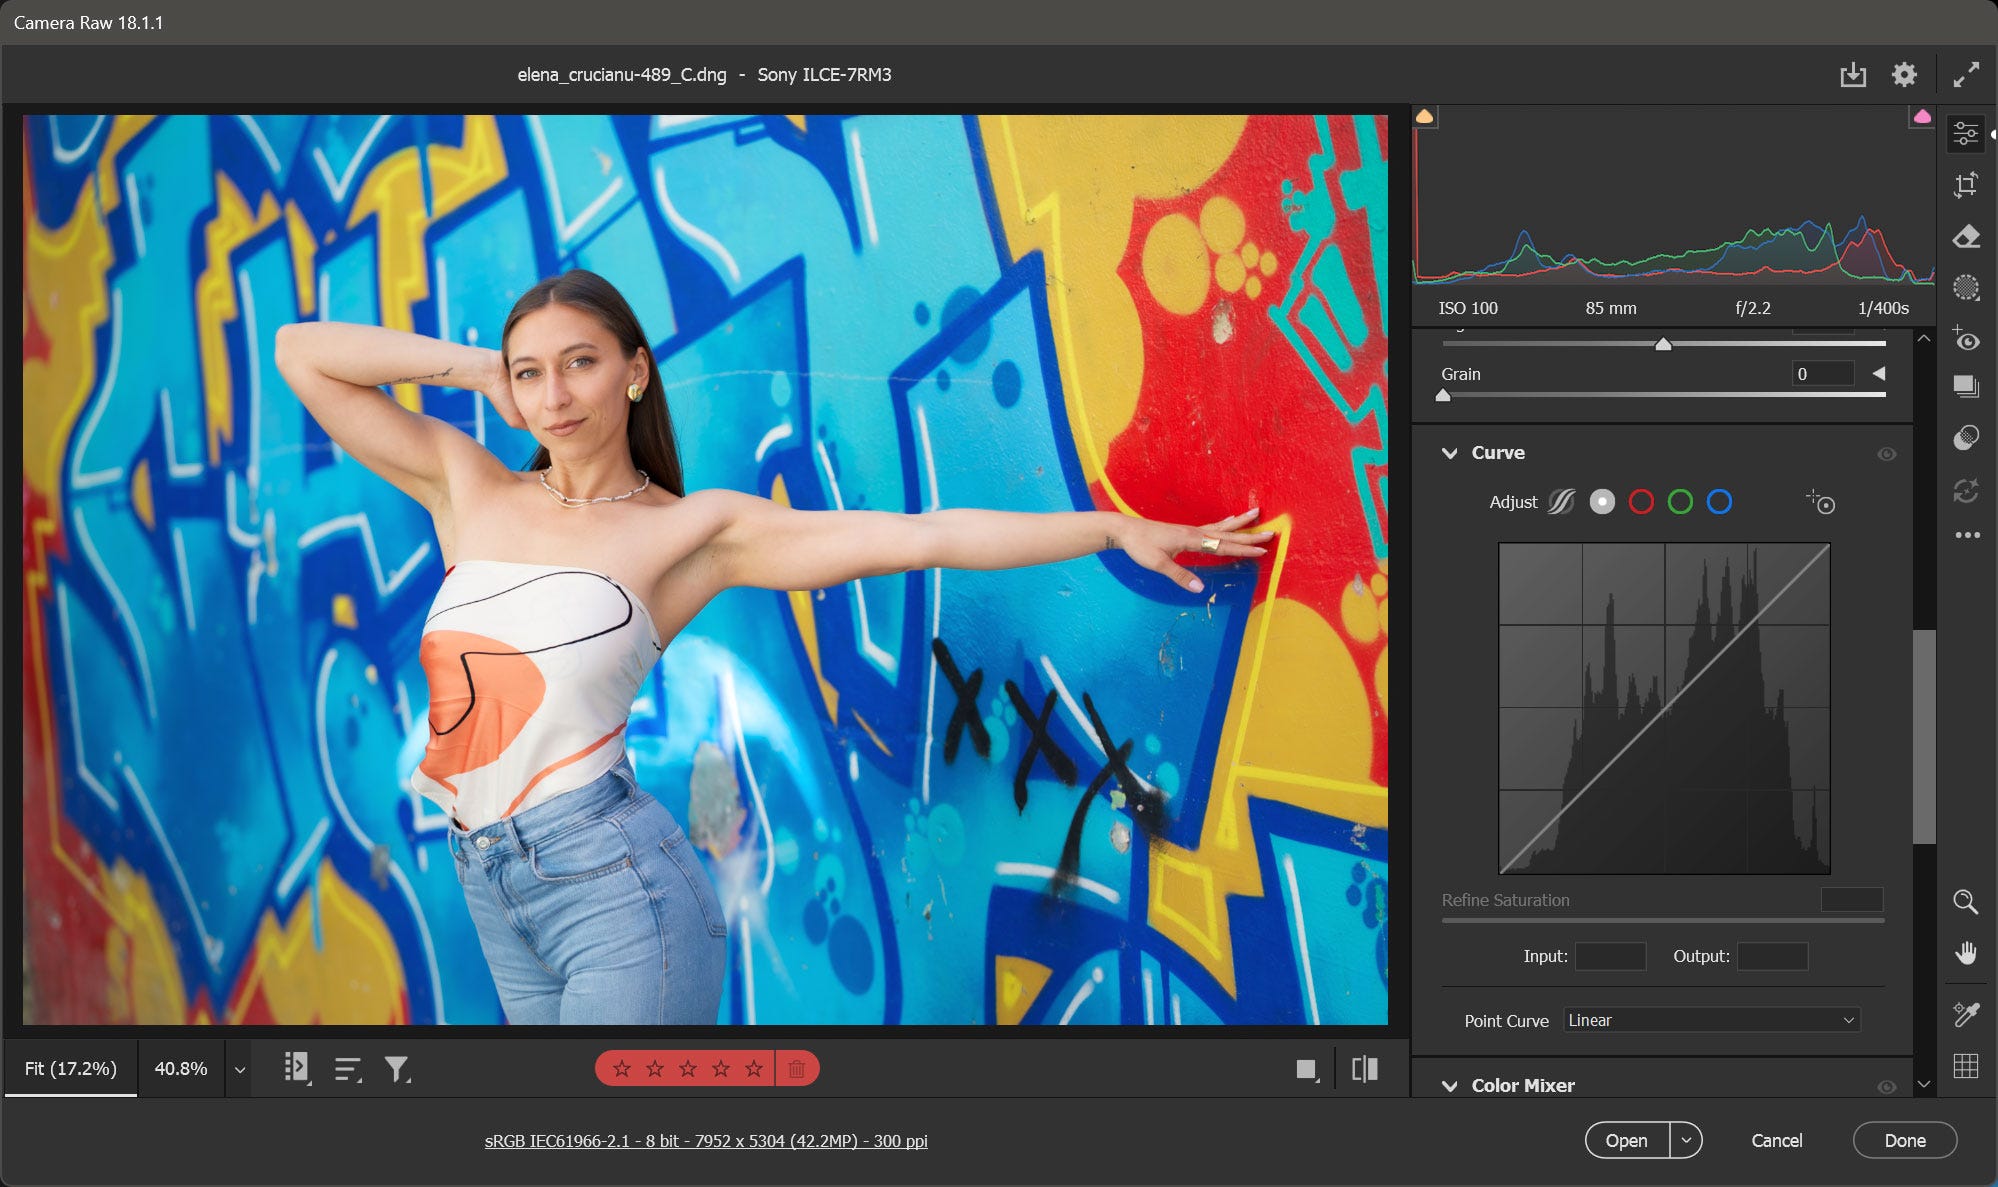
Photoshop, Lightroom, and most image editing applications by default* work in RGB values when making tonal adjustments to an image. When adjusting the tone curve of an image, we are making changes to RGB values in order to make those adjustments. This means the amount of Red, Green, and Blue are being changed in order to affect the lightness or luminosity in the image. As a result, the saturation of colors will be affected since they are tied together by the nature of RGB.
In figure 1, below, we have an image open in Adobe Camera Raw. It has been adjusted for white balance and exposure only. Note the linear status of the Curves panel.
Figure 1
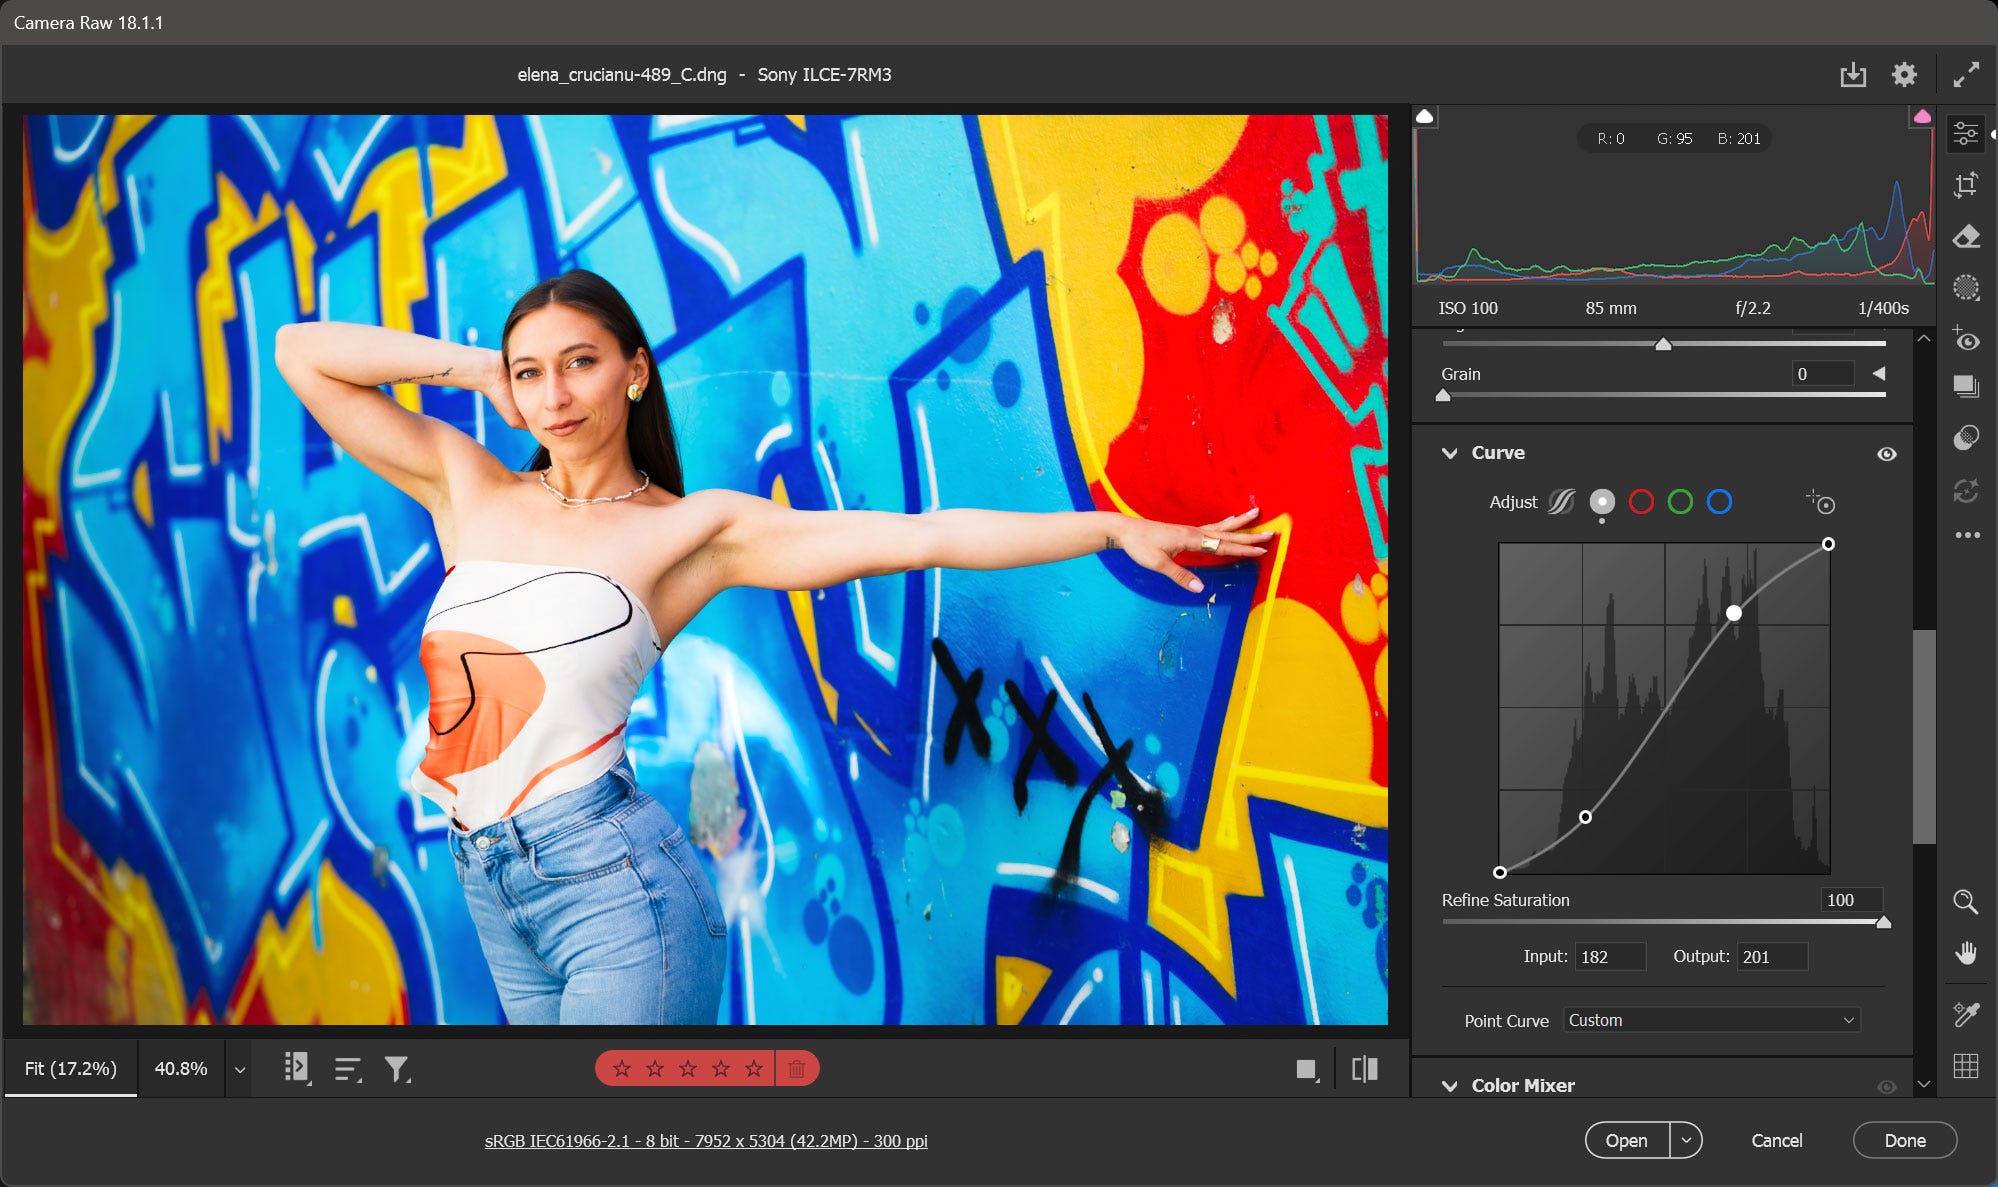
When making small adjustments, this saturation change may not cause an issue, or in some cases, the resulting saturation change may be welcome. However, there are times when you might want to adjust tone and contrast without making changes to color saturation, or at least be able to moderate the amount of saturation change.
You can see in figure 2 that adjustments have been made to the Curves panel (a classic “S” shape) to adjust the contrast. The image has strong contrast boost adding some nice “pop”, but the colors are very saturated and Elena’s skin has gotten very ruddy in the shadow areas.
Figure 2
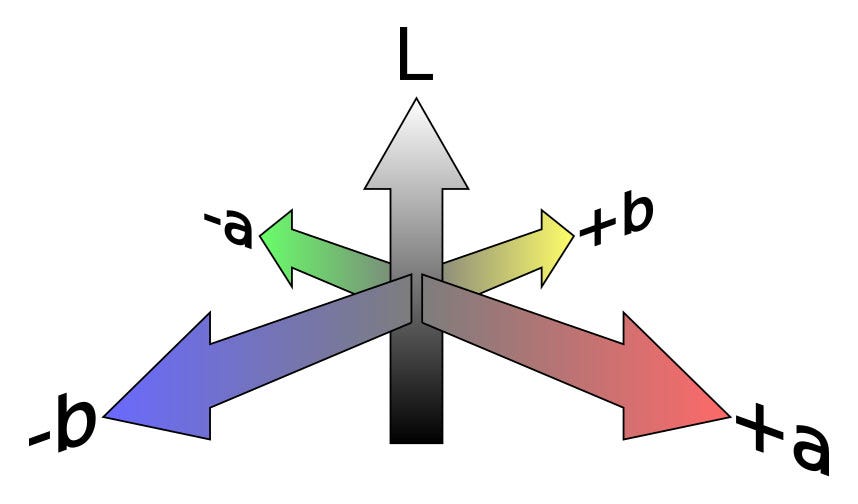
In Adobe Camera Raw and Lightroom, one would have to use the vibrance or saturation adjustments to counter saturation changes, or if you really wanted to get “down & dirty”, you could adjust the individual red, green, and blue curves individually. This still struck me as a less than ideal approach and my problem is that I traveled a bit down the Lab color rabbit hole years ago, and it changed the way I look at color/contrast adjustment. Let me explain.
Years ago, I read Dan Margulis’ book, Photoshop Lab Color, and learned about this color space that separated color information from luminosity. I go into some of the details about Lab Color in my recent article, but the important part is that using this color space allowed one to apply curves, and other adjustments, to only the brightness information (or only the color information if that was your desire). This is one of those revelations that changed my approach to image adjustments when I encountered tricky situations. Not every image needs this level of control, but it has been a good tool to have in my arsenal.
Figure 3
Then, Adobe added Adjustment Layers (figure 4 below) to Photoshop with Version CS4 (ver 11) which allowed one to apply adjustments like levels and curves using the Luminosity blend mode. This works similarly** to going the L channel route without having to round-trip to Lab color and back to RGB.
Figure 4
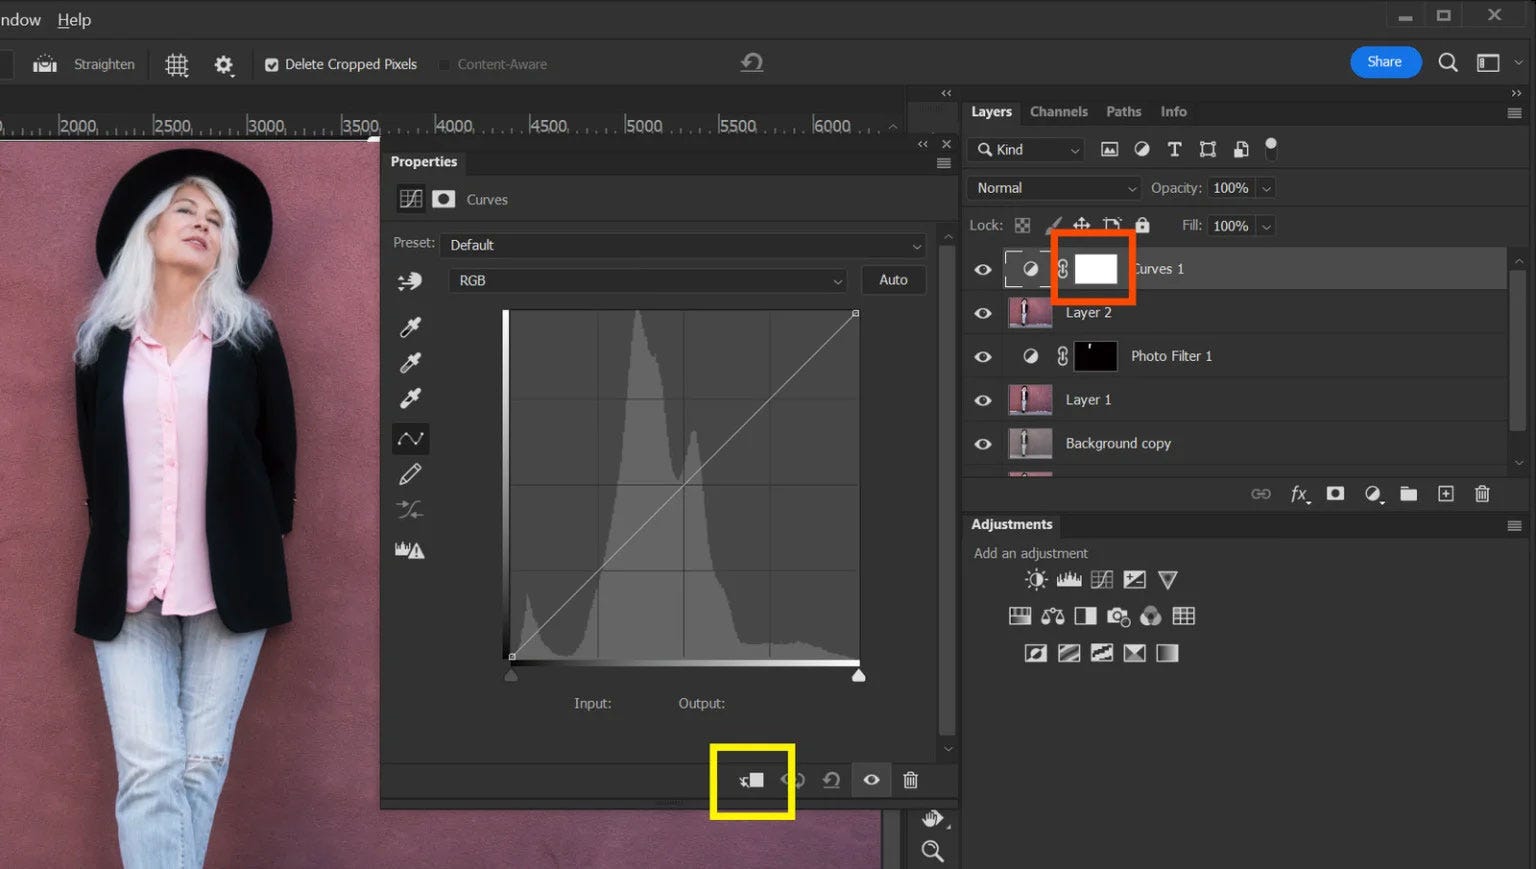
This was great for working in Photoshop but Camera Raw and Lightroom still applied their adjustments in the RGB space so making curves adjustments in these applications still lacked the control that desired, until...
In the summer of 2024, I was processing a set of images in Camera Raw and thinking about how I was going to need to send some of them to Photoshop. The tonal adjustments I wanted to make in Camera Raw were blowing up my reds. I could go into the color mixer to attempt to bring them back under control, maybe, but it would just be so much easier to have the Curves adjustment be applied only to the brightness/luminosity like one could do in Photoshop.
Feeling like there must be another way, I reached out to Adobe “Evangelist” Julianne Kost hoping that she might have an answer. It turned out that she did, and that the solution had been introduced a year earlier in the form of the Refine Saturation slider. This slider, located at the bottom of the Curves panel (see figure 5) in Camera Raw and Lightroom, allows one to adjust the color saturation changes that occur from using Curves in an RGB based editing environment.
Figure 5
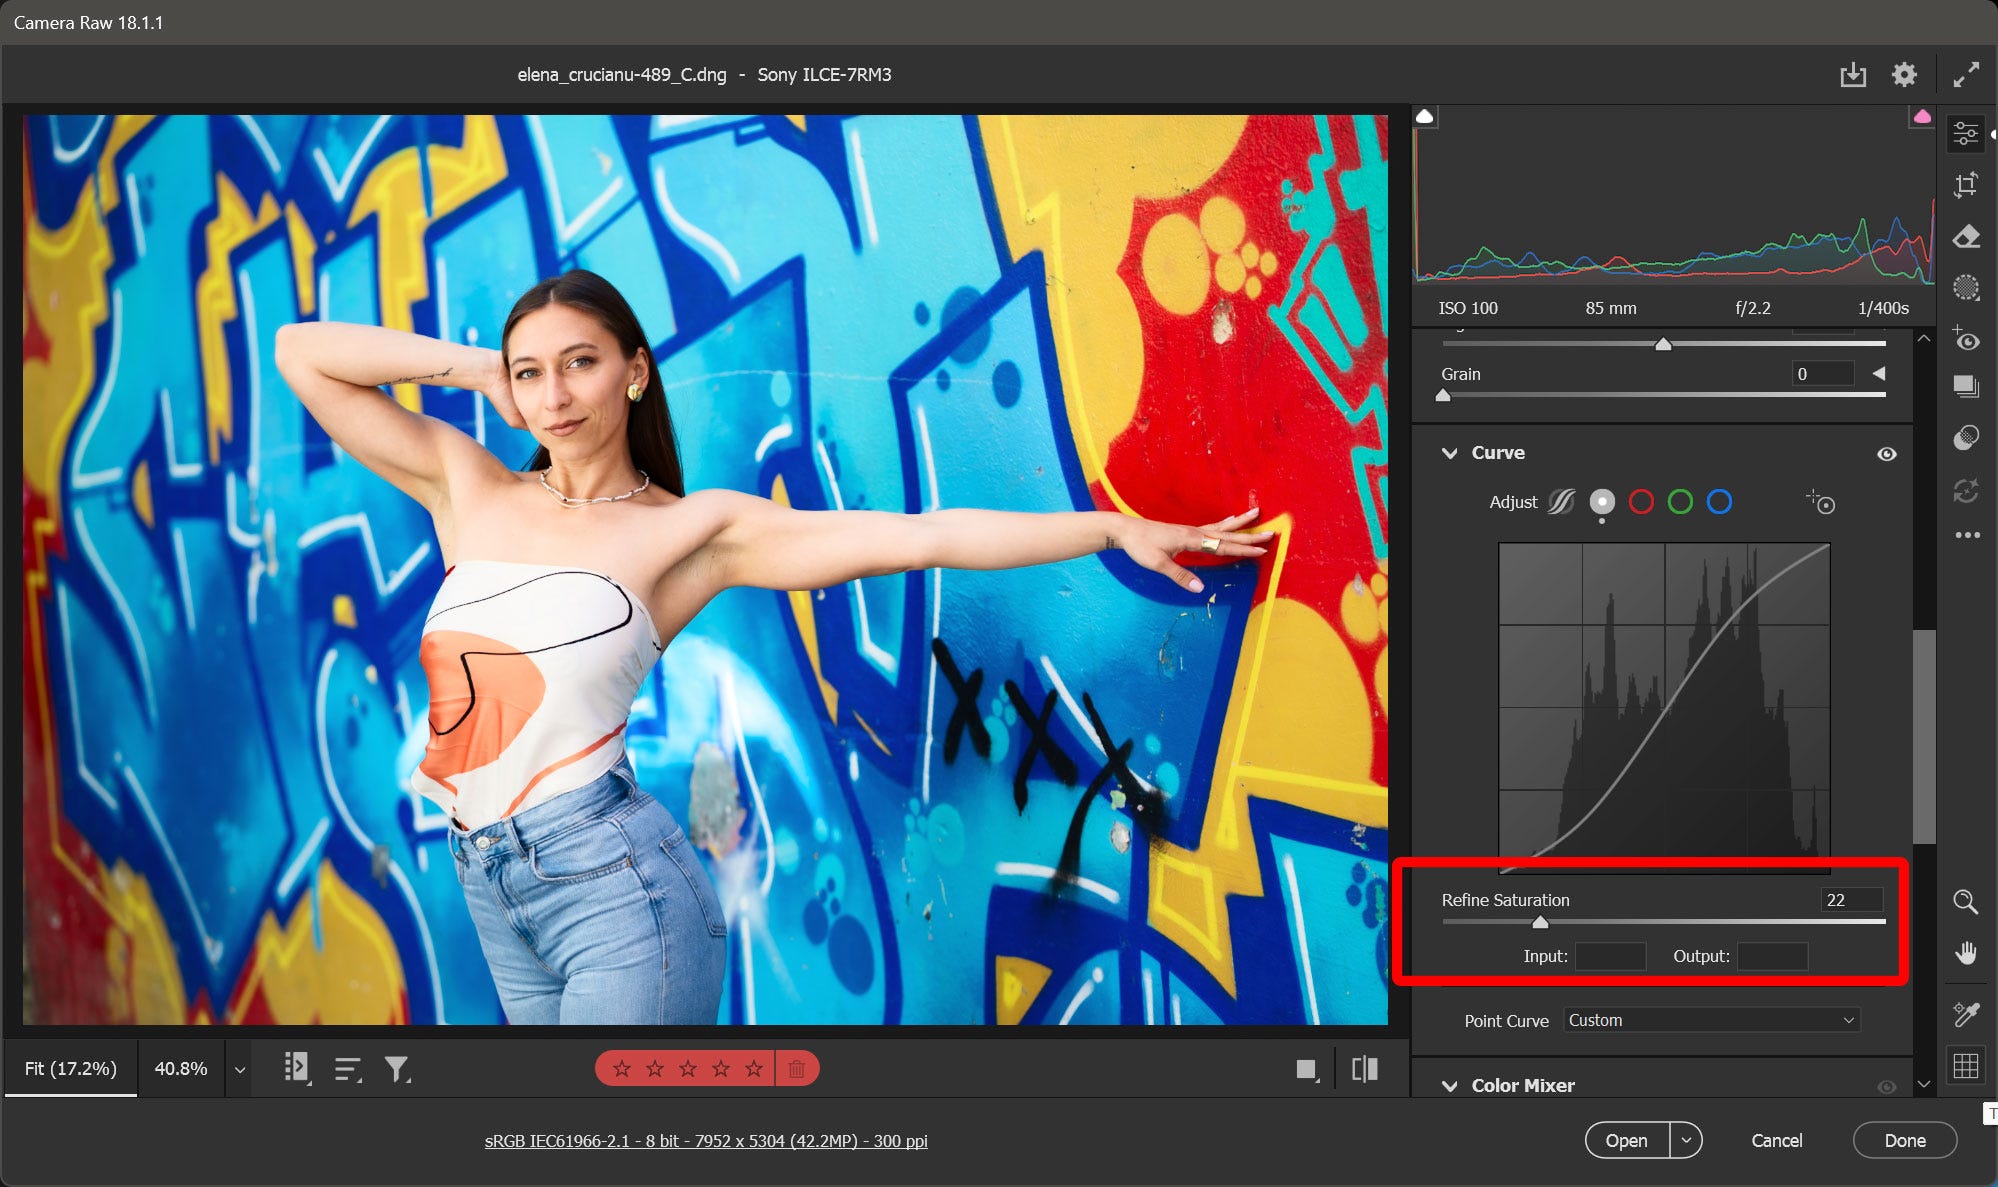
When Julieanne first told me about this adjustment, I was confused as I had never noticed this control for a simple reason. I use the compact layout in Camera Raw and when in that mode, the slide is labeled simply as “Refine”. Switching to the standard view reveals the full “Refine Saturation” label. I had missed out on this feature for about a year because of this simple interface usage decision .
Armed with the Refine Saturation adjustment, I could now apply Curves in the way I wanted to in the raw development process and skip the trip to Photoshop, at least when it wasn’t otherwise necessary. So here I am sharing this with those of you who might have missed out on this subtle, but important addition to how Curves can be managed when in the raw processing space.
Is this an earth-shattering, game-changing feature that will change your life? Probably not. Does it offer you a way to easily wrangle the saturation effect inherent in making Curves adjustments that could make your life easier in some cases? Yes, yes it does.
* many image editing applications can also work in color spaces like CMYK, Lab, and more but the vast majority operate in RGB
** while using the Luminosity blend mode in Photoshop is similar to applying Curves to the Luminosity channel in LAB color, there is a noticeable difference in tonal ranges
No posts
Comments
Nothing yet. Say the first thing.
Sign in to join the conversation.